Introduction
Welcome to the digital age where we juggle numerous commitments, appointments, and deadlines on a daily basis. With so much going on, it’s crucial to have a reliable and efficient system to keep track of all your activities. That’s where Google Calendar comes in handy.
Google Calendar is a user-friendly and versatile tool that helps you organize your schedule, manage events, and stay on top of your to-do list with ease. Whether you’re scheduling personal appointments, work meetings, or social events, Google Calendar offers a range of features to streamline your planning process.
In this guide, we will take you through the essential steps of setting up your Google Calendar, customizing its appearance, adding and managing events, creating multiple calendars, sharing and collaborating with others, syncing with other calendar apps, and using it on your mobile devices. We will also share some valuable tips and tricks to maximize your calendar organization and productivity.
No matter if you’re a busy professional, a student, or just someone looking to better manage your time, this comprehensive guide will empower you to make the most out of Google Calendar’s features. So, let’s dive in and start optimizing your scheduling experience!
Setting Up Your Google Calendar
Before diving into the full potential of Google Calendar, it’s important to start by setting up your calendar to suit your preferences and needs. Follow these steps to get started:
- Sign in to your Google account: If you don’t have a Google account yet, create one at accounts.google.com/signup. If you already have one, sign in at calendar.google.com.
- Navigate to Google Calendar: Once signed in, click on the grid icon located in the top right corner of your Google account page, and then select “Calendar” from the list of available Google apps.
- Set your time zone: To ensure that events and reminders are displayed correctly according to your local time, go to “Settings” (gear icon in the top right corner) and click on “General.” From there, select your preferred time zone under the “Time Zone” section.
- Choose your calendar view: Google Calendar offers different views to visualize your schedule. Click on the four-square icon in the top right corner of the calendar page and select between “Day,” “Week,” “Month,” “Year,” or “Schedule” view to find the one that works best for you.
- Customize your calendar appearance: Personalize your calendar by selecting a theme or color scheme that suits your taste. Click on the gear icon in the top right corner, select “Settings,” and navigate to the “View Options” section. From there, you can choose a preset theme or customize your own.
- Enable notifications: To receive timely reminders for your events, click on the gear icon, select “Settings,” and go to the “Notifications” section. Here, you can specify how and when you want to be notified.
By following these simple steps, you will have set up your Google Calendar to align with your preferences. Now it’s time to start populating it with events and making the most out of its powerful features.
Customizing Your Calendar View
Google Calendar offers various customization options to tailor the appearance and functionality of your calendar view. By customizing your calendar, you can optimize the way you visualize and interact with your schedule. Here are some key ways to customize your calendar view:
- Choosing a default view: Google Calendar allows you to select your preferred default view when you first open the calendar. To do this, click on the gear icon at the top right corner of the calendar and go to “Settings.” From there, navigate to the “View Options” section and select your preferred default view such as “Month,” “Week,” “Day,” or “Year.”
- Modifying the time slots: If you find that the default time slots in your calendar view don’t align with your schedule, you can easily modify them. Click on the gear icon, go to “Settings,” and navigate to the “View Options” section. Here, you can adjust the start and end times of each day to match your specific needs.
- Customizing the color scheme: To make your calendar visually appealing and easily distinguishable, you can customize the color scheme of different calendars. Click on the three-dot icon next to the calendar name, select “Edit Calendar,” and choose your desired color for that specific calendar. Repeat this process for each calendar you want to customize.
- Displaying specific calendars: If you have multiple calendars and want to focus on specific ones at a time, you can easily hide or show individual calendars. Click on the three-line menu icon at the top left corner of the calendar page, scroll down, and select or deselect the calendars you want to display or hide under the “My Calendars” section.
- Adding or removing sidebar widgets: The sidebar in Google Calendar provides quick access to additional features such as Tasks, Reminders, and Keep. You can customize the sidebar by adding or removing these widgets according to your preferences. Click on the three-line menu icon, scroll down to “View Options,” and select or deselect the widgets you want to display or hide in the sidebar.
- Adjusting the font size: Google Calendar allows you to increase or decrease the font size to improve readability. Click on the gear icon, go to “Settings,” and navigate to the “General” section. Here, you can adjust the font size using the “Font Size” option.
By utilizing these customization options, you can create a calendar view that is tailored to your specific needs and preferences. Experiment with different settings until you find the perfect setup that enhances your productivity and organization.
Adding and Managing Calendar Events
Google Calendar makes it easy to add and manage events, ensuring that you stay organized and never miss an important appointment. Here’s how you can add and manage calendar events effectively:
- Creating a new event: To add a new event to your calendar, simply click on the desired day and time slot in the calendar view. You can then provide details such as the event title, location, start and end time, and any additional notes or reminders. You can also set the event as recurring if it happens on a regular basis.
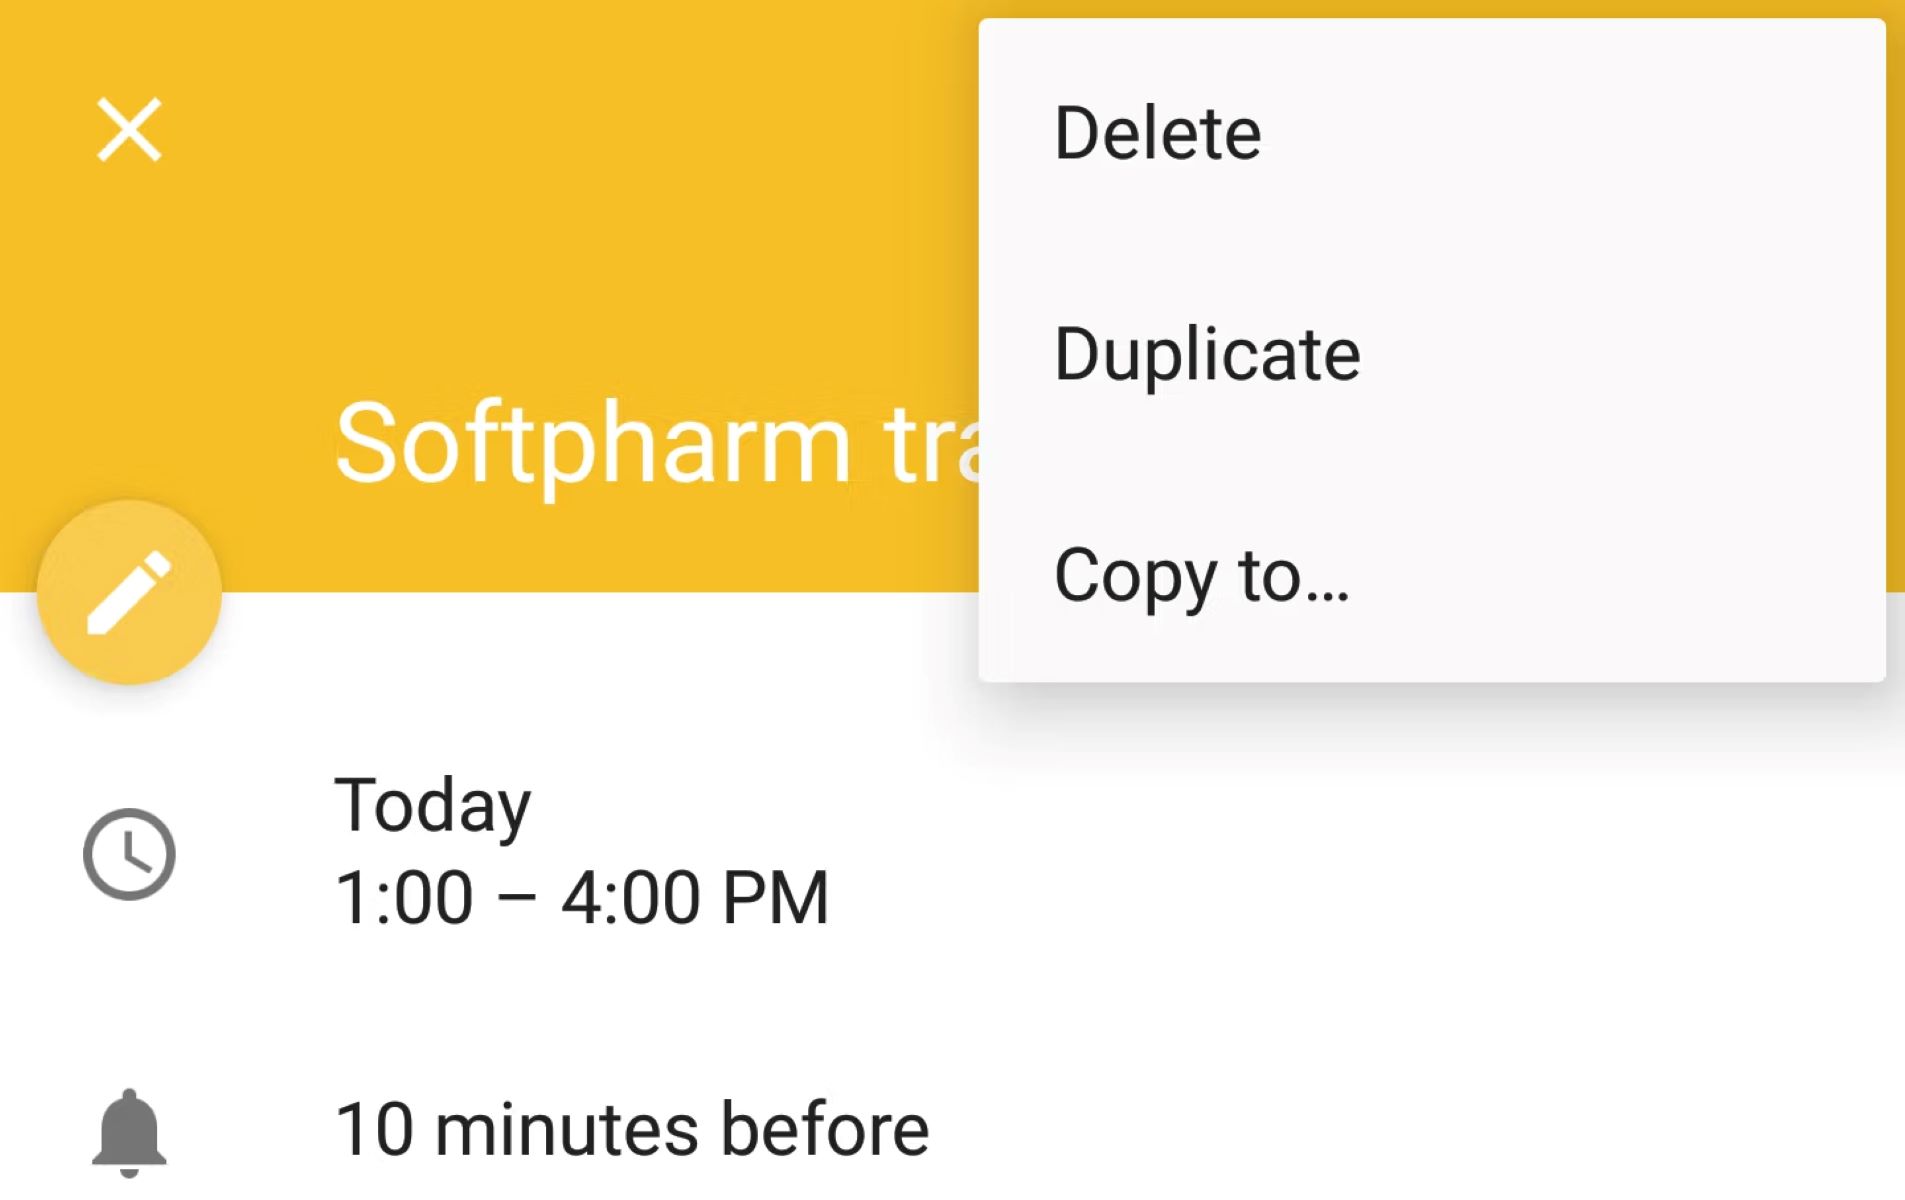
- Editing an event: If you need to make changes to an existing event, click on the event in the calendar view and select the “Edit” option. You can then modify any details such as the title, time, location, or reminders. Don’t forget to save your changes.
- Deleting an event: To remove an event from your calendar, click on the event in the calendar view and select the “Delete” option. Confirm the deletion when prompted. Please note that deleting a recurring event will give you the option to delete only the selected occurrence or the entire series.
- Adding event reminders: Google Calendar enables you to set reminders for your events to ensure that you don’t forget them. When creating or editing an event, you can specify when you want to receive reminders, such as minutes, hours, or days before the start time.
- Creating all-day events: For events that span the entire day, such as birthdays or holidays, you can create all-day events. When adding a new event, simply check the box next to “All-day” to designate it as an all-day event.
- Adding attachments and links: Google Calendar allows you to attach files or include links in event descriptions. This can be useful for adding meeting agendas, relevant documents, or any other supporting materials to your events.
- Managing event invitations: If you’re organizing an event with other attendees, you can easily send out invitations directly from Google Calendar. When creating or editing an event, enter the email addresses of the attendees, and they will receive an invitation with the event details. You can also track their responses and manage their attendance status.
- Setting event visibility: You can control the visibility of your events by toggling between public, private, and shared options. Public events are visible to anyone who has access to your calendar, while private events can only be seen by you. Shared events can be viewed by specific individuals or groups that you choose.
By utilizing these features, you can easily add, edit, and manage events in your Google Calendar. Stay organized and on top of your schedule by making the most of these convenient event management tools.
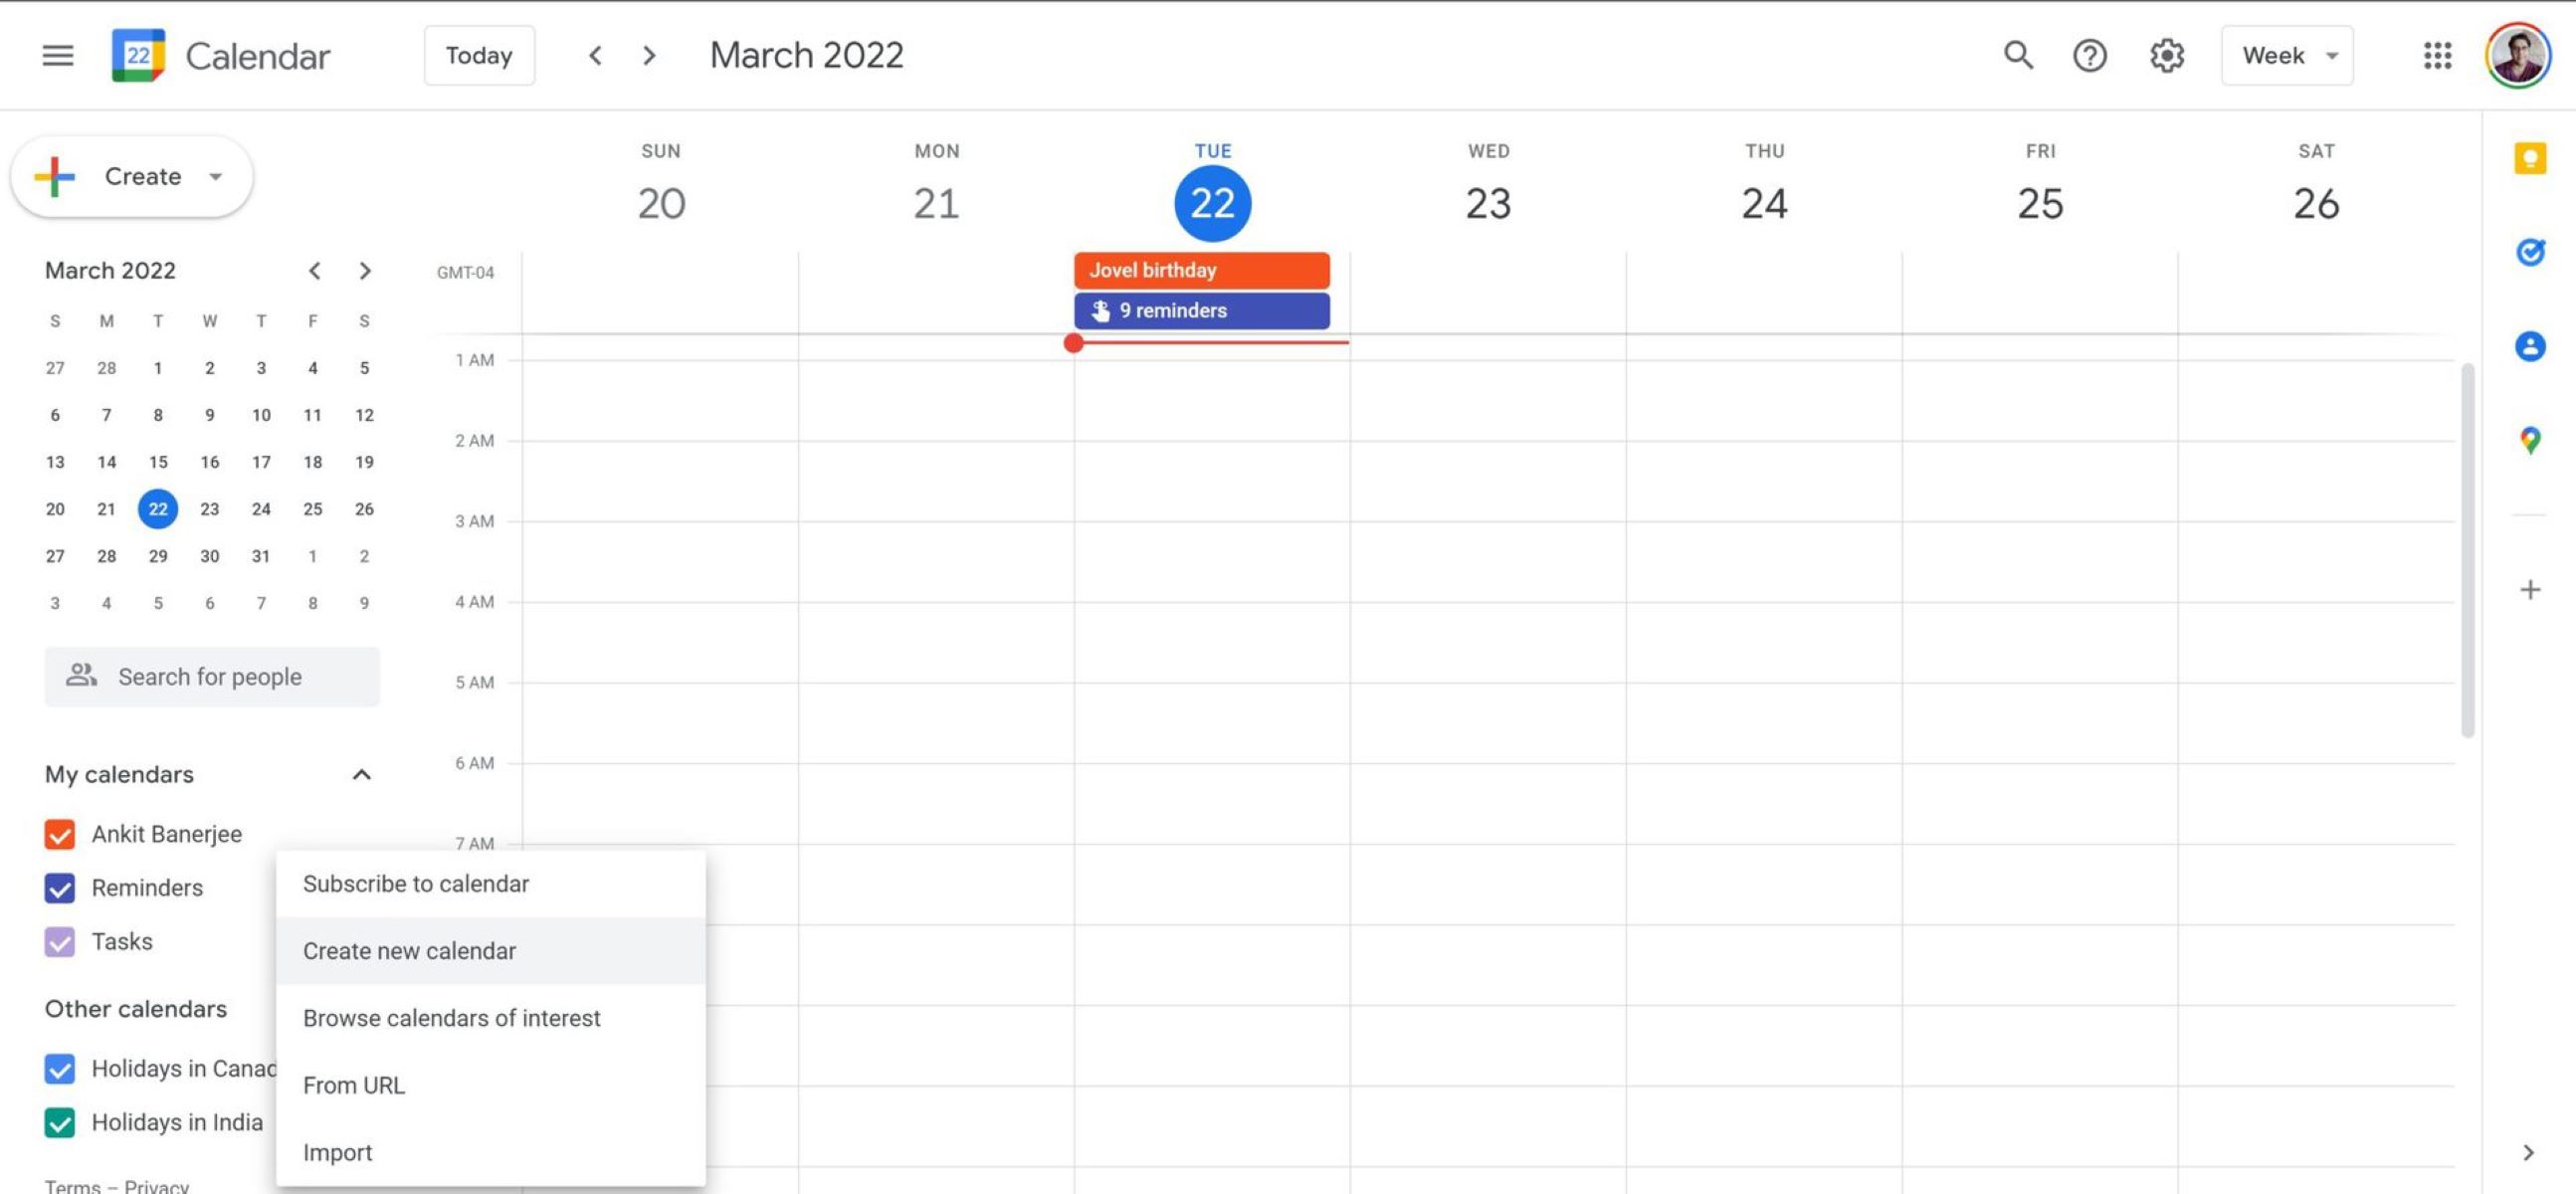
Creating and Managing Multiple Calendars
Google Calendar allows you to create and manage multiple calendars, which is a handy feature for keeping different aspects of your life separate and organized. Here’s how to create and manage multiple calendars effectively:
- Creating a new calendar: To create a new calendar, click on the “+” button next to “Add a Calendar” in the sidebar on the left. Enter the calendar name, adjust the color if desired, and specify the desired visibility settings. Click on “Create Calendar” to finalize the creation.
- Switching between calendars: With multiple calendars, you can easily switch between them to view their respective events. The calendars will be listed in the sidebar on the left. Simply click on the calendar name to toggle its display on or off in the calendar view.
- Adding events to specific calendars: When creating a new event, you can assign it to a specific calendar. In the event creation window, click on the drop-down menu next to the calendar name and select the desired calendar. This allows you to keep events organized under different categories.
- Sharing calendars: Google Calendar enables you to share your calendars with others, facilitating collaboration and coordination. To share a calendar, click on the three-dot icon next to the calendar name in the sidebar and select “Settings and Sharing.” From there, you can choose to make the calendar public, share it with specific individuals, or generate a link to share.
- Managing calendar permissions: When sharing calendars with others, you can set permissions to control who can view, edit, or make changes to the events. You can assign view-only access, allow editing and event creation, or give full control over the calendar. It’s important to adjust permissions according to your preferences and privacy needs.
- Merging calendars: If you have multiple calendars and want to merge them into one, Google Calendar offers a feature called “Overlay.” This feature allows you to view events from multiple calendars simultaneously, making it easier to get an overview of your schedule. To enable the overlay feature, click on the three-line menu icon at the top left corner of the calendar page, scroll down, and select “Settings.” Under the “View Options” section, check the boxes next to the calendars you want to overlay.
- Deleting a calendar: If you no longer need a specific calendar, you can delete it. Keep in mind that deleting a calendar will permanently remove all events associated with that calendar. To delete a calendar, click on the three-dot icon next to the calendar name in the sidebar and select “Settings and Sharing.” Scroll down and click on the “Delete” button at the bottom of the page. Confirm the deletion when prompted.
By leveraging the power of multiple calendars, you can effectively organize different areas of your life, keep events separate, and collaborate with others more efficiently. Take advantage of Google Calendar’s features to manage and customize your calendars to suit your unique needs.
Sharing and Collaborating on Calendars
Sharing and collaborating on calendars is a useful feature offered by Google Calendar that allows you to coordinate and stay connected with others. Whether it’s for work, school, or personal events, here’s how you can share and collaborate on calendars effectively:
- Share calendar with specific individuals: To share a calendar with specific individuals, click on the three-dot icon next to the calendar name in the sidebar and select “Settings and Sharing.” Under the “Share with specific people” section, enter the email addresses of the individuals you want to share the calendar with. You can specify their access permissions, such as “See only free/busy,” “Make changes to events,” or “Make changes and manage sharing.”
- Make a calendar public: If you want to make a calendar accessible to anyone, you can set it as public. In the calendar settings, click on the “Get Sharable Link” option and select “Make available to public.” This allows anyone with the link to view the calendar’s events, depending on the access permissions you’ve set.
- Embed calendar on a website: Google Calendar offers the option to embed your calendar on a website or blog. You can generate an HTML code for the calendar and insert it on your web page. This allows visitors to view and interact with the calendar without leaving your website.
- Synchronize events across calendars: If you have multiple Google Calendars or use other calendar apps, you can synchronize events across different calendars to keep everything up to date. This ensures that any changes made in one calendar are reflected in all synchronized calendars.
- Respond to event invitations: When someone invites you to an event through Google Calendar, you’ll receive an email notification. You can respond to the invitation directly from the email or open the event in your calendar to accept, decline, or indicate your availability. Your response will be automatically updated in the host’s calendar.
- View shared calendars: If someone has shared their calendar with you, you can easily view it alongside your own calendars. The shared calendar will appear under the “Other calendars” section in the sidebar of your Google Calendar. Simply check the box next to the shared calendar to display its events in your calendar view.
- Collaborate on shared calendars: When multiple people have access to a shared calendar, everyone with the appropriate permissions can add, edit, and update events within that calendar. This makes it easy for teams, groups, or families to collaborate and stay on the same page regarding events and scheduling.
- Manage notification settings: When you share a calendar or collaborate on a shared calendar, you can customize your notification settings to receive updates and reminders related to the shared events. This allows you to stay informed about any changes or additions made to the shared calendar.
By leveraging the sharing and collaboration features of Google Calendar, you can streamline coordination, increase productivity, and stay connected with others. Explore these options to effectively work together and keep everyone in sync with your shared events and schedules.
Syncing Google Calendar with Other Calendar Apps
Syncing Google Calendar with other calendar apps allows you to access and manage your schedule across different platforms and devices. Whether you use a mobile device or prefer a different calendar app, here’s how you can sync Google Calendar with other apps effectively:
- Sync with mobile devices: Google Calendar is compatible with both Android and iOS devices. To sync your Google Calendar with your mobile device, download and install the “Google Calendar” app from the respective app store. Sign in to the app with your Google account, and your calendar events will automatically sync and be accessible on your mobile device.
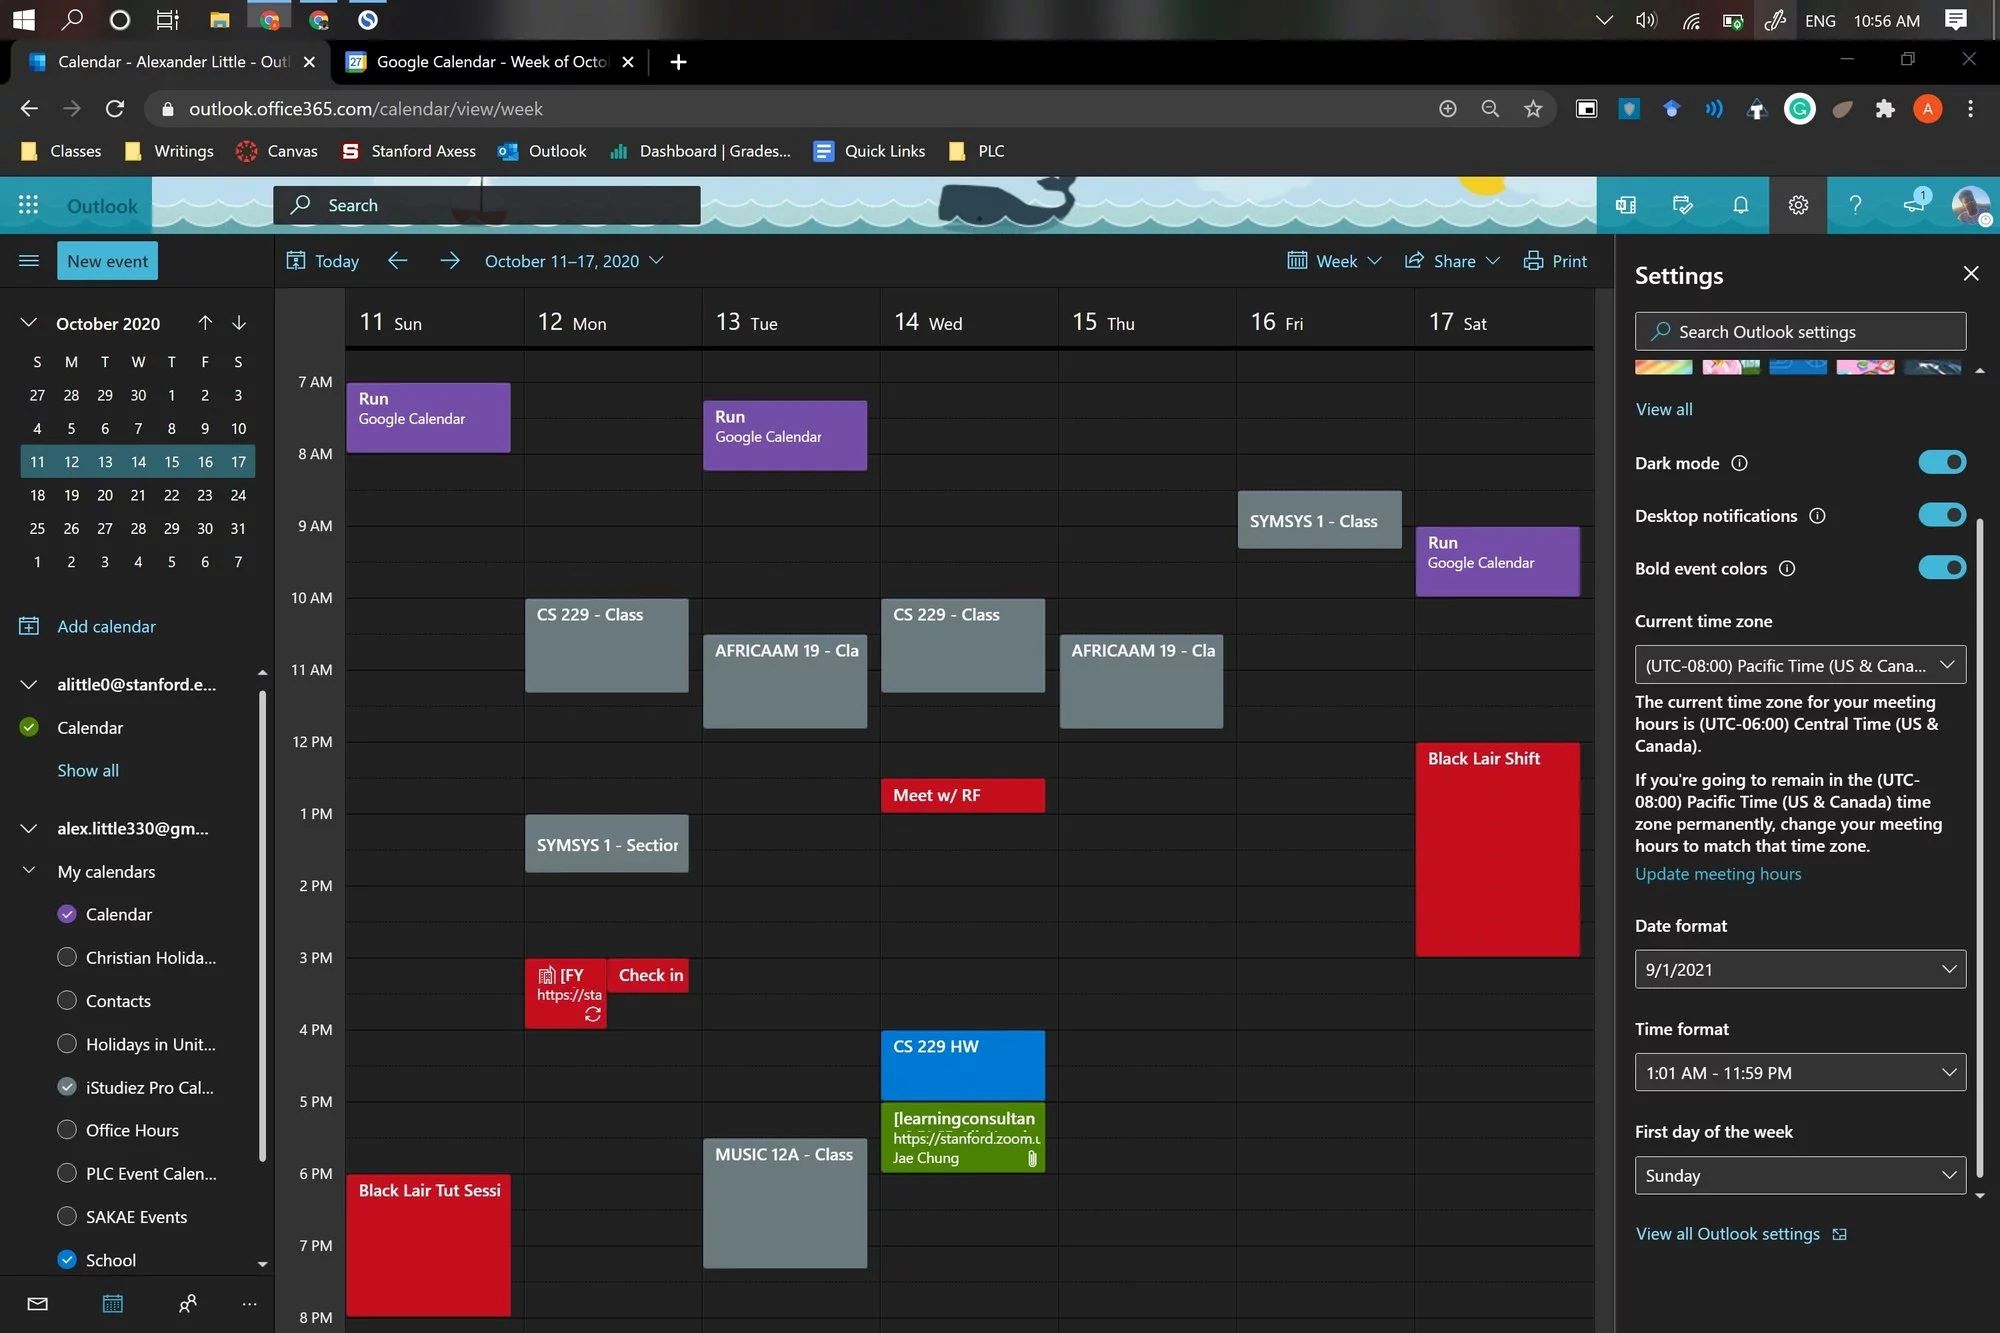
- Sync with desktop calendar apps: If you prefer using a desktop calendar app such as Microsoft Outlook or Apple Calendar, you can sync it with Google Calendar to have all your events in one place. In Google Calendar, click on the three-line menu icon at the top left corner and select “Settings.” Under the “Integrations” tab, choose the desktop calendar app you want to sync with and follow the instructions provided.
- Subscribe to external calendars: Google Calendar allows you to subscribe to external calendars to have their events displayed in your calendar view. This is useful for staying updated on public holidays, sports schedules, or any other events that are relevant to you. To subscribe to an external calendar, click on the “+” button next to “Add a Calendar” in the sidebar on the left. Select “From URL” and enter the URL of the external calendar’s feed.
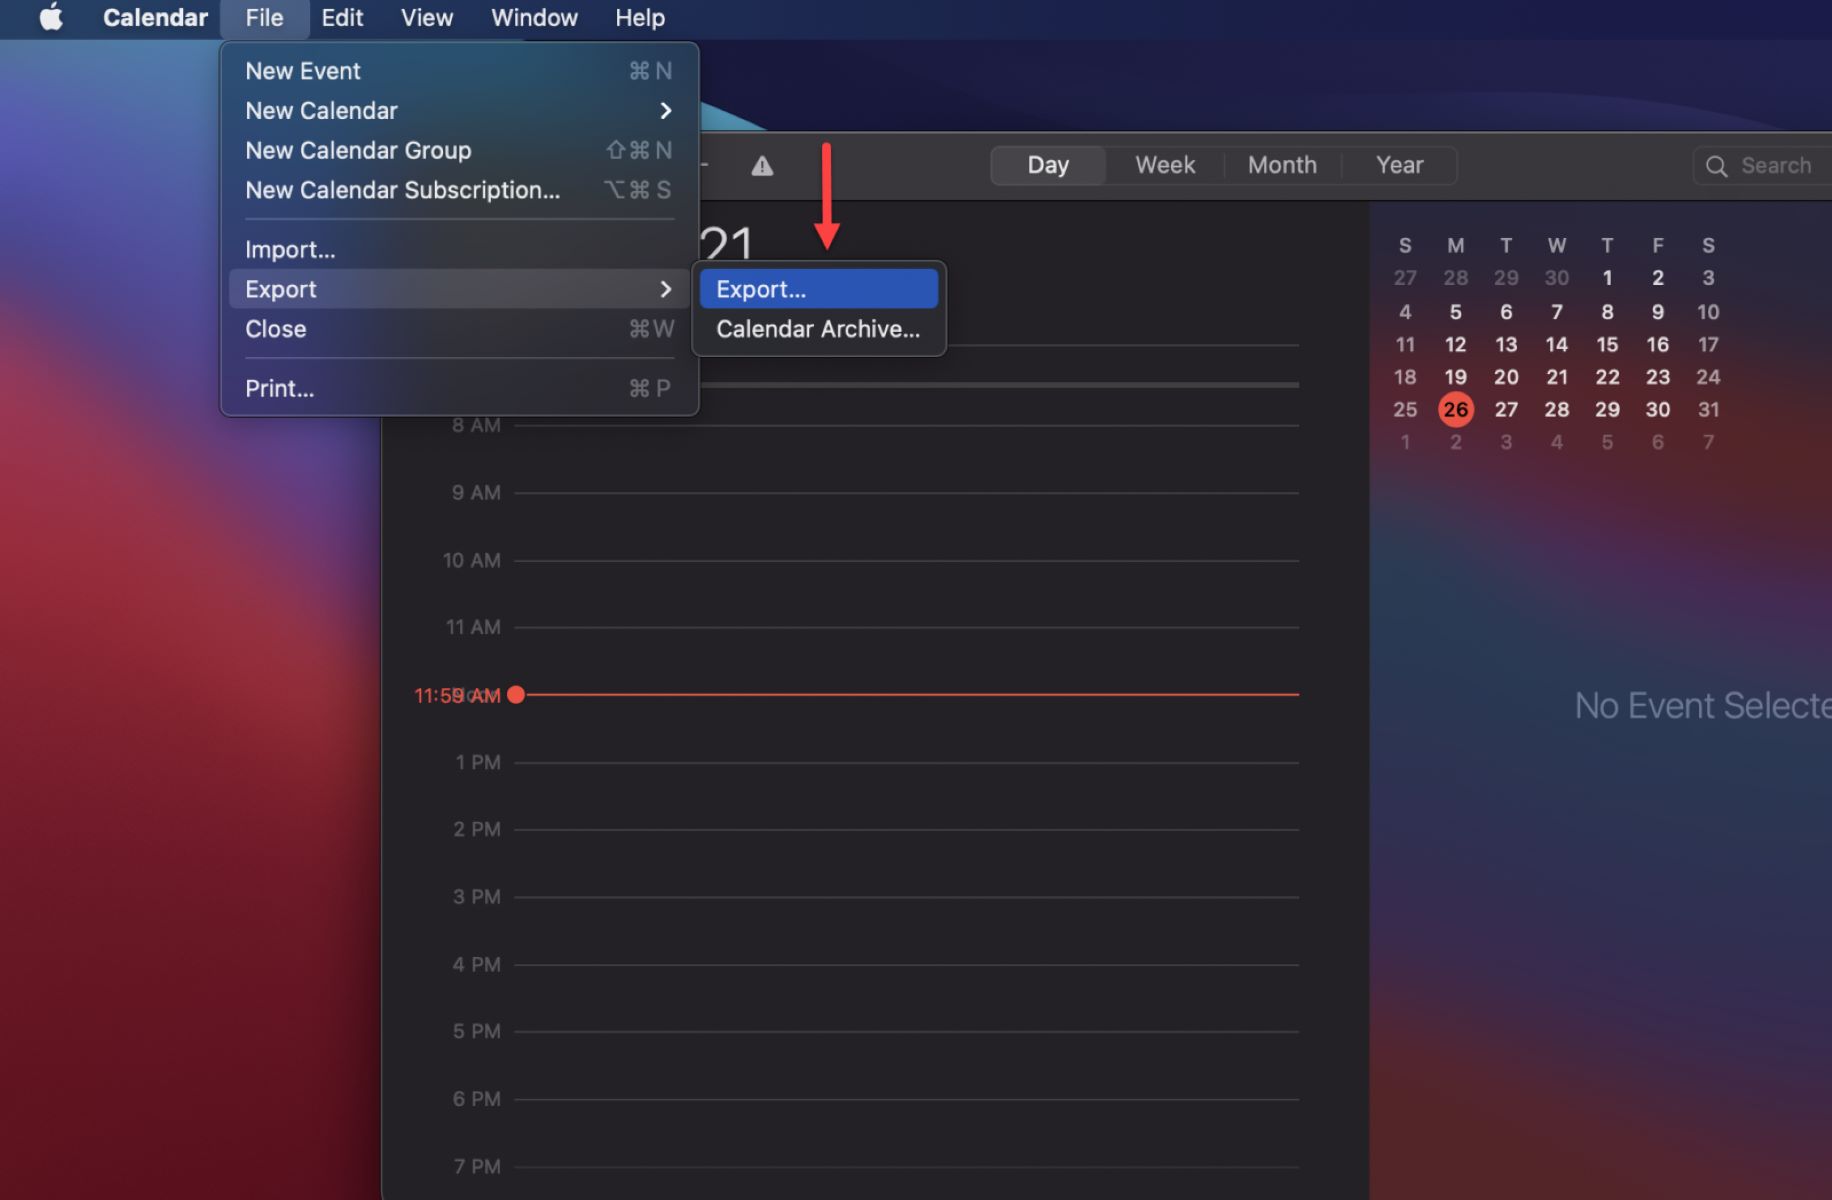
- Import and export calendar files: If you have events stored in a different format or calendar app, you can import them into Google Calendar. Click on the three-line menu icon, go to “Settings,” and navigate to the “Import & Export” tab. Here, you can import events from a file or export your Google Calendar events to a file that can be imported into another calendar app.
- Sync with online productivity tools: Google Calendar can also be synced with online productivity tools, such as project management systems or task management apps. This allows you to integrate your calendar with other tools you use for better organization and collaboration. Look for integrations or add-ons available for your specific online productivity tool.
- Set up automatic sync: To ensure that your Google Calendar and other calendar apps stay in sync without manually updating them, set up automatic sync. This can usually be done by enabling the option in the settings of the respective calendar apps or using third-party synchronization tools.
By syncing Google Calendar with other calendar apps, you can have a unified view of your schedule across all your devices and platforms. Take advantage of these syncing options to stay organized and stay up to date, regardless of which calendar app or device you use.
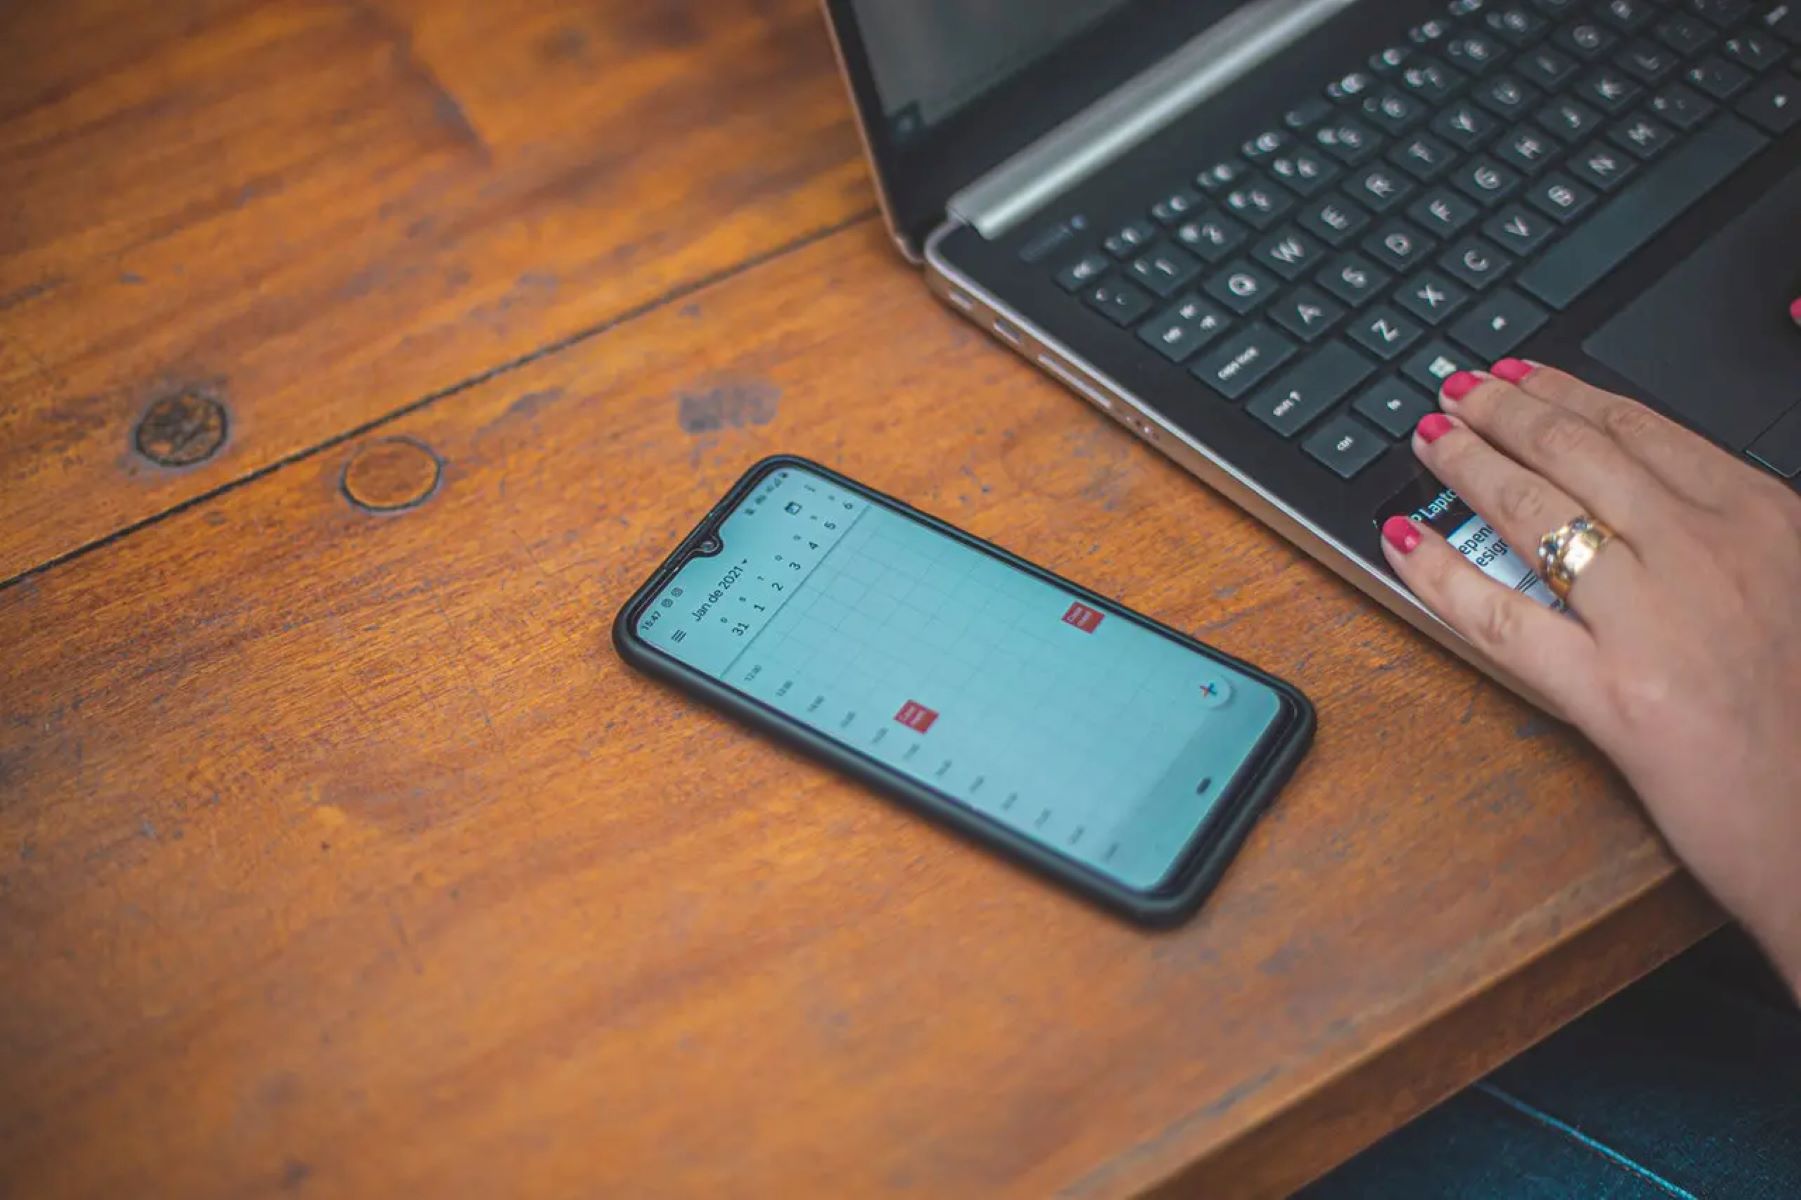
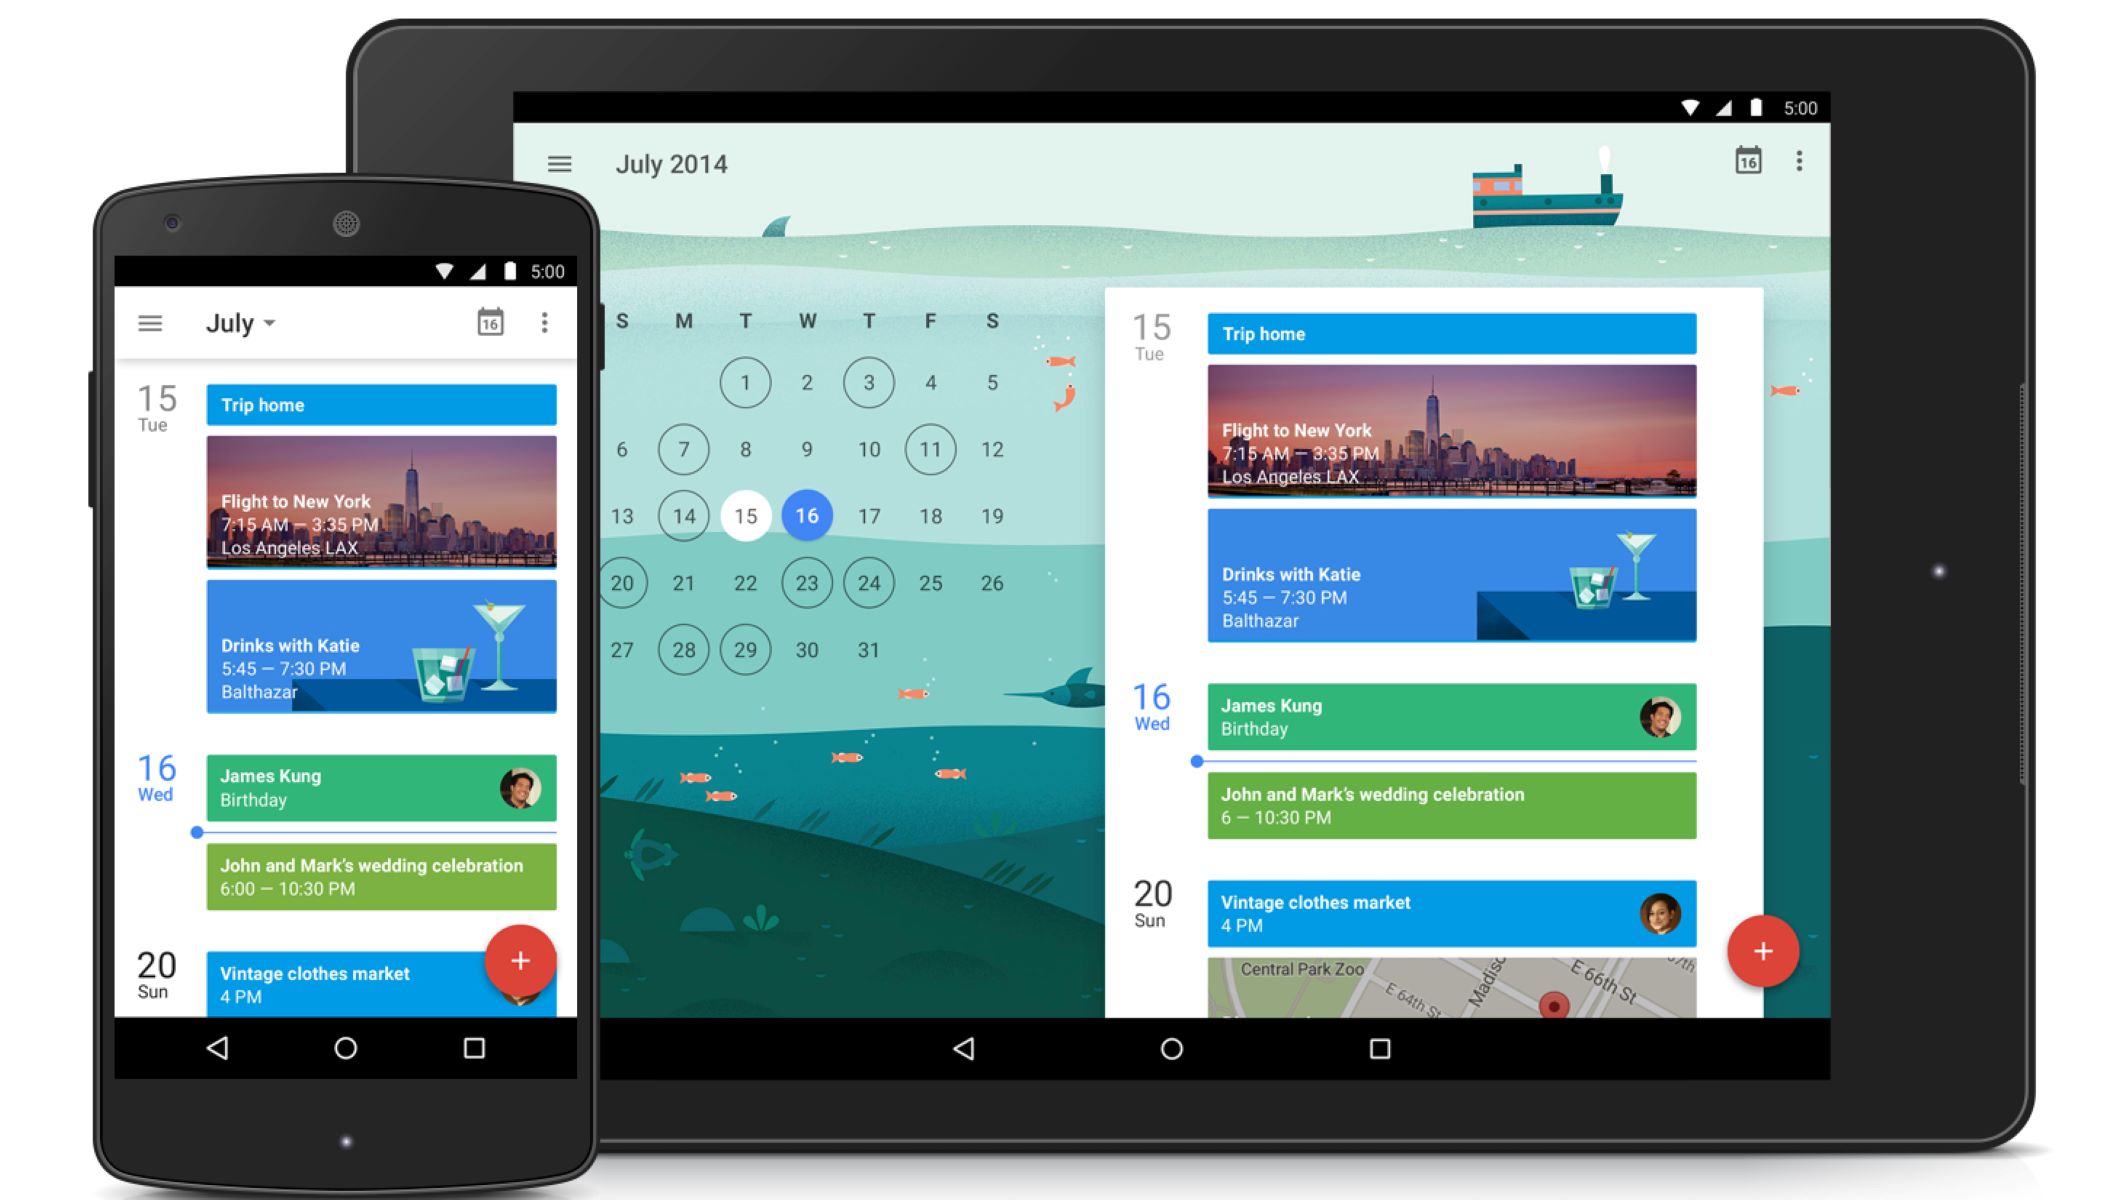
Using Google Calendar on Mobile Devices
Google Calendar offers a mobile app that allows you to access and manage your schedule on the go. With the Google Calendar app installed on your mobile device, you can stay organized and never miss an appointment. Here’s how you can make the most of Google Calendar on your mobile device:
- Download and install the app: Visit the app store on your mobile device, search for “Google Calendar,” and download the app. Once installed, sign in to the app using your Google account credentials.
- View and manage your events: Open the Google Calendar app to view your events in various calendar views such as day, week, month, or agenda. Swipe left or right to navigate through different dates. Tap on an event to view or edit its details, add reminders, or change the time or location.
- Add new events: To add a new event to your calendar, tap on the “+” button located at the bottom right corner of the app. Enter the event details such as the title, date, time, and location. You can also set reminders and invite others to the event.
- Get event reminders: The Google Calendar app provides notifications and reminders to keep you informed about your upcoming events. Customize your notification settings by navigating to the app’s settings and selecting “Notifications.” From there, you can specify how and when you want to be reminded.
- Receive event invitations: When someone invites you to an event through Google Calendar, you’ll receive a notification on your mobile device. You can respond to the invitation directly from the notification or open the event in the app to accept, decline, or indicate your availability.
- Sync with other calendars: If you use multiple calendars or calendar apps, you can sync them with the Google Calendar app on your mobile device. This allows you to have all your events and schedules in one place. To sync other calendars, go to the app’s settings, select “Manage Accounts,” and follow the instructions for adding and syncing additional calendars.
- Search for events: Google Calendar on mobile devices provides a search functionality that allows you to quickly find specific events or appointments. Simply tap on the search icon in the app and enter keywords related to the event you’re looking for.
- Switch between multiple Google accounts: If you have multiple Google accounts, you can easily switch between them in the Google Calendar app. This is useful if you manage different calendars or need to access events from different accounts. Tap on your profile picture in the app and select the desired account.
- Integrate with other apps: The Google Calendar app can be integrated with other apps and services to enhance your productivity and organization. Look for available integrations in the app’s settings or explore third-party apps that offer synchronization with Google Calendar.
With the Google Calendar app on your mobile device, you have access to your schedule wherever you go. Take advantage of these features and functionalities to manage your events, stay organized, and make the most of your mobile calendar experience.
Tips and Tricks for Effective Calendar Organization
Effective calendar organization is crucial for managing your time, staying on top of your commitments, and maximizing productivity. Here are some useful tips and tricks to help you make the most out of your calendar:
- Create separate calendars for different areas of your life: To keep your personal and professional events separate, consider creating different calendars for each aspect of your life. This will allow you to easily toggle between them and maintain organization.
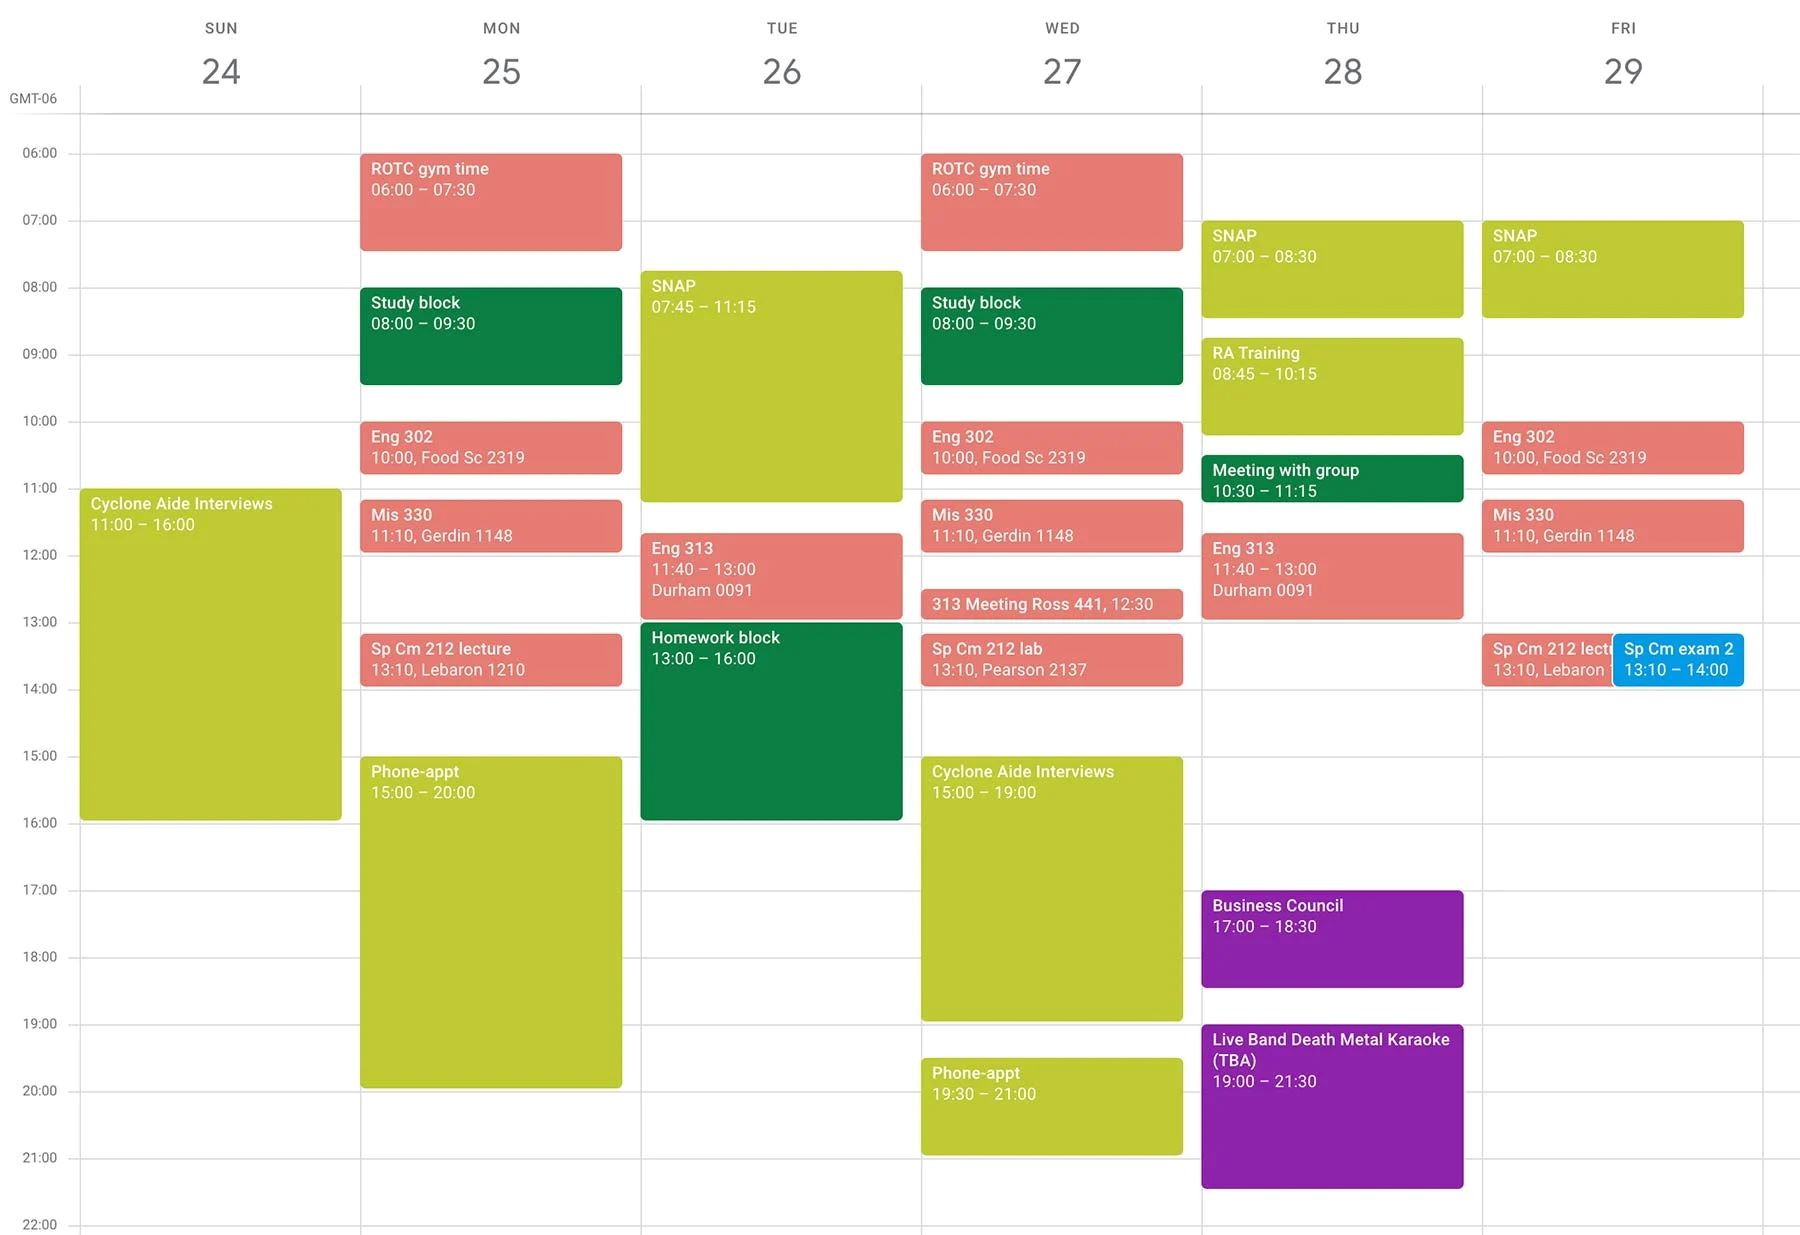
- Use color-coding: Assign different colors to different calendars or types of events. Color-coding helps visually distinguish events at a glance and makes it easier to identify different categories of activities in your calendar.
- Add detailed information to each event: Include relevant details such as location, notes, and attachments for each event. Adding this information reduces the chances of miscommunication and helps you prepare effectively for each event.
- Set reminders and notifications: Utilize reminders and notifications to ensure that you never miss important events. Set reminders at appropriate intervals before the event to give yourself enough time for preparation and travel.
- Take advantage of recurring events: If you have events that occur on a regular basis, such as weekly meetings or monthly appointments, utilize the recurring events feature. This saves time and effort by automatically scheduling these events for you.
- Utilize time blocks: Schedule specific time blocks for different types of tasks or activities, such as work, exercise, or personal time. This helps you allocate your time effectively and ensures that you prioritize important activities.
- Set aside buffer time: Leave gaps or buffer time between events to allow for unexpected delays or additional preparation. Buffer time helps you stay flexible and gives you a cushion for handling unforeseen circumstances.
- Schedule regular review and planning sessions: Set aside dedicated time to review and plan your upcoming events. This allows you to anticipate important deadlines, timelines, and prepare in advance for crucial tasks.
- Sync your calendar across devices: Ensure that your calendar is synced across all your devices, including your computer, smartphone, and tablet. This way, you can access and update your calendar from anywhere and stay up to date with your schedule.
- Regularly declutter and update: Periodically review your calendar and remove any outdated or irrelevant events. Keeping your calendar clean and up to date reduces visual clutter and ensures that you have a clear view of your upcoming commitments.
By implementing these tips and tricks, you can effectively organize your calendar, optimize your time management, and stay on track with your schedule. Experiment with different strategies to find the organizational techniques that work best for you.
Conclusion
Google Calendar is a powerful tool that allows you to efficiently manage and organize your schedule. From setting up your calendar to customizing its appearance, adding and managing events, creating multiple calendars, sharing and collaborating with others, syncing with other calendar apps, and using it on mobile devices, Google Calendar offers a wide range of features to meet your scheduling needs.
By following the steps outlined in this guide, you can harness the full potential of Google Calendar and make it work for you. Take advantage of the customization options to tailor your calendar view, utilize the sharing and collaboration features to coordinate with others, and sync your Google Calendar with other apps to have all your events in one place.
Remember to incorporate effective organizational practices such as color-coding, setting reminders, utilizing recurring events, and allocating buffer time. These strategies will help you stay organized, prioritize your tasks, and make the most out of your time.
Whether you’re a busy professional, a student, or simply looking to better manage your schedule, Google Calendar provides the tools to streamline your planning process and enhance your productivity. So get started today, optimize your scheduling experience, and take control of your time with Google Calendar.