Introduction
Welcome to our guide on how to add more categories in Google Calendar. Google Calendar is a powerful tool that helps you stay organized and manage your schedule with ease. By default, Google Calendar provides a few pre-defined categories such as Work, Personal, and Holidays. However, you may find these categories limiting or not adequately reflecting your needs.
Fortunately, Google Calendar allows you to create additional custom categories to better categorize and color-code your events. This feature enables you to organize your calendar more effectively and quickly identify upcoming events.
In this tutorial, we will walk you through the steps to add new categories, customize their colors, and assign them to events. Whether you want to create categories for specific projects, hobbies, or anything else, this guide will help you personalize your Google Calendar to suit your needs.
Let’s get started by accessing the Google Calendar settings where you can add new categories and make customizations.
Accessing Google Calendar Settings
Before you can add new categories to your Google Calendar, you need to access the settings where you can make this customization. Here’s how:
- Open Google Calendar in your preferred web browser and sign in to your Google account.
- Once you are signed in, click on the gear icon located in the top-right corner of the page. This will open the Settings menu.
- In the dropdown menu, click on “Settings” to access the Calendar settings page.
- On the left-hand side of the settings page, you will see a list of options. Look for the “Calendar” section and click on it.
- Under the “Calendar” section, you will find various settings and preferences. Scroll down until you see the “Events” category.
- Click on “Events” to expand the section and reveal more options.
By following these steps, you will successfully access the Google Calendar settings page where you can make changes and add new categories. Now, let’s move on to the next section to learn how to create a new category in Google Calendar.
Adding a New Category
Once you have accessed the Google Calendar settings, you can easily add a new category to expand the available options for organizing your events. Follow these steps to add a new category:
- On the Google Calendar settings page, under the “Events” category, you will find an option labeled “Default Event Color.”
- Click on the colored box next to the “Default Event Color” option. This will open a color picker, allowing you to select a color for your new category.
- Choose a color that represents the category you want to add. You can also enter a custom color value if you have a specific color in mind.
- Once you have selected a color, click “Save” to save your changes. The new category will now appear as an option in the color picker.
- To name your new category, simply select the color box corresponding to your chosen color in the color picker and enter a name for the category.
- Click “Save” again to save the category name.
By following these steps, you have successfully added a new category to your Google Calendar. You can now use this category to organize your events and easily distinguish them by their color. Let’s move on to the next section to learn how to customize the colors of your categories.
Customizing Category Colors
Personalizing the colors of your categories in Google Calendar can help you easily differentiate events and make your calendar visually appealing. Here’s how you can customize the colors:
- In the Google Calendar settings page, navigate to the “Events” category, where you added your new category in the previous section.
- Click on the colored box next to the name of the category you want to customize. This will open the color picker.
- Choose a new color from the color picker or enter a custom color value.
- Once you have selected a color, click “Save” to save your changes.
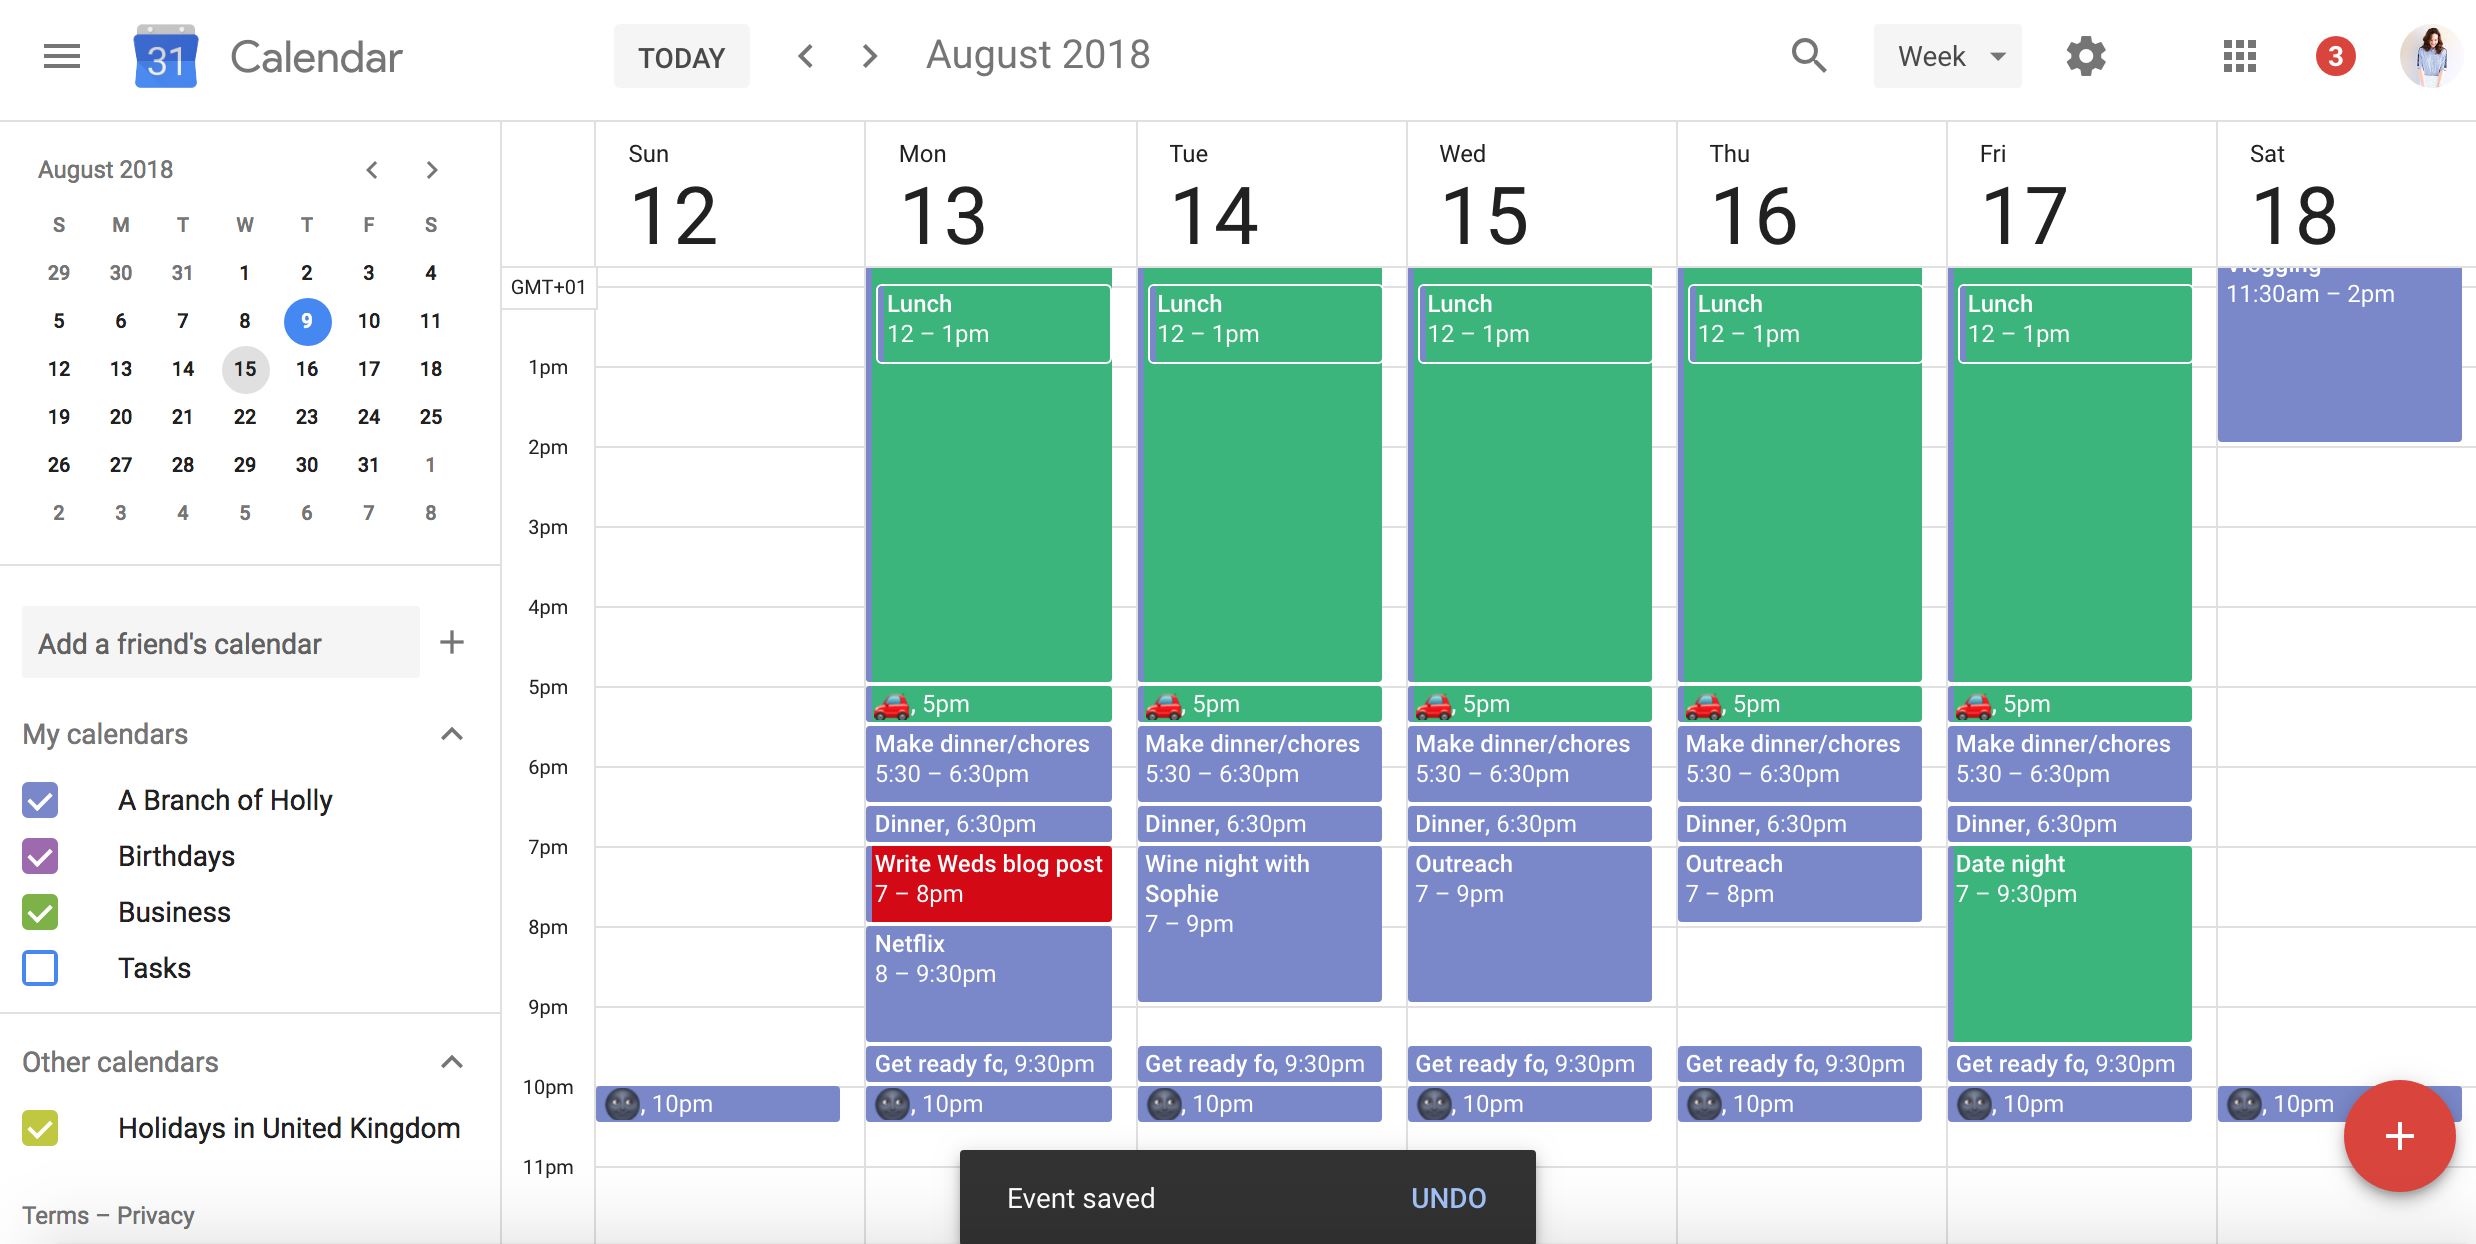
By customizing the colors of your categories, you can assign specific colors that resonate with the nature of the events they represent. For example, you could assign a bright red color for work-related events and a calming blue for personal events.
Customizing category colors not only helps you visually organize your calendar, but it also makes it easier to glance at your schedule and quickly identify the type of events you have planned.
Now that you have customized the colors of your categories, let’s move on to the next section to learn how to assign these categories to your events.
Assigning Categories to Events
Assigning categories to events in Google Calendar allows you to group similar events together and quickly identify them based on their assigned category color. To assign a category to an event, follow these steps:
- Open the Google Calendar and create a new event or edit an existing one.
- In the event creation/editing window, you will find a drop-down menu labeled “Category.” Click on it to view the list of available categories.
- Select the category that best suits the event you are creating/editing.
- Once you have selected a category, the event color will automatically update to match the category color you assigned.
Assigning categories to events provides a convenient way to visually organize your calendar and quickly identify specific types of events. For example, if you create a category for “Meetings,” you can assign this category to all your meeting events and instantly distinguish them from other types of events.
Additionally, you have the flexibility to assign multiple categories to a single event if it falls under different categories. This allows for further customization and organization of your events.
Now that you know how to assign categories to your events, let’s move on to the next section to learn how to view events by category.
Viewing Events by Category
Google Calendar provides a convenient way to view your events by category, allowing you to focus on specific types of events at a glance. Here’s how you can view events by category:
- Open Google Calendar in your web browser and sign in to your Google account.
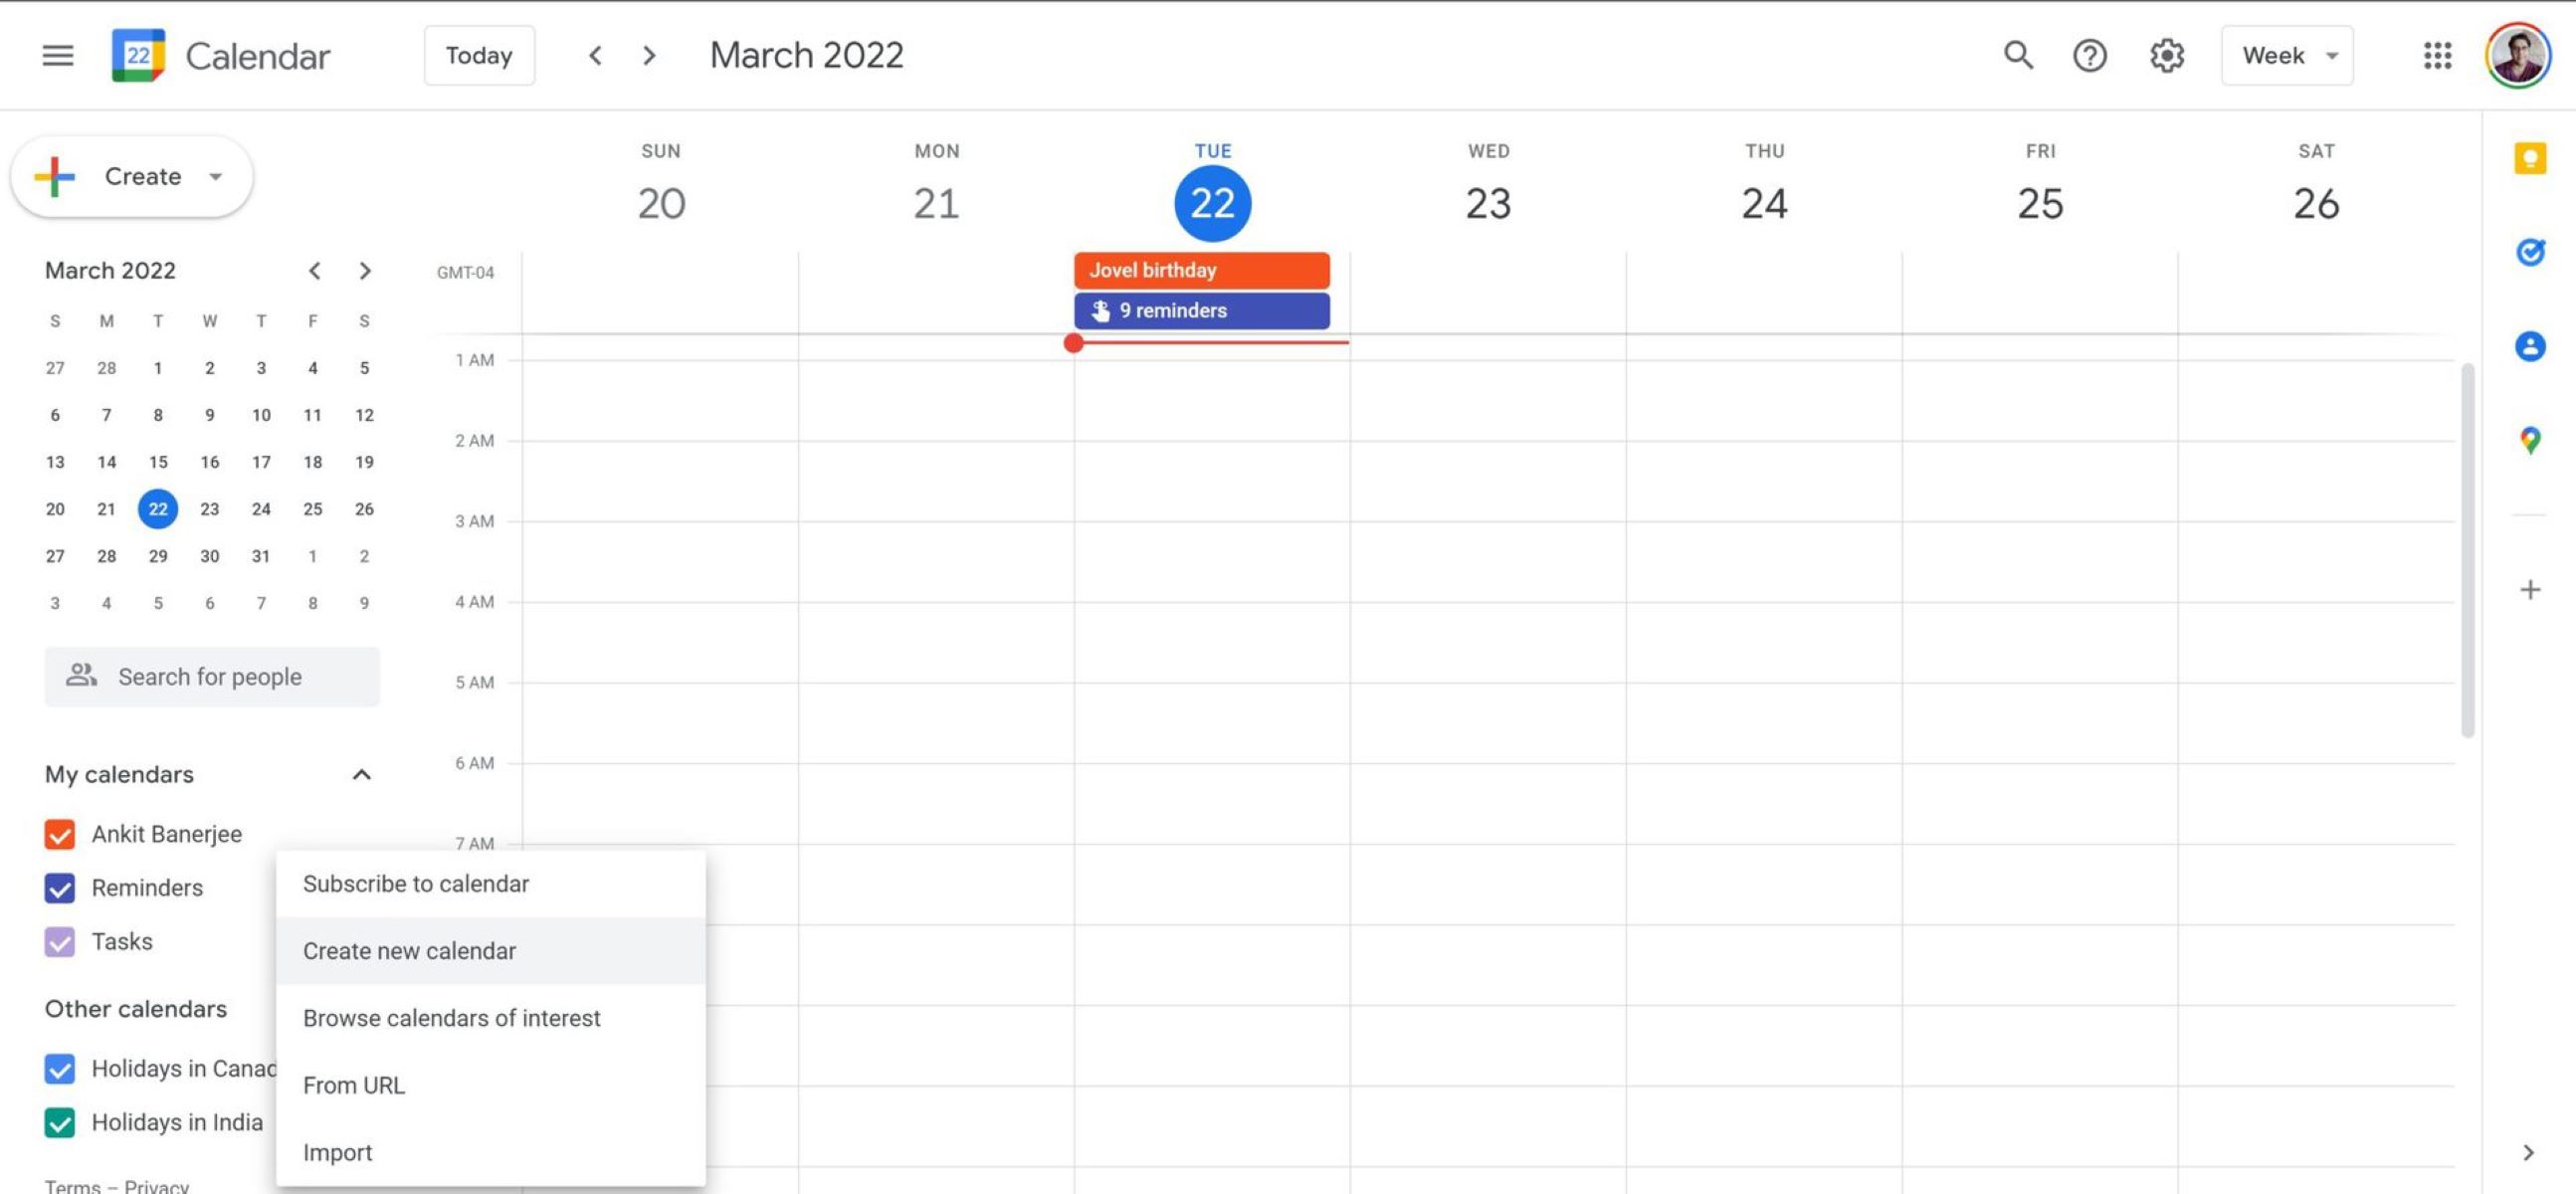
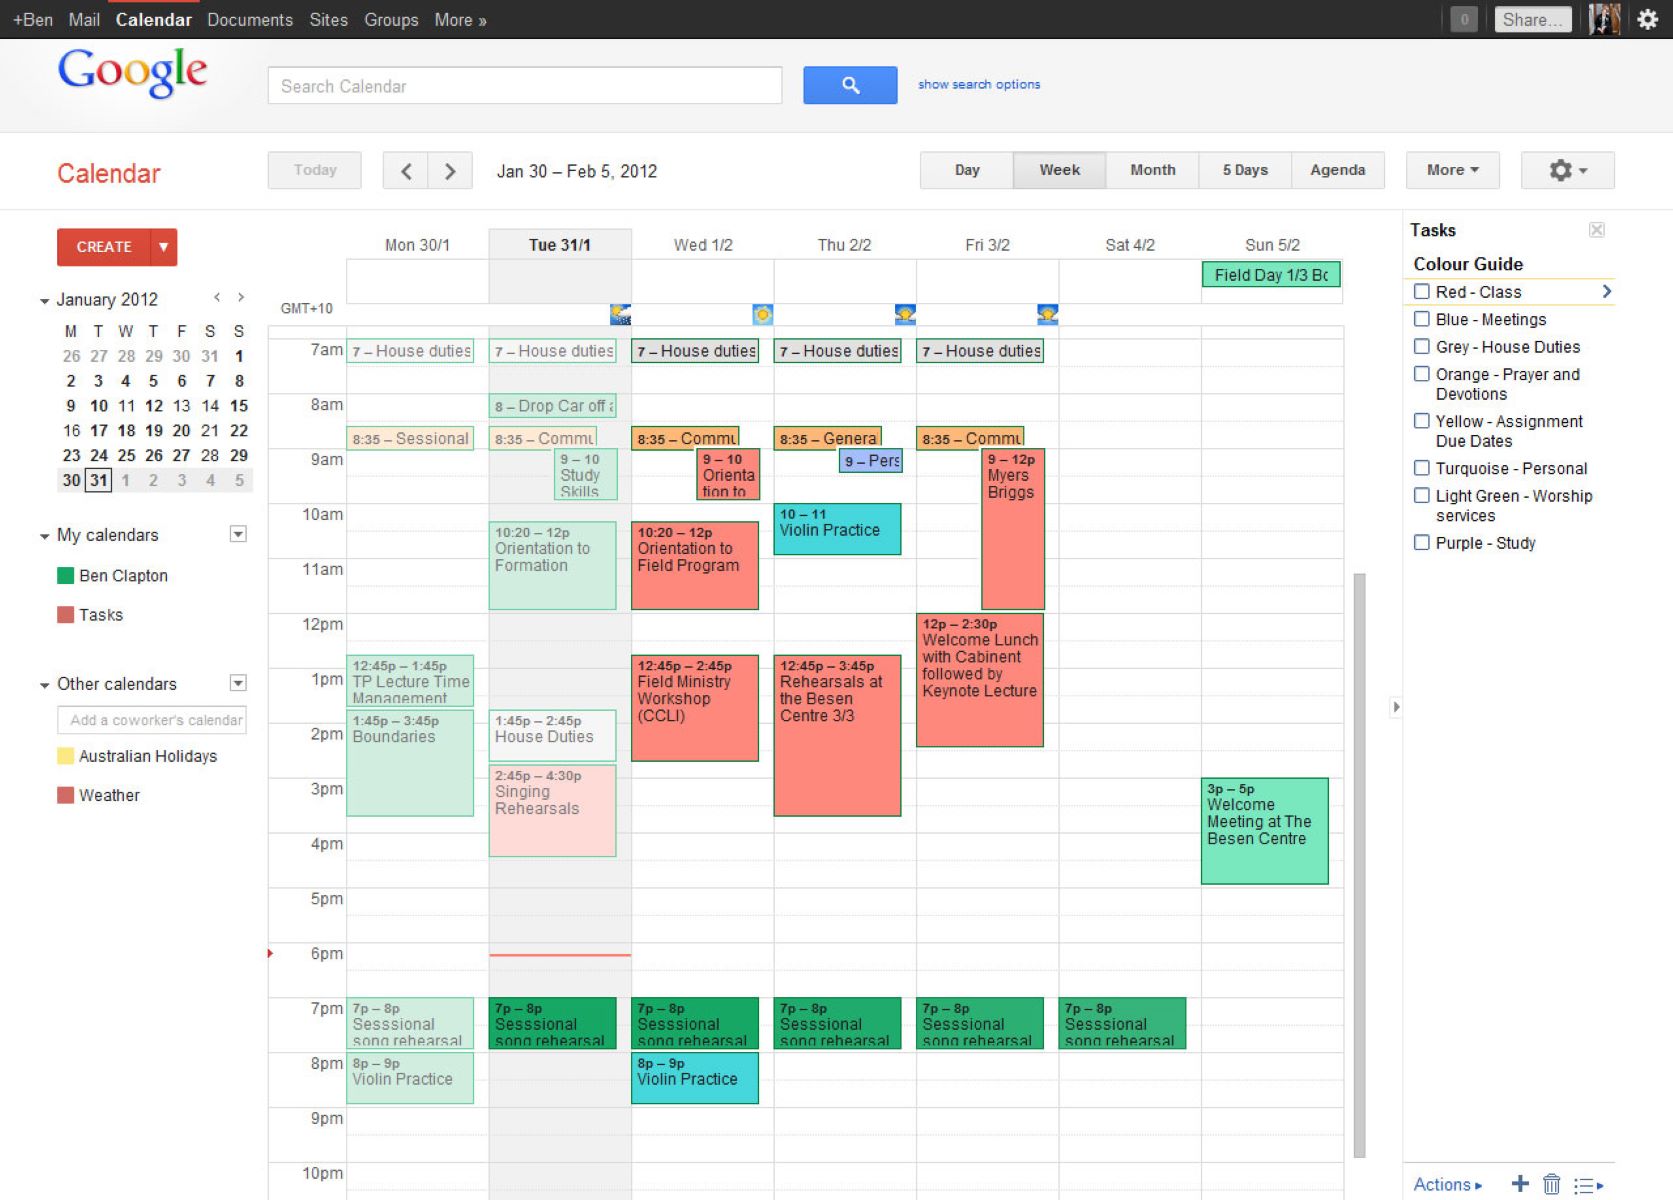
- In the left-hand side panel, you will see a list of all your created categories under the “My Calendars” section.
- To view events from a specific category, simply click on the checkbox next to the category name.
- Once you click the checkbox, the calendar view will update to only display events from the selected category.
By viewing events by category, you can streamline your focus and easily locate specific types of events. This feature is particularly useful when you want to check your upcoming meetings or personal appointments without being overwhelmed by other event types.
Additionally, you have the flexibility to display events from multiple categories simultaneously by selecting the corresponding checkboxes. This allows you to have a comprehensive view of various categorizations and stay well-organized.
Now that you know how to view events by category, let’s move on to the next section to learn how to edit or delete categories.
Editing or Deleting Categories
If you ever need to make changes to your categories or remove them altogether, Google Calendar provides simple options to edit or delete categories. Follow these steps to edit or delete a category:
To Edit a Category:
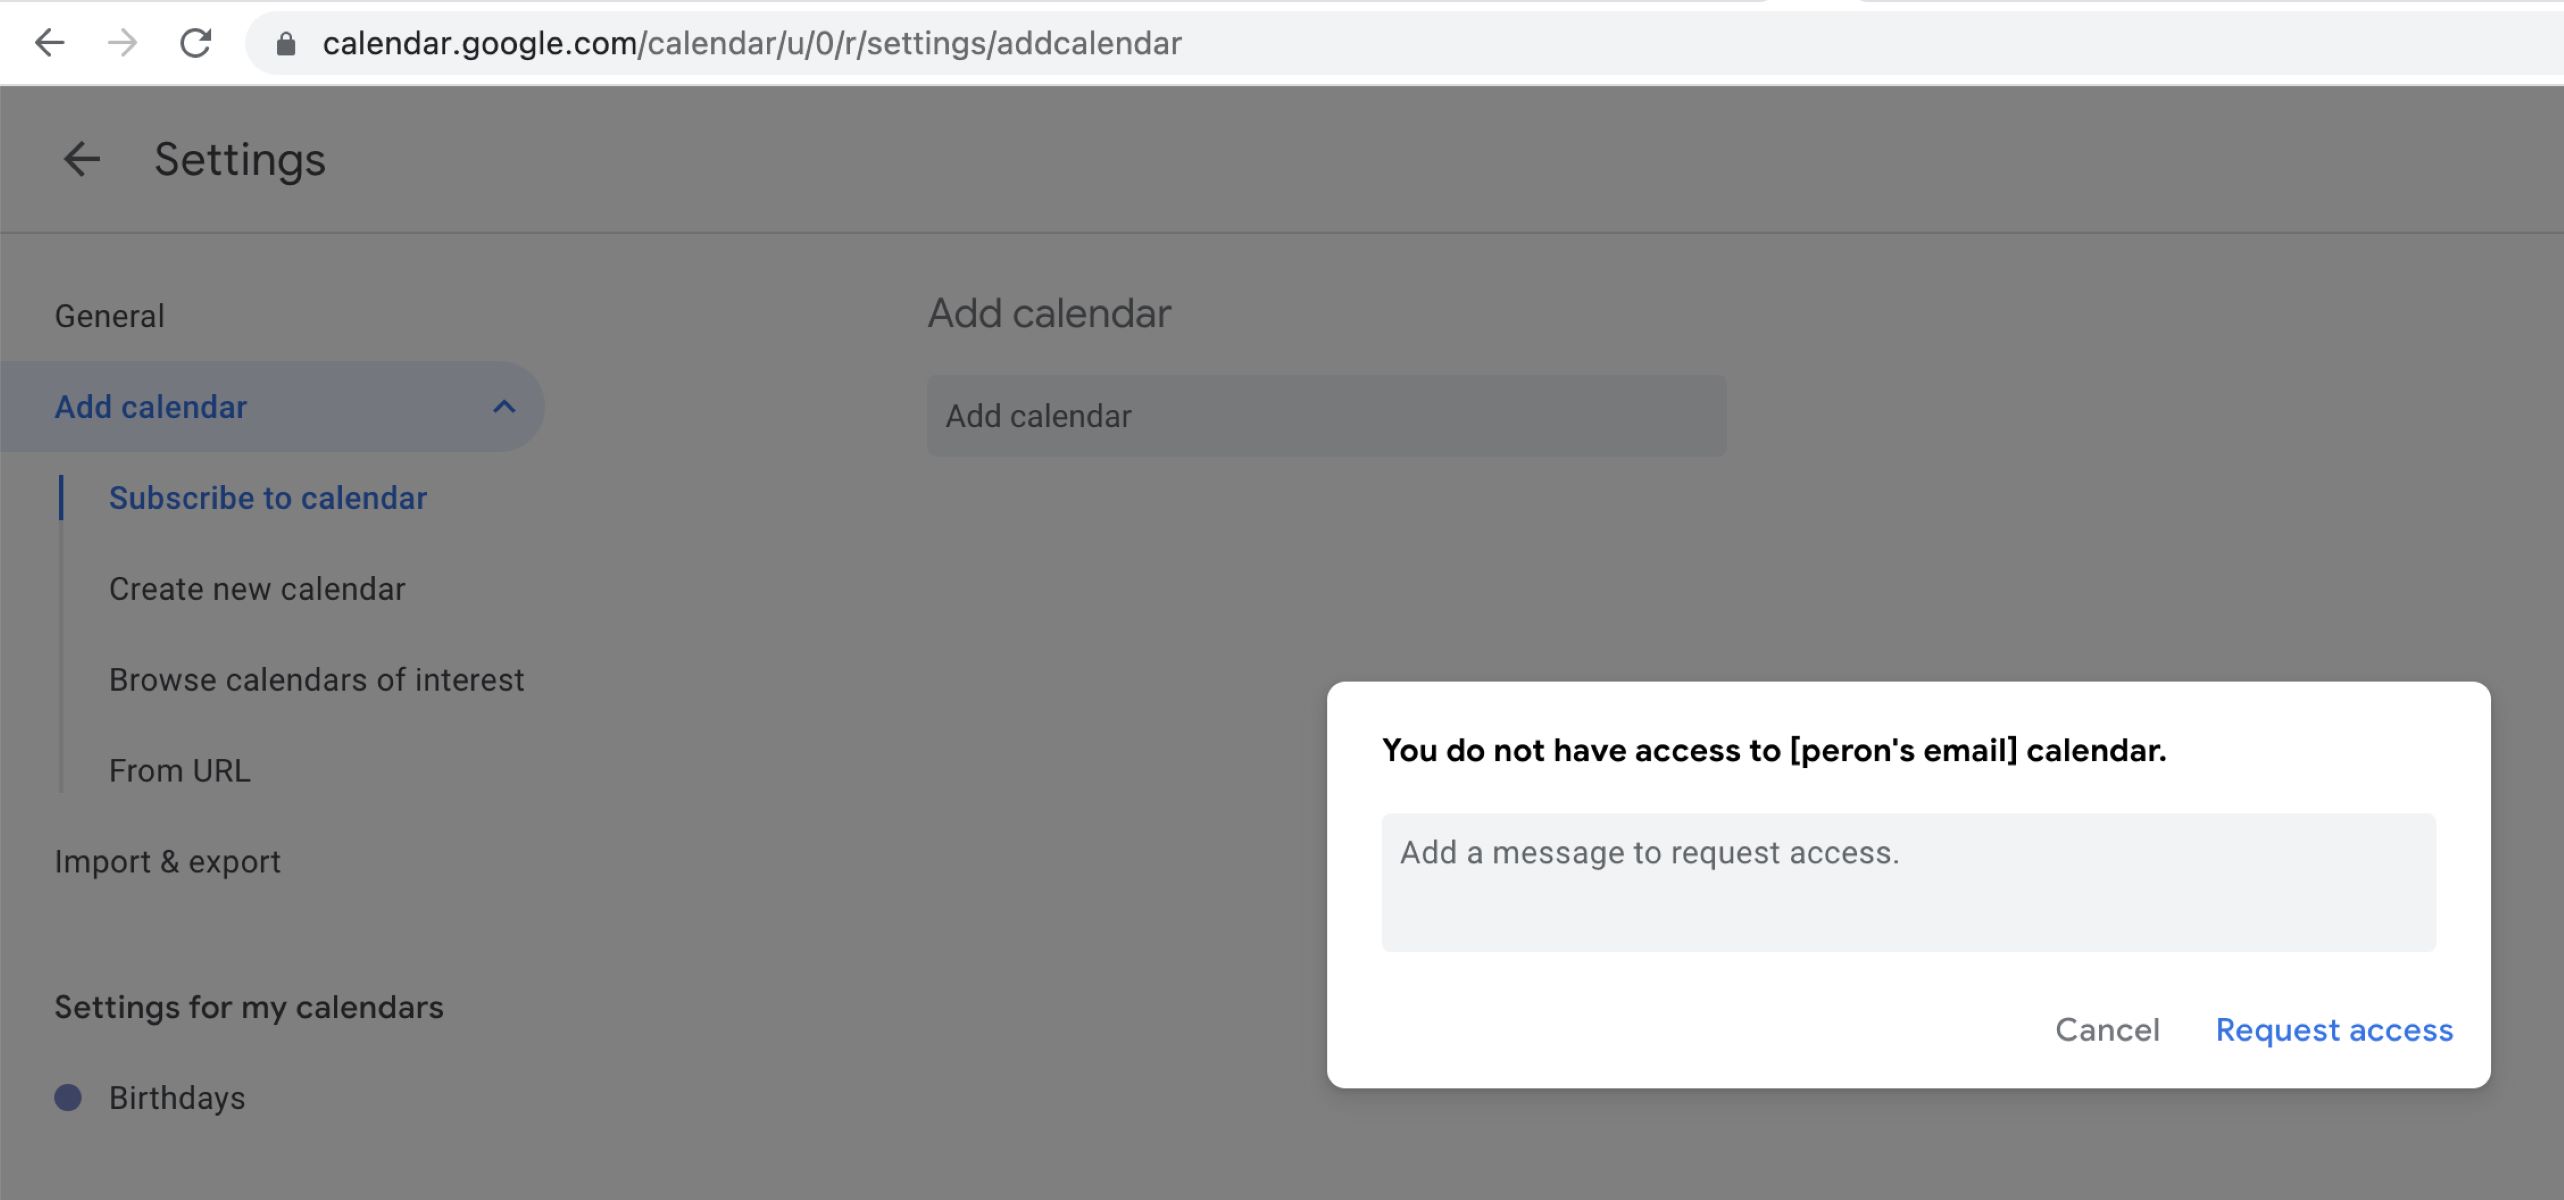
- Open the Google Calendar settings page.
- Navigate to the “Events” category where you can find your created categories.
- Click on the colored box next to the category you want to edit. This will open the color picker and the category name field.
- Make the necessary changes to the category color or name.
- Click “Save” to save your changes.
To Delete a Category:
- Open the Google Calendar settings page.
- In the “Events” category, locate the category you want to delete.
- Click on the “X” icon next to the category name. A confirmation pop-up will appear.
- Click “OK” to confirm the deletion.
Editing or deleting categories provides the flexibility to make adjustments as your needs change. Whether you want to modify the color of a category to better represent its purpose or remove a category that is no longer relevant, these options allow you to tailor your Google Calendar to your evolving scheduling requirements.
Remember that when you edit or delete a category, it will affect all events assigned to that category. Events assigned to a deleted category will default to the “default” category color.
Now that you know how to edit or delete categories, you have the ability to keep your Google Calendar organized and up to date with minimal effort.
Conclusion
Congratulations! You have successfully learned how to add more categories in Google Calendar to better organize and manage your schedule. By customizing category colors, assigning categories to events, and viewing events by category, you can easily distinguish between different types of events and stay on top of your commitments.
Google Calendar’s flexibility in creating and customizing categories allows you to tailor your calendar to suit your unique needs. Whether you want to separate work and personal events, categorize events based on projects or hobbies, or create any other personalized categorization system, Google Calendar has you covered.
Remember, accessing the Google Calendar settings is the key to adding and customizing categories. From there, you can easily add new categories, assign colors, and even edit or delete existing categories as your scheduling needs evolve.
By following the steps outlined in this guide, you can take full advantage of Google Calendar’s robust features and improve your productivity and organization. So go ahead and start personalizing your calendar with the categories that make the most sense for you.
Now that you have the knowledge and tools to enhance your Google Calendar experience, you can confidently manage your schedule and stay on top of your commitments like never before.