Introduction
Welcome to this guide on how to add guests to Google Calendar. Google Calendar is a powerful tool that allows you to organize your schedule, set reminders, and conveniently invite others to your events. Adding guests to your calendar events enables you to collaborate, coordinate, and keep everyone on the same page.
Whether you’re planning a work meeting, a family gathering, or a social event, Google Calendar makes it easy to invite people and manage their responses. With just a few simple steps, you can share your events with others, grant them access to event details, and keep track of their attendance status.
In this article, we will walk you through the process of adding guests to Google Calendar events. We will explore how to create new events, add guest email addresses, customize permissions, send invitations, and manage guest responses. We will also delve into tracking and updating guest attendance to ensure everyone is informed and prepared for the event.
Whether you are new to Google Calendar or an experienced user looking for a refresher, this guide will provide you with the knowledge and steps necessary to seamlessly add guests to your calendar events. So let’s dive in and get started!
Step 1: Access Google Calendar
The first step in adding guests to your Google Calendar events is to access Google Calendar itself. Here’s how you can do it:
1. Open a web browser: Launch your preferred web browser (such as Chrome, Firefox, Safari, or Edge).
2. Sign in to your Google account: Visit the Google homepage and sign in to your Google account. If you don’t have an account, you will need to create one by clicking on the “Create account” option.
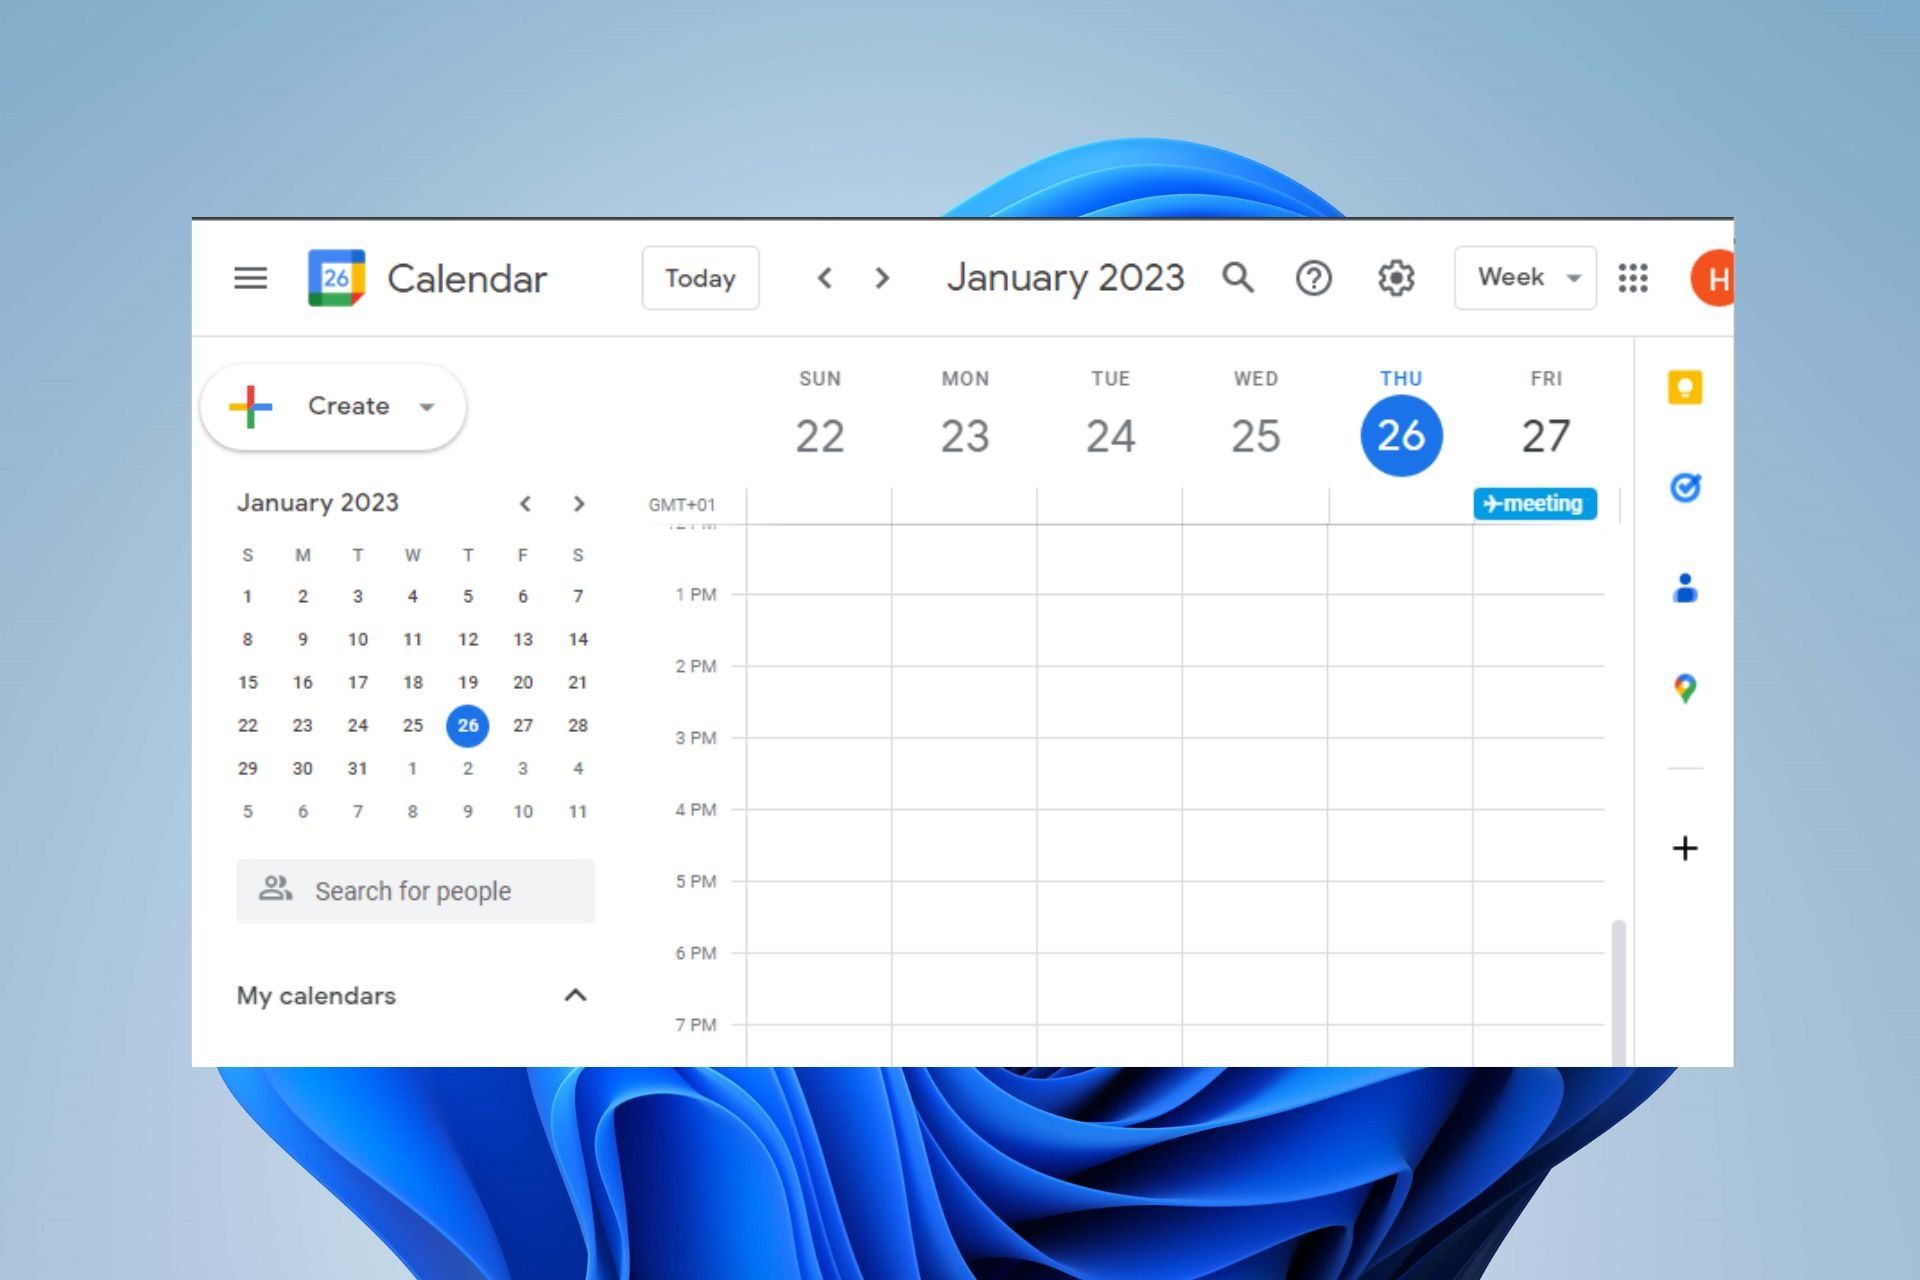
3. Go to Google Calendar: Once you’re signed in, go to the Google Apps menu (usually represented by a grid of squares in the top right corner) and click on the “Calendar” icon. This will take you to the Google Calendar interface.
4. Familiarize yourself with the Google Calendar interface: Take some time to explore the various features and elements of the Google Calendar interface. Familiarizing yourself with the layout and navigation will make it easier for you to add guests and manage your events.
5. Access your calendar: On the left side of the screen, you will see a list of calendars. Click on the calendar that you want to use for your event. If you have multiple calendars, ensure that you select the correct one.
Once you have successfully accessed Google Calendar and selected the appropriate calendar, you are ready to move on to the next step: creating a new event and adding guests.
Step 2: Create a new event
After accessing Google Calendar, the next step is to create a new event. Follow these steps to create your event:
1. Click on the desired date and time: On the calendar interface, click on the date and time slot where you want to schedule your event. A “Create event” popup will appear.
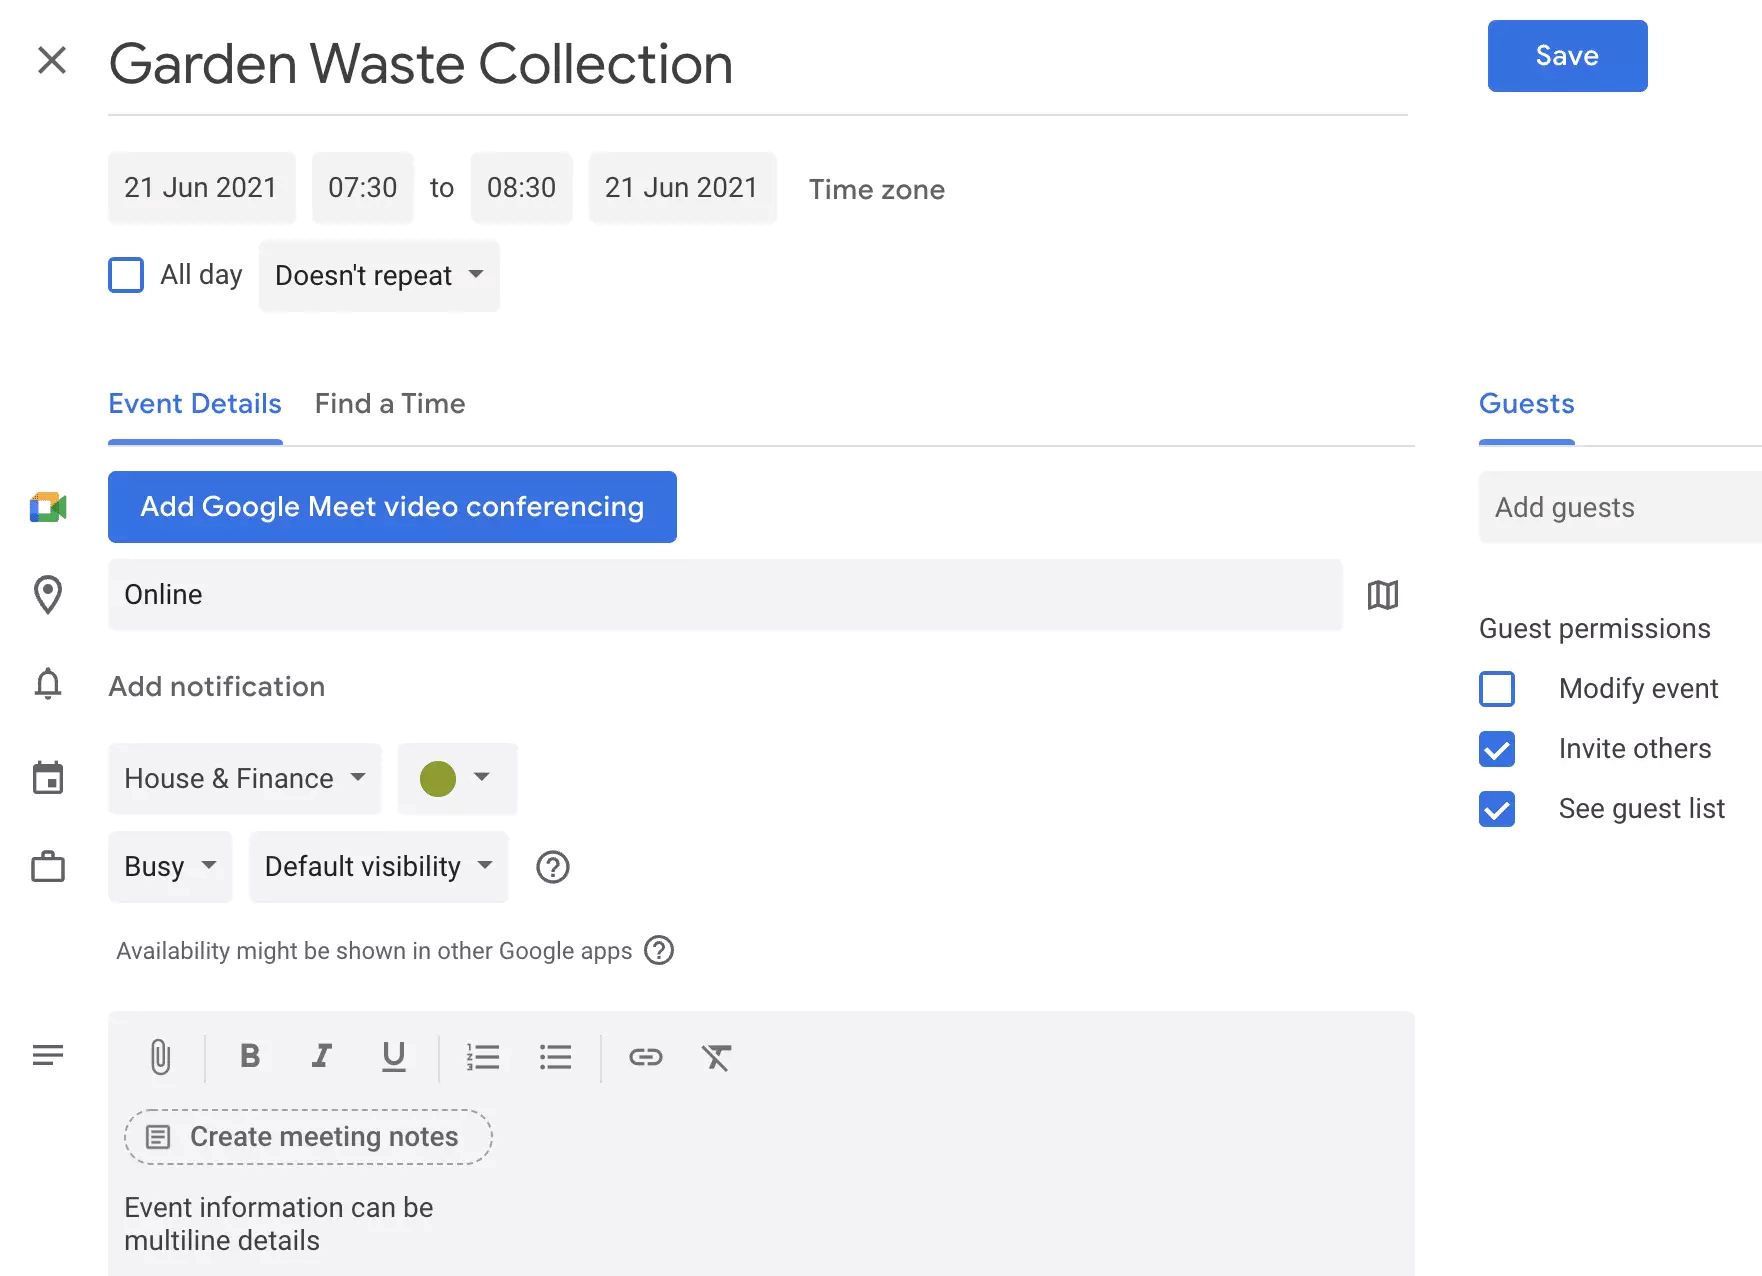
2. Enter event details: In the “Create event” popup, enter the necessary details for your event. This includes the event title, date, start and end time, location, and any additional information you want to include.
3. Set event reminders: If you want to set reminders for yourself and your guests, click on the “Add notification” option within the event details. You can choose to receive notifications via email or as a pop-up reminder on your device.
4. Add event description: If you want to provide more context or instructions for your guests, you can add a description to the event. This can include agenda items, dress code, or any other relevant information that your guests need to know.
5. Customize event color and visibility: By default, events in Google Calendar are assigned a specific color. You can customize the color of your event to make it stand out or match a specific category. Additionally, you can choose whether the event should be public, private, or shared with specific individuals.
6. Save the event: Once you have entered all the necessary details, click on the “Save” button to create the event. The event will now appear on your Google Calendar on the specified date and time slot.
Now that you have created a new event, it’s time to proceed to the next step: adding guests to your event.
Step 3: Add guest email addresses
Once you have created a new event in Google Calendar, the next step is to add guest email addresses. Adding guests allows you to invite people to your event and share event details with them. Here’s how you can add guest email addresses:
1. Open event details: Locate the event on your Google Calendar and click on it to open the event details popup. Alternatively, you can double-click on the event to open the details directly.
2. Click on “Add guests”: Within the event details popup, you will find an “Add guests” field. Click on it to bring up a text box where you can enter the email addresses of the guests you want to invite.
3. Enter email addresses: In the text box, enter the email addresses of the guests you want to add, separating each address with a comma or pressing the Enter key. You can add multiple email addresses at once.
4. Choose guests from the contact list: As you start typing an email address, Google Calendar will suggest matching contacts from your Google account. You can select the desired guest from the suggestions to quickly add them to the event.
5. Grant guest permission levels: By default, guests are granted “Guest” permission, which allows them to view and edit event details. However, you can customize the level of access for individual guests in the event details popup. To do this, click on the guest’s email address and select the appropriate permission level (such as “See only free/busy (hide details)” or “Make changes to events”).
6. Save the changes: After adding the guest email addresses and setting their permission levels, make sure to click on the “Save” button to save the changes to the event.
Once you save the changes, the guests will receive an email invitation to the event, and the event will be added to their respective Google Calendars. They will be able to view the event details and respond to the invitation accordingly.
Now that you have successfully added guest email addresses to your event, it’s time to move on to the next step: customizing guest permissions.
Step 4: Customize guest permissions
After adding guest email addresses to your event in Google Calendar, you have the option to customize the permissions for each guest. Customizing guest permissions allows you to control what guests can do with the event and its associated details. Here’s how you can customize guest permissions:
1. Open event details: Locate the event on your Google Calendar and click on it to open the event details popup. Alternatively, you can double-click on the event to open the details directly.
2. Access guest permissions: Within the event details popup, you will see a list of the added guests. To customize the permission for a specific guest, click on their email address.
3. Choose permission level: After clicking on a guest’s email address, a dropdown menu will appear with different permission levels. Select the appropriate permission level for the guest:
- See only free/busy (hide details): This permission level allows the guest to see if you are available or busy during the event’s time slot but hides specific details of the event.
- See all event details: With this permission, the guest can view all details of the event, including the event description, location, and any attached files or notes.
- Make changes to events: This permission grants the guest the ability to make changes to the event, such as modifying the date, time, or location. They can also add or remove other guests.
- Delegate: If you are the organizer of the event and want to assign someone else to manage it on your behalf, you can select the “Delegate” option. This gives the guest full control over the event, allowing them to invite or remove guests, change event details, and manage guest responses.
4. Save the changes: After customizing the permission level for a guest, make sure to click on the “Save” button in the event details popup to save the changes.
Note that the guest permissions you set will solely apply to the individual guest. Other guests will not be able to see or modify the permissions of other attendees.
By customizing guest permissions, you can ensure that each guest has the appropriate level of access and control over the event. Once you have customized the guest permissions, it’s time to move on to the next step: sending the invitation to your guests.
Step 5: Send the invitation
Once you have added guests to your event and customized their permissions in Google Calendar, the next step is to send out the invitations. Sending the invitation ensures that your guests receive all the necessary information about the event and can respond accordingly. Here’s how you can send the invitation:
1. Open event details: Locate the event on your Google Calendar and click on it to open the event details popup. Alternatively, you can double-click on the event to open the details directly.
2. Review event details: Before sending out the invitation, review the event details to ensure that everything is accurate and complete. Verify the event title, date, time, location, and any additional information you included in the description.
3. Click on “Send”: Within the event details popup, you will find a “Send” button. Click on the button to initiate the sending process.
4. Confirm email addresses: A popup will appear, showing the email addresses of the invited guests. Double-check the email addresses to make sure they are accurate and up to date. If necessary, you can edit the email addresses at this stage.
5. Personalize the message (Optional): You have the option to personalize the invitation message before sending it. You can add a greeting, provide additional instructions, or include any other relevant information for your guests.
6. Send the invitation: Once you are ready, click on the “Send” button to send out the invitation to your guests. Each guest will receive an email notification with the event details and a prompt to respond to the invitation.
7. Verify invitation status: After sending the invitations, you can track the status of the invitations in the event details popup. You will see a list of guests and their respective status (such as “Invited” or “Accepted”).
Once you have sent the invitations, it’s important to monitor the guest responses and manage any changes or updates to the event. This leads us to the next step: managing guest responses.
Step 6: Manage guest responses
After sending out invitations to your Google Calendar event, the next step is to manage the guest responses. Managing guest responses allows you to keep track of who has accepted, declined, or tentative to attend the event. Here’s how you can effectively manage guest responses:
1. Open event details: Locate the event on your Google Calendar and click on it to open the event details popup. Alternatively, you can double-click on the event to open the details directly.
2. Check guest responses: Within the event details popup, you will see a list of the invited guests along with their response status. The response status can be one of the following:
- Yes: This indicates that the guest has accepted the invitation and plans to attend the event.
- No: This indicates that the guest has declined the invitation and will not be attending the event.
- Maybe: This indicates that the guest is tentative and has not confirmed their attendance.
- Not responded: This indicates that the guest has not yet responded to the invitation.
3. Send reminders: If you have guests who have not responded to the invitation, you can send them reminder emails to prompt them to RSVP. Within the event details popup, select the “Send reminders” option and choose the guests that you would like to send reminders to.
4. Update guest responses manually: In some cases, guests may inform you of their response outside of the Google Calendar notification system. To manually update a guest’s response, click on the guest’s email address in the event details popup and select the appropriate response status.
5. Manage changes and updates: As guests respond to the invitation, you may need to make changes or updates to the event. You can make these modifications in the event details popup and notify all guests of any changes by clicking on the “Send” button again.
6. Review guest responses: Regularly review the guest responses to keep track of the attendance status for your event. This will help you gauge the number of attendees and make any necessary adjustments or preparations.
By effectively managing guest responses, you can stay informed about the attendance status of your event and ensure that all necessary arrangements are made for a successful gathering.
Now that you have managed the guest responses, it’s time to move on to the final step: tracking and updating guest attendance.
Step 7: Track and Update Guest Attendance
Once you have received responses from your guests regarding their attendance to the event in Google Calendar, the final step is to track and update their attendance status. Tracking and updating guest attendance allows you to have an accurate count of attendees and make any necessary arrangements. Here’s how you can effectively track and update guest attendance:
1. Open event details: Locate the event on your Google Calendar and click on it to open the event details popup. Alternatively, you can double-click on the event to open the details directly.
2. Review guest responses: Within the event details popup, you will find a list of invited guests along with their response status. Review the responses to see who has confirmed their attendance and who has declined or marked themselves as tentative.
3. Update attendance manually: If a guest informs you of a change in their attendance status outside of the Google Calendar notification system, you can manually update their response. Click on the guest’s email address in the event details popup and select the appropriate response status.
4. Add guest attendance notes: If you need to keep additional information or notes about a guest’s attendance, you can add notes in the guest’s details within the event. This can be useful for tracking special preferences or necessary accommodations for specific attendees.
5. Make necessary adjustments: Based on the guest responses and updated attendance information, you can make any necessary adjustments or preparations for the event. This can include ensuring enough space, seating, food, or any other requirements that may be affected by the guest attendance count.
6. Communicate changes with guests: If there are any significant changes to the event, such as time, location, or other details, make sure to communicate these updates to the guests. Use the “Send” button in the event details popup to send a notification to all the guests, ensuring they are informed and have the most up-to-date information.
By effectively tracking and updating guest attendance, you can ensure that the event is well-prepared and catered to the number of attendees. It allows you to make any necessary adjustments and communicate any changes to the guests in a timely manner.
Now that you have successfully tracked and updated guest attendance, you are ready to host your event confidently.
Conclusion
Adding guests to your Google Calendar events is a simple yet effective way to collaborate, coordinate, and keep everyone on the same page. With the steps outlined in this guide, you can easily invite others to your events, share event details, and manage guest responses.
From accessing Google Calendar to customizing guest permissions, sending invitations, managing guest responses, and tracking attendance, each step is crucial in ensuring a successful event. By following these steps, you can streamline the process and have a clear overview of who is attending your events.
Remember to regularly check the guest responses and update attendance as needed. This will allow you to make any necessary adjustments and communicate changes with your guests promptly. Effective management of guest attendance ensures that you can cater to the needs of your attendees and ensure a smooth event experience.
By utilizing Google Calendar’s features and functionalities, you can enhance your event planning and coordination efforts. Whether you’re organizing a work meeting, a family gathering, or a social event, Google Calendar provides you with the tools to simplify the process and keep everyone informed.
Now that you have equipped yourself with the knowledge and steps necessary to add guests to Google Calendar, it’s time to start planning and inviting guests to your events. Embrace the power of collaboration and coordination that Google Calendar offers, and make your events a success.