Introduction
Welcome to the world of Squarespace! As a website builder and content management system, Squarespace offers countless possibilities for creating stunning and functional websites. One of the features that can greatly enhance the user experience is embedding a Google Calendar directly into your Squarespace site.
In this guide, we will walk you through the step-by-step process of embedding a Google Calendar into your Squarespace site. Whether you want to showcase your upcoming events, share a schedule, or simply make it easier for visitors to find and book appointments, embedding a Google Calendar can provide the perfect solution.
By embedding a Google Calendar, you streamline the process of managing and displaying events on your website. No more manually updating event information! With just a few easy steps, you can have a dynamic and interactive calendar right on your Squarespace site.
Before we dive into the details, it’s important to note that you will need a Google account to create and manage a Google Calendar. If you don’t have an account, you can easily create one for free. Additionally, you will need access to a Squarespace website and have administrative privileges to add and edit content.
Now that we’ve covered the basics, let’s get started with embedding a Google Calendar into your Squarespace site! Follow the steps outlined below, and soon you’ll have a fully functional and visually appealing calendar that seamlessly integrates with your website.
Step 1: Create a Google Calendar
The first step in embedding a Google Calendar into your Squarespace site is to create a Google Calendar. If you already have a Google account, you can use that to create and manage your calendar. If not, you can easily create a free account by visiting the Google account creation page.
Once you have your Google account ready, follow these simple steps to create a Google Calendar:
- Visit the Google Calendar website by typing ‘calendar.google.com’ into your web browser’s address bar.
- Sign in to your Google account if you haven’t already done so.
- On the left-hand side of the Google Calendar page, you’ll see a sidebar with various calendars listed. Click on the ‘+’ button next to ‘Add a calendar’ to create a new calendar.
- Enter a name for your calendar. This could be something like ‘My Events’ or ‘Company Schedule’.
- Choose the calendar’s time zone to ensure that events display accurately.
- Click the ‘Create calendar’ button to finalize the creation of your Google Calendar.
Congratulations! You have successfully created your Google Calendar. You can now start adding events, customizing the calendar settings, and inviting others to contribute or access the calendar.
In the next step, we’ll make the Google Calendar public so that it can be embedded into your Squarespace site. Keeping the calendar public will ensure that visitors to your site can view the events without needing to sign in to a Google account.
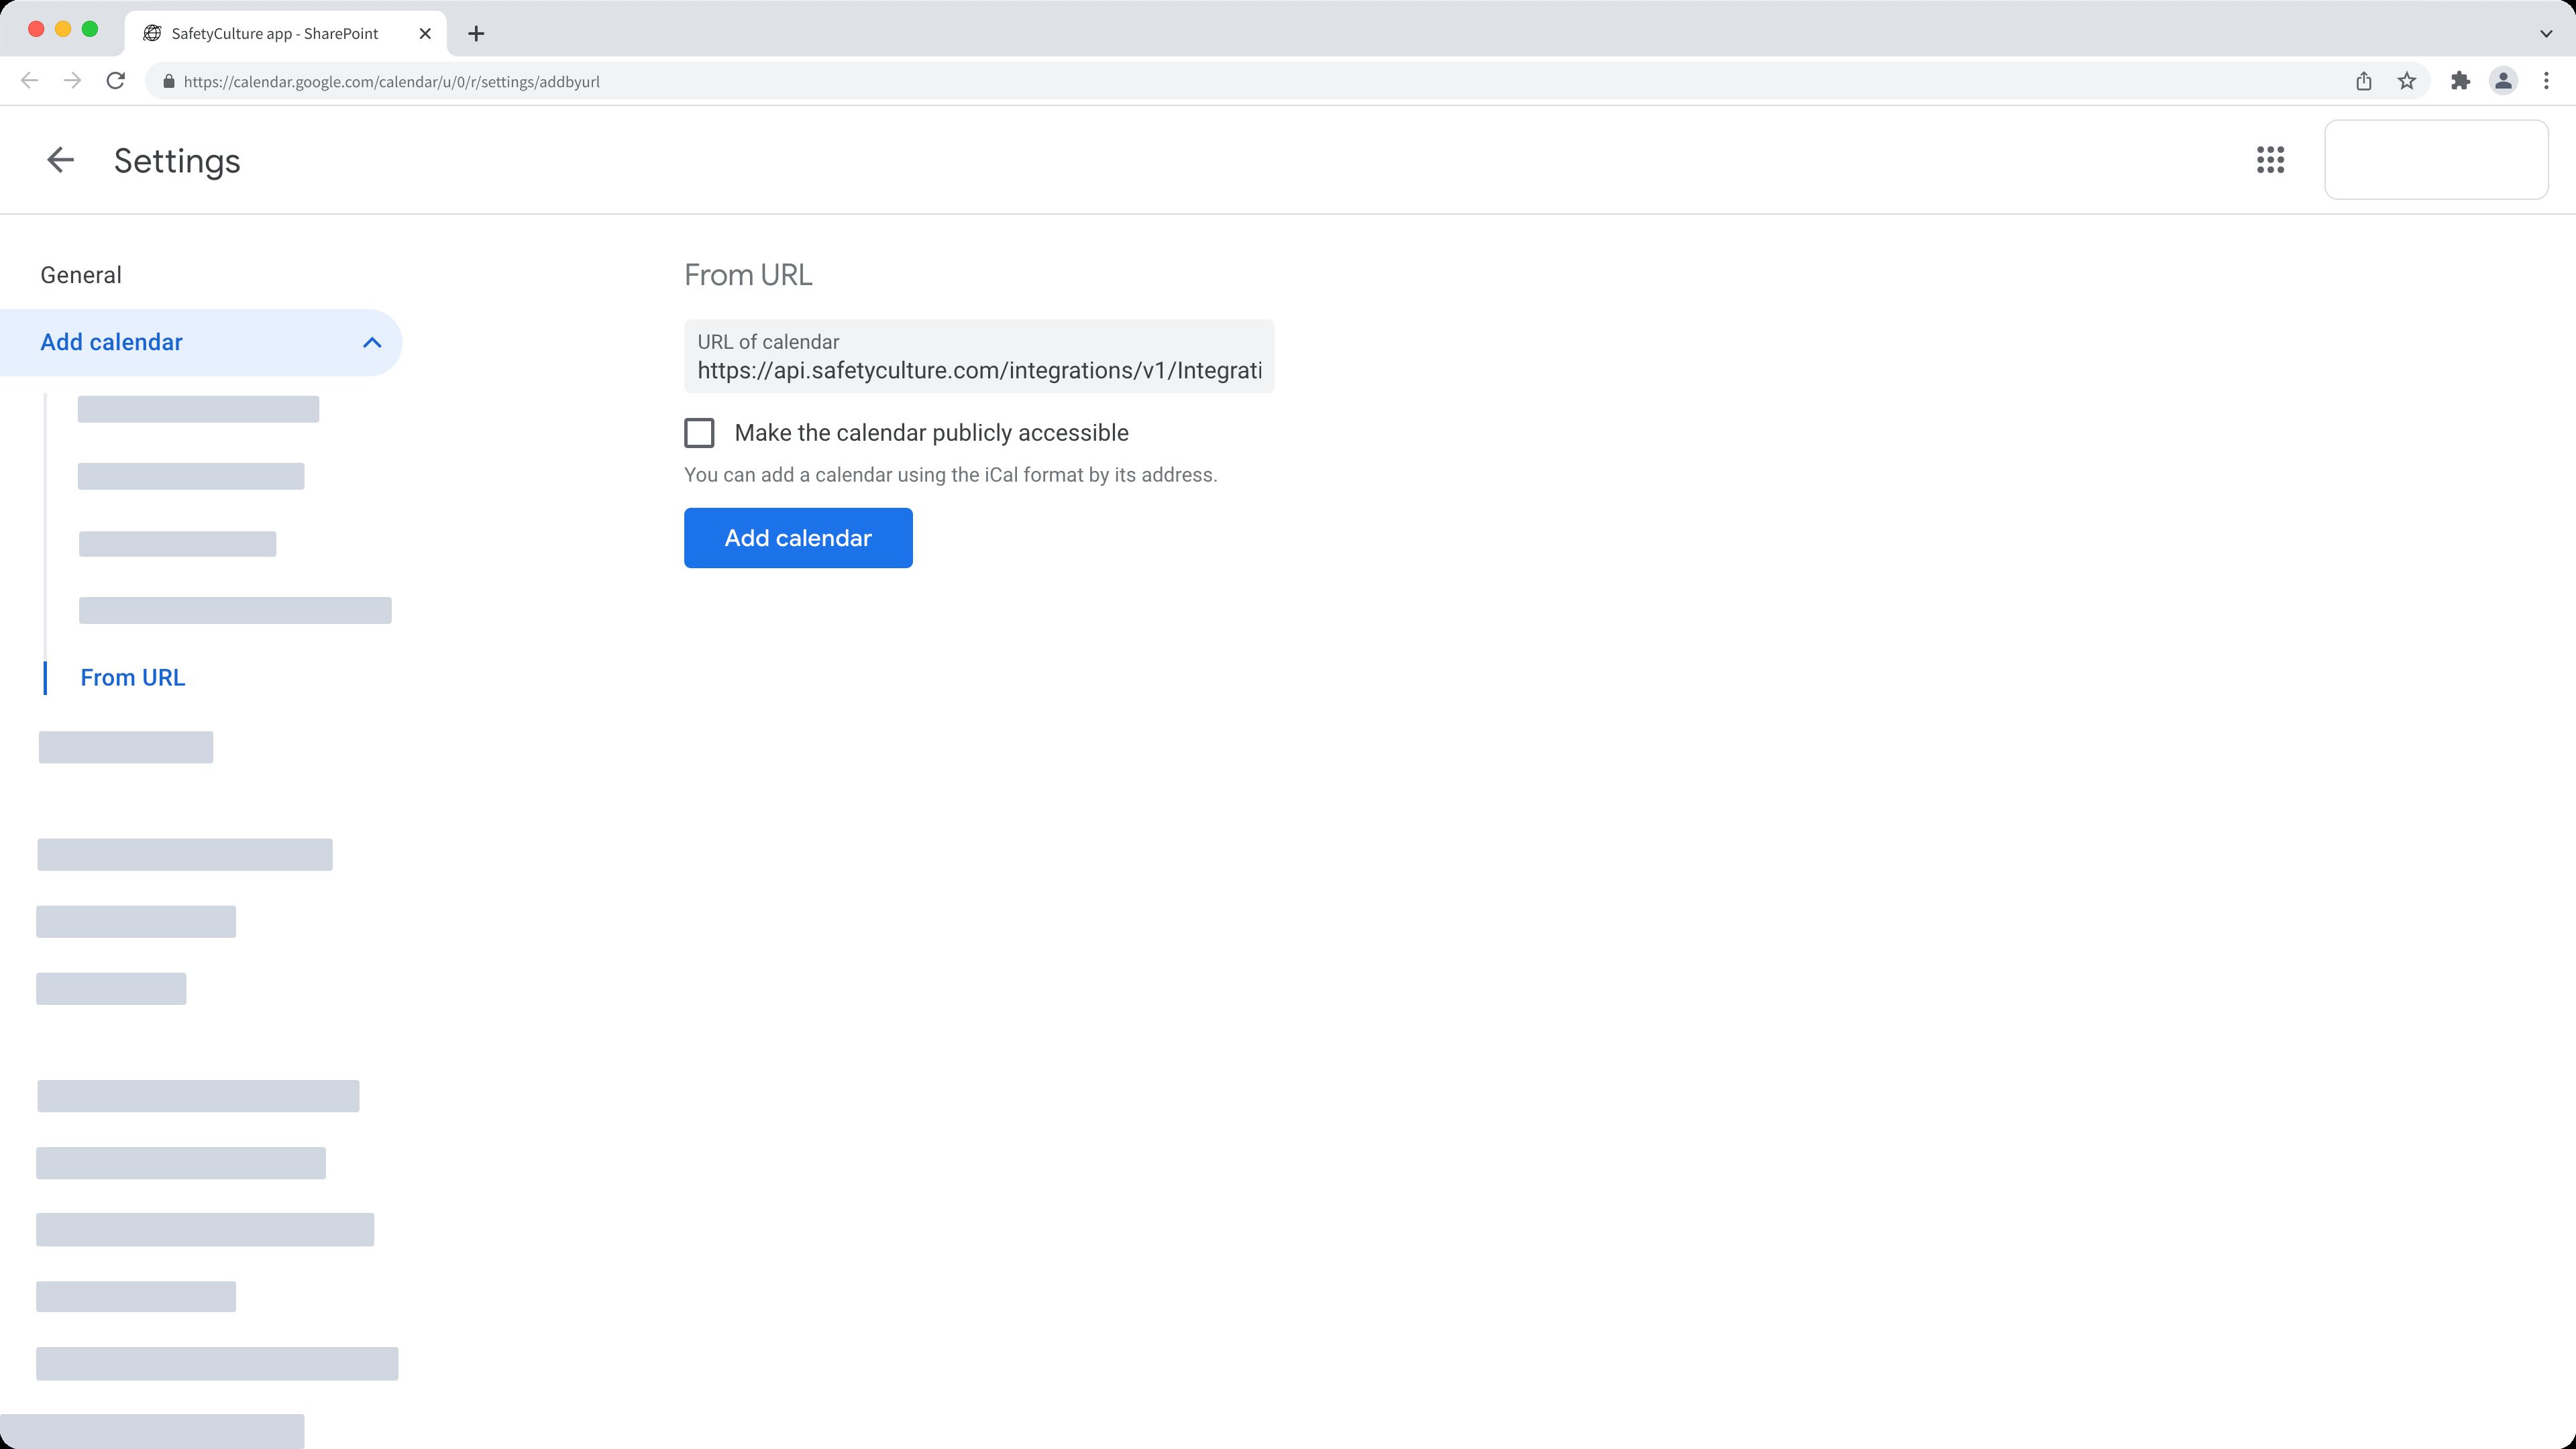
Step 2: Make the Google Calendar Public
Before you can embed your Google Calendar into your Squarespace site, you need to make sure the calendar is set to public. By making your calendar public, anyone with the calendar’s URL will be able to view its events, even if they don’t have a Google account.
Follow these straightforward steps to make your Google Calendar public:
- Go to the Google Calendar website and sign in to your account, if you haven’t already.
- On the left sidebar of the Google Calendar page, locate the calendar you want to embed and click on its name to open it.
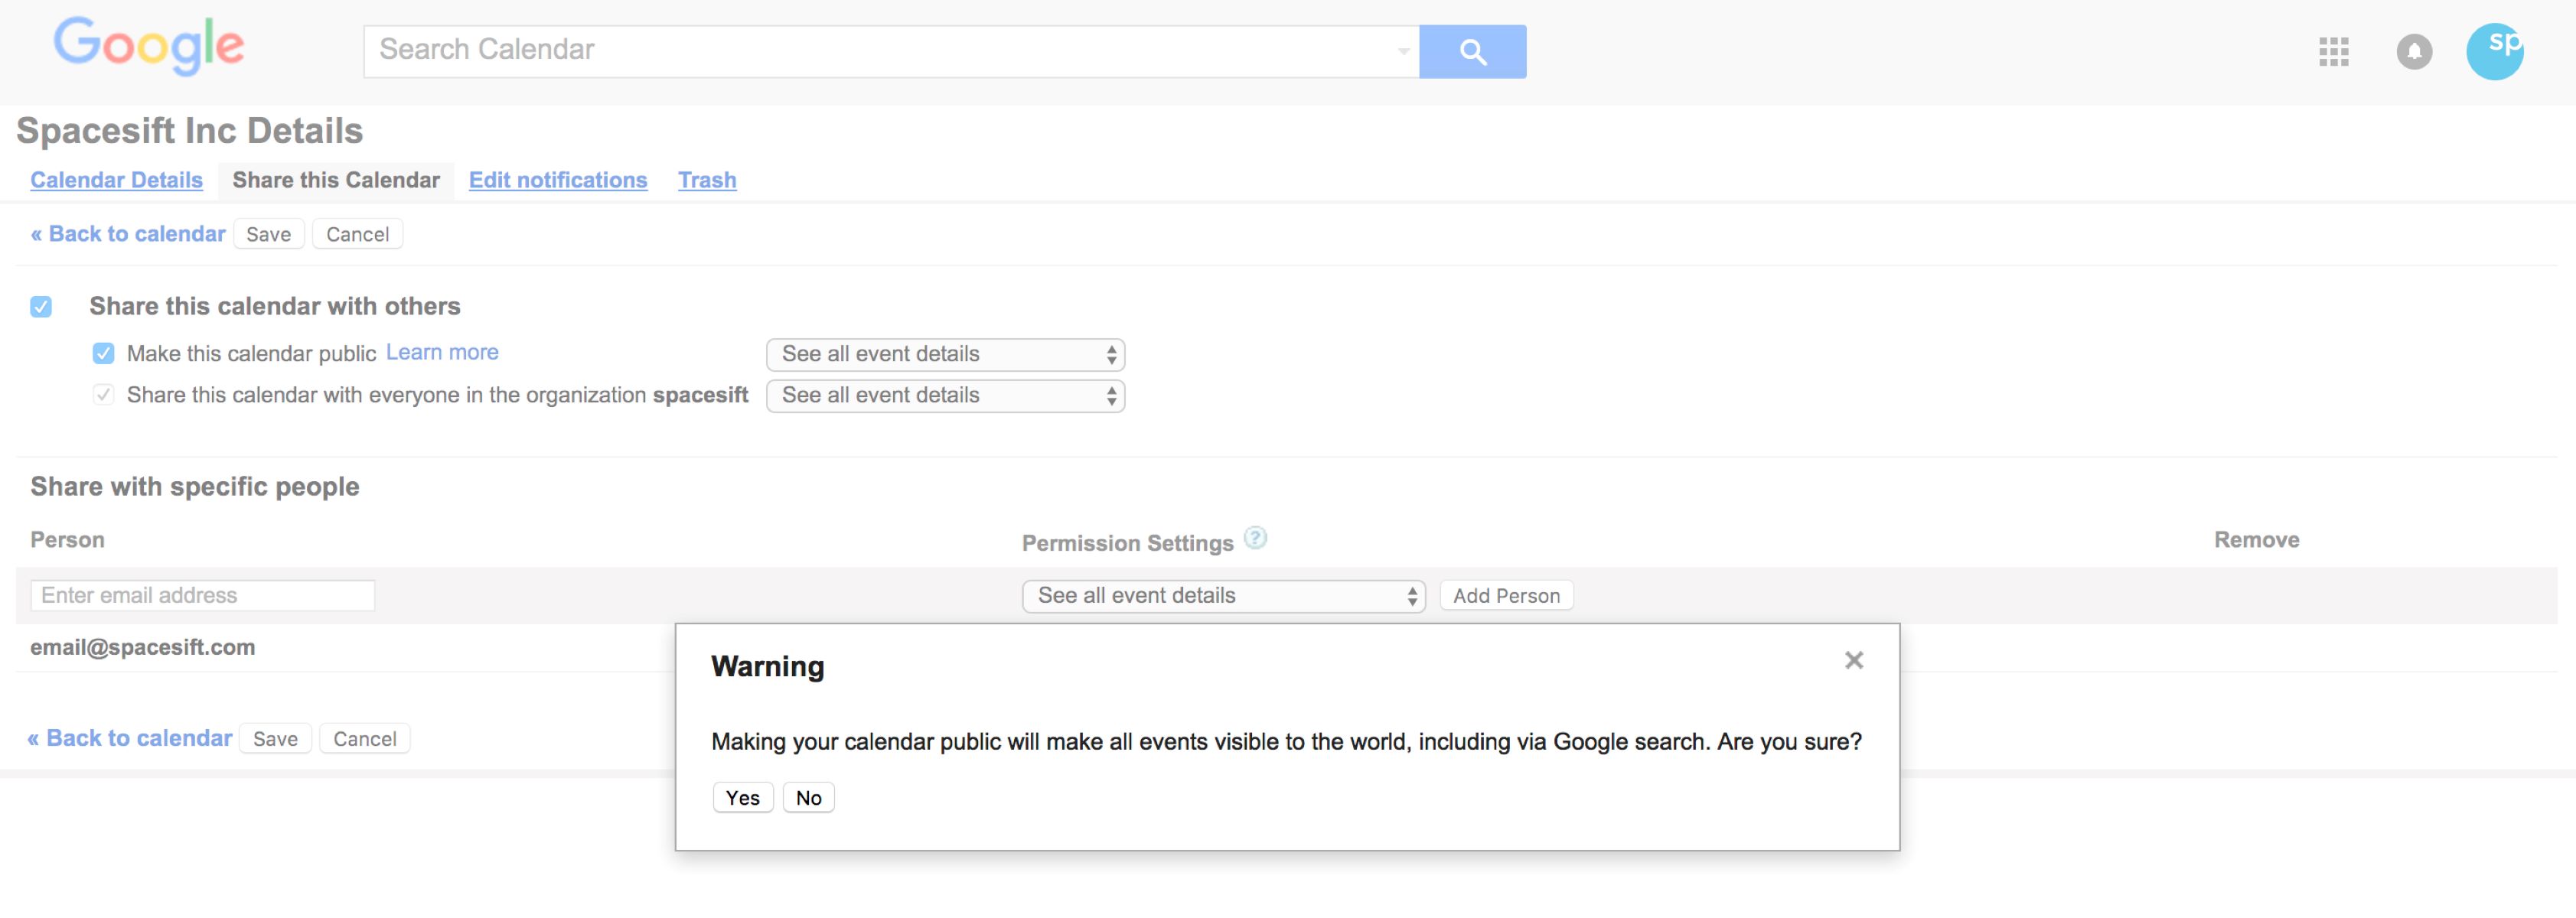
- Click on the three vertical dots icon (more options) next to the calendar’s name and select ‘Settings and sharing’ from the dropdown menu.
- In the ‘Access permissions’ section, make sure the ‘Make available to public’ box is checked.
- Scroll down to find the ‘Integrate calendar’ section. Here, you’ll see the calendar’s embed code, but we’ll come back to that in the next step.
- Click the ‘Save’ button at the bottom of the page to save your changes.
That’s it! Your Google Calendar is now set to public, making it accessible to anyone. The next step is to retrieve the embed code, which we’ll use to integrate the calendar into your Squarespace site.
Note: By making your calendar public, all events and details will be visible to anyone who views the calendar. Make sure you’re comfortable with this level of access before proceeding.
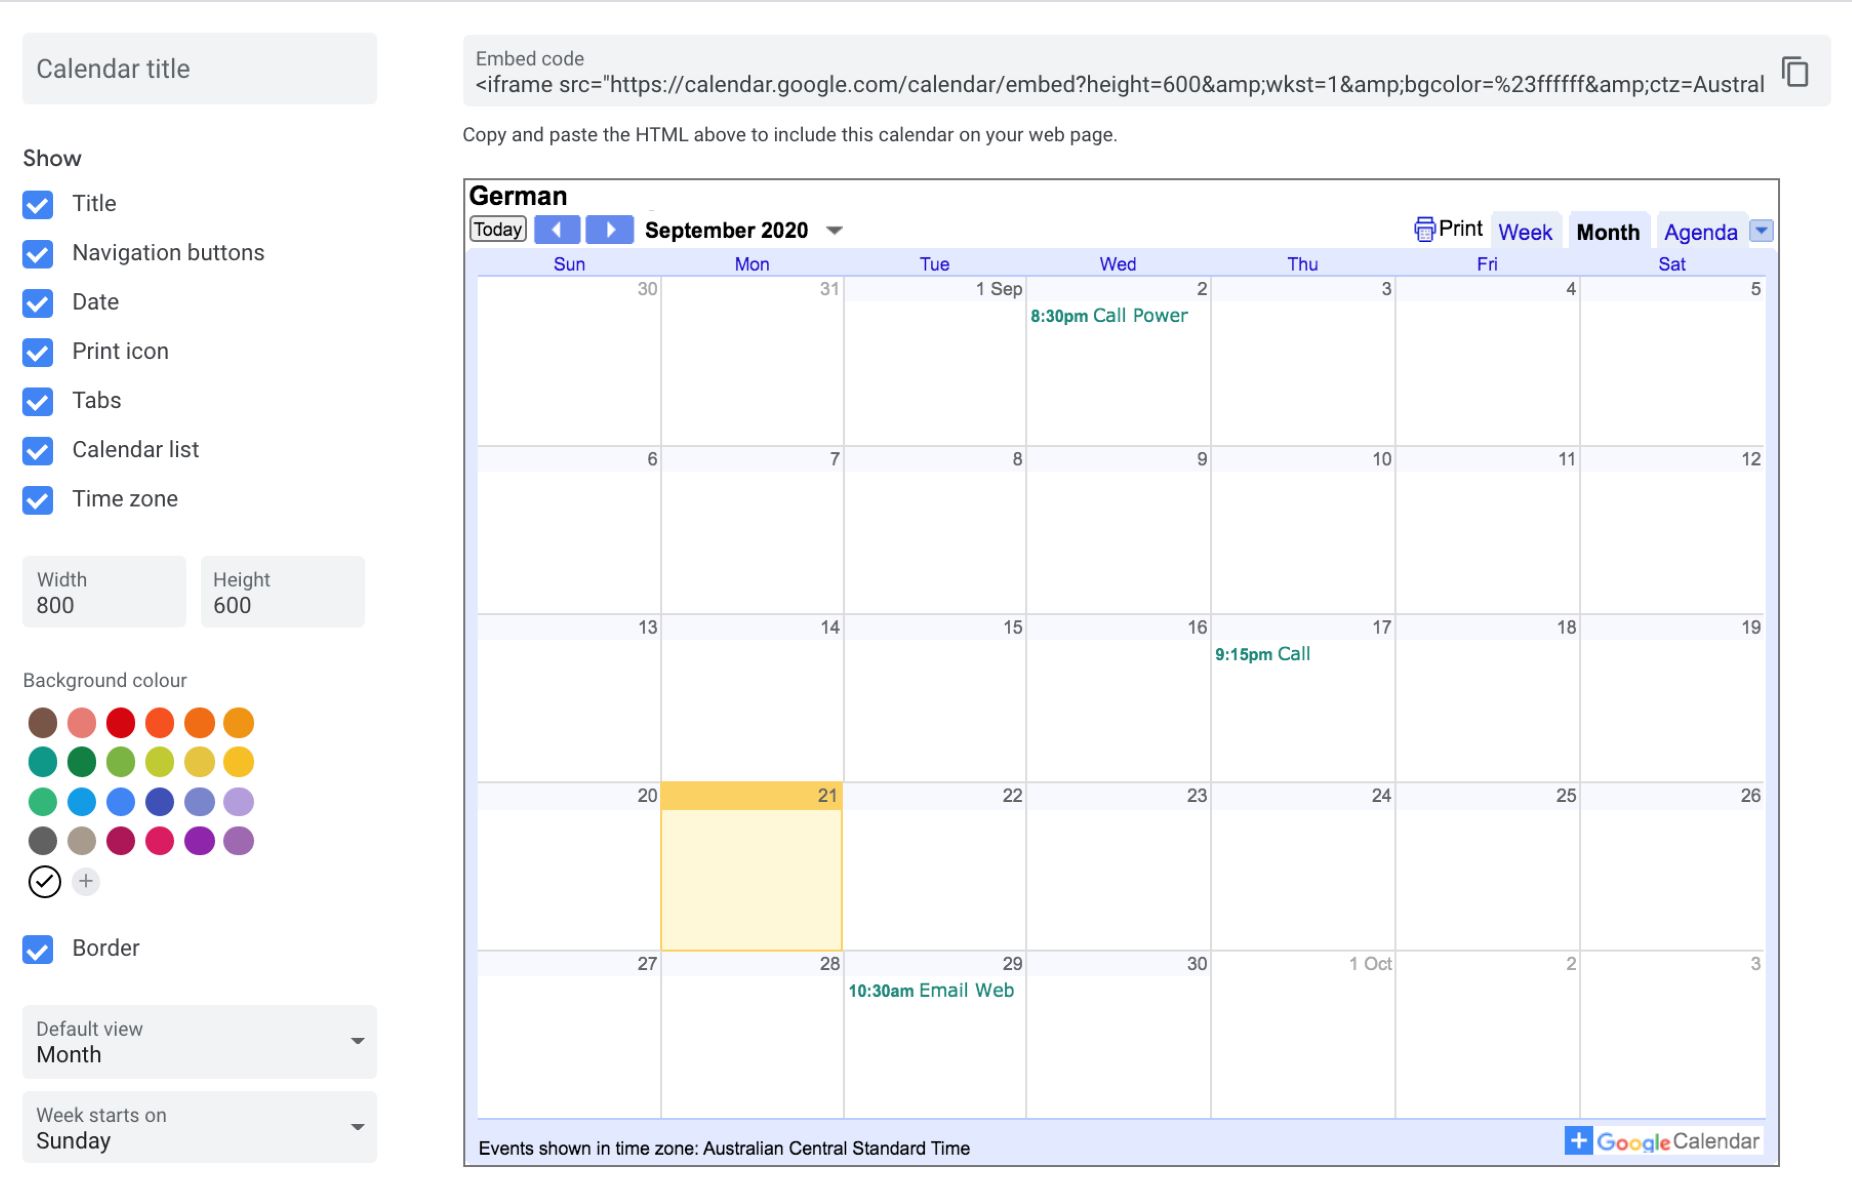
Step 3: Get the Google Calendar Embed Code
Now that you have made your Google Calendar public, you can retrieve the embed code. This code is what allows you to seamlessly integrate your calendar into your Squarespace site.
Follow these steps to obtain the embed code for your Google Calendar:
- Go to the Google Calendar website and sign in to your account, if you haven’t already.
- On the left sidebar, locate the calendar you want to embed and click on its name to open it.
- Click on the three vertical dots icon (more options) next to the calendar’s name and select ‘Settings and sharing’ from the dropdown menu.
- In the ‘Integrate calendar’ section, you will find the embed code.
- Click on the ‘Copy’ button next to the embed code to copy it to your clipboard.
The embed code is now copied and ready to be pasted into your Squarespace site. In the next steps, we’ll show you how to add the code and customize the appearance of your Google Calendar on Squarespace.
Keep in mind that the embed code includes important information such as the size and style of the calendar. You can modify these settings within the code to fit your preferences or make adjustments later within Squarespace’s editing tools.
With the embed code now in your possession, let’s move on to the next step and learn how to integrate the Google Calendar into your Squarespace site.
Step 4: Log in to Squarespace
In order to add or edit content on your Squarespace site, you need to log in to your Squarespace account. If you haven’t created a Squarespace account yet, you can sign up for free on the Squarespace website.
Once you have your Squarespace account ready, follow these simple steps to log in:
- Open your web browser and enter ‘www.squarespace.com’ in the address bar.
- Click on the ‘Login’ button in the top-right corner.
- Enter your Squarespace account email address and password in the provided fields.
- Click the ‘Log in’ button to access your Squarespace account.
If the login information you provided is correct, you will be redirected to your Squarespace dashboard. This is where you can manage and edit all aspects of your Squarespace website.
Now that you’re logged in and ready to make changes to your Squarespace site, let’s move on to the next step and add a new page or edit an existing page where you want to embed your Google Calendar.
Step 5: Add a New Page or Edit an Existing Page
Before embedding your Google Calendar into your Squarespace site, you’ll need to decide whether you want to add a new page specifically for the calendar or edit an existing page to include it. Both options are possible with Squarespace and offer different ways to showcase your calendar.
If you want to add a new page:
- Log in to your Squarespace account and navigate to the website editor by clicking on ‘Edit Site’ or similar options.
- Click on the ‘+’ button to add a new page.
- Select the type of page you want to create. For example, you can choose ‘Blank Page’ or ‘Calendar Page’ depending on your preferences.
- Name your new page and click ‘Save’ or ‘Create’ to proceed.
If you prefer to edit an existing page:
- Log in to your Squarespace account and navigate to the website editor.
- Select the page you want to edit from the list of pages on the left-hand side.
- If the page does not have a content block where you want to embed the calendar, click on the ‘+’ button to add a new content block.
- Choose the desired content block type, such as ‘Code’ or ‘Embed’.
- Proceed to the next step to add the code for your Google Calendar.
Whichever option you choose, adding a new page or editing an existing page, you’re now ready to move on to the next step and add the code block where you will paste the embed code for your Google Calendar.
Before proceeding, make sure you have the embed code copied from the previous step. It’s time to integrate your Google Calendar into your Squarespace site!
Step 6: Add a Code Block
To embed the Google Calendar into your Squarespace site, you’ll need to add a code block. A code block allows you to insert custom HTML code, which includes the embed code for your calendar.
Follow these steps to add a code block to your Squarespace page:
- Log in to your Squarespace account and navigate to the website editor.
- Select the page where you want to embed the calendar or the newly created page you want to add the calendar to.
- If you’ve chosen an existing page, click on the content block where you want to add the calendar. If not, skip this step.
- Click on the ‘+’ button to add a new content block.
- From the content block options, select ‘Code’ or ‘Embed’.
- In the code block, click on the area that says ‘Click to add code’ or ‘Enter an embed code’.
- Paste the embed code for your Google Calendar into the code block.
At this point, you have added a code block to your Squarespace page and pasted the embed code inside it. The next step involves adjusting the calendar’s size and style to fit your website’s design and layout.
Continue to the next step to learn how to customize the appearance of your embedded calendar on Squarespace!
Step 7: Paste the Google Calendar Embed Code
Now that you have added a code block to your Squarespace page, it’s time to paste the embed code for your Google Calendar into the code block. This will allow your calendar to be displayed on your Squarespace site.
Follow these steps to paste the Google Calendar embed code into your Squarespace page:
- Log in to your Squarespace account and navigate to the website editor.
- Select the page where you added the code block in the previous step.
- If you haven’t already done so, click on the code block you added to your page.
- In the code block, locate the area that says ‘Click to add code’ or ‘Enter an embed code’.
- Paste the embed code for your Google Calendar into this area.
Make sure to paste the entire embed code, including any HTML tags and attributes provided by Google Calendar. It should look something like this:
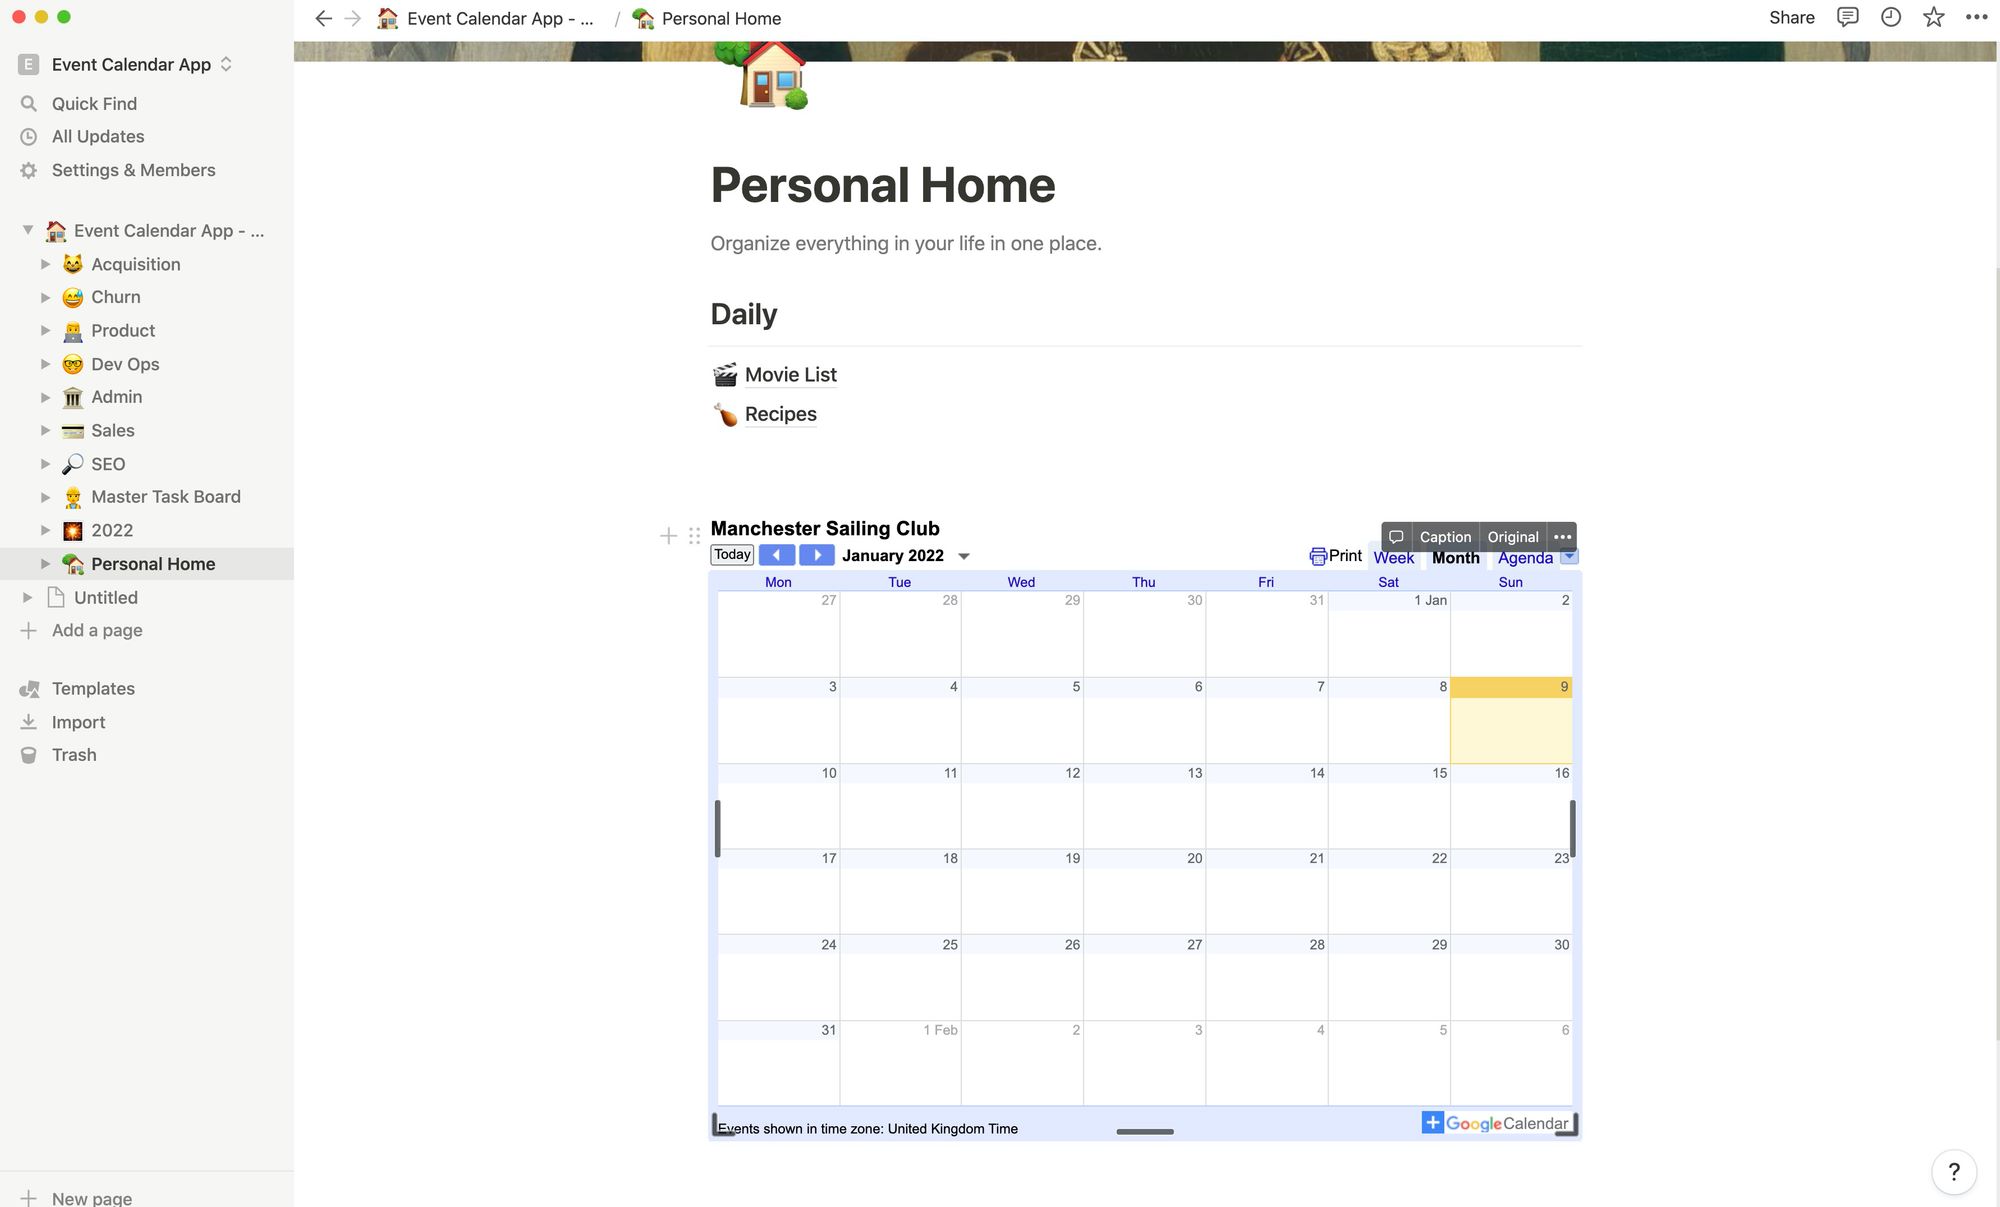
<iframe src="https://calendar.google.com/calendar/embed?src=yourcalendarid"></iframe>Once you have pasted the code, it should display the embedded Google Calendar within the code block on your Squarespace page.
Now that the embed code is in place, you can move on to the next step and make any necessary adjustments to the calendar’s size and style.
Note: If you’re having trouble with the embed code or the calendar is not displaying correctly, double-check that you have correctly copied the entire code from your Google Calendar settings.
Step 8: Adjust the Calendar Size and Style
After pasting the Google Calendar embed code into your Squarespace page, you may want to customize the calendar’s size and style to ensure it fits seamlessly with the design of your website. Squarespace provides options to adjust the dimensions, colors, and other visual aspects of the embedded calendar.
Here’s how you can adjust the size and style of the embedded Google Calendar:
- Log in to your Squarespace account and navigate to the website editor.
- Select the page where you added the Google Calendar embed code.
- Click on the code block that contains the embed code to edit it.
- Look for the attributes within the embed code that control the size of the calendar, such as width and height.
- Modify the values of these attributes to adjust the size of the calendar. You can use percentages, pixels, or other supported units of measurement.
- If desired, you can also modify the style of the embedded calendar by adding CSS code. This allows you to change colors, fonts, borders, and other visual elements. Refer to the Squarespace documentation for more information on using CSS in code blocks.
By adjusting the size and style of the embedded calendar, you can ensure it seamlessly integrates with your Squarespace site’s overall design and layout. Experiment with different dimensions and styles to find the perfect look for your calendar.
Once you’ve made the necessary adjustments, don’t forget to save the changes and preview how the Google Calendar appears on your Squarespace site. This will allow you to make any further tweaks or refinements as needed.
With the calendar’s size and style customized to your liking, you’re now ready to move on to the final step: saving and previewing the changes made to your Squarespace site.
Step 9: Save and Preview Changes
Now that you have embedded and customized your Google Calendar on your Squarespace site, it’s time to save your changes and preview how the calendar looks and functions. This step allows you to ensure that everything is working smoothly and that the calendar is displaying correctly.
Here’s what you need to do to save and preview the changes made to your Squarespace site:
- Make sure you are in the Squarespace editing mode.
- Click on the ‘Save’ button or equivalent option to save your changes.
- To preview your updated site, click on the ‘Preview’ button. This allows you to see how the Google Calendar appears to visitors on your Squarespace site.
- While previewing, navigate to the page where you embedded the Google Calendar and test its functionality. Ensure that events are displayed accurately, any clickable elements work as intended, and any custom styles or settings applied to the calendar are properly applied.
- If you notice any issues or if the calendar is not displaying as expected, return to the editing mode and make necessary adjustments to the code block or the calendar’s settings.
- Once you are satisfied with how the Google Calendar appears and functions on your Squarespace site, click on the ‘Publish’ button or equivalent option to make your changes live and visible to visitors.
Remember to periodically check your site to ensure that the Google Calendar continues to display correctly, especially after any updates or changes made to your Squarespace site or the Google Calendar itself.
Congratulations! You have successfully embedded a Google Calendar into your Squarespace site and customized its appearance. By following these steps and taking the time to adjust and preview the changes, you can provide a seamless and interactive calendar experience for your website visitors.
Now that you have learned how to embed a Google Calendar into Squarespace, you can keep your audience informed about upcoming events, schedules, or appointments. Enjoy the benefits of having a dynamic calendar that is integrated with your Squarespace site!
Conclusion
Embedding a Google Calendar into your Squarespace site is a powerful way to enhance the user experience and provide valuable information to your visitors. By following the step-by-step guide outlined in this article, you can easily integrate a dynamic and interactive calendar that seamlessly blends with the design of your website.
Creating a Google Calendar, making it public, and obtaining the embed code are the initial steps to set up the integration. Once you’ve logged in to your Squarespace account, you can either add a new page specifically for the calendar or edit an existing page to incorporate it. With the addition of a code block and pasting of the Google Calendar embed code, you have the foundation in place.
Customizing the calendar’s size and style allows you to tailor it to your website’s aesthetic, ensuring a seamless integration. Adjusting dimensions, colors, and adding CSS code are all options to explore in this step.
Lastly, saving the changes and previewing them on your Squarespace site is crucial in finalizing the integration. This allows you to test the calendar’s functionality and appearance, making any necessary adjustments before officially publishing the changes.
By embedding a Google Calendar within your Squarespace site, you can keep your audience informed about upcoming events, display schedules, or provide an intuitive interface for booking appointments. Take advantage of the benefits of a dynamic calendar that is integrated seamlessly into your website.
Now that you have mastered the process of embedding a Google Calendar in Squarespace, you can leverage this feature to enhance the functionality and user experience of your website. Keep your visitors engaged and informed with a fully integrated and visually appealing calendar on your Squarespace site.