Introduction
Welcome to the fascinating world of dots projectors. These innovative devices have gained popularity in recent years, offering a unique way to create mesmerizing visual experiences. Whether you’re a professional artist, a party enthusiast, or simply a creative soul, a dots projector can add a touch of magic to any event or space.
But what exactly is a dots projector, and how does it work? In this article, we will unravel the mysteries of dots projectors, explore their various applications, and provide valuable tips on how to make the most of these incredible devices.
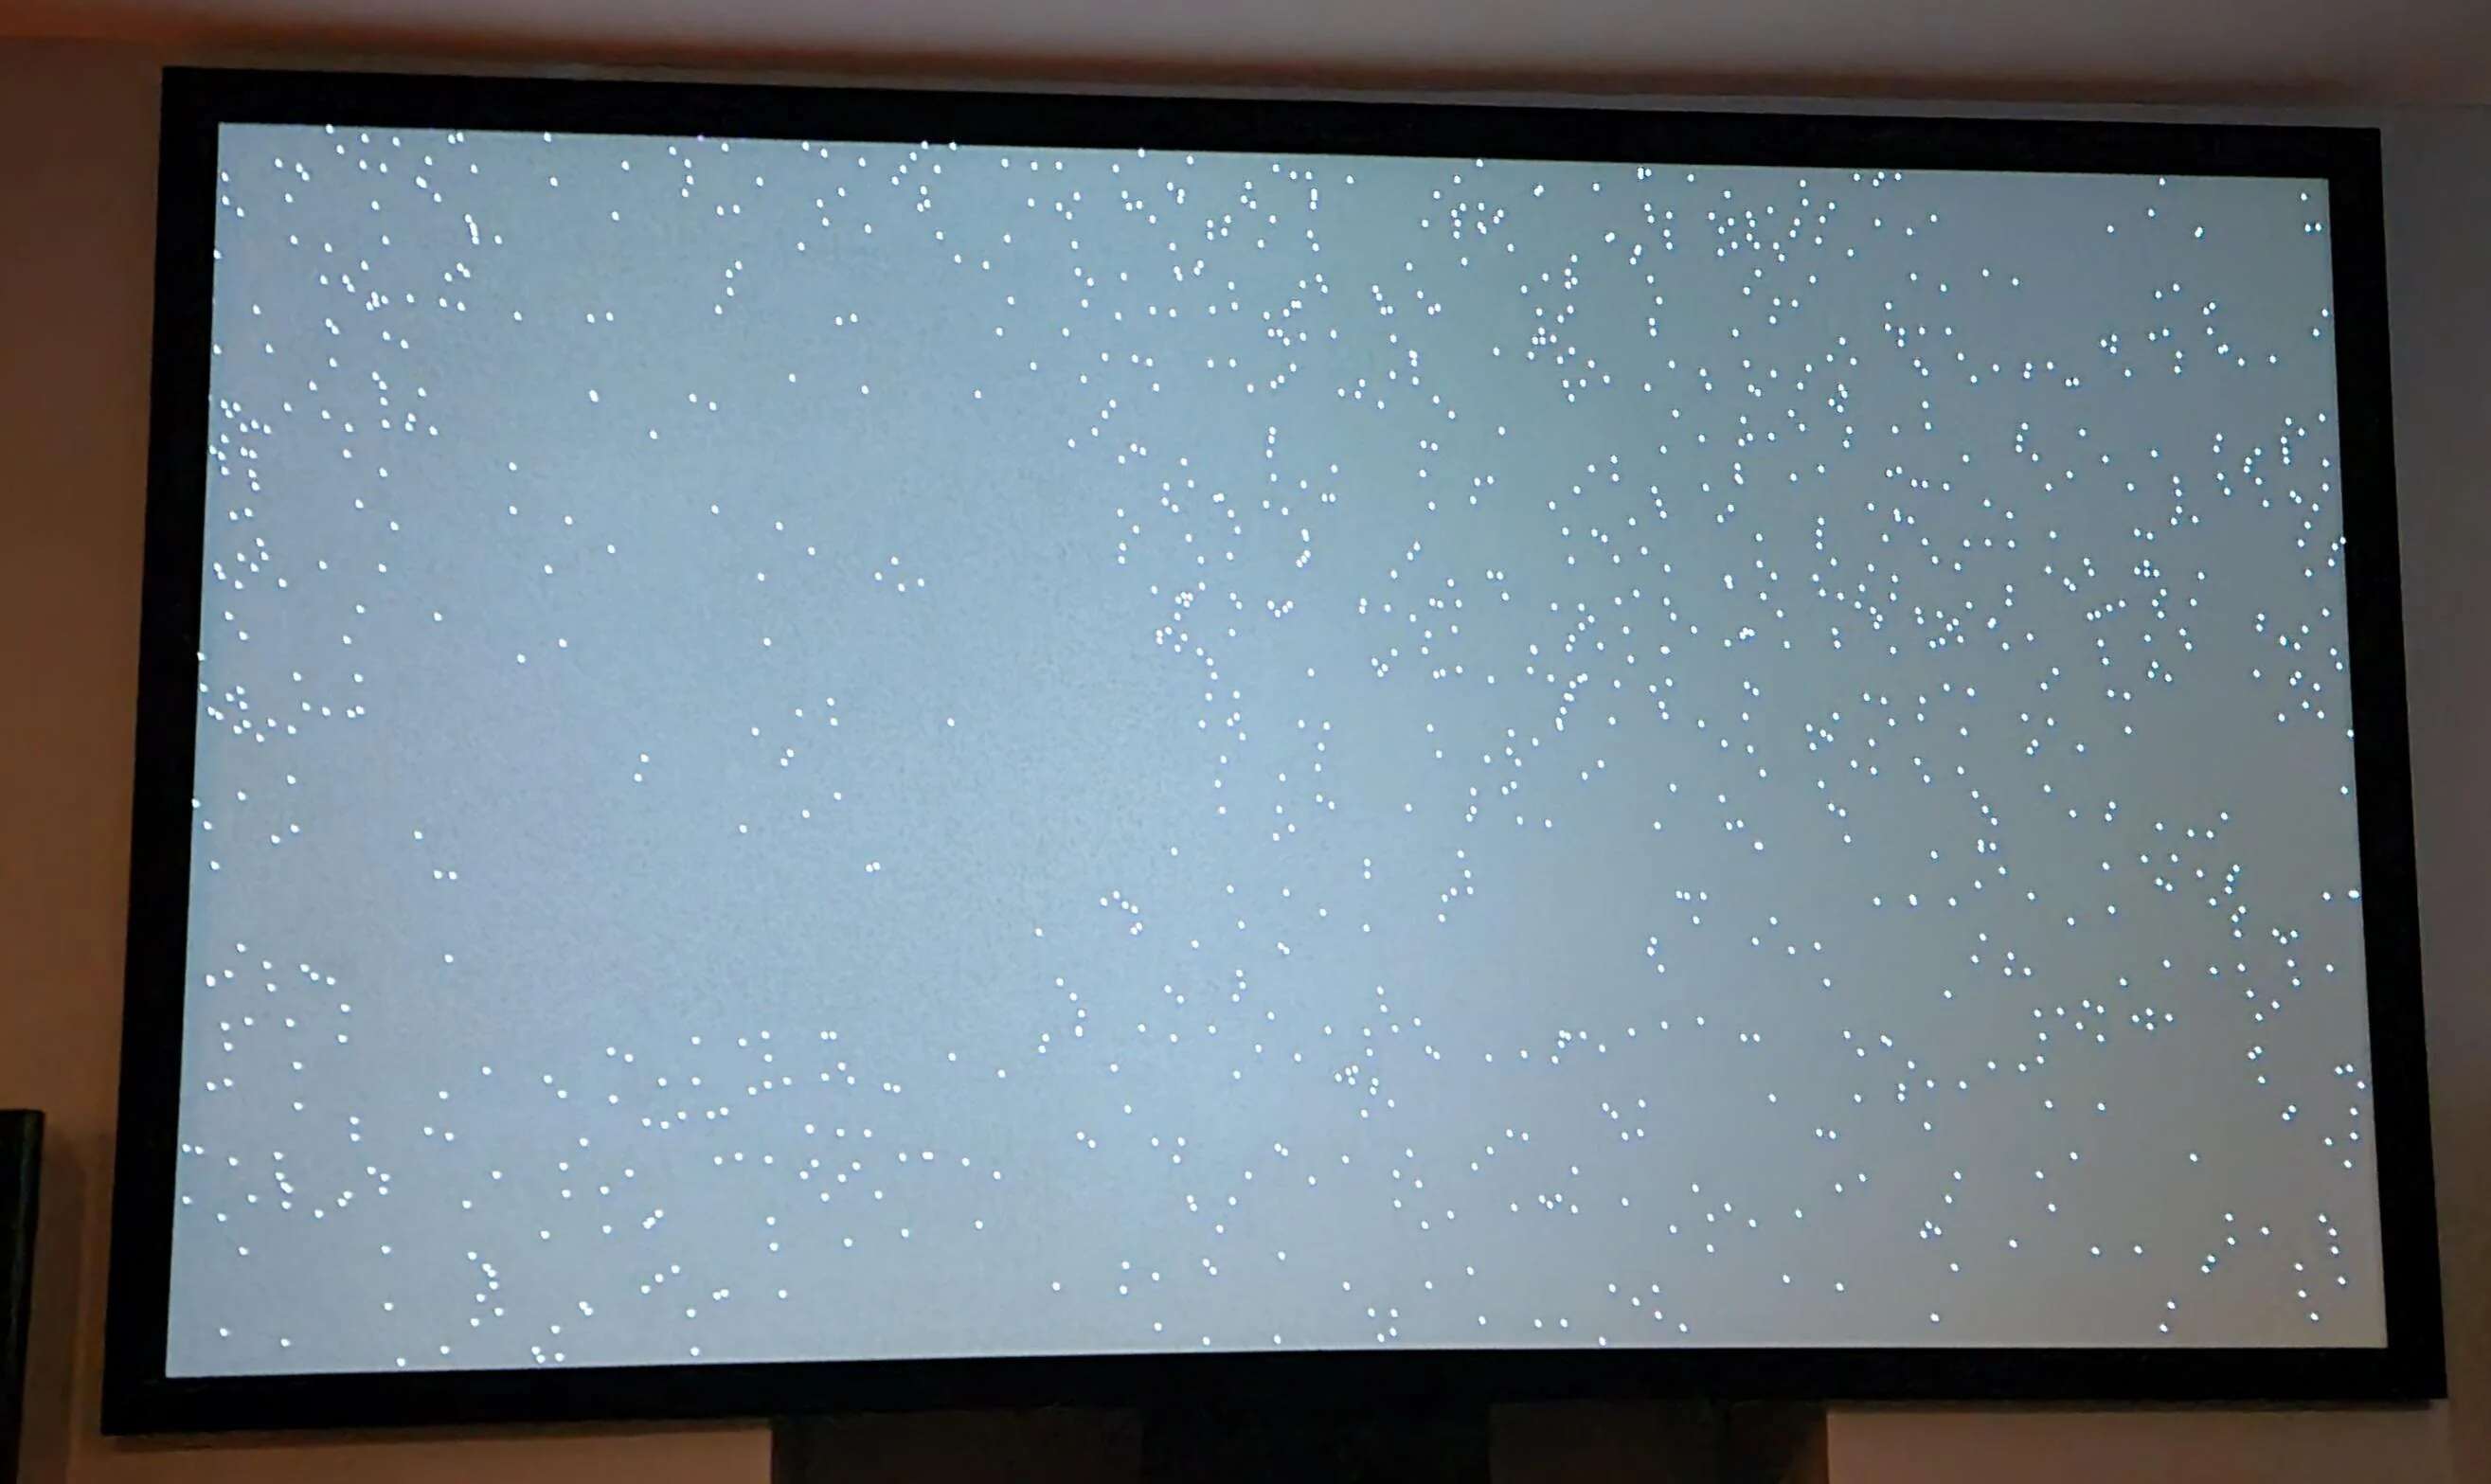
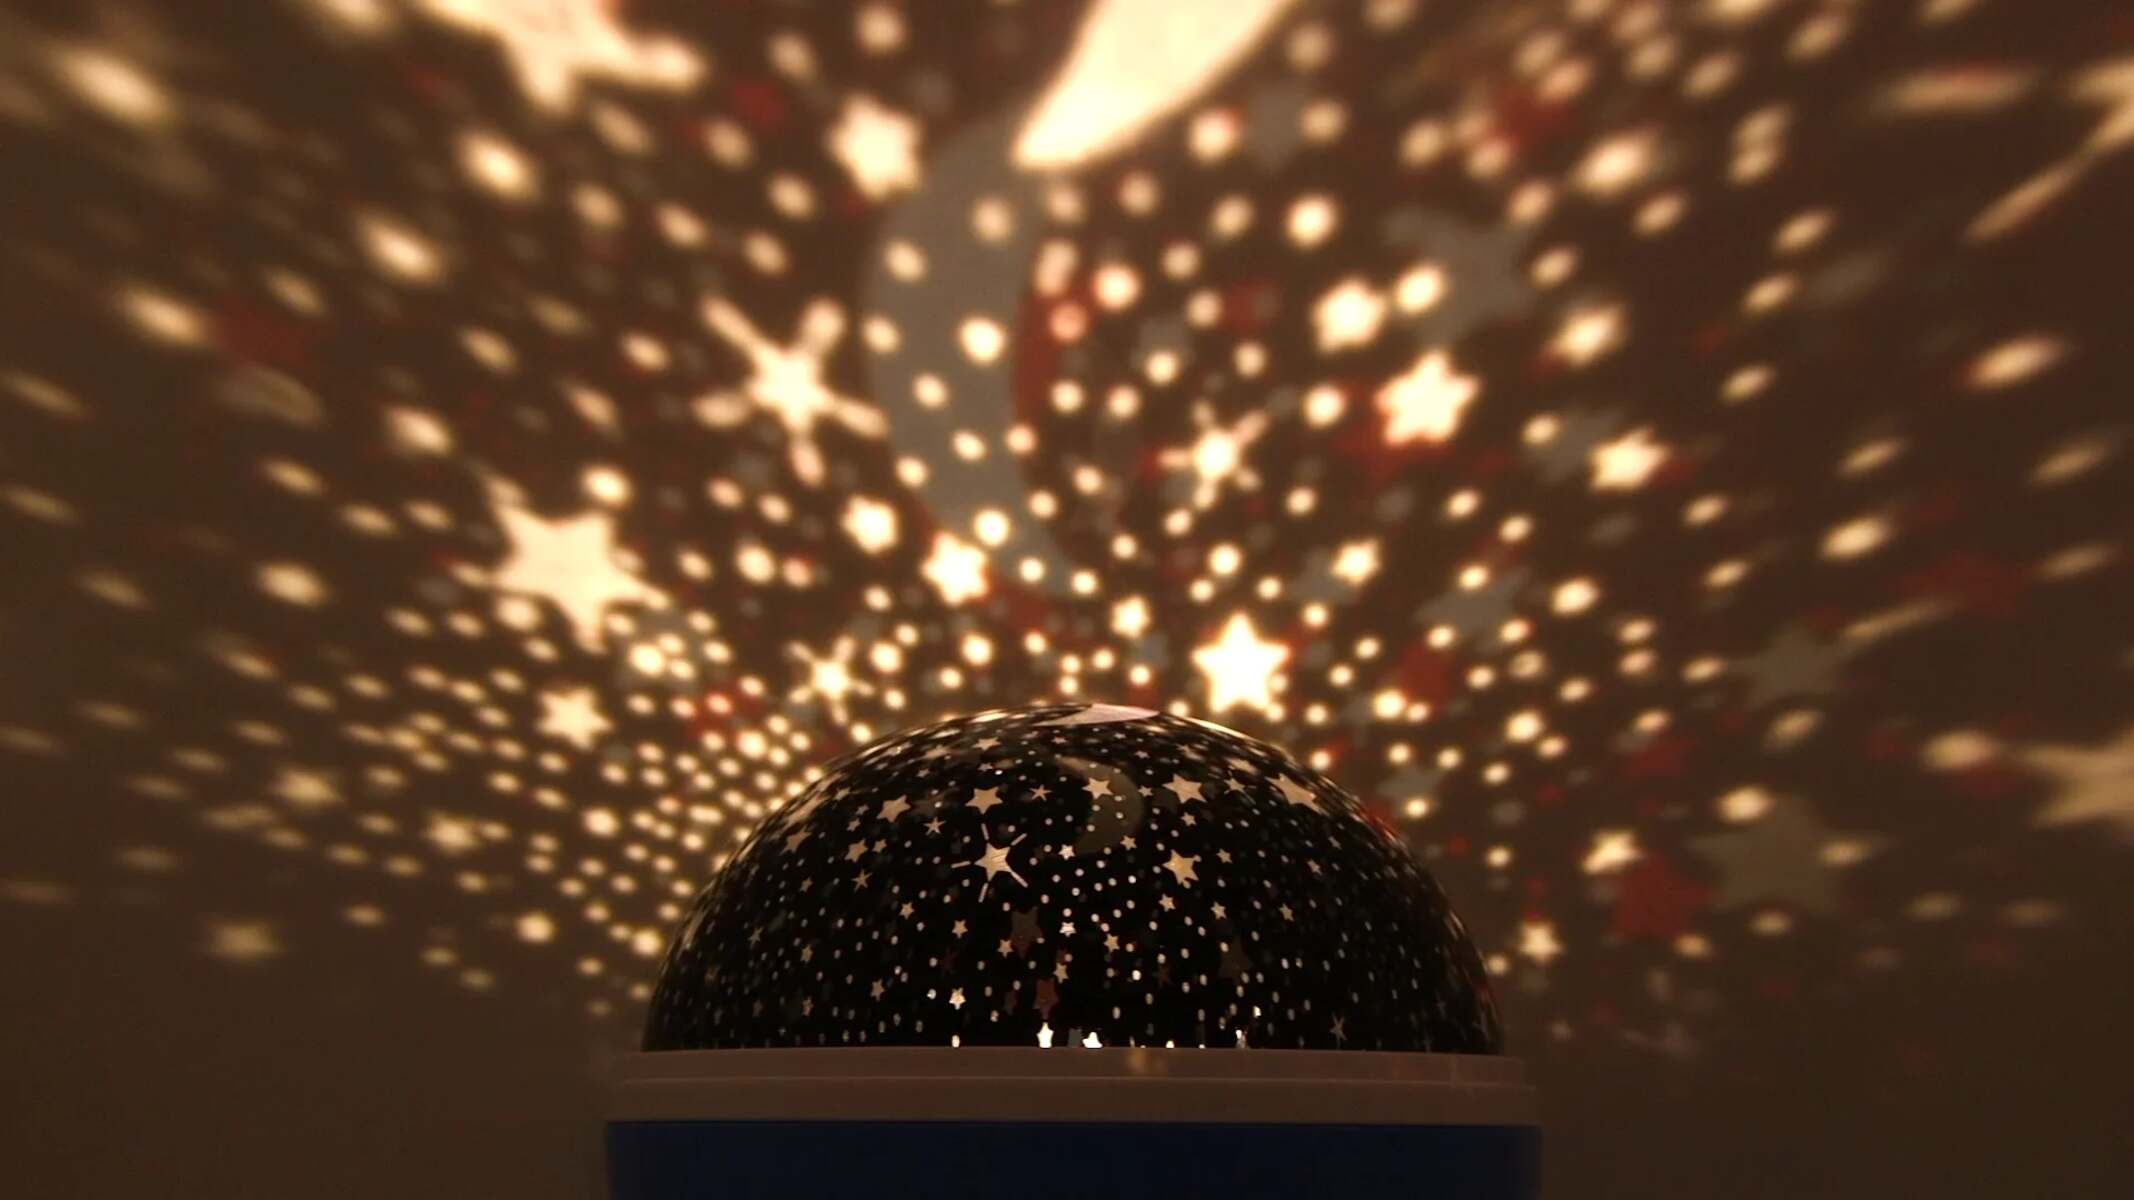
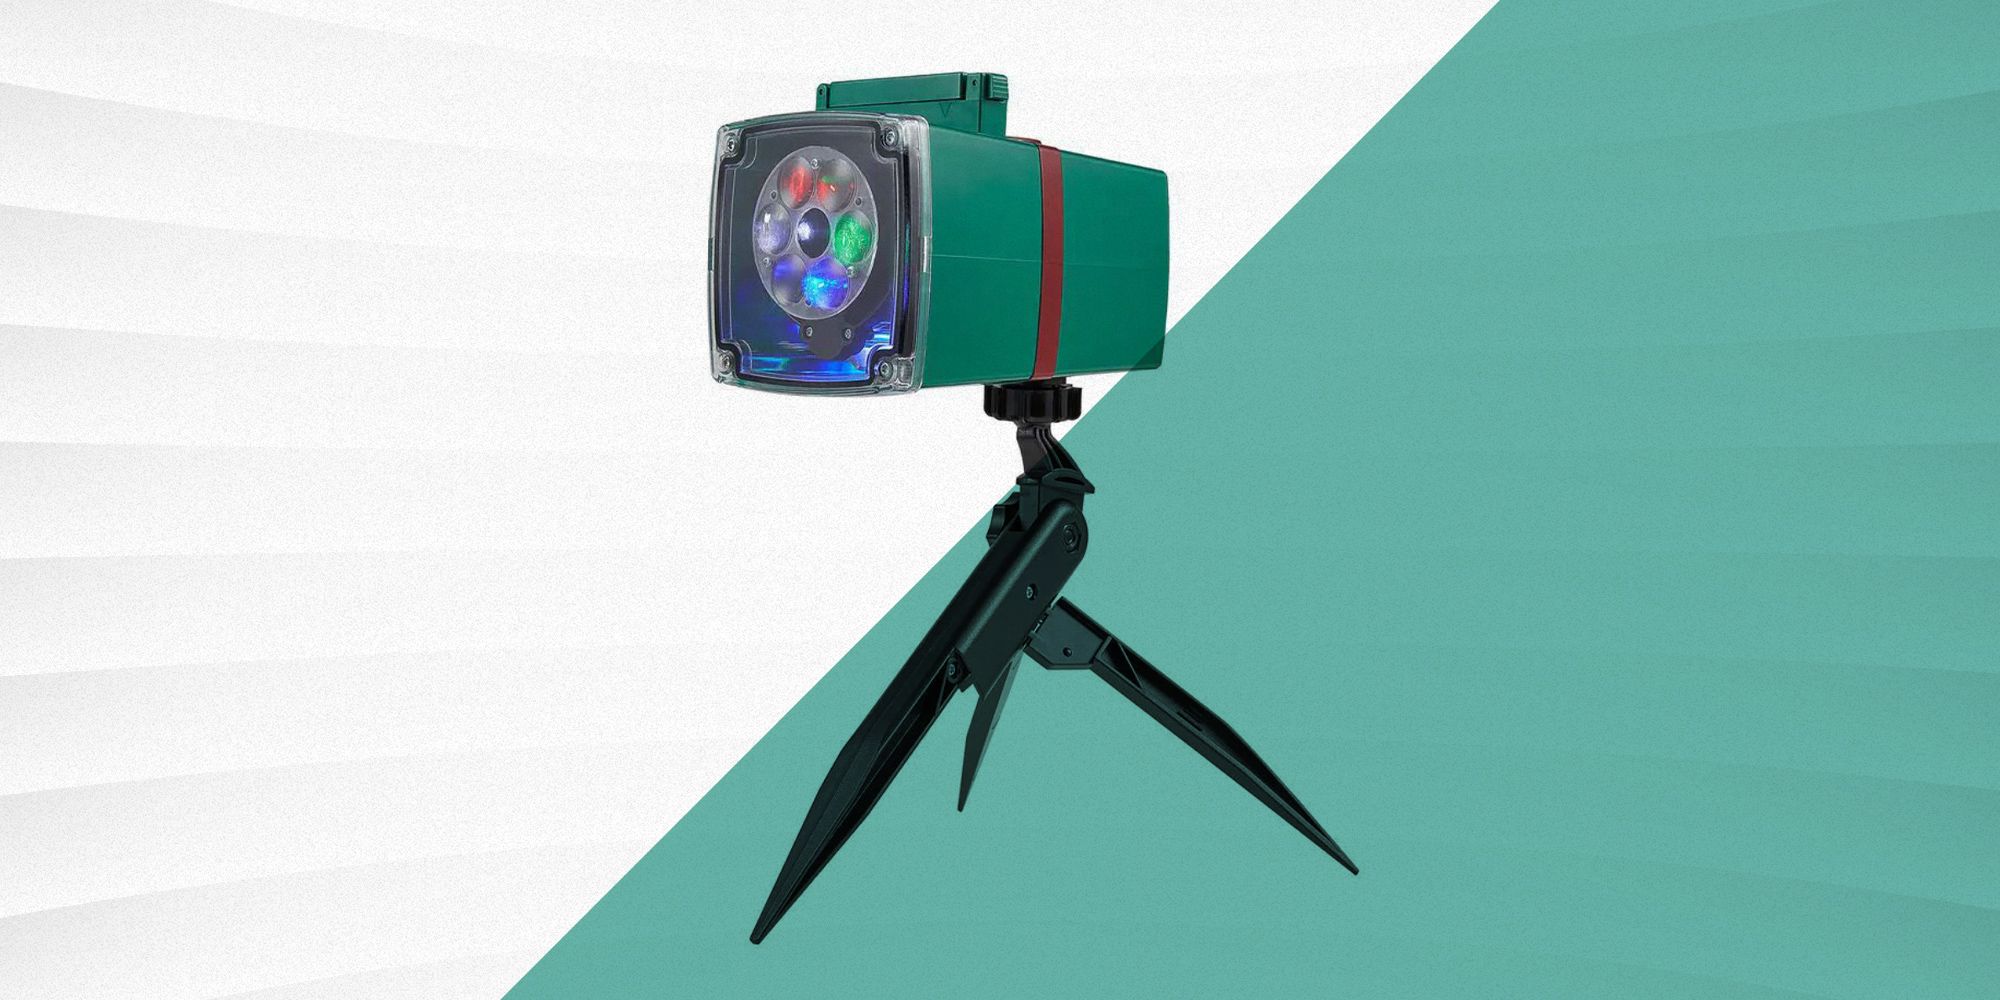
A dots projector is a specialized piece of equipment that projects images or patterns using a matrix of dots. It works by shining a light through a patterned disc or lens that is often interchangeable. As the disc rotates, the dots are projected onto a surface, creating captivating visual effects.
One of the most intriguing aspects of dots projectors is their versatility. They can be used for a wide range of purposes, from ambient lighting and mood-setting in a home theater to creating dynamic art installations or transforming a plain room into a vibrant and interactive space.
Whether you’re hosting a party, setting up a gallery exhibition, or looking to add some flair to your bedroom decor, a dots projector offers endless possibilities for creative expression. You can project anything from abstract patterns and colorful landscapes to celestial scenes and intricate designs.
Choosing the right dots projector for your needs is essential to ensure optimal performance and compatibility with your desired applications. Factors such as brightness, resolution, connectivity options, and ease of use should be considered before making a purchase.
In the following sections, we will dive deeper into the world of dots projectors, exploring how these devices work, how to set them up properly, and techniques for creating stunning visuals. So, buckle up, as we embark on a journey to unlock the full potential of dots projectors!
What Is a Dots Projector?
A dots projector, also known as a dot matrix projector or dot pattern projector, is a device that uses dots or pixels to create images or patterns. It is a specialized type of projector that offers a unique way to display visuals.
The fundamental concept behind dots projectors is to break down an image or pattern into a grid of dots. These dots are then projected onto a surface, creating a larger composite image. By varying the intensity and arrangement of the dots, intricate and dynamic visuals can be created.
Unlike traditional projectors that use continuous light sources and lenses to create images, dots projectors rely on precisely timed laser diodes or LED lights that emit short bursts of light. The dots are created by modulating the intensity of these light bursts, resulting in a series of individual dots that combine to form the desired image.
Dots projectors offer several advantages over traditional projectors. Firstly, they provide a higher level of control and precision in creating images. Since each dot can be controlled independently, dots projectors can produce sharper and more defined patterns. This makes them ideal for applications that require intricate details, such as artistic displays or architectural projections.
Another advantage of dots projectors is their ability to project onto irregular surfaces. By manipulating the position and intensity of the dots, these projectors can adapt to the shape of the projection surface, eliminating distortions and ensuring a clear and accurate representation of the image.
Dots projectors can be used in a wide range of settings and applications. They are commonly used in art installations, theaters, nightclubs, and advertising displays to create eye-catching visuals and enhance the overall experience. Additionally, dots projectors are popular for creating interactive displays and games, allowing users to interact with the projected patterns and images.
It’s important to note that dots projectors require careful calibration and alignment to ensure optimal performance. Proper calibration ensures that the dots align correctly, resulting in a seamless image or pattern. Improper calibration can lead to distorted visuals or misaligned patterns.
Now that you have a better understanding of what a dots projector is and its capabilities, let’s explore how these devices work and how to choose the right one for your needs.
How Does a Dots Projector Work?
At first glance, a dots projector may seem like a magical device that can transform any surface into a canvas of mesmerizing patterns. But how exactly does it work? Let’s delve into the inner workings of a dots projector.
At the core of a dots projector is its light source, which can be either laser diodes or LEDs. These light sources emit short bursts of light, each burst representing a single dot in the projected image or pattern. The timing and intensity of these bursts are meticulously controlled to create a coherent and seamless projection.
Using a patterned disc, lens, or a combination of both, the dots projector modulates the light bursts to project the desired patterns. The patterned disc or lens has a matrix of tiny holes or transparent areas that allow light to pass through. As the disc or lens rotates, the light passes through these holes or transparent areas, creating a series of dots on the projection surface.
To create complex images or patterns, dots projectors make use of a technique called persistence of vision. As the dots are projected onto the surface and quickly refreshed, our eyes blend these individual dots together, creating the illusion of a continuous image. This technique enables dots projectors to produce smooth and fluid animations or patterns.
In addition to controlling the timing and intensity of the light bursts, dots projectors also employ algorithms and image processing techniques to enhance the quality of the projected images. These algorithms ensure that the dots are as precise and sharp as possible, resulting in high-resolution visuals.
Furthermore, dots projectors often come equipped with various connectivity options, allowing you to connect them to a computer, smartphone, or other media devices. This enables you to project images, videos, or animations directly from your preferred source, offering a wide range of creative possibilities.
When using a dots projector, it is crucial to consider the ambient lighting conditions. Dimmer environments tend to produce more vivid and striking visuals, as the projected dots stand out against a darker background. However, some dots projectors come with adjustable brightness settings, allowing you to adapt to different lighting conditions.
Now that you have a better understanding of how a dots projector works, it’s time to explore the factors to consider when choosing the right dots projector for your specific needs. Let’s dive into the world of dots projector selection and find the perfect device for you.
Choosing the Right Dots Projector for Your Needs
When it comes to choosing a dots projector, there are several factors to consider to ensure that you select the right device for your specific needs. Here are some key considerations:
- Brightness: The brightness of a dots projector is measured in lumens. Depending on your intended use, consider the ambient lighting conditions in the space where you plan to use the projector. For brighter environments or larger projection areas, opt for a higher lumen output to ensure clear and vibrant visuals.
- Resolution: The resolution of a dots projector determines the level of detail and clarity in the projected images. Higher resolutions produce sharper and more defined visuals. Consider the intended viewing distance and the level of intricacy you require in your projections.
- Connectivity: Make sure the dots projector is compatible with your preferred source devices. Check if it has HDMI, USB, or wireless connectivity options, allowing you to easily connect your computer, smartphone, or media player.
- Projection Size and Distance: Consider the size of the projection area you wish to cover and the distance between the projector and the surface. Ensure that the projector you choose can accommodate your desired projection size and throw distance.
- Ease of Use: Look for a dots projector that is user-friendly and intuitive. Consider the availability of easy-to-navigate menus, remote control options, and any additional features that make operating the projector convenient.
- Portability: If you plan to use the projector in different locations, consider its portability. Look for lightweight and compact models that are easier to transport and set up.
- Additional Features: Some dots projectors offer extra features such as built-in speakers, keystone correction, or support for 3D projection. Determine which features are important to you and select a projector that meets your requirements.
It’s also worth reading reviews and checking customer feedback for any dots projector models you are considering. This can provide valuable insights into the performance, reliability, and overall user experience of the projector.
By carefully considering these factors and aligning them with your specific needs and preferences, you can choose a dots projector that will deliver outstanding visuals and enhance your creative endeavors.
Setting Up Your Dots Projector
Once you’ve chosen the perfect dots projector for your needs, it’s time to set it up and start creating stunning visuals. Here are some steps to help you get started:
- Choose the Projection Surface: Select a suitable surface for projection. It should be clean, smooth, and preferably white or light-colored to reflect the projected light effectively. Additionally, consider the size and shape of the surface to ensure it aligns with your desired projection area.
- Position the Projector: Place the dots projector in a stable and level position. Consider the throw distance and adjust the projector’s position accordingly to achieve the desired projection size. Use a tripod or mounting bracket if necessary to ensure stability.
- Connect Input Devices: If your dots projector supports external input devices, connect them using the appropriate cables (e.g., HDMI, VGA, or USB). This will allow you to project images, videos, or animations from your computer, smartphone, or media player.
- Power Up the Projector: Plug in the dots projector and power it on. Follow the manufacturer’s instructions for powering up and initializing the projector. This may involve pressing buttons on the projector or using a remote control.
- Adjust Projection Settings: Access the projector’s menu system and adjust the projection settings to suit your preferences. This may include brightness, contrast, color temperature, and keystone correction. Experiment with these settings to achieve the desired visual effects.
- Calibrate and Align: Proper calibration and alignment are vital for optimal projection quality. Most dots projectors offer calibration features to ensure the dots align correctly and produce a seamless image. Follow the manufacturer’s instructions for calibrating the projector.
- Test and Fine-tune: Before your actual presentation or event, conduct a test run to ensure everything is functioning as expected. Make any necessary adjustments to the projector’s settings, projection surface, or placement to achieve the desired results.
- Consider Ambient Lighting: Dim the lights or adjust the ambient lighting to enhance the visibility and impact of the projected dots. Experiment with different lighting conditions to create different moods and effects.
- Engage Your Audience: Once everything is set up and ready to go, let your creativity shine. Use the dots projector to captivate and engage your audience with mesmerizing visuals, intriguing patterns, or interactive displays.
Remember to refer to the dots projector’s user manual for detailed instructions and any specific setup requirements. Taking the time to properly set up your dots projector will ensure optimal performance and maximize the visual impact of your projections.
Calibration and Alignment Tips
Proper calibration and alignment are essential for getting the best possible performance from your dots projector. Here are some tips to help you calibrate and align your projector effectively:
- Use Calibration Software: Many dots projectors come with dedicated software for calibration. Install and use this software to ensure precise alignment and accurate dot projection.
- Adjust Dot Size and Density: Depending on your desired effect, adjust the size and density of the dots to achieve the desired level of detail and clarity. This can be done through the calibration software or the projector’s settings menu.
- Focus the Projection: Ensure that the projected dots are sharp and well-focused. Use the projector’s focus adjustment feature to fine-tune the clarity of the projected image.
- Check Projection Angle: Verify that the projector is positioned at an appropriate angle to project the dots accurately onto the target surface. Use keystone correction features to adjust the projected image and minimize distortion.
- Consider Environmental Factors: Take into account the environmental conditions that may affect the projection. Factors such as temperature, humidity, and air flow can impact the performance of the projector. Keep the projector and its surroundings within optimal operating conditions.
- Regularly Clean the Projector Lens: Dust and smudges on the projector lens can affect the projection quality. Clean the lens regularly using a soft, lint-free cloth to ensure clear and crisp projections.
- Test Various Projection Surfaces: Experiment with different projection surfaces to find the one that best suits your desired visual effect. Different surfaces may reflect light differently, which can impact the perceived brightness and clarity of the projected dots.
- Perform Regular Maintenance: Maintain your dots projector by regularly updating its firmware, cleaning filters, and inspecting for any signs of wear or damage. Follow the manufacturer’s guidelines for proper maintenance to ensure optimal performance and longevity.
- Take Advantage of Built-in Calibration Tools: Some dots projectors offer built-in calibration tools, such as alignment grids or test patterns. Utilize these tools to enhance the accuracy and alignment of the projection.
- Revisit Calibration Periodically: Over time, the calibration of the dots projector may shift. Revisit the calibration settings periodically to ensure ongoing accuracy in the projected imagery.
Remember to refer to the user manual provided with your dots projector for specific calibration and alignment instructions. Following these tips will help you achieve precise and stunning projections with your dots projector.
Creating Stunning Visuals with Your Dots Projector
With a dots projector at your disposal, you have the power to unleash your creativity and create awe-inspiring visuals. Here are some tips and techniques to help you make the most of your dots projector:
- Experiment with Patterns and Images: Don’t be afraid to explore different patterns, images, and designs. Mix and match various elements to create visually captivating compositions.
- Play with Colors: Experiment with different color combinations to evoke different moods and emotions. Use vibrant and contrasting colors for a dynamic and energetic effect, or opt for soft and muted tones for a calming and soothing ambiance.
- Create Depth and Dimension: Combine different layers and depths in your projections to add a sense of depth and dimension. Play with overlapping patterns or use 3D projection mapping techniques to create a multidimensional experience.
- Add Motion and Animation: Use animated patterns or create motion graphics to bring your projections to life. By introducing movement, you can engage and captivate your audience on a whole new level.
- Integrate Interactivity: Incorporate interactive elements into your projections to actively engage your audience. This can include motion sensors, touch-sensitive surfaces, or even interactive game elements that respond to user input.
- Create Dynamic Visuals with Sound: Sync your dots projections with music or sound effects to create a fully immersive experience. Use visualizers that respond to audio input to synchronize your visuals with the rhythm and beat.
- Utilize Projection Mapping: Explore the technique of projection mapping to project your visuals onto complex and irregular surfaces. This allows you to turn any object or architectural structure into a canvas for your creativity.
- Consider Context and Theme: Tailor your visuals to the specific context and theme of your event or installation. Consider the message you want to convey and align your projections accordingly to create a cohesive and impactful experience.
- Think Outside the Box: Don’t limit yourself to traditional projection surfaces. Explore unconventional surfaces such as fabrics, sculptures, or even water screens to create truly unique and mesmerizing displays.
- Engage Your Audience: Encourage your audience to interact with and be part of the visual experience. Allow them to control aspects of the projections, such as color changes or image manipulation, to create a sense of ownership and connection.
Remember to continuously experiment, push boundaries, and refine your techniques. The possibilities with dots projectors are virtually endless, so embrace your creativity and let your imagination soar.
Advanced Techniques and Tips for Dots Projection
Once you’ve mastered the basics of dots projection, you can take your skills to the next level with these advanced techniques and tips:
- Create Custom Discs or Lenses: Experiment with designing and creating your own patterned discs or lenses. This allows you to project unique and personalized patterns that reflect your artistic vision.
- Combine Multiple Projectors: Expand your creative possibilities by using multiple dots projectors together. By synchronizing their projections, you can create larger, more complex, and immersive visuals.
- Use Masking Techniques: Explore masking techniques to selectively project dots onto specific areas of your surface. This allows you to create intriguing visual effects and draw attention to specific elements of your composition.
- Employ Dots Projection in Performances: Incorporate dots projection into live performances or stage productions to enhance the visual experience. Coordinate the projections with music, dance, or theater elements to create a truly memorable show.
- Experiment with Mapping onto Dynamic Objects: Explore projection mapping techniques on dynamic objects that are in motion, such as moving sculptures or performers. This requires precise tracking and calibration to maintain accurate projections.
- Create Motion Tracking Interactions: Implement motion tracking technology to allow your projections to respond to the movements of individuals or objects. This can create interactive and dynamic visual experiences that adapt in real-time.
- Incorporate Ambient Lighting: Enhance the impact of your projections by strategically illuminating the surrounding area with additional lighting. Experiment with different color temperatures, spotlighting, or backlighting to create visually stunning effects.
- Combine Dots Projection with Other Visual Techniques: Integrate dots projection with other visual techniques, such as laser lighting, video mapping, or holography, to create truly immersive and multidimensional experiences.
- Collaborate with Other Artists or Experts: Connect with other artists or experts in the field of projection art or visual arts. Collaborations can lead to valuable insights, new techniques, and innovative approaches to dots projection.
- Document and Share Your Work: Capture high-quality recordings or photographs of your dots projection creations. Share your work on social media, artist platforms, or participate in exhibitions to inspire and connect with a wider audience.
Remember that advanced techniques require time, practice, and experimentation. Embrace the learning process and continuously challenge yourself to push the boundaries of what can be achieved with dots projection.
Troubleshooting Common Dots Projector Issues
While dots projectors offer a captivating visual experience, it’s not uncommon to encounter some issues along the way. Here are some common problems you may encounter with your dots projector and tips on how to troubleshoot them:
- Poor Image Quality: If your projected image appears blurry, grainy, or distorted, ensure that the projector lens is clean and free from smudges or dust. Additionally, check the focus adjustment to ensure the image is sharp. Adjust the projector’s resolution and brightness settings if necessary.
- Inaccurate Alignment: If the dots are misaligned or not projecting straight, carefully check the projector’s positioning and angle. Use the projector’s keystone correction feature to adjust the image and minimize any distortion. Calibrate the projector according to the manufacturer’s instructions for precise alignment.
- Color Inconsistency: If the colors of the projected image appear off or inconsistent, check the color temperature settings of the projector. Ensure that the input source device is correctly connected and configured. Adjust the color settings on the projector as needed.
- No Power or Startup Issues: If the dots projector does not power on or experiences startup issues, check the power source and ensure it is plugged in properly. Inspect the power cord for any damage and try a different power outlet. If the issue persists, consult the manufacturer’s troubleshooting guide or contact customer support.
- Overheating: If the projector becomes excessively hot during operation, it may be overheating. Ensure that the projector is properly ventilated and that the air filters are clean. Avoid operating the projector in a confined space or in high-temperature environments. If overheating continues, contact the manufacturer for further assistance.
- Noisy Operation: If the projector emits unusual noises, such as grinding or buzzing sounds, it could indicate a mechanical issue. Ensure that the fan and other moving parts are clear of obstructions. If the problem persists, seek professional assistance or contact the manufacturer for repair or replacement options.
- Connection Issues: If you are experiencing connectivity problems with external input devices, double-check that the cables are securely connected. Try using a different cable or port to rule out any connection-related issues. Update the firmware on the projector if available, as it may address compatibility or performance issues.
- Remote Control Malfunction: If the projector’s remote control is not functioning, ensure that the batteries are properly inserted and have sufficient charge. Verify that there is a clear line of sight between the remote control and the projector. If the issue persists, try resetting the remote control or using a universal remote as a workaround.
- Irregular or Flickering Dots: If the projected dots appear irregular or flicker, this could be a sign of a connectivity issue or a problem with the source content. Check the cable connections and try a different source device. If the issue persists, consult the projector’s user manual or contact technical support for further assistance.
- Unresponsive Controls: If the controls on the projector or its menu system become unresponsive, try resetting the projector to its factory defaults. If that doesn’t resolve the issue, consult the user manual for any troubleshooting steps or contact the manufacturer for support.
If you encounter any other issues or if the problem persists despite troubleshooting attempts, refer to the dots projector’s user manual or contact the manufacturer’s customer support for further assistance and guidance.
Conclusion
Dots projectors offer a world of creative possibilities, allowing you to transform any space into a captivating visual experience. By understanding how dots projectors work, selecting the right device for your needs, and following proper setup and calibration techniques, you can create stunning visuals that leave a lasting impression.
From projecting mesmerizing patterns and dynamic animations to mapping onto complex surfaces and incorporating interactivity, there are endless ways to utilize dots projectors for artistic expression, entertainment, or even commercial applications. The advanced techniques and troubleshooting tips provided in this article will help you overcome challenges and explore the full potential of your dots projector.
Remember to continuously experiment, refine your skills, and collaborate with other artists or experts in the field. Engaging your audience and documenting your work will help inspire others and expand the reach of your creative endeavors.
Whether you’re an artist, event organizer, or simply someone with a passion for visual innovation, a dots projector is a powerful tool for creating stunning and immersive experiences. So, unlock your imagination, embrace the possibilities, and let your creativity shine with dots projection.