Introduction
Have you recently come across a treasure trove of old 8mm films from your family’s archives? Or perhaps you stumbled upon a collection of vintage films at a yard sale? Whatever the case may be, you may find yourself eager to relive the memories captured on these 8mm films. However, the problem arises when you realize that you don’t have a functioning 8mm film projector to view them with.
But fear not! In this article, we will explore various methods to help you view your 8mm films without the need for a traditional projector. Whether you’re a history enthusiast, a filmmaker, or simply want to reminisce about the past, these techniques will allow you to see the precious footage captured on your 8mm films.
We will discuss how to understand the nature of 8mm film and how to prepare it for viewing. We will then delve into setting up your workspace, followed by four different options for viewing the films: using a film scanner, a lightbox, a DIY projector, or utilizing a telecine transfer service if you prefer professional assistance. We will also provide some troubleshooting tips to help you overcome any challenges you might encounter.
So, if you’re ready to unlock the secrets of your 8mm films and embark on a journey of nostalgia, let’s dive right in to learn how you can view these precious memories without the use of a traditional projector.
Understanding 8mm Film
Before we delve into the various methods of viewing 8mm film without a projector, it’s important to have a basic understanding of what exactly 8mm film is and how it works. 8mm film is a motion picture film format that was wildly popular during the mid-20th century. It gained widespread use in amateur filmmaking due to its affordability and ease of use.
The 8mm film format was introduced by Kodak in 1932 as an alternative to the larger and more expensive 16mm film. It quickly became a favorite among families and hobbyists for capturing important moments, such as birthdays, vacations, and family gatherings. The resulting 8mm films are typically housed in small, lightweight plastic or metal reels.
8mm film consists of individual frames that are arranged in a continuous strip. The frames are small, measuring about 8mm wide, hence the name. The film is usually made of cellulose acetate or polyester, and it can be either black and white or color. Each frame captures a single moment in time, and when viewed in rapid succession, the illusion of motion is created.
One of the challenges of viewing 8mm film without a projector is that the film itself is not designed to be viewed by hand. It requires a light source behind it to illuminate each frame, allowing you to see the images clearly. Additionally, the film needs to be securely guided while being threaded through the projector to prevent damage.
Now that you have a basic understanding of 8mm film, let’s move on to the next section, where we will explore how to prepare your 8mm film for viewing without a traditional projector.
Preparing Your 8mm Film
Before you can begin viewing your 8mm films without a projector, it’s essential to properly prepare them for playback. Taking the time to ensure your films are in good condition will not only enhance the viewing experience but also help preserve the footage for future generations.
The first step in preparing your 8mm film is to inspect it for any visible signs of damage or deterioration. Look for scratches, tears, or warped sections that could affect the quality of the footage. If you come across any damaged sections, consider consulting a professional film restoration service to repair or preserve the film.
Next, clean the film using a soft microfiber cloth or a specialized film cleaning solution. Gently wipe the surface of the film while being careful to avoid applying too much pressure, as this could scratch or damage the delicate emulsion. If the film is particularly dirty, you may need to use a mild detergent and water solution. However, always test this on a small, inconspicuous area of the film first to ensure it doesn’t cause any harm.
Once the film is clean, inspect the film reel for any signs of looseness or instability. Ensure that the film is tightly wound onto the reel to prevent it from unraveling or snagging during playback.
It’s also important to consider the condition of the film’s sprocket holes. The sprocket holes are the small perforations along the edges of the film that align with the projector’s mechanism. If the sprocket holes are torn or damaged, you may need to repair them using specialized film splicing tape. This tape is designed to be transparent and durable, ensuring a smooth and seamless flow through the playback device.
Lastly, make sure you have a suitable space for viewing your 8mm films. Choose a clean, dimly lit room to minimize distractions and allow for optimal viewing. Consider using a clean, white surface or a projection screen to project the film onto if you opt for a DIY projector method.
By taking the time to properly prepare your 8mm films, you can significantly improve the quality of the viewing experience and ensure the long-term preservation of these precious memories.
Setting Up Your Workspace
Creating a suitable workspace is crucial when it comes to viewing your 8mm films without a projector. A well-prepared workspace will not only enhance the viewing experience but also ensure the safety and proper handling of your films.
The first consideration when setting up your workspace is lighting. Choose a room with minimal natural light, as too much light can cause glare and hinder your ability to see the film clearly. Consider using blackout curtains or blinds to block out any unwanted light. Additionally, you may need to utilize artificial lighting to create a consistent and even illumination on the film.
Next, consider the surface on which you will be working. Ensure that it is clean, flat, and free of any debris that could scratch or damage the film. A smooth, white surface is ideal as it provides a neutral background, allowing the film’s colors to be accurately represented.
In addition to the surface, you will need a film reel holder or a film splicing table to securely handle and guide the film during the viewing process. These tools will prevent the film from unraveling or slipping, ensuring smooth playback.
It’s also important to have a suitable viewing device or method in place. This could be a film scanner, a lightbox, a DIY projector, or utilizing a telecine transfer service, depending on your preferences and available resources. Whatever method you choose, make sure it is set up correctly and ready to use before starting.
Lastly, organize your workspace to have all the necessary tools and materials within reach. This can include film cleaning solutions, microfiber cloths, film splicing tape, and any other items you may need during the preparation and viewing process.
By setting up a dedicated workspace for viewing your 8mm films, you can ensure a comfortable and efficient experience. Take the time to create an environment that is conducive to enjoying the films and preserving their quality.
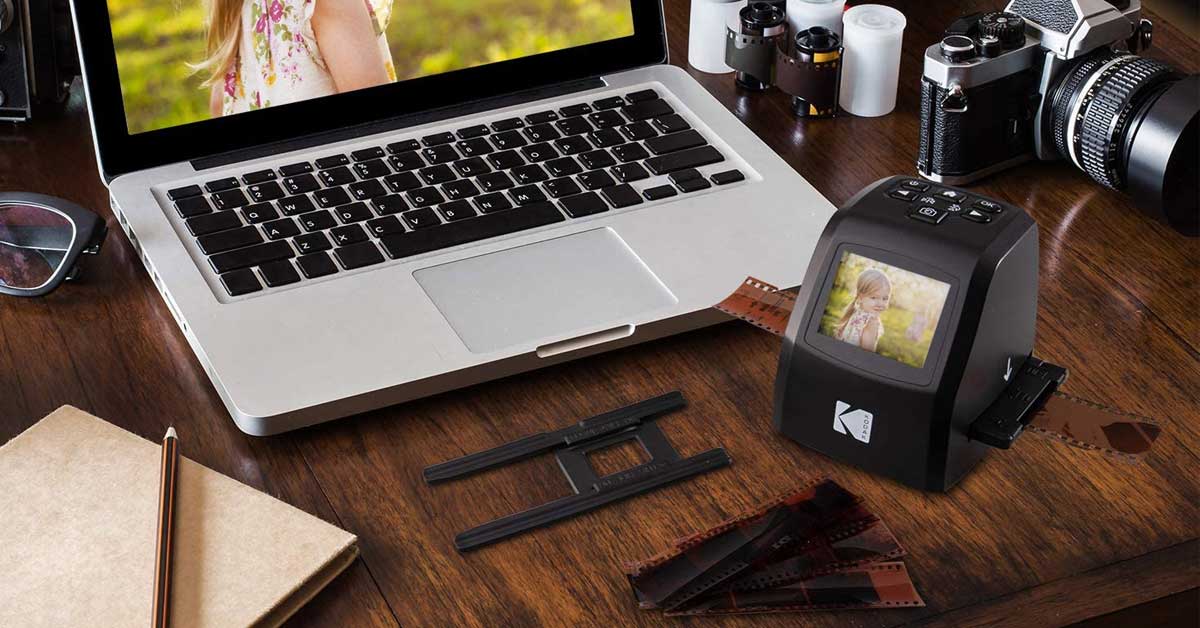
Option 1: Using a Film Scanner
Using a film scanner is a popular and convenient option for viewing 8mm films without a traditional projector. Film scanners are specialized devices that can digitize your film frames, allowing you to view them on a computer or other digital devices.
To use a film scanner, start by connecting it to your computer and installing any necessary software or drivers. Next, open the software and follow the instructions provided to load your 8mm film into the scanner. Most film scanners have a film holder or a specific mechanism for securing the film reel.
Once the film is loaded, start the scanning process. The scanner will automatically capture each frame and convert it into a digital image. Depending on your scanner and the settings you choose, you can adjust factors such as resolution, color correction, and file format.
After the scanning process is complete, you can view the digitized images on your computer. Some film scanning software even allows you to edit and enhance the images to improve their overall quality.
One of the major advantages of using a film scanner is that it provides a non-destructive way to view and preserve your 8mm films. By digitizing the footage, you eliminate the need to physically handle the film and reduce the risk of potential damage.
It’s worth noting that film scanning can be a time-consuming process, especially if you have a large collection of 8mm films. However, the convenience of having digital copies of your films and the ability to easily share and preserve them for future generations make it a worthwhile option.
Keep in mind that film scanners vary in terms of quality and features, so it’s important to choose a reputable brand and model that suits your specific needs. Read reviews, compare specifications, and consider seeking recommendations from other film enthusiasts to ensure you select the best film scanner for your requirements.
Using a film scanner opens up a whole new world of possibilities for enjoying and sharing your 8mm films. It provides a modern and efficient way to view and preserve these cherished memories for years to come.
Option 2: Using a Lightbox
If you prefer a more hands-on approach to viewing your 8mm films, using a lightbox is an excellent option. A lightbox, also known as a light table, is a flat and illuminated surface that allows you to view the frames of your film manually.
To use a lightbox, begin by setting it up on a stable and level surface, ensuring that it is positioned at a comfortable viewing height. Plug in the lightbox and turn it on to create an evenly illuminated surface.
Next, carefully thread your 8mm film through the lightbox, making sure to align the frames with the light source from behind. You may need to use a film reel holder or tape the film to the surface to keep it flat and prevent it from moving around.
Once the film is in position, you can examine each frame individually by moving them along the lightbox surface. Take the time to appreciate the details captured in each frame and immerse yourself in the nostalgic scenes brought to life.
Using a lightbox gives you the freedom to control the speed at which you view the film. You can pause and study specific frames or allow the film to flow in a continuous motion, simulating the experience of watching it through a projector.
One advantage of using a lightbox is its simplicity and affordability compared to other viewing options. Lightboxes are relatively easy to find, either in specialized photography stores or online. They come in various sizes, allowing you to choose one that best suits your needs.
However, it’s important to note that using a lightbox requires manual handling of the film. This means that you need to exercise caution and take proper precautions to avoid damaging the film or leaving fingerprints on the delicate emulsion. Always handle the film by the edges and avoid touching the actual image area.
Using a lightbox can be a nostalgic and immersive way to view your 8mm films. It provides a tangible experience of browsing through the frames and reliving the memories captured on the film. So, grab a comfortable seat, dim the lights, and let the magic of the lightbox transport you back in time.
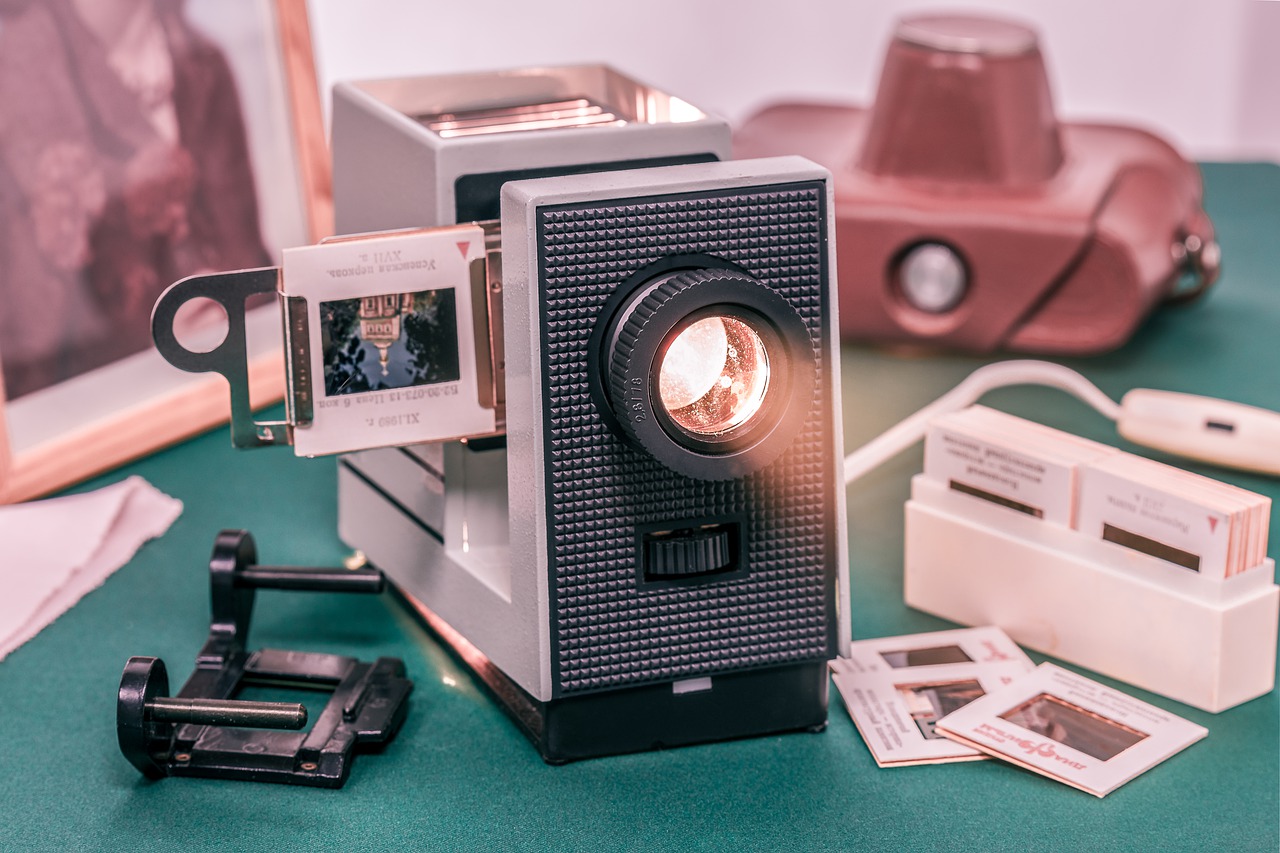
Option 3: Using a DIY Projector
If you’re feeling a bit adventurous and creative, you can try building a DIY projector to view your 8mm films. While it may require some time and effort, the satisfaction of constructing your own projector and experiencing the nostalgic charm it brings can be well worth it.
Building a DIY projector involves creating a pathway for the light to pass through the film frames and project them onto a screen or a smooth surface. Here’s a simple step-by-step guide to get you started:
- Begin by gathering the necessary materials. You will need a box, a light source (such as a flashlight or a smartphone), a magnifying lens, and a white screen or surface to project the film onto.
- Place the film reel inside the box, ensuring that it is held securely and can be easily threaded. Position the film so that the frames can be projected onto the screen.
- Make a small opening in the box’s front, big enough for the magnifying lens to fit through. This will act as the projection lens, focusing the light onto the film frames.
- Attach the magnifying lens to the opening, ensuring that it is secure and positioned correctly to create a sharp and clear projection.
- Position your light source in such a way that it shines through the film frames and onto the magnifying lens. Adjust the intensity and angle of the light to achieve the desired brightness and clarity.
- Finally, place your white screen or surface a suitable distance away from the projection lens to capture and display the projected images. Adjust the focus and positioning as needed for the best viewing experience.
It’s important to note that a DIY projector may not produce the same level of image quality and clarity as a professional projector or other viewing options. However, the charm and sense of accomplishment you gain from creating your own makeshift projector can be a delightful experience in itself.
Experimenting with different materials and techniques can further enhance the results. For example, using a larger magnifying lens or even a camera lens can improve the focus and sharpness of the projection. You can also incorporate additional features like a film reel rotation mechanism for a more authentic viewing experience.
Building a DIY projector requires a bit of patience, creativity, and tinkering. It’s a fun and unique way to engage with your 8mm films and immerse yourself in the magic of analog film projection.
Option 4: Using a Telecine Transfer Service
If you prefer a professional and hassle-free option for viewing your 8mm films without a projector, utilizing a telecine transfer service is worth considering. A telecine transfer service involves having your 8mm films digitized by experts using specialized equipment, ensuring high-quality results.
When using a telecine transfer service, you will need to carefully package and send your films to the service provider. It’s important to choose a reputable and experienced company that specializes in film transfer to ensure the best possible outcome.
Once your films are received, the telecine transfer process begins. Skilled technicians will clean, repair, and prepare the films for digitization. They will use professional-grade telecine machines that project the film frames onto a digital sensor, capturing each frame as a high-resolution image or video file.
Telecine transfer services offer various options for the output format, including digital files, DVDs, or even Blu-ray discs. This allows you to easily view and share your 8mm films on modern devices, such as computers, TVs, or smartphones.
One of the significant advantages of utilizing a telecine transfer service is the expertise and equipment involved. The technicians are experienced in handling fragile films and know how to optimize the digital transfer to retain as much detail and color fidelity as possible.
While using a telecine transfer service ensures professional results, it’s important to keep in mind that it comes at a cost. The price may vary depending on factors such as the length of the film, the desired output format, and additional services like color correction or restoration.
Additionally, sending your films to a third-party service means temporarily parting with them. If your films hold a high sentimental value or are irreplaceable, it’s worth considering making backup copies of the digital files or choosing a service that offers secure storage and returns your original films after transfer.
Using a telecine transfer service provides a convenient and professional way to digitize your 8mm films and enjoy them without the need for a projector. It allows you to preserve and share your precious memories, ensuring they can be cherished for years to come.
Troubleshooting Tips
While viewing your 8mm films without a projector can be an enjoyable experience, there may be some challenges that arise along the way. Here are a few troubleshooting tips to help you overcome common issues and ensure a smooth viewing process:
- Film Jams or Snags: If your film gets stuck or jammed during playback, resist the temptation to force it. Gently rewind the film and try again. If the issue persists, consult a professional film technician for assistance.
- Poor Image Quality: If your film appears blurry or lacks sharpness, carefully clean the film surface using a soft microfiber cloth. It’s also worth adjusting the lighting conditions, as too much or too little light can affect the image quality.
- Excessive Flickering: If you notice excessive flickering or strobing in the projected image, try adjusting the speed at which the film is moving through the projector. Sometimes, a slower speed can help reduce the flickering effect.
- Audio Sync Issues: If you’re using a telecine transfer service or a DIY projector that includes sound, ensure that the audio is properly synchronized with the film. Adjust the settings on your playback device or consult the service provider for assistance.
- Damaged Film Frames: If you encounter damaged or deteriorated frames, it’s best to consult a professional film restoration service for assistance. They can help repair or preserve the damaged sections, ensuring the integrity of the film is maintained.
- Compatibility Issues: When using a film scanner or telecine transfer service, ensure that the digital files generated are in a format that is compatible with your devices. Convert the files if necessary or seek support from the service provider.
- Film Deterioration: Over time, film can degrade, leading to color changes, loss of detail, or brittleness. If you notice significant deterioration, consider seeking professional film restoration services to preserve the film and salvage the footage.
Remember, troubleshooting issues with viewing 8mm films without a projector may require some experimentation and patience. If you encounter persistent problems that you’re unable to resolve, don’t hesitate to seek professional assistance from experts in film restoration and digitization.
By being aware of potential challenges and utilizing these troubleshooting tips, you can navigate through any obstacles that may arise and enjoy the full experience of viewing your 8mm films.
Conclusion
There you have it! We have explored various options for viewing your 8mm films without the need for a traditional projector. Whether you choose to use a film scanner, a lightbox, a DIY projector, or opt for a telecine transfer service, each method offers a unique way to relive the memories captured on your precious 8mm films.
Understanding the nature of 8mm film and properly preparing it for viewing is crucial to ensure the best possible experience. Setting up a suitable workspace, whether it’s a dedicated room or a small corner of your home, creates an environment conducive to enjoying the films to their fullest.
From using a film scanner to digitize your films to constructing a DIY projector for a hands-on experience, each method has its own merits and considerations. Choose the option that works best for your needs, budget, and level of technical expertise.
Remember to troubleshoot any issues that may arise, such as film jams, image quality, or audio sync problems. By being patient and exploring solutions, you can overcome these challenges and fully enjoy your 8mm films.
Don’t let the absence of a projector limit your ability to relish the nostalgic moments captured on your 8mm films. With the available options mentioned in this article, you can embark on a journey through time and immerse yourself in the rich memories preserved on these humble reels.
So, gather your 8mm films, choose your preferred method, and get ready to embark on a delightful trip down memory lane. The magic of 8mm film awaits!