Introduction
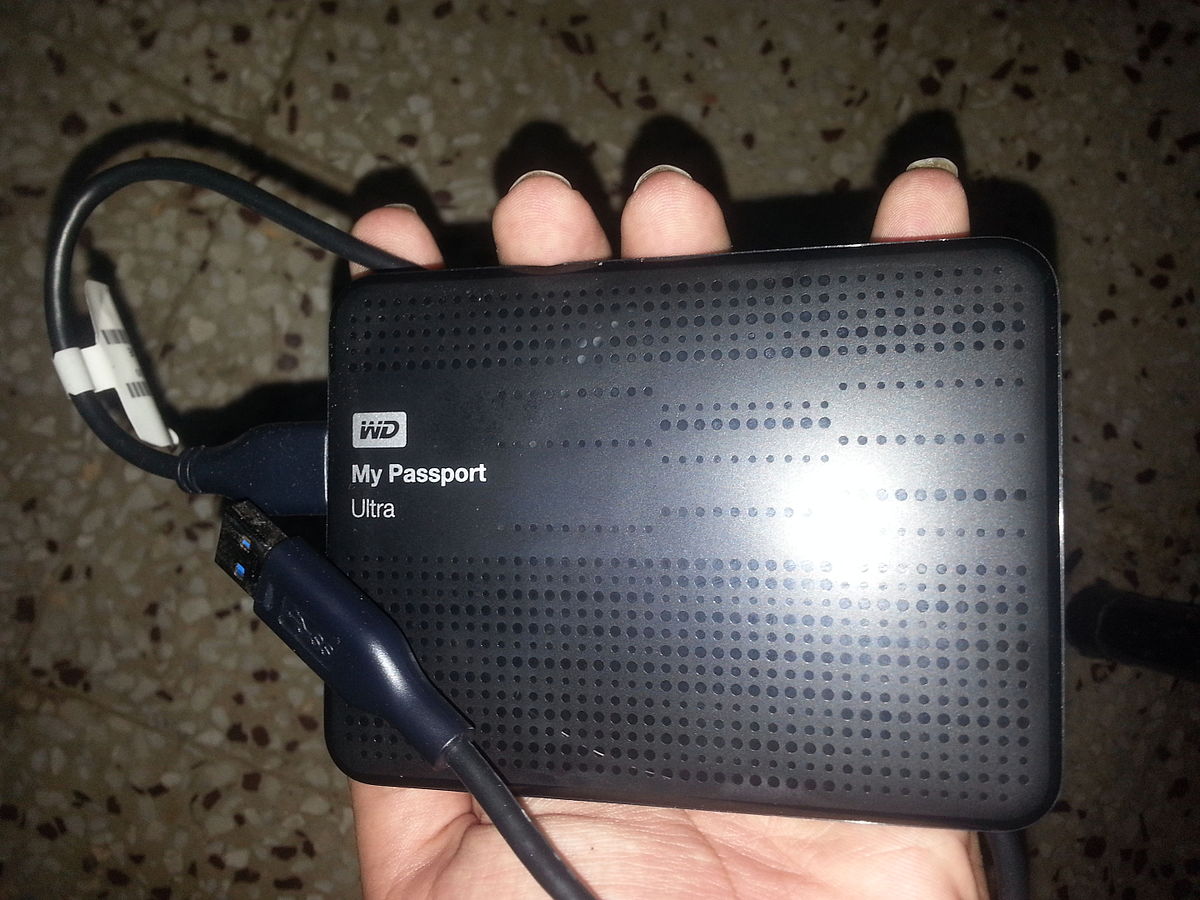
Welcome to the guide on how to upload files to your My Passport Hard Disk Drive. The My Passport is a popular and reliable external hard drive that allows you to securely store and backup your important files and documents. Whether you need to transfer photos, videos, music, or any other files, this step-by-step tutorial will walk you through the process.
Uploading files to your My Passport is a straightforward procedure that can be completed in just a few simple steps. By following these instructions, you will be able to quickly and easily transfer your files to the external hard drive, ensuring that they are safely stored and easily accessible whenever you need them.
Before we dive into the steps, it’s important to note that the specific process may vary slightly depending on the operating system you are using. Whether you have a Windows PC or a Mac, we will provide instructions for both platforms to ensure that you can upload files to your My Passport regardless of your device.
Now, let’s get started with the first step, which is connecting the My Passport Hard Disk Drive to your computer.
Step 1: Connecting the Passport Hard Disk Drive
The first step in uploading files to your My Passport Hard Disk Drive is to connect the device to your computer. The My Passport comes with a USB cable that you can use to establish the connection. Follow these instructions based on your operating system:
Windows:
- Locate an available USB port on your computer.
- Take one end of the USB cable and insert it into the USB port on your computer.
- Take the other end of the USB cable and insert it into the USB port on your My Passport Hard Disk Drive.
- Once the connection is established, your computer will recognize the external hard drive.
Mac:
- Locate an available USB-C or Thunderbolt port on your Mac.
- If your My Passport Hard Disk Drive has a USB-C connector, simply connect it to the USB-C port on your Mac.
- If your My Passport Hard Disk Drive has a USB-A connector, you will need a USB-C to USB-A adapter to connect it to your Mac.
- After connecting the My Passport Hard Disk Drive to your Mac, it will be automatically recognized by the system.
Once you have connected your My Passport Hard Disk Drive to your computer, you are ready to move on to the next step of the upload process. In step 2, we will guide you on how to open the file explorer or finder to locate the files you want to upload.
Step 2: Open the File Explorer or Finder
To upload files to your My Passport Hard Disk Drive, you need to navigate to the location where your files are stored on your computer. This can be done by opening the File Explorer on Windows or the Finder on Mac. Follow the instructions below based on your operating system:
Windows:
- Click on the “Start” menu in the bottom left corner of the screen.
- From the menu, select “File Explorer” or simply press the “Windows key + E” on your keyboard.
- The File Explorer window will open, displaying your computer’s storage and file directories.
Mac:
- Click on the “Finder” icon in the dock, which is typically located at the bottom of the screen.
- The Finder window will open, showing your computer’s storage and file directories.
Once you have opened the File Explorer or Finder, you will have access to all the files and folders on your computer. The next step is to locate the files that you want to upload to your My Passport Hard Disk Drive. In step 3, we will guide you on how to find and select the files for uploading.
Step 3: Locating the Files You Want to Upload
Now that you have opened the File Explorer or Finder, it’s time to locate the files you want to upload to your My Passport Hard Disk Drive. Follow these steps to find the files on your computer:
- Browse through the different folders and drives in the File Explorer or Finder to navigate to the location where your files are stored.
- If you know the specific folder where your files are located, you can directly click on that folder to access its contents.
- You can also perform a search to find specific files by using the search bar in the File Explorer or Finder. Simply enter the file name or any relevant keywords and press enter.
Take your time to locate the files you want to upload. You can navigate through various folders and sub-folders to find the files stored on your computer. It’s important to ensure that you have identified all the files you wish to transfer to your My Passport Hard Disk Drive before moving on to the next step.
In step 4, we will guide you on how to select the files that you want to upload to your external hard drive.
Step 4: Selecting the Files
Once you have located the files you want to upload to your My Passport Hard Disk Drive, the next step is to select them. Selecting the files will allow you to copy and transfer them to your external hard drive. Follow these instructions:
- Click on the first file you want to upload to your My Passport Hard Disk Drive. To select multiple files, hold down the “Ctrl” key (Windows) or the “Command” key (Mac) and click on each file you want to include in the selection. Alternatively, you can click and drag the mouse to create a selection of multiple files.
- If you want to select all the files in a folder, you can press “Ctrl + A” (Windows) or “Command + A” (Mac) to select everything in the current folder.
- Once you have selected the files, you will notice that they are highlighted or appear with a different color to indicate that they are selected.
Make sure you have selected all the files you want to upload to your My Passport Hard Disk Drive before proceeding to the next step. This will ensure that all the necessary files are included in the transfer.
In step 5, we will guide you on how to copy the selected files in preparation for uploading them to your external hard drive.
Step 5: Copying the Files
After selecting the files you want to upload to your My Passport Hard Disk Drive, the next step is to make copies of them in preparation for the upload. Follow these instructions to copy the selected files:
- Right-click on one of the selected files. A context menu will appear.
- In the context menu, select the “Copy” option. Alternatively, you can use the keyboard shortcut “Ctrl + C” (Windows) or “Command + C” (Mac) to copy the files.
- Once you have copied the files, you can proceed to the next step of navigating to the My Passport Hard Disk Drive folder.
Copying the files will create duplicates or copies of the selected files, which will be transferred to your My Passport Hard Disk Drive. It’s important to note that the original files will still remain in their original location on your computer.
In step 6, we will guide you on how to navigate to the My Passport Hard Disk Drive folder in order to paste the copied files and complete the upload process.
Step 6: Navigating to the My Passport Hard Disk Drive Folder
Once you have copied the files that you want to upload to your My Passport Hard Disk Drive, it’s time to navigate to the correct folder on the external hard drive. Follow these instructions to find the My Passport Hard Disk Drive folder:
- Open the File Explorer or Finder window again, if it is not already open.
- Look for the My Passport Hard Disk Drive in the list of available drives or devices. It is usually labeled as “My Passport” or a similar name.
- Click on the My Passport Hard Disk Drive to access it. This will open the folder that represents the external hard drive.
By navigating to the My Passport Hard Disk Drive folder, you are essentially entering the storage space of your external hard drive. This is where you will paste the files that you previously copied.
In step 7, we will guide you on how to paste the copied files into the My Passport Hard Disk Drive folder, completing the upload process and transferring the files to your external hard drive.
Step 7: Pasting the Files
Now that you have navigated to the My Passport Hard Disk Drive folder, it’s time to paste the files that you previously copied. Follow these instructions to complete the upload process:
- Right-click anywhere inside the My Passport Hard Disk Drive folder. A context menu will appear.
- In the context menu, select the “Paste” option. Alternatively, you can use the keyboard shortcut “Ctrl + V” (Windows) or “Command + V” (Mac) to paste the files.
- The copied files will now be pasted into the My Passport Hard Disk Drive folder. This process may take some time depending on the size and number of files you are uploading.
As the files are being pasted, you will be able to see the progress of the upload. You can monitor the progress either through a progress bar or by observing the file transfer speed. It’s important to allow the upload process to complete and avoid interrupting it to ensure the files are successfully transferred to your My Passport Hard Disk Drive.
In step 8, we will explain how to monitor the upload progress and ensure the files are safely uploaded to your external hard drive.
Step 8: Monitoring the Upload Progress
While the files are being pasted into the My Passport Hard Disk Drive folder, it’s important to monitor the upload progress to ensure that the transfer is successful. Follow these instructions to keep an eye on the upload progress:
- Observe the progress bar or percentage indicator that appears during the file transfer. This will give you an indication of how much of the upload is completed.
- Some operating systems may also display the file transfer speed, allowing you to gauge how quickly the files are being uploaded.
It’s recommended to avoid interrupting the upload process while the files are being transferred. Interrupting the upload could potentially lead to incomplete transfers and data corruption. It’s best to wait until the progress indicator shows that the upload is complete before proceeding.
In step 9, we will guide you on how to safely eject or disconnect your My Passport Hard Disk Drive from your computer once the upload process is finished.
Step 9: Safely Ejecting the My Passport Hard Disk Drive
Once the upload process is complete and all the files have been successfully transferred to your My Passport Hard Disk Drive, it’s important to safely eject or disconnect the external hard drive from your computer. Follow these instructions to ensure a safe removal:
- Locate the “Safely Remove Hardware” or “Eject” icon in the system tray on your computer. This icon typically looks like a USB plug with a green checkmark or an arrow pointing upwards.
- Click on the “Safely Remove Hardware” or “Eject” icon to open the removal menu.
- From the removal menu, select the My Passport Hard Disk Drive that you want to eject. This will initiate the ejection process.
- Wait for a notification or a confirmation message indicating that it is safe to disconnect the external hard drive.
Once you receive the confirmation that it is safe to do so, you can unplug the USB cable connecting the My Passport Hard Disk Drive from your computer. It is now safe to physically remove the external hard drive.
By safely ejecting the My Passport Hard Disk Drive, you prevent any potential data loss or corruption that could occur from an abrupt removal. It ensures that all the files are properly written and saved on the external hard drive.
With that, you have successfully uploaded your files to your My Passport Hard Disk Drive and safely disconnected it from your computer.
Congratulations! You have now completed the entire process of uploading your files to your My Passport Hard Disk Drive. Your files are securely stored and easily accessible on your external hard drive whenever you need them. Whether it’s important documents, memorable photos, or your favorite music, you can rest assured that your files are safe and protected.
Conclusion
Uploading files to your My Passport Hard Disk Drive is a simple and convenient way to store and backup your important data. By following the step-by-step instructions in this guide, you should now have a good understanding of how to successfully upload files to your external hard drive.
We started by connecting the My Passport Hard Disk Drive to your computer, ensuring a stable and reliable connection. Then, we guided you through the process of opening the File Explorer or Finder to locate the files you want to upload. Once the files were selected, we showed you how to copy them and navigate to the My Passport Hard Disk Drive folder.
You then learned how to paste the copied files into the external hard drive’s folder, successfully transferring them. Throughout this process, it’s important to monitor the upload progress to ensure that all the files are properly uploaded. Finally, we emphasized the importance of safely ejecting the My Passport Hard Disk Drive to avoid data corruption.
By following these steps, you can confidently upload files to your My Passport Hard Disk Drive, giving you peace of mind knowing that your data is securely stored and readily accessible.
Whether you’re backing up valuable documents, storing precious memories, or organizing your media, the My Passport Hard Disk Drive is a reliable solution for all your storage needs. Remember to regularly back up your files to ensure that you never lose important data.
We hope this guide has been helpful and that you can now confidently upload files to your My Passport Hard Disk Drive. Enjoy the convenience and security of having your files safely stored on your external hard drive!


