Introduction
Your laptop is your portable workhorse, helping you power through tasks and enjoy entertainment on the go. But what if you find yourself in need of a performance boost, particularly when it comes to graphics-intensive applications like gaming or graphic design? Upgrading your laptop’s graphics card can provide that much-needed enhancement, unlocking the potential for smoother gameplay, improved visual quality, and faster rendering times.
However, unlike desktop computers, laptops are notorious for their limited upgrading capabilities. While some high-end gaming laptops have the option to swap out graphics cards, most mainstream laptops have integrated or non-upgradable graphics solutions. This leaves many users wondering if upgrading their laptop’s graphics card is even possible.
In this article, we will delve into the world of laptop graphics card upgrades, exploring the limitations and possibilities. We will guide you through the process of researching compatibility, preparing your laptop for the upgrade, removing the old graphics card, installing the new one, and ensuring proper software integration. We will also discuss the importance of updating graphics drivers and BIOS, as well as offer tips and recommendations for optimizing the performance of your upgraded graphics card.
While it’s important to note that not all laptops can be easily upgraded, especially when it comes to graphics cards, it’s worth exploring your options to see if an upgrade is feasible for your specific laptop model. With the right tools, knowledge, and a little bit of patience, you might be able to transform your laptop into a graphics powerhouse and take your computing experience to the next level.
Understanding the Limitations of Laptop Graphics Cards
Before diving into the process of upgrading your laptop’s graphics card, it’s essential to understand the limitations that you may come across. Unlike desktop computers, laptops have components that are tightly integrated, making it difficult to upgrade certain hardware. Graphics cards are one such component that often falls into this category.
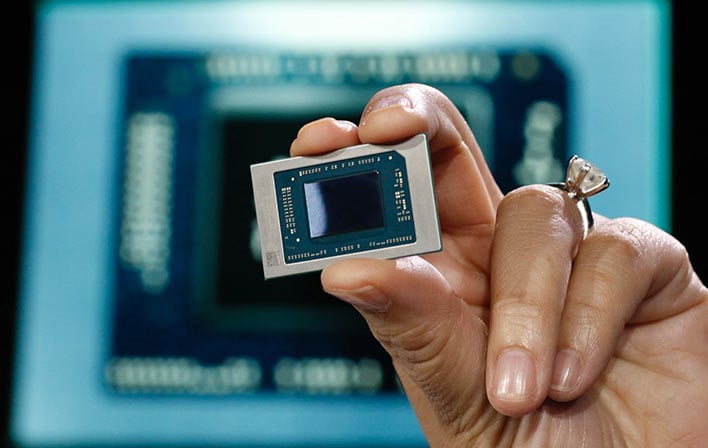
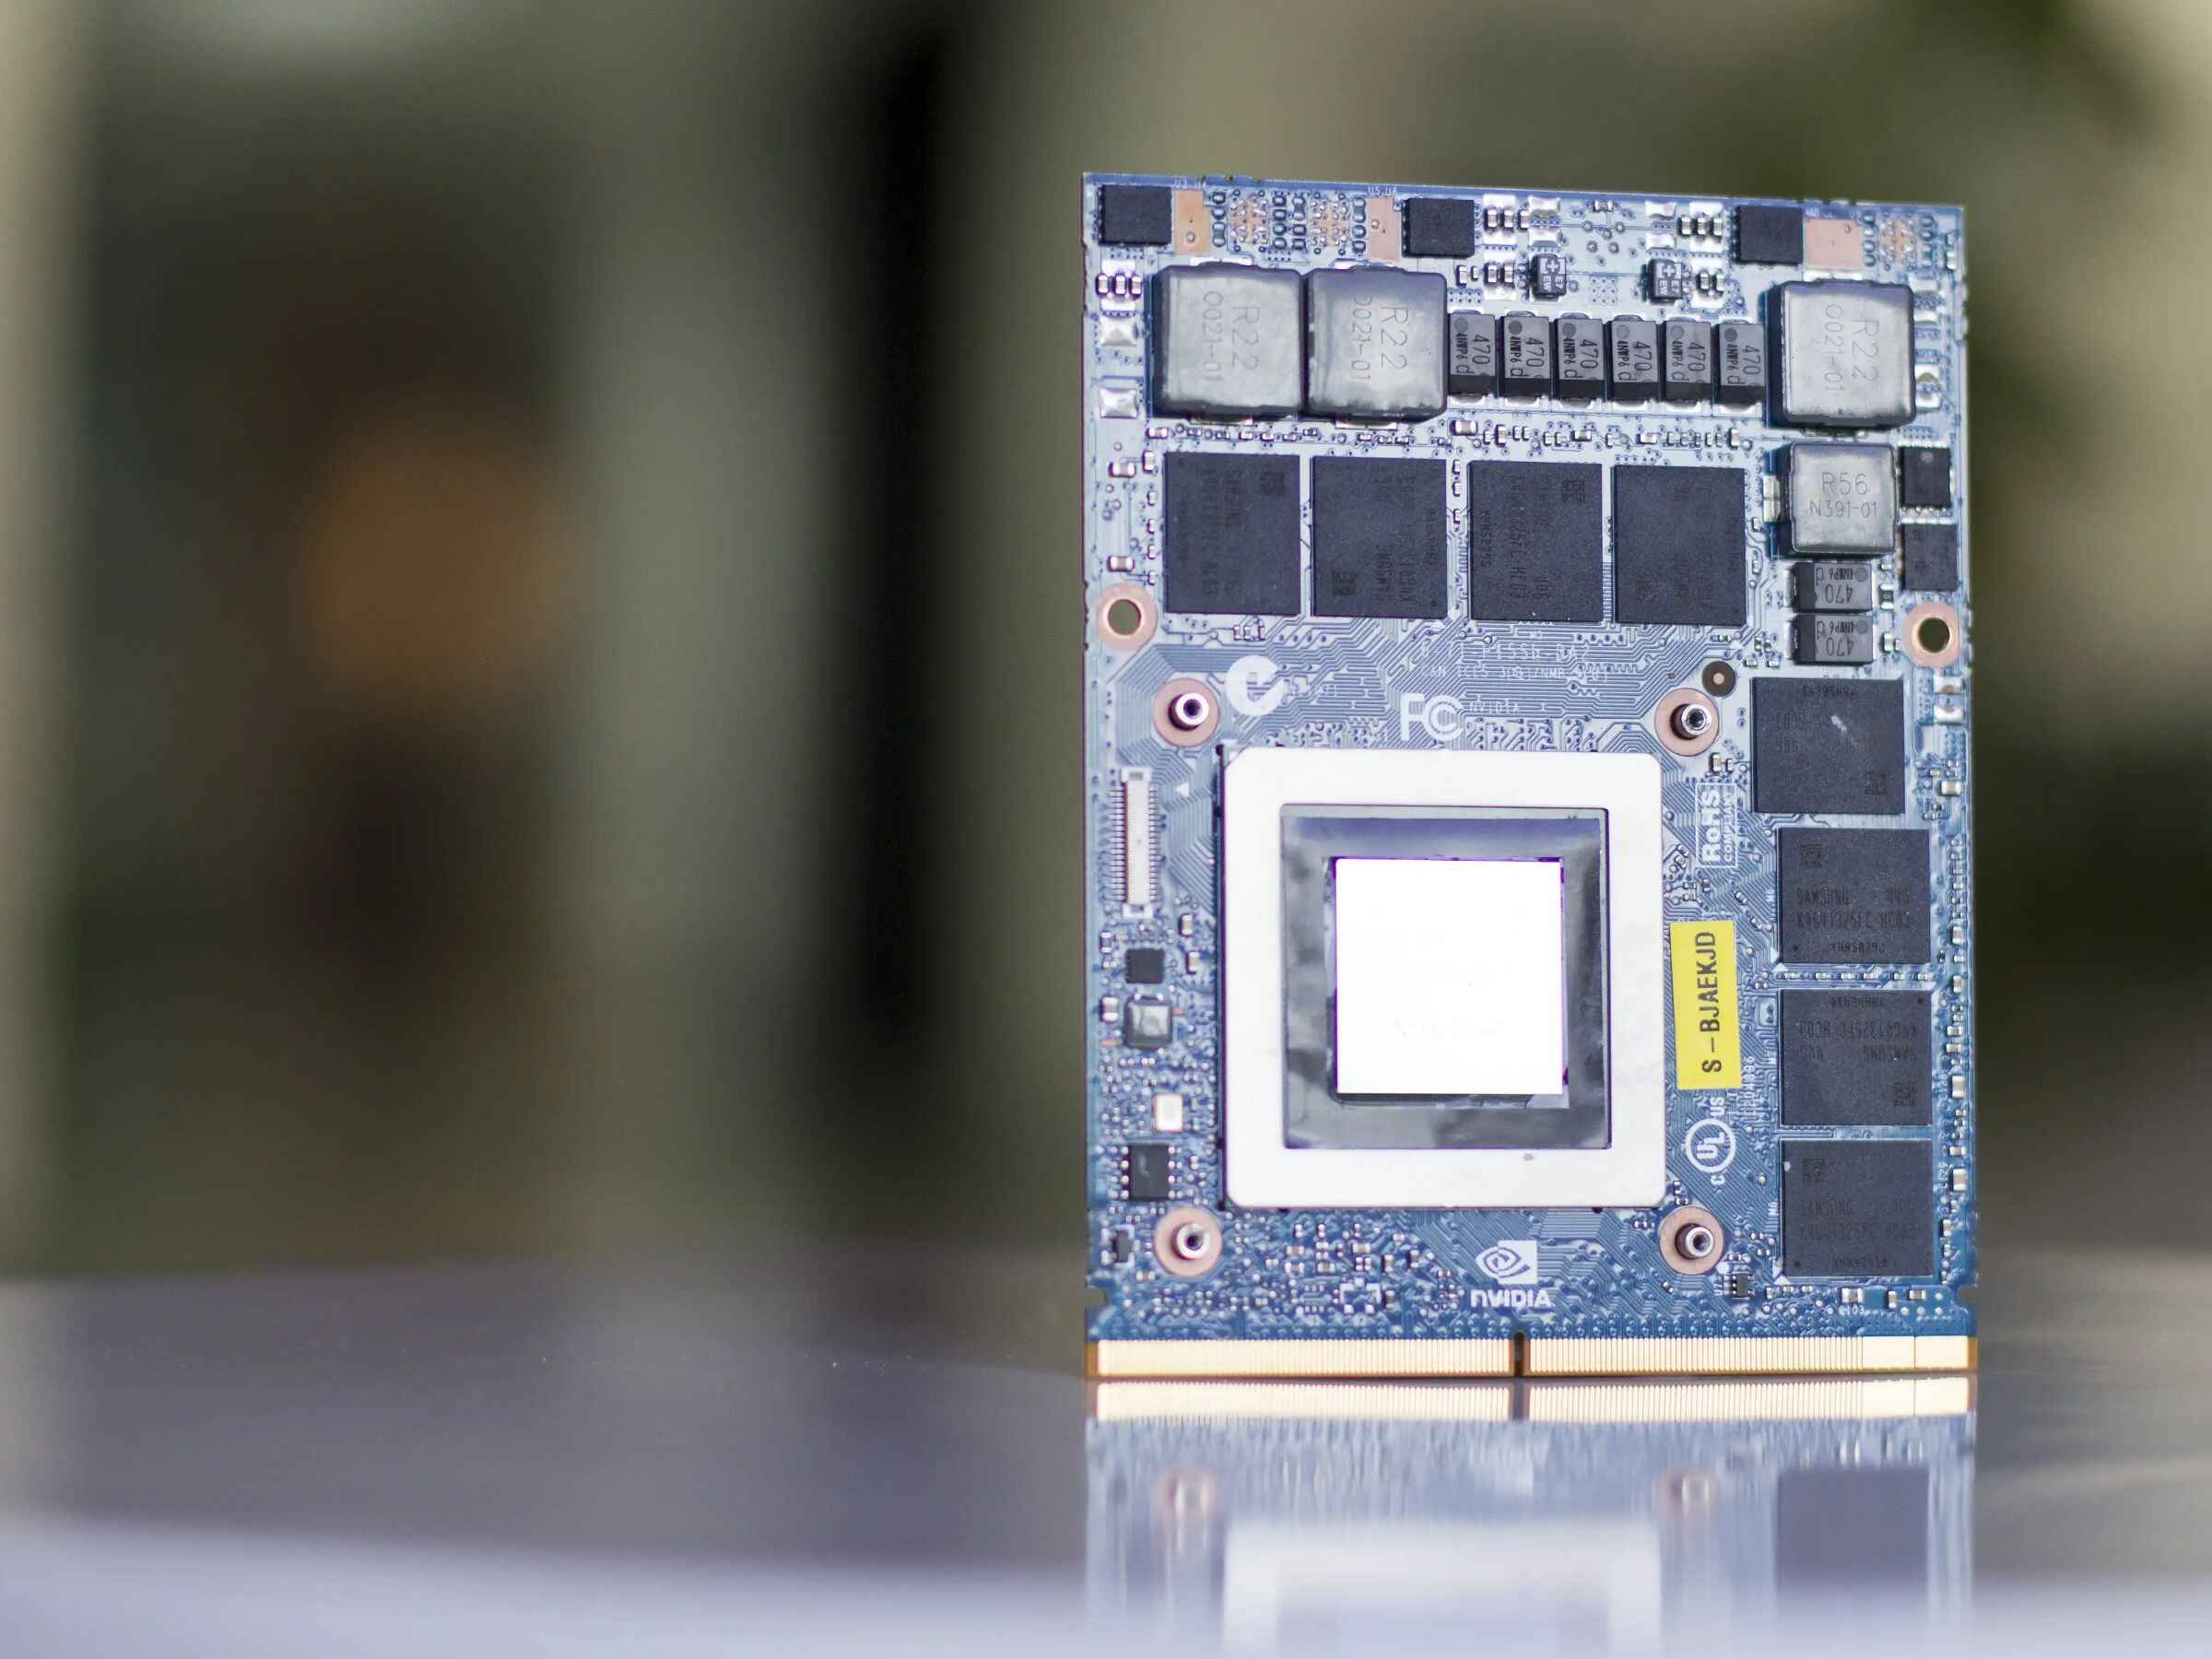
One of the primary limitations of laptop graphics cards is their physical form factor. Unlike desktop graphics cards, which are larger and can be easily plugged into PCIe slots, laptop graphics cards are typically soldered directly onto the motherboard. This means that they are not easily replaceable or upgradable without professional expertise and specialized tools.
Furthermore, many laptops have restrictions set by the manufacturer, known as whitelisting, which only allow certain graphics cards to be compatible with the laptop. This is done to maintain stability and prevent compatibility issues. It’s crucial to research your specific laptop model and check if any whitelisting restrictions are in place before purchasing a new graphics card.
Another limitation to consider is the power supply. Upgrading to a more powerful graphics card may require more power than your laptop’s existing power supply can provide. Higher-end graphics cards often demand a dedicated power connection, which most laptops do not have. It’s important to determine if your laptop can handle the increased power requirements before proceeding with an upgrade.
Thermal limitations are also a consideration. Laptops are designed with heat dissipation in mind, and upgrading to a more powerful graphics card may result in higher temperatures. This can lead to thermal throttling, where the laptop’s components automatically reduce their performance to prevent overheating. Ensuring that your laptop has adequate cooling mechanisms in place is crucial to avoid potential heat-related issues.
Lastly, it’s essential to note that not all laptops have the necessary interface to support a dedicated graphics card. Many laptops prioritize slimness and portability over expandability, resulting in a lack of PCIe slots or other interfaces required for upgrading the graphics card.
In summary, while there are limitations to consider, it is still possible to upgrade the graphics card in some laptops. It’s important to understand these limitations and assess your laptop’s compatibility before proceeding with an upgrade. Doing thorough research, consulting with professionals if needed, and taking the necessary precautions will increase your chances of a successful upgrade.
Researching Compatibility and Upgrading Options
Once you’ve decided to upgrade your laptop’s graphics card, the next step is to research compatibility and explore your upgrading options. Understanding the compatibility requirements and available upgrade options will help you make informed decisions and ensure a successful upgrade process.
The first step is to identify the specific model of your laptop’s current graphics card. This information can be found in your laptop’s specifications or system information. Knowing the exact model will help you determine the type of graphics card it uses and the interface it supports.
With the current graphics card information in hand, start researching the compatible upgrade options for your laptop. Visit the official website of the laptop manufacturer to search for any official documentation or support pages that outline the supported upgrade options for your laptop model. Look for compatibility lists, user manuals, or technical specifications that may provide insights into compatible graphics cards.
While the manufacturer’s website is a good starting point, it’s also worthwhile to explore online forums, communities, and tech websites dedicated to laptop hardware upgrades. These platforms often have discussions and user experiences regarding successful graphics card upgrades for specific laptop models. This firsthand information can be invaluable in helping you determine which graphics cards have been tested and confirmed to work with your laptop.
Additionally, consider reaching out to professional laptop repair or upgrade services. These experts have the knowledge and experience to guide you through the compatibility research process. They can also provide recommendations based on your specific laptop model, taking into account any limitations or restrictions that may exist.
As you research compatibility, keep in mind that you might need to consider factors beyond just the graphics card itself. Consider the power requirements, thermal constraints, and physical form factor of the potential upgrade. Ensure that your laptop’s power supply and cooling system can support the new graphics card to avoid any compatibility issues or performance limitations.
Finally, budget is another crucial aspect to consider. Graphics cards vary in price, and it’s important to find a balance between your budget and the performance upgrade you’re seeking. Researching prices, comparing different models, and reading customer reviews will help you make an informed decision.
Remember, thorough research is key when it comes to compatibility and upgrading options. Take your time to gather as much information as possible before making a decision. This will increase your chances of a successful graphics card upgrade and enhance your laptop’s overall performance.
Preparing Your Laptop for the Upgrade
Before jumping into the physical process of upgrading your laptop’s graphics card, it’s essential to prepare your laptop to ensure a smooth and hassle-free upgrade. Taking the necessary precautions and preparing your laptop will minimize the risk of damaging any components and help you stay organized throughout the process.
The first step in preparing your laptop is to back up all your important data. Upgrading the graphics card involves opening up your laptop and tinkering with its internal components. It’s always better to be safe than sorry, so ensure that all your essential files, documents, and media are securely backed up either on an external hard drive, cloud storage, or another computer.
Next, gather all the tools you will need for the upgrade. Depending on your laptop model, you may need a screwdriver, thermal paste, antistatic wrist strap, and other specialized tools. Consult the laptop manufacturer’s documentation or online resources to determine the specific tools required. Having all the necessary tools ready before you begin will prevent any unnecessary delays or frustrations during the upgrade process.
Make sure you have a clean and well-lit workspace. Find a flat surface with enough space to lay out your laptop and its components. Working in a clean environment will help prevent dust and debris from entering the laptop and potentially causing damage. If possible, work on an anti-static mat or surface to protect sensitive electronic components.
It’s also a good idea to consult your laptop’s user manual or the manufacturer’s website for any specific instructions or precautions related to upgrading hardware. Some laptops may have unique steps or considerations that you need to be aware of before starting the upgrade.
Before proceeding with the upgrade, fully power off your laptop and unplug it from the power source. This ensures that there is no electricity flowing through the system and reduces the risk of any electrical shocks or damage to components. It’s also advisable to disconnect any external devices or peripherals that are connected to the laptop.
If your laptop has an integrated graphics card, you might need to disable it in the BIOS settings before installing the new graphics card. Refer to your laptop’s user manual or the manufacturer’s support documentation for instructions on how to access and modify the BIOS settings.
Finally, take a moment to mentally prepare yourself for the upgrade process. Stay focused, patient, and organized throughout the process to avoid any mistakes or accidents. Following the proper steps and guidelines will ensure a successful upgrade and minimize the risk of any damage to your laptop.
By taking these necessary preparatory steps, you will create a conducive environment for the hardware upgrade and reduce any potential risks. Once you have everything ready, you can move on to the next step of removing the old graphics card from your laptop.
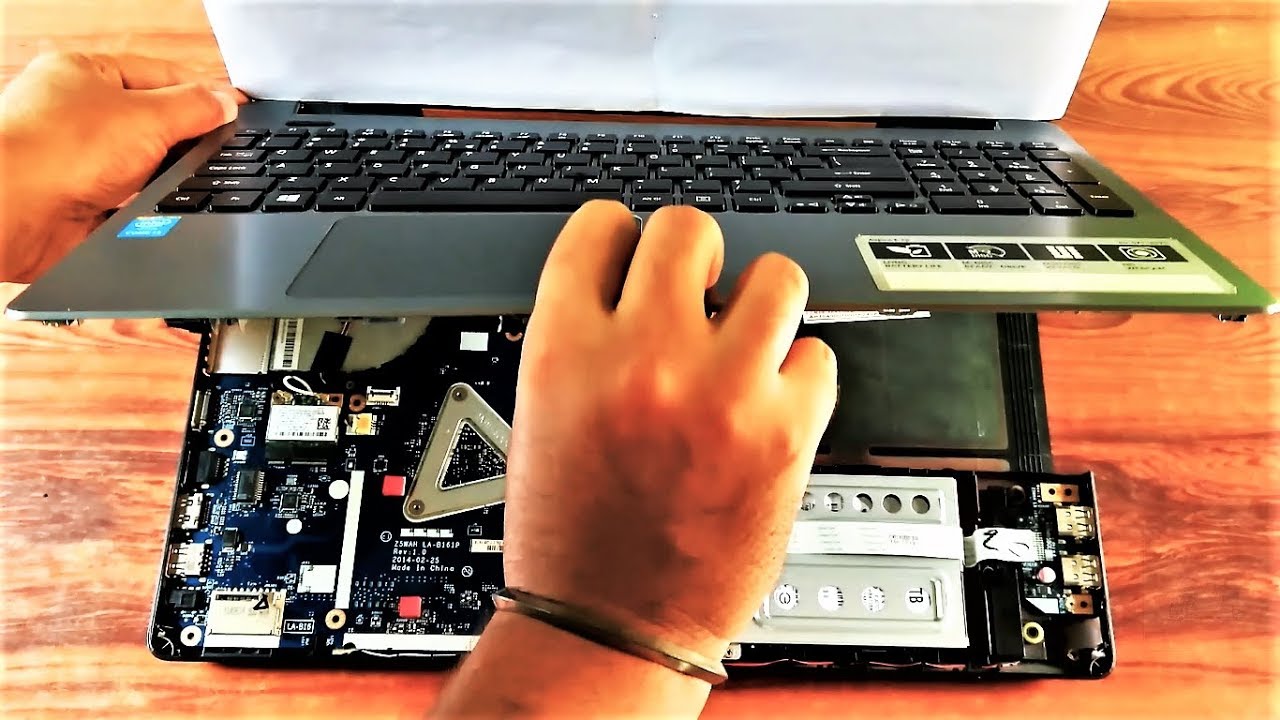
Removing the Old Graphics Card
Now that you have prepared your laptop for the upgrade, it’s time to remove the old graphics card. Removing the old graphics card may vary depending on your laptop model and its internal design. It’s important to handle the components with care and follow the steps outlined below to ensure a successful removal.
Begin by locating the old graphics card inside your laptop. Most laptops have a dedicated access panel on the bottom or back that allows you to reach the internal components. Consult your laptop’s user manual or manufacturer’s documentation to find the precise location of the graphics card.
Before touching any internal components, it’s crucial to discharge any static electricity that may have built up in your body. To do this, you can use an anti-static wrist strap grounded to a metal object or by periodically touching a grounded metal surface throughout the process. This helps prevent any accidental electrostatic discharge that could damage the sensitive electronics.
Once you’ve discharged static electricity, gently remove any screws or securing mechanisms that hold the old graphics card in place. Be cautious and keep track of the screws as they vary in size and placement. Use a small screwdriver to carefully unscrew and set aside the screws in a safe location.
Now, you can carefully lift and remove the old graphics card from its slot. Hold it by the edges and avoid touching any of the sensitive components on the card. Depending on the design, the graphics card might be connected to the motherboard by a connector or ribbon cable. Ensure that you disconnect any cables or connectors properly before completely removing the card.
Inspect the old graphics card for any signs of damage or wear. It’s a good idea to compare it with the new graphics card to ensure that they have the same physical dimensions and connections. This step can help confirm compatibility and serve as a reference point during the installation of the new graphics card.
After removing the old graphics card, carefully place it in an anti-static bag or wrap it with an anti-static material. This is important for the safe storage of the old component and can be useful if you ever need to return to the original graphics card or troubleshoot any issues in the future.
With the old graphics card successfully removed, you have completed a crucial step in the upgrade process. Keep the old graphics card in a safe location and proceed to the next section where we will guide you through the installation of the new graphics card.
Installing the New Graphics Card
With the old graphics card removed, it’s time to install the new graphics card in your laptop. Installing a new graphics card can greatly enhance your laptop’s performance and capabilities, allowing you to enjoy smoother graphics, better gaming experiences, and improved visual quality. Follow these steps to ensure a successful installation of the new graphics card.
Take out the new graphics card from its packaging and inspect it for any physical damage. Make sure that the new card matches the specifications and requirements of your laptop, including its form factor, power requirements, and compatibility with the interface. Check the manufacturer’s documentation or the card’s user manual for any specific installation instructions or recommendations.
Before handling the new graphics card, discharge any static electricity by using an anti-static wrist strap or periodically grounding yourself by touching a metal object. Static electricity can damage the sensitive electronics of the new card, so it’s crucial to follow proper grounding procedures.
Locate the graphics card slot in your laptop. It is typically situated in the same area where you removed the old graphics card from. The slot may have a latch or securing mechanism that needs to be opened, so consult your laptop’s user manual or manufacturer’s documentation for guidance on accessing and preparing the slot.
Gently insert the new graphics card into the slot, ensuring that it is properly aligned with the connector. Apply gentle and even pressure until the card is firmly seated in the slot. Do not force it in, as this can cause damage to both the card and the slot. If the card has a separate power connector, check that it is properly connected to the power supply in your laptop.
Once the new card is securely in place, reattach any screws or securing mechanisms to hold it firmly in position. Use the screws that came with your laptop or those recommended by the new graphics card’s documentation. Tighten the screws gently and evenly to avoid putting excessive pressure on the card.
Check all cable connections and ensure that everything is properly connected. Double-check that any previously disconnected cables or connectors are securely reattached. Take a moment to verify that there are no obstructions or loose components in the vicinity of the graphics card that could hinder its performance or cause damage.
Now that the new graphics card is installed, it’s time to close up the laptop. Replace the access panel or cover and secure it using the screws you previously removed. Make sure that all screws are tightened properly to maintain the overall integrity of your laptop’s casing.
Finally, before turning on your laptop, it’s recommended to perform a thorough visual inspection of the installation area. Ensure that everything looks secure and in place. This visual check can help detect any potential issues before powering up your laptop.
With the new graphics card installed, you are one step closer to enjoying improved performance and enhanced graphics capabilities. In the next section, we will discuss the importance of updating graphics drivers and BIOS to ensure the optimal functioning of your newly installed graphics card.
Updating Graphics Drivers and BIOS
After installing a new graphics card in your laptop, it’s essential to update the graphics drivers and BIOS to ensure compatibility and optimal performance. Graphics drivers and the BIOS (Basic Input/Output System) firmware play a crucial role in the functioning of your graphics card, and keeping them up to date is vital. Follow these steps to update these essential components.
The graphics drivers are software programs that communicate with the operating system and enable it to interact with the graphics card. Outdated or incompatible drivers can result in reduced performance, compatibility issues, and graphical glitches. Begin by visiting the website of your graphics card manufacturer, such as NVIDIA or AMD, and navigate to the drivers download section.
Locate the appropriate drivers for your specific graphics card model, operating system, and laptop configuration. Download the latest drivers, following the manufacturer’s instructions. Once the download is complete, install the drivers by running the downloaded setup file. Follow the on-screen instructions and restart your laptop if prompted.
Updating the BIOS is equally important as it provides low-level system functionality and compatibility between hardware components. It’s essential to ensure that your laptop’s BIOS supports the new graphics card and any associated features or optimizations. Visit the laptop manufacturer’s website and search for the support section corresponding to your laptop make and model.
Check for any available BIOS updates or firmware upgrades specific to your laptop. Carefully read the documentation associated with each update to determine if it includes any improvements or compatibility enhancements related to graphics cards. Follow the manufacturer’s instructions to download and install the BIOS updates, paying attention to any warnings or precautions mentioned.
When updating the BIOS, it’s crucial to ensure that your laptop is connected to a reliable power source and that the power supply remains uninterrupted throughout the update process. Any interruption or loss of power during the update can lead to irreversible damage to the laptop’s firmware or other components.
After updating the graphics drivers and BIOS, restart your laptop to apply the changes. Once your laptop has rebooted, it’s a good practice to verify that the updated drivers and BIOS are functioning correctly. Open Device Manager (Windows) or System Information (macOS) and navigate to the Display Adapters section. Ensure that the correct name of your new graphics card is displayed without any warning symbols or errors.
To further optimize your newly installed graphics card, consider installing any additional software provided by the graphics card manufacturer. These software packages often include utilities for fine-tuning graphics settings, monitoring performance, and enabling features specific to your graphics card.
By updating the graphics drivers and BIOS, you ensure that your new graphics card functions at its best and remains compatible with your laptop’s hardware and software. A smooth and updated system will help maximize the performance and longevity of your graphics card.
Testing and Troubleshooting the New Graphics Card
Once you have installed and updated the new graphics card in your laptop, it’s time to test and troubleshoot its functionality. Testing the new graphics card will ensure that it is functioning correctly and delivering the expected performance. This section will guide you through the process of testing and troubleshooting the new graphics card.
Begin by powering on your laptop and allowing it to boot up. Once it has started, check if the operating system recognizes the new graphics card. Open the Device Manager (Windows) or System Information (macOS) and verify that the correct graphics card is listed under the Display Adapters section without any errors or warning symbols.
To ensure that the new graphics card is performing optimally, run benchmark tests or put the card through its paces by running graphics-intensive applications or games. These tests will push the graphics card to its limits and allow you to evaluate its performance and stability. Pay attention to any artifacts, screen tearing, crashes, or other anomalies that may indicate issues with the new card.
If you experience any problems or performance issues, make sure that you have the latest drivers installed for your new graphics card. Visit the manufacturer’s website and download any updated drivers specific to your new graphics card model and operating system. Reinstall the drivers, following the manufacturer’s instructions, and restart your laptop. Retry the benchmark tests or graphics-intensive applications to see if the issues persist.
If problems persist after updating the drivers, it’s essential to troubleshoot further. Check for any loose connections or cables inside your laptop, ensuring that all components are firmly seated and securely attached. Verify that the power supply is adequate for the new graphics card’s requirements and that the cooling system is functioning properly to prevent thermal throttling or overheating.
It’s also advisable to consult the laptop manufacturer’s support resources, such as their website, user forums, or customer support channels. They may offer specific troubleshooting steps or have knowledge of common issues related to your laptop model and graphics card upgrades. Engaging with the manufacturer’s support can help you pinpoint and address any underlying problems.
In some cases, you may need to revert to the previous graphics card if the issues persist or if the compatibility of the new card with your specific laptop model proves to be problematic. Store the new graphics card safely for potential future use or consider seeking professional assistance for further diagnosis and resolution.
Remember to maintain a record of any steps taken, error messages encountered, or observations made during the testing and troubleshooting process. This documentation can be valuable when seeking assistance or when dealing with warranty claims or support requests.
By thoroughly testing and troubleshooting the new graphics card, you can address any issues early on and ensure that it is running optimally. Taking the time to perform these tests and resolve any issues will result in a smooth and enjoyable computing experience with your upgraded graphics card.
Tips and Recommendations for Optimizing Performance
Now that you have successfully upgraded your laptop’s graphics card, optimizing its performance can further enhance your computing experience. Here are some tips and recommendations to help you get the most out of your newly installed graphics card:
1. Keep drivers up to date: Regularly check for and install the latest drivers provided by the graphics card manufacturer. These updates often contain bug fixes, performance improvements, and optimizations that can enhance the compatibility and performance of your graphics card.
2. Adjust graphics settings: Explore the graphics settings within your applications and games. Optimize them according to your preferences and the capabilities of your new graphics card. Adjusting settings such as resolution, anti-aliasing, texture quality, and shadow quality can help you strike the right balance between visuals and performance.
3. Monitor and manage temperatures: Higher-end graphics cards can generate significant heat. Ensure that your laptop has proper cooling mechanisms in place and consider using third-party software to monitor the temperatures of your graphics card. Managing and maintaining suitable temperatures can prevent overheating and performance throttling.
4. Clean and optimize your system: Regularly clean out dust and debris from your laptop’s cooling vents and fans. An accumulation of dust can restrict airflow and cause higher temperatures. Additionally, optimize your system by removing unnecessary startup programs and conducting regular disk cleanups to keep your laptop running smoothly.
5. Consider external cooling solutions: If you find that your laptop’s built-in cooling system is not sufficient, you may opt for external cooling solutions such as laptop cooling pads or laptop cooling fans. These accessories can help dissipate heat more effectively and keep your laptop’s temperatures in check during demanding tasks.
6. Monitor performance with benchmarking: Utilize benchmarking software to assess and compare the performance of your graphics card. Run benchmarks before and after making any performance-related changes to measure improvements and identify any potential issues.
7. Optimize power settings: Adjust your laptop’s power settings to strike a balance between performance and battery life. High-performance mode can provide maximum graphics card performance at the cost of increased power consumption, while power-saving mode can prioritize battery life over graphics performance.
8. Update your laptop’s BIOS: Periodically check for BIOS updates from the laptop manufacturer and install them if necessary. BIOS updates can introduce optimizations and fixes that can improve compatibility and performance with your new graphics card.
9. Seek professional help if needed: If you encounter persistent performance issues, artifacts, or compatibility problems, consider consulting professional laptop repair or upgrade services. These experts can diagnose and address any underlying issues, ensuring your graphics card is functioning optimally.
10. Enjoy your upgraded experience: Lastly, take the time to enjoy the improved visuals, smoother gameplay, and enhanced performance that your new graphics card brings. Whether you’re gaming, editing videos, or working on graphic-intensive tasks, your upgraded graphics card will provide a significant boost to your laptop’s capabilities.
By following these tips and recommendations, you can optimize the performance and maximize the benefits of your new graphics card. Experiment, customize, and fine-tune the settings to suit your preferences and specific needs. Embark on a multimedia journey with confidence, knowing that your laptop is equipped with a powerful graphics card.
Conclusion
Upgrading your laptop’s graphics card can be a game-changer, unlocking new possibilities for high-performance gaming, graphic design, and multimedia experiences. While laptop graphics card upgrades come with certain limitations and considerations, this article has guided you through the process, from researching compatibility to troubleshooting and optimizing performance.
Understanding the limitations of laptop graphics cards is crucial, as these components are often integrated and not easily upgradeable. However, with thorough research and knowledge of your laptop model, you can determine whether an upgrade is possible and explore compatible options.
Preparing your laptop for the upgrade is essential to ensure a smooth process. Backing up your data, gathering the necessary tools, and creating a clean workspace will minimize risks and frustration. Removing the old graphics card and installing the new one require careful handling and attention to detail, ensuring proper alignment and connection to optimize compatibility.
Once the new graphics card is installed, updating the graphics drivers and BIOS is vital to ensure optimal performance. Regularly checking for driver updates and BIOS enhancements will improve compatibility and resolve any potential issues that arise after the upgrade.
Testing and troubleshooting the new graphics card is necessary to ensure its proper functionality. Running benchmark tests, monitoring temperatures, and seeking assistance from the laptop manufacturer can help you identify and address any performance issues or compatibility concerns.
To maximize performance, follow recommendations such as adjusting graphics settings, managing temperatures, cleaning your system, and considering external cooling solutions. Regularly update your laptop’s BIOS, optimize power settings, and seek professional help if needed.
In conclusion, while laptop graphics card upgrades present challenges, they can greatly enhance your laptop’s capabilities. By following the steps and recommendations outlined in this article, you can embark on a successful graphics card upgrade journey and unlock a new level of performance and visual experience on your laptop.