Introduction
Welcome to this guide on how to update RAM on your laptop. If you want to improve your laptop’s performance and increase its ability to handle more tasks smoothly, upgrading the RAM is a great solution. RAM (Random Access Memory) is the temporary storage space that your computer uses to quickly access data while it is running. By upgrading your laptop’s RAM, you can ensure that it has enough memory to handle multiple applications or software simultaneously, making it faster and more efficient.
However, before diving into the process of updating the RAM, it is important to understand the basics of RAM and its role in your laptop’s performance. In this guide, we will explain what RAM is and how it affects your laptop’s speed and multitasking capabilities. We will also discuss the importance of checking compatibility between your laptop and the new RAM modules you plan to install.
Furthermore, we will provide you with a list of the necessary tools you will need for the RAM update process, ensuring that you have everything ready before you begin. We will guide you through the steps to shut down your laptop properly and open the case safely, making it easier to access the RAM slots. Once inside, we will show you how to remove the old RAM modules and install the new ones correctly.
After you have successfully installed the new RAM, we will explain how to close the laptop case securely and power on your laptop to test the newly upgraded RAM. Finally, we will conclude with some tips and reminders to ensure that you have a successful RAM upgrade.
Upgrading your laptop’s RAM can significantly enhance its overall performance, allowing you to multitask smoothly and run demanding applications without any hiccups. So, let’s get started on this journey to boost your laptop’s performance by updating its RAM!
Understanding RAM
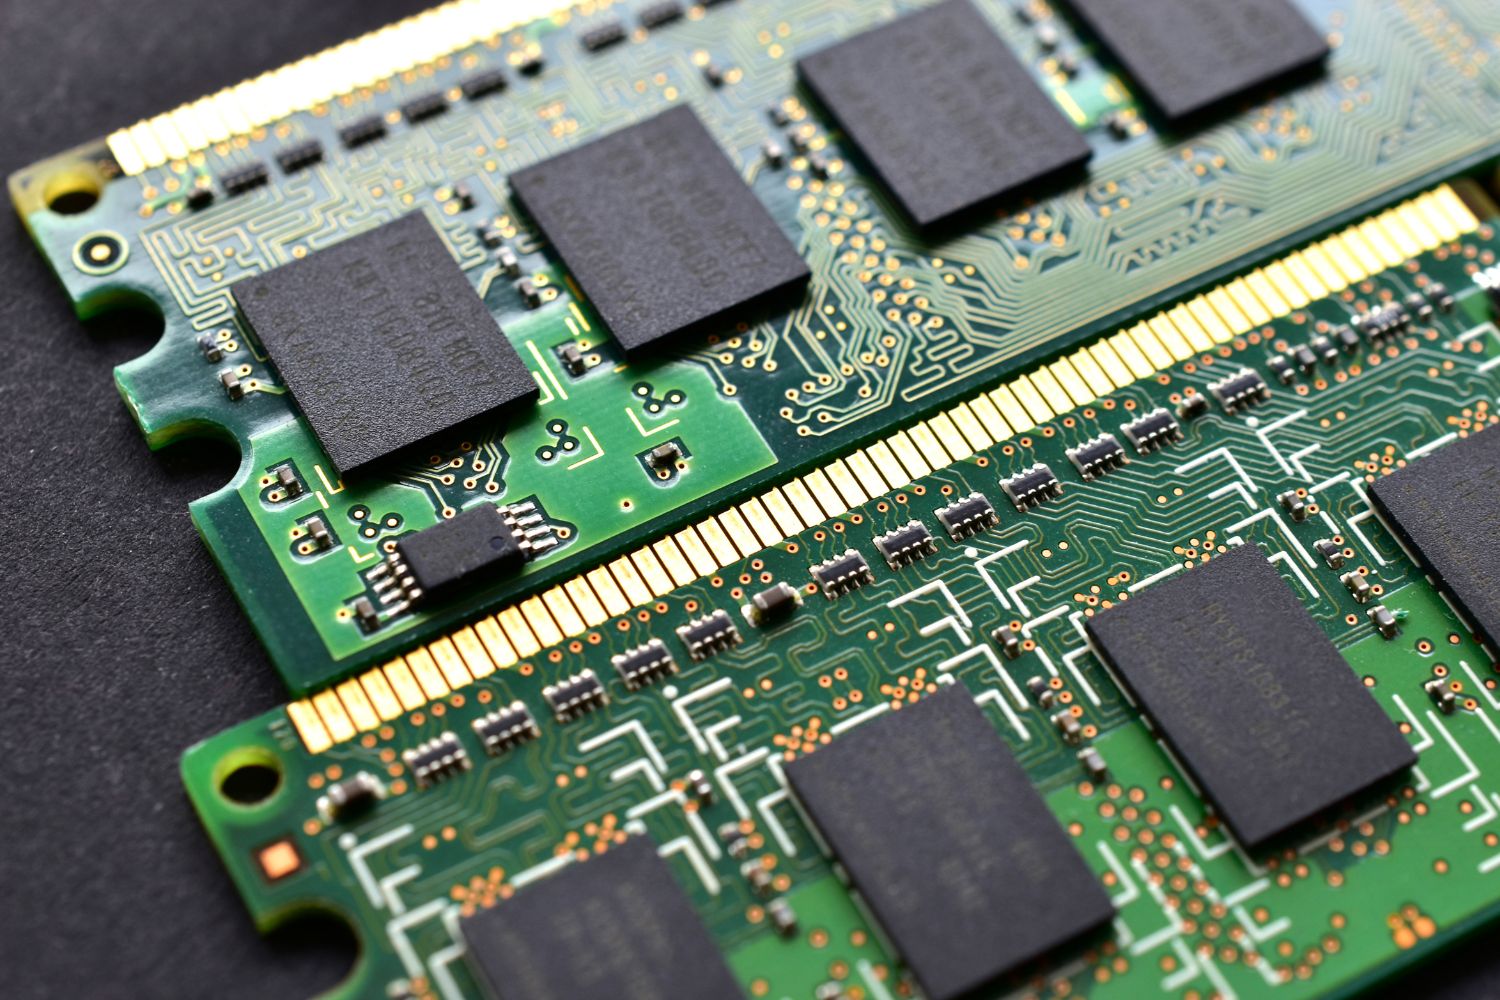
Before diving into the process of updating your laptop’s RAM, it is essential to have a clear understanding of what RAM is and how it affects your laptop’s performance. RAM, or Random Access Memory, is a crucial component of your computer that temporarily stores data that your computer needs to access quickly. It acts as a temporary workspace for your laptop’s processor, allowing it to perform tasks more efficiently.
RAM plays a vital role in multitasking and the overall speed of your laptop. When you open multiple applications or run memory-intensive software, your laptop needs sufficient RAM to handle the workload. Insufficient RAM can lead to sluggish performance, slower load times, and even system crashes.
The amount of RAM in your laptop determines how much data it can store and access simultaneously. RAM capacity is measured in gigabytes (GB). The more RAM your laptop has, the more tasks it can handle at once, and the smoother your multitasking experience will be.
It is important to note that RAM is different from the storage capacity of your hard drive or solid-state drive (SSD). While storage is used to store files, documents, and other data even when the computer is powered off, RAM is volatile memory and only holds data while the computer is running. When you power off your laptop, the contents of RAM are erased.
Additionally, the speed of your RAM, measured in megahertz (MHz), also affects your laptop’s performance. Higher-speed RAM allows for faster data transfer and improved overall responsiveness, especially when running demanding applications or software.
Understanding the importance of RAM and its impact on your laptop’s performance is crucial when deciding to upgrade. By increasing your laptop’s RAM capacity and choosing higher-speed RAM modules, you can optimize its multitasking capabilities and overall performance.
Checking Compatibility
When it comes to updating your laptop’s RAM, it is vital to ensure that the new RAM modules are compatible with your laptop. Incompatible RAM can prevent your laptop from functioning properly or even cause damage. Therefore, before purchasing new RAM, it is essential to perform a compatibility check to avoid any potential issues.
The first step in checking compatibility is to determine the maximum amount of RAM your laptop can support. This information can usually be found in your laptop’s user manual or by visiting the manufacturer’s website. It will specify the maximum RAM capacity your laptop can handle. It is crucial to note that some laptops have limitations on the amount of RAM they can support, so make sure you do not exceed this limit.
Next, you need to identify the type of RAM your laptop requires. Common types of RAM include DDR3, DDR4, and DDR5. Again, consulting your laptop’s user manual or manufacturer’s website will provide you with the necessary information. It is important to choose RAM modules that match the required type to ensure compatibility.
Aside from the RAM type, you should also consider the speed of the RAM. It is recommended to match the speed of the existing RAM modules in your laptop or choose RAM with a higher speed. Mismatched RAM speeds may result in the RAM running at a lower speed, impacting performance.
Furthermore, you need to check the number of RAM slots available in your laptop. This will determine the number of RAM modules you can install. Some laptops have one or two RAM slots, while others may have more. Make sure to purchase the appropriate number of RAM modules based on the available slots in your laptop.
Lastly, check if your laptop has any specific requirements for RAM module size or form factor. Some laptops may require low-profile or smaller-sized RAM modules due to space constraints. It is crucial to choose RAM modules that fit properly in your laptop’s slots without any physical obstruction.
By performing a thorough compatibility check, you can ensure that the new RAM modules you purchase are compatible with your laptop. This will save you time, effort, and potential headaches down the line, allowing for a smooth and successful RAM upgrade.
Gathering Necessary Tools
Before you begin the RAM upgrade process, it’s important to gather all the necessary tools to ensure a smooth and hassle-free experience. Having the right tools on hand will make the installation process easier and help you avoid any potential damage to your laptop or the new RAM modules. Here are the essential tools you’ll need:
- Screwdriver: Most laptops require a small Phillips or Torx screwdriver to remove the screws securing the laptop’s case. Check the size and type of screws on your laptop beforehand to determine the appropriate screwdriver needed.
- Antistatic wrist strap: Electronics are sensitive to static electricity, which can cause damage. An antistatic wrist strap will help discharge any static buildup from your body, protecting your laptop’s components during the installation process.
- Clean cloth or microfiber cloth: Keeping a clean cloth or a microfiber cloth handy is essential for wiping away dust and fingerprints from the RAM modules and other components. This ensures a clean and secure connection when installing the new RAM.
- Compressed air canister: Dust can accumulate inside your laptop over time, impacting performance and potentially causing overheating. Using a canister of compressed air allows you to blow away any dust or debris from the RAM slots, ensuring a clean installation.
- Container for screws: It’s always a good idea to have a small container or magnetic tray to hold the screws securely. This prevents them from getting lost during the process, ensuring that you can easily reassemble your laptop afterward.
These tools are essential for a successful RAM upgrade. Make sure to gather them all before starting the process to avoid any interruptions or delays. It’s also a good idea to prepare a clean and well-lit workspace, free of any clutter or static-inducing materials, to ensure the safety of your laptop and the new RAM modules.
With the necessary tools at your disposal, you’ll be well-equipped to proceed with the RAM upgrade process confidently and efficiently. Let’s move on to the next steps of shutting down your laptop and opening the case.
Shutting Down Laptop
Before you can begin the process of updating your laptop’s RAM, it is crucial to shut down your laptop properly. Performing a proper shutdown ensures that all the applications and processes are closed, preventing any data loss or damage during the RAM upgrade process.
Follow these steps to shut down your laptop safely:
- Save your work: Before shutting down your laptop, make sure to save any unsaved documents or files you were working on. This prevents any potential data loss.
- Close all applications: Close all the open applications and programs running on your laptop. This includes any background processes or system tray programs.
- Disconnect external devices: If you have any external devices connected to your laptop, such as USB drives or external hard drives, safely eject and disconnect them.
- Click on the Start menu: On Windows laptops, click on the Start button located at the bottom left corner of the screen. From the menu, select the “Power” option.
- Select the Shut Down option: In the power menu, select the “Shut Down” option. This will initiate the shutdown process.
- Wait for the laptop to shut down: Once the shutdown process is initiated, your laptop will start closing all the running processes and eventually power off completely. Wait for a few moments until the laptop shuts down completely.
It is important to note that the shutdown process may vary slightly depending on the operating system of your laptop. The steps mentioned above are for Windows laptops, but the general idea remains the same for other operating systems too.
Once your laptop is completely shut down, you can move on to the next step of opening the laptop case. Remember to perform the shutdown process carefully and allow enough time for your laptop to power off completely before proceeding with the RAM upgrade.
Opening the Laptop Case
Now that your laptop is properly shut down, it’s time to open the case to access the RAM slots. Opening the laptop case may vary depending on the laptop model and manufacturer. It is essential to follow the specific instructions provided by your laptop’s manufacturer or refer to the user manual. However, in general, here are the basic steps to open the laptop case:
- Disconnect the power source: Ensure that your laptop is disconnected from any power source, including the charger. This helps prevent any electrical mishaps and ensures your safety.
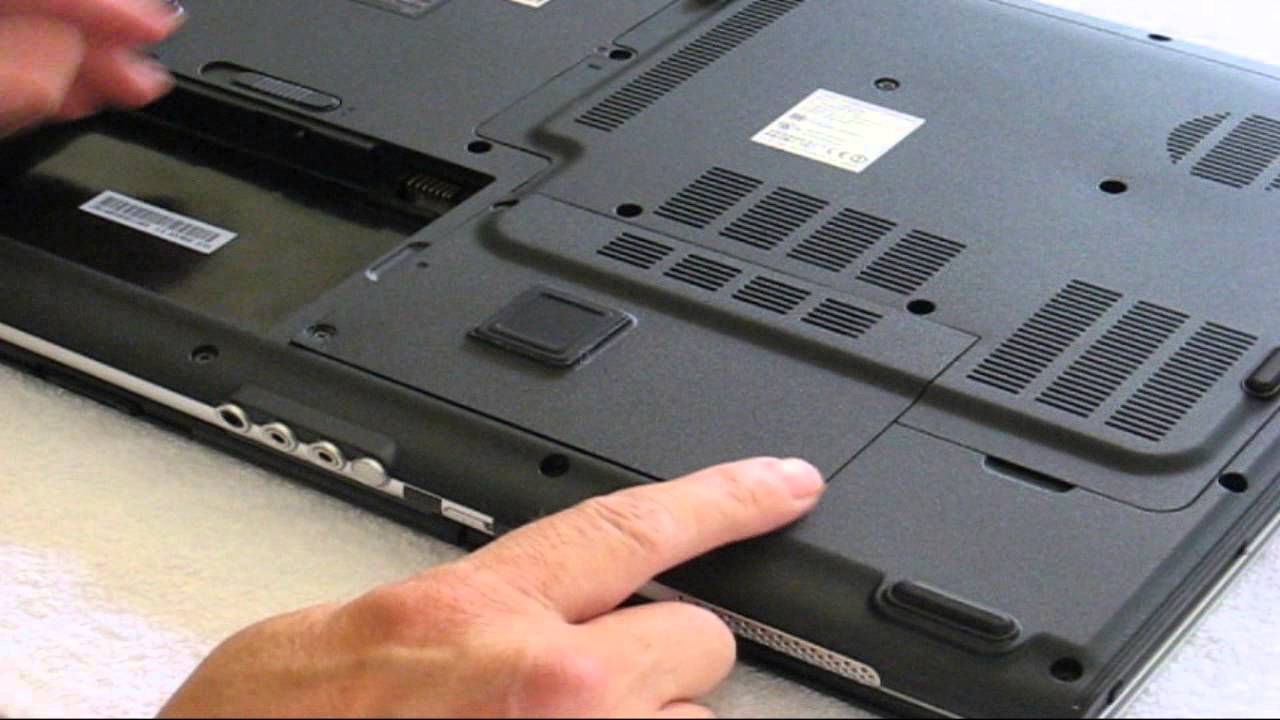
- Flip the laptop upside down: Place your laptop on a clean and stable surface with the bottom side facing up. This will expose the bottom panel of your laptop, which grants access to the internal components.
- Locate the screws: Look for the screws securing the laptop’s bottom panel. These screws may be marked by icons or symbols and are typically located along the edges or at the corners of the laptop. Depending on your laptop model, there may be various sizes and types of screws.
- Remove the screws: Use the appropriate screwdriver (Phillips or Torx) to carefully unscrew and remove all the screws securing the bottom panel. Place the screws in a safe container or magnetic tray to prevent them from getting lost.
- Remove the bottom panel: Once all the screws are removed, gently lift and remove the bottom panel. Be cautious as there may be some resistance due to clips or connectors holding the panel in place. Take your time and apply gentle pressure to avoid damaging any internal components.
It’s important to note that some laptops may have additional steps or specific instructions for opening the case, such as removing the keyboard or other components. Always refer to the manufacturer’s guidelines or user manual for precise instructions tailored to your specific laptop model.
With the laptop case opened, you’ll have access to the internal components, including the RAM slots. In the next section, we’ll guide you through locating the RAM slots inside your laptop.
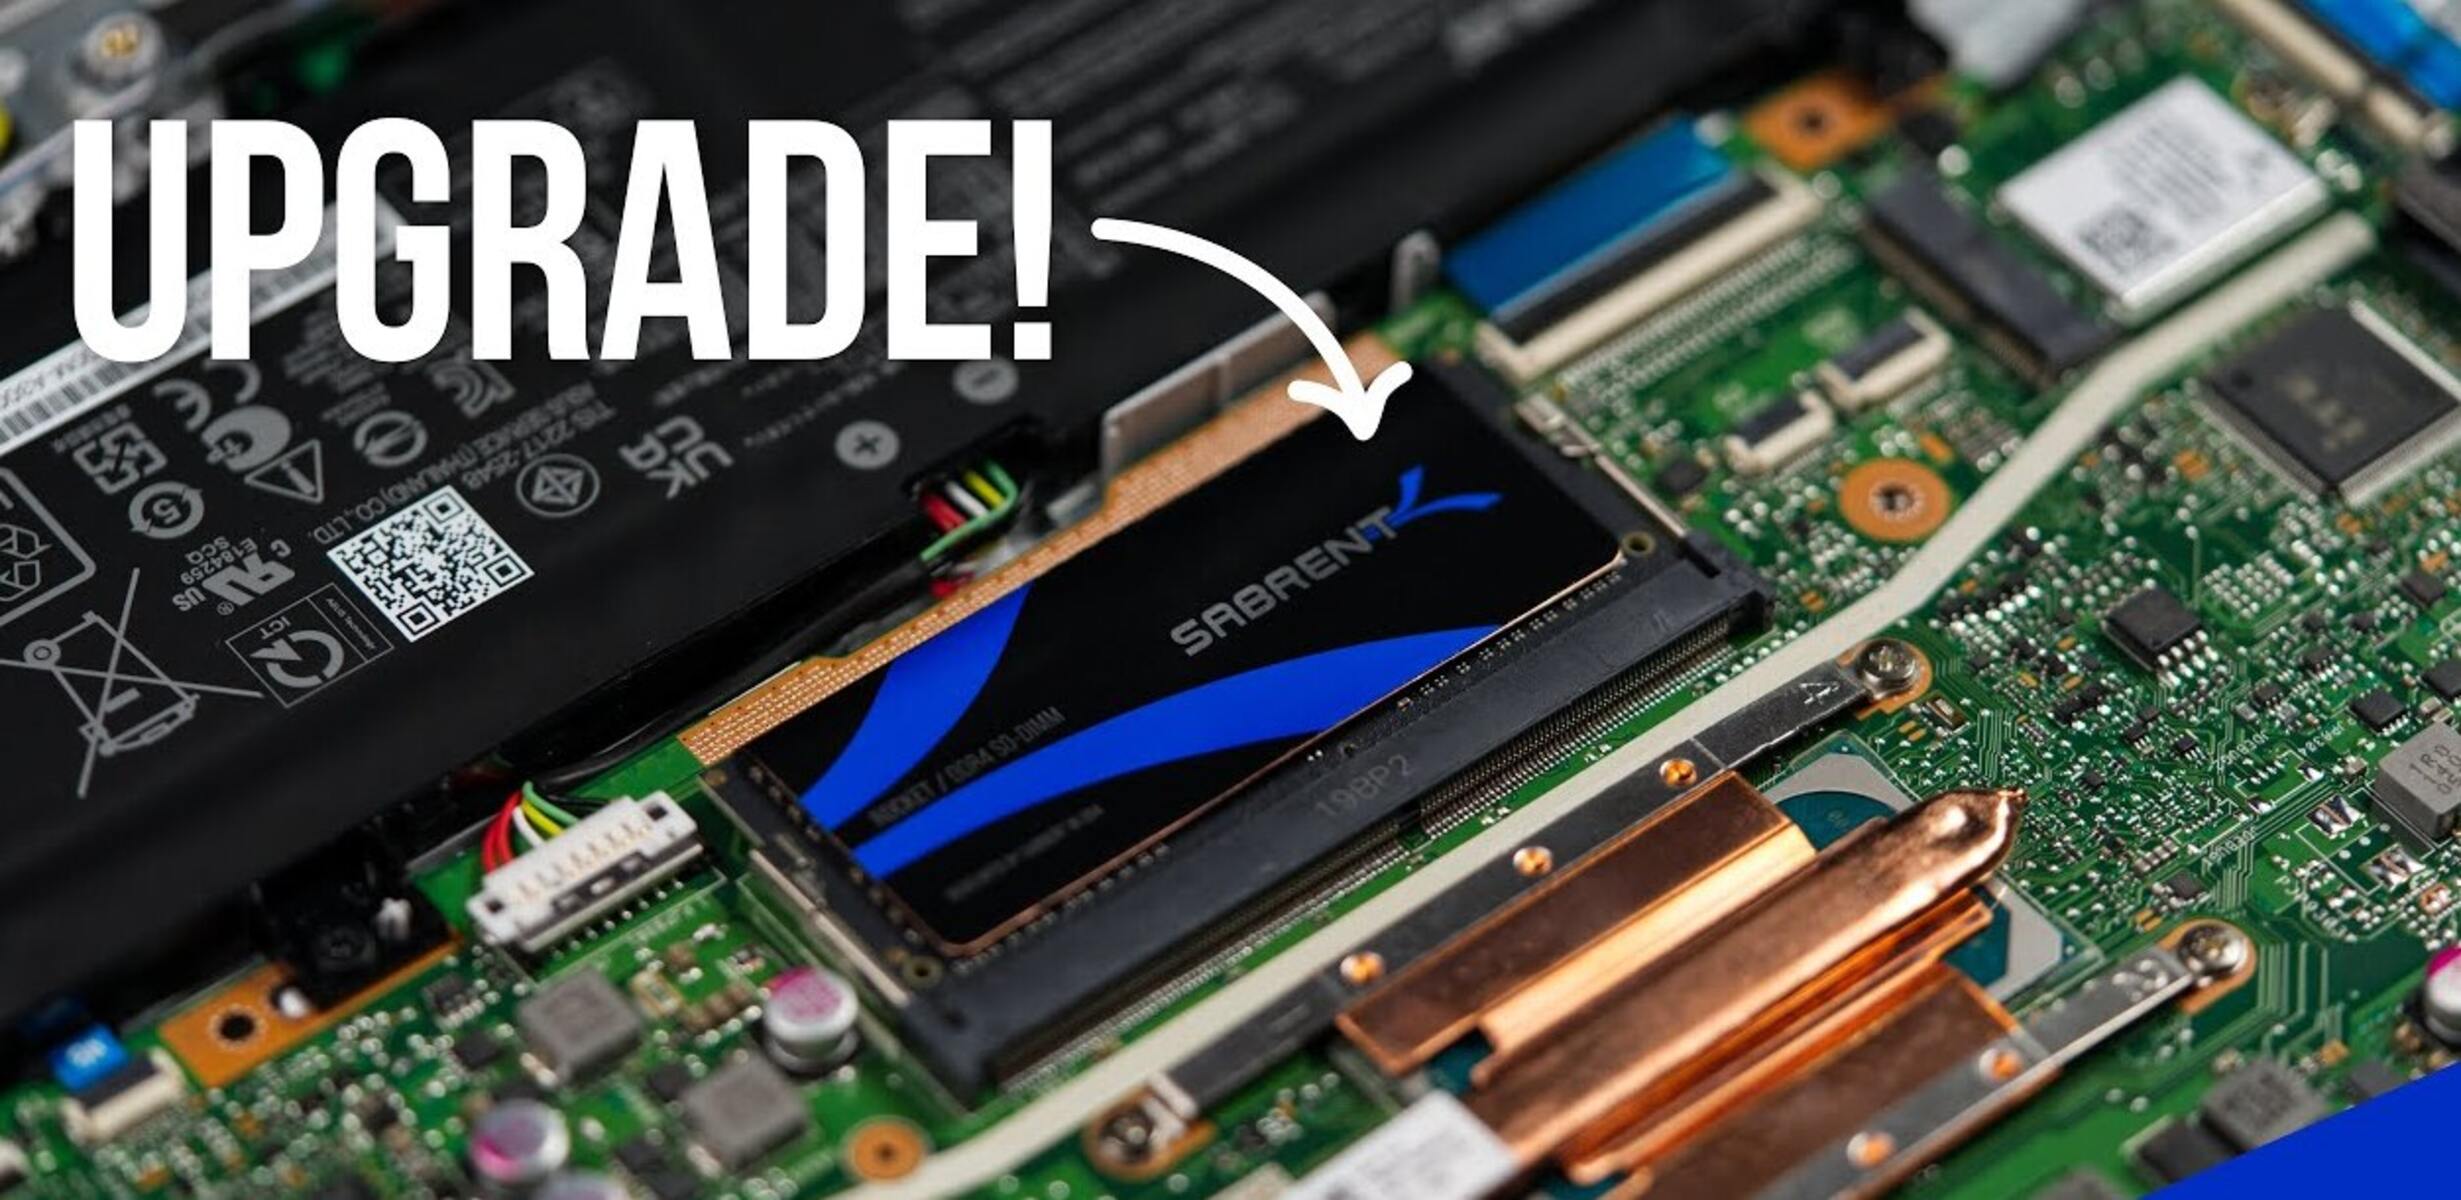
Locating the RAM Slots
Now that you have successfully opened the laptop case, the next step is to locate the RAM slots. The RAM slots are where the RAM modules are inserted and secured inside the laptop. Finding the RAM slots may vary depending on your laptop model, but here are some general guidelines:
- Refer to the user manual: The user manual that came with your laptop is a valuable resource for locating the RAM slots. It provides detailed instructions and diagrams specific to your laptop model.
- Search online: If you don’t have access to the user manual, you can search online for your laptop model’s specifications or guides. Many manufacturers have online resources or support pages that provide detailed information about your laptop’s internal components.
- Look for removable panels: In some laptop models, the RAM slots are easily accessible through dedicated removable panels. These panels are typically labeled with icons or symbols indicating the RAM slots.
- Inspect the motherboard: If there are no removable panels, you may need to inspect the motherboard to locate the RAM slots. The motherboard is the main circuit board inside your laptop, and the RAM slots are typically located near the center or edges of the motherboard.
- Identify the RAM modules: RAM modules are rectangular in shape and have gold or silver contacts on one side. They are slightly larger than a stick of chewing gum. Look for slots that match the size and shape of the RAM modules.
It is crucial to handle the RAM modules and other internal components with care. Avoid touching the gold or silver contacts on the RAM modules, as oil or dirt can interfere with the connection. Additionally, it’s a good practice to discharge any static electricity from your body by touching a metal surface or using an antistatic wrist strap before handling the RAM modules.
Once you have located the RAM slots, you are ready to proceed with removing the old RAM modules. In the next section, we will guide you through the process of removing the old RAM from your laptop.
Removing Old RAM
Now that you have located the RAM slots inside your laptop, it’s time to remove the old RAM modules. Removing the old RAM modules is a relatively straightforward process, but it’s important to follow the steps carefully to avoid damaging any components. Here’s how to remove the old RAM:
- Identify the retaining clips: Look for the retaining clips on either side of the RAM module. These clips hold the RAM module in place.
- Release the retaining clips: Gently push the retaining clips outward until they release the RAM module. The module will pop up at an angle.
- Remove the old RAM module: With the retaining clips released, pull the RAM module out of its slot at the same angle it popped up. Be cautious not to use excessive force or bend the module.
- Repeat for additional modules: If you have multiple RAM modules, repeat the process for each module one at a time. Some laptops may have additional RAM slots located on the other side of the motherboard.
It’s important to handle the RAM modules with care and avoid touching the gold or silver contacts. If you accidentally touch the contacts, use a clean, lint-free cloth or an eraser to gently clean them. This helps ensure a good connection when installing the new RAM.
After removing the old RAM modules, inspect them for any signs of damage or issues. If the modules are faulty or damaged, take note of their specifications (capacity, speed, type) to ensure you choose suitable replacements.
With the old RAM modules successfully removed, you’re now ready to install the new RAM modules. In the next section, we’ll guide you through the process of installing the new RAM into your laptop.
Installing New RAM
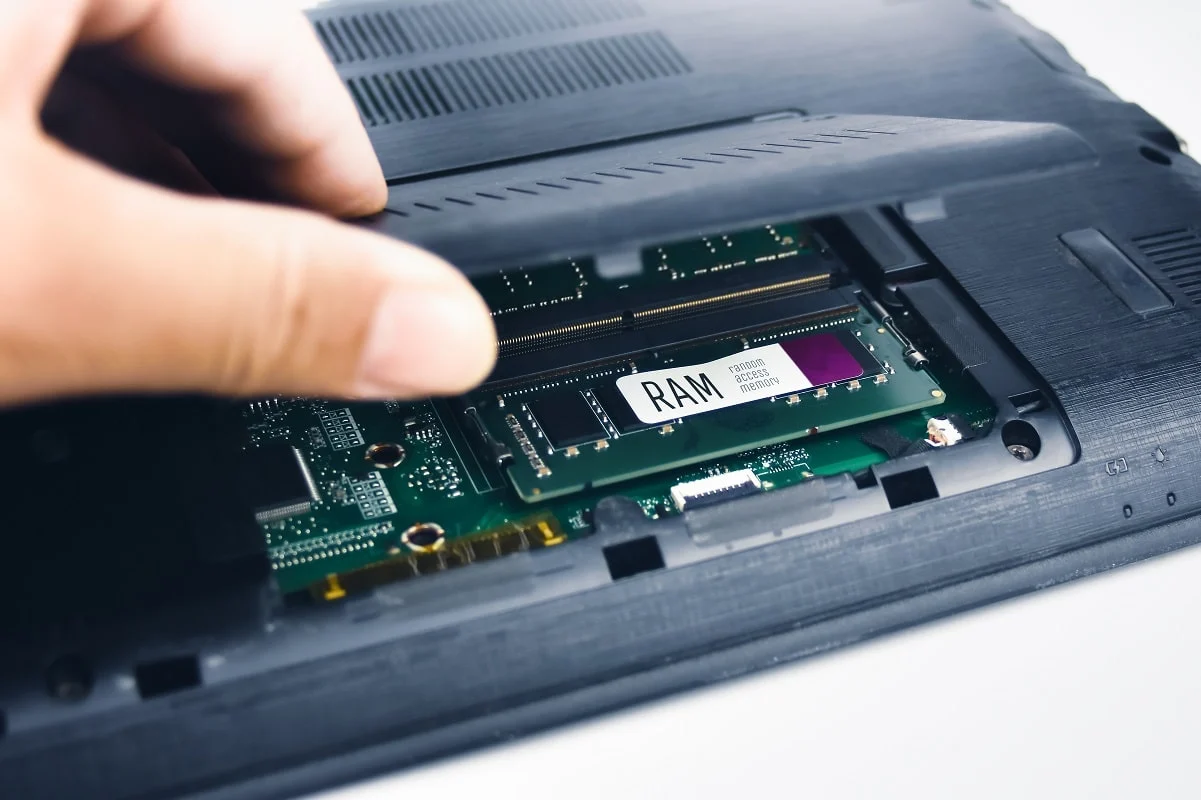
Now that you have removed the old RAM modules, it’s time to install the new RAM modules into your laptop. Installing new RAM is a straightforward process, but it’s important to follow the steps carefully to ensure a proper and secure installation. Here’s how to install the new RAM:
- Check the orientation: Align the notch on the RAM module with the corresponding notch in the RAM slot. This ensures that the module is inserted in the correct orientation.
- Insert the RAM module: Hold the RAM module at a slight angle, with the contacts facing down. Gently insert the module into the slot, making sure it fits snugly. Apply even pressure until the module clicks into place.
- Secure the retaining clips: Once the RAM module is fully inserted, gently push down on the module until the retaining clips snap back into place. You should hear a click, indicating that the module is securely locked.
- Repeat for additional modules: If you have multiple RAM modules, repeat the process for each module, inserting them one at a time. Ensure each module is fully inserted and secured before moving on to the next.
It’s important to note that not all laptops have the same number of RAM slots. Some laptops may only have one or two slots, while others have more. Make sure to refer to your laptop’s specifications or user manual to determine the maximum supported RAM capacity and the number of available RAM slots.
As you install the new RAM modules, be cautious not to use excessive force or bend the modules. They should slide in smoothly and fit snugly into the slot. If you encounter any resistance or difficulty, double-check the orientation and alignment before applying more pressure.
Once all the new RAM modules are installed and secured, ensure that they are properly seated by gently pressing down on each module. This helps ensure a good connection and eliminates any potential issues when powering on your laptop.
With the new RAM modules successfully installed, you’re now ready to close the laptop case and test your upgraded RAM. In the next section, we will guide you through the process of closing the laptop case securely.
Closing the Laptop Case
After successfully installing the new RAM modules, it’s time to close the laptop case and secure everything in place. Properly closing the laptop case is important to protect the internal components and ensure that your laptop functions optimally. Here are the steps to close the laptop case:
- Align the bottom panel: Place the bottom panel back onto the laptop, aligning it with the screw holes and making sure all the edges are flush.
- Press down gently: Apply gentle pressure to the panel, pressing it into place. You may need to run your fingers along the edges to ensure a secure fit.
- Insert and tighten the screws: Insert the screws back into their respective positions on the bottom panel. Use your screwdriver to tighten the screws snugly, but avoid overtightening to prevent damage.
- Verify all screws are in place: Double-check that all the screws have been properly tightened and are securely in place. This ensures that the bottom panel is held firmly.
It’s crucial to ensure that the bottom panel is securely closed and all the screws are in place. Loose screws or an improperly aligned panel can result in an unstable or noisy laptop and may even cause damage to the internal components.
Once you have closed the laptop case and secured it with the screws, take a moment to clean the external surface of your laptop using a clean cloth or microfiber cloth. This helps remove any fingerprints, dust, or smudges that may have accumulated during the upgrade process.
With the laptop case closed and clean, you’re now ready to power on and test the newly upgraded RAM. In the next section, we will guide you through the process of powering on your laptop and conducting the necessary tests.
Powering On and Testing
Now that you have closed the laptop case, it’s time to power on your laptop and ensure that the new RAM is working correctly. Testing the RAM after installation is an important step to verify its compatibility and functionality. Here are the steps to power on your laptop and conduct the necessary tests:
- Connect the power source: Plug in the power adapter and connect it to your laptop to provide the necessary power.
- Press the power button: Locate the power button on your laptop and press it to turn on the device.
- Observe the startup process: As your laptop powers on, observe the startup process to ensure that it boots up properly without any error messages or unusual behavior.
- Check the BIOS/UEFI settings: During startup, you may need to access the BIOS (Basic Input/Output System) or UEFI (Unified Extensible Firmware Interface) settings. This allows you to verify that the new RAM is detected and recognized by your laptop. Consult your laptop’s documentation to determine the specific key or combination of keys needed to access these settings.
- Verify the RAM capacity: Once you are in the BIOS/UEFI settings, navigate to the system information or memory settings to verify that the correct amount of RAM is detected. It should match the capacity of the new RAM modules you installed.
- Run a RAM test utility: To further ensure that the new RAM is functioning properly, you can run a RAM test utility. These utilities check for any memory errors or issues and provide a comprehensive report. There are several third-party RAM test utilities available online, such as Memtest86 or Windows Memory Diagnostic, which you can download and run on your laptop.
If your laptop starts up without any error messages and the new RAM is recognized and functioning correctly in the BIOS/UEFI settings, you can be confident that the RAM upgrade was successful. The RAM test utility further confirms the stability and reliability of the new RAM modules.
In the event that you encounter any issues, such as errors during startup or memory test failures, ensure that the RAM modules are properly installed and seated. Double-check the compatibility of the RAM with your laptop and consider seeking professional assistance if needed.
With the new RAM successfully installed and tested, you can now enjoy the enhanced performance and multitasking capabilities offered by the upgraded memory. Congratulations on completing the RAM upgrade!
Conclusion
Upgrading the RAM on your laptop is a fantastic way to enhance its performance, improve multitasking capabilities, and ensure smoother and more efficient operations. With the right tools, knowledge, and careful steps, you can successfully update the RAM and reap the benefits of increased memory capacity.
In this guide, you learned the importance of understanding RAM and its impact on your laptop’s speed and multitasking abilities. Checking compatibility with your laptop is a crucial step to ensure that the new RAM modules are compatible with your specific model. By gathering the necessary tools and following the correct procedures, you can safely shut down your laptop, open the case, locate the RAM slots, remove the old RAM, install the new RAM, close the laptop case, and power on for testing.
Remember to handle the RAM modules with care, avoid touching the contacts, and properly secure the laptop case to protect the internal components. Once your laptop is powered on with the new RAM, verify its proper detection and functionality using the BIOS/UEFI settings and running a RAM test utility.
By successfully upgrading your laptop’s RAM, you have unlocked its potential for improved performance and increased multitasking capabilities. Whether you’re a professional using resource-intensive software or a student juggling multiple applications, the RAM upgrade will elevate your computing experience.
Keep in mind that while upgrading the RAM can significantly enhance your laptop’s performance, it may not solve all performance issues. If you continue to experience performance problems, consider other factors such as CPU, storage, or software optimization.
Now that you have completed the RAM upgrade process, enjoy the improved speed, responsiveness, and overall performance of your laptop. Happy computing!