Introduction
Uninstalling a program on Windows is a common task that many users need to perform at some point. Whether you want to free up disk space, remove unnecessary software, or troubleshoot an issue, knowing how to properly uninstall a program is essential.
When it comes to removing programs from your Windows computer, you have several options available. The most commonly used methods include using the Control Panel, Settings, or the program’s own uninstaller. Each approach has its own advantages, and the choice depends on your preferences and the specific program you want to uninstall.
In this guide, we will explore these different methods and provide step-by-step instructions to help you successfully uninstall programs from your Windows computer. Whether you’re a tech-savvy user or a beginner, you’ll find these instructions easy to follow and effective in removing unwanted software.
Before diving into the specific uninstallation methods, it’s important to note that uninstalling a program will remove its files and entries from your computer, but it may not remove all associated data, such as settings or saved files. If you want to make sure that all traces of the program are deleted, consider using an additional tool, such as a third-party uninstaller or a registry cleaner.
Now, let’s explore the different methods you can use to uninstall a program on Windows. Whether you prefer the straightforward approach of the Control Panel, the modern interface of Settings, or the precision of a program’s own uninstaller, there’s a method that will suit your needs.
Option 1: Uninstall using Control Panel
One of the most common methods to uninstall a program on Windows is through the Control Panel. This method provides a straightforward way to manage your installed programs and remove the ones you no longer need. Here’s how to do it:
Step 1: Open Control Panel
To access the Control Panel, you can click on the Start menu and search for “Control Panel” or press the Windows key + X and select “Control Panel” from the menu that appears.
Step 2: Click on “Uninstall a Program”
Once you’re in the Control Panel, locate the “Programs” or “Programs and Features” section and click on the “Uninstall a program” link. This will open a window displaying all the installed programs on your computer.
Step 3: Select the program you want to uninstall
In the list of installed programs, locate the program you want to remove and click on it to select it. You can also use the search bar at the top right corner of the window to search for the program by name.
Step 4: Click on “Uninstall” button
Once you’ve selected the program, click on the “Uninstall” button located at the top of the window. This will initiate the uninstallation process.
Step 5: Follow the prompts to uninstall the program
After clicking on the “Uninstall” button, you will be prompted with a confirmation dialogue box and may be asked to provide administrative privileges. Follow the on-screen prompts to complete the uninstallation process. Depending on the program, you may be asked to confirm the removal, choose additional options, or restart your computer.
The Control Panel method provides a simple and reliable way to uninstall programs on Windows. However, it’s worth noting that not all programs may appear in the Control Panel’s list, especially if they were installed using other methods. In such cases, you can explore alternative methods, such as using the Settings app or the program’s own uninstaller.
Step 1: Open Control Panel
To begin the process of uninstalling a program using the Control Panel, you first need to open the Control Panel itself. Here’s how:
There are a few different ways to access the Control Panel on Windows, but one of the easiest methods is to click on the Start menu and search for “Control Panel”. When the Control Panel app appears in the search results, click on it to open it.
Another quick way to open the Control Panel is by pressing the Windows key + X on your keyboard. This will open a menu with various options, and you can select “Control Panel” from the list.
Once you’ve opened the Control Panel, you’ll see a window with various categories and options to choose from. The appearance may vary slightly depending on your Windows version, but the overall functionality remains the same.
If you prefer a more traditional view of the Control Panel, you can click on the drop-down menu in the top-right corner and select “Large icons” or “Small icons”. This will display all the available options in a list format, making it easier to navigate through them.
Alternatively, you can search for “Control Panel” in the Windows search bar located on the taskbar. Simply click on the search bar, type “Control Panel”, and select it from the search results.
Once you have successfully opened the Control Panel, you’re ready to proceed to the next step: clicking on “Uninstall a program” and selecting the program you want to uninstall.
Opening the Control Panel is the crucial first step in the process of uninstalling a program on Windows. It provides access to essential features and settings that allow you to manage installed programs, customize your computer, and troubleshoot any issues that may arise.
With the Control Panel open, you’re now ready to move on to the next steps in the process of uninstalling a program using this method.
Step 2: Click on “Uninstall a Program”
After opening the Control Panel, the next step in uninstalling a program on Windows is to locate and click on the “Uninstall a program” option. Here’s how to do it:
Within the Control Panel window, you will see a variety of categories and options. Look for the section titled “Programs” or “Programs and Features” and click on the corresponding link.
Upon clicking on the “Programs” or “Programs and Features” link, a new window will open, displaying a list of all the programs installed on your computer. This is the main interface where you can manage and uninstall programs.
In some versions of Windows, the list of programs may be organized in alphabetical order by default. However, you can also sort the programs by various criteria, such as by installation date or size, by clicking on the corresponding column header.
If you prefer a more compact view, you can change the layout of the window by clicking on the “View” option in the menu bar and selecting either “Details” or “List”. This will display more information about each program in a concise format.
Scroll through the list of installed programs until you find the one you want to uninstall. If you have trouble locating a specific program, you can use the search bar located at the top right corner of the window. Simply enter the name of the program or any relevant keywords, and the list will automatically update to show matching results.
Once you have located the program you want to uninstall, click on it to select it. You should see the program’s name highlighted or marked in some way to indicate that it’s selected.
After selecting the program, you’re now ready to proceed to the next step: clicking on the “Uninstall” button, which will initiate the uninstallation process.
The “Uninstall a program” option within the Control Panel provides a convenient and centralized way to view and manage all the installed programs on your Windows computer. By locating and selecting the program you wish to uninstall, you’re taking the necessary steps to remove it from your system.
With the program selected, you can now move on to the next steps in the process, which will guide you through the actual uninstallation of the program using the Control Panel method.
Step 3: Select the program you want to uninstall
Once you’ve accessed the “Uninstall a program” section within the Control Panel, the next step in uninstalling a program on Windows is to locate and select the specific program you wish to remove. Here’s how to do it:
Within the “Uninstall or change a program” window, you will see a list of all the installed programs on your computer. This list may vary in length depending on the number of programs you have installed.
Take a moment to scroll through the list and locate the program you want to uninstall. Programs are typically listed alphabetically, making it easier to find the desired program by its name. However, if you are unable to locate the program, you can use the search bar located at the top right corner of the window to input the program’s name or relevant keywords.
As you navigate through the list, you may also notice additional information provided for each program, such as the publisher, installation date, size, and version number. This information can help you verify that you’ve selected the correct program.
To select the program you want to uninstall, simply click on it once. You should see the program’s name highlighted or marked in some way to indicate that it’s selected. Depending on your Windows version, you may also see an option to “Change” or “Repair” the program. For our purpose of uninstalling, we will focus on the “Uninstall” option.
It’s important to double-check that you’ve selected the correct program before proceeding to the next steps. Removing the wrong program can result in unintended consequences, so take a moment to confirm that you’ve chosen the program you no longer wish to have on your computer.
With the program now selected, you’re ready to move on to the next step: clicking on the “Uninstall” button and initiating the uninstallation process.
By selecting the program within the “Uninstall or change a program” window, you’ve taken a crucial step toward removing it from your Windows computer. Once you’ve confirmed that the correct program is selected, you can proceed confidently with the uninstallation process.
Step 4: Click on “Uninstall” button
After selecting the program you want to uninstall within the “Uninstall or change a program” window in the Control Panel, the next step in removing the program from your Windows computer is to click on the “Uninstall” button. Follow these instructions to proceed:
Locate the “Uninstall” button at the top of the window. It is usually situated next to other options, such as “Organize” or “Change”. The button may also be labeled as “Uninstall/Change”, depending on the program or your Windows version.
Clicking on the “Uninstall” button will initiate the uninstallation process for the selected program. This action sends a command to the operating system to begin removing the program and its associated files from your computer.
Before clicking on the “Uninstall” button, make sure that the correct program is selected. Removing the wrong program can have unintended consequences, so it’s essential to take a moment to verify your selection.
In some cases, you may be prompted with a confirmation dialogue box after clicking on the “Uninstall” button. This dialog box might ask you to confirm your decision or provide additional options related to the uninstallation process. Read the prompts carefully and follow the instructions presented to you.
Depending on the program, you may also be asked to provide administrative privileges to proceed with the uninstallation. This typically occurs for programs that were installed using an administrator account. If prompted, enter the necessary credentials to continue.
By clicking on the “Uninstall” button, you are effectively instructing Windows to remove the selected program from your computer. The uninstallation process will vary depending on the program’s complexity, size, and any additional settings or components associated with it.
Once you’ve clicked on the “Uninstall” button, you can expect the program to begin uninstalling. The progress of the uninstallation may be displayed on the screen or in a separate uninstallation wizard or window, depending on the program you’re removing.
It’s important to be patient during this process as it may take some time, especially for large programs or those with many files and components. Avoid interrupting the uninstallation process to ensure a clean and successful removal.
With the “Uninstall” button clicked, you’re now ready to proceed to the final step of following the prompts to complete the uninstallation process.
By clicking on the “Uninstall” button, you’ve initiated the process of removing the selected program from your Windows computer. With patience and attentiveness, you can proceed confidently and smoothly through the next steps of the uninstallation process.
Step 5: Follow the prompts to uninstall the program
After clicking on the “Uninstall” button and initiating the uninstallation process for the selected program within the Control Panel, the next step is to follow the prompts that appear on your screen. These prompts will guide you through the remaining steps to successfully uninstall the program. Here’s what you need to do:
Once you’ve clicked on the “Uninstall” button, a confirmation dialog box or an uninstallation wizard may appear on your screen. Read the information presented to you carefully and follow any instructions provided.
Depending on the program, you may be asked to confirm your decision to uninstall, provide any additional preferences or options, or review the consequences of removing the program. Make sure to pay attention to these prompts and select the appropriate choices.
In some cases, you may encounter a progress bar indicating the status of the uninstallation process. This progress bar shows you how much of the program has been removed and can give you an estimate of the time remaining for the uninstallation process to complete.
During the uninstallation process, the program may also prompt you to close any related applications or restart your computer. Follow these instructions to ensure a successful uninstallation. Some programs require a system restart to fully remove all traces and complete the removal process.
As the prompts guide you through the uninstallation process, it’s important to be patient and allow each step to complete before moving on to the next. Interrupting the process or closing the prompt windows too soon can potentially leave remnants of the program on your system.
After following all the necessary prompts, the uninstallation process will finalize, and the selected program should be successfully removed from your computer. You may receive a notification or confirmation message indicating that the program has been uninstalled successfully.
Once the program has been uninstalled, it’s a good practice to perform a system restart to ensure that any remaining traces or settings associated with the program are completely cleared from your system.
By following the prompts during the uninstallation process, you can ensure a smooth and successful removal of the selected program from your Windows computer. Completing the uninstallation process will help free up disk space, optimize system performance, and maintain a clutter-free environment on your computer.
With the prompts followed and the program uninstalled, you can now proceed with confidence, knowing that the selected program has been successfully removed from your Windows computer.
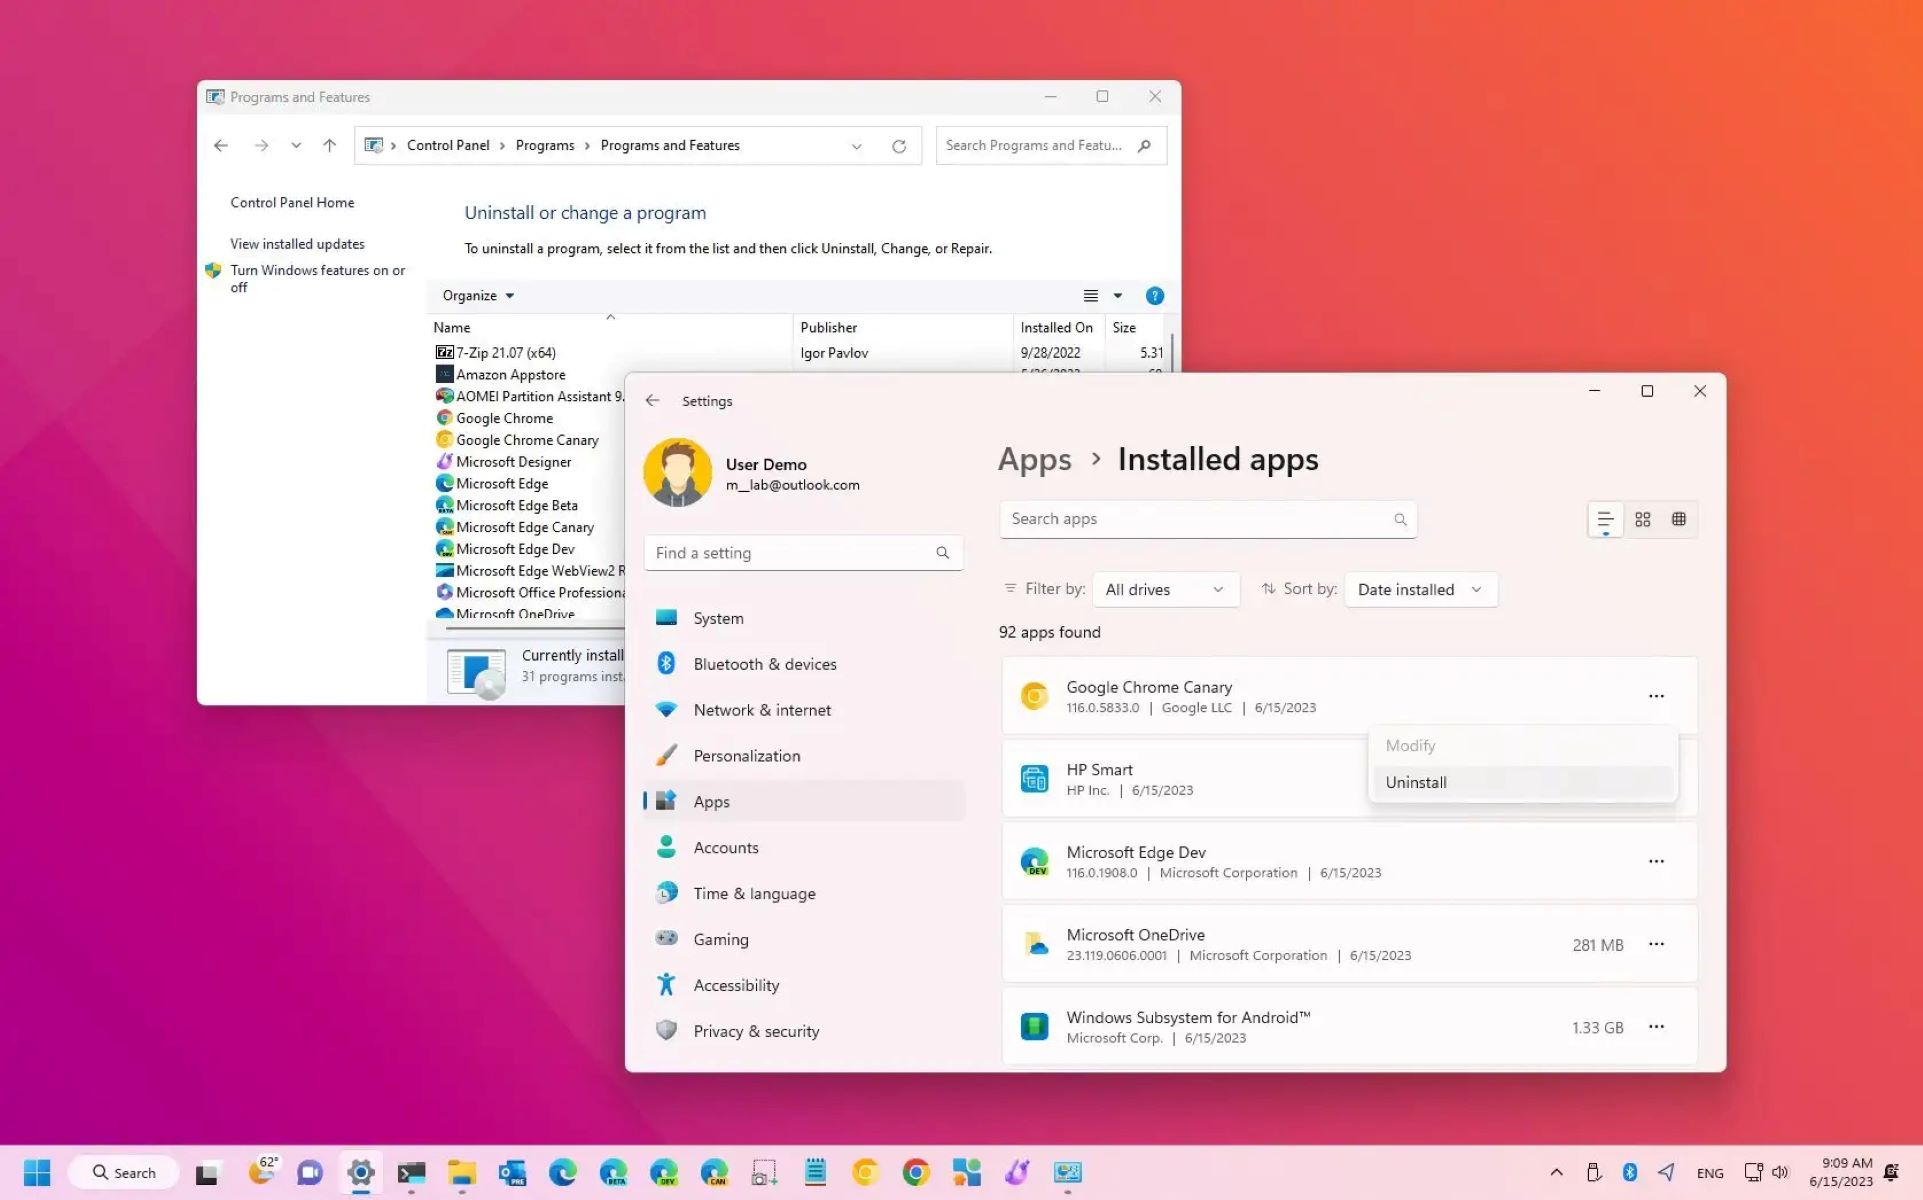
Option 2: Uninstall using Settings
Another method to uninstall a program on Windows is by using the Settings app. This method offers a more modern and streamlined approach to managing your installed programs. Here’s how to uninstall a program using the Settings app:
Step 1: Open Settings
To access the Settings app, you can click on the Start menu and select the gear icon labeled “Settings”. Alternatively, you can press the Windows key + I on your keyboard to open Settings directly.
Step 2: Click on “Apps”
Within the Settings app, locate and click on the “Apps” option. This will open a new window displaying various settings related to installed applications.
Step 3: Select the program you want to uninstall
In the “Apps & features” section, scroll through the list of installed programs until you find the one you want to remove. You can also use the search bar at the top of the window to quickly search for the program by name.
Step 4: Click on “Uninstall” button
Once you’ve located the program, click on it to expand the options. Then, click on the “Uninstall” button that appears below the program’s name and details. This action will initiate the uninstallation process.
Step 5: Follow the prompts to uninstall the program
After clicking on the “Uninstall” button, you may be prompted with a confirmation dialog box or additional options related to the uninstallation. Carefully read through these prompts and follow the instructions provided.
Depending on the program, you may need to provide administrative permissions or confirm your decision to uninstall the program. The prompts will guide you through these steps.
Once you’ve followed the prompts, the uninstallation process will commence and eventually remove the program from your system. You may see a progress indicator or receive a notification when the program has been successfully uninstalled.
Using the Settings app to uninstall programs offers a modern and user-friendly interface. It provides a convenient way to manage and remove installed applications on your Windows computer.
Note that not all programs may appear in the Settings app, particularly those that were installed using alternative methods. In such cases, you may need to use the Control Panel or the program’s own uninstaller.
Now that you’re familiar with the process of uninstalling programs using the Settings app, you can confidently remove unwanted software and keep your computer clean and optimized.
Step 1: Open Settings
The first step in uninstalling a program using the Settings app on Windows is to open the Settings app itself. Here’s how:
To access the Settings app, you can click on the Start menu, which is usually located at the bottom left corner of the screen. From the Start menu, find and select the gear icon labeled “Settings”. Alternatively, you can press the Windows key + I on your keyboard to open Settings directly.
Upon clicking on the Settings icon or pressing the Windows key + I, the Settings app will open and display a range of options and settings that you can configure for your Windows computer.
The Settings app provides a streamlined and user-friendly interface, making it easy to navigate and locate the desired options.
Inside the Settings app, you’ll notice various categories listed on the left-hand side of the window, such as System, Devices, Update & Security, and more. These categories group related settings and configurations together for easy access.
To proceed with uninstalling a program, you’ll need to click on the “Apps” category within the Settings app. This category allows you to manage installed applications on your Windows computer.
You can either scroll through the list of categories on the left-hand side and click on “Apps” or use the search bar located at the top of the window to search for “Apps”. Once you’ve located the “Apps” category, click on it to access the related settings.
When the “Apps” category is selected, the main content area of the Settings app will display options and information related to installed applications on your computer.
Opening the Settings app is the crucial first step in the process of uninstalling a program using this method. It provides access to a range of options and settings, including those related to managing and uninstalling applications.
With the Settings app open and the “Apps” category selected, you’re now ready to move on to the next steps in the process, which will guide you through removing the program using the Settings app method.
Step 2: Click on “Apps”
After opening the Settings app, the next step in uninstalling a program using this method is to navigate to the “Apps” section. This category within the Settings app allows you to manage and uninstall installed applications on your Windows computer. Follow these instructions to proceed:
Take a moment to familiarize yourself with the interface of the Settings app. The main content area of the app will display various categories and related settings, while the left-hand side lists the available categories.
To access the “Apps” category, locate it within the list of categories on the left-hand side. You can either scroll through the list or use the search bar at the top of the window to quickly find “Apps”.
Click on the “Apps” category to navigate to that section within the Settings app. This action will open a new page with options and information specific to installed applications.
Once you are in the “Apps” section, you will see different options related to managing your installed applications. The main content area may display a list of installed apps, sorting them alphabetically by default, or it may show additional options, such as the ability to manage optional features or default apps.
Scroll through the list of installed apps to get a sense of the programs currently installed on your computer. This list may vary in length and may include both traditional Win32 applications and modern Universal Windows Platform (UWP) apps.
If you’re looking for a specific program, you can use the search bar located at the top of the window to quickly find it. Simply enter the name of the program, and the list will automatically update to display matching results.
By clicking on the “Apps” category within the Settings app, you have accessed the section where you can manage and uninstall installed applications on your Windows computer. With this step completed, you’re now ready to continue to the next steps, which will guide you through selecting the program you want to uninstall.
Step 3: Select the program you want to uninstall
Once you have navigated to the “Apps” section within the Settings app, the next step in uninstalling a program on Windows is to select the specific program you wish to remove. Here’s how to do it:
Within the “Apps & features” section of the Settings app, you will see a list of all the installed programs on your computer. This list may vary in length depending on the number of programs you have installed.
Take a moment to scroll through the list and locate the program you want to uninstall. Programs are typically listed alphabetically, making it easier to find the desired program by its name. However, if you are unable to locate the program, you can use the search bar located at the top right corner of the window to input the program’s name or relevant keywords.
As you navigate through the list, you may also notice additional information provided for each program, such as the publisher, installation date, size, and version number. This information can help you verify that you’ve found the correct program.
To select the program you want to uninstall, simply click on it. You should see the program’s name highlighted or marked in some way to indicate that it’s selected.
If you’re unsure about which program to choose, you can always click on the selected program to expand the options. This will provide more details about the program, such as the version number and installation size, which can aid in confirming your selection.
It’s important to double-check that you’ve selected the correct program before proceeding to the next steps. Removing the wrong program can result in unintended consequences, so take a moment to confirm that you’ve chosen the program you no longer wish to have on your computer.
With the program selected, you’re now ready to move on to the next step: clicking on the “Uninstall” button and initiating the uninstallation process.
By selecting the program within the “Apps & features” section of the Settings app, you’re taking a crucial step toward removing it from your Windows computer. Now that you’ve confirmed the correct program is selected, you can proceed with confidence to complete the uninstallation process.
Step 4: Click on “Uninstall” button
After selecting the program you want to uninstall within the “Apps & features” section of the Settings app, the next step is to locate and click on the “Uninstall” button. Follow these instructions to proceed:
Once you have selected the program, additional options and information will appear below the program’s name and details. Look for the option labeled “Uninstall” and click on it. This will initiate the uninstallation process for the selected program.
Clicking on the “Uninstall” button within the Settings app sends a command to the operating system, instructing it to begin removing the program and its associated files from your computer.
Before clicking on the “Uninstall” button, double-check that you have selected the correct program. Uninstalling the wrong program can have unintended consequences, so it’s important to take a moment to verify your selection.
In some cases, you may encounter a confirmation message or additional prompts when clicking on the “Uninstall” button. Read the information presented to you carefully and follow any instructions provided.
Depending on the program, you may be asked to confirm your decision to uninstall, provide administrative permissions, or choose additional options related to the uninstallation process. Follow the prompts presented to you in order to proceed.
By clicking on the “Uninstall” button, you are initiating the process of removing the selected program from your computer using the Settings app. The uninstallation process will vary depending on the program’s complexity, size, and any additional settings or components associated with it.
After clicking on the “Uninstall” button, you may see a progress indicator or receive notifications on the screen as the program is being uninstalled. This will provide you with information about the progress and completion of the uninstallation process.
It’s important to be patient during this process as it may take some time, especially for larger programs or those with many files and components. Avoid interrupting the uninstallation process to ensure a clean and successful removal.
With the “Uninstall” button clicked, you have successfully initiated the uninstallation process for the selected program within the Settings app. The program will now be removed from your Windows computer, and you can proceed to complete the remaining uninstallation steps.
Step 5: Follow the prompts to uninstall the program
After clicking on the “Uninstall” button within the “Apps & features” section of the Settings app, the next step is to follow the prompts that appear on your screen. These prompts will guide you through the remaining steps to successfully uninstall the program. Here’s what you need to do:
Upon clicking on the “Uninstall” button, a confirmation dialog box or uninstallation wizard may appear on your screen. Read the information presented to you carefully and follow any instructions provided.
Depending on the program, you may be asked to confirm your decision to uninstall, provide administrative permissions, or review the consequences of removing the program. Take a moment to review and acknowledge these prompts before proceeding.
Follow the prompts presented to you in order to proceed with the uninstallation process. These prompts may include options related to the uninstallation, such as the removal of user data or specific components of the program.
In some cases, you may be prompted to confirm the uninstallation or be asked to enter additional information. Follow these steps and provide the necessary input as directed by the prompts.
During the uninstallation process, you may also see a progress indicator that displays the status of the uninstallation. This can help you track the progress and estimate the time remaining for the completion of the process.
Be patient as the uninstallation process proceeds. This process can take some time, especially for larger programs or those with many files and components. It’s important to allow the process to complete without interruption for a successful and thorough removal.
Once the program has been uninstalled, you may receive a notification or confirmation message indicating the successful completion of the uninstallation process.
After following all the necessary prompts, the uninstallation process will finalize, and the selected program should be successfully removed from your system. Depending on the program, you may be prompted to restart your computer to complete the uninstallation process.
With the prompts followed, the program has been uninstalled using the Settings app. You have successfully removed the selected program from your Windows computer, freeing up space and potentially improving system performance.
Now that you’ve completed the process of uninstalling a program using the Settings app, you can confidently remove unwanted software and maintain a clean and optimized computer environment.
Option 3: Uninstall using Program’s Uninstaller
In certain cases, when uninstalling a program on Windows, it is recommended to use the program’s own uninstaller. This method allows you to utilize the specialized uninstaller provided by the program’s developer to ensure a thorough and complete removal. Here’s how you can uninstall a program using the program’s uninstaller:
Step 1: Open the program’s folder
Locate the program’s folder on your Windows computer. This can typically be found in the “Program Files” or “Program Files (x86)” directory. To access these directories, you can navigate through your file explorer or open the Start menu, search for “File Explorer,” and select the appropriate result.
Step 2: Look for an uninstallation file
Within the program’s folder, search for an uninstallation file. This file is usually named “uninstall.exe,” “unwise.exe,” or something similar. It may also be labeled with the program’s name or contain an “_uninstall” suffix. If you’re unable to locate the uninstallation file, you can check the program’s documentation or visit the program’s official website for instructions.
Step 3: Run the uninstallation file
Once you’ve identified the uninstallation file, double-click on it to initiate the program’s uninstallation process. This will launch the specialized uninstaller provided by the program’s developer.
Step 4: Follow the prompts to uninstall the program
After running the uninstallation file, you will be presented with a series of prompts and instructions specific to the program’s uninstaller. These prompts may include options related to the uninstallation process, such as the removal of user data or the selection of specific components to uninstall.
Follow the prompts provided by the program’s uninstaller to proceed with the uninstallation process. Carefully read the information presented to you and select the appropriate choices as needed. The prompts may differ based on the program, so it’s important to pay attention and follow the specific instructions provided by the uninstaller.
Once you’ve followed the necessary prompts, the program’s uninstaller will proceed with removing the program and its associated files from your computer. The uninstallation process may take some time, depending on the program’s size and complexity.
With the program successfully uninstalled using the program’s own uninstaller, you can expect a thorough and complete removal of the program from your Windows computer. The program’s uninstaller provides specialized instructions and procedures to ensure that all components and settings associated with the program are properly removed.
It’s worth noting that not all programs provide a dedicated uninstallation file or a separate uninstaller. In such cases, you can utilize the other options discussed earlier, such as using the Control Panel or the Settings app, to remove the program from your computer.
By utilizing the program’s uninstaller, you have taken advantage of the specialized removal process provided by the program’s developer. With the program successfully uninstalled, you can now enjoy a clean and clutter-free computer environment.
Step 1: Open the program’s folder
When it comes to uninstalling a program using the program’s own uninstaller, the first step is to locate and open the program’s folder on your Windows computer. Follow these steps to proceed:
1. Open the File Explorer on your Windows computer. You can do this by clicking on the folder icon in the taskbar or by pressing the Windows key + E on your keyboard.
2. Navigate to the directory where the program is installed. The default location for installed programs is usually in the “Program Files” or “Program Files (x86)” folder, which can be found on the system drive (typically C:). Double-click on the appropriate folder to open it.
3. Once you’re in the program’s installation folder, you’ll see various files and folders associated with the program. These files and folders may include executables, support files, documentation, and more.
4. Look for the main executable file of the program. This file is often named after the program itself or bears a recognizable name. It may have an .exe extension or a different executable file format specific to the program. This executable file is usually responsible for launching the program.
5. Right-click on the main executable file and select “Open file location” or “Open folder location” from the context menu that appears. This action will open the program’s folder in the File Explorer.
By following these steps, you have successfully opened the program’s folder on your Windows computer. This folder contains essential files and resources related to the program you want to uninstall.
It’s important to note that the program’s folder may contain additional files and subfolders that are necessary for the program’s operation. Avoid deleting or modifying files unless you are certain of their purpose or have been instructed to do so by the program’s developer or uninstallation documentation.
With the program’s folder open, you’re now ready to proceed to the next steps, where you’ll look for an uninstallation file and run it to initiate the program’s uninstallation process.
Step 2: Look for an uninstallation file
After opening the program’s folder in the File Explorer, the next step in uninstalling a program using its own uninstaller is to locate an uninstallation file. This file, often provided by the program’s developer, is designed specifically to remove the program and its associated components from your Windows computer. Here’s how to find the uninstallation file:
1. In the program’s folder, scan through the files and subfolders to locate an uninstallation file. Common names for this file include “uninstall.exe,” “unwise.exe,” or something similar. It might also have the name of the program or include an “_uninstall” suffix.
2. If you’re having trouble finding the uninstallation file, try sorting the files by name or modifying the view settings in the File Explorer window. This can make it easier to identify the specific file you are looking for.
3. If you have the program’s documentation or installation files, consult them for any instructions or hints on locating the uninstallation file. The documentation may provide explicit details or recommend specific steps for uninstallation.
4. Alternatively, visit the program’s official website and search for uninstallation instructions or support documentation. The website may provide specific guidance on finding and running the uninstaller for that particular program.
Keep in mind that not all programs provide a dedicated uninstallation file. Some programs may rely on alternative methods, such as an uninstallation tool or script. In such cases, consult the program’s documentation or official website for uninstallation instructions specific to that program.
By locating the uninstallation file within the program’s folder, you have taken an important step towards uninstalling the program using its dedicated uninstaller. The specific name and location of the uninstallation file can vary between programs, but once you find it, you’re ready to proceed to the next step: running the uninstallation file to initiate the program’s uninstallation process.
Make sure to read any provided instructions or documentation carefully before proceeding with uninstallation to ensure a smooth and successful removal of the program from your Windows computer.
Step 3: Run the uninstallation file
After locating the uninstallation file in the program’s folder, the next step in uninstalling a program using its own uninstaller is to run that file. The uninstallation file, provided by the program’s developer, is designed specifically to initiate the program’s uninstallation process. Follow these steps to run the uninstallation file:
1. Double-click on the uninstallation file. This action will launch the program’s dedicated uninstaller, which is designed to guide you through the uninstallation process.
2. Depending on the program, you may encounter a user account control (UAC) prompt asking you to confirm your action. If prompted, click “Yes” to proceed and provide the necessary administrative permissions.
3. The uninstallation process will begin once the program’s dedicated uninstaller is launched. Follow any prompts or instructions that appear on the screen. These prompts may vary depending on the program and may include options related to the removal of user data, the selection of specific components to uninstall, or other preferences outlined by the program’s developer.
4. Read and review any information or warnings provided by the uninstaller. Pay attention to additional prompts or options presented during the uninstallation process, as they may affect the behavior and outcome of the uninstallation.
5. Follow the prompts and provide any necessary input as instructed. This may include confirming your decision to uninstall the program or selecting specific options related to the uninstallation process.
6. Allow the uninstallation process to complete. Depending on the complexity and size of the program, the uninstallation may take a few moments or longer. Do not interrupt the process and be patient until the uninstallation is finished.
7. Once the uninstallation process is complete, you may receive a confirmation message stating that the program has been successfully uninstalled. Some uninstallers may also prompt you to restart your computer to fully complete the removal process. If prompted, follow the instructions provided.
By running the uninstallation file, you have initiated the program’s dedicated uninstaller and started the process of removing the program and its associated files from your Windows computer. Following the prompts and instructions provided by the uninstaller will ensure a smooth and successful uninstallation.
It’s important to note that the user experience of different uninstallation files may vary depending on the program and its developer. Some uninstallers may provide more options and customization, while others may have a simplified interface. Regardless, following the uninstaller’s prompts is crucial for a proper and complete removal of the program.
After running the uninstallation file and proceeding through the prompts, you have successfully initiated the uninstallation process of the program using its dedicated uninstaller. The program should now be removed from your Windows computer, leaving behind no unnecessary files or remnants.
Step 4: Follow the prompts to uninstall the program
After running the uninstallation file provided by the program’s developer, the next step in uninstalling a program using its own uninstaller is to follow the prompts displayed on your screen. These prompts are specific to the program’s uninstaller and are designed to guide you through the uninstallation process. Here’s what you need to do:
1. As the program’s dedicated uninstaller launches, you may encounter a series of prompts and instructions. Read the information presented carefully to understand the process and any options available.
2. Pay attention to any warning messages or additional information provided by the uninstaller. These messages may offer important details or specific instructions related to the uninstallation process.
3. Follow the prompts and instructions provided by the uninstaller. These prompts may vary depending on the program and the preferences set by the program’s developer. They may include options such as removing user data, selecting components to uninstall, or customizing the uninstallation process.
4. If the uninstaller offers options or settings during the uninstallation process, make your selections based on your preferences and needs. Be cautious when adjusting settings and consider any consequences that may arise from your choices.
5. Read any confirmation messages carefully. Ensure that you are selecting the correct options and that you understand the consequences of your choices. Confirm the uninstallation when prompted, if required.
6. Allow the uninstallation process to complete without interruption. Depending on the size of the program and the speed of your computer, it may take a few moments or longer to remove the program completely. Avoid closing the uninstaller or interfering with the process until it has finished.
7. Once the program has been successfully uninstalled, you may receive a confirmation message indicating the removal’s completion. Some uninstallers may also recommend restarting your computer to finalize the removal process. If prompted, follow the instructions provided to restart your computer.
By following the prompts presented by the program’s uninstaller, you effectively navigate the uninstallation process while ensuring a smooth and successful removal of the program from your Windows computer.
It’s worth noting that the prompts and options presented by uninstallers may vary, depending on the program and the developer’s choices. Some uninstallers may offer more advanced settings and customization, while others have a simplified interface.
After you have followed the prompts and completed the uninstallation process, the program should be successfully removed from your Windows computer, leaving behind no traces of its existence.
With the prompts followed and the program uninstalled using its own uninstaller, you can rest assured that the removal process was carried out according to the developer’s recommendations. Your Windows computer is now free of the program, allowing you to maintain a clean and optimized system environment.
Conclusion
Uninstalling a program on Windows is a routine task that allows you to free up disk space, optimize system performance, and maintain a clutter-free computer environment. In this guide, we explored three different methods to uninstall programs: using the Control Panel, the Settings app, and the program’s own uninstaller.
The Control Panel method provides a straightforward approach to managing your installed programs. By accessing the “Uninstall a program” section within the Control Panel, you can select and remove unwanted programs easily.
The Settings app offers a modern and user-friendly interface for uninstalling programs. With just a few clicks, you can navigate to the “Apps” section and remove unwanted applications from your computer.
By utilizing a program’s own uninstaller, you can ensure a thorough and complete removal. Running the uninstallation file provided by the program’s developer initiates the specialized uninstallation process designed specifically for that program, guiding you through the removal steps with prompts and options.
Regardless of the method chosen, it’s important to follow the prompts and instructions during the uninstallation process. This helps ensure a successful and clean removal, as well as minimizing the chance of leaving any unnecessary files or remnants behind on your system.
Remember to exercise caution when uninstalling programs. Double-check your selections, particularly when removing programs using the Control Panel or the Settings app, as removing the wrong program can have unintended consequences.
It’s also worth noting that some programs may have unique uninstallation procedures or requirements. In such cases, consult the program’s documentation, official website, or seek assistance from the program’s support team for specific uninstallation instructions.
By effectively uninstalling programs, you can maintain a well-organized and efficient computer system. Regularly reviewing and removing unnecessary programs ensures that your Windows computer remains optimized and provides the best possible performance.
Now that you’re familiar with multiple methods of uninstalling programs on Windows, you can confidently free up space, manage your installed software, and maintain a smoothly running computer environment.