Introduction
Welcome to this step-by-step guide on how to uninstall Windows from your computer. Whether you’re looking to upgrade your operating system or switch to a different one, properly uninstalling Windows is essential to ensure a clean and smooth transition.
Before we dive into the uninstallation process, it’s important to note that removing Windows from your computer will permanently delete all your files and programs. Therefore, it’s crucial to back up any important data you wish to keep before proceeding.
In this guide, we will explore various methods to uninstall Windows, ranging from built-in tools to third-party software options. We’ll cover how to remove unnecessary applications, uninstall programs, use the settings app, control panel, PowerShell, and even clean up the registry.
By the end of this guide, you’ll have a comprehensive understanding of the different methods available for uninstalling Windows, enabling you to choose the approach that best suits your needs and preferences.
It’s important to note that the specific steps may vary slightly depending on the version of Windows you are using. Therefore, it’s recommended to consult official documentation or guides specific to your Windows version for any version-specific instructions.
Now, let’s get started on the journey to uninstall Windows and pave the way for a fresh computing experience.
Backup your data
Before you begin the process of uninstalling Windows, it’s crucial to back up all your important data. Uninstalling Windows will result in the deletion of all your files and programs, so it’s essential to take the necessary precautions to ensure you don’t lose important information. Here’s how you can back up your data:
- External storage device: Connect an external hard drive or USB flash drive to your computer. Copy all the files and folders that you want to keep to the external storage device. Make sure to organize your files properly and create separate folders to make it easier to restore them later.
- Cloud storage service: If you have a reliable internet connection, consider using a cloud storage service like Google Drive, Dropbox, or OneDrive. Sign up for an account if you don’t already have one and upload your files to the cloud. This ensures that your data is securely stored offsite and can be easily accessed from any device with an internet connection.
- Network storage: If you have access to a network storage device or a shared network folder, you can transfer your files to that location. This is especially useful for users who are part of a home or office network. Simply copy your files to the network storage device or folder, making sure to organize them properly.
Once you have successfully backed up all your important data, it’s important to double-check and ensure that all the files and folders you need are safely stored in their respective locations. Make sure you have verified the integrity of your backups before proceeding with the uninstallation process.
Remember, taking the time to back up your data will give you peace of mind and ensure that you don’t lose any important files during the Windows uninstallation process. It’s always better to be safe than sorry.
Remove unnecessary applications
Before uninstalling Windows, it’s important to remove any unnecessary applications or software programs from your computer. This step will help streamline the uninstallation process and ensure a smoother transition. Here are some steps to follow:
- Review installed applications: Go through the list of installed applications on your computer and make note of any programs you no longer use or need. These could be trial software, bloatware that came pre-installed with your computer, or applications that you simply don’t use anymore.
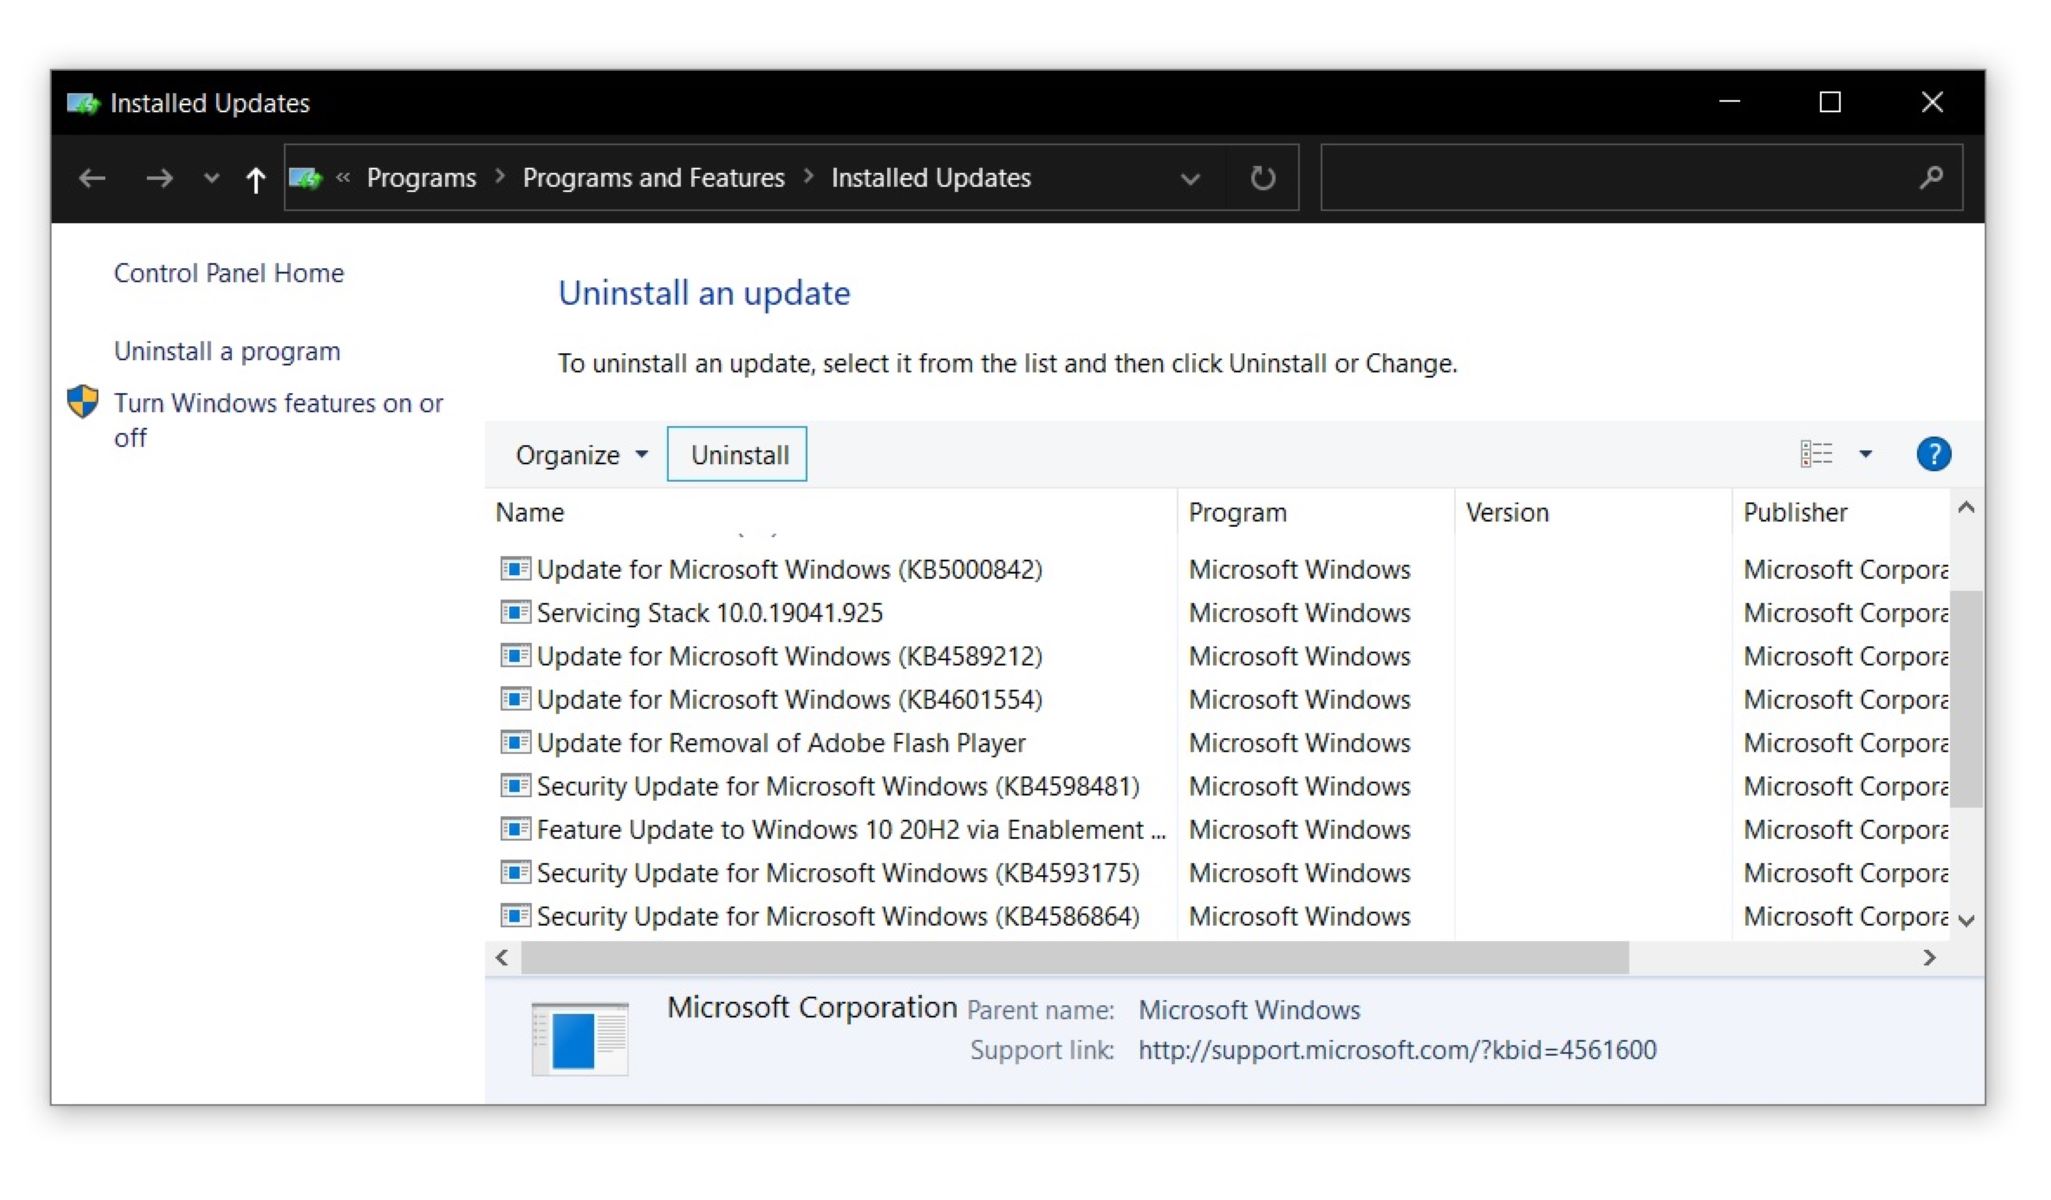
- Uninstall via Control Panel: One of the easiest ways to remove unwanted applications is through the Control Panel. To access the Control Panel, click on the Start button, search for “Control Panel,” and open it. From there, navigate to the “Programs” or “Programs and Features” section and choose “Uninstall a program.” Select the application you want to remove and click on “Uninstall.” Follow the on-screen prompts to complete the uninstallation process.
- Use third-party uninstaller: If you have stubborn applications that cannot be uninstalled through the Control Panel, consider using a third-party uninstaller. There are several free and paid uninstaller tools available online that can help you remove stubborn programs completely. These tools often have additional features like cleaning up leftover files and registry entries.
- Clean up desktop and start menu: Take the time to clean up your desktop and Start menu by removing shortcuts to applications you no longer need. Right-click on the shortcut and choose “Delete” to remove it. This will help declutter your system and make the uninstallation process easier.
- Scan for malware: Before proceeding with the Windows uninstallation, it’s always a good idea to scan your computer for malware or viruses. Use a reliable antivirus software to scan your system and remove any malicious programs that could interfere with the uninstallation process.
By removing unnecessary applications from your computer, you’ll not only free up valuable storage space but also create a more streamlined environment for the Windows uninstallation process. It’s important to note that some applications may require additional steps or specific instructions for complete removal, so always refer to the documentation provided by the software developer or the application’s support website for guidance.
Uninstall programs
Once you have removed any unnecessary applications from your computer, the next step is to uninstall the programs that you no longer need. Uninstalling programs will free up disk space and ensure a clean system for the Windows uninstallation process. Here’s how you can uninstall programs:
- Control Panel: The Control Panel is a built-in tool in Windows that allows you to manage various system settings, including installed programs. To uninstall a program using the Control Panel, click on the Start button, search for “Control Panel,” and open it. Navigate to the “Programs” or “Programs and Features” section and choose “Uninstall a program.” This will display a list of installed programs. Select the program you want to uninstall and click on “Uninstall.” Follow the on-screen prompts to complete the uninstallation process.
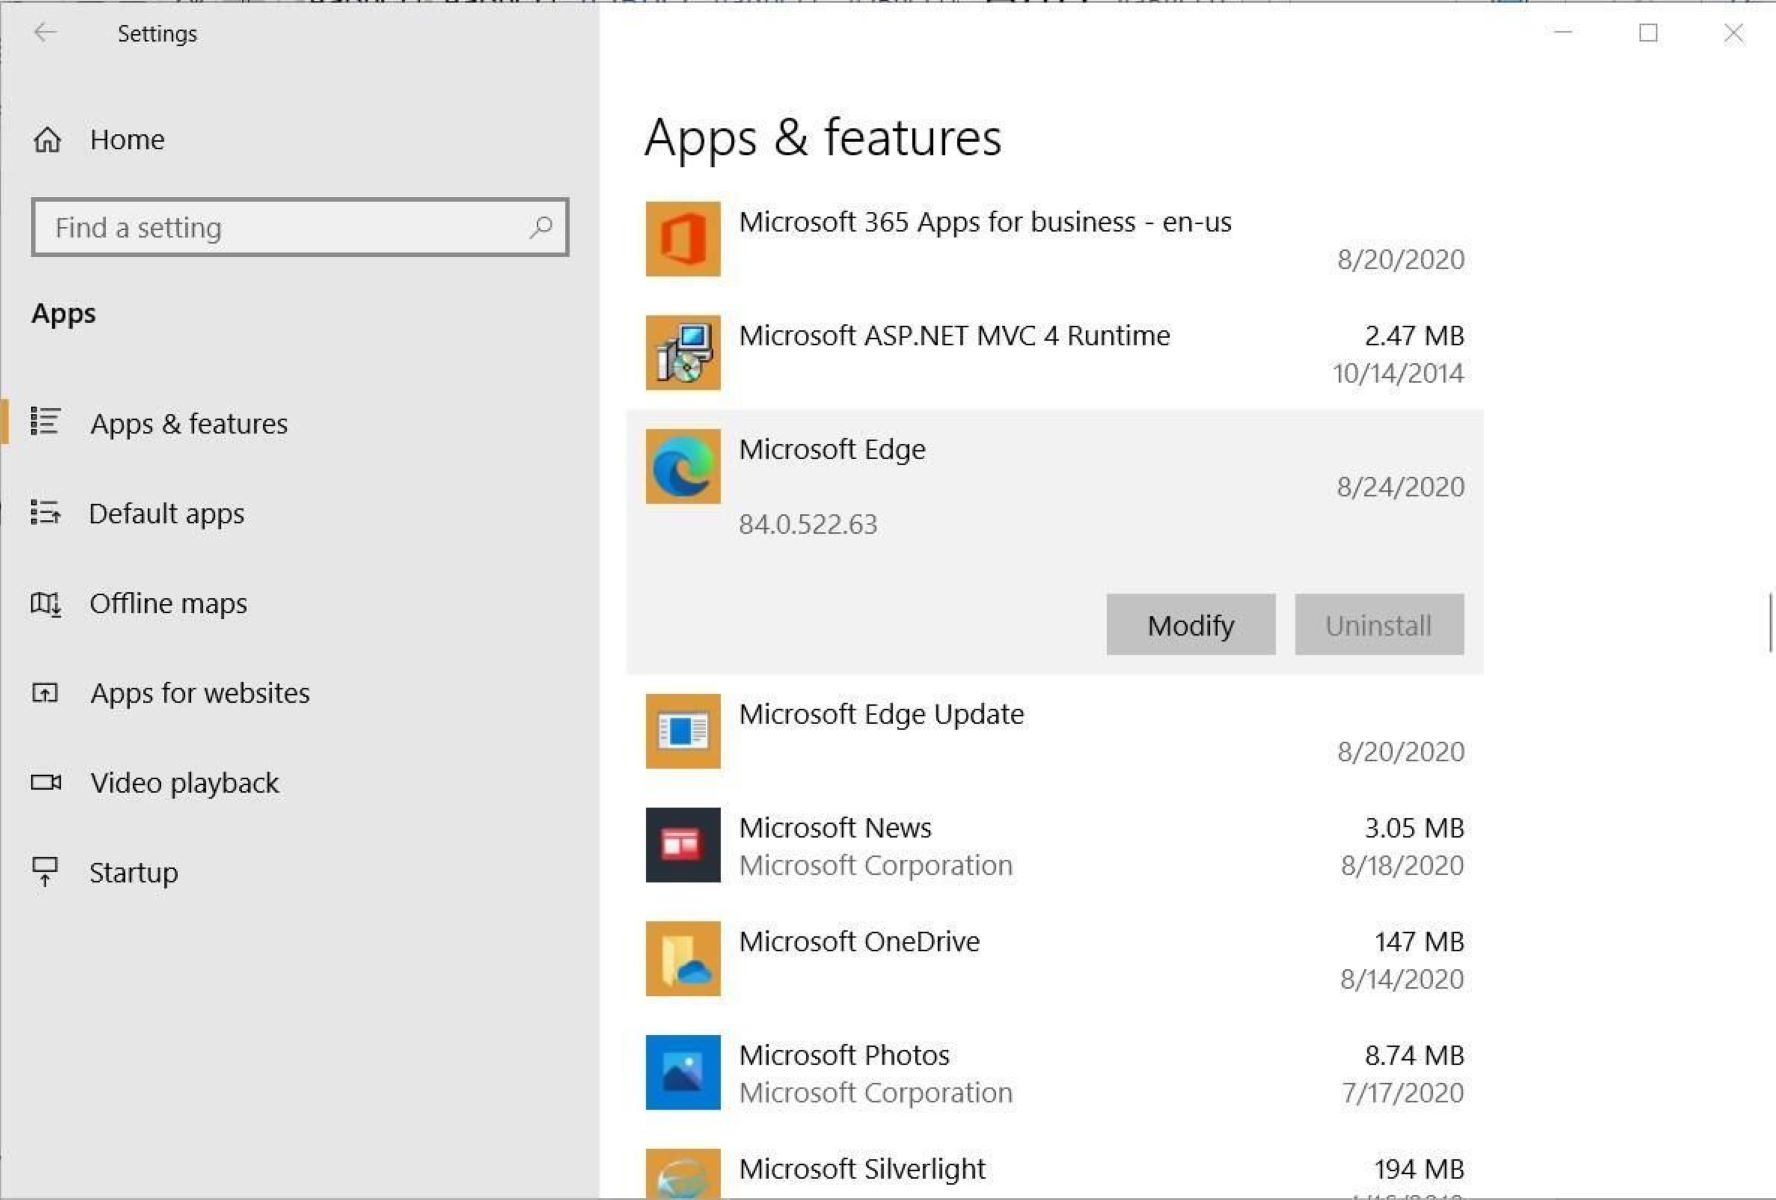
- Settings App: Windows 10 introduced the Settings app as an alternative to the Control Panel. To uninstall a program using the Settings app, click on the Start button and select “Settings.” In the Settings app, go to “Apps” or “Apps & features.” This will show you a list of installed programs. Select the program you want to uninstall and click on “Uninstall.” Follow the on-screen instructions to remove the program.
- Program Uninstaller: Some programs come with their own uninstaller tool. Check the program’s documentation or website for specific uninstallation instructions. This may involve running an uninstaller executable or accessing the uninstall option within the program itself.
- Third-party uninstaller: If you encounter difficulties uninstalling a program through the Control Panel or Settings app, you can use third-party uninstaller software. There are free and paid options available that can help you remove stubborn programs completely. These uninstallers often have advanced features to clean up leftover files and registry entries.
After uninstalling a program, it’s always a good practice to restart your computer to ensure the changes take effect. Additionally, it’s important to note that some programs may require you to deactivate or unregister them before uninstalling, especially if they are licensed software.
By uninstalling programs that you no longer need, you’ll not only free up disk space but also ensure a smoother Windows uninstallation process. Remember to review the list of installed programs carefully and only remove those that you no longer use or require.
Use the settings app
Windows 10 introduced the Settings app as a centralized hub for managing various system settings, including the ability to uninstall programs. The Settings app provides a user-friendly interface and an alternative method to uninstall programs without having to access the Control Panel. Here’s how you can use the Settings app to uninstall programs:
- Open the Settings app: Click on the Start button and select “Settings” from the menu. Alternatively, you can press the Windows key + I on your keyboard to directly open the Settings app.
- Navigate to the Apps section: In the Settings app, you’ll find various categories. Look for the category named “Apps” or “Apps & features” and click on it. This will display a list of all the installed programs on your computer.
- Select the program to uninstall: Scroll through the list or use the search bar to find the program you want to uninstall. Once you locate the program, click on it to expand the options.
- Uninstall the program: Within the program’s options, you’ll find an “Uninstall” button. Click on this button to initiate the uninstallation process. A confirmation prompt may appear asking if you’re sure you want to uninstall the program. Review the prompt, and if you want to proceed, click “Uninstall” again.
- Follow the on-screen instructions: Once you confirm the uninstallation, Windows will guide you through the process. It may ask you to confirm your selection, prompt you to save any unsaved data from the program, or ask for additional preferences related to the uninstallation. Follow the on-screen instructions to complete the process.
Using the Settings app to uninstall programs offers a streamlined and intuitive approach. It simplifies the process and eliminates the need to navigate through the Control Panel. However, it’s important to note that the availability and functionality of the Settings app may vary slightly depending on the version of Windows you are using. Always refer to the official Microsoft documentation or specific guides for your Windows version for accurate instructions.
By utilizing the Settings app, you can quickly and easily uninstall programs from your computer. This helps declutter your system and create a more efficient computing environment.
Use the control panel
The Control Panel is a powerful tool in Windows that allows you to manage various system settings, including the ability to uninstall programs. While Windows 10 introduced the Settings app as an alternative interface, the Control Panel still remains a staple for many users. Here’s how you can use the Control Panel to uninstall programs:
- Open the Control Panel: Click on the Start button and search for “Control Panel”. Once you find it, click on it to open the Control Panel.
- Navigate to the “Programs” section: In the Control Panel, you’ll find different categories. Look for the category named “Programs” or “Programs and Features” and click on it. This will display a list of installed programs on your computer.
- Find the program to uninstall: Scroll through the list of installed programs or use the search bar to find the specific program you want to uninstall. Once you locate the program, click on it to select it.
- Initiate the uninstallation: Once you have selected the program, various options will appear at the top of the Control Panel window. Look for the option that says “Uninstall” or “Change/Remove”. Click on this option to initiate the uninstallation process.
- Follow the on-screen instructions: Windows will guide you through the uninstallation process. It may prompt you to confirm your selection or ask for additional preferences related to the uninstallation. Follow the on-screen instructions and prompts to complete the process.
Using the Control Panel to uninstall programs provides a comprehensive and customizable approach. It allows you to manage installed programs more efficiently and gives you additional tools and options for program removal.
It’s important to note that some programs may require you to deactivate or unregister them before uninstalling, especially if they are licensed software. In such cases, make sure to follow the specific instructions provided by the software developer or consult the program’s documentation for guidance.
The Control Panel remains a reliable and effective method for uninstalling programs in Windows. It gives you granular control over your installed software and ensures a clean and optimized system.
Use PowerShell
PowerShell is a powerful command-line tool in Windows that provides extensive functionality for managing and automating various system tasks, including uninstalling programs. While it may seem more technical than other methods, PowerShell offers flexibility and advanced capabilities for program removal. Here’s how you can use PowerShell to uninstall programs:
- Open PowerShell: Click on the Start button and search for “PowerShell”. Once you find it, right-click on it and select “Run as administrator”. This will ensure that you have the necessary privileges to perform uninstallation tasks.
- Check the list of installed programs: In PowerShell, you can use the command
Get-WmiObject -Class "Win32_Product"to retrieve a list of installed programs on your computer. This command will display the names of the installed programs, along with other details such as the version number and vendor. - Identify the program to uninstall: Review the list of installed programs in PowerShell and identify the name of the program you want to uninstall. Take note of the exact name as it appears in the list.
- Uninstall the program: In PowerShell, use the command
gwmi -Query "SELECT * FROM Win32_Product WHERE Name='program_name'" | ForEach-Object { $_.uninstall() }, replacing “program_name” with the name of the program you want to uninstall. This command will locate the program in the list of installed products and initiate the uninstallation process. - Follow the on-screen instructions: PowerShell will execute the uninstallation command and display any relevant information or prompts. Follow the on-screen instructions to complete the uninstallation process.
PowerShell provides a highly customizable and efficient method for uninstalling programs, especially when dealing with multiple programs simultaneously. It allows you to automate tasks, create scripts, and perform complex operations on your system.
It’s important to note that using PowerShell requires a basic understanding of command-line syntax and computer management. Take extra caution while using PowerShell, as incorrect commands or actions can have unintended consequences. Double-check your commands and ensure you have identified the correct program name before proceeding.
By harnessing the power of PowerShell, you can efficiently uninstall programs with precision and control.
Use a third-party uninstaller
While built-in tools like the Control Panel or Settings app are effective for uninstalling programs, there are times when you may encounter stubborn or difficult-to-remove applications. In such cases, using a third-party uninstaller can provide a more comprehensive and thorough removal process. Here’s how you can use a third-party uninstaller to uninstall programs:
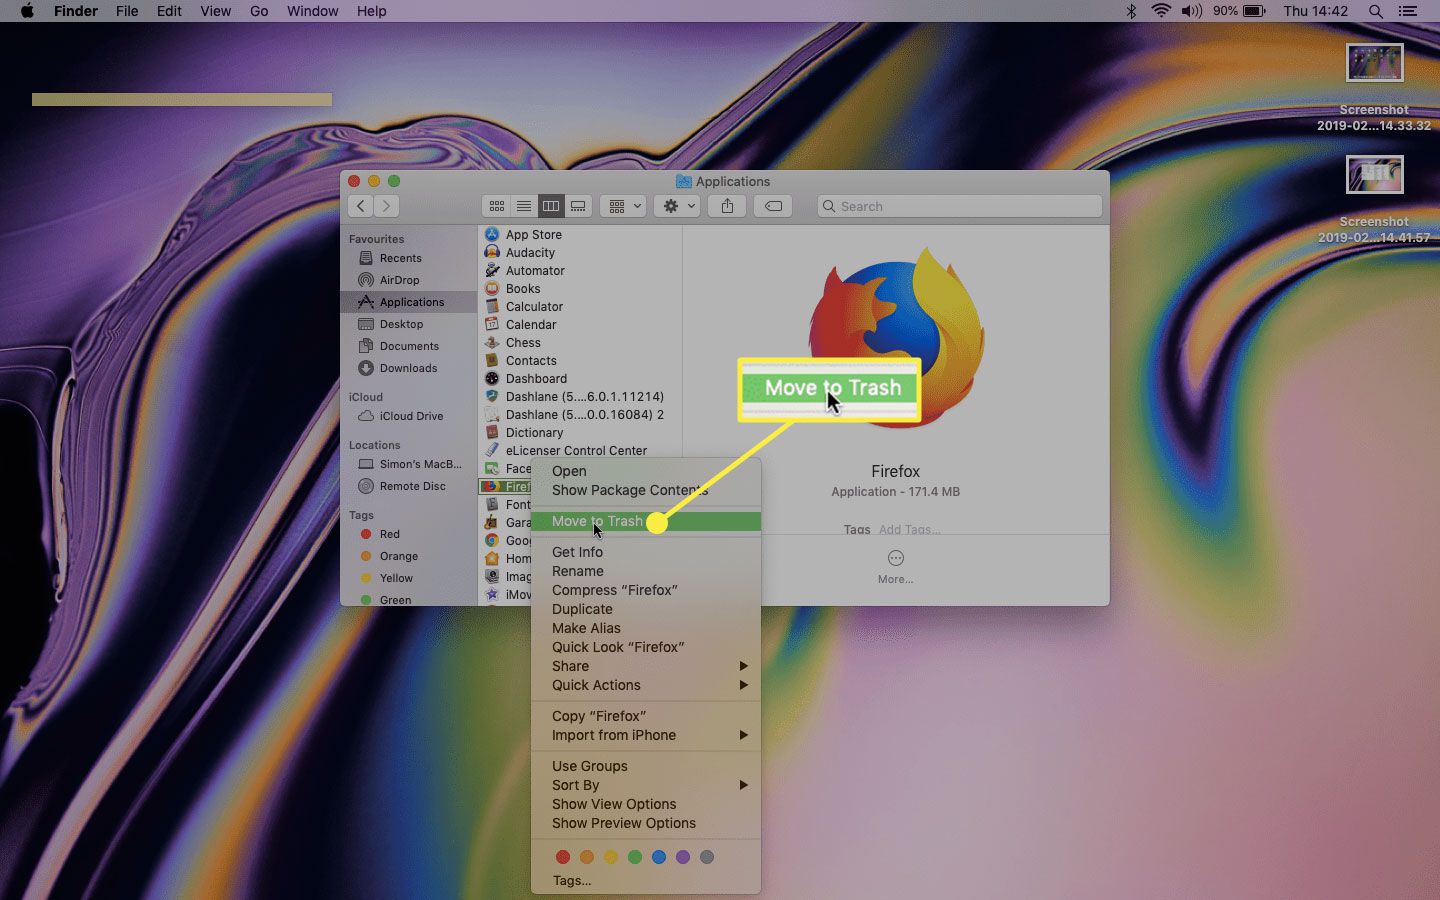
- Research and choose a reliable uninstaller: There are several third-party uninstaller tools available, both free and paid. Take the time to research and choose a reputable uninstaller that suits your needs. Look for features such as complete program removal, scanning for leftover files and registry entries, and ease of use. Popular options include Revo Uninstaller, IObit Uninstaller, and Geek Uninstaller.
- Download and install the uninstaller: Once you have chosen a third-party uninstaller, visit the official website and download the installer. Run the installer and follow the on-screen instructions to install the uninstaller tool on your computer. Make sure to read and understand any prompts or additional options during the installation process.
- Launch the uninstaller: After installing the uninstaller, locate the program icon or open it from the Start menu or desktop shortcut. Launch the third-party uninstaller to begin using its features and functionalities.
- Scan for installed programs: Most third-party uninstallers have a feature that scans your computer for installed programs. Initiate the scanning process by clicking on the “Scan” or “Search” button within the uninstaller interface. This will generate a list of installed programs on your computer.
- Select the program for uninstallation: From the list of installed programs, locate the specific program you want to uninstall. Click on the program to select it or check the box next to it, depending on the interface of the uninstaller you’re using.
- Uninstall the program: Once you have selected the program to uninstall, look for the “Uninstall” button or option within the uninstaller interface. Clicking on this button will initiate the uninstallation process for the selected program. Follow any on-screen instructions or prompts provided by the uninstaller to complete the removal.
- Follow cleanup steps (if available): Some third-party uninstallers offer additional cleanup steps after the program is uninstalled. These steps may include scanning for leftover files, registry entries, or other related items. If such cleanup options are available, it is recommended to follow them to ensure a thorough removal of the program.
Using a third-party uninstaller can be particularly useful when dealing with stubborn or problematic programs, as these uninstallers often have advanced algorithms and scanning capabilities to ensure complete removal. They can also help you clean up any leftover traces of the uninstalled program, optimizing your system’s performance.
Always ensure that you download third-party uninstallers from reputable sources to avoid potential malware or security risks. Research user reviews and ratings to find a trustworthy uninstaller that suits your needs. Remember to periodically update the uninstaller to benefit from the latest features and improvements.
Clean up the registry
When you uninstall programs from your computer, traces of their presence can often remain in the Windows registry. The registry is a database that stores configuration settings and information about installed programs, and over time, it can accumulate outdated or unnecessary entries. Cleaning up the registry can help improve system performance and ensure a more streamlined computing experience. Here’s how you can clean up the registry:
- Create a registry backup: Before making any changes to the registry, it’s important to create a backup to safeguard against any unintended consequences. To create a backup, open the registry editor by pressing the Windows key + R, typing “regedit,” and pressing Enter. Once in the registry editor, click on “File” in the top menu, select “Export,” choose a location to save the backup file, and give it a descriptive name. This backup can be used to restore the registry if any issues arise.
- Open the registry editor: To open the registry editor, press the Windows key + R, type “regedit,” and press Enter. This will launch the registry editor, which allows you to make changes to the registry database.
- Navigate to the registry keys: In the registry editor, you can navigate the registry tree structure by expanding the folders. Look for the following registry keys that may contain leftover entries related to uninstalled programs:
HKEY_CURRENT_USER\SoftwareHKEY_LOCAL_MACHINE\SoftwareHKEY_LOCAL_MACHINE\Software\Wow6432Node(for 64-bit systems)
- Search for program-related entries: Within the registry keys mentioned above, search for entries related to the program you have uninstalled. Look for keys or subkeys that contain the name of the program or the program’s vendor. Right-click on any found keys or subkeys and select “Delete” to remove them. Exercise caution when deleting registry entries and ensure that you are only removing entries related to the uninstalled program.
- Continue with other keys and subkeys: Repeat the search and deletion process for other relevant registry keys and subkeys related to uninstalled programs. Be thorough, but also be cautious not to delete any keys that are critical to the functioning of other programs or Windows itself. Deleting the wrong registry entries can cause system instability or application issues.
Cleaning up the registry can help optimize system performance and ensure a tidy registry database. It’s important to exercise caution when making changes to the registry, as deleting the wrong entries can have unintended consequences. If you’re unsure about certain entries or don’t feel confident in manually editing the registry, consider using a trusted registry cleaning tool that can automate the process while minimizing the risk of errors.
Remember to create a backup before making any changes to the registry, and if you encounter any issues or unintended side effects after cleaning up the registry, you can restore the backup to revert to the previous state.
Delete Windows files and partitions
If you’re planning to uninstall Windows completely from your computer, you’ll need to delete the Windows files and partitions. This step is crucial to ensure that all traces of the Windows operating system are removed from your computer’s storage. Here’s how you can delete Windows files and partitions:
- Backup your data: Before proceeding with deleting Windows files and partitions, it’s essential to back up any important data you want to keep. This step ensures that you don’t lose any valuable files during the process. You can copy your files to an external storage device or upload them to a cloud storage service to keep them safe.
- Boot from a different operating system or recovery media: To delete Windows files and partitions, you’ll need to boot your computer from a different operating system or recovery media. This could be a different Windows installation, a Linux distribution, or a recovery USB or DVD. Make sure you have the necessary media to boot from before proceeding.
- Boot into the different operating system or recovery media: Restart your computer and enter the boot menu or BIOS settings. This process varies depending on the computer’s manufacturer. Look for the key or combination of keys to access the boot menu or BIOS settings during startup. Select the appropriate media or device to boot into the alternative operating system or recovery environment.
- Format or delete Windows partitions: Once you’re booted into the different operating system or recovery environment, you’ll need to format or delete the Windows partitions. Depending on the operating system or utility you’re using, you may have different options for accessing the partition management tools. Look for options like “Disk Management” or “GParted” to manage partitions. Identify the Windows partitions and format or delete them to remove the Windows installation.
- Clean up the boot loader: After deleting the Windows partitions, it’s essential to clean up the boot loader to remove any remnants of the Windows operating system. This can be done by accessing the boot loader configuration or using tools like “Boot Repair” for certain operating systems.
- Verify successful deletion: After deleting the Windows files and partitions, restart your computer and ensure that it successfully boots into the alternative operating system or recovery environment. Verify that all traces of the Windows operating system have been removed.
Deleting Windows files and partitions is a critical step in completely uninstalling Windows from your computer. It ensures that the operating system is thoroughly removed, allowing you to start fresh with a different operating system or perform a clean Windows installation if desired.
It’s important to exercise caution when deleting partitions and make sure that you are targeting the correct partitions. Double-checking your actions and having proper backup copies of your data will provide an extra layer of safety throughout this process.
Reinstalling Windows
If you’ve decided to reinstall Windows on your computer after the uninstallation process, it’s essential to follow the proper steps to ensure a successful and clean installation. Reinstalling Windows gives you a fresh start and can help resolve any lingering issues or performance problems you may have encountered. Here’s how you can reinstall Windows:
- Backup your data: Before reinstalling Windows, it’s crucial to back up all your important data. This step ensures that you don’t lose any valuable files during the reinstallation process. Copy your files to an external storage device or upload them to a cloud storage service to keep them safe.
- Create installation media: To reinstall Windows, you’ll need to create installation media. This typically involves downloading the Windows installation files from the official Microsoft website and creating a bootable USB drive or DVD. Follow the instructions provided by Microsoft to create the installation media for your specific version of Windows.
- Boot from the installation media: Once you have created the installation media, insert it into your computer’s USB port or DVD drive. Restart your computer and enter the boot menu or BIOS settings. Look for the key or combination of keys to access the boot menu or BIOS settings during startup. Select the installation media as the boot device.
- Install Windows: After booting from the installation media, you’ll be presented with the Windows installation wizard. Follow the on-screen instructions to begin the installation process. You’ll need to choose the language, region, and product key, if applicable. You may also be prompted to select the edition and partition where you want to install Windows.
- Follow the setup process: Once you’ve selected the installation settings, the Windows installation will begin. The process may take some time, depending on your computer’s hardware configuration. Follow the on-screen instructions to set up Windows, including choosing privacy settings, creating user accounts, and configuring security options.
- Install drivers and update Windows: After the Windows installation is complete, it’s essential to install the necessary drivers for your hardware components. These drivers can usually be obtained from the manufacturer’s website or through Windows Update. Additionally, make sure to update Windows to the latest version to ensure that you have the latest security patches and bug fixes.
- Restore your backed-up data: Once you have reinstalled Windows and set up your system, you can restore your backed-up data. Copy your files back to your computer from the external storage device or cloud storage service. Ensure that you organize your files properly and place them in the appropriate folders.
Reinstalling Windows provides a fresh start and allows you to start with a clean and optimized operating system. It’s important to keep in mind that reinstalling Windows will erase all data and applications on your computer’s system drive, so make sure you have backed up everything you need before proceeding.
Follow these steps carefully to ensure a successful and hassle-free Windows reinstallation process. Taking the time to reinstall Windows properly can help resolve any previous issues and provide you with a stable and optimized computing experience.