Introduction
McAfee Antivirus is a powerful security software that helps protect your computer from malware, viruses, and other online threats. While McAfee provides excellent protection for your system, there may be instances where you need to uninstall the antivirus program. This could be due to various reasons, such as upgrading to a different antivirus software or experiencing conflicts with other applications.
In this article, we will guide you through the process of uninstalling McAfee Antivirus on both Windows and Mac operating systems. We will provide step-by-step instructions to ensure a smooth and effective uninstallation.
It is important to note that before uninstalling McAfee Antivirus, you should have an alternative security solution installed on your system to ensure continuous protection. This will help protect your computer from potential threats during the uninstallation process.
Uninstalling McAfee Antivirus involves disabling real-time scanning, exiting the program, and using either the Control Panel (on Windows) or manually deleting the application and related files (on Mac). We will also address common issues that may arise during the uninstallation process and provide troubleshooting tips.
By following the instructions in this guide, you will be able to safely and completely remove McAfee Antivirus from your computer, allowing you to proceed with other security measures or switch to a different antivirus program of your choice.
Why Uninstall McAfee Antivirus?
While McAfee Antivirus offers robust protection for your computer, there may be several reasons why you may need to uninstall the software.
Firstly, you may have decided to switch to a different antivirus solution that better suits your needs. With the wide range of security software options available, it’s natural to explore alternatives that offer different features or better performance.
Secondly, you may have encountered compatibility issues with other applications on your system. In some cases, McAfee Antivirus may interfere with the functioning of certain programs, causing them to crash or operate abnormally. Uninstalling McAfee can help resolve these compatibility issues and ensure smooth operation of other software.
Another reason could be that you no longer require antivirus software on your computer. If you have migrated to a different operating system or if you solely use your computer for non-internet related tasks, the need for constant antivirus protection may be reduced.
Additionally, you may have experienced performance issues with your computer due to McAfee Antivirus. While the software is designed to run efficiently in the background, it can consume system resources, causing your computer to slow down. Uninstalling McAfee can help optimize system performance, especially if you have limited resources or an older computer.
Lastly, some users may find that they have inadvertently installed McAfee Antivirus and have no use for it. This could be the result of bundled software installations or pre-installed antivirus software on a new computer. In such cases, uninstalling McAfee can help declutter your system and free up valuable resources.
It’s important to note that regardless of the reasons for uninstalling McAfee Antivirus, you should have an alternative antivirus solution in place to ensure the continued security of your computer. Leaving your computer unprotected can leave it vulnerable to malware, viruses, and other online threats.
Now that we understand the reasons behind uninstalling McAfee Antivirus, let’s delve into the step-by-step process of uninstalling the software on both Windows and Mac operating systems.
How to Uninstall McAfee Antivirus on Windows Operating System
Uninstalling McAfee Antivirus on a Windows operating system involves several steps. Follow the instructions below to complete the process:
Step 1: Disable Real-Time Scanning
The first step before uninstalling McAfee is to disable real-time scanning. This prevents the antivirus software from interfering during the uninstallation process. To do this, right-click on the McAfee Antivirus icon in the system tray and select the “Open McAfee Antivirus” option. In the McAfee Antivirus program, navigate to the settings and disable the real-time scanning feature.
Step 2: Exit McAfee Antivirus Program
Before proceeding with the uninstallation, exit the McAfee Antivirus program completely. To do this, right-click on the McAfee Antivirus icon in the system tray and select the “Exit” or “Quit” option. This ensures that all McAfee processes are closed.
Step 3: Uninstall via Control Panel
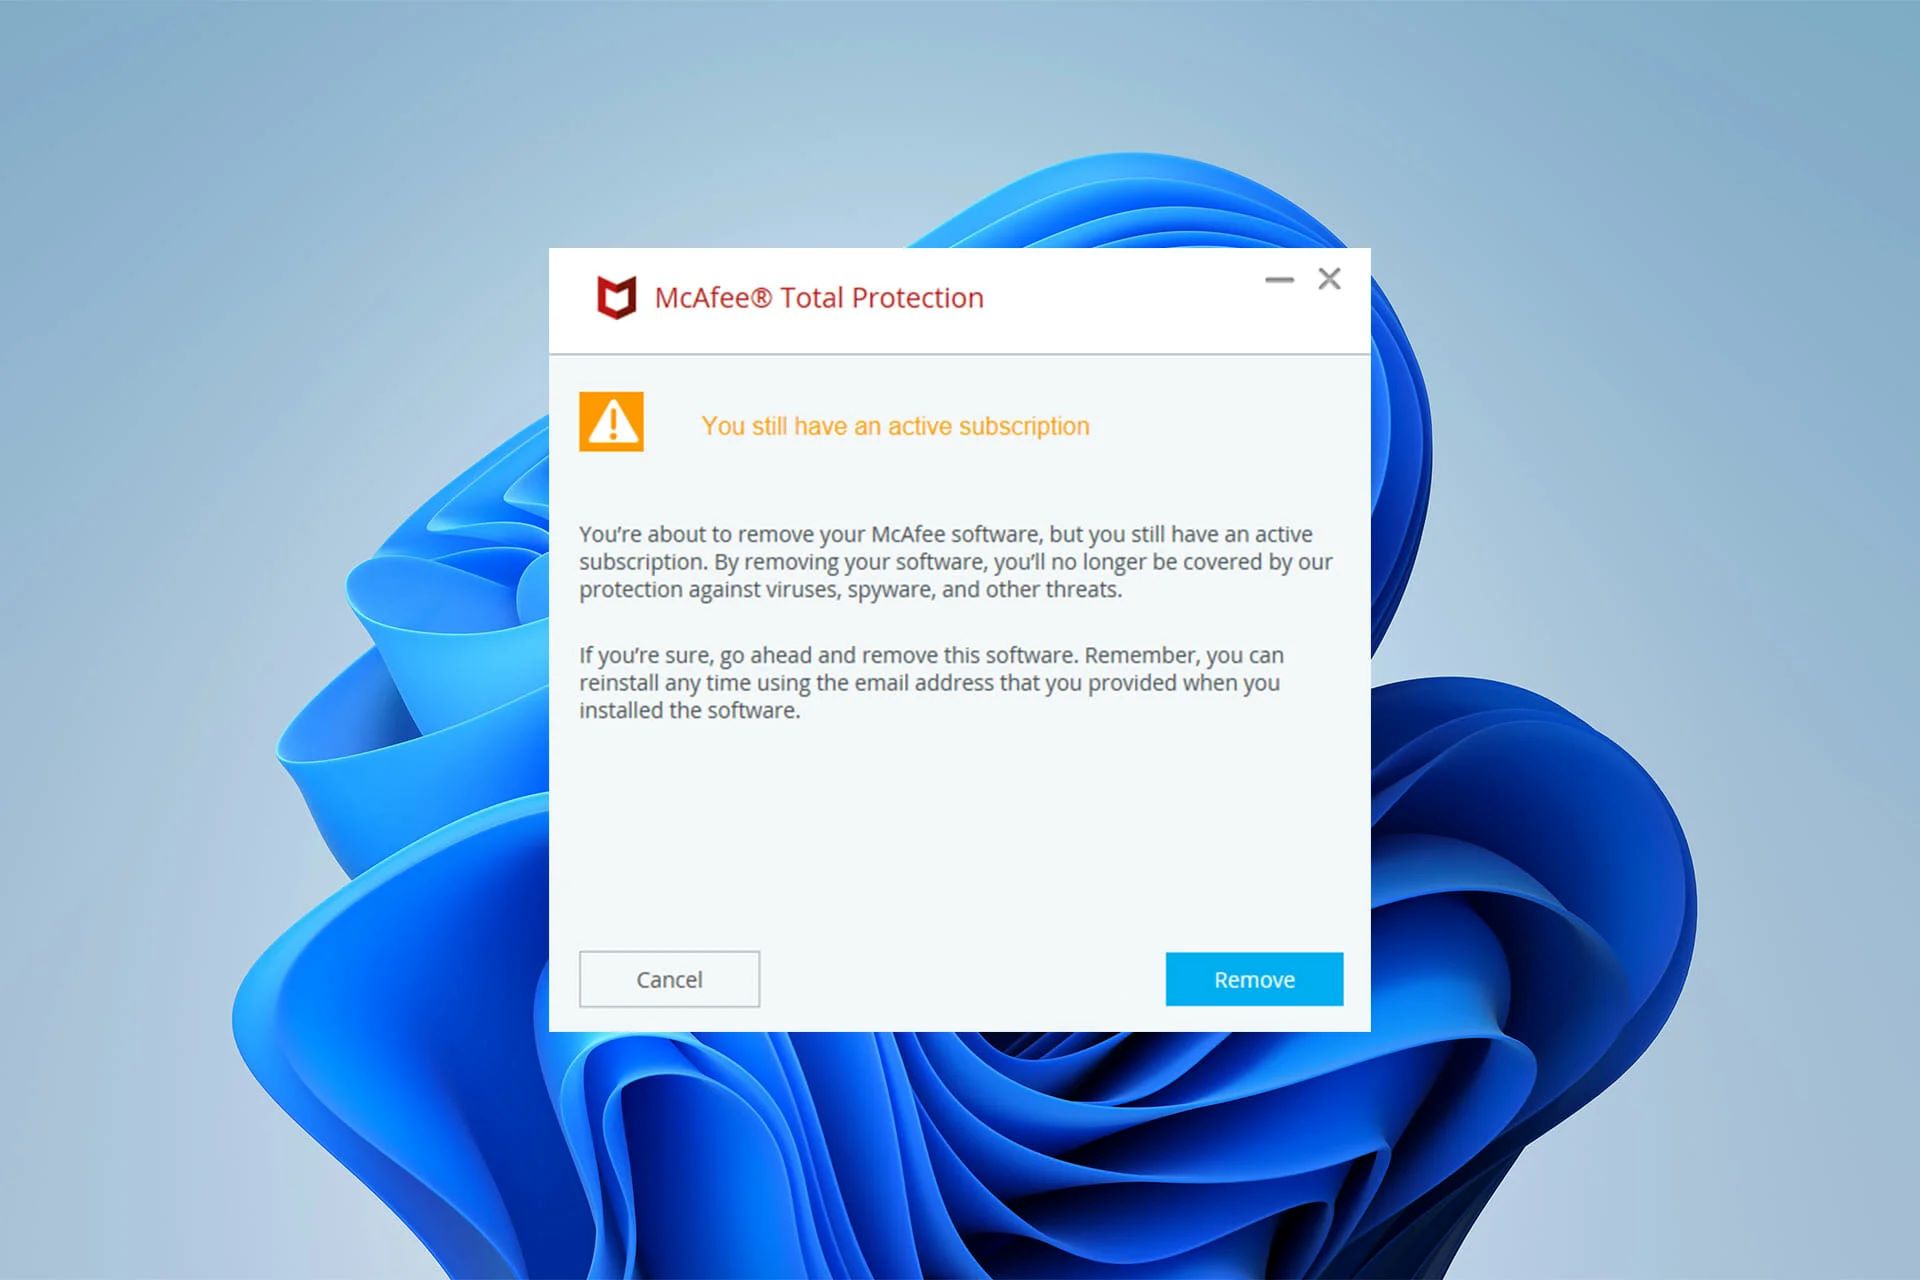
Next, go to the Control Panel by searching for it in the Windows search bar. In the Control Panel, select the “Programs” or “Programs and Features” option. Look for McAfee Antivirus in the list of installed programs and click on it. Then, click on the “Uninstall” or “Remove” button and follow the on-screen instructions to complete the uninstallation process.
Step 4: Use McAfee Consumer Products Removal (MCPR) Tool
If you encounter any issues with the standard uninstallation process, you can use the McAfee Consumer Products Removal (MCPR) tool provided by McAfee. This tool helps remove any remnants of McAfee Antivirus from your system. Simply download the MCPR tool from the official McAfee website and run it. Follow the on-screen instructions to remove McAfee Antivirus completely.
Step 5: Restart Your Computer
After completing the uninstallation process, it is recommended to restart your computer. This ensures that any remaining files or processes associated with McAfee Antivirus are fully removed from your system.
By following these steps, you will be able to successfully uninstall McAfee Antivirus from your Windows operating system. Make sure to have an alternative antivirus software installed on your system to continue protecting your computer from online threats.
Step 1: Disable Real-Time Scanning
The first step in uninstalling McAfee Antivirus on a Windows operating system is to disable the real-time scanning feature. By disabling real-time scanning, you prevent the antivirus software from interfering during the uninstallation process and ensure a smooth uninstallation experience. Follow the instructions below:
1. Locate the McAfee Antivirus icon in the system tray, which is typically located at the bottom-right corner of your screen. Right-click on the icon to open the context menu.
2. From the context menu, select the “Open McAfee Antivirus” or a similar option to open the McAfee Antivirus program.
3. Once the McAfee Antivirus program is open, navigate to the settings or options menu. The location of these settings may vary depending on the version of McAfee Antivirus you have installed.
4. In the settings menu, look for an option related to real-time scanning or real-time protection. This may be labeled as “Real-Time Scanning,” “Real-Time Protection,” or something similar.
5. Disable the real-time scanning feature by unchecking the corresponding checkbox or toggling the option off. This will deactivate the real-time protection provided by McAfee Antivirus.
6. After disabling the real-time scanning feature, ensure that the changes are applied by clicking on the “Apply” or “OK” button in the settings menu.
By following these steps, you have successfully disabled the real-time scanning feature of McAfee Antivirus. This will prevent any interference from the antivirus software during the uninstallation process.
It’s important to note that while the real-time scanning feature is disabled, your computer may be temporarily unprotected from threats. Therefore, it is essential to have an alternative antivirus solution installed on your system to ensure continuous protection.
Now that you have disabled real-time scanning, you can proceed to the next step of uninstalling McAfee Antivirus on your Windows operating system.
Step 2: Exit McAfee Antivirus Program
Before uninstalling McAfee Antivirus on a Windows operating system, it is important to ensure that the antivirus program is completely closed. This step will prevent any active processes or components from interfering with the uninstallation process. Follow the instructions below to exit the McAfee Antivirus program:
1. Locate the McAfee Antivirus icon in the system tray, which is typically found in the bottom-right corner of your screen. The icon resembles an “M” inside a red shield. Right-click on the McAfee Antivirus icon to open the context menu.
2. In the context menu, look for an option that says “Exit,” “Quit,” or “Close.” Click on this option to initiate the closing of the McAfee Antivirus program.
3. If prompted with a confirmation message asking if you want to exit the program, click “Yes” or “OK.” This will close all active processes and components associated with McAfee Antivirus.
4. To double-check if McAfee Antivirus is completely closed, ensure that the McAfee Antivirus icon is no longer visible in the system tray. If the icon is still present, repeat the previous steps to exit the program once again.
By following these steps, you have successfully exited the McAfee Antivirus program on your Windows operating system. This ensures that there are no active processes or components running in the background that might interfere with the uninstallation process.
It’s important to note that while the McAfee Antivirus program is closed, your computer may be temporarily vulnerable to threats. Therefore, it is crucial to have an alternative antivirus solution installed on your system to ensure continuous protection.
Now that you have exited the McAfee Antivirus program, you can proceed to the next step of uninstalling McAfee Antivirus on your Windows operating system.
Step 3: Uninstall via Control Panel
Once you have disabled real-time scanning and exited the McAfee Antivirus program, the next step in uninstalling McAfee Antivirus on a Windows operating system is to use the Control Panel. The Control Panel allows you to manage installed programs on your computer. Follow the instructions below to uninstall McAfee Antivirus:
1. Click on the “Start” menu icon in the bottom-left corner of your screen and select the “Control Panel” option. Alternatively, you can search for “Control Panel” in the Windows search bar and click on the corresponding result.
2. In the Control Panel window, navigate to the “Programs” or “Programs and Features” section. The name may vary depending on your version of Windows.
3. Look for an option called “Uninstall a Program” or “Add/Remove Programs” and click on it. This will open a list of all the programs installed on your computer.
4. In the list of installed programs, locate and select “McAfee Antivirus.” The list is usually organized alphabetically, so you can scroll through the list to find it. Alternatively, you can use the search function within the Control Panel to locate the program.
5. Once you have selected “McAfee Antivirus,” click on the “Uninstall” or “Remove” button at the top of the program list. This will initiate the uninstallation process.
6. Follow the on-screen instructions provided by the McAfee uninstaller to complete the removal process. You may be asked to confirm the uninstallation, enter your administrator password, or choose additional options. Ensure that you carefully read and follow the instructions to ensure a successful uninstallation.
7. Once the uninstallation process is complete, you may be prompted to restart your computer. If prompted, click on the “Restart Now” or “Restart Later” button, depending on your preference. It is generally recommended to restart your computer to complete the removal process.
By following these steps, you have successfully uninstalled McAfee Antivirus via the Control Panel on your Windows operating system. It is important to note that some remnants of the program may still remain on your system after uninstallation. To completely remove any leftover files or registry entries, it is recommended to use the McAfee Consumer Products Removal (MCPR) tool provided by McAfee, which will be covered in the next step.
Now that you have uninstalled McAfee Antivirus via the Control Panel, you can proceed to the next step to ensure a thorough removal of any remnants using the MCPR tool.
Step 4: Use McAfee Consumer Products Removal (MCPR) Tool
If you encounter any issues with the standard uninstallation process or want to ensure a thorough removal of McAfee Antivirus remnants on your Windows operating system, you can use the McAfee Consumer Products Removal (MCPR) tool. This tool provided by McAfee is specifically designed to completely remove all traces of McAfee products from your computer. Follow the instructions below to use the MCPR tool:
1. Visit the official McAfee website and navigate to the MCPR tool download page.
2. Click on the download link to initiate the downloading process of the MCPR tool onto your computer.
3. Once the download is complete, locate the downloaded file and double-click on it to run the MCPR tool.
4. If you see a security warning dialog box, click on “Yes” or “Run” to proceed with running the MCPR tool.
5. In the MCPR tool interface, read and accept the End User License Agreement (EULA) by checking the corresponding checkbox. Then, click on the “Next” or “Continue” button to proceed.
6. The MCPR tool will begin scanning your computer for any McAfee products and associated files. This process may take a few moments.
7. Once the scan is complete, you will see a confirmation screen that displays the McAfee products detected on your computer. Click on the “Remove” or “Clean Up” button to start the removal process.
8. The MCPR tool will now proceed with uninstalling and removing all detected McAfee products and associated files from your computer. The tool may require administrative privileges to perform these actions.
9. Wait for the removal process to complete. This may take several minutes, depending on the number of McAfee products detected and the size of associated files.
10. Once the removal process is finished, you will see a confirmation message indicating the successful removal of McAfee products. Click on the “Restart” or “OK” button to restart your computer and finalize the removal.
By following these steps and using the MCPR tool, you have completed a comprehensive removal of McAfee Antivirus and all associated files from your Windows operating system. This ensures that there are no remnants or leftovers that could potentially interfere with your computer’s performance or conflict with other antivirus software.
After restarting your computer, it is recommended to install an alternative antivirus solution to continue protecting your computer from online threats.
Now that you have used the MCPR tool, you can proceed with confidence knowing that McAfee Antivirus has been completely removed from your system.
Step 5: Restart Your Computer
After completing the uninstallation process of McAfee Antivirus on your Windows operating system, it is essential to restart your computer. Restarting your computer helps ensure that any remaining traces or processes associated with McAfee Antivirus are completely removed from your system. Follow the instructions below to restart your computer:
1. Save and close any open documents or programs you have running on your computer. It is important to save your work to avoid losing any unsaved changes.
2. Click on the “Start” menu icon in the bottom-left corner of your screen to open the menu.
3. In the start menu, click on the power icon, which is typically represented as a circle with a vertical line inside it. This will open a submenu with various power options.
4. From the power options submenu, select the “Restart” option. This will initiate the restart process for your computer.
5. Wait for your computer to shut down and start up again. The time it takes for your computer to restart may vary depending on your system’s specifications.
6. Once your computer has restarted, you can log back in to your user account. After logging in, your computer will be refreshed, and any remaining remnants of McAfee Antivirus will no longer be active.
Restarting your computer after uninstalling McAfee Antivirus is an important step to ensure a clean and fresh start without any residual traces of the antivirus software. It helps remove any lingering processes or files associated with McAfee, ensuring optimal system performance.
Once your computer has restarted, you can proceed to install an alternative antivirus solution to continue protecting your system from online threats.
By following these steps and restarting your computer, you have successfully completed the uninstallation of McAfee Antivirus on your Windows operating system. Your computer is now ready for the next steps in securing it with a new antivirus program or exploring other security options.
How to Uninstall McAfee Antivirus on Mac Operating System
If you’re using a Mac operating system and wish to uninstall McAfee Antivirus, the process is slightly different from that of Windows. Follow the steps below to uninstall McAfee Antivirus on your Mac:
Step 1: Quit McAfee Antivirus Application
To begin the uninstallation process, you need to first quit the McAfee Antivirus application. To do this, open the McAfee Antivirus program if it’s currently running. Then, go to the Menu bar at the top of your screen and click on the “McAfee Antivirus” menu. From the dropdown menu, select the “Quit” option to exit the application.
Step 2: Remove the McAfee Antivirus Application
Next, you’ll need to remove the McAfee Antivirus application itself. Open the “Finder” application on your Mac by clicking on its icon in the Dock or by pressing Command + Spacebar and typing “Finder”. In the Finder window, navigate to the “Applications” folder
In the Applications folder, locate the McAfee Antivirus application icon. Click and drag the icon to the Trash bin located on your Dock. Alternatively, you can right-click on the application icon and select the “Move to Trash” option.
Step 3: Remove Related Files and Folders
Removing the application from the Applications folder does not completely uninstall McAfee Antivirus. To ensure a thorough removal, you need to delete related files and folders. Here are the recommended locations to search for and delete McAfee-related files:
- /Library/Application Support/
- /Library/Caches/
- /Library/Preferences/
- /Library/LaunchDaemons/
- /Library/LaunchAgents/
In each of these locations, search for any files or folders with “McAfee” in their names and move them to the Trash bin. Before permanently deleting them, it’s advisable to double-check that the files and folders are indeed associated with McAfee.
Step 4: Restart Your Mac
To complete the uninstallation process, restart your Mac. Restarting will help ensure that any remaining files or processes related to McAfee Antivirus are fully removed from your system. Once your Mac has restarted, McAfee Antivirus will no longer be present on your computer.
By following these steps, you can successfully uninstall McAfee Antivirus from your Mac operating system. Remember to replace it with an alternative antivirus solution to maintain the security of your Mac and protect it from online threats.
Step 1: Quit McAfee Antivirus Application
The first step in uninstalling McAfee Antivirus on a Mac operating system is to quit the McAfee Antivirus application. By quitting the application, you ensure that it is no longer running in the background and can proceed with the uninstallation process smoothly. Follow the instructions below:
1. Open the McAfee Antivirus program if it is currently running. You can typically find the program in your Applications folder or in the top menu bar of your screen.
2. Once the McAfee Antivirus program is open, go to the Menu bar at the top of your screen. Look for the “McAfee Antivirus” menu and click on it. A dropdown menu will appear.
3. In the dropdown menu, locate the “Quit” or “Exit” option and click on it. This will initiate the process of quitting the McAfee Antivirus application.
4. After selecting the “Quit” or “Exit” option, wait for the McAfee Antivirus application to fully close. You can verify this by ensuring that the program’s icon is no longer visible in the Dock at the bottom of your screen.
By following these steps, you have successfully quit the McAfee Antivirus application on your Mac. Now that the application is no longer running, you can proceed with the remaining steps to uninstall McAfee Antivirus completely.
It’s important to note that while the McAfee Antivirus application is closed, your Mac may be temporarily vulnerable to threats. Therefore, it’s crucial to have an alternative antivirus solution installed on your system to ensure continuous protection.
Now that you have quit the McAfee Antivirus application, you can proceed to the next step of the uninstallation process on your Mac.
Step 2: Remove the McAfee Antivirus Application
Once you have quit the McAfee Antivirus application on your Mac, the next step in uninstalling McAfee Antivirus is to remove the application itself. This involves deleting the McAfee Antivirus application from your system. Follow the instructions below to remove the McAfee Antivirus application:
1. Open the “Finder” application on your Mac by clicking on its icon in the Dock or by pressing Command + Spacebar and typing “Finder”.
2. In the Finder window, navigate to the “Applications” folder. You can usually find this folder in the sidebar on the left side of the Finder window.
3. In the Applications folder, locate the McAfee Antivirus application icon. It may be named “McAfee Antivirus”, “McAfee Total Protection”, or something similar.
4. Click and drag the McAfee Antivirus application icon to the Trash bin located on your Dock. Alternatively, you can right-click on the application icon and select the “Move to Trash” option.
5. Once you have moved the McAfee Antivirus application to the Trash bin, right-click on the Trash bin icon and select the “Empty Trash” option. Confirm the action when prompted.
By following these steps, you have successfully removed the McAfee Antivirus application from your Mac. The application is now deleted and no longer present in your Applications folder.
It’s important to note that removing the McAfee Antivirus application alone may leave behind certain files or folders associated with the application. To ensure a thorough uninstallation, follow the next step to remove any related files and folders.
Now that you have removed the McAfee Antivirus application, you can proceed to the next step to remove any associated files and folders from your Mac.
Step 3: Remove Related Files and Folders
After removing the McAfee Antivirus application on your Mac, it is important to remove any related files and folders to ensure a thorough uninstallation. These files and folders may contain configuration settings, logs, or other remnants of McAfee Antivirus. Follow the instructions below to locate and delete the related files and folders:
1. Open a new Finder window on your Mac by clicking on the “Finder” icon in the Dock or pressing Command + N.
2. In the Finder window, click on “Go” in the menu bar at the top of the screen.
3. From the dropdown menu, select “Go to Folder.” Alternatively, you can press Shift + Command + G on your keyboard.
4. A small window will appear. In the text field, enter the following path:
/Library/Application Support/
5. Click on the “Go” button, and a new Finder window will open, showing the contents of the “Application Support” folder.
6. Look for any folders related to McAfee Antivirus, such as “McAfee” or “McAfee Antivirus.” Select these folders and move them to the Trash. To delete the folders permanently, right-click on the Trash icon in the Dock and select “Empty Trash.”
7. Repeat the process to search for and delete related files and folders in the following locations:
/Library/Caches//Library/Preferences//Library/LaunchDaemons//Library/LaunchAgents/
8. After deleting the related files and folders, empty the Trash to permanently remove them from your system.
By following these steps, you have successfully removed the related files and folders associated with McAfee Antivirus from your Mac. This ensures a thorough uninstallation of McAfee Antivirus.
It’s important to note that deleting files and folders from the system directory requires administrator privileges. You may need to enter your administrator password to perform these actions.
Now that you have removed the related files and folders, you can proceed to the next step to restart your Mac and complete the uninstallation process.
Step 4: Restart Your Mac
After completing the removal of the McAfee Antivirus application and related files and folders on your Mac, it is important to restart your computer. Restarting your Mac helps ensure that any remaining traces or processes associated with McAfee Antivirus are fully removed from your system. Follow the instructions below to restart your Mac:
1. Close any open applications or documents that you have on your Mac. Saving your work before restarting is important to avoid losing any unsaved changes.
2. Click on the Apple menu icon in the top-left corner of your screen.
3. From the dropdown menu, select the “Restart” option. Alternatively, you can press the Control + Command + Power button combination at the same time.
4. A confirmation dialog box will appear, asking if you want to restart your Mac. Click on the “Restart” button to proceed.
5. Wait for your Mac to shut down and start up again. This process may take a few moments.
6. Once your Mac has restarted, you can log back in to your user account. After logging in, your Mac will be refreshed, and any remaining traces of McAfee Antivirus will no longer be active on your system.
By following these steps and restarting your Mac, you have successfully completed the uninstallation of McAfee Antivirus. This ensures that all remnants of the software have been removed from your system, minimizing any potential conflicts or issues.
It is recommended to install a trusted alternative antivirus solution on your Mac to ensure ongoing protection against online threats.
Now that you have restarted your Mac, you can proceed with confidence knowing that McAfee Antivirus has been completely uninstalled.
Troubleshooting Common Issues During Uninstallation
While uninstalling McAfee Antivirus on your operating system, you may encounter some common issues. These issues can include remnants of the software, error messages, or difficulties in completing the uninstallation process. Here are some troubleshooting tips to help you resolve these issues:
1. Remnants of McAfee Antivirus:
If you find that remnants of McAfee Antivirus still exist on your system even after following the uninstallation steps, consider using the official McAfee Consumer Products Removal (MCPR) tool. This tool is specifically designed to remove all traces of McAfee software from your computer.
2. Error Messages:
If you encounter error messages during the uninstallation process, it is advisable to consult the official McAfee support website or contact their customer support for guidance. They can provide specific troubleshooting steps or alternative methods to resolve the error.
3. Incomplete Uninstallation:
If the uninstallation process does not complete successfully, you can try restarting your computer and repeating the steps. Ensure that you have administrative privileges on your system and that you have disabled real-time scanning and quit the McAfee Antivirus application before attempting the uninstallation again.
4. Conflicts with Other Antivirus Software:
If you have another antivirus software installed on your system, it is important to ensure that the McAfee Antivirus program is fully uninstalled before activating the new antivirus software. Conflicts between antivirus software can cause system instability and performance issues. Use the methods outlined in the previous sections to remove McAfee Antivirus entirely.
5. Missing McAfee Uninstaller:
If you are unable to find the McAfee Uninstaller or the uninstallation files, visit the official McAfee website and search for specific instructions for your particular product version or contact their customer support for assistance.
If you encounter any other issues or challenges during the uninstallation process, seeking assistance from McAfee support or consulting their knowledge base can provide you with the necessary guidance to resolve the problem.
Remember to always have an alternative antivirus solution installed on your system to ensure continuous protection against online threats while uninstalling McAfee Antivirus.
By troubleshooting and resolving any issues that may arise during the uninstallation process, you can successfully uninstall McAfee Antivirus from your operating system and transition to a new antivirus solution smoothly.
Conclusion
Uninstalling McAfee Antivirus from your operating system, whether it’s Windows or Mac, may become necessary for various reasons. By following the step-by-step instructions provided in this guide, you can successfully remove McAfee Antivirus from your computer.
We explored the process of disabling real-time scanning, exiting the McAfee Antivirus program, and uninstalling the software via the Control Panel on Windows. For Mac users, we covered quitting the McAfee Antivirus application, removing the application itself, and deleting related files and folders.
Additionally, we highlighted the troubleshooting steps to tackle common issues that might arise during the uninstallation process, such as remnants of McAfee, error messages, or conflicts with other antivirus software.
It’s important to remember that after uninstalling McAfee Antivirus, you should have an alternative antivirus solution installed on your system to ensure continuous protection against malware and other online threats.
By following the steps outlined in this guide and troubleshooting any potential issues, you can confidently uninstall McAfee Antivirus and transition to a new antivirus software that better suits your needs.
Always refer to official documentation or seek support from McAfee’s customer service if you encounter any specific or complex issues during the uninstallation process.
Now that you have successfully uninstalled McAfee Antivirus, you are ready to explore other security options and ensure the ongoing protection of your computer.