Introduction
Welcome to the world of Apple Watch, a powerful and stylish wearable device that seamlessly integrates with your iPhone. Whether you’re a fitness enthusiast, a tech-savvy professional, or simply someone looking to stay organized and connected, the Apple Watch has something for everyone. In this guide, we’ll walk you through the essential steps to set up your Apple Watch and get the most out of its features.
The Apple Watch is not just a timepiece; it’s a personal assistant, a health tracker, and a fashion statement all in one. With its intuitive interface and vast range of capabilities, you’ll be able to stay on top of your notifications, track your fitness goals, make quick payments, and so much more, right from your wrist.
Before we dive into the details of setting up and customizing your Apple Watch, it’s important to note that you’ll need an iPhone 6s or later running the latest version of iOS to pair and fully utilize the features of your Apple Watch. Additionally, make sure your Apple Watch is fully charged before beginning the setup process to ensure a seamless experience.
Now, let’s dive in and explore the exciting world of the Apple Watch, step by step. By the end of this guide, you’ll be well-equipped to use your Apple Watch to its fullest potential and enjoy the convenience, style, and functionality it brings to your daily life.
Unboxing and Charging your Apple Watch
The first step in setting up your Apple Watch is unboxing and ensuring that it is fully charged. When you open the box, you’ll find your Apple Watch nestled inside along with its charging cable and power adapter. Here’s what you need to do:
- Remove the plastic wrap and carefully take out your Apple Watch.
- Locate the circular charging puck that came with your watch.
- Connect one end of the charging cable to the charging puck and the other end to the power adapter or a USB port on your computer.
- Place the charging puck on the back of your Apple Watch. It should magnetically snap into place.
- Once connected, you’ll see a charging symbol on the watch face, indicating that it’s charging.
- Allow your Apple Watch to charge completely before proceeding. This may take up to a couple of hours.
It’s important to ensure that your Apple Watch is fully charged before setting it up. This will ensure that you have a smooth and uninterrupted setup process. Additionally, keeping your Apple Watch charged will ensure that it’s ready for your activities throughout the day.
While your Apple Watch is charging, you can take this time to download and install the latest version of the Apple Watch app on your iPhone from the App Store. This app will be essential for pairing and setting up your Apple Watch.
Once your Apple Watch is fully charged, it’s time to move on to the next step: pairing your Apple Watch with your iPhone.
Pairing your Apple Watch with your iPhone
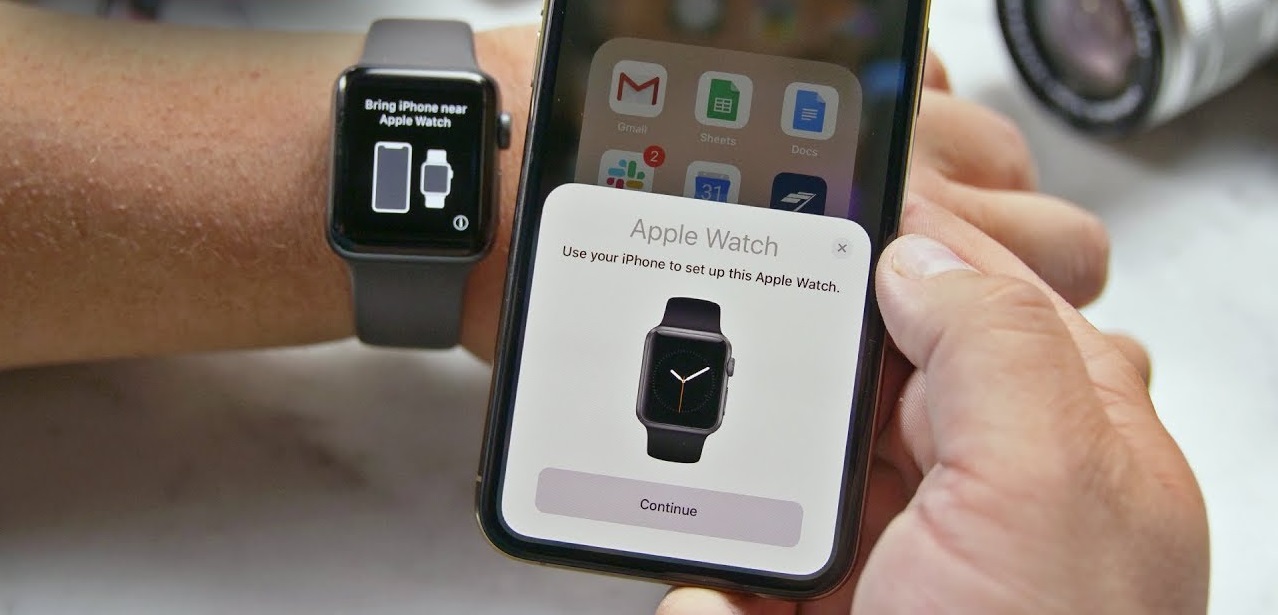
Now that your Apple Watch is charged, it’s time to pair it with your iPhone. The pairing process will establish a seamless connection between your devices, allowing you to receive notifications, make calls, and access various features right from your wrist. Here’s how to do it:
- Ensure that your iPhone is running the latest version of iOS and that Bluetooth is enabled.
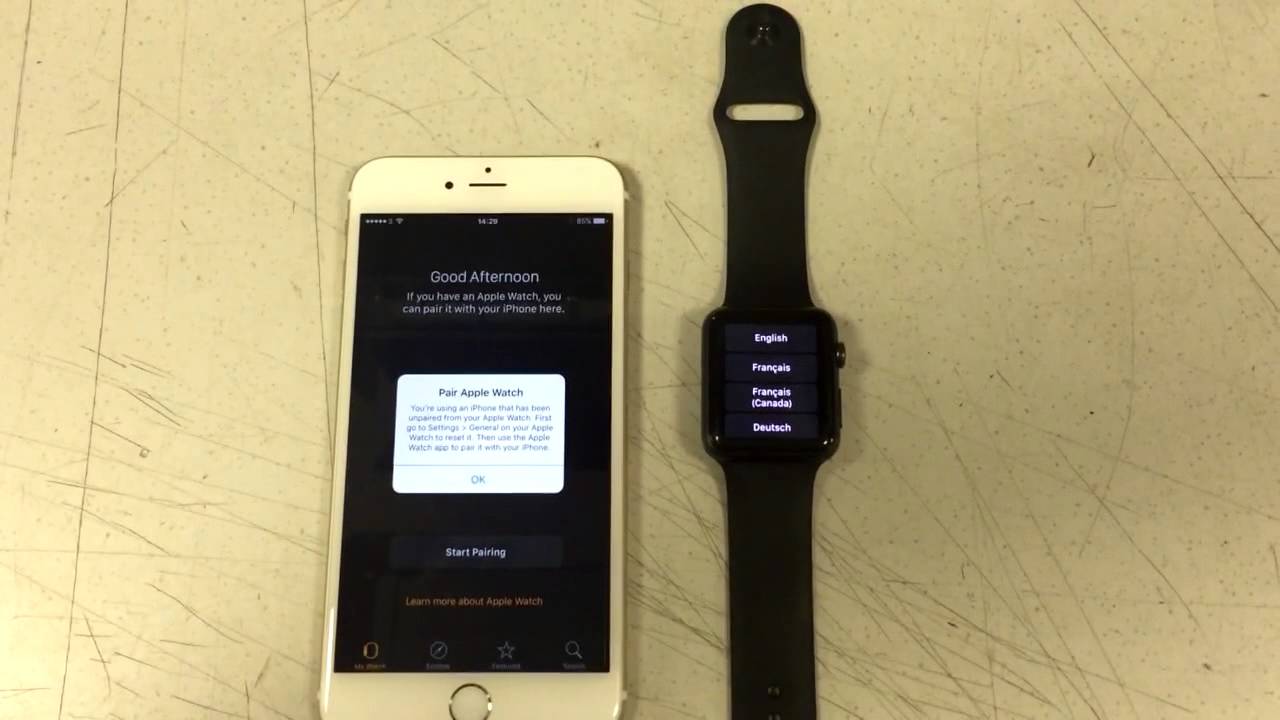
- Open the Apple Watch app on your iPhone.
- Tap on the “Start Pairing” button.
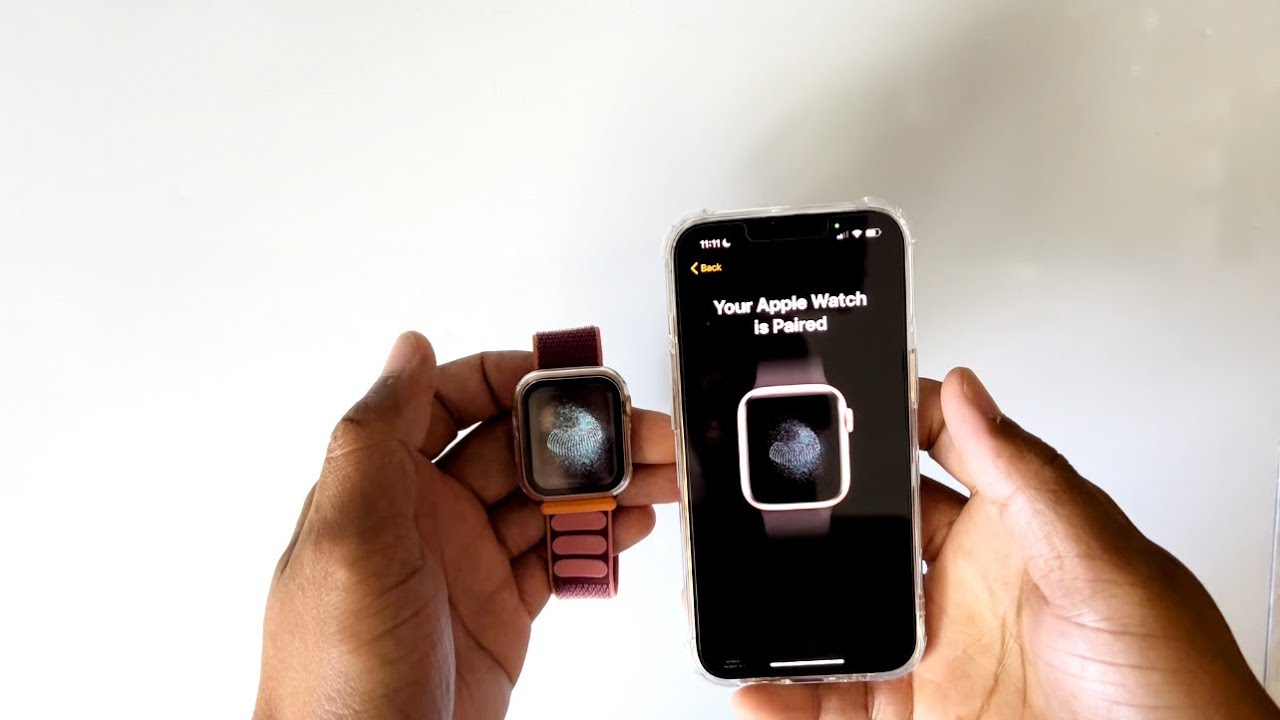
- Hold your Apple Watch close to your iPhone, and align the watch face within the viewfinder on your iPhone’s screen.
- Follow the onscreen instructions to complete the pairing process.
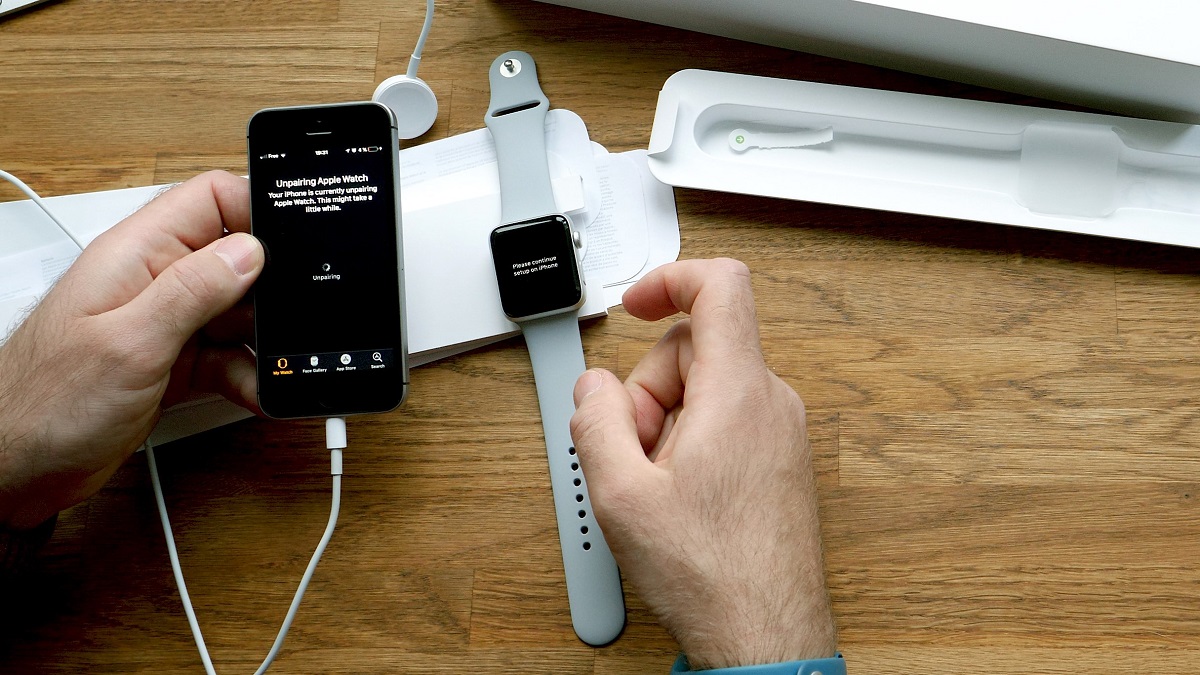
- If prompted, choose whether you want to set up your Apple Watch as a new device or restore from a previous backup.
- Create a passcode for your Apple Watch to secure it.
- Choose whether to enable wrist detection, allowing your Apple Watch to lock automatically when you’re not wearing it.
- Agree to the terms and conditions.
- Sign in with your Apple ID to enable features such as Messages, iCloud, and Find My.
Once the pairing is completed, you’ll have the option to customize your watch face, add apps, and personalize your Apple Watch settings. The Apple Watch app on your iPhone will act as the gateway to manage and configure your watch, giving you full control over its features and functionalities.
Pairing your Apple Watch with your iPhone not only unlocks its full potential but also allows you to seamlessly integrate it into your daily life. With this connection established, you can enjoy the convenience of receiving notifications, accessing your favorite apps, and staying connected, all from the convenience of your wrist.
Now that your Apple Watch is paired with your iPhone, let’s move on to the next step: customizing your watch face.
Customizing your Watch Face
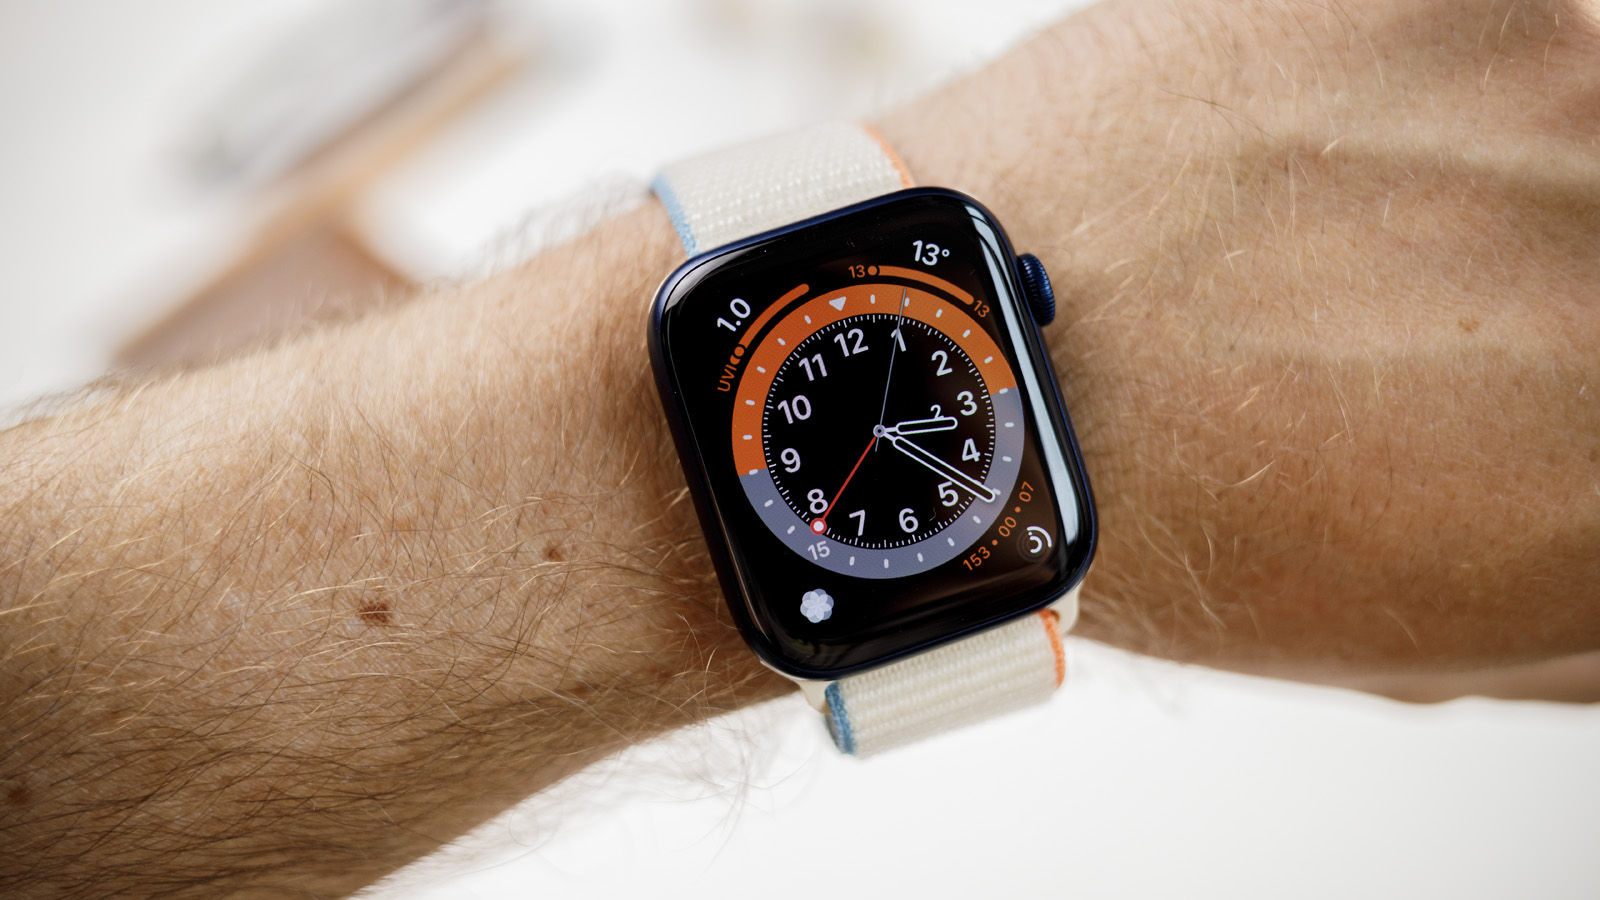
One of the great things about the Apple Watch is the ability to customize your watch face to reflect your personal style and preferences. With a variety of watch face options and customization features, you can make your Apple Watch truly your own. Here’s how to customize your watch face:
- On your Apple Watch, press firmly on the current watch face to access the watch face gallery.
- Swipe left or right to browse through the available watch face options.
- Tap on a watch face to select it.
- Once you’ve chosen a watch face, you can customize it by tapping on the “Customize” button.
- Use the digital crown or swipe left and right to navigate through the customization options.
- Depending on the watch face, you can add complications (mini-widgets) such as weather, calendar, or fitness data, change the color scheme, and adjust other settings.
- Once you’re satisfied with your customizations, tap on the “Set as current Watch Face” button.
Customizing your watch face allows you to tailor the information and style that you see at a glance. Whether you prefer a simple and minimalistic look or a more feature-packed watch face, the choice is in your hands.
In addition to the pre-designed watch faces, you can also create your own watch face using your favorite photos or even utilize dynamic watch faces that change throughout the day, showcasing different information as per your preferences.
Remember that you can always change your watch face whenever you like. Simply follow the same steps to access the watch face gallery and select a new watch face that matches your mood or activity for the day.
Now that you’ve customized your watch face, let’s move on to adding and managing watch apps.
Adding and Managing Watch Apps
One of the key features of the Apple Watch is the ability to add and manage a wide range of apps, allowing you to extend its functionality and personalize your user experience. By installing your favorite apps on your Apple Watch, you can access their features and receive notifications right from your wrist. Here’s how to add and manage watch apps:
- On your iPhone, open the Apple Watch app.
- Navigate to the “App Store” section within the app.
- Browse through the available apps or search for specific ones using the search bar.
- Tap on an app to view more information about it.
- If the app is compatible with your Apple Watch, you’ll see an option to “Get” or “Install” it.
- Tap on “Get” or “Install” to download and install the app on your Apple Watch.
- Once installed, the app’s icon will appear on your Apple Watch’s home screen.
- To manage your watch apps, press firmly on the app icon on your Apple Watch to enter the app grid view.
- Tap and hold on any app icon to enter the editing mode.
- You can now rearrange the app icons by dragging them around or even delete apps by tapping on the “X” that appears on each icon.
It’s important to note that some apps require an active internet connection on your iPhone or a Wi-Fi or cellular connection on your Apple Watch to function properly. Additionally, you can manage notifications for each app within the Apple Watch app on your iPhone, allowing you to control which apps send notifications to your Apple Watch.
With a collection of your preferred apps at your fingertips, you can easily access their features, receive updates, and interact with them on your Apple Watch. Whether it’s staying on top of your fitness goals, checking the latest news, or managing your calendar, having your favorite apps on your wrist will make your Apple Watch even more indispensable.
Now that you know how to add and manage watch apps, let’s move on to setting up notifications and alerts.
Setting up Notifications and Alerts
One of the core functionalities of the Apple Watch is the ability to receive notifications and alerts directly on your wrist, allowing you to stay informed and connected without constantly checking your iPhone. By setting up notifications and customizing how you receive them, you can ensure that only the most important updates reach your Apple Watch. Here’s how to set up notifications and alerts:
- On your iPhone, open the Apple Watch app.
- Scroll down and tap on “Notifications.”
- You can choose to mirror the notifications settings from your iPhone or customize them specifically for your Apple Watch.
- To customize notifications, tap on an app listed under the “Mirror My iPhone” section or scroll down to the “Custom” section and enable or disable individual apps for your Apple Watch.
- You can also tap on an app and choose whether you want to receive notifications as banners, alerts, or not at all.
- Additionally, you can enable or disable notifications for specific notification types such as messages, phone calls, emails, and more.
- Scroll further down to the “Notification Privacy” section and enable or disable the “Show as Banners” and “Show on Lock Screen” options to control how notifications display on your Apple Watch.
By customizing your notifications, you can ensure that only the notifications that matter to you are delivered to your Apple Watch. This not only helps you stay focused but also prevents your wrist from being constantly bombarded with unnecessary updates.
In addition to customizing notifications, you can also set up custom alerts and haptic feedback for specific apps or contacts. This allows you to differentiate and prioritize notifications based on their importance and urgency.
With notifications and alerts set up to your preferences, you can receive important updates, messages, and calls directly on your Apple Watch, ensuring that you never miss a beat while staying connected throughout the day.
Now that you’ve set up notifications and alerts, let’s move on to configuring health and fitness features.
Configuring Health and Fitness Features
The Apple Watch is not just a stylish accessory; it’s also a comprehensive health and fitness companion. With a range of sensors and features, it can help you track your activity, monitor your workouts, and even motivate you to live a healthier lifestyle. Here’s how to configure the health and fitness features on your Apple Watch:
- On your iPhone, open the Apple Watch app.
- Scroll down and tap on “Health”.
- Here, you can enable or disable various health and fitness-related features.
- Under the “Activity” section, you can set your daily move goal, enable stand reminders, and track your exercise.
- Tap on “Stand Reminders” to choose the notification intervals that remind you to stand up and move around throughout the day.
- Under the “Workouts” section, you can set your preferred workout metrics and enable features like “Detect Gym Equipment” or “Auto Pause”.
- If you’re into running, biking, or other outdoor activities, be sure to enable features like “Outdoor Walk” or “Outdoor Run” to accurately track your routes using built-in GPS.
- In the “Noise” section, you can enable the Noise app to monitor environmental sound levels and protect your hearing health.
- Make sure to grant the necessary permissions to the Health app on your iPhone to access and share data with your Apple Watch for a comprehensive health profile.
Configuring the health and fitness features on your Apple Watch allows you to monitor your progress, set goals, and receive timely reminders to stay active. By utilizing these features, you can take control of your health and make positive changes to your daily routines.
It’s worth noting that the Apple Watch can also detect irregular heart rhythms, track your sleep patterns, and provide insights into your overall well-being. As you explore these features, you’ll discover the multitude of ways your Apple Watch can support your health and fitness journey.
Now that you’ve configured the health and fitness features, let’s move on to personalizing your Apple Watch settings.
Personalizing your Apple Watch Settings
Your Apple Watch is more than just a functional device—it’s also a fashion statement. With a wide range of settings and customization options, you can truly make your Apple Watch reflect your personal style and preferences. Here’s how to personalize your Apple Watch settings:
- On your Apple Watch, open the “Settings” app on the home screen.
- Scroll and tap on the option you want to customize.
- In the “Display & Brightness” settings, you can adjust the brightness, text size, and choose between a traditional or zoomed display mode.
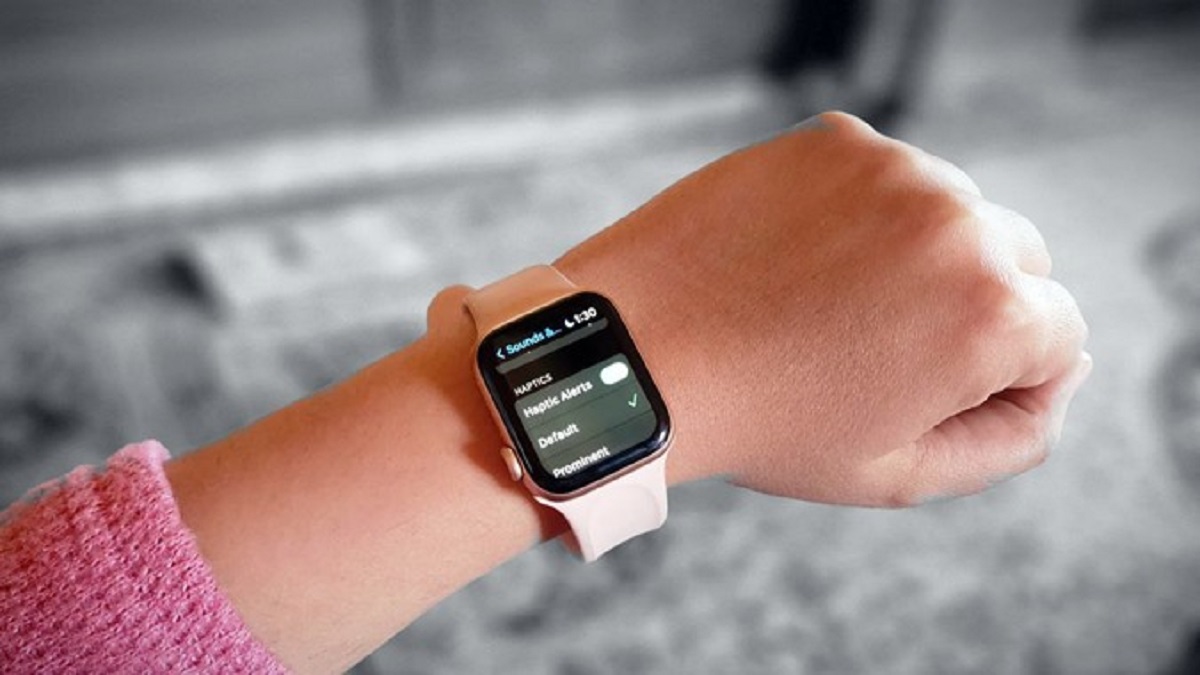
- Under “Sounds & Haptics,” you can customize the sound and haptic feedback settings for notifications, alerts, and more.
- In the “Do Not Disturb” settings, you can enable or schedule Do Not Disturb mode to prevent interruptions during specific times or activities.
- Under “Accessibility,” you can enable features like VoiceOver, Zoom, and larger text sizes for users with visual or hearing impairments.
- Personalize your watch’s language and region, adjust the timekeeping settings, and choose your preferred units of measurement in the “General” settings.
- Tap on “Siri” to customize how you interact with Siri on your Apple Watch.
- Explore the “Privacy” settings to control which apps can access certain data and manage location services.
- Finally, don’t forget to update your watch’s software by heading to “Software Update” in the settings to ensure you have the latest features and security enhancements.
Personalizing your Apple Watch settings allows you to fine-tune its functionality and appearance to your liking. Whether it’s adjusting the screen brightness, customizing haptic feedback, or enabling accessibility features, your Apple Watch can be tailored to meet your unique needs.
Additionally, you can further personalize your Apple Watch by changing the watch bands. Apple offers a variety of bands, including sport bands, leather bands, and stainless steel bands, allowing you to switch up the look of your watch to match your outfit or occasion.
Now that you’ve personalized your Apple Watch’s settings, let’s move on to adding and managing contacts.
Adding and Managing Contacts
Your Apple Watch allows you to stay connected with your favorite contacts right from your wrist. By adding and managing contacts on your Apple Watch, you can easily call, message, or even share your activity with your friends and family. Here’s how to add and manage contacts on your Apple Watch:
- Open the “Phone” app on your Apple Watch.
- Tap on the “Contacts” tab at the bottom of the screen.
- To add a new contact, tap on the “+” icon and enter the contact’s information, such as name, phone number, and email address.
- If you have iCloud contacts or synced contacts from your iPhone, they will automatically appear on your Apple Watch.
- To manage your contacts, you can tap on a contact’s name to view their details or swipe left on a contact to access options like calling, messaging, or removing the contact.
- If you have a long list of contacts, you can use the digital crown or swipe up and down to navigate through the list quickly.
- By customizing your contact settings on your iPhone, you can choose which contacts are available on your Apple Watch.
With your contacts readily available on your Apple Watch, you can easily initiate calls or send messages without needing to reach for your iPhone. This convenience ensures that you can stay connected with your loved ones at a moment’s notice.
Additionally, the Apple Watch allows you to easily share your activity and progress with your selected contacts. This feature can be useful for sharing fitness achievements, collaborating on challenges, or simply keeping your close ones informed about your well-being.
Keep in mind that managing your contacts on your Apple Watch is seamlessly synchronized with your iPhone, ensuring that any changes or updates you make are reflected across both devices.
Now that you know how to add and manage contacts on your Apple Watch, let’s move on to the exciting world of Apple Pay and how to use it on your watch.
Using Apple Pay on your Apple Watch
Apple Pay makes it incredibly convenient to make purchases without the need for physical wallets or credit cards. With Apple Pay on your Apple Watch, you can quickly and securely make payments with just a flick of your wrist. Here’s how to use Apple Pay on your Apple Watch:
- Open the “Wallet” app on your Apple Watch.
- Scroll and select the card you want to use for your payment, or double-click the side button to bring up your default card.
- Position your Apple Watch near the payment terminal and wait for the payment confirmation.
- You may need to authenticate the payment using Face ID, Touch ID, or by entering your passcode, depending on the security settings of your Apple Watch.
- Once the payment is accepted, you’ll receive a notification on your Apple Watch and a confirmation on the payment terminal.
Using Apple Pay on your Apple Watch is not only convenient but also secure. Each transaction is encrypted and authenticated, ensuring that your payment information is well-protected. Plus, since Apple Pay doesn’t store your actual credit or debit card numbers, even if your Apple Watch is lost or stolen, your personal information remains safe.
Aside from making purchases at physical stores, Apple Pay on your Apple Watch can also be used to make payments within apps and websites that support this feature. Simply follow the prompts and use the side button or double-click gesture to authenticate the payment.
Make sure to add your preferred credit or debit cards to the Wallet app on your iPhone, and they’ll automatically be available on your Apple Watch as well. Just keep in mind that your bank or financial institution needs to support Apple Pay for you to take advantage of this convenient payment method.
Now that you know how to use Apple Pay on your Apple Watch, let’s move on to troubleshooting common issues you may encounter.
Troubleshooting Common Issues
While the Apple Watch is a reliable and user-friendly device, you may encounter some common issues during its use. Here are some troubleshooting tips for resolving these issues:
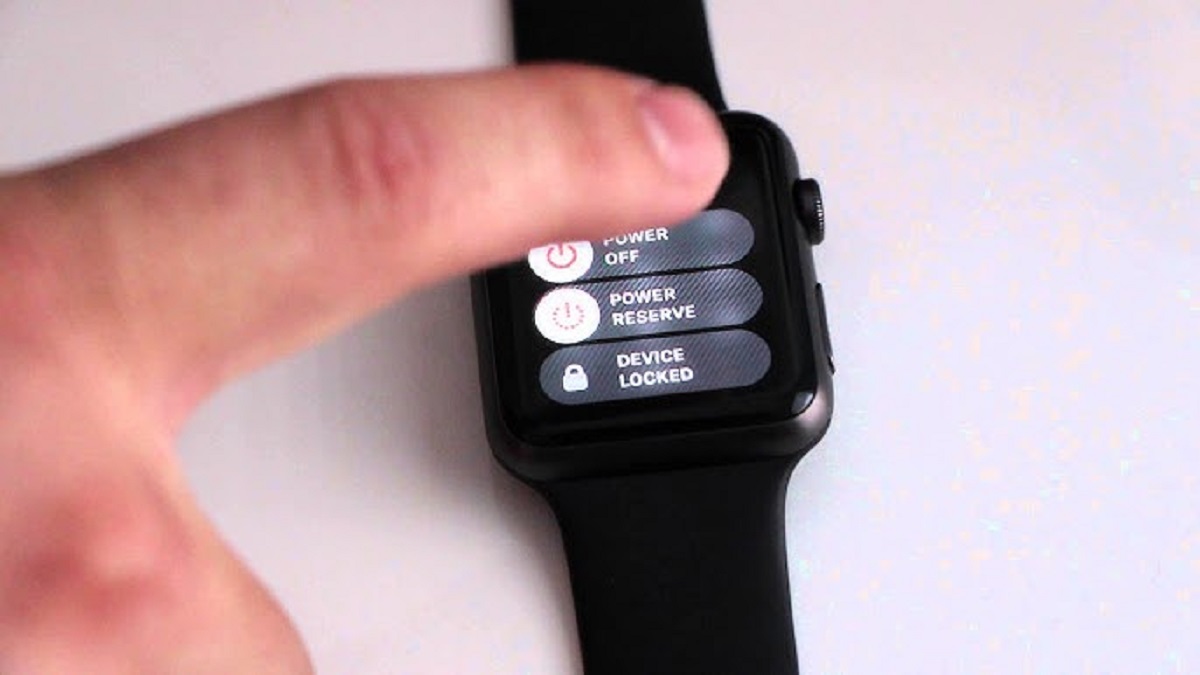
- If your Apple Watch is not responding, try a force restart by pressing and holding the side button and the digital crown together until the Apple logo appears.
- If your Apple Watch is not connecting to your iPhone, make sure Bluetooth is enabled on both devices and that they are within range of each other. You may also try restarting both devices and re-pairing them.
- If your Apple Watch is not syncing data, ensure that both your iPhone and Apple Watch are connected to Wi-Fi or a cellular network. If the issue persists, try disabling and re-enabling Bluetooth or restarting both devices.
- If your Apple Watch battery is draining quickly, check for any battery-draining apps or excessive background activity. Adjusting settings like screen brightness, notifications, and background app refresh can also help conserve battery life.
- If your Apple Watch is not tracking your activity accurately, make sure the watch is snugly fitted on your wrist and that you have enabled the necessary permissions for motion and fitness tracking in the Privacy settings on your iPhone.
- If an app is not working properly on your Apple Watch, try force quitting the app by pressing the side button and then swiping up on the app’s preview card. If the issue persists, you can try uninstalling and reinstalling the app on your iPhone.
- If you are experiencing issues with notifications, ensure that the “Mirror iPhone” setting is enabled in the Apple Watch app on your iPhone. You can also try disabling and re-enabling notifications for specific apps or restarting both devices.
If you’ve tried the above troubleshooting steps and are still experiencing issues with your Apple Watch, you can visit the Apple Support website or contact Apple Support directly for further assistance.
Remember, it’s normal for technology to have occasional hiccups, and with a little troubleshooting, you can usually resolve most issues and continue enjoying the full functionality of your Apple Watch.
Now that you’re equipped with troubleshooting knowledge, you’re ready to make the most of your Apple Watch and enjoy all its amazing features!
Conclusion
Setting up and personalizing your Apple Watch is an exciting journey that opens up a world of convenience, style, and functionality on your wrist. From unboxing and charging your device to customizing your watch face, adding and managing apps, setting up notifications, configuring health and fitness features, and utilizing Apple Pay, every step is designed to enhance your experience and make your Apple Watch truly your own.
Throughout this guide, we’ve covered the essential steps to help you get started and navigate the various features of your Apple Watch. By following these instructions, you can seamlessly integrate your Apple Watch into your daily life, staying connected, organized, and motivated.
Remember, in addition to the technical aspects, the Apple Watch is also a fashion statement. Don’t hesitate to personalize it with different watch bands to match your style and mood.
If you encounter any issues along the way, refer to the troubleshooting tips provided to resolve common problems and ensure that your Apple Watch is functioning at its best.
Now that you have the knowledge and tools to set up and make the most of your Apple Watch, it’s time to start exploring and enjoying the many features it offers. From staying on top of your notifications and tracking your fitness to making quick and secure payments, your Apple Watch will undoubtedly enhance your daily life in numerous ways.
So, go ahead, put on your Apple Watch, and embrace the convenience and innovation that this remarkable device brings to your wrist. Enjoy the journey and seize the endless possibilities that await!