Introduction
Are you ready to disconnect your Apple Watch from your iPhone? Whether you’re upgrading to a new model, selling your watch, or simply taking a break from wearable technology, disconnecting your Apple Watch is a straightforward process that can be done in a few simple steps. In this guide, we’ll walk you through two methods: unpairing your Apple Watch from your iPhone and resetting your Apple Watch without your iPhone.
Unpairing your Apple Watch from your iPhone is the recommended method and ensures a smooth transition between devices. This process will automatically backup your Apple Watch data, disable activation lock, and remove all personal information from the watch. On the other hand, resetting your Apple Watch without your iPhone should only be done as a last resort, such as when you no longer have access to your iPhone or if it’s not functioning properly. This method erases all content and settings on your Apple Watch, including any data that might not have been backed up.
Now that we’ve introduced the two methods, let’s dive into the step-by-step process of unpairing your Apple Watch from your iPhone and resetting your Apple Watch without your iPhone. With these instructions, you’ll be able to disconnect your Apple Watch smoothly and without hassle.
Unpairing Your Apple Watch from Your iPhone
To ensure a seamless transition, it is recommended to unpair your Apple Watch from your iPhone. This process will automatically backup your Apple Watch data, disable activation lock, and remove all personal information from the watch. Follow these steps to unpair your Apple Watch:
- Disable Activation Lock: Before unpairing your Apple Watch, make sure to disable Activation Lock to prevent any complications. Open the Apple Watch app on your iPhone, go to the My Watch tab, tap on your watch’s name, and then tap on the “i” icon. From there, select “Unpair Apple Watch” and confirm your choice.
- Back Up Your Apple Watch: After disabling Activation Lock, it’s important to back up your Apple Watch data. This will allow you to restore your settings and content if you choose to pair your watch with a new iPhone in the future. To do this, go to the Apple Watch app on your iPhone, select your watch, and tap on the “i” icon. Then, tap on “Unpair Apple Watch” and confirm the unpairing process. Your watch will begin backing up automatically.
- Open the Apple Watch App on Your iPhone: Launch the Apple Watch app on your iPhone, which is conveniently pre-installed on iOS devices. This app allows you to manage your Apple Watch settings and pair it with your iPhone.
- Tap on Your Watch: In the Apple Watch app, find and tap on your Apple Watch. This will open the settings and options specific to your watch.
- Tap on the “i” Icon: Inside the settings of your Apple Watch, look for the small “i” icon located next to your watch’s name. Tap on it to access additional information.
- Tap on “Unpair Apple Watch”: Scroll down the information page until you see the option to “Unpair Apple Watch.” Tap on it to initiate the unpairing process.
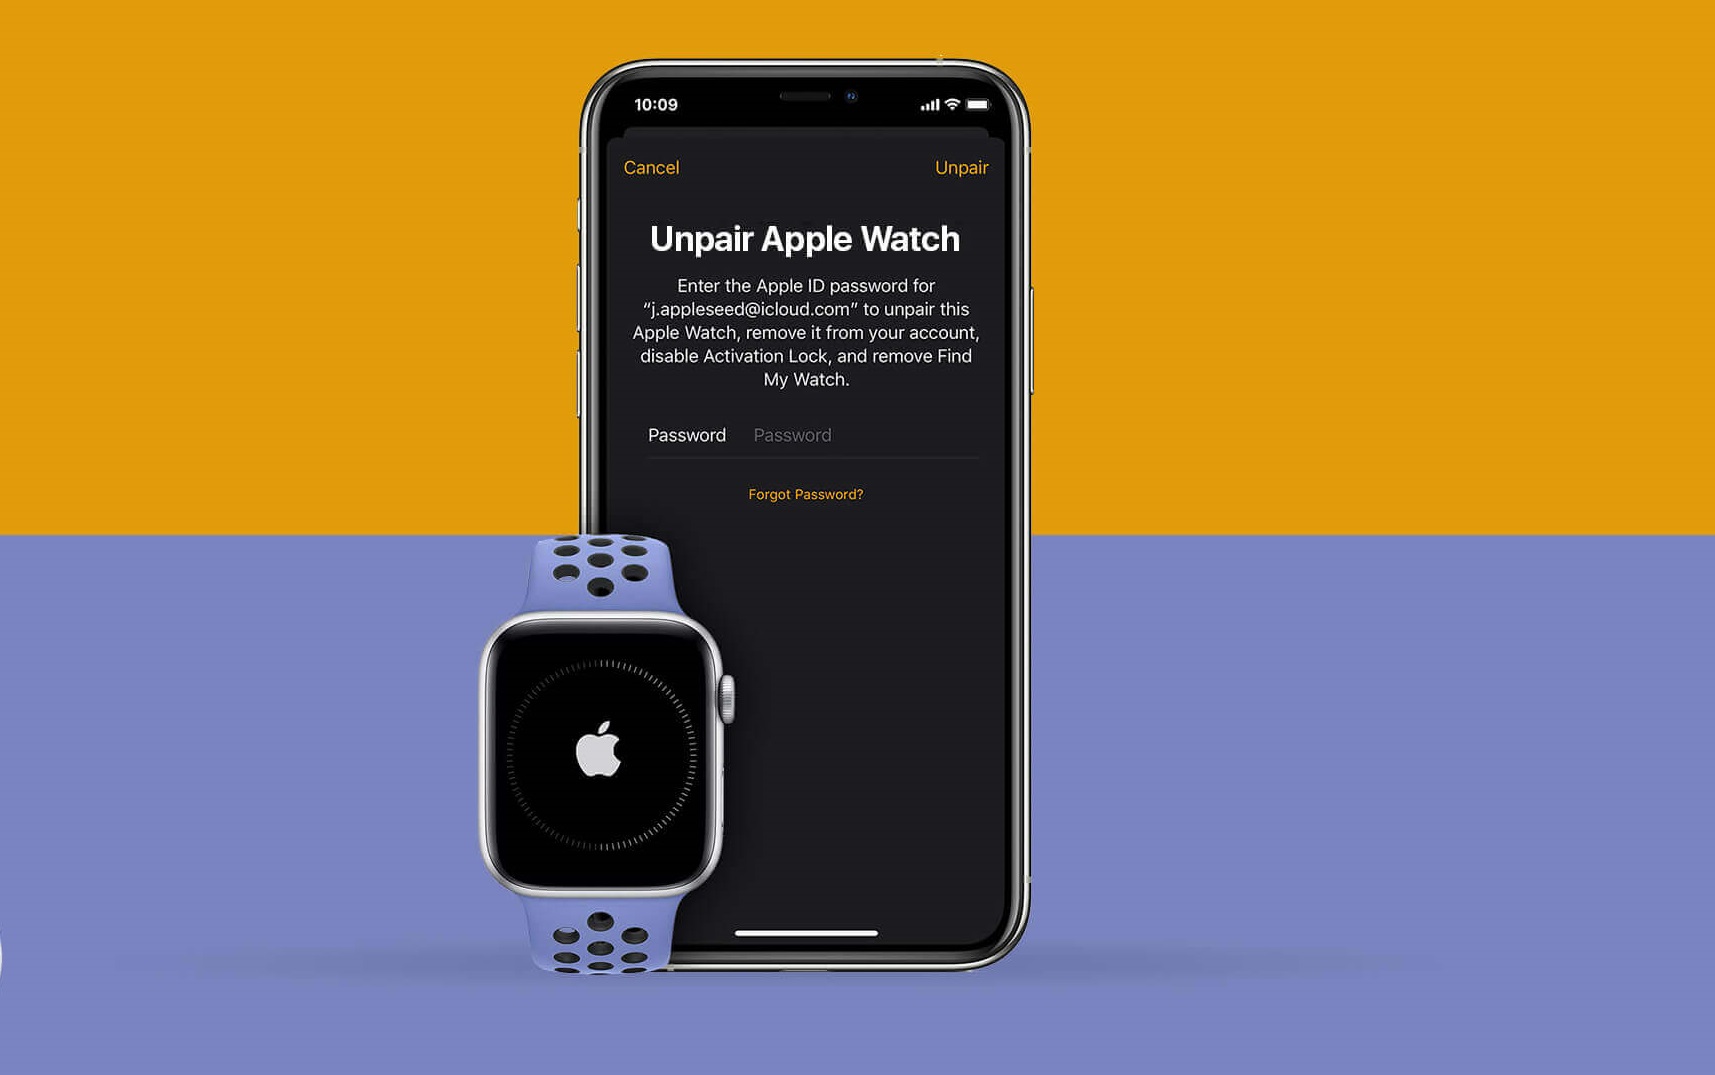
- Confirm the Unpairing Process: A pop-up message will appear asking you to confirm your decision to unpair your Apple Watch. Review the information provided and tap on “Confirm” to proceed.
By following these steps, you will successfully unpair your Apple Watch from your iPhone. This process will ensure your data is securely backed up and your watch is ready for a new pairing or transition to a new owner.
Disable Activation Lock
Before unpairing your Apple Watch from your iPhone, it is crucial to disable Activation Lock. This security feature ensures that no one else can pair your watch with their iPhone without your permission. Follow these steps to disable Activation Lock:
- Open the Apple Watch app on your iPhone: Locate and tap on the Apple Watch app icon on your iPhone’s home screen.
- Go to the My Watch tab: Once the app opens, navigate to the “My Watch” tab at the bottom of the screen. This section contains all the settings and options related to your Apple Watch.
- Select your Apple Watch: In the “My Watch” tab, you will see a list of devices. Tap on your Apple Watch to access its specific settings.
- Tap on the “i” icon: On the main settings page for your Apple Watch, you will find an “i” icon located next to your watch’s name. Tap on this icon to view additional information and options.
- Select “Unpair Apple Watch”: Scroll through the additional information until you see the option to “Unpair Apple Watch.” Tap on it to proceed with the unpairing process.
- Confirm your decision: A pop-up message will appear to confirm the unpairing process. Read the information provided and tap on “Confirm” to proceed.
By following these steps, you will disable Activation Lock on your Apple Watch, ensuring that it can be seamlessly paired with another iPhone or prepare it for the unpairing process. Keep in mind that disabling Activation Lock is essential to protect your privacy and prevent unauthorized access to your Apple Watch.
Back Up Your Apple Watch
Before unpairing your Apple Watch from your iPhone, it is important to back up your data. This ensures that you can restore your settings and content if you decide to pair your watch with a new iPhone in the future. Follow these steps to back up your Apple Watch:
- Open the Apple Watch app on your iPhone: Locate the Apple Watch app on your iPhone’s home screen and tap on it to launch the app.
- Select your Apple Watch: Once the Apple Watch app opens, go to the “My Watch” tab located at the bottom of the screen. In this tab, you will see a list of devices associated with your Apple ID. Tap on your Apple Watch to access its specific settings.
- Tap on the “i” icon: On the main settings page for your Apple Watch, you will find an “i” icon next to its name. Tap on this icon to access additional information and options.
- Tap on “Unpair Apple Watch”: Scroll down until you see the option to “Unpair Apple Watch.” Tap on it to initiate the unpairing process and start the backup of your watch.
- Confirm the unpairing process: A confirmation message will appear, informing you that unpairing will create a backup of your Apple Watch on your iPhone. Review the information provided and tap on “Confirm” to proceed with the unpairing and backup process.
Once you confirm the unpairing process, your Apple Watch will begin backing up its data to your iPhone. This backup will include settings, app data, and synced content, such as music, photos, and workout data. The time it takes to complete the backup will depend on the amount of data on your watch.
By backing up your Apple Watch before unpairing it from your iPhone, you can ensure that your important data is saved and easily accessible. This backup will allow for a smooth transition if you decide to pair your watch with a new iPhone or restore it in the future.
Open the Apple Watch App on Your iPhone
To manage and customize your Apple Watch settings, you’ll need to open the Apple Watch app on your iPhone. This app allows you to pair your watch with your iPhone, customize watch faces, install apps, and more. Follow these steps to open the Apple Watch app:
- Locate the Apple Watch app on your iPhone: The Apple Watch app should be pre-installed on your iPhone, so you can easily find it on your home screen. Look for the icon with a silhouette of an Apple Watch and tap on it to launch the app.
- Access the “My Watch” tab: After opening the Apple Watch app, you will see different tabs at the bottom of the screen. Tap on the “My Watch” tab, which is the first tab on the left. This tab is where you can manage your Apple Watch and its settings.
By tapping on the “My Watch” tab, you will be able to customize various aspects of your Apple Watch, such as watch faces, notifications, and app configurations. You can also view and organize installed apps, adjust health and fitness settings, and manage other device-specific settings.
Additionally, the Apple Watch app allows you to explore and install compatible third-party apps from the App Store directly onto your watch. This gives you access to a wide range of functionalities and features to enhance your Apple Watch experience.
By opening the Apple Watch app on your iPhone, you gain complete control over your Apple Watch’s settings, features, and customization options. Take some time to explore the various tabs and adjust your preferences to tailor your Apple Watch to your needs and style.
Tap on Your Watch
Once you have opened the Apple Watch app on your iPhone and accessed the “My Watch” tab, it’s time to tap on your Apple Watch to access its specific settings and options. Follow these steps to tap on your watch:
- Locate your Apple Watch: In the “My Watch” tab of the Apple Watch app, you will see a list of devices associated with your Apple ID. Scroll through the list or search for your Apple Watch to find it.
- Tap on your Apple Watch: Once you have located your Apple Watch in the list, tap on its name to access its specific settings and options.
By tapping on your Apple Watch, you will open a dedicated page within the Apple Watch app that displays various settings and configurations specific to your watch. This page allows you to further customize your watch’s appearance, functionality, and behavior.
On this page, you can change the watch face, customize complications, adjust notifications, and manage app layouts. You can also explore additional features and settings, such as controlling the volume, adjusting brightness, and enabling or disabling fitness tracking.
Tapping on your Apple Watch within the Apple Watch app is critical for tailoring your watch to your preferences and needs. It offers you the opportunity to personalize various aspects of your watch’s appearance, functionality, and settings to ensure an optimal user experience.
Tap on the “i” Icon
Once you have accessed the settings page for your Apple Watch in the Apple Watch app, you will find an “i” icon next to your watch’s name. Tapping on this icon will provide you with additional information and options to customize your watch. Follow these steps to tap on the “i” icon:
- Locate the “i” icon: On the main settings page for your Apple Watch in the Apple Watch app, look for the small “i” icon next to your watch’s name. This icon usually indicates that more information and customization options are available.
- Tap on the “i” icon: Once you have found the “i” icon, simply tap on it to access the additional information and options specific to your Apple Watch.
By tapping on the “i” icon, you open a new page that provides you with detailed information about your watch, including storage usage, software version, serial number, and more. This page also gives you access to various additional customization options and specific settings.
Within this information page, you can adjust settings like passcode, wrist detection, haptic feedback, and sound. You can also manage notifications and enable or disable features such as water lock mode and theater mode. Keep in mind that the available options may vary depending on your Apple Watch model and software version.
Tapping on the “i” icon allows you to delve deeper into the settings and customization options for your Apple Watch. Take some time to explore this page to personalize your watch’s functionalities and tailor it to your preferences.
Tap on “Unpair Apple Watch”
Once you have accessed the specific settings page for your Apple Watch in the Apple Watch app and tapped on the “i” icon, it’s time to proceed with unpairing your watch. Look for the option to “Unpair Apple Watch” and follow these steps:
- Scroll down the information page: On the page that opens after tapping on the “i” icon, scroll through the available options and information until you find the section related to unpairing your Apple Watch.
- Tap on “Unpair Apple Watch”: Within the unpairing section, you will find the option to “Unpair Apple Watch.” Tap on this option to initiate the unpairing process.
Tapping on “Unpair Apple Watch” within the Apple Watch app will begin the process of disconnecting your watch from your iPhone. This step is crucial if you no longer want your watch to be paired with your current iPhone or if you plan to sell or transfer ownership of the watch.
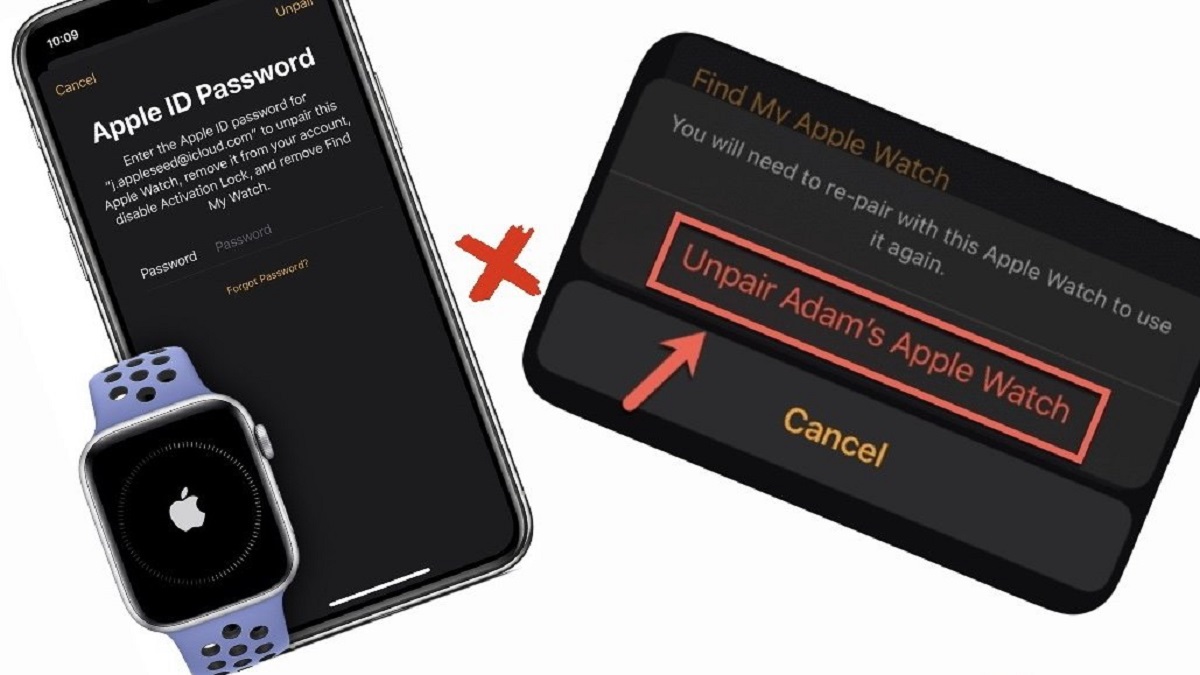
Once you tap on “Unpair Apple Watch,” a message will appear on your iPhone confirming your decision to unpair your watch. This message may inform you that your watch will be backed up and that Activation Lock will be disabled. Review the information provided and proceed with the unpairing process.
It’s important to note that unpairing your Apple Watch from your iPhone will remove all personal information from the watch and reset it to factory settings. After unpairing, your watch will no longer be connected to your iPhone, and you will need to go through the initial setup process if you decide to pair it with another iPhone in the future.
By tapping on “Unpair Apple Watch” within the Apple Watch app, you take the final step in disconnecting your watch from your iPhone. This process ensures a clean separation between the devices and prepares your watch for new pairing or ownership.
Confirm the Unpairing Process
After tapping on the “Unpair Apple Watch” option within the Apple Watch app, a confirmation message will appear on your iPhone. This message will ask you to confirm your decision to unpair your Apple Watch. Follow these steps to complete the unpairing process:
- Review the information: Take a moment to carefully read the information provided in the confirmation message. It will typically outline the consequences of unpairing your Apple Watch, such as the removal of all personal data and the reset of the watch to factory settings.
- Confirm your decision: If you agree with the information provided and understand the implications of unpairing your Apple Watch, tap on the “Confirm” button to proceed.
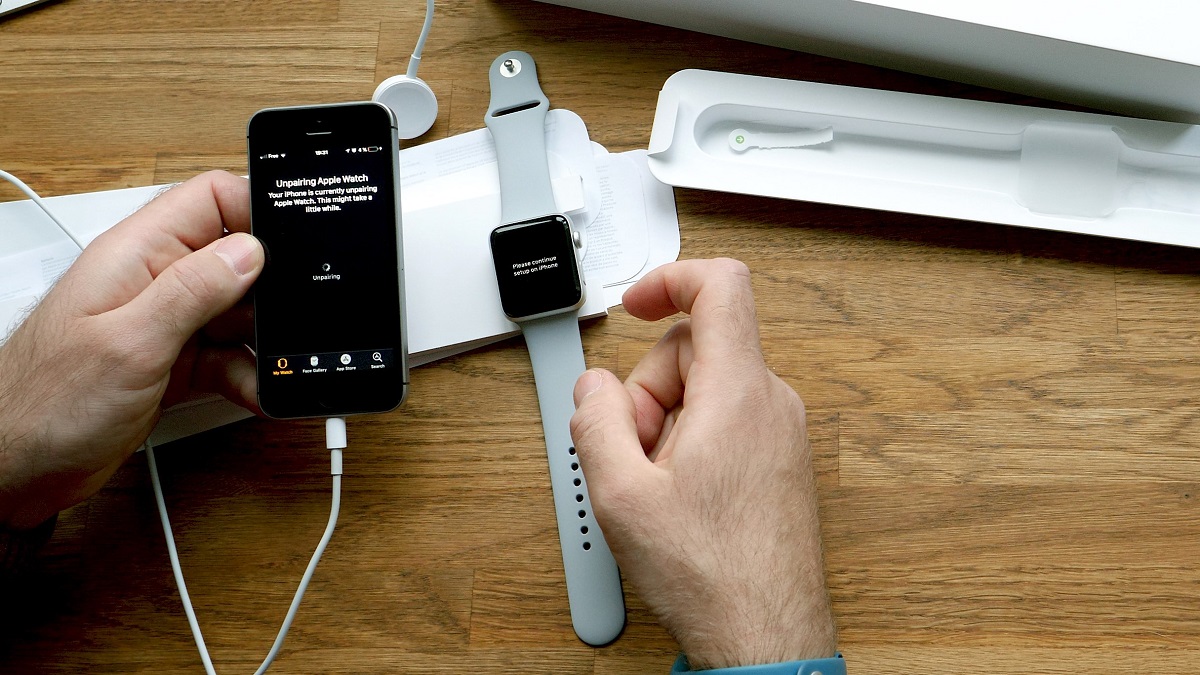
Tapping on “Confirm” will initiate the unpairing process, which includes disabling Activation Lock and erasing all personal information from the watch. The duration of the process may vary depending on the amount of data on the watch and its connectivity.
Once the unpairing process is complete, your Apple Watch will no longer be connected to your iPhone, and it will reset to factory settings. You may be prompted to perform the initial setup process on your watch if you decide to pair it with another iPhone in the future.
Confirming the unpairing process is a vital step to ensure the successful disconnection of your Apple Watch from your iPhone. It is essential to carefully consider the consequences of unpairing, as it will result in the removal of personal data and the reset of the watch.
By confirming the unpairing process, you complete the separation between your Apple Watch and your iPhone. This action allows you to either pair your watch with a new iPhone or prepare it for a new owner, ensuring a fresh start for the device.
Unpairing Your Apple Watch without Your iPhone
While it is recommended to unpair your Apple Watch from your iPhone for a seamless transition, there may be instances where you need to disconnect your watch without access to your iPhone. Unpairing your Apple Watch without your iPhone can be done through the device’s settings. Follow these steps to unpair your Apple Watch without your iPhone:
- Resetting your Apple Watch: To unpair your Apple Watch without your iPhone, you’ll have to reset the device. On your Apple Watch, go to the Settings app, which can be accessed from the home screen.
- Tap on “General”: Inside the Settings app, navigate to the “General” option. This section contains a range of basic settings and options for your watch.
- Tap on “Reset”: Among the options in the General section, look for “Reset” and tap on it. This is where you can initiate the reset process for your Apple Watch.
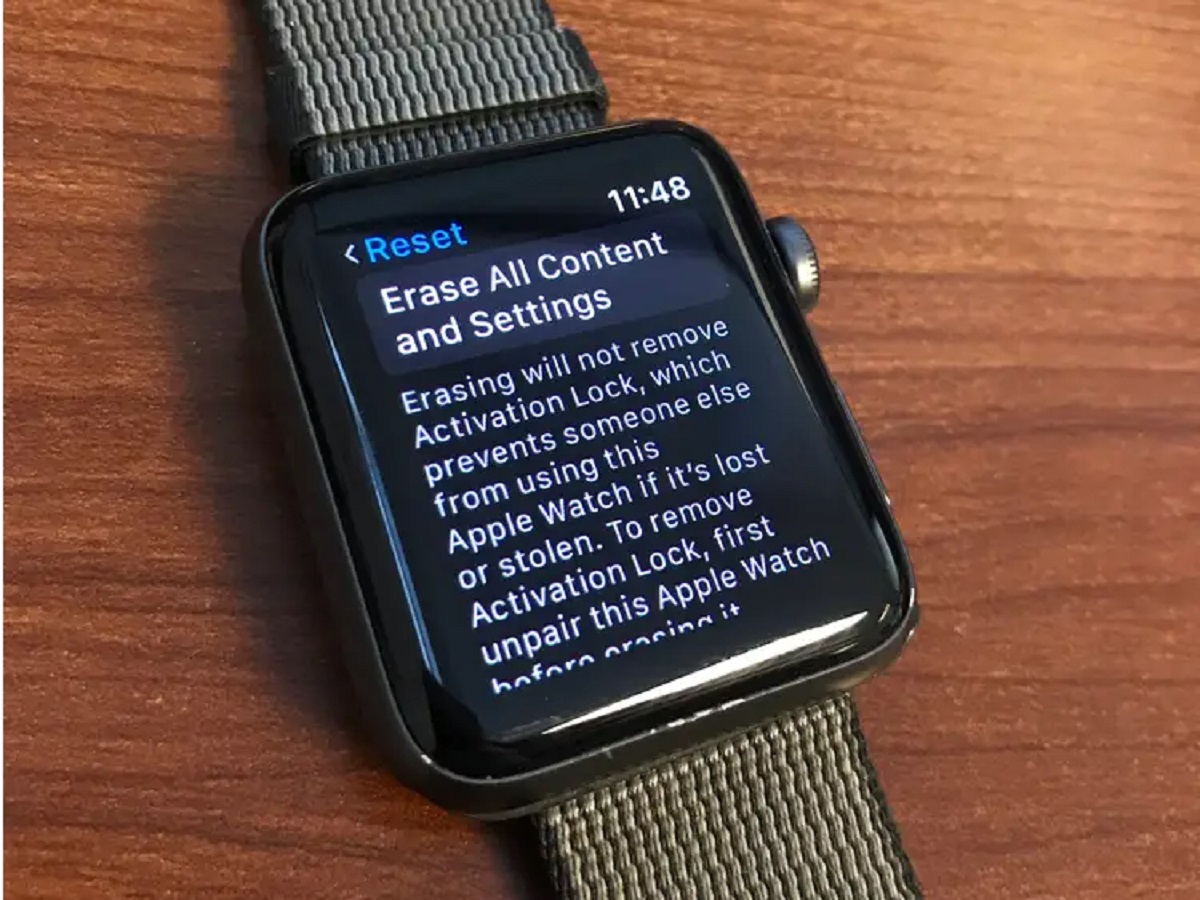
- Tap on “Erase All Content and Settings”: Within the Reset menu, you’ll see various reset options. Select “Erase All Content and Settings” to initiate the unpairing process.
- Confirm the Reset: After selecting “Erase All Content and Settings,” a confirmation prompt will appear. Read the information provided and confirm your decision to proceed with the reset.
By following these steps, you will reset your Apple Watch to its factory settings, effectively unpairing it without the assistance of your iPhone. Keep in mind that this process erases all content and settings on your watch, so be sure to back up any important data beforehand if possible.
After the reset, your Apple Watch will prompt you to set it up as a new watch or pair it with another iPhone. If you plan to pair your watch with a new device in the future, follow the on-screen instructions to complete the setup process.
Unpairing your Apple Watch without your iPhone is a viable option when you don’t have access to your iPhone or when it’s not functioning properly. It allows you to disconnect your watch and prepare it for new pairing or use in a standalone capacity.
Resetting Your Apple Watch
Resetting your Apple Watch is the key step to unpair it without your iPhone. This process erases all content and settings on your watch and prepares it for a new pairing or standalone use. Follow these steps to reset your Apple Watch:
- Go to Settings: From your Apple Watch’s home screen, tap on the Settings app to open it. The Settings app icon resembles a gear.
- Tap on “General”: Inside the Settings app, scroll down and locate the “General” option. Tap on it to access a range of basic settings and options for your watch.
- Tap on “Reset”: Among the available options in the General section, look for “Reset” and tap on it. This is where you can initiate the reset process for your Apple Watch.
- Tap on “Erase All Content and Settings”: Inside the Reset menu, you’ll find different reset options. Select “Erase All Content and Settings” to proceed with the reset. This action will erase all data and settings on your watch, so make sure to back up any important data beforehand if possible.
- Confirm the Reset: After selecting “Erase All Content and Settings,” a confirmation prompt will appear on your Apple Watch. Read the information provided and confirm your decision to proceed with the reset.
Once you confirm the reset, your Apple Watch will begin the process of erasing all its content and settings. The duration of the reset may vary depending on the model and the amount of data on your watch.
After the reset is complete, your Apple Watch will reboot and display the initial setup screen. From here, you can choose to set up your watch as a new device or pair it with a new iPhone.
Resetting your Apple Watch is a useful option when you need to unpair it without your iPhone or perform a fresh start. It allows you to disconnect your watch and prepare it for a new pairing or use it as a standalone device.
Go to Settings
If you want to reset your Apple Watch, the first step is to access the Settings app on the device. Here’s how you can navigate to the Settings on your Apple Watch:
- On your Apple Watch’s home screen, tap on the digital crown button on the side of the watch. This will take you to the app grid, where you can see all the installed apps.
- Scroll through the app icons or use Siri to find and launch the Settings app. The Settings app icon resembles a gear, making it easy to identify.
- Once you’ve located the Settings app, simply tap on it to open the app.
Upon opening the Settings app, you’ll have access to various options and configurations for your Apple Watch. These settings allow you to personalize your watch, adjust its features, and manage its functionality according to your preferences.
Some of the key settings you can find in the Settings app include display brightness, sound and haptic feedback, passcode settings, watch face customization, and app-specific settings. You can also view information about your watch, such as its storage usage, software version, and battery life.
By going to the Settings app on your Apple Watch, you gain control over how your watch operates and interacts with you. This gives you the freedom to customize and tailor the device to your specific needs and preferences.
Tap on “General”
After opening the Settings app on your Apple Watch, the next step is to tap on the “General” option. This section contains a range of basic settings and options that allow you to customize various aspects of your watch. Here’s how you can navigate to the “General” settings:
- From the home screen of your Apple Watch, locate and tap on the Settings app. The app icon resembles a gear.
- Once you have the Settings app open, scroll through the available options by swiping up or down on the screen until you see “General.” The icon for the “General” option typically looks like a gear.
- Tap on “General” to access the settings within this category.
By tapping on “General,” you will be able to access and modify various settings that are not specific to a particular feature or functionality. These settings can include language preferences, accessibility options, software updates, and more.
Within the “General” settings section, you may also find options to modify device-specific settings, such as enabling or disabling features like “Do Not Disturb,” “Wake Screen,” or adjusting the date and time settings.
Accessing the “General” settings on your Apple Watch gives you the ability to customize broader aspects of the watch’s functionality and personalize it to meet your specific needs and preferences.
Tap on “Reset”
When you are in the General settings of your Apple Watch, the next step is to tap on the “Reset” option. This menu provides you with various reset options that allow you to make changes to your watch’s settings or perform a complete reset. Here’s how you can access the “Reset” menu:
- Open the Settings app on your Apple Watch by tapping on its icon from the home screen. The Settings app icon resembles a gear.
- Scroll through the available settings options until you locate and tap on “General.” This section contains general watch settings and customization options.
- Within the General settings, scroll down and find the “Reset” option. It should be near the bottom of the list.
- Tap on “Reset” to access the reset menu on your Apple Watch.
By tapping on “Reset,” you open a menu that offers various reset options for your Apple Watch. These options include resetting individual settings, erasing content and settings, or resetting network settings. It is important to note that selecting some of these options will result in the loss of data and the device reverting to its default state.
Within the “Reset” menu, you may find options such as “Reset Settings,” “Reset Home Screen Layout,” or “Reset Network Settings.” Each option serves a different purpose and allows you to make specific changes to your Apple Watch to suit your needs.
Tapping on “Reset” within the General settings of your Apple Watch provides you with the flexibility to modify specific settings, clear certain data, or reset network-related configurations. Make sure to choose the appropriate reset option based on your desired outcome and carefully review any warning messages that may appear.
Tap on “Erase All Content and Settings”
Once you have accessed the “Reset” menu on your Apple Watch, the next step is to tap on the “Erase All Content and Settings” option. This action will initiate the process of erasing all data and settings on your watch. Here’s how you can proceed:
- Open the Settings app on your Apple Watch by locating its icon on the home screen and tapping on it. The Settings app icon resembles a gear.
- Scroll down and tap on “General” to access the general settings options.
- Within the General settings, continue scrolling until you find the “Reset” option. Tap on it to open the reset menu.
- From the reset options available, tap on “Erase All Content and Settings.” This option will completely wipe your Apple Watch clean.
By tapping on “Erase All Content and Settings,” you are initiating the process of resetting your Apple Watch to its factory settings. This action will erase all data, including apps, settings, and personal information, from your watch.
It is important to note that once you confirm this action, your Apple Watch will be restored to its original state as if it were brand new. This also means that all your data will be permanently lost, so make sure you have backed up any important information beforehand, if possible.
After tapping on “Erase All Content and Settings,” you may be prompted to enter your passcode or Apple ID credentials to confirm the action. This is an added security measure to ensure that the reset process is intentional.
By choosing to tap on “Erase All Content and Settings” within the reset menu, you are taking the final step towards completely wiping your Apple Watch and preparing it for a fresh start or a new owner.
Confirm the Reset
After tapping on “Erase All Content and Settings” within the “Reset” menu on your Apple Watch, a confirmation message will appear on the screen. This message will ask you to confirm your decision to proceed with the reset. Follow these steps to confirm the reset:
- Read the information provided: Take a moment to carefully review the information provided in the confirmation message. It will typically warn you that all data, settings, and personal information on your Apple Watch will be permanently erased.
- Confirm your decision: If you understand the implications of resetting your Apple Watch and agree with the information provided, tap on the “Confirm” button to proceed with the reset.
By tapping on “Confirm,” the reset process will begin, and your Apple Watch will start erasing all content and settings. This process may take a few minutes to complete, depending on the amount of data on your watch and its performance.
Once the reset is finished, your Apple Watch will reboot and display the initial setup screen. At this point, you can choose to set up your watch as a new device or pair it with a new iPhone.
It’s important to note that confirming the reset is irreversible, and all your data, settings, and personal information will be permanently erased from the watch. Therefore, it’s crucial to have a backup of any vital data before proceeding with the reset, if possible.
By confirming the reset, you complete the process of resetting your Apple Watch to its factory settings. This prepares the watch for a fresh start or potential pairing with a new iPhone, ensuring a clean and personalized experience.
Conclusion
Unpairing and resetting your Apple Watch can be necessary for various reasons, such as upgrading to a new model, selling your watch, or troubleshooting issues. By following the appropriate steps, you can disconnect your Apple Watch from your iPhone and ensure that your personal data is safe and secure.
If you have access to your iPhone, unpairing your Apple Watch is the recommended method. This process allows you to automatically backup your watch’s data, disable Activation Lock, and remove personal information. By opening the Apple Watch app, tapping on your watch, and selecting “Unpair Apple Watch,” you can complete the unpairing process smoothly.
If you don’t have access to your iPhone, resetting your Apple Watch directly from its settings is the alternative option. By going to the Settings app, tapping on “General,” and selecting “Reset,” you can initiate the erase process. However, keep in mind that this method will remove all content and settings from your watch, and it’s crucial to back up any important data beforehand, if possible.
Regardless of the method you choose, it’s essential to confirm your decisions throughout the process. Whether it’s disabling Activation Lock, erasing all content and settings, or confirming the reset, carefully review the information provided and proceed with caution.
By unpairing or resetting your Apple Watch, you can prepare it for a new pairing or a fresh start. Whether you’re upgrading to a new device or parting ways with your watch, following the correct steps ensures a seamless and secure transition.
Remember, unpairing and resetting your Apple Watch should be done with care. Before proceeding, consider the implications and ensure that you have a backup of any important data. This way, you can confidently disconnect your Apple Watch from your iPhone and reset it to a clean state while safeguarding your personal information.