Introduction
The Apple Watch has revolutionized the way we interact with our smart devices, providing convenience and functionality right on our wrists. However, like all electronic devices, the battery life of the Apple Watch can eventually diminish. When this happens, it’s time to replace the battery.
Replacing the battery of your Apple Watch may seem like a daunting task, but with the right tools and a little bit of guidance, it can be easily accomplished. In this step-by-step guide, we will walk you through the process of replacing the battery on your Apple Watch, ensuring that you can continue enjoying your device for years to come.
Before we begin, it’s important to note that the process of replacing the Apple Watch battery is different for each model. Therefore, make sure to identify your specific Apple Watch model and follow the appropriate instructions. Additionally, it’s always a good idea to backup any important data on your Apple Watch before starting the battery replacement process, just to be on the safe side.
Now that we have the basics covered, let’s gather the necessary tools to get started!
Step 1: Gather the necessary tools
Before you begin the process of replacing the battery on your Apple Watch, it’s important to gather all the necessary tools. Having the right tools on hand will make the process much smoother and ensure that you can complete the battery replacement without any issues.
Here are the tools you will need:
1. Replacement battery: Purchase a genuine replacement battery that is compatible with your specific Apple Watch model. It’s recommended to buy from a reliable source to ensure the quality and compatibility of the battery.
2. Small screwdriver set: You will need a set of small screwdrivers to remove the screws on the back cover of the Apple Watch. Make sure to choose a screwdriver set that includes the appropriate size for your specific Apple Watch model.
3. Spudger or plastic pry tool: A spudger or plastic pry tool will come in handy for disconnecting cables and removing the battery safely. It will help prevent any damage to the delicate components of the Apple Watch.
4. Tweezers: Tweezers will assist you in handling small components, such as screws or connectors, with precision and ease. Choose a pair of tweezers with a fine tip for better control.
5. Adhesive strips: Depending on the Apple Watch model, adhesive strips may be required to secure the new battery in place. These adhesive strips are usually included with the replacement battery, but you can also purchase them separately if needed.
6. Clean cloth or microfiber cloth: It’s always a good idea to have a clean cloth or microfiber cloth on hand to wipe down the Apple Watch and keep it free from dust, fingerprints, or smudges during the battery replacement process.
Having all these tools ready before you start will save you time and make the process much more efficient. Once you have gathered all the necessary tools, you are ready to power off your Apple Watch and move on to the next step.
Step 2: Power off the Apple Watch
Before you begin working on your Apple Watch, it’s essential to power it off to prevent any potential electrical mishaps. Here’s how you can power off your Apple Watch:
1. Press and hold the side button on the Apple Watch until the power off screen appears.
2. Once the power off screen shows up, swipe the power icon from left to right to turn off the Apple Watch.
3. Wait for the Apple Watch to completely shut down before proceeding to the next step. This ensures that there is no electrical current running through the device and minimizes the risk of accidental damage.
Remember, safety should always be a top priority when handling electronic devices, especially when it involves opening up the watch and working with delicate components. By powering off your Apple Watch, you reduce the risk of electric shock and ensure a safer working environment.
Now that your Apple Watch is powered off, it’s time to move on to the next step: removing the band from the watch.
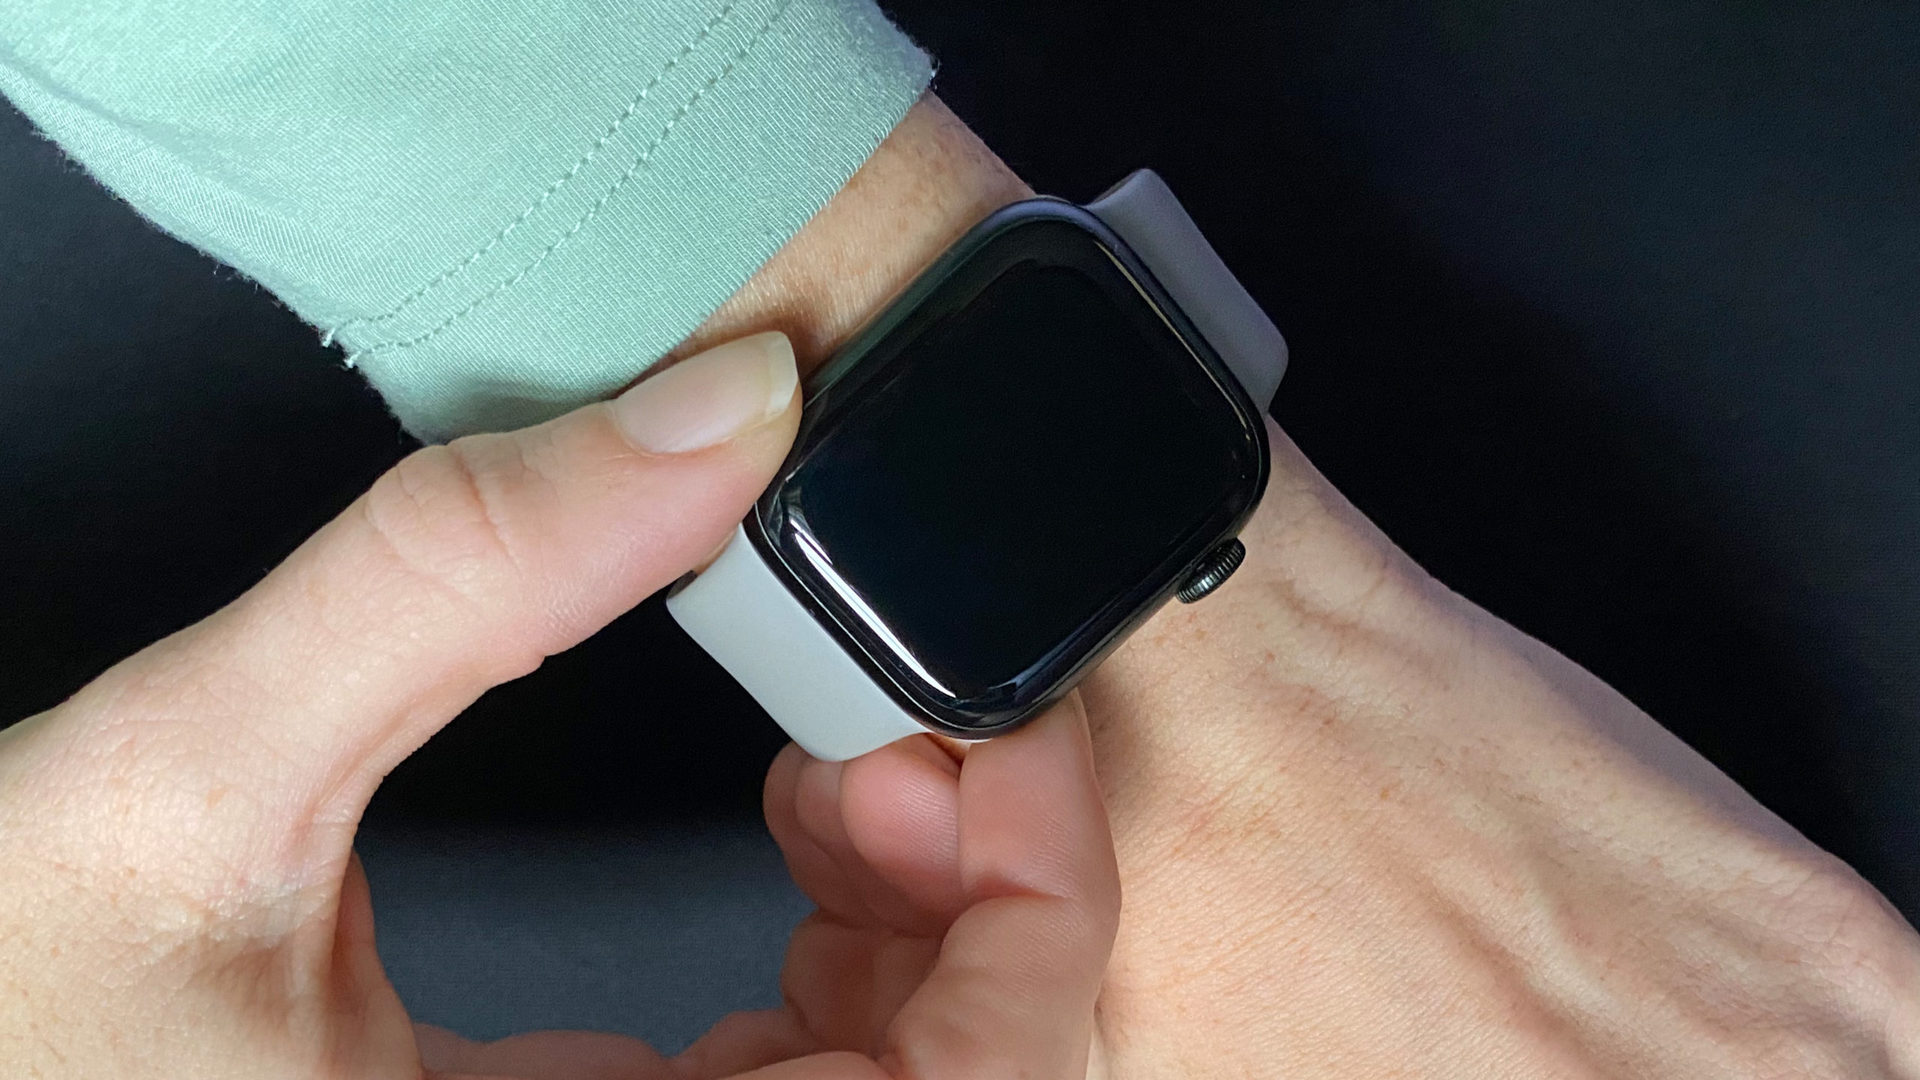
Step 3: Remove the Apple Watch band
Before you can access the battery of your Apple Watch, you’ll need to remove the band. Here’s how you can do it:
1. Hold your Apple Watch with the display facing down and locate the two buttons on the backside of the watch.
2. Press and hold the small button on one side of the watch band connector.
3. While holding the button, slide the watch band out of the groove. You may need to apply some gentle pressure to release it.
4. Repeat this process for the other side of the watch band connector.
5. Once both sides of the watch band connector are released, you can easily slide out the watch band.
Removing the Apple Watch band gives you better access to the internal components of the device, allowing you to perform the battery replacement without any obstructions. Make sure to keep the watch band in a safe place to prevent any damage or loss.
Now that the band is removed, you can proceed to the next step: opening the back cover of the Apple Watch.
Step 4: Open the Apple Watch back cover
To access the battery of your Apple Watch, you’ll need to open the back cover. Follow these steps:
1. Lay your Apple Watch on a soft, lint-free cloth or a microfiber cloth to protect the display from getting scratched during the process.
2. Locate the small screws around the perimeter of the back cover. These screws secure the cover in place, and you’ll need to remove them to open it.
3. Select the appropriate screwdriver from your small screwdriver set that fits the size of the screws on your Apple Watch model.
4. Carefully unscrew each of the screws, taking note of their position and keeping them in a safe place. It’s important to keep track of the screws to avoid confusion when reassembling the Apple Watch later.
5. Once all the screws are removed, gently lift the back cover using a plastic pry tool or a spudger. Insert the tool into the small gap between the back cover and the body of the watch and gently apply pressure to pry it open.
6. As you lift the back cover, be mindful of any cables or connectors that may be attached. Take your time and use caution to avoid damaging any components.
Opening the back cover gives you access to the internal components of the Apple Watch, including the battery. However, be aware that the internal components are delicate, so handle them with care to prevent any accidental damage.
With the back cover opened, you’re now ready to move on to the next step: disconnecting the battery connector.
Step 5: Disconnect the battery connector
To safely replace the battery of your Apple Watch, you’ll need to disconnect the battery connector. Here’s how you can do it:
1. Take a close look at the internal components of your Apple Watch. Locate the battery connector, which is typically a thin cable connecting the battery to the motherboard.
2. Gently lift the small plastic tab or flap that secures the battery connector in place. This can usually be done using a plastic pry tool or a pair of tweezers.
3. Once the plastic tab is lifted, carefully pull the battery connector away from its socket on the motherboard. Apply gentle, even pressure while pulling to avoid damaging the connector or the motherboard.
4. Double-check that the battery connector is completely disconnected before moving on to the next step. It’s crucial to make sure there is no electrical connection between the battery and the rest of the device.
Disconnecting the battery connector prevents any power from reaching the device, ensuring a safe and secure battery replacement process. It’s essential to exercise caution while performing this step to avoid damaging any delicate components of the Apple Watch.
Now that the battery connector is disconnected, you can proceed to remove the old battery from your Apple Watch.
Step 6: Remove the old battery
With the battery connector safely disconnected, you can now remove the old battery from your Apple Watch. Here’s how:
1. Take a close look at the battery and its placement within the Apple Watch. Note any adhesive strips or tabs that may be securing the battery in place.
2. Gently lift the old battery from its position, being mindful of any adhesive or tabs. Use a plastic pry tool or a pair of tweezers to carefully lift the battery, applying gentle pressure as needed.
3. Slowly and carefully detach any adhesive strips or tabs that might be holding the battery in place. Follow the instructions provided with the replacement battery, as the process may vary depending on the model of your Apple Watch.
4. Pay attention to any connectors or cables that are still attached to the old battery. If necessary, gently disconnect them from the battery by releasing any clips or connectors.
5. Once the old battery is completely detached, set it aside in a safe place. Properly dispose of the old battery according to local regulations and guidelines for electronic waste.
Removing the old battery is a delicate process, so take your time and be mindful of the fragile components within your Apple Watch. Careful handling will ensure a smooth transition to the installation of the new battery.
Now that the old battery is removed, it’s time to install the new battery and bring your Apple Watch back to life.
Step 7: Install the new battery
With the old battery removed, it’s time to install the new battery in your Apple Watch. Follow these steps:
1. Take the new battery and ensure it matches the specifications of your Apple Watch model. Check for any adhesive strips or tabs that may be necessary for securing the battery in place.
2. Carefully align the new battery in the same position as the old one, taking note of any connectors or cables that need to be reattached. Make sure that the battery is snugly fit within the designated space.
3. If there are adhesive strips or tabs included with the replacement battery, follow the instructions provided to secure the battery in place. Remove any protective coverings or backings on the adhesive strips before attaching them to the Apple Watch.
4. If there are connectors or cables, carefully reattach them to the new battery, ensuring a secure and proper connection. Align the connectors properly and gently press them into place. Take care not to force or bend any of the connectors.
5. Once the new battery is securely installed and all connectors or cables have been reattached, double-check that everything is in the correct position. Ensure that the battery is flat and positioned properly within the Apple Watch.
Installing the new battery is a critical step in the replacement process. Take your time to ensure a correct and secure installation. Properly fitting the new battery will prevent any issues or malfunctions and restore the power to your Apple Watch.
With the new battery installed, it’s time to move on to the next step: reconnecting the battery connector.
Step 8: Reconnect the battery connector
Now that the new battery is securely installed, the next step is to reconnect the battery connector in your Apple Watch. Follow these steps:
1. Locate the battery connector on the motherboard of your Apple Watch. It should be in close proximity to where the old battery was connected.
2. Take the disconnected battery connector and gently align it with the socket on the motherboard. Ensure that the connector is properly aligned and in the correct position.
3. Once aligned, gently push the battery connector into the socket on the motherboard. Apply even pressure and make sure the connector is firmly seated in its socket.
4. Once the battery connector is securely connected, check that it is in place and aligned properly. Take care not to force or bend the connector while reconnecting it.
Reconnecting the battery connector is a crucial step to restore power to your Apple Watch. Take your time and be gentle when aligning and connecting the battery connector to avoid any damage to the delicate components.
With the battery connector successfully reconnected, you are now ready to move on to the next step: closing the back cover of your Apple Watch.
Step 9: Close the Apple Watch back cover
After reconnecting the battery connector, it’s time to close the back cover of your Apple Watch. Follow these steps to securely close the back cover:
1. Carefully position the back cover over the Apple Watch, aligning it with the edges and screw holes.
2. Ensure that all cables and connectors are properly positioned inside the Apple Watch and not pinched or obstructed by the back cover.
3. With the back cover in place, use gentle pressure to press down evenly around the edges. Apply firm but gentle pressure to ensure a proper fit.
4. Begin by installing and tightening the screws one by one, starting from one side and working your way around.
5. Tighten each screw just enough to secure the back cover, but avoid overtightening. Overtightening the screws may damage the threads or strip the screws.
By securely closing the back cover, you ensure that the internal components of your Apple Watch are protected and housed properly. It also helps maintain the integrity of the device’s water resistance.
Now that the back cover is closed, it’s time to move on to the final step: reattaching the band to your Apple Watch.
Step 10: Reattach the Apple Watch band
With the back cover securely closed, the final step in replacing the battery of your Apple Watch is to reattach the watch band. Follow these steps to reattach the band:
1. Take one end of the watch band and align it with the groove on one side of the watch.
2. Slide the watch band into the groove, ensuring that it is securely in place.
3. Press the small button on the watch band connector and slide the opposite end of the band into the groove on the other side of the watch.
4. Release the button to secure the watch band in place.
5. Give the watch band a gentle tug to ensure that it is properly attached and doesn’t come loose.
By reattaching the Apple Watch band, you ensure that your device is comfortably secured to your wrist while you use it. Properly attaching the band also ensures that the watch stays in place during daily activities.
Now that the band is securely attached, you are ready to power on your Apple Watch and enjoy the benefits of the new battery.
In summary, replacing the battery of your Apple Watch is a meticulous process that requires attention to detail and careful handling of the delicate internal components. By following these step-by-step instructions, you can successfully replace the battery and extend the life of your Apple Watch. Remember to always use genuine replacement parts and tools suitable for your specific Apple Watch model.
Congratulations on successfully replacing the battery of your Apple Watch! Enjoy your device with its renewed power and extended battery life.
Step 11: Power on the Apple Watch
With the battery replacement process complete, it’s time to power on your Apple Watch and ensure that everything is functioning properly. Here’s how you can power on your Apple Watch:
1. Press and hold the side button on your Apple Watch until the Apple logo appears on the screen. This may take a few seconds.
2. Release the button once you see the Apple logo. The watch will start to boot up and initialize.
3. Wait for the Apple Watch to fully power on. This may take a minute or two, so be patient.
4. Once the Apple Watch is powered on, you will be prompted to go through the setup process. Follow the on-screen instructions to connect your Apple Watch to your iPhone and complete the setup.
5. After completing the setup process, check the battery level of your Apple Watch. Ensure that it is charging and has an adequate charge to function properly.
Powering on your Apple Watch after replacing the battery is an important step to ensure that all components are working as intended. It allows you to confirm that the battery replacement was successful and that your Apple Watch is ready for use.
If you encounter any issues during the power-on process or notice any irregularities with the Apple Watch’s functionality, try restarting the device and double-checking the connections. If problems persist, consider seeking assistance from Apple Support or a professional technician.
Congratulations! You have successfully replaced the battery and powered on your Apple Watch. Enjoy your device with its renewed battery life and continue to explore all its features and capabilities.
Conclusion
Replacing the battery of your Apple Watch may seem like a daunting task, but with the right tools, instructions, and a little bit of patience, it can be accomplished successfully. By following the step-by-step guide outlined in this article, you can extend the life of your Apple Watch and continue to enjoy its functionality.
Remember, always ensure that you have the appropriate tools for the job, including a replacement battery, small screwdriver set, spudger or plastic pry tool, tweezers, adhesive strips, and a clean cloth. These tools will help you navigate the battery replacement process with ease and minimize the risk of damage to your Apple Watch.
Throughout the process, pay close attention to the delicate components of your Apple Watch and handle them with care. Take your time when removing the old battery, installing the new battery, and reconnecting the battery connector to ensure a proper fit and alignment.
Once the new battery is installed and the Apple Watch is reassembled, power it on and follow the setup process to make sure everything is functioning correctly. If you encounter any issues, consider referring to Apple Support or seeking assistance from a professional.
By replacing the battery in your Apple Watch, you’re extending the life of your device and ensuring that it continues to serve you well in the years to come. Enjoy the convenience and functionality of your Apple Watch with its renewed power and battery life.
Thank you for following this guide on how to replace the battery in your Apple Watch. We hope this article has been informative and helpful, and we wish you success in your battery replacement endeavor.