Introduction
Welcome to the world of Apple Watch! This revolutionary wearable device has quickly become an essential part of our lives, offering a plethora of features and functionalities. However, like any electronic device, the Apple Watch can encounter issues that may require repair.
In this article, we will guide you through the process of troubleshooting and repairing your Apple Watch. Whether it’s a software glitch or a hardware problem, we’ve got you covered. From simple restarts to more complex DIY repairs, we’ll provide you with the necessary steps and tips to get your Apple Watch back in working condition.
Before we delve into the troubleshooting and repair techniques, it’s important to note that not all issues can be resolved without professional assistance. If your Apple Watch is still covered under warranty or AppleCare, we recommend contacting Apple Support to explore your repair options.
However, if you’re feeling adventurous or your device is no longer under warranty, we’ll provide some DIY solutions for common problems. Keep in mind that attempting DIY repairs may void your warranty and should be done at your own risk. It’s always a good idea to proceed with caution and seek professional help if you’re unsure about any steps.
Now let’s dive into the world of Apple Watch repairs and empower you to fix your device!
Troubleshooting
Before considering any repairs, it’s important to troubleshoot the issues you’re experiencing with your Apple Watch. Troubleshooting can often help pinpoint the cause of the problem and potentially resolve it without the need for extensive repairs. Here are some steps you can take to troubleshoot your Apple Watch:
- Check the basics: Ensure that your Apple Watch is properly charged and in close proximity to your iPhone. Sometimes, a simple low battery or connectivity issue can cause problems.
- Restart the Apple Watch: This is often the first step in troubleshooting. To restart your Apple Watch, press and hold the side button until the power off slider appears. Then, drag the slider to power off. After the device has turned off, press and hold the side button again until the Apple logo appears to turn it back on.
- Check for software updates: Outdated software can cause compatibility issues and performance problems. Ensure that both your iPhone and Apple Watch are running the latest software updates. To check for updates on your iPhone, go to Settings > General > Software Update. For your Apple Watch, open the Apple Watch app on your iPhone, tap General, and then Software Update.
- Unpair and re-pair the Apple Watch: If you’re experiencing persistent issues, unpairing and re-pairing your Apple Watch can sometimes resolve them. Open the Apple Watch app on your iPhone, go to My Watch, tap your watch at the top of the screen, and then tap the “i” icon. Select Unpair Apple Watch and follow the on-screen instructions. After unpairing, you can re-pair your Apple Watch by following the initial setup process.
- Force restart the Apple Watch: If your Apple Watch becomes unresponsive or frozen, a force restart can help. To force restart, simultaneously press and hold both the side button and the digital crown until the Apple logo appears.
These troubleshooting steps should help you resolve many common issues with your Apple Watch. However, if the problem persists or you’re facing hardware-related issues, you may need to explore repair options. Let’s move on to the next sections to learn more about fixing common software issues and performing hardware repairs.
Restarting the Apple Watch
One of the first steps in troubleshooting any issues with your Apple Watch is to restart it. Restarting the device can often resolve minor glitches and improve overall performance. Here’s how you can restart your Apple Watch:
- Press and hold the side button until the power off slider appears on the screen.
- Drag the power off slider to the right to turn off the Apple Watch.
- Wait for a few seconds, then press and hold the side button again until the Apple logo appears. This indicates that the device is restarting.
- Once the Apple logo disappears, your Apple Watch should be powered on and ready to use.
Restarting the Apple Watch is a simple yet effective troubleshooting step that can help resolve various issues, including unresponsive apps, connectivity problems, and general performance slowdowns. It clears temporary caches and refreshes the device, similar to restarting a computer or smartphone.
If you’re still experiencing problems after restarting your Apple Watch, try performing a hard restart by following these steps:
- Press and hold both the side button and the digital crown simultaneously.
- Continue holding the buttons until the Apple logo appears on the screen.
- Release the buttons and wait for the device to restart.
A hard restart can be helpful if your Apple Watch is completely unresponsive or frozen. It forces the device to restart and can often resolve more serious issues. However, keep in mind that a hard restart should be used as a last resort and should not be done frequently.
By restarting your Apple Watch regularly and performing a hard restart when necessary, you can keep your device running smoothly and troubleshoot minor issues effectively. If restarting doesn’t resolve the problem, continue reading to learn more about checking for software updates and unpairing and re-pairing your Apple Watch.
Checking for software updates
Keeping your Apple Watch up to date with the latest software is essential for optimal performance and to ensure compatibility with other devices. Apple regularly releases software updates that include bug fixes, security enhancements, and new features. Here’s how you can check for software updates on your Apple Watch:
- Open the Apple Watch app on your paired iPhone.
- Tap on the “My Watch” tab at the bottom of the screen.
- Scroll down and select “General”.
- Tap on “Software Update”.
If an update is available, you will see the option to download and install it. Make sure your Apple Watch is connected to Wi-Fi and has at least 50% battery life before proceeding with the update. It’s also recommended to keep your iPhone nearby during the update process for a smoother experience.
Software updates not only fix known issues but also introduce new features and improvements to the Apple Watch. They can address compatibility problems with other devices and enhance overall performance and stability. It’s important to regularly check for updates and install them to ensure that your device is running on the latest software.
In addition to checking for software updates on your Apple Watch, it’s also crucial to keep your iPhone updated. Many Apple Watch updates are delivered through the paired iPhone, so make sure your iPhone is running the latest version of iOS as well.
By keeping your Apple Watch and iPhone updated, you can enjoy the latest features and improvements while minimizing potential software-related issues. However, if updating the software doesn’t resolve your problem, continue reading to learn about unpairing and re-pairing your Apple Watch.
Unpairing and Re-pairing the Apple Watch
If you’re experiencing persistent issues with your Apple Watch, unpairing and re-pairing it with your iPhone can often resolve the problem. This process essentially resets the connection between the devices and can help fix software-related issues. Here are the steps to unpair and re-pair your Apple Watch:
- Open the Apple Watch app on your paired iPhone.
- Go to the “My Watch” tab at the bottom of the screen.
- Tap on the information (i) icon next to your Apple Watch.
- Select “Unpair Apple Watch”.
- Follow the on-screen instructions to confirm the unpairing process.
Once you’ve successfully unpaired your Apple Watch, you can proceed with re-pairing it by following these steps:
- Place your Apple Watch near your iPhone.
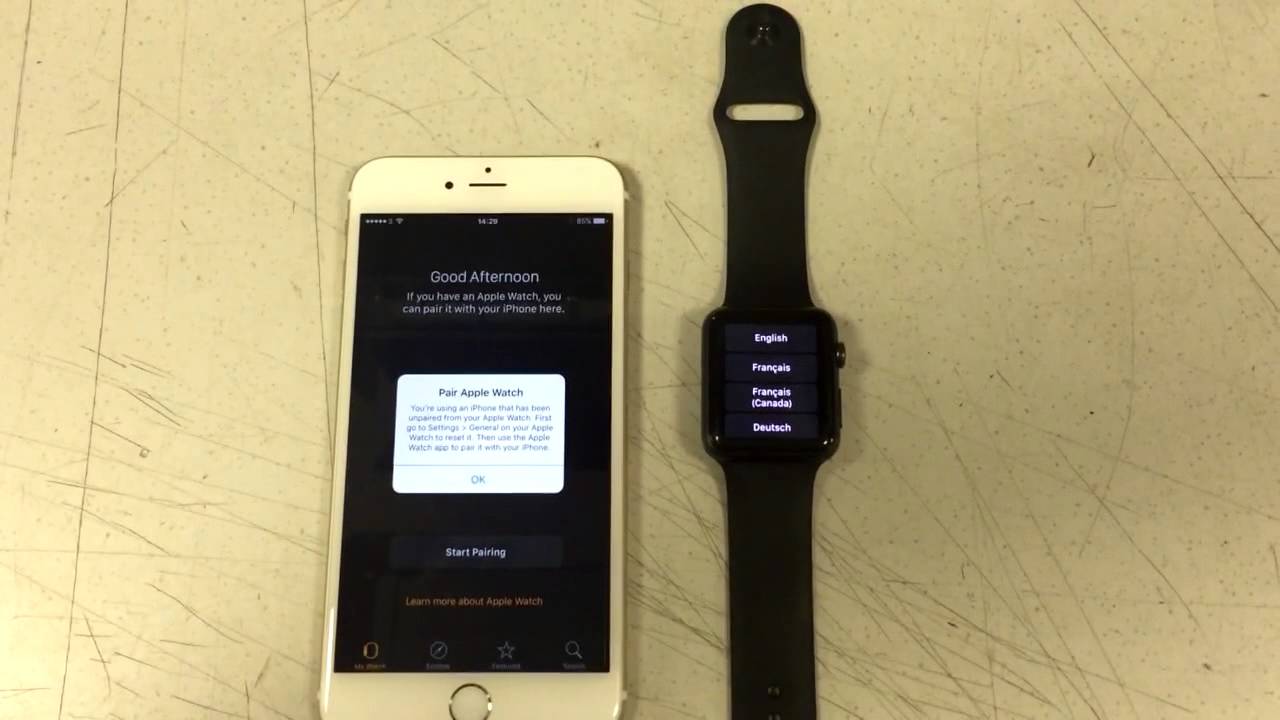
- Open the Apple Watch app on your iPhone and select “Start Pairing”.
- Scan the animation on your Apple Watch using your iPhone’s camera.
- Follow the on-screen instructions to set up your Apple Watch again.
During the re-pairing process, you’ll have the option to restore from a backup or set up your Apple Watch as new. If you choose to restore from a backup, make sure you have a recent backup available on your iPhone to transfer your settings, apps, and data back to the watch.
Unpairing and re-pairing your Apple Watch can help resolve connectivity issues, syncing problems, and other software-related glitches. It resets the device’s settings and can provide a fresh start, similar to a factory reset. However, note that unpairing and re-pairing will erase all data on the Apple Watch, so it’s important to have a backup of your data before proceeding.
If unpairing and re-pairing doesn’t solve your problem, continue reading to explore other troubleshooting steps and potential software fixes for common Apple Watch issues.
Force Restarting the Apple Watch
If your Apple Watch becomes unresponsive or frozen and a regular restart doesn’t solve the issue, a force restart may be necessary. Force restarting the Apple Watch can help resolve more serious software-related problems. Here’s how you can force restart your Apple Watch:
- Press and hold both the side button and the digital crown simultaneously.
- Continue holding the buttons even after the power off slider appears.
- Release both buttons when you see the Apple logo on the screen.
The Apple logo indicates that the force restart is in progress. Once the device completes the force restart, it should boot up normally. This process is similar to a hard restart on a computer or a force restart on other Apple devices like the iPhone or iPad.
Force restarting the Apple Watch can help fix various issues, including unresponsive apps, system freezes, and performance problems. It forcibly shuts down all processes and restarts the device from scratch, often clearing out any temporary glitches that may be causing the problem.
It’s important to note that force restarting your Apple Watch should be used as a last resort when other troubleshooting methods fail. It’s not recommended to use this method frequently or as a regular way to restart your device. Performing force restarts too frequently may cause unnecessary strain on the system.
If force restarting the Apple Watch doesn’t resolve the issue or if you’re facing hardware-related problems, it may be necessary to explore other repair options. Continue reading to learn more about fixing common software issues or diagnosing and repairing hardware problems with your Apple Watch.
Fixing Common Software Issues
Software issues can occur on any device, including the Apple Watch. Fortunately, many common software problems can be resolved without the need for extensive repairs. Here are some troubleshooting steps to fix common software issues on your Apple Watch:
- Check app updates: Go to the App Store on your paired iPhone and check for any updates for the apps installed on your Apple Watch. Updating the apps can often resolve compatibility issues and improve their performance.
- Remove and reinstall problematic apps: If a specific app is causing issues on your Apple Watch, try removing it and reinstalling it. This can help resolve any corrupted files or settings that may be causing the problem.
- Disable and enable notifications: If you’re experiencing issues with notifications on your Apple Watch, try disabling and re-enabling them. Open the Apple Watch app on your iPhone, go to My Watch, and select Notifications. Toggle off and on the notifications for the problematic apps to refresh their settings.
- Reset sync data: If you’re having trouble with data syncing between your Apple Watch and iPhone, you can reset the sync data. Go to the Apple Watch app on your iPhone, tap on My Watch, then General, and finally Reset. Select “Reset Sync Data” and confirm your choice.
- Force close and reopen apps: If an app is not responding or behaving erratically, try force closing it and reopening it. On your Apple Watch, double-press the digital crown to bring up the app switcher, swipe left or right to find the problematic app, then swipe it up or down to force close it. Launch the app again to see if the issue is resolved.
These troubleshooting steps should help alleviate many common software issues on your Apple Watch. However, if the problem persists or if you’re facing more significant issues, you may need to consider more advanced troubleshooting techniques or seek professional assistance.
Next, we will explore the option of resetting the Apple Watch to its factory settings, which can be a more comprehensive solution for persistent software problems or if you’re preparing to sell or pass on your device. Read on to learn how to perform a factory reset on your Apple Watch.
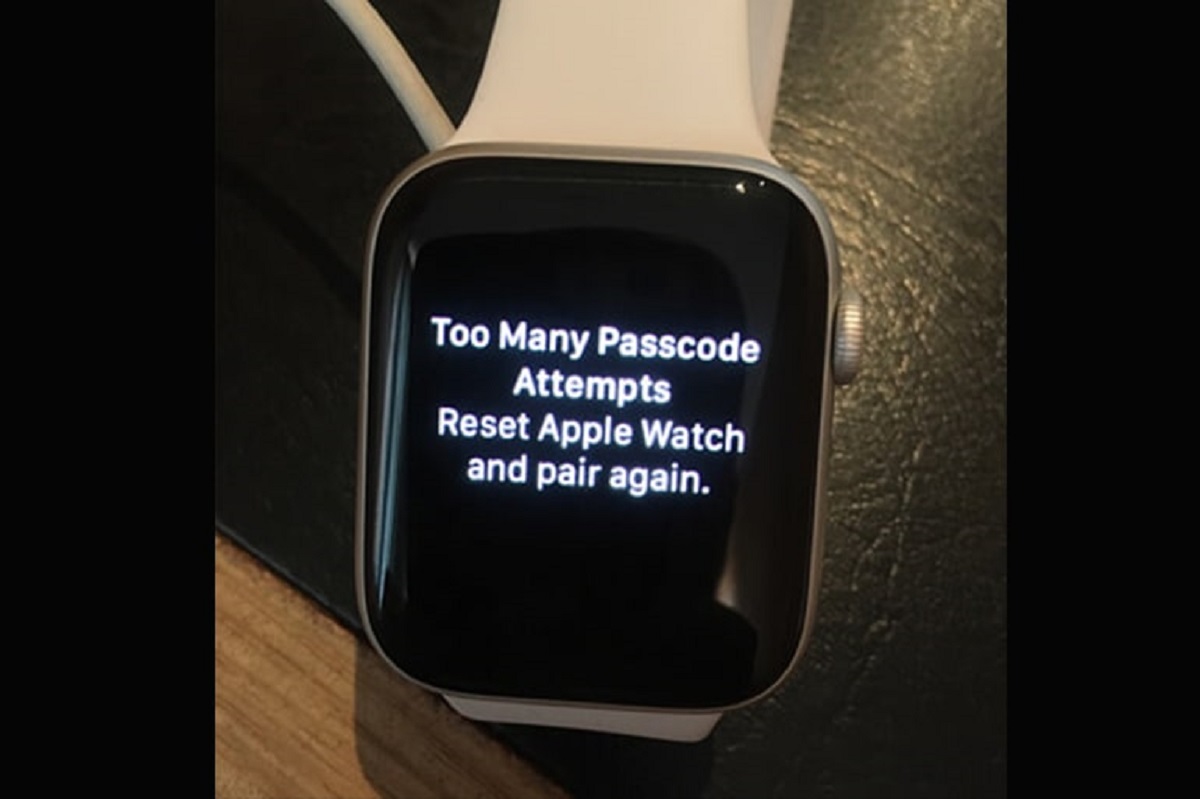
Resetting the Apple Watch to Factory Settings
If you’re still encountering persistent software issues with your Apple Watch, performing a factory reset can often resolve the problems. Resetting the device to its factory settings erases all data and settings, returning it to its original state. Here’s how you can reset your Apple Watch:
- Open the “Settings” app on your Apple Watch.
- Scroll down and select “General”.
- Swipe down and tap on “Reset”.
- Select “Erase All Content and Settings”.
- Enter your passcode (if prompted) and confirm your choice.
After initiating the reset process, your Apple Watch will erase all data and settings, and then restart. Once the reset is complete, you’ll need to set up your Apple Watch from scratch, just like when you first purchased it.
Performing a factory reset can be a powerful solution to fix persistent software problems, such as unresponsive apps, frequent crashes, or significant performance issues. It eliminates any software conflicts or corrupted files that may be causing the issues, giving your Apple Watch a fresh start.
However, it’s crucial to note that a factory reset will erase all data on your Apple Watch, including apps, settings, and personal data. Therefore, it’s essential to have a backup of your important data before proceeding with the reset. You can back up your Apple Watch data through the Apple Watch app on your iPhone.
Remember, if the software issues persist even after resetting your Apple Watch, or if you’re facing hardware-related problems, it may be necessary to explore other repair options. In the following sections, we will delve into diagnosing hardware issues, sending the Apple Watch for repair, and even some DIY repairs you can attempt.
Hardware Repairs
While software issues can often be resolved through troubleshooting and resetting, there may come a time when your Apple Watch requires hardware repairs. It’s important to identify and diagnose any hardware problems accurately to determine the best course of action. Here’s a guide to help you with hardware repairs for your Apple Watch:
Diagnosing hardware issues
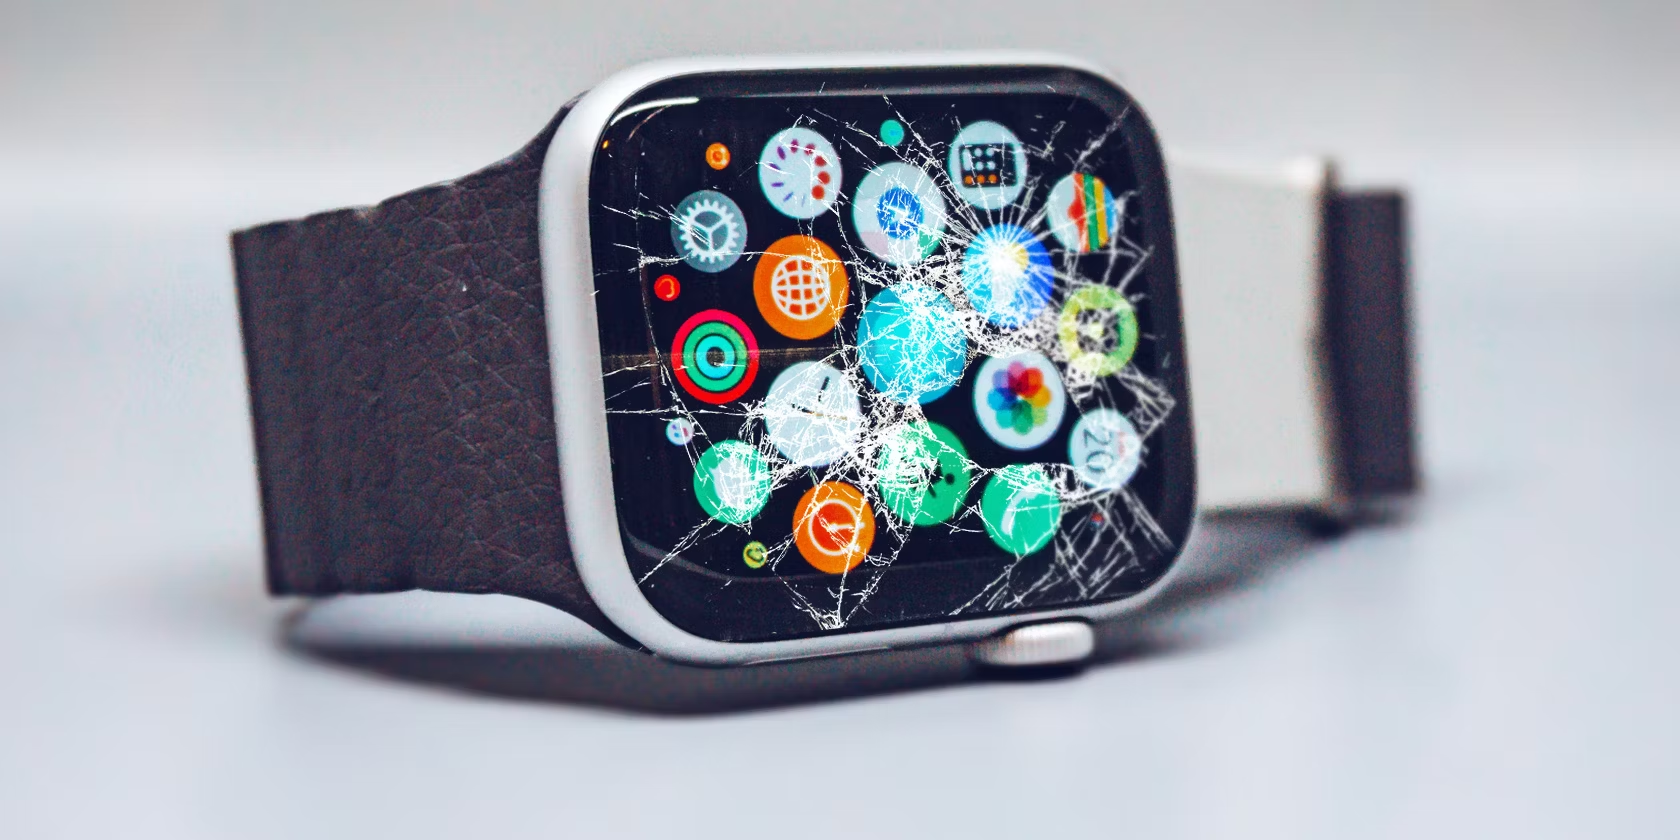
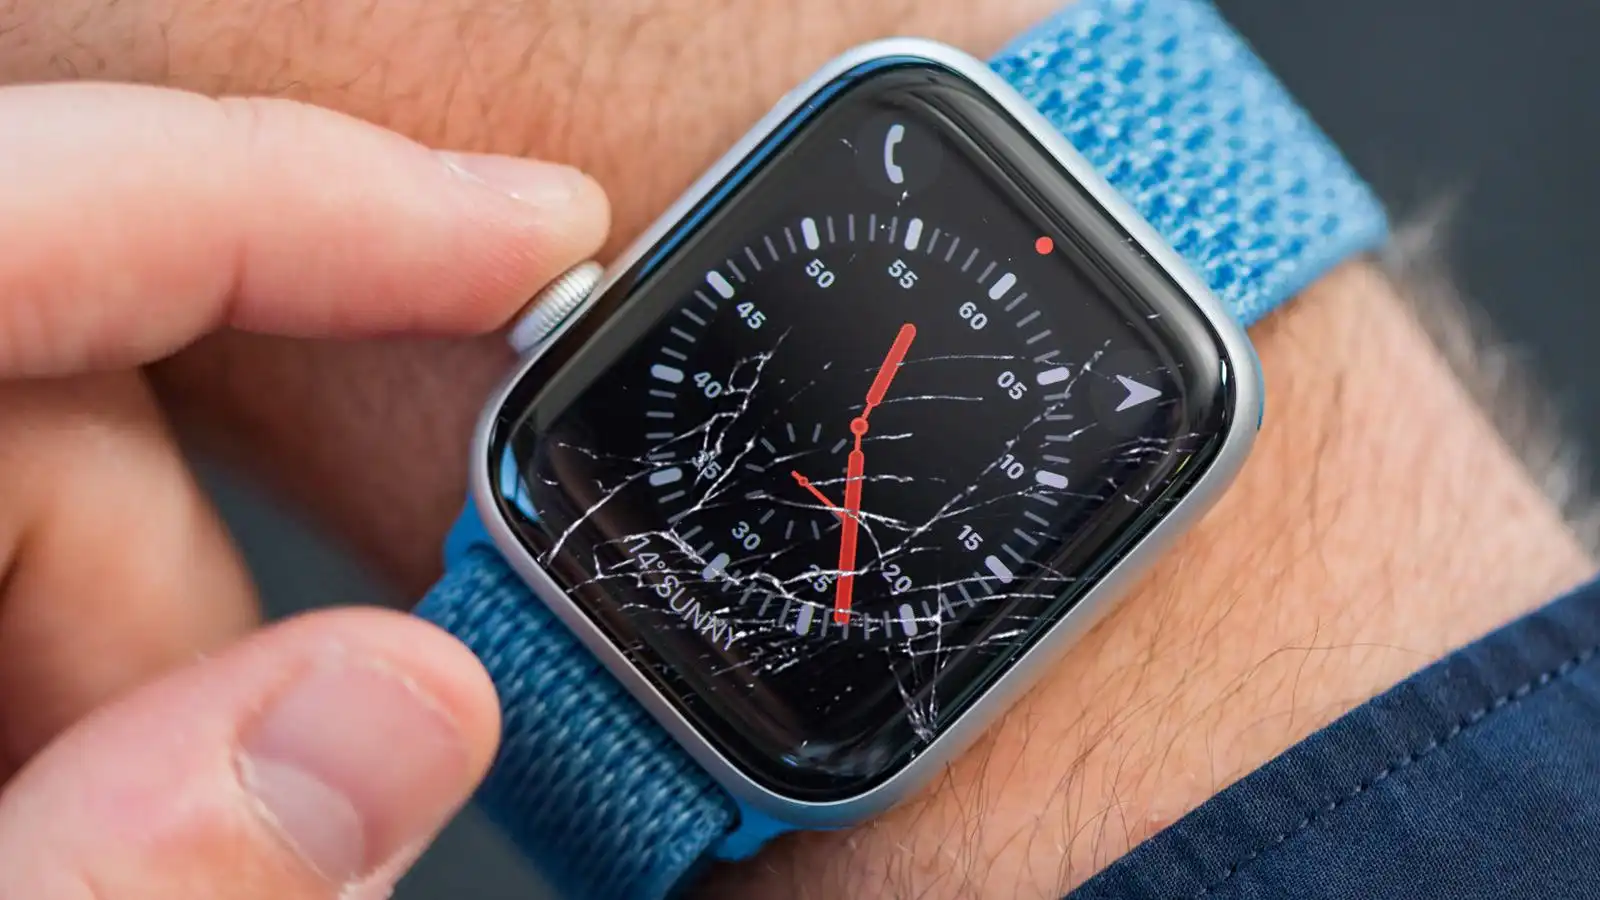
If you’re experiencing physical or functional problems with your Apple Watch, it’s essential to diagnose the specific issue before attempting any repairs. Some common hardware issues include a cracked or scratched screen, unresponsive buttons, faulty sensors, or a battery that drains quickly. Take a close look at your Apple Watch and note any visible damage or irregularities. Perform troubleshooting steps to rule out software-related problems, such as restarting, updating, and resetting.
Sending the Apple Watch for repair
If you’re unsure about diagnosing or fixing the hardware issue yourself, it’s recommended to contact Apple Support for assistance. If your Apple Watch is still within the warranty period or covered by AppleCare, you may be eligible for a repair or device replacement. Apple support can guide you through the process and provide options for getting your watch repaired by authorized technicians.
DIY repairs
For those who are skilled and confident in their abilities, some minor repairs can be done at home. However, it’s important to note that attempting DIY repairs may void your warranty and should be done with caution. Some DIY repairs you can try include replacing the Apple Watch battery, fixing a scratched screen with a screen protector or polishing kit, or addressing unresponsive buttons by cleaning or replacing them. There are plenty of online resources available, such as tutorials and replacement part suppliers, to assist you with these repairs. Exercise proper care and follow instructions diligently to avoid causing further damage or injury.
Cleaning and maintaining the Apple Watch
To prevent potential hardware issues, it’s crucial to clean and maintain your Apple Watch regularly. Use a non-abrasive cloth to wipe the screen and body of the device. Avoid exposing your watch to extreme temperatures, water, or harsh chemicals. Additionally, ensure a snug and comfortable fit by regularly adjusting the watch band and cleaning it if necessary. Proper maintenance can extend the lifespan of your Apple Watch and minimize the need for extensive repairs.
Remember, knowledge and experience are key when it comes to hardware repairs. If you’re not confident in your abilities, it’s best to reach out to professional technicians or Apple Support for assistance. Taking proper care of your Apple Watch can help you avoid hardware issues, but if they do arise, it’s important to address them promptly and effectively.
Diagnosing Hardware Issues
When encountering hardware issues with your Apple Watch, it’s crucial to diagnose and identify the specific problem accurately. Here are some steps to help you diagnose potential hardware issues with your Apple Watch:
1. Assess the physical condition
Examine your Apple Watch closely for any physical damage or irregularities. Look for cracks or scratches on the screen, dents or bends in the casing, and any visible signs of wear or damage. Note down any abnormalities you observe, as this information will be helpful when seeking repair options.
2. Check for fluid damage
If your Apple Watch has come into contact with water, it may be susceptible to water damage. Check for signs of moisture or water ingress, such as condensation under the screen or visible corrosion on the connectors. Water damage can cause a range of issues, including malfunctioning buttons, unresponsive touch screen, or erratic behavior.
3. Test the functionality
Take the time to thoroughly test the various functions and features of your Apple Watch. Pay close attention to the responsiveness of the touch screen, functionality of the buttons, accuracy of the sensors (such as heart rate or GPS), and the overall performance of the device. Note down any issues that you encounter during the testing process.
4. Monitor battery performance
Keep an eye on the battery performance of your Apple Watch. If you notice that the battery drains unusually fast, doesn’t hold a charge, or exhibits unpredictable behavior, it could be an indication of a hardware issue. Battery problems can be caused by a faulty battery or other underlying hardware components.
5. Rule out software-related issues
Before concluding that the problem is hardware-related, it’s essential to rule out any software-related issues. Ensure that your Apple Watch is running the latest software updates and perform troubleshooting steps, such as restarting or resetting the device, to rule out any temporary glitches or conflicts that can mimic hardware issues.
By thoroughly diagnosing hardware issues, you can have a clearer understanding of the problem and make informed decisions regarding the next steps. If you’re unsure about the diagnosis, it’s recommended to seek professional assistance or contact Apple Support for guidance. In the following sections, we will explore repair options including sending the Apple Watch for repair and attempting DIY repairs.
Sending the Apple Watch for Repair
If you’re experiencing hardware issues with your Apple Watch and are unable to resolve them on your own, sending it for professional repair is often the best course of action. Here’s a guide to help you navigate the process of sending your Apple Watch for repair:
1. Check warranty coverage
Before proceeding with any repairs, check the warranty status of your Apple Watch. If your device is still covered under the Apple Limited Warranty or if you have AppleCare+, you may be eligible for repair services at no additional cost. You can check your warranty coverage by entering the serial number of your Apple Watch on the Apple Support website or contacting Apple Support directly for assistance.
2. Contact Apple Support
If your Apple Watch is within the warranty period or covered by AppleCare+, it’s recommended to contact Apple Support to initiate the repair process. They will guide you through the necessary steps and provide options for repairing your watch. You may be directed to send your device to an Apple Authorized Service Provider or to an Apple Repair Center for further assessment and repair.
3. Follow repair instructions
Once you have connected with Apple Support, they will provide you with specific instructions on how to send your Apple Watch for repair. This typically involves packaging your device securely, obtaining a shipping label, and arranging for shipping to the designated repair facility. Be sure to follow the instructions carefully to ensure a smooth and secure process.
4. Service options and turnaround time
The service options and turnaround time can vary depending on the nature of the issue and the availability of parts. In some cases, on-site repairs may be available at an Apple Store or Apple Authorized Service Provider. For more complex repairs, your Apple Watch may need to be sent to an off-site Apple Repair Center. Apple Support will provide detailed information on the available service options and the estimated time frame for repair.
5. Backup your data
Before sending your Apple Watch for repair, it’s important to back up your data. Creating a backup ensures that your personal information, settings, and apps are safely preserved. You can back up your Apple Watch data through the paired iPhone by going to the Apple Watch app and selecting “General” and then “Reset”. Choose “Erase Apple Watch Content and Settings” and follow the instructions to create a backup before proceeding with the repair process.
Sending your Apple Watch for repair allows trained professionals to assess and address the hardware issues with expertise and specialized tools. Whether it’s a cracked screen, faulty buttons, or other hardware-related problems, professional repair services can help restore your Apple Watch to optimal functioning. If you prefer a more hands-on approach, you may also consider attempting DIY repairs, which we will explore in the next section.
DIY Repairs
If you’re feeling confident in your abilities and prefer a hands-on approach, there are some DIY repairs you can attempt for your Apple Watch. However, it’s important to note that DIY repairs may void your warranty, and they should be done at your own risk. Here are a few common DIY repairs you can consider:
1. Replacing the Apple Watch battery
If you’re experiencing issues with your Apple Watch battery, such as diminished capacity or rapid draining, you can replace it yourself. Start by purchasing a compatible battery and follow online tutorials or step-by-step guides that provide instructions specific to your Apple Watch model. Keep in mind that replacing the battery requires careful handling and precise tools. Make sure to follow the instructions diligently and exercise caution during the process.
2. Repairing a scratched or cracked screen
If your Apple Watch screen has minor scratches, you can try using a screen protector to minimize their appearance. For more significant scratches or a cracked screen, you may need to replace the screen yourself. Screen replacement kits are available for purchase, and online resources offer detailed instructions on how to safely remove the old screen and install the new one. Take your time, work in a clean and well-lit environment, and follow the step-by-step guidelines to ensure a successful repair.
3. Fixing buttons that are not working
If the buttons on your Apple Watch are unresponsive or sticking, they may need cleaning or replacement. Start by gently cleaning around the buttons using a soft cloth or a toothbrush. If the issue persists, you can consider replacing the buttons yourself with replacement parts specifically designed for your Apple Watch model. Follow comprehensive guides or video tutorials to carefully dismantle your watch and install the new buttons. Take note of the button positioning and ensure a secure fit during reassembly.
4. Cleaning and maintaining the Apple Watch
Regular cleaning and maintenance can help prevent hardware problems and keep your Apple Watch in good condition. Use a non-abrasive cloth to clean the screen and casing regularly. Be cautious when using water or cleaning agents near the speaker or microphone openings. Additionally, make sure to adjust the watch band properly and keep it clean to ensure a comfortable and secure fit.
It’s important to note that DIY repairs require technical skills and the appropriate tools. Take the time to research and understand the process fully before attempting any repairs. If you’re unsure or uncomfortable with any step, it’s advisable to seek professional assistance or contact Apple Support for guidance.
Remember, DIY repairs should only be attempted if you have the necessary experience, knowledge, and confidence. Proceed with caution and take proper safety measures to avoid causing further damage to your Apple Watch. If you’re uncertain about your ability to perform the repair successfully, it’s best to seek professional help.
Replacing the Apple Watch Battery
If you’re experiencing issues with the battery of your Apple Watch, such as reduced battery life or failure to hold a charge, replacing the battery may resolve the problem. Here’s a step-by-step guide on how to replace the battery in your Apple Watch:
1. Gather the necessary tools
Before you start, ensure that you have the right tools for the job. You’ll need a small screwdriver set, a plastic prying tool, and a replacement battery specifically designed for your Apple Watch model. Make sure the replacement battery is of high-quality and from a reliable source.
2. Prepare your work area
Find a clean, well-lit workspace where you can perform the battery replacement. A flat surface with ample room to lay out the components and tools will be ideal. It’s also recommended to put down a soft cloth or mat to prevent any damage to your Apple Watch during the process.
3. Power off your Apple Watch
Make sure to power off your Apple Watch before starting the battery replacement. Press and hold the side button until the power off slider appears, then swipe it to the right to turn off your watch.
4. Open the Apple Watch
Using a small screwdriver, carefully remove the screws located at the bottom of the Apple Watch. Once the screws are removed, use a plastic prying tool to pry open the casing. Be gentle and cautious during this process to avoid damaging any internal components.
5. Disconnect the battery
Locate the battery connector, which is a small rectangular component connected to the mainboard by a thin cable. Disconnect the battery connector by gently lifting the retaining flap and carefully pulling the cable out. Take note of the cable’s position and orientation for later reassembly.
6. Remove the old battery
Using a plastic prying tool or a non-conductive tool, carefully pry out the old battery from its housing. Be cautious not to damage any surrounding components. It may require some gentle maneuvering to free the battery from its adhesive underneath, so take your time and proceed with care.
7. Install the new battery
Take your replacement battery and align it correctly in the housing, ensuring it sits flush. Press it down gently to adhere it to the adhesive underneath. Make sure it is securely in place before proceeding to the next step.
8. Reconnect the battery
Carefully reconnect the battery cable to the mainboard, inserting it into the connector socket and then pushing down the retaining flap to secure it in place. Double-check that the connection is secure and properly aligned.
9. Close and power on your Apple Watch
Gently press the casing back together until it snaps into place. Align the screw holes and use the small screwdriver to reinsert and tighten the screws. Once the casing is securely closed, hold down the side button until the Apple logo appears to power on your Apple Watch.
Replacing the battery in your Apple Watch can help restore its battery life and functionality. However, if you’re unfamiliar with hardware repairs or feel unsure about any steps, it’s best to seek professional assistance or contact Apple Support for guidance.
Repairing a Scratched or Cracked Screen
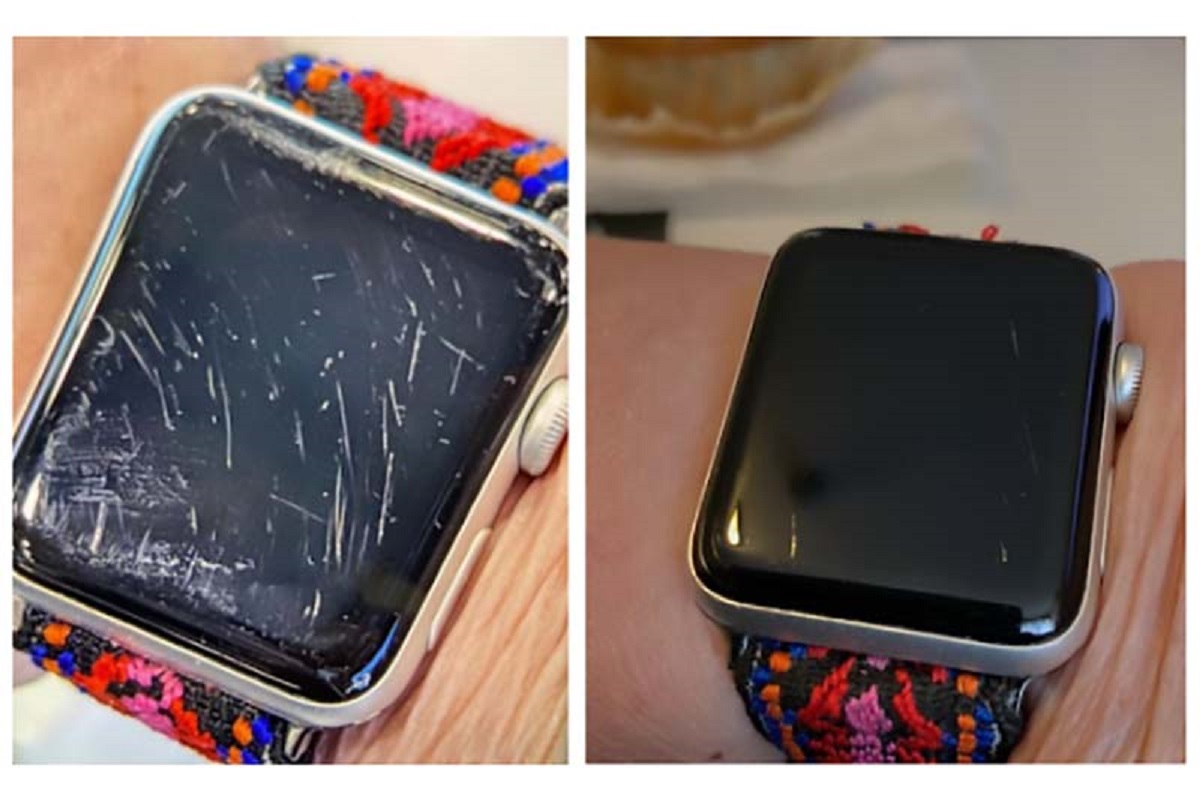
A scratched or cracked screen can be a frustrating sight on your Apple Watch. While it’s impossible to repair deep cracks or major damage without professional assistance, you can still minimize the appearance of minor scratches or cracks using a few DIY methods. Here’s a step-by-step guide to help you repair a scratched or cracked screen on your Apple Watch:
1. Assess the damage
Examine the screen of your Apple Watch to determine the extent of the scratches or cracks. If the damage is minor, it may be possible to reduce its visibility with DIY methods. However, if the cracks are deep or the screen is severely damaged, it’s best to contact Apple Support or authorized repair centers for assistance.
2. Apply a screen protector
If the scratches are shallow and not too noticeable, applying a screen protector can help reduce their appearance. Screen protectors adhere to the surface of the screen, creating a protective layer that obscures minor scratches. Make sure to purchase a screen protector specifically designed for your Apple Watch model and follow the instructions to apply it correctly.
3. Use toothpaste or baking soda paste
For minor scratches on an Apple Watch with a plastic or Ion-X glass screen, you can try using toothpaste or a baking soda paste. Dab a small amount of toothpaste or mix baking soda with water to form a paste. Apply the paste to a clean, microfiber cloth and gently rub it in a circular motion over the scratched area. Rinse the screen with water and dry it with a soft cloth. This method may help minimize the appearance of light scratches, but it may not work on deeper scratches or on the Sapphire crystal display.
4. Polish with a scratch removal kit
If the scratches are more severe, you can consider using a scratch removal kit designed for watch crystals or phone screens. These kits typically include a specialized polish and instructions on how to apply it. Follow the instructions precisely, as different kits may have varying application methods. Gently polish the scratched area using the provided materials, making sure to avoid excessive pressure that could cause further damage.
5. Consider professional repair
If the DIY methods don’t yield satisfactory results or if the screen is cracked or shattered, it’s best to seek professional repair. Contact Apple Support or visit an authorized service center to inquire about screen replacement services for your specific Apple Watch model. Trained professionals have the necessary tools and expertise to replace the screen professionally and ensure the quality and reliability of the repair.
Remember, while these DIY methods may help improve the appearance of minor scratches, they may not restore the screen to its original condition. It’s important to exercise caution and stop the repair process if you feel uncomfortable or uncertain. Seeking professional assistance is always the best option for significant screen damage or if you want the assurance of a professional repair.
Fixing Buttons that are Not Working
If you’re experiencing issues with the buttons on your Apple Watch, such as unresponsiveness or sticking, there are a few DIY methods you can try to fix the problem. Here’s a step-by-step guide to help you fix buttons that are not working on your Apple Watch:
1. Clean the buttons
Start by gently cleaning around the buttons using a soft, lint-free cloth. Wipe away any debris, dirt, or residue that may be causing the buttons to stick or not register properly. Be cautious not to apply excessive pressure while cleaning, as it may damage the buttons.
2. Use isopropyl alcohol
If cleaning alone doesn’t resolve the issue, moisten a cotton swab or cloth with isopropyl alcohol. Gently rub the moistened swab or cloth around the problematic buttons, ensuring the alcohol reaches the edges and crevices. This can help remove any grime or sticky substances that may be interfering with the button’s functionality.
3. Press and rotate the buttons
Press and rotate the buttons repeatedly to dislodge any debris or particles that may be causing them to stick. Apply gentle pressure while rotating the buttons clockwise and counterclockwise. This method can sometimes help loosen any obstruction or debris that is hindering the button’s movement.
4. Check for physical obstructions
Inspect the buttons closely for any visible physical obstructions, such as debris or particles lodged between the buttons and the casing. If you notice any foreign objects, gently try to remove them using a non-abrasive tool, such as a toothpick or a plastic prying tool. Be careful not to scratch or damage the buttons while removing the obstructions.
5. Replace the buttons
If the above methods do not improve the button’s functionality, it may be necessary to replace the buttons. Replacement button kits designed for your specific Apple Watch model can be purchased online. Follow detailed guides or video tutorials that provide step-by-step instructions on how to dismantle your Apple Watch and install the new buttons. Ensure you observe the correct positioning and alignment of the buttons during reassembly.
If you’re uncomfortable with any of the steps or unsure about your ability to perform the repair, it’s always best to seek professional assistance. Contact Apple Support or visit an authorized service center for guidance and repair options.
Remember, DIY repairs should be done with caution, and it’s important to understand your limitations. If you are uncertain or uncomfortable with any repair methods, relying on professional assistance is the recommended course of action.
Cleaning and Maintaining the Apple Watch
To keep your Apple Watch in its best condition, regular cleaning and maintenance are essential. Here are some tips to help you effectively clean and maintain your Apple Watch:
1. Clean the screen and casing
Use a soft, lint-free cloth to gently wipe the screen and casing of your Apple Watch. Microfiber cloths are ideal for this purpose as they are non-abrasive and help remove smudges and fingerprints without scratching the surface. Avoid using abrasive materials or harsh chemicals that can damage the screen or the coating.
2. Avoid extreme temperatures
High temperatures, such as leaving your Apple Watch in direct sunlight or exposing it to extreme heat, can negatively impact the performance and longevity of the device. Similarly, exposing it to very cold temperatures can affect the battery life. It’s best to keep your Apple Watch within the recommended temperature range specified by Apple.
3. Protect against water and moisture
Although recent Apple Watch models have improved water resistance, it’s important to limit exposure to water and moisture to prevent potential damage. Avoid submerging your Apple Watch in water, and always remove it before swimming, showering, or engaging in water-based activities. Dry your watch thoroughly using a soft cloth if it comes into contact with water.
4. Adjust and clean the watch band
If your Apple Watch has a removable watch band, regularly adjust it to ensure a snug and comfortable fit. This will prevent excessive movement, which can lead to wear and tear. Additionally, clean the watch band regularly, particularly if it is made of fabric or has a textured surface. Follow the manufacturer’s instructions for cleaning or use a mild soap and water solution to gently clean the band.
5. Store in a safe place
When you’re not wearing your Apple Watch, make sure to store it in a safe place. Avoid leaving it on surfaces where it can be easily knocked off or scratched. Consider using a dedicated Apple Watch stand or case to protect it from accidental damage and ensure it remains in good condition.
Regular cleaning and maintenance not only keep your Apple Watch looking its best but also help prolong its lifespan and performance. By following these simple tips, you can enjoy your Apple Watch for years to come. If you have any concerns or encounter persistent issues, it’s advisable to seek professional assistance from Apple Support or authorized service centers.
Conclusion
Repairing and maintaining your Apple Watch doesn’t have to be an intimidating task. With the right knowledge and tools, you can troubleshoot and fix many common software and hardware issues on your own. From restarting the device to diagnosing hardware issues and attempting DIY repairs, you have various options to get your Apple Watch back in optimal working condition.
Remember to prioritize safety and follow instructions carefully when attempting any repairs or maintenance. If you’re unsure about any step or uncomfortable with the process, it’s always best to seek professional assistance or contact Apple Support for guidance.
Cleaning and maintaining your Apple Watch on a regular basis helps keep it looking its best and extends its lifespan. By following simple practices such as cleaning the screen and casing, avoiding extreme temperatures, protecting against water, adjusting and cleaning the watch band, and storing it properly when not in use, you can keep your Apple Watch in excellent condition for years to come.
If your Apple Watch encounters more complex issues or requires extensive hardware repairs, it’s recommended to contact Apple Support or visit authorized service centers. They have the expertise and resources to handle advanced repairs and ensure the quality and reliability of the repair.
Remember, taking good care of your Apple Watch not only ensures its performance but also enhances your overall experience with this innovative wearable device. Whether it’s troubleshooting software issues, replacing a battery, fixing a scratched screen, or maintaining its cleanliness, you can tackle many repairs and maintenance tasks with confidence.
Now armed with this knowledge, you can be empowered to resolve issues and enjoy your Apple Watch to the fullest!