The Importance of Repairing Your Apple Watch without Resetting
When faced with connectivity issues or other problems with your Apple Watch, it can be frustrating to think that the only solution is to perform a factory reset, losing all your data and customization. However, there are steps you can take to repair your Apple Watch without resorting to a full reset. This is advantageous because it allows you to retain your settings, apps, and personalization while resolving the issue at hand.
One of the main reasons why it is important to repair your Apple Watch without resetting is the preservation of your data. Resetting your device erases all the information stored on it, including your health and fitness data, settings, and personalized watch faces. Losing this data can be particularly frustrating if you’ve been using your Apple Watch for a while and have built up a collection of important information.
Another reason to repair your Apple Watch without resetting is the convenience factor. It takes time and effort to set up your Apple Watch from scratch after a factory reset. You need to reconfigure all your settings, reinstall your apps, and personalize your watch face. By repairing your watch without resetting, you can avoid this lengthy and tedious process.
In addition, not having to reset your Apple Watch allows you to maintain the seamless integration with your iPhone. When you reset the watch, you also need to reset the connection between your Apple Watch and iPhone, which can cause further complications. By repairing your watch without resetting, you can ensure that your devices remain connected and synced without any additional hassle.
Furthermore, repairing your Apple Watch without resetting is ideal for troubleshooting specific issues. Sometimes, the problem you’re experiencing may not be resolved by simply resetting the device. By following specific repair steps, you can target the issue directly and resolve it without having to go through a full reset.
Overall, repairing your Apple Watch without resorting to a complete reset is essential for preserving your data, maintaining convenience, retaining device integration, and troubleshooting specific issues. With a little knowledge and the right steps, you can resolve problems with your Apple Watch while keeping all your valuable settings and personalized data intact.
Step 1: Check for Connectivity Issues
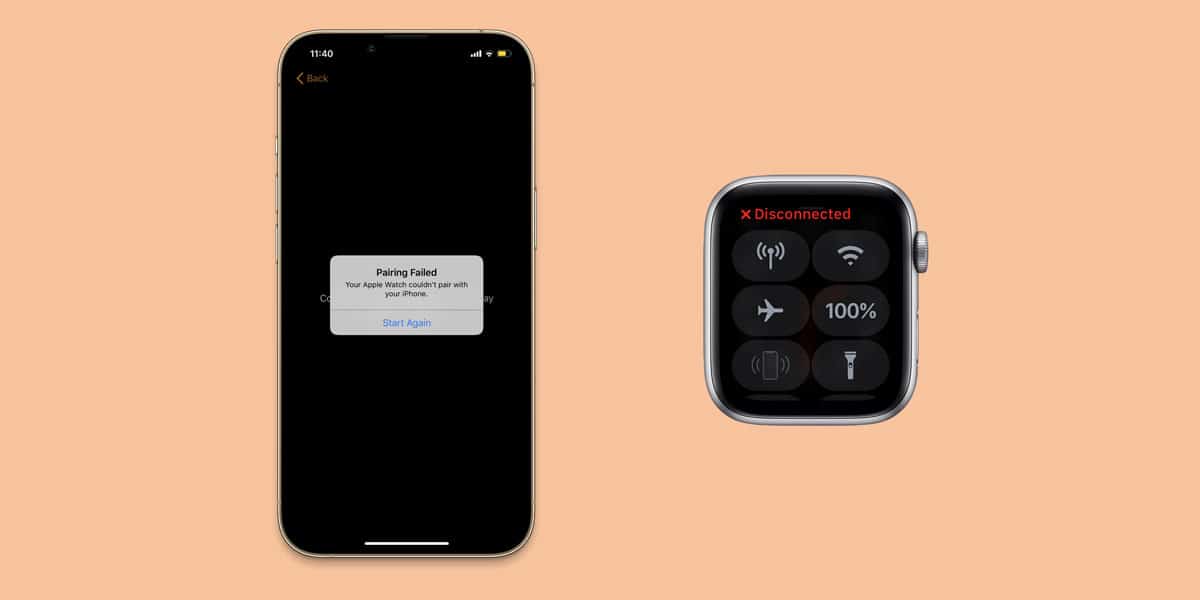
When encountering problems with your Apple Watch, the first step is to check for connectivity issues. This is crucial as connectivity problems can often be the cause of various issues, such as syncing problems, app malfunctions, or notifications not coming through.
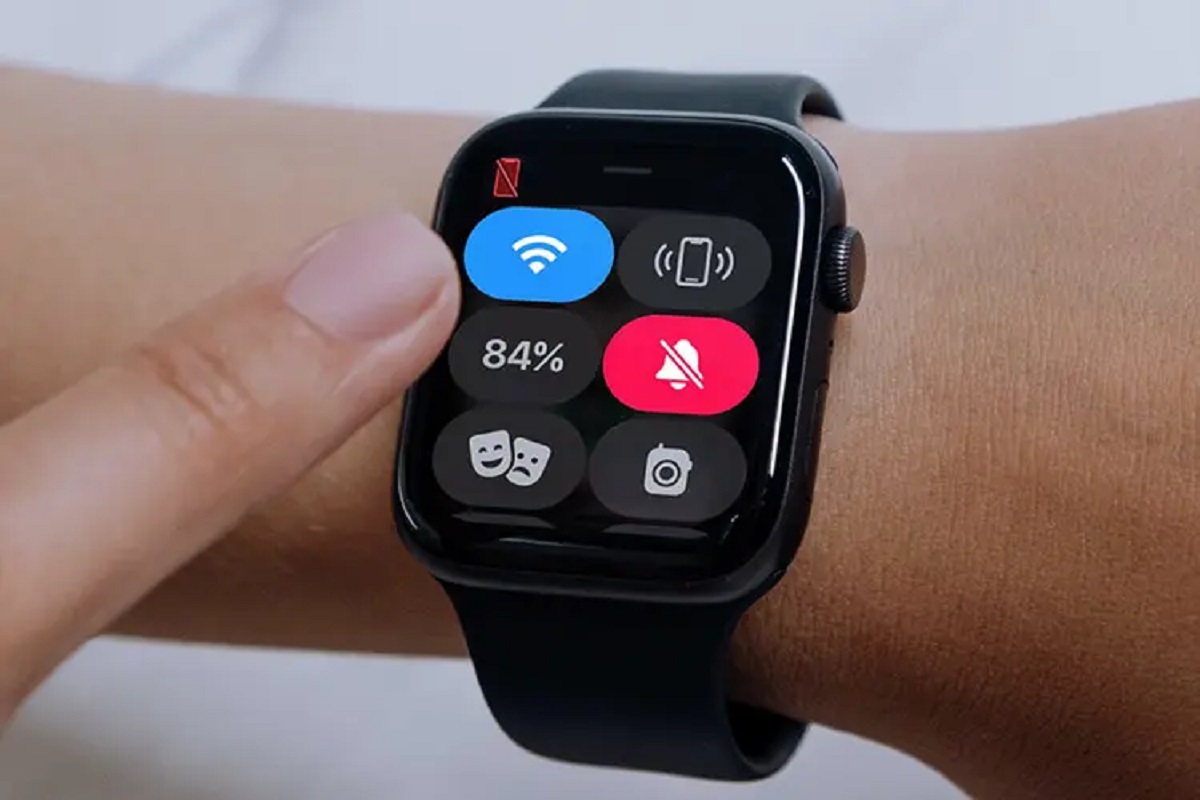
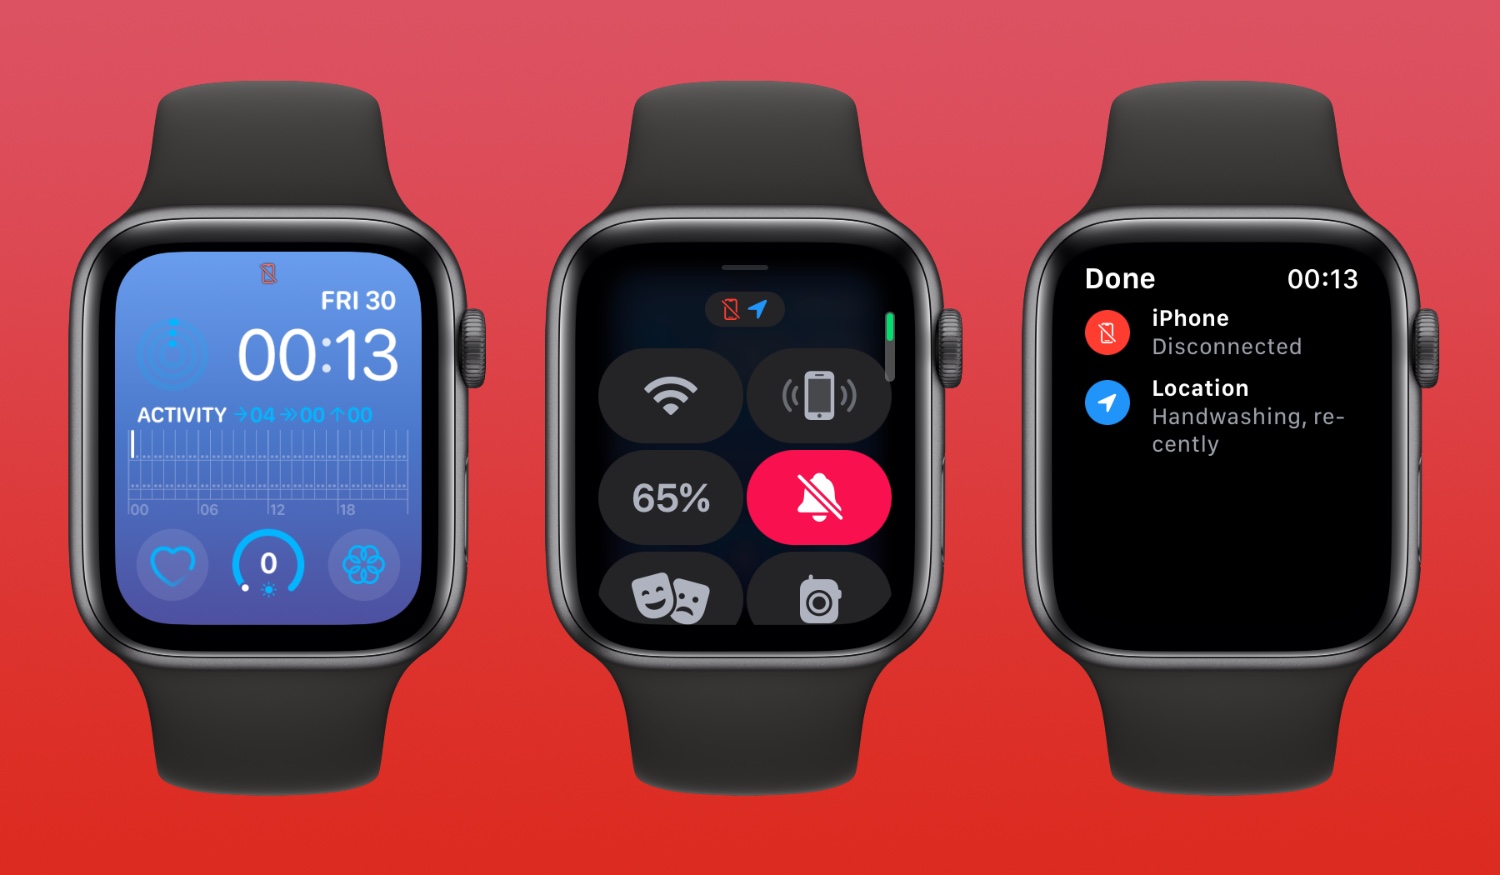
Begin by ensuring that your Apple Watch is connected to your iPhone. Open the Control Center on your Apple Watch by swiping up from the bottom of the screen. Look for the “Disconnected” or “Not Connected” icon. If you see this icon, it means that your Apple Watch is not connected to your iPhone. To fix this, try the following:
- Make sure that Bluetooth is enabled on both your Apple Watch and iPhone.
- Ensure that your iPhone is nearby, as Bluetooth has a limited range.
- Restart both your Apple Watch and iPhone, as this can sometimes help re-establish the connection.
If your Apple Watch is still not connecting to your iPhone, try unpairing and re-pairing the devices. On your iPhone, go to the Apple Watch app and tap on your watch’s name. Then, tap on the “i” icon next to the watch’s name and select “Unpair Apple Watch.” Follow the instructions to complete the unpairing process. Afterward, go through the initial pairing process again to reconnect your devices.
If you are still experiencing connectivity issues after attempting the above steps, it may be helpful to check for any software updates. Sometimes, bugs or compatibility issues can cause connectivity problems. To check for updates, go to the Apple Watch app on your iPhone and navigate to the “General” section. Tap on “Software Update” to see if there are any available updates for your Apple Watch.
By carefully checking for connectivity issues and taking the necessary steps to resolve them, you can ensure that your Apple Watch is properly connected to your iPhone. This will help in addressing various problems and pave the way for a smoother and more enjoyable user experience.
Step 2: Restart Your Apple Watch and Pairing Devices
In many cases, simply restarting your Apple Watch and pairing devices can help resolve various issues that you may be experiencing. This step is relatively easy to follow and often proves to be effective in restoring functionality to your Apple Watch.
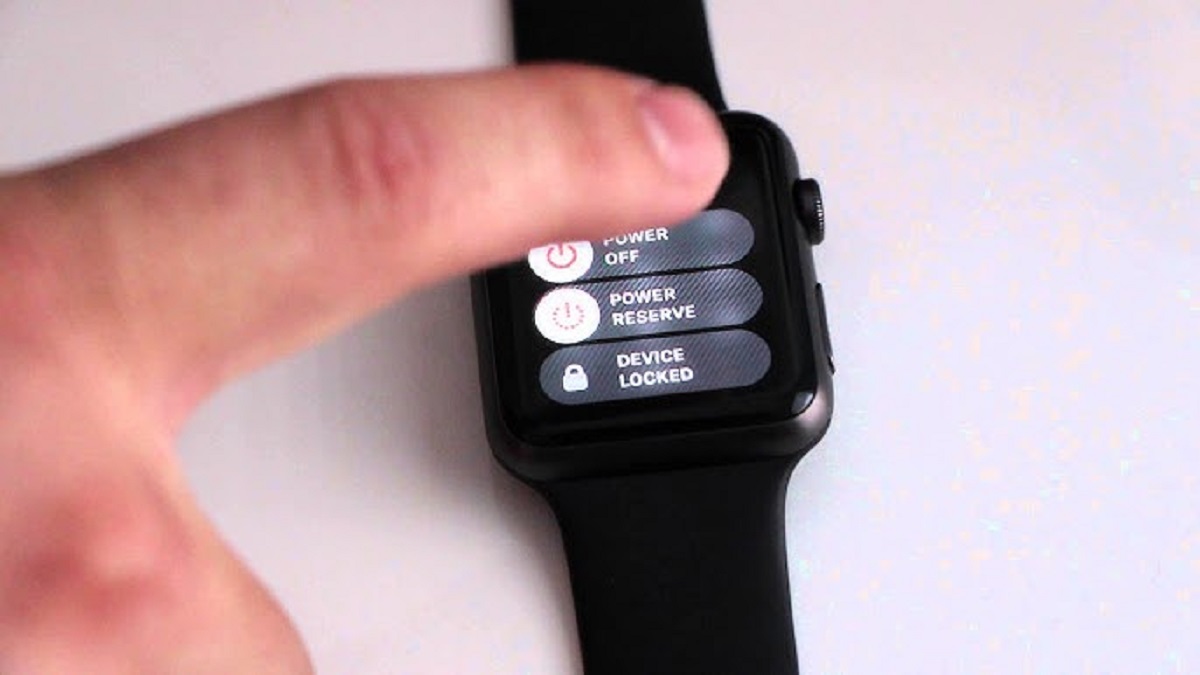
To restart your Apple Watch, follow these steps:
- Press and hold the side button until the power off slider appears.
- Drag the slider to turn off your Apple Watch.
- Wait for a few seconds, then press and hold the side button again until the Apple logo appears, indicating that your Apple Watch is restarting.
Once your Apple Watch has restarted, try pairing it with your iPhone again. To do this, open the Settings app on your iPhone, then tap on “Bluetooth.” Make sure that Bluetooth is turned on. Next, put your Apple Watch on your wrist and follow the on-screen instructions to complete the pairing process. It is important to keep your Apple Watch close to your iPhone during this process to ensure a successful pairing.
If you are still unable to pair your Apple Watch with your iPhone, ensure that both devices have the latest software updates installed. Outdated software can sometimes be the culprit behind pairing issues. On your iPhone, go to the Settings app, select “General,” and then tap on “Software Update” to check for and install any available updates for your device and Apple Watch.
In some cases, a soft reset of both your Apple Watch and iPhone may be necessary. To perform a soft reset on your Apple Watch, press and hold the side button and the Digital Crown simultaneously until the Apple logo appears. On your iPhone, perform a forced restart by pressing and holding the power button and the volume down button (or the home button, depending on the iPhone model) together until the Apple logo appears.
By following the steps to restart your Apple Watch and pairing devices, you can often resolve connectivity and syncing issues that you may be encountering. This simple yet effective step can save you time and frustration, allowing you to enjoy the full functionality of your Apple Watch once again.
Step 3: Reset Network Settings on iPhone
If you are still experiencing connectivity issues between your Apple Watch and iPhone after restarting both devices, it may be necessary to reset the network settings on your iPhone. This step can help resolve any underlying network-related problems that may be causing the connectivity issues with your Apple Watch.
Resetting network settings on your iPhone will remove all saved Wi-Fi networks, Bluetooth connections, and other network-related settings. To reset network settings on your iPhone, follow these steps:
- Open the Settings app on your iPhone and navigate to the “General” section.
- Scroll down and tap on “Reset.”
- Select “Reset Network Settings.”
- Enter your passcode if prompted and confirm your selection.
After resetting network settings on your iPhone, your device will restart. Once it has restarted, you will need to reconnect to Wi-Fi networks and pair your Bluetooth devices, including your Apple Watch, again.
Keep in mind that resetting network settings will remove all Wi-Fi passwords previously saved on your iPhone, so be sure to have them handy to reconnect to your Wi-Fi networks. Additionally, you will need to re-pair your Apple Watch with your iPhone following the previously mentioned pairing process.
Resetting network settings on your iPhone can often help resolve connectivity issues between your Apple Watch and iPhone. It refreshes the network configurations and clears any potential glitches that could be causing the problem. It is worth noting that this step is specific to the iPhone, as network settings on the Apple Watch cannot be reset independently.
If resetting network settings on your iPhone does not resolve the connectivity issues, continue with the remaining steps to repair your Apple Watch without resetting, as there might be another underlying cause that needs to be addressed.
Step 4: Repair Apple Watch with iPhone
If you have tried the previous steps and are still unable to resolve the issues with your Apple Watch, the next step is to repair the device with your iPhone. This process essentially re-establishes the connection and sync between your Apple Watch and iPhone, helping to resolve any persistent problems.
To repair your Apple Watch with your iPhone, follow these steps:
- Make sure your Apple Watch is charged and within range of your iPhone.
- Open the Apple Watch app on your iPhone.
- Tap on the “My Watch” tab at the bottom of the screen.
- Tap on your Apple Watch’s name at the top of the screen.
- Tap on the “i” icon next to your watch’s name.
- Tap on “Unpair Apple Watch” and confirm your selection.
- Follow the on-screen instructions to complete the unpairing process.
- After unpairing, tap on “Pair New Watch” to begin the pairing process again.
- Hold your Apple Watch up to your iPhone’s camera or manually enter the pairing code displayed on your Apple Watch’s screen.
This process will pair your Apple Watch with your iPhone once again, establishing a fresh connection between the two devices. It will sync your settings, apps, and other data, allowing you to regain full functionality of your Apple Watch.
Keep in mind that unpairing your Apple Watch will create a backup of its data on your iPhone. This backup can be used to restore your Apple Watch if needed. However, it is still advisable to regularly back up your iPhone using iCloud or iTunes to ensure a comprehensive backup of all your data.
If the repair process is successful, your Apple Watch should now be fully functional and connected to your iPhone. However, if the issues persist or you encounter any errors during the pairing process, proceed to the next step for further troubleshooting.
Step 5: Reconnect to Wi-Fi Network
If you are facing Wi-Fi connectivity issues on your Apple Watch, reconnecting it to your Wi-Fi network can help in resolving the problem. This step ensures that your Apple Watch has a stable and reliable connection to the internet, allowing you to use features that rely on Wi-Fi, such as app updates and notifications.
To reconnect your Apple Watch to a Wi-Fi network, follow these steps:
- Ensure that your Apple Watch is within range of the Wi-Fi network you want to connect to.
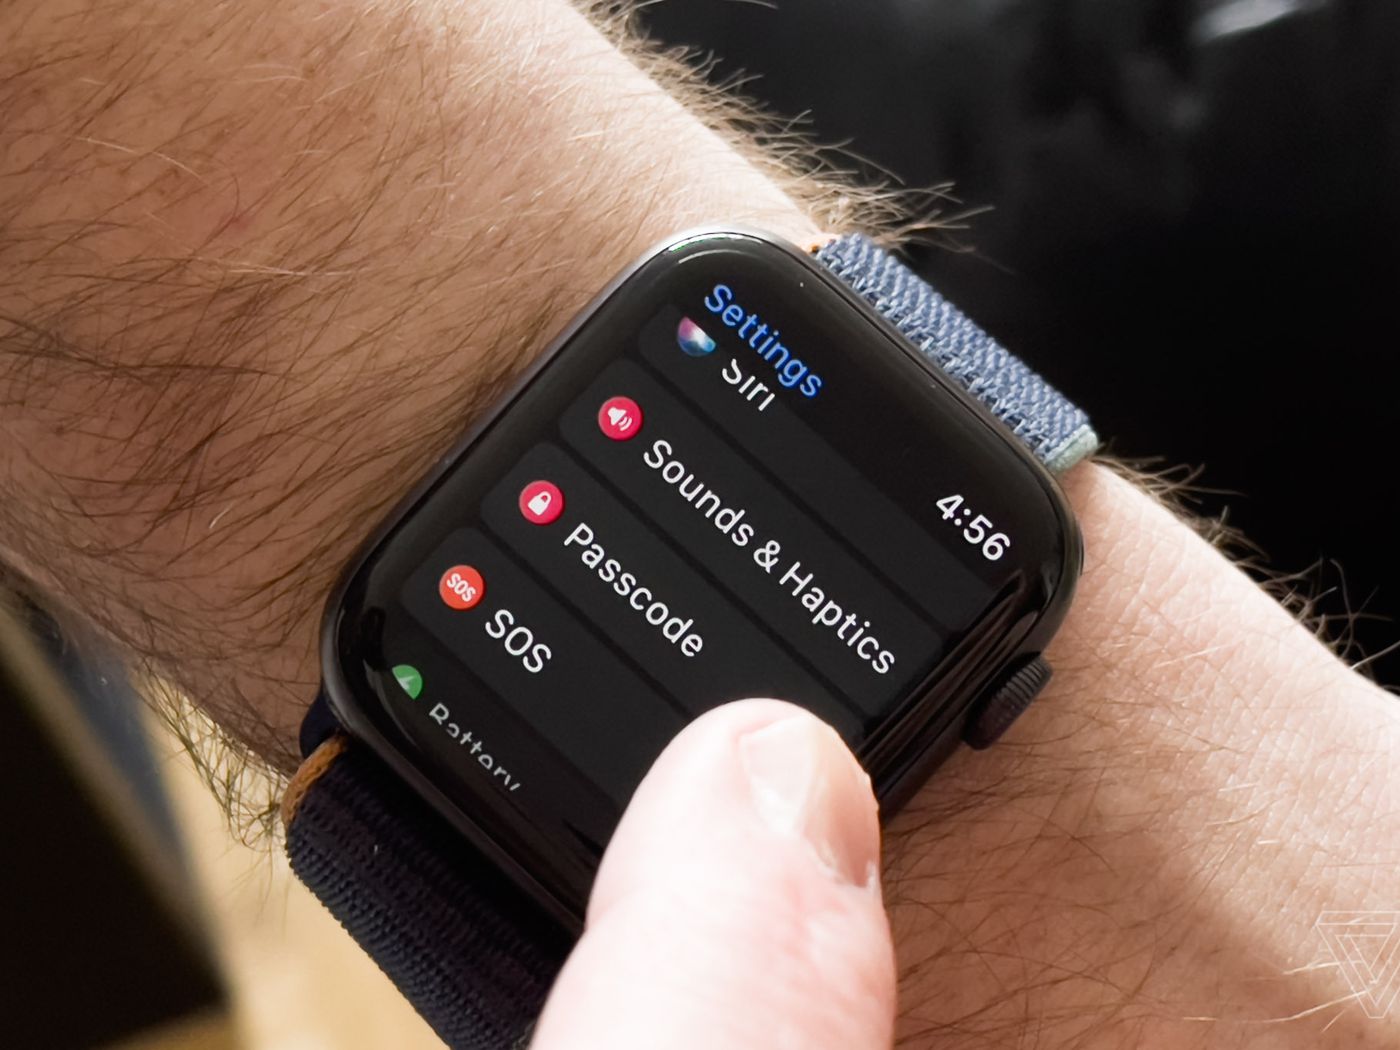
- On your Apple Watch, open the Settings app.
- Scroll down and tap on “Wi-Fi.”
- Wait for your Apple Watch to scan for available Wi-Fi networks.
- Select the desired Wi-Fi network from the list.
- If prompted, enter the Wi-Fi password to connect.
After connecting your Apple Watch to the Wi-Fi network, make sure to check if the connectivity issues you were experiencing have been resolved. Test various features that rely on an internet connection, such as receiving notifications or accessing apps that require internet access.
If you are still facing Wi-Fi issues, it is recommended to perform the previous steps again, starting with restarting your Apple Watch and iPhone, as well as repairing your Apple Watch with your iPhone. Sometimes, a combination of these steps can help address stubborn connectivity problems.
It is worth noting that not all models of Apple Watch support Wi-Fi connectivity. Make sure to check your specific Apple Watch model’s specifications to confirm if it supports Wi-Fi capabilities.
By reconnecting your Apple Watch to a Wi-Fi network, you can ensure that it has a stable and consistent internet connection. This will enable you to fully utilize the features and capabilities of your Apple Watch, providing you with a seamless and connected experience.
Step 6: Update Software on iPhone and Apple Watch
Keeping your devices up to date with the latest software versions is essential for maintaining optimal performance and resolving any software-related issues. If you are experiencing problems with your Apple Watch, updating the software on both your iPhone and Apple Watch can often address compatibility issues and potential bugs.
To update the software on your iPhone, follow these steps:
- Ensure that your iPhone is connected to a stable Wi-Fi network and is charged or plugged into a power source.
- Open the Settings app on your iPhone.
- Scroll down and tap on “General.”
- Select “Software Update.”
- If an update is available, tap on “Download and Install.”
- Follow the on-screen instructions to complete the update process.
After updating the software on your iPhone, don’t forget to update the software on your Apple Watch as well. To update the software on your Apple Watch, follow these steps:
- Ensure that your Apple Watch is charged to at least 50% and connected to the charger.
- Connect your iPhone to a stable Wi-Fi network.
- Open the Apple Watch app on your iPhone.
- Tap on the “My Watch” tab at the bottom of the screen.
- Tap on “General” and select “Software Update.”
- If an update is available, tap on “Download and Install.”
- Follow the on-screen instructions to complete the update process.
It is important to note that updating the software on your Apple Watch may take some time, so be patient and ensure that your devices remain connected and charged during the update process.
By updating the software on both your iPhone and Apple Watch, you can take advantage of the latest features, improvements, and bug fixes. This step can often resolve software-related issues and enhance the overall performance and functionality of your Apple Watch.
Step 7: Erase Apple Watch Settings and Content
If all else fails and you are still experiencing persistent issues with your Apple Watch, you may need to consider erasing the settings and content on your device. This step will reset your Apple Watch to its factory settings, essentially wiping all data and personalization from the device.
Before proceeding with this step, it is important to note that erasing your Apple Watch will delete all your apps, settings, and data, including health and fitness information. Consider backing up your Apple Watch data using iCloud or iTunes to ensure you can restore it later if needed.
To erase the settings and content on your Apple Watch, follow these steps:
- On your Apple Watch, open the Settings app.
- Scroll down and tap on “General.”
- Swipe down and tap on “Reset.”
- Tap on “Erase All Content and Settings.”
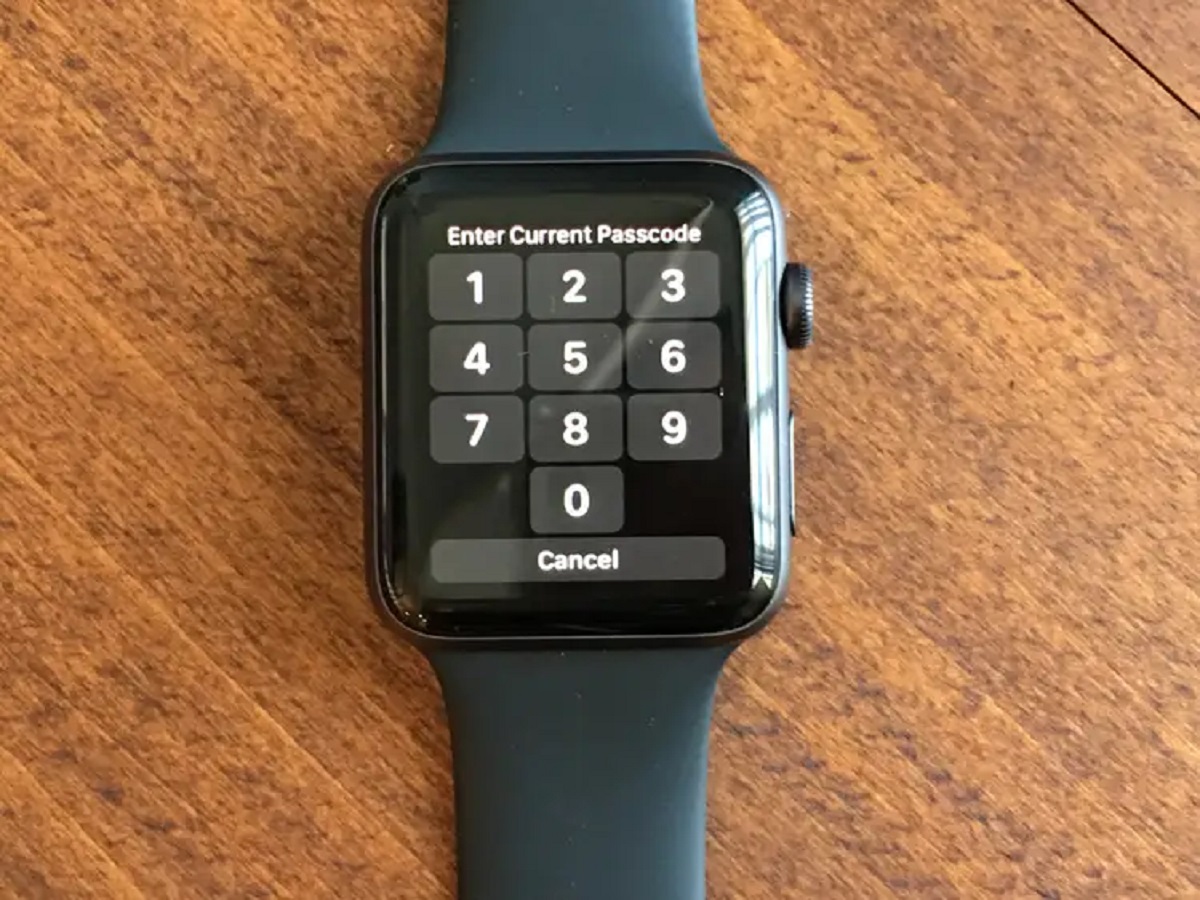
- If prompted, enter your passcode to confirm.
- Follow the on-screen instructions to complete the erasing process.
After erasing your Apple Watch, you will need to set it up as a new device or restore it from a backup. Use the initial setup process to configure your Apple Watch settings, install apps, and personalize it according to your preferences.
It is recommended to update the software on your Apple Watch after erasing to ensure you have the latest version installed. This will help improve compatibility and resolve any potential bugs that may have been causing the issues you were experiencing.
Keep in mind that erasing your Apple Watch should only be done as a last resort if all other troubleshooting steps have been unsuccessful. If the problems persist even after erasing, it may be best to contact Apple Support for further assistance.
By erasing the settings and content on your Apple Watch, you can start fresh and eliminate any persistent issues that may have been plaguing your device. Although this step requires reconfiguration and personalization, it can often provide a clean slate and restore the full functionality of your Apple Watch.
Step 8: Contact Apple Support if the Issue Persists
If you have followed all the previous steps and are still experiencing persistent issues with your Apple Watch, it may be time to reach out to Apple Support for professional assistance. Apple Support has a team of experts trained to diagnose and troubleshoot complex technical problems.
Contacting Apple Support can be done through various channels, such as phone, online chat, or visiting an Apple Store. To get started, visit the Apple Support website and select the most convenient contact method for you. Be prepared to provide detailed information about the problem you are facing, the steps you have already taken, and any error messages or symptoms you have encountered.
When contacting Apple Support, make sure to have your Apple Watch’s serial number and proof of purchase on hand. This will help the support team better assist you by verifying your device and warranty status.
The Apple Support team will guide you through troubleshooting steps specific to your issue and may provide further instructions, suggest repairs, or offer a replacement, depending on the nature of the problem and the warranty coverage of your Apple Watch.
Remember to remain patient and courteous when communicating with Apple Support. They are there to help you find a solution to the problem you are facing and ensure that you have a positive experience with your Apple Watch.
By contacting Apple Support, you can tap into the expertise and resources of Apple’s customer service team. They have the knowledge and tools to diagnose and resolve complex technical issues, providing you with the best possible solution for your Apple Watch.
If the issue persists even after seeking assistance from Apple Support, they may recommend further troubleshooting steps or explore alternative options to ensure your Apple Watch is functioning properly.
Conclusion
Repairing your Apple Watch without resetting it can save you time, effort, and the frustration of losing your data and personalization. By following the steps outlined in this guide, you can troubleshoot common connectivity and software issues, helping to restore the functionality of your Apple Watch.
First, checking for connectivity issues and restarting your Apple Watch and pairing devices can often resolve minor glitches and re-establish a stable connection with your iPhone. Resetting network settings on your iPhone can help address network-related problems, while reconnecting to a Wi-Fi network ensures a stable internet connection for your Apple Watch.
If the issues persist, updating the software on your iPhone and Apple Watch can provide bug fixes and improvements, resolving compatibility issues. If all else fails, erasing your Apple Watch settings and content can be done as a last resort to start fresh, though it is important to backup your data beforehand.
If none of these steps resolve the problem, contacting Apple Support is your best course of action. Their knowledgeable team can provide further guidance, troubleshoot specific issues, and explore additional options to ensure your Apple Watch is functioning optimally.
Remember, each step in this guide is designed to help you repair your Apple Watch without resorting to a complete reset. By following these steps, you can save your data, maintain convenience, retain device integration, troubleshoot specific issues, and enjoy a seamless user experience with your Apple Watch.