Introduction
Welcome to our guide on how to remove an Apple Watch from your iPhone. Whether you’re upgrading to a new Apple Watch or no longer need the device, unpairing it from your phone is a simple process. By following the steps outlined in this article, you can successfully disconnect your Apple Watch from your iPhone and ensure that your data is backed up and protected.
The Apple Watch is a versatile and powerful device that seamlessly integrates with your iPhone. However, there may come a time when you need to part ways with your Apple Watch, either to upgrade to a newer model or to sell it. Unpairing your Apple Watch from your iPhone is crucial before doing so, as it allows you to disconnect the devices and remove any personal information or settings.
We understand that unpairing your Apple Watch from your iPhone can be a bit confusing, especially if you’re new to Apple devices or technology in general. That’s why we’ve created this step-by-step guide to walk you through the process.
In this article, we will cover the necessary steps to remove your Apple Watch from your iPhone. We’ll explain how to unpair the devices, back up your Apple Watch data, reset the watch, remove it from your iPhone’s Bluetooth settings, and remove it from iCloud. By following these steps carefully, you can ensure a smooth and complete removal of your Apple Watch from your iPhone.
So, if you’re ready to bid farewell to your Apple Watch or simply want to know the process for future reference, let’s get started with unpairing your Apple Watch from your iPhone and ensuring a clean removal process.
Step 1: Unpairing Your Apple Watch
The first step in removing your Apple Watch from your iPhone is to unpair the devices. Unpairing your Apple Watch is important because it disconnects the watch from your iPhone and removes any personal data, settings, and connections between the two devices.
To unpair your Apple Watch from your iPhone, follow these steps:
- Ensure that your Apple Watch is charged and within range of your iPhone.
- On your iPhone, open the Watch app.
- Tap on the “My Watch” tab located at the bottom of the screen.
- Scroll down and tap on the “All Watches” option. This will display a list of all connected watches.
- Tap on the Apple Watch you want to remove.
- Tap on the “i” (information) icon next to the watch’s name.
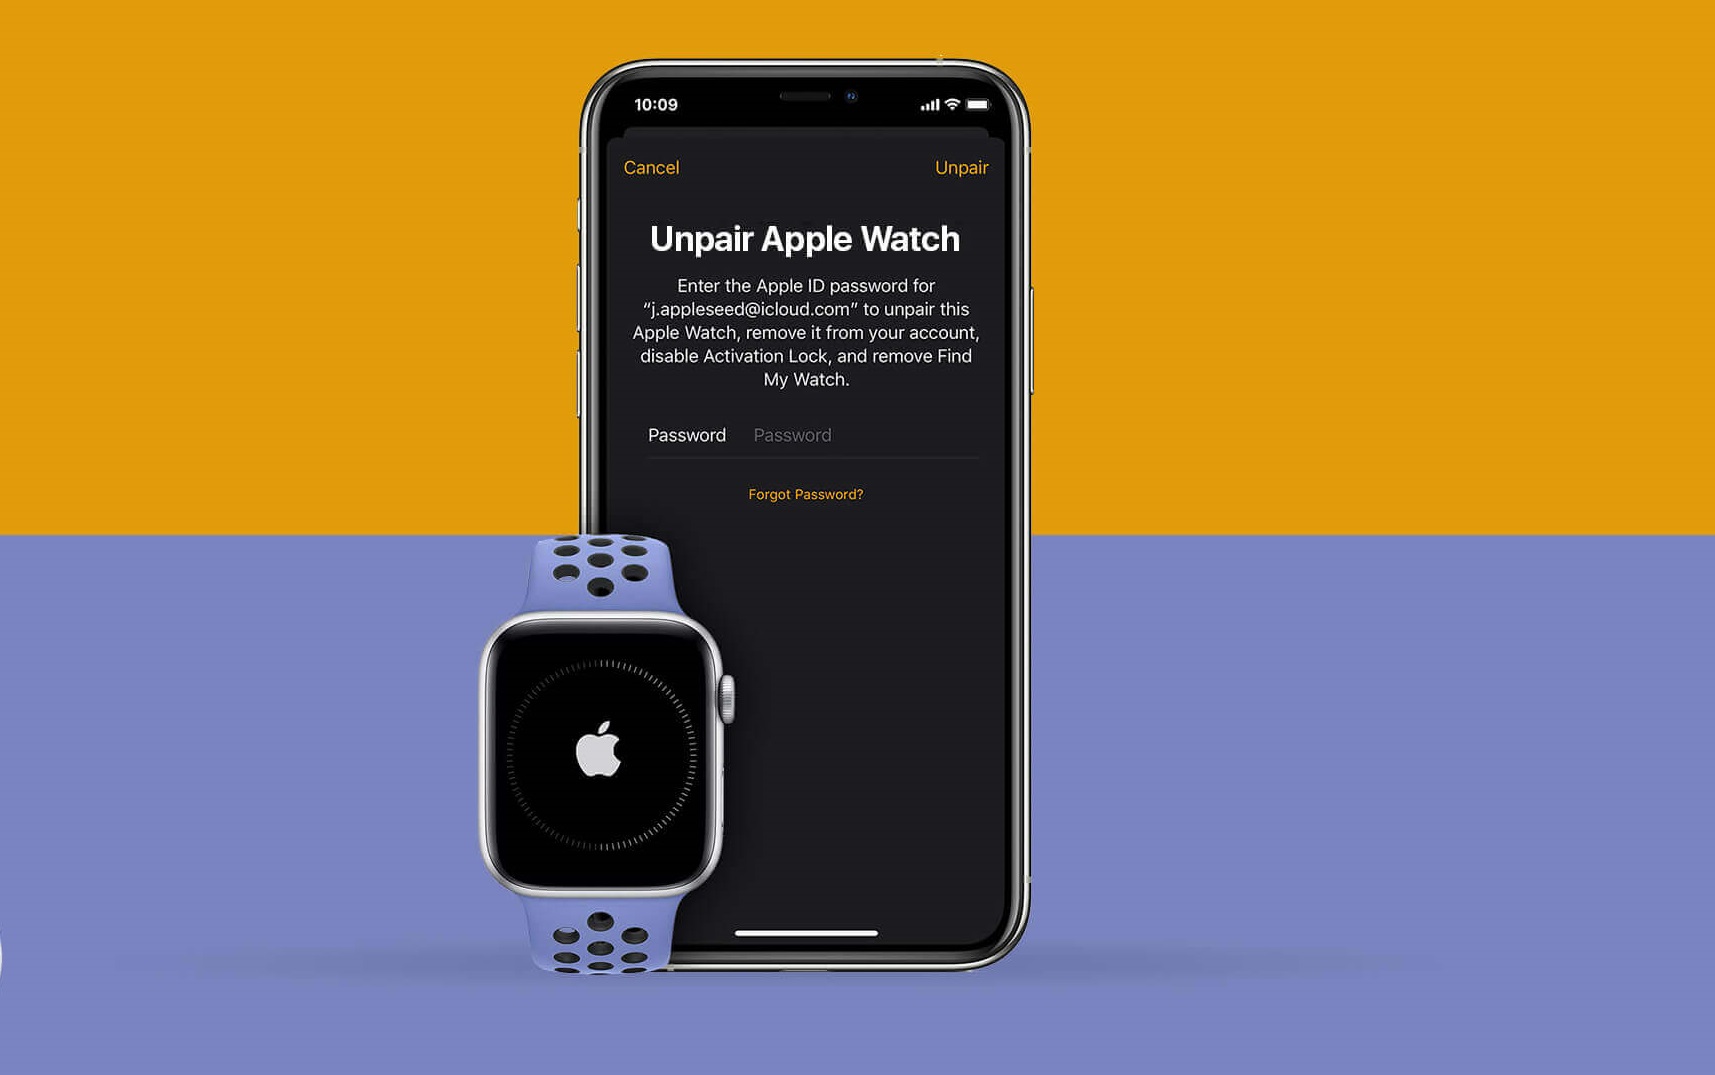
- Tap on the “Unpair Apple Watch” option.
- Confirm the unpairing process by tapping on “Unpair [Apple Watch name]”.
- Enter your Apple ID password when prompted to disable Activation Lock.
Once you have completed these steps, your Apple Watch will be unpaired from your iPhone. The watch will reset, removing all data and settings associated with your iPhone. However, it’s important to note that this process does not erase any data or settings on your iPhone.
Now that you have successfully unpaired your Apple Watch from your iPhone, it’s time to move on to the next step: backing up your Apple Watch data. This is crucial to ensure that you don’t lose any important information or settings during the removal process.
Step 2: Backup Your Apple Watch Data
Before proceeding with the removal process, it’s essential to back up your Apple Watch data. This ensures that you have a copy of your important information, including your app settings, health and fitness data, and personalized watch faces.
To back up your Apple Watch data, follow these steps:
- Make sure your iPhone is connected to Wi-Fi.
- Ensure that your Apple Watch is on the charger and has at least a 50% battery charge.
- On your iPhone, open the Watch app.
- Tap on the “My Watch” tab at the bottom of the screen.
- Scroll down and tap on the “General” option.
- Select the “Reset” option.
- Tap on “Erase Apple Watch Content and Settings.
- Confirm the action by entering your Apple ID password.
- Wait for the backup process to complete. This may take some time, so it’s important to be patient.
Once the backup process is finished, your Apple Watch data will be securely stored on your iPhone, ready to be restored to a new device, if needed.
Backing up your Apple Watch data is crucial to ensure that you don’t lose any valuable information during the unpairing process. It’s always a good idea to have a backup in case anything goes wrong or if you decide to use another Apple Watch in the future.
Now that you have successfully backed up your Apple Watch data, it’s time to move on to the next step: resetting your Apple Watch.
Step 3: Resetting Your Apple Watch
After backing up your Apple Watch data, the next step is to reset the device. Resetting your Apple Watch will erase all content and settings, ensuring that your personal information is completely removed before you part ways with the device.
To reset your Apple Watch, follow these steps:
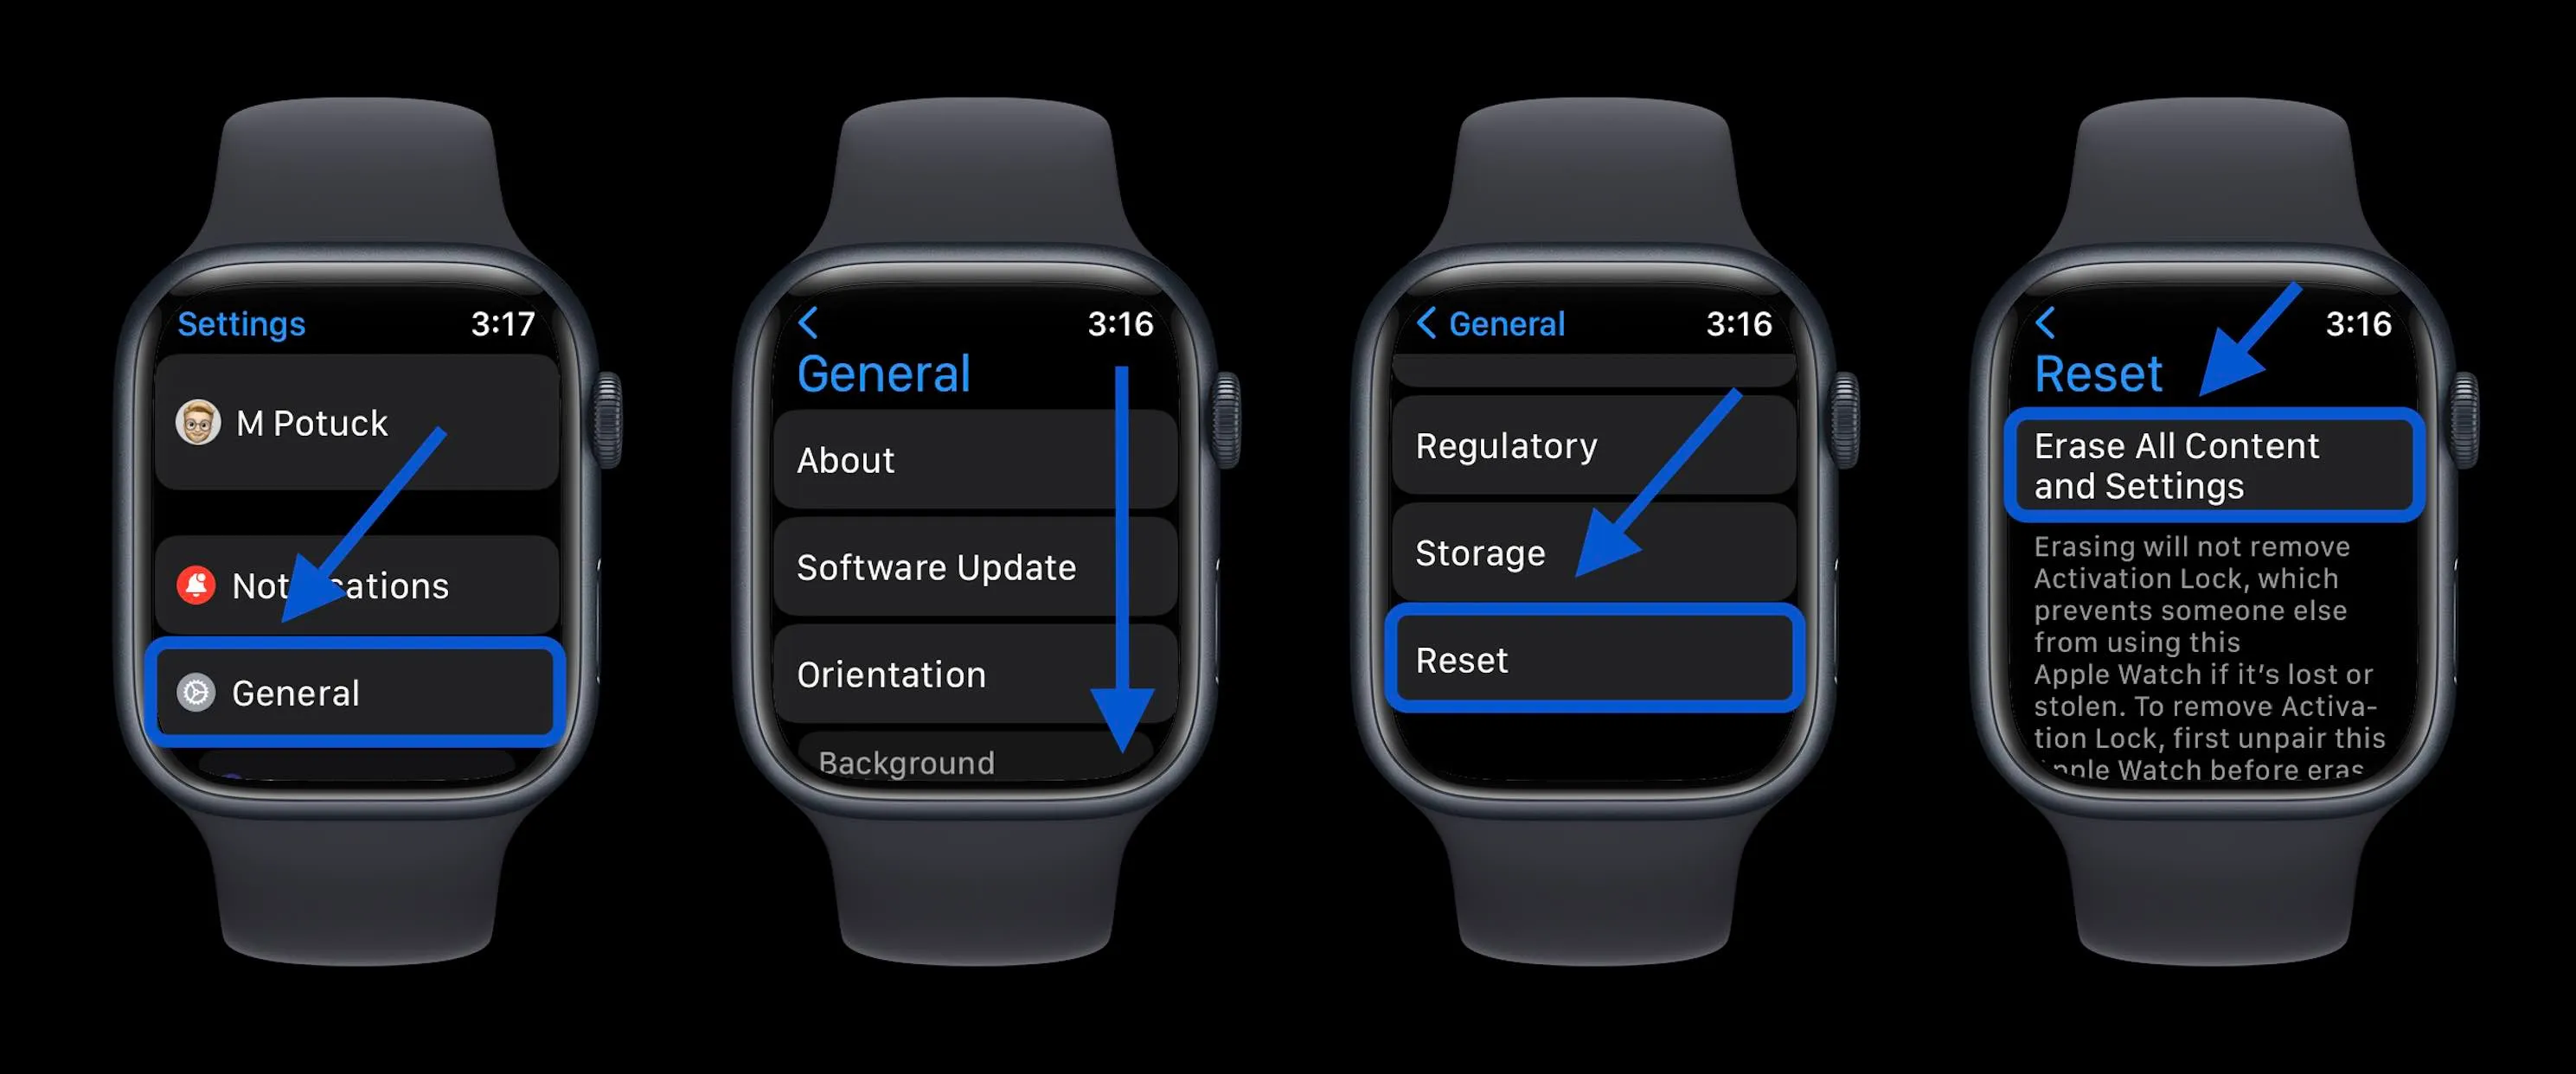
- On your Apple Watch, go to the Home screen by pressing the Digital Crown.
- Open the Settings app by tapping on the icon resembling a gear.
- Scroll down and tap on the “General” option.
- Swipe down and tap on “Reset”.
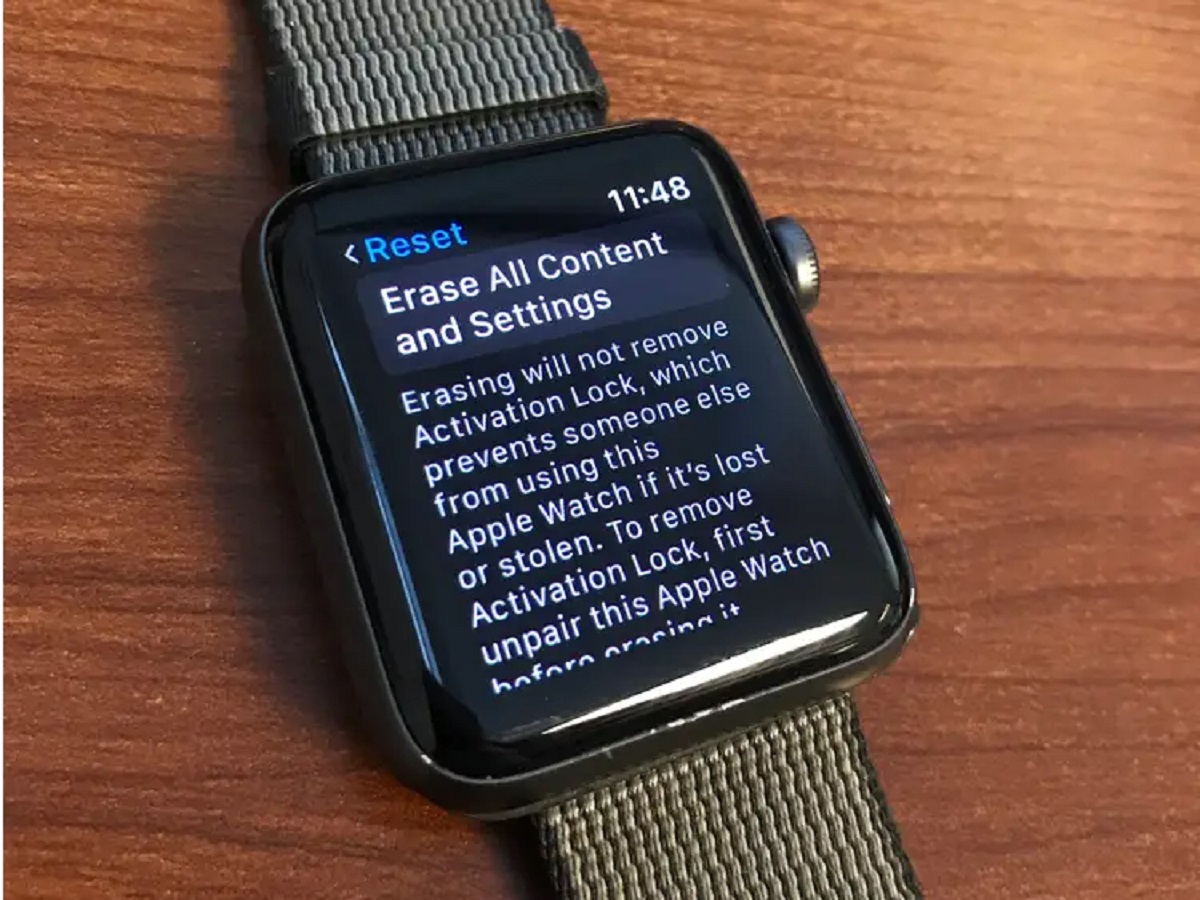
- Choose the option “Erase All Content and Settings”.
- Confirm the action by entering your passcode, if prompted.
- Wait for the reset process to complete. This may take a few minutes.
Upon completion, your Apple Watch will be reset to its original factory settings, ready for a new user or future use. It’s important to note that this reset process cannot be undone, so ensure that you have backed up any data you wish to keep.
Resetting your Apple Watch is a critical step in the removal process, as it ensures that your personal information and settings are completely wiped from the device. This helps protect your privacy and ensures that the next user will have a clean start with the Apple Watch.
Now that you’ve successfully reset your Apple Watch, it’s time to proceed to the next step: removing your Apple Watch from your iPhone’s Bluetooth settings.
Step 4: Remove Apple Watch from your iPhone’s Bluetooth Settings
After resetting your Apple Watch, the next step is to remove it from your iPhone’s Bluetooth settings. This step ensures that the watch is no longer connected to your iPhone and prevents any unintentional reconnection in the future.
To remove your Apple Watch from your iPhone’s Bluetooth settings, follow these steps:
- On your iPhone, open the “Settings” app.
- Scroll down and tap on the “Bluetooth” option.
- Under the “MY DEVICES” section, you should see your Apple Watch listed.
- Tap on the “i” (information) icon next to your Apple Watch’s name.
- Tap on “Forget This Device”.
- Confirm the action by tapping on “Forget Device”.
Once you have completed these steps, your Apple Watch will be removed from your iPhone’s Bluetooth settings. This ensures that the watch is no longer paired or connected to your iPhone.
Removing your Apple Watch from your iPhone’s Bluetooth settings is an important step in the removal process. It prevents any accidental re-pairing and ensures that the watch is completely disconnected from your iPhone.
Now that you have successfully removed your Apple Watch from your iPhone’s Bluetooth settings, it’s time to move on to the final step: removing your Apple Watch from iCloud.
Step 5: Remove Apple Watch from iCloud
The final step in the process of removing your Apple Watch from your iPhone is to remove it from iCloud. Removing your Apple Watch from iCloud ensures that it is no longer associated with your Apple ID or any other iCloud services.
To remove your Apple Watch from iCloud, follow these steps:
- On your iPhone, open the “Settings” app.
- Tap on your name at the top of the screen, which will take you to your Apple ID settings.
- Scroll down and tap on “iCloud”.
- Under the “APPS USING ICLOUD” section, tap on “Manage Storage”.
- Tap on “Backups”.
- Tap on the backup that includes your Apple Watch.
- In the backup details, tap on your Apple Watch’s name.
- Tap on “Delete Backup”.
- Confirm the action by tapping on “Turn Off & Delete”.
By following these steps, you will remove your Apple Watch from iCloud and ensure that it is no longer associated with your Apple ID or any iCloud backups.
Removing your Apple Watch from iCloud is a crucial step in the removal process. It helps safeguard your personal information and ensures that the watch is no longer connected to any of your iCloud services.
Congratulations! You have successfully completed all the necessary steps to remove your Apple Watch from your iPhone. The watch is now unpaired, the data is backed up, the device is reset, disconnected from Bluetooth, and removed from iCloud.
Now you can safely proceed with selling or upgrading your Apple Watch, knowing that your personal information is protected and your devices are properly disconnected.
Conclusion
Congratulations! You have successfully learned how to remove an Apple Watch from your iPhone. By following the steps outlined in this guide, you can confidently unpair your Apple Watch, back up your data, reset the device, remove it from Bluetooth settings, and detach it from iCloud. This ensures that your personal information is protected and your devices are properly disconnected.
Remember, it’s essential to unpair your Apple Watch before selling, upgrading, or transferring ownership of the device. By following these steps, you can ensure that your Apple Watch is ready for its next user while safeguarding your privacy.
Now that you’ve successfully removed your Apple Watch from your iPhone, you can explore new possibilities with your device or proceed with your plans confidently. Should you need to pair a new Apple Watch in the future, the process will be straightforward, and you can refer back to this guide if needed.
Thank you for choosing our guide to assist you in removing your Apple Watch from your iPhone. We hope this article has been informative and helpful in guiding you through the unpairing process. If you have any further questions or need additional assistance, feel free to reach out and we will be happy to assist you.
Happy unpairing!