Introduction
The Apple Watch is not only a stylish accessory, but it also serves as a comprehensive fitness tracker. With its built-in Workout app, you can easily log and track your workouts, helping you stay motivated and reach your fitness goals. Whether you’re running, cycling, swimming, or doing any other form of exercise, the Apple Watch can provide valuable insights and help you monitor your progress.
In this guide, we’ll walk you through the process of logging a workout on your Apple Watch. We’ll cover everything from accessing the Workout app to reviewing your workout summary, and even managing and analyzing your workout data in the Health app. By the end, you’ll have a complete understanding of how to make the most of your Apple Watch as a fitness companion.
So, if you’re ready to take your workouts to the next level and make the most out of your Apple Watch, let’s dive in and learn how to log a workout!
Step 1: Accessing the Workout app on your Apple Watch
To get started with logging your workout on your Apple Watch, you’ll first need to access the Workout app. Follow these simple steps:
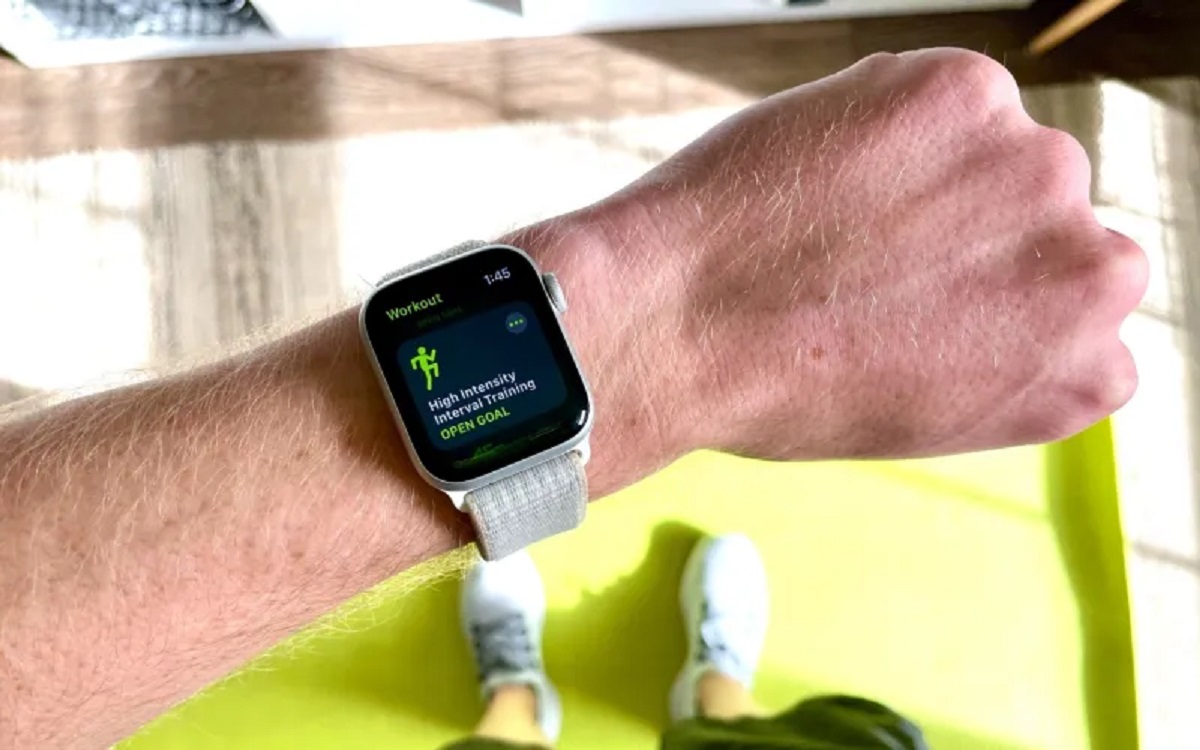
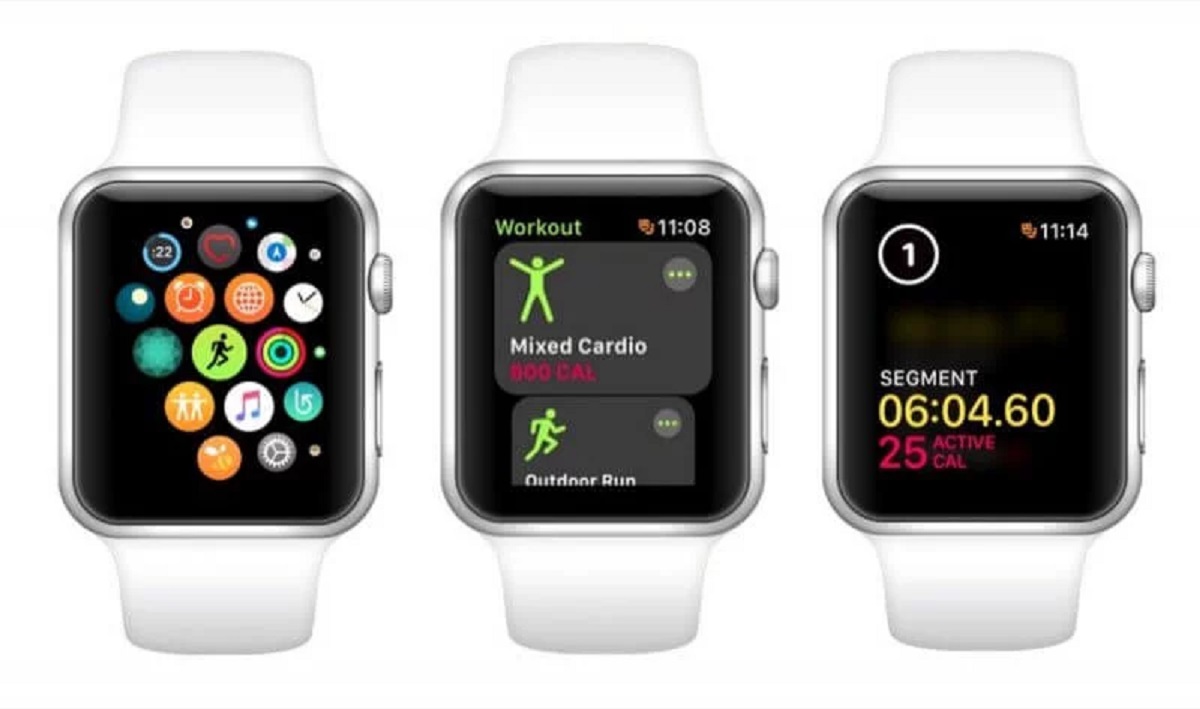
- On your Apple Watch home screen, locate the Workout app icon. It looks like a green running figure.
- Tap on the Workout app icon to open it. You’ll be presented with various workout options.
- Scroll through the list to find the specific workout type that matches your activity. Whether it’s outdoor running, indoor cycling, or swimming, the Workout app has you covered.
- Once you’ve found the appropriate workout type, tap on it to select it. You’ll then have the option to set your workout goal.
That’s it! You’ve successfully accessed the Workout app on your Apple Watch and you’re ready to begin logging your workout. It’s important to note that the Workout app supports a wide range of activities, so you can find the perfect option for your chosen exercise.
Now that you’ve accessed the Workout app, let’s move on to the next step: selecting the appropriate workout type.
Step 2: Selecting the appropriate workout type
Now that you’ve accessed the Workout app on your Apple Watch, it’s time to select the appropriate workout type that matches your activity. Here’s how you can do it:
- On the Workout app screen, scroll through the list of available workout types until you find the one that best aligns with your exercise. The options include outdoor running, walking, swimming, cycling, yoga, and many more.
- Once you’ve identified the correct workout type, tap on it to select it. This will ensure that your Apple Watch accurately tracks and records your workout data.
- If you can’t find the exact activity you’re doing, don’t worry. The “Other” option allows you to cover any other exercise that is not listed. Simply select the “Other” option and proceed with your workout.
By selecting the appropriate workout type, you allow your Apple Watch to track specific metrics that are relevant to your activity. For example, if you choose outdoor running, the Apple Watch will utilize the built-in GPS to track your route, pace, and distance. If you opt for swimming, the watch will be able to detect your strokes and measure your laps.
Remember, the accuracy of your workout data relies on selecting the correct workout type, so take a moment to ensure you’ve chosen the appropriate option. Once you’ve selected your workout type, you’re ready to move on to the next step: setting your workout goal.
Step 3: Setting your workout goal
After selecting the appropriate workout type on your Apple Watch, it’s time to set your workout goal. Setting a goal can help you stay focused and motivated during your workout session. Here’s how you can do it:
- On the workout screen, you’ll see an option to set your goal. Tap on it to proceed.
- You’ll be presented with different goal options, such as time, distance, calories, or open goal. Choose the goal that aligns with what you want to achieve during your workout.
- If you select a time goal, use the digital crown or the plus/minus buttons to adjust the desired duration. Similarly, for a distance goal, you can adjust the distance using the available controls.
- If you prefer to have a specific calorie burn goal, use the provided controls to set the desired calorie target.
- If you opt for the open goal, your Apple Watch will track your activity without a specific target. This option is great for casual workouts or when you simply want to track your progress without focusing on a specific goal.
Once you’ve set your workout goal, your Apple Watch will display it on the screen. This serves as a reminder and encourages you to push yourself to achieve your target during the workout.
Selecting an appropriate workout goal helps you track your progress and stay motivated throughout your session. Now that you’ve set your goal, it’s time to move on to the next step: starting the workout session.
Step 4: Starting the workout session
Now that you’ve set your workout goal and you’re ready to begin your exercise routine, it’s time to start the workout session on your Apple Watch. Here’s how you can get started:
- Ensure that you’re on the workout screen, where your goal is displayed.
- When you’re ready to begin your workout, simply tap the “Start” button. Your Apple Watch will initiate the workout session, and the timer or distance tracker will start depending on the goal you’ve set.
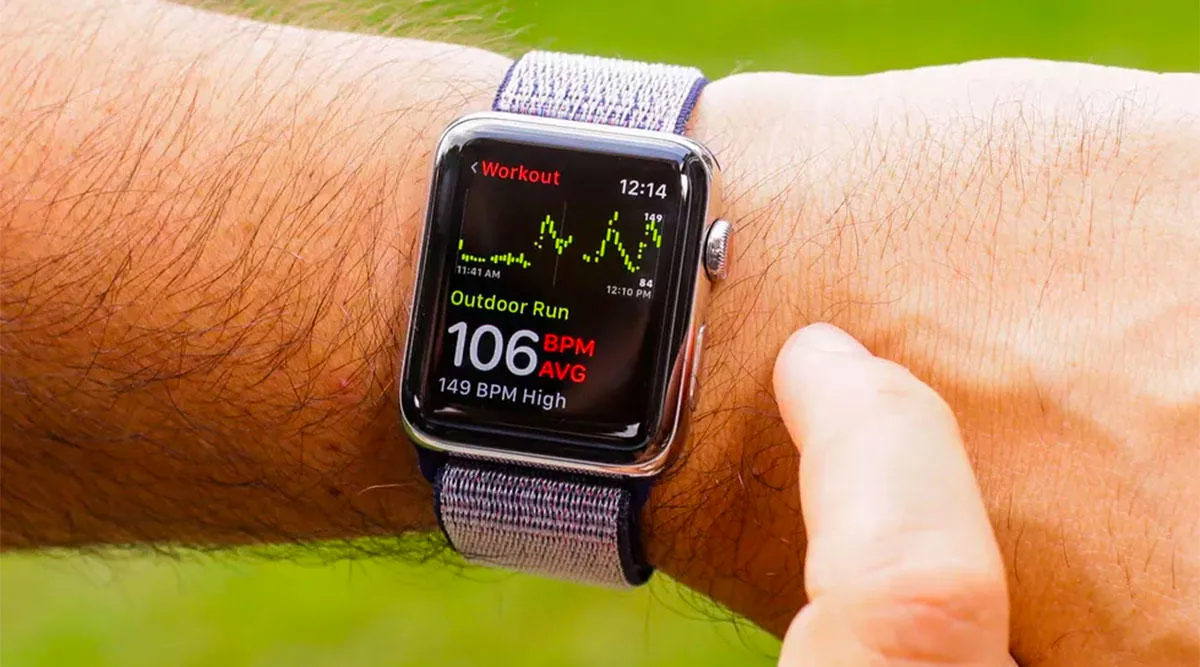
- During your workout, you’ll be able to view real-time metrics such as elapsed time, pace, heart rate, and more. Simply raise your wrist to activate the display, or tap on the screen to access additional information.
- If you’re wearing headphones and want to listen to music or receive audio cues during your workout, make sure your Apple Watch is connected to your iPhone or a wireless accessory.
Starting the workout session not only tracks your progress but also allows you to access important data throughout your exercise routine. Your Apple Watch will continuously monitor and display relevant metrics to keep you informed and motivated.
Now that you’ve started your workout session, it’s time to move on to the next step: pausing and resuming your workout.
Step 5: Pausing and resuming your workout
During your workout session on your Apple Watch, there may be instances where you need to take a break or pause your activity. Fortunately, the Workout app allows you to easily pause and resume your workout. Here’s how:
- If you need to pause your workout, simply swipe right on the workout screen and tap the “Pause” button. This will temporarily halt the timer or distance tracker and pause the collection of metrics.
- When you’re ready to resume your workout, swipe right again on the workout screen, and tap the “Resume” button. This will restart the timer or distance tracker, allowing the Apple Watch to continue tracking your progress.
- While your workout is paused, you can also access other features on your Apple Watch, such as checking notifications or using other apps.
- If you’re unable to resume your workout immediately and need to end the session, swipe right on the workout screen and tap the “End” button. This will save your workout data up until that point.
Pausing and resuming your workout gives you the flexibility to take breaks without interrupting the overall tracking of your activity. Whether you need to catch your breath, hydrate, or attend to any other matter, the pause feature ensures accurate recording of your exercise session.
Now that you know how to pause and resume your workout, it’s time to move on to the next step: ending the workout session.
Step 6: Ending the workout session
Once you’ve completed your workout and are ready to wrap up your session, it’s important to properly end the workout on your Apple Watch to ensure your data is saved. Follow these simple steps to end your workout session:
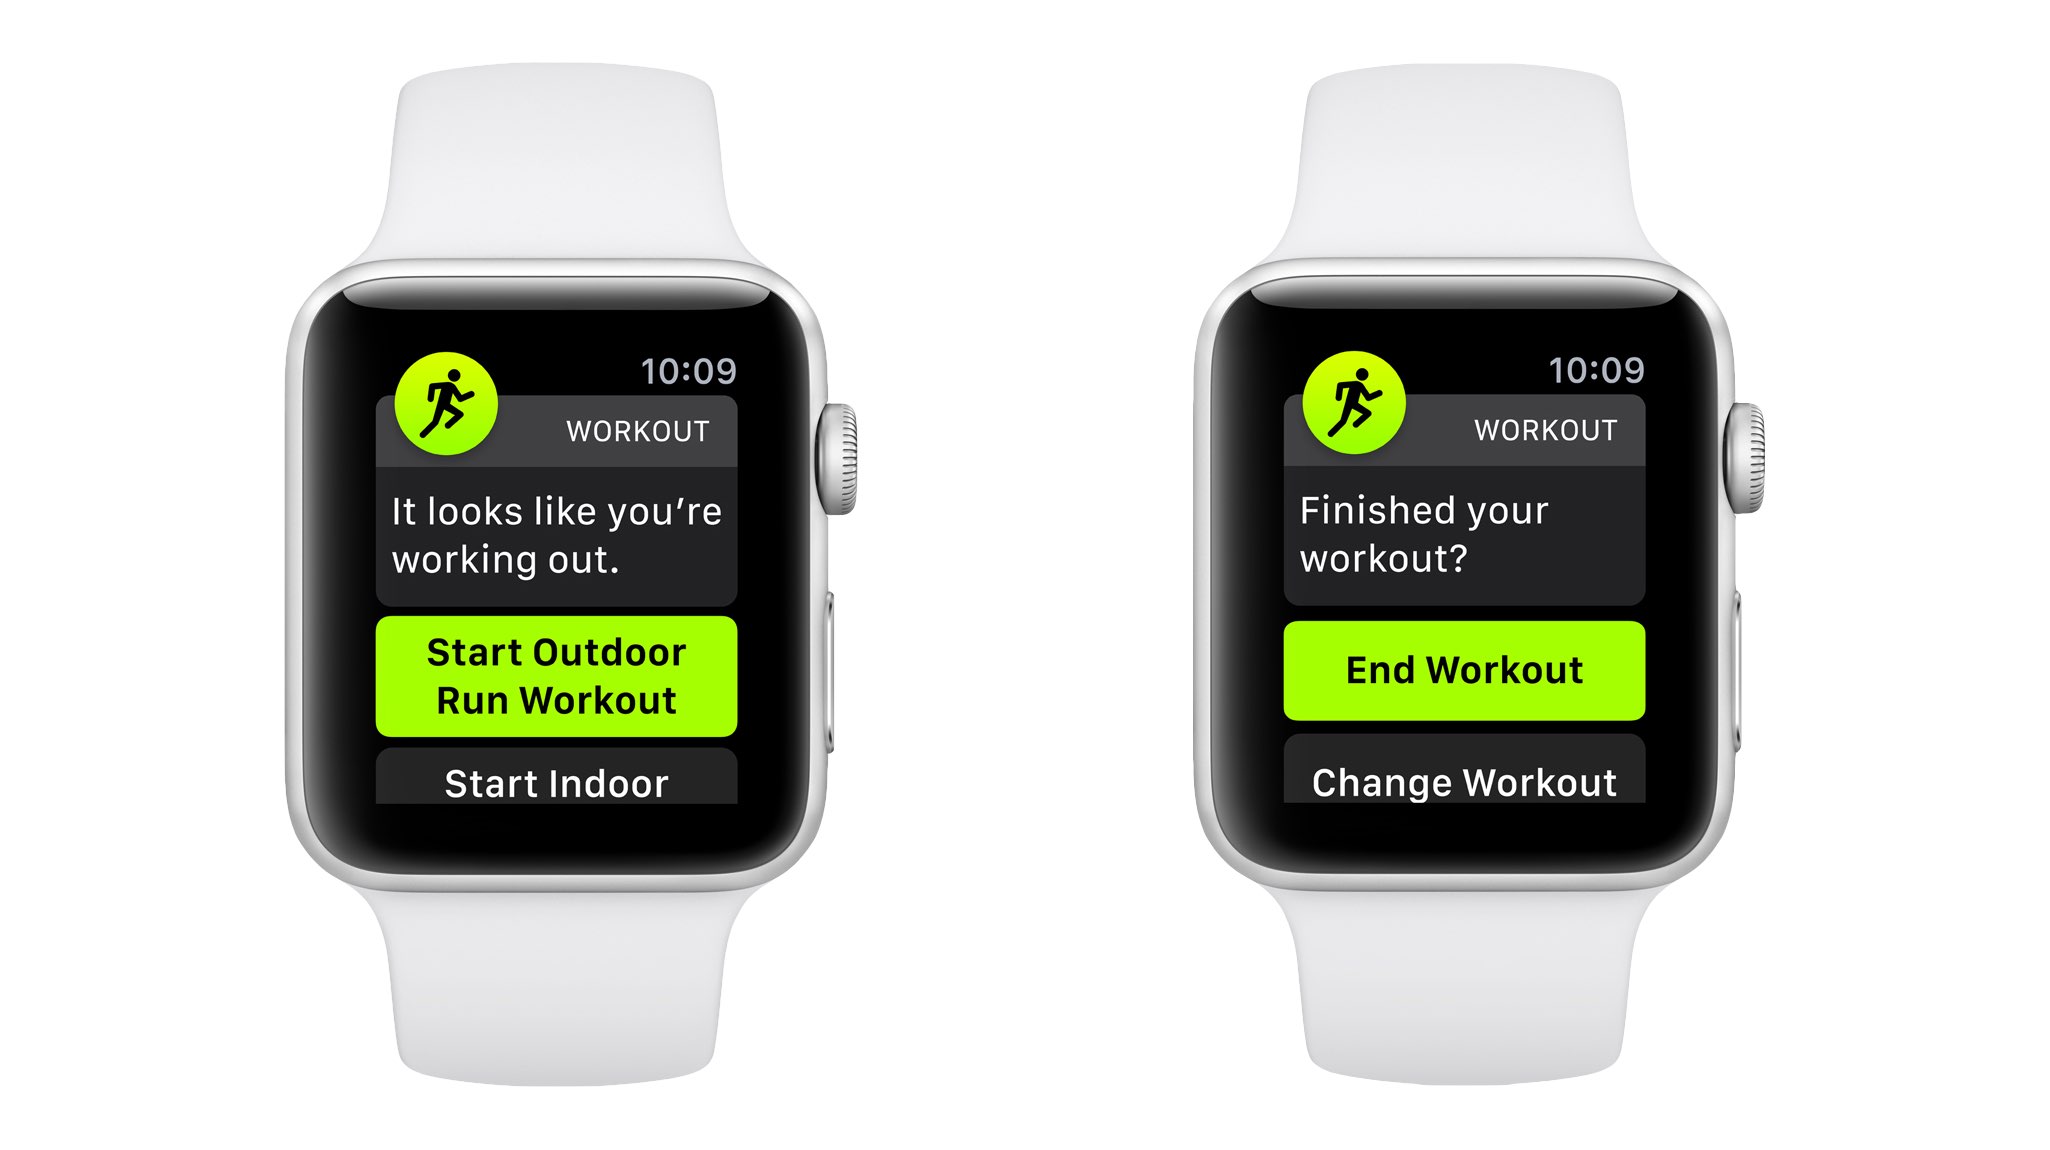
- When you’re finished with your workout, swipe right on the workout screen to access the controls.
- Tap the “End” button to conclude your workout. This will stop the timer or distance tracker and save your workout data.
- Your Apple Watch will then display a summary of your workout session, including details such as total time, distance, average pace, and calories burned.
- You can review this summary by scrolling down on the screen. If you’re satisfied with the information, tap the “Done” button to complete the process.
Ending your workout session ensures that your Apple Watch captures and stores the data from your exercise, providing you with valuable insights and allowing you to track your progress over time.
Remember to take a moment to review the workout summary before tapping “Done,” as this information can be useful for monitoring your performance and making adjustments to your fitness goals.
With the workout session now ended, you’ve successfully recorded your exercise activity on your Apple Watch. The next step is to review your workout summary, which we’ll cover in the next step.
Step 7: Reviewing your workout summary
After you’ve ended your workout session on your Apple Watch, you can take a moment to review the summary of your workout. This summary provides valuable information about your performance and progress during your exercise. Follow these steps to review your workout summary:
- After ending your workout, your Apple Watch will display a summary of your session on the screen.
- Scroll down on the screen to view additional details such as total time, distance covered, average pace, and calories burned. Depending on the workout type, you may also see additional relevant metrics.
- You can use the digital crown or swipe up to access more detailed information, including heart rate graphs, elevation changes, and lap splits for certain workouts.
- Take note of any significant observations or achievements from your workout summary that you may want to track or share with others.
Reviewing your workout summary allows you to gain insights into your performance and progress over time. It provides a snapshot of your workout data, helping you understand your strengths, areas for improvement, and overall fitness level.
Once you’ve reviewed your workout summary, you can tap the “Done” button to exit the summary screen and return to the main Workout app menu on your Apple Watch.
With your workout summary reviewed, you’re almost done with the process. The final step is to manage and analyze your workout data in the Health app, which we’ll cover in the next step.
Step 8: Managing and analyzing your workout data in the Health app
Once you’ve completed your workout and reviewed the summary on your Apple Watch, you can further manage and analyze your workout data using the Health app on your iPhone. The Health app provides a comprehensive view of your health and fitness data, including your workout history. Here’s how you can manage and analyze your workout data:
- On your iPhone, open the Health app. It is a pre-installed app that comes with your device.
- Navigate to the “Browse” tab at the bottom of the screen and select the “Workouts” category. This will display a summary of your recorded workouts.
- Tap on a specific workout to view more detailed information, such as heart rate trends, workout route maps (if applicable), and a breakdown of the workout metrics.
- Explore the various charts and graphs to gain insights into your progress, performance, and patterns over time. You can analyze different metrics, compare workouts, and track improvements using the available tools.
- The Health app also allows you to share your workout data with third-party fitness apps and platforms to further enhance your fitness journey.
Managing and analyzing your workout data in the Health app gives you a comprehensive perspective on your fitness activities. It enables you to track your progress, identify trends, and make informed decisions about your training regimen.
Remember to regularly sync your Apple Watch with your iPhone to ensure that your workout data is updated and reflected accurately in the Health app.
With this final step, you’ve successfully learned how to manage and analyze your workout data in the Health app. Congratulations on becoming proficient in logging and tracking your workouts on your Apple Watch!
Conclusion
Logging and tracking your workouts on your Apple Watch is a powerful tool to help you stay motivated and make progress towards your fitness goals. With the Workout app and its array of features, you can easily record your exercise sessions, monitor your performance, and gain valuable insights into your fitness journey.
In this guide, we’ve covered the essential steps to log a workout on your Apple Watch. We started by accessing the Workout app and selecting the appropriate workout type. We then learned how to set a workout goal and start the workout session. Along the way, we explored how to pause and resume our workouts, and finally, we wrapped up by ending the session and reviewing the workout summary.
But it doesn’t stop there. The Health app on your iPhone allows you to further manage and analyze your workout data, providing a comprehensive view of your fitness activities and progress. By utilizing the tools and features within the Health app, you can track improvements, compare workouts, and make data-driven decisions to optimize your training.
So, whether you’re a dedicated athlete or simply looking to incorporate more physical activity into your daily routine, your Apple Watch can be a reliable companion on your fitness journey. Stay consistent, set challenging goals, and enjoy the benefits of tracking your progress every step of the way.
Now it’s time to put your knowledge into practice. Grab your Apple Watch, head out for a workout, and experience the power of logging your workouts with this fantastic device!