Introduction
Welcome to the world of Apple Watch, a cutting-edge wearable device that seamlessly combines style and functionality. Whether you’re a tech enthusiast or a fashion-forward individual, putting on an Apple Watch is an exciting experience. However, it’s essential to have a clear understanding of the process to ensure a comfortable and secure fit.
In this article, we will guide you through the steps of how to put on an Apple Watch properly. From unboxing to turning it on, we will cover everything you need to know to start enjoying your new Apple device.
The Apple Watch is not just a timepiece; it’s a technological marvel that offers various features and capabilities. From tracking your fitness goals to receiving notifications and accessing apps, this smartwatch is designed to simplify your life. By knowing how to put on your Apple Watch correctly, you can optimize its performance and make the most of its features.
Before we dive into the step-by-step process, it’s important to note that the Apple Watch comes in different models, including Apple Watch Series 6, SE, and older generations. However, the steps for putting on the watch remain generally the same, regardless of the model you have.
So, without further ado, let’s get started with unboxing the Apple Watch and preparing it for use.
Step 1: Unboxing the Apple Watch
Excitement fills the air as you eagerly unbox your brand-new Apple Watch. To begin the process of putting it on, follow these simple steps:
1. Carefully remove the outer packaging to reveal the sleek and stylish Apple Watch box.
2. Open the box by gently lifting the lid. Inside, you’ll find the Apple Watch nestled securely in a protective case.
3. Lift the Apple Watch out of the case, being cautious not to touch the face or any buttons. Depending on the model, you may also find additional accessories such as a charging cable or extra watch bands.
4. Set aside the accessories for now. Your focus will be on getting the Apple Watch ready to wear.
5. Take a moment to admire the exquisite design and craftsmanship of the Apple Watch. Notice the smooth curves, the vibrant display, and the precision-engineered components that make it so unique.
Now that the Apple Watch is unboxed, it’s time to move on to the next step: charging the device to ensure it has enough power for setup and everyday use.
Step 2: Charging the Apple Watch
Before you can put on your Apple Watch and start using it, it’s crucial to ensure that the device has enough battery power. Follow these steps to charge your Apple Watch:
1. Locate the charging cable that came with your Apple Watch. It typically consists of a USB connector on one end and a magnetic charging pad on the other.
2. Connect the USB end of the charging cable to a power source, such as a wall adapter or a USB port on your computer.
3. Take the magnetic charging pad and align it with the back of the Apple Watch. The magnets will securely attach the charging pad to the back of the watch.
4. Ensure that the charging pad is connected properly and firmly attached. You should see the charging symbol appear on the watch face, indicating that the device is charging.
5. Leave the Apple Watch to charge for a sufficient period to reach an acceptable battery level. It is recommended to charge the watch to at least 50% before proceeding with the setup process.
6. While the watch is charging, take this opportunity to familiarize yourself with its features and functions by exploring the user manual or online resources.
Once the Apple Watch has reached an adequate battery level, you can proceed to the next step of choosing the right watch band that suits your style and preferences.
Step 3: Choosing the Right Watch Band
Apple offers a variety of watch bands to suit different styles and occasions. Before you can put on your Apple Watch, you’ll need to choose the right watch band that matches your aesthetic preferences and provides a comfortable fit. Here’s how to go about it:
1. Start by considering the design and material of the watch bands available for your Apple Watch model. Options range from classic stainless steel and leather bands to sporty silicone and nylon bands.
2. Think about your personal style, whether you prefer a more formal or casual look. Apple offers a range of colors and finishes, allowing you to express your individuality.
3. Consider the intended use of the Apple Watch. If you plan to use it primarily for fitness activities, you may want to opt for a band that is sweat-resistant and comfortable during workouts.
4. Visit the Apple website or an authorized retailer to explore the different watch bands available for your specific Apple Watch model. Take your time to browse through the options and read reviews to make an informed decision.
5. Once you’ve chosen the ideal watch band, ensure that it is compatible with your specific Apple Watch size (e.g., 38mm, 40mm, 42mm, or 44mm). Refer to the product specifications to ensure compatibility.
By selecting the right watch band, you’ll not only enhance the overall look of your Apple Watch, but you’ll also ensure a comfortable and secure fit on your wrist. Once you’ve acquired the desired watch band, it’s time to move on to the next step: adjusting the watch band to achieve the perfect fit.
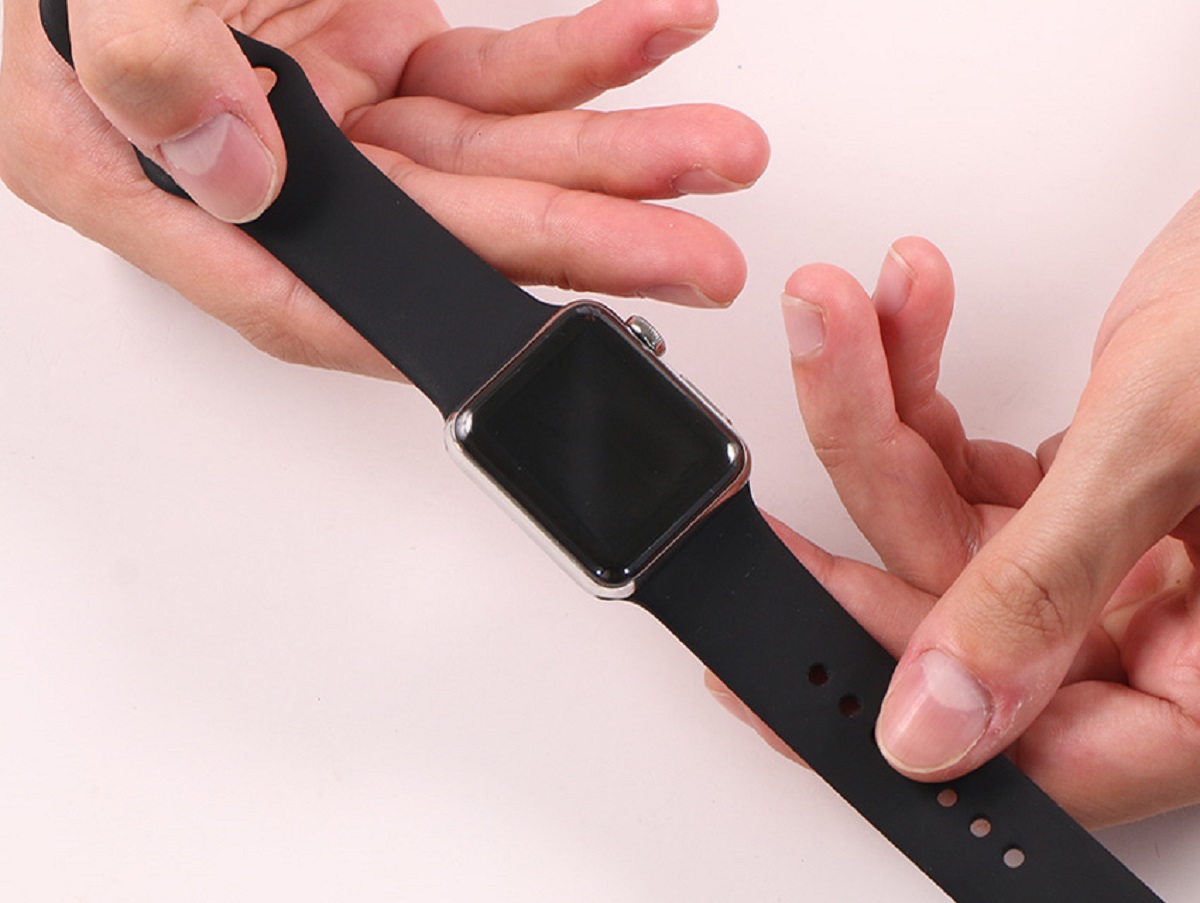
Step 4: Adjusting the Watch Band
Now that you’ve chosen the perfect watch band for your Apple Watch, it’s time to ensure that it fits comfortably on your wrist. Here’s how you can adjust the watch band:
1. Begin by identifying the type of watch band you have. Apple offers various styles, including adjustable bands with a buckle or clasp and bands with a link bracelet.
2. If you have an adjustable band with a buckle or clasp, locate the small holes on the band and the corresponding studs on the opposite side. Depending on your wrist size, you may need to adjust the band to fit snugly.
3. Use the pin or mechanism provided with the band to release the clasp or buckle. Slide the band through until you reach the desired size.
4. Once you’ve found the appropriate hole, insert the pin or close the clasp to secure the band. Test the fit by ensuring that the Apple Watch sits comfortably on your wrist without feeling too tight or loose.
5. If you have a link bracelet band, you may need to remove or add links to achieve the correct size. Consult the user manual or seek assistance from a professional if needed.
6. Take extra care when adjusting the band to avoid scratching the watch or damaging the band. Follow the instructions provided by Apple or refer to official resources for guidance.
By customizing the watch band to fit your wrist, you’ll ensure a comfortable wearing experience and prevent the Apple Watch from sliding around or feeling restrictive.
Once you’ve successfully adjusted the watch band, it’s time to move on to the exciting part: putting on the Apple Watch and securing it properly on your wrist.
Step 5: Putting on the Apple Watch
With the watch band adjusted to the perfect fit, you’re now ready to put on your Apple Watch. Follow these steps to ensure a comfortable and secure wear:
1. Hold the Apple Watch in your hand with the display facing up and the watch band facing down. Orient the watch so that the digital crown, which is the small wheel on the side, is on the right side of the watch.
2. Gently place the watch on your wrist, positioning it just above the bony part on the side. The watch should be centered on the top of your wrist, with the display facing you.
3. Wrap the watch band around your wrist, making sure it goes through the loop or buckle, depending on the design of your band. Take your time to align the band properly and ensure a smooth fit.
4. Slide the watch band through the loop or buckle, adjusting it gradually until the watch feels snug but not too tight. You should be able to move your wrist comfortably while wearing the Apple Watch.
5. Check that the watch is positioned parallel to your arm, with the display facing upward and situated in a way that allows easy interaction with the touch screen and digital crown.
6. Use your free hand to hold the watch band in place, preventing it from slipping while you secure it. This will ensure a secure fit and prevent the watch from accidentally slipping off your wrist.
By following these steps, you’ll have successfully put on your Apple Watch, ready to enjoy its functionality and features throughout the day. The next step involves properly securing the watch band to prevent any accidental loosening or detachment.
Step 6: Securing the Apple Watch
Now that you’ve put on your Apple Watch, it’s essential to secure it properly on your wrist to ensure it stays in place throughout your daily activities. Follow these steps to securely fasten the watch band:
1. Check that the watch band is snug but not overly tight on your wrist. It should be comfortable enough to wear for extended periods without causing discomfort or restrict blood circulation.
2. If your watch band has a buckle or clasp, make sure it is securely fastened. Double-check that the buckle is inserted into the correct hole or that the clasp is properly closed.
3. For bands with a loop or closure, ensure that the loop is tightly secured around the end of the band. This will prevent any excess band from coming loose and maintain a firm hold on your wrist.
4. Give your wrist a gentle shake or rotate your arm to test the watch’s stability. If you feel any loosening or sliding, readjust the band to achieve a more secure fit.
5. Take care when participating in vigorous activities or exercise sessions. Ensure that the watch is securely fastened to prevent any accidental detachment during movement.
Remember, the Apple Watch is designed to withstand everyday wear and tear, but it’s essential to take certain precautions to ensure its longevity. By securing the watch band properly, you can enjoy peace of mind knowing that your Apple Watch will stay firmly in place.
Now that your Apple Watch is securely on your wrist, it’s time to move on to the next step: turning on the device and setting it up for use.
Step 7: Turning on the Apple Watch
With your Apple Watch securely fastened and in place, it’s time to power it on and start the setup process. Follow these steps to turn on your Apple Watch:
1. Locate the side button, which is located below the digital crown on the right side of the watch.
2. Press and hold the side button until the Apple logo appears on the screen. This indicates that the device is turning on.
3. Wait patiently as the Apple Watch boots up. This process may take a few moments, so allow the device sufficient time to complete the startup sequence.
4. Once the Apple Watch is powered on, you’ll be prompted to select your language and region. Use the touchscreen or the digital crown to navigate through the setup screens and make your selections.
5. Follow the on-screen instructions to connect your Apple Watch to your iPhone. Make sure your iPhone is nearby and has Bluetooth enabled.
6. When prompted, open the Apple Watch app on your iPhone and follow the instructions to pair and set up your Apple Watch.
7. During the setup process, you’ll be asked to sign in with your Apple ID and configure various settings, such as setting a passcode and enabling features like Siri and Apple Pay.
8. Once you’ve completed the setup process, your Apple Watch will be ready to use. Explore the various features and customize the settings to suit your preferences.
By following these steps and setting up your Apple Watch correctly, you’ll be able to fully enjoy the functionality and convenience this innovative device offers.
Congratulations! You’ve successfully put on and turned on your Apple Watch. Now you can explore all the features and benefits it has to offer while enjoying the convenience of having a smartwatch on your wrist.
Conclusion
Putting on an Apple Watch may seem like a simple task, but taking the time to follow the proper steps ensures a comfortable and secure fit. By unboxing the watch, charging it, selecting the right watch band, adjusting it to the perfect size, and securing it on your wrist, you’ll be ready to enjoy all the features and functionalities of your Apple Watch.
Remember to power on your Apple Watch and go through the setup process to personalize your device and connect it to your iPhone. Take advantage of the various settings and features available to enhance your user experience.
Whether you’re using your Apple Watch for fitness tracking, receiving notifications, accessing apps, or simply making a fashion statement, wearing it correctly is crucial for comfort and functionality. By following the steps outlined in this guide, you can ensure that your Apple Watch fits perfectly and stays securely on your wrist throughout the day.
Now that you have mastered the art of putting on an Apple Watch, it’s time to enjoy all the capabilities it offers. Stay connected, track your activities, and add a touch of style to your wrist with this remarkable wearable device.
Embrace the world of Apple Watch and discover the endless possibilities it brings to your daily life. From stylish designs to advanced features, your Apple Watch is the perfect companion for staying connected and achieving your goals.
So, put on your Apple Watch with confidence and enjoy the seamless blend of technology and fashion that it offers. Stay ahead of the curve and embrace the future on your wrist with an Apple Watch!