Introduction
Welcome to our guide on how to set up your Xfinity WiFi box! With the increasing need for reliable internet connectivity, having a high-quality WiFi router is essential. Xfinity offers a range of routers that provide fast and secure internet access, allowing you to enjoy seamless browsing, streaming, and gaming experiences. In this step-by-step tutorial, we will walk you through the process of setting up your Xfinity WiFi box, from unboxing to connecting devices and configuring settings.
Before we dive into the technical aspects, let us assure you that the setup process is designed to be user-friendly and straightforward. You don’t need to be a tech expert to get your WiFi box up and running. By carefully following our instructions, you will have your Xfinity WiFi box set up in no time.
Setting up your Xfinity WiFi box is the first crucial step to unlocking the power of high-speed internet in your home or office. Whether you’re a student, a remote worker, or simply someone who enjoys streaming movies and playing online games, a reliable internet connection is a must-have. Xfinity WiFi boxes offer advanced features like dual-band technology, parental controls, and guest networks, ensuring that everyone in your household can enjoy a secure and efficient online experience.
So, if you’re ready to unleash the full potential of your Xfinity WiFi box, let’s get started with the unboxing process and move on to the various steps required to set it up. By the time we’re done, you’ll be enjoying fast and reliable internet connectivity from the comfort of your home or office.
Step 1: Unboxing the Xfinity WiFi Box
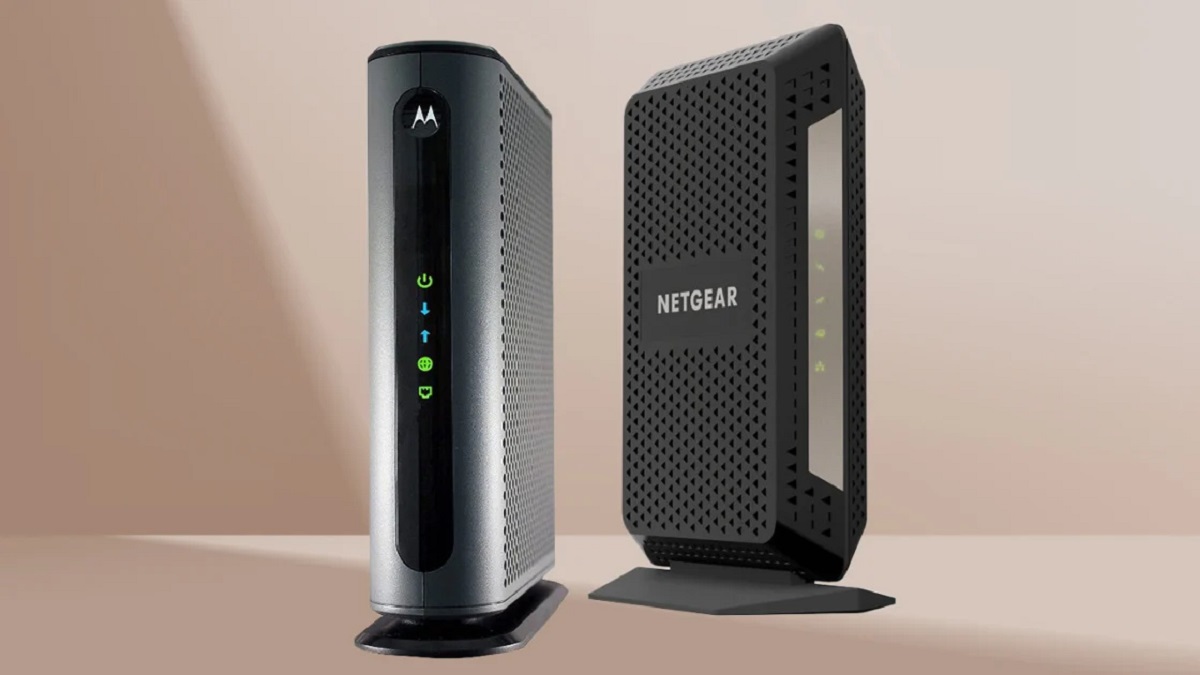
The first step in setting up your Xfinity WiFi box is unboxing it and familiarizing yourself with the components. When you receive your package, you’ll find the WiFi box, power adapter, coaxial cable, and an Ethernet cable.
To begin, find a clean and spacious area where you can easily access the contents of the box. Carefully open the packaging and remove all the items. Make sure to keep the box and packaging materials aside in case you need them for any future reference or if you ever need to return the product.
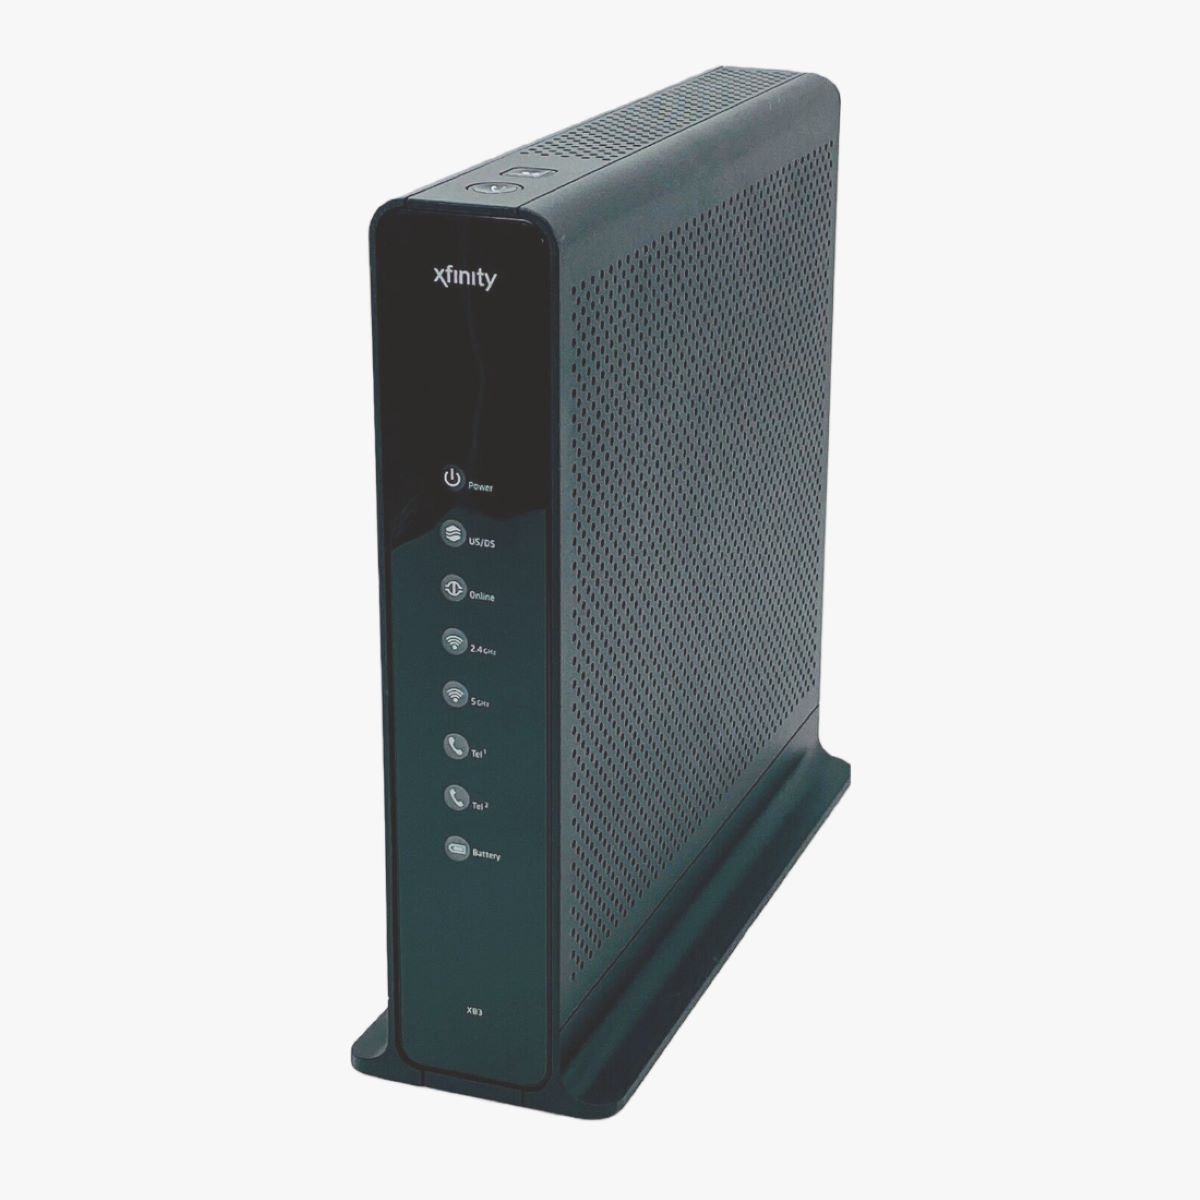
Take a moment to examine the WiFi box and identify its different ports and buttons. On the back or bottom of the box, you’ll find the power input, coaxial cable input, and several Ethernet ports. These ports will be used for connecting the necessary cables to set up your internet connection.
In addition to the physical components, you will also find some documentation in the box, including a quick start guide and a user manual. These resources can provide you with valuable information and troubleshooting tips, so it’s a good idea to keep them handy throughout the setup process.
Once you have familiarized yourself with the components and documentation, you are ready to move on to the next step of setting up your Xfinity WiFi box, which involves connecting the power and coaxial cables.
Step 2: Connecting the Power and Coaxial Cables
Now that you’ve unboxed your Xfinity WiFi box, it’s time to connect the power and coaxial cables to get your internet connection up and running. The power and coaxial cables are essential for providing electricity and establishing a connection between your WiFi box and the internet service provider’s network.
To start, locate the power adapter and plug one end into the power input port on the back of the WiFi box. Make sure the adapter is firmly inserted and secure. Next, connect the other end of the power adapter to a nearby power outlet. Ensure the outlet is easily accessible and switched on.
Once the power cable is connected, locate the coaxial cable that came with your WiFi box. This cable is usually white and has screw-on connectors on both ends. The coaxial cable is responsible for connecting your WiFi box to the cable wall outlet or the cable modem.
On the back of your WiFi box, find the coaxial cable input port and screw one end of the cable firmly into it. Rotate the connector clockwise until it is tightly secured. Now, take the other end of the coaxial cable and connect it to the cable wall outlet or the cable modem. Again, ensure that the connection is secure by rotating the connector clockwise.
With the power and coaxial cables properly connected, you have successfully established the physical connections needed to set up your Xfinity WiFi box. The next step involves configuring the internet connection, which we’ll cover in the following section.
Step 3: Setting up the Internet Connection
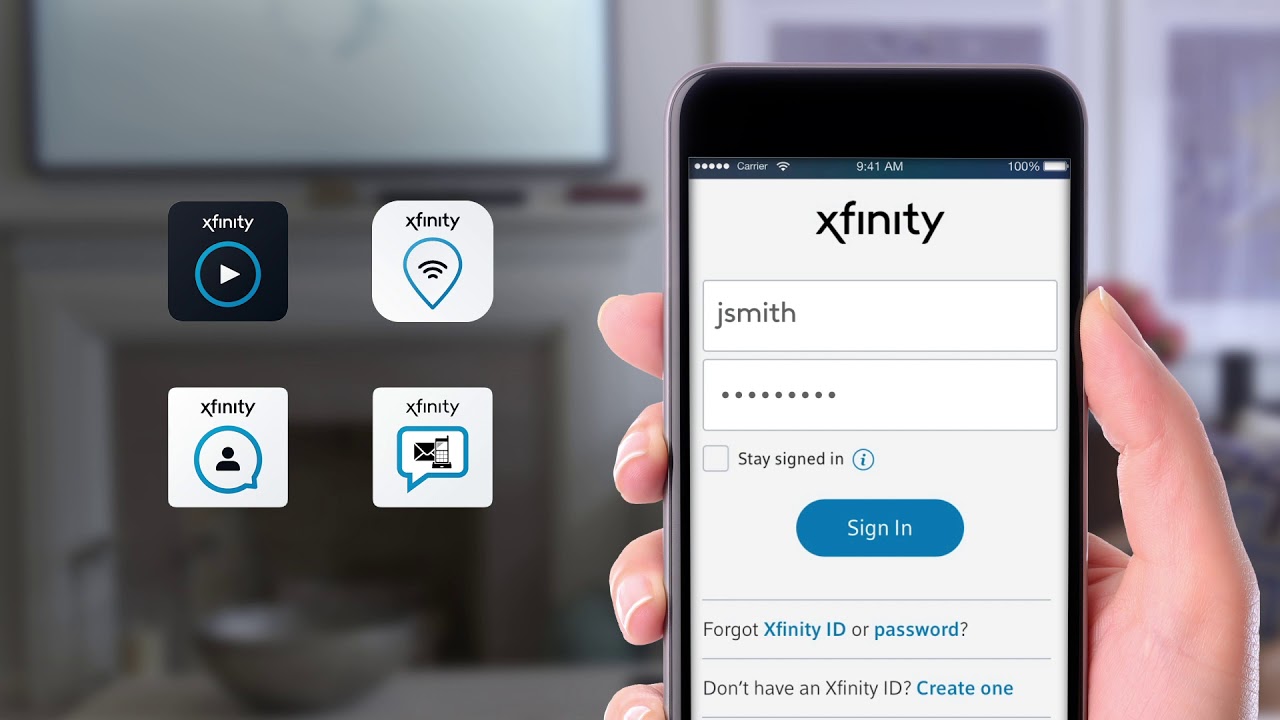
Now that you have connected the power and coaxial cables, it’s time to set up the internet connection for your Xfinity WiFi box. To do this, you will need to access the Xfinity website or use the Xfinity app on your smartphone or tablet.
First, ensure that your device is connected to the WiFi network of the Xfinity WiFi box. Look for the default network name (SSID) and password provided with your WiFi box. Once connected, open a web browser or launch the Xfinity app to begin the setup process.
On the Xfinity website or app, locate the option for setting up a new WiFi box. You may need to create an Xfinity account or log in to your existing account. Follow the on-screen prompts and provide the necessary information, such as your location and account credentials, to initiate the setup process.
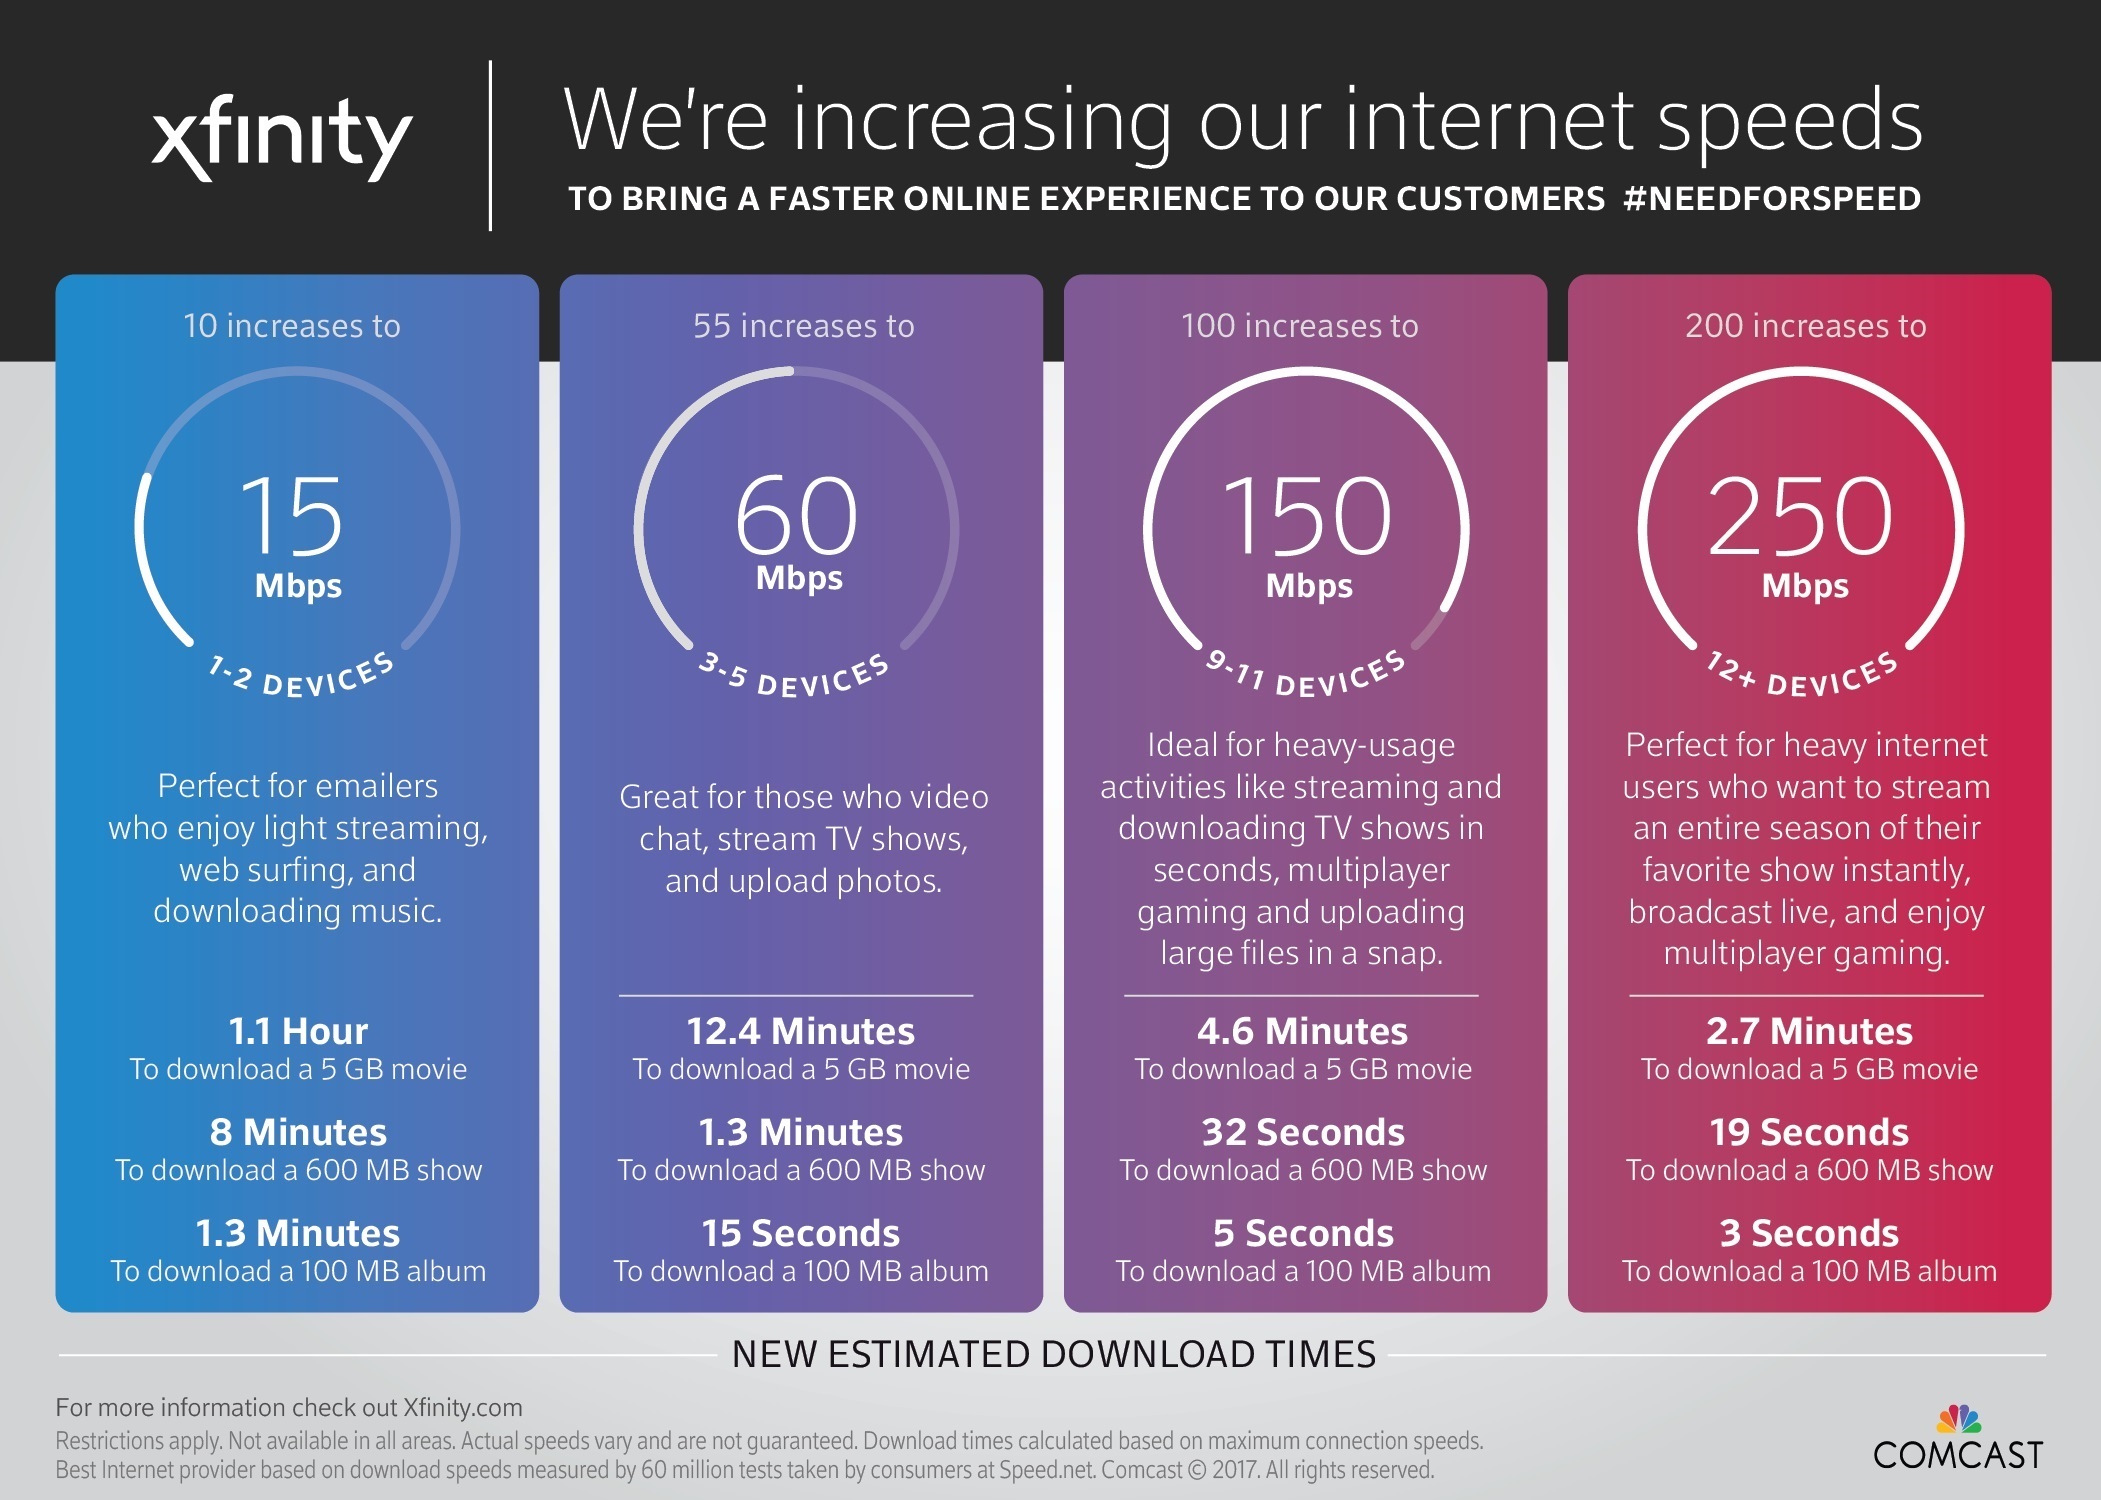
During the setup, you may be asked to verify your account and choose a service plan. Make sure to select the appropriate plan that matches your subscription. If you are unsure about the details, refer to your Xfinity account or contact their customer support for assistance.
After verifying your account and selecting the service plan, the website or app will guide you through the steps to activate your Xfinity WiFi box. This process typically involves provisioning the device on the network, updating firmware if necessary, and configuring the necessary network settings.
Once the activation process is completed, your Xfinity WiFi box will establish a connection to the internet. This may take a few minutes, so be patient during this time. You may also be prompted to restart the WiFi box to finalize the setup.
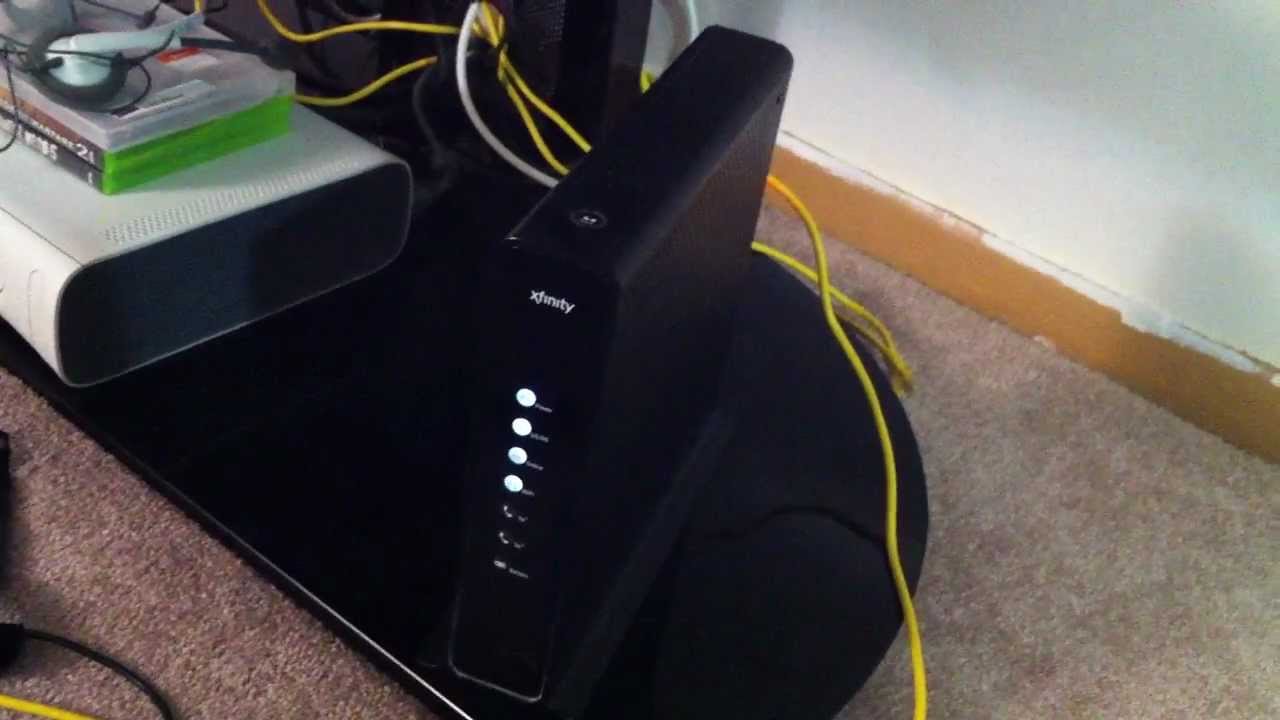
After the WiFi box is activated and connected to the internet, you should see the status indicator lights on the device turn solid or display a steady pattern, indicating that everything is functioning correctly. At this point, you have successfully set up the internet connection for your Xfinity WiFi box.
Next, we will move on to connecting devices to the WiFi box and configuring the WiFi settings to create a secure and efficient wireless network.
Step 4: Connecting Devices to the Xfinity WiFi Box
With your Xfinity WiFi box successfully set up and connected to the internet, it’s time to start connecting your devices to enjoy seamless internet access. Whether you have smartphones, laptops, smart TVs, or gaming consoles, the process of connecting them to your WiFi box is relatively straightforward.
Begin by accessing the WiFi settings on your device. Locate the list of available WiFi networks and look for the network name (SSID) associated with your Xfinity WiFi box. It should be the same as the network name mentioned in the documentation or on the sticker attached to the WiFi box.
Select the Xfinity WiFi network and enter the corresponding password when prompted. The password is also provided in the documentation or on the sticker. Ensure that you enter the password correctly, as it is case-sensitive.
Once you have entered the correct password, your device will attempt to connect to the Xfinity WiFi network. After a few moments, a successful connection should be established. You may see a notification or an icon indicating that you are connected to the WiFi network.
Repeat this process for each device you want to connect to your Xfinity WiFi box. As long as the devices are within range of the WiFi signal and have the correct password, they should be able to connect without any issues.
If you have devices that support Ethernet connections, you can also connect them directly to the Ethernet ports on the back of the WiFi box. This can be useful for devices that require a more stable and higher-speed connection, such as gaming consoles or desktop computers.
Once your devices are connected to the Xfinity WiFi network, they should have access to the internet. You can now enjoy browsing the web, streaming movies and TV shows, playing online games, and much more.
Next, we will explore how to configure the WiFi settings on your Xfinity WiFi box to optimize your wireless network and ensure a secure and efficient connection for all your devices.
Step 5: Configuring WiFi Settings
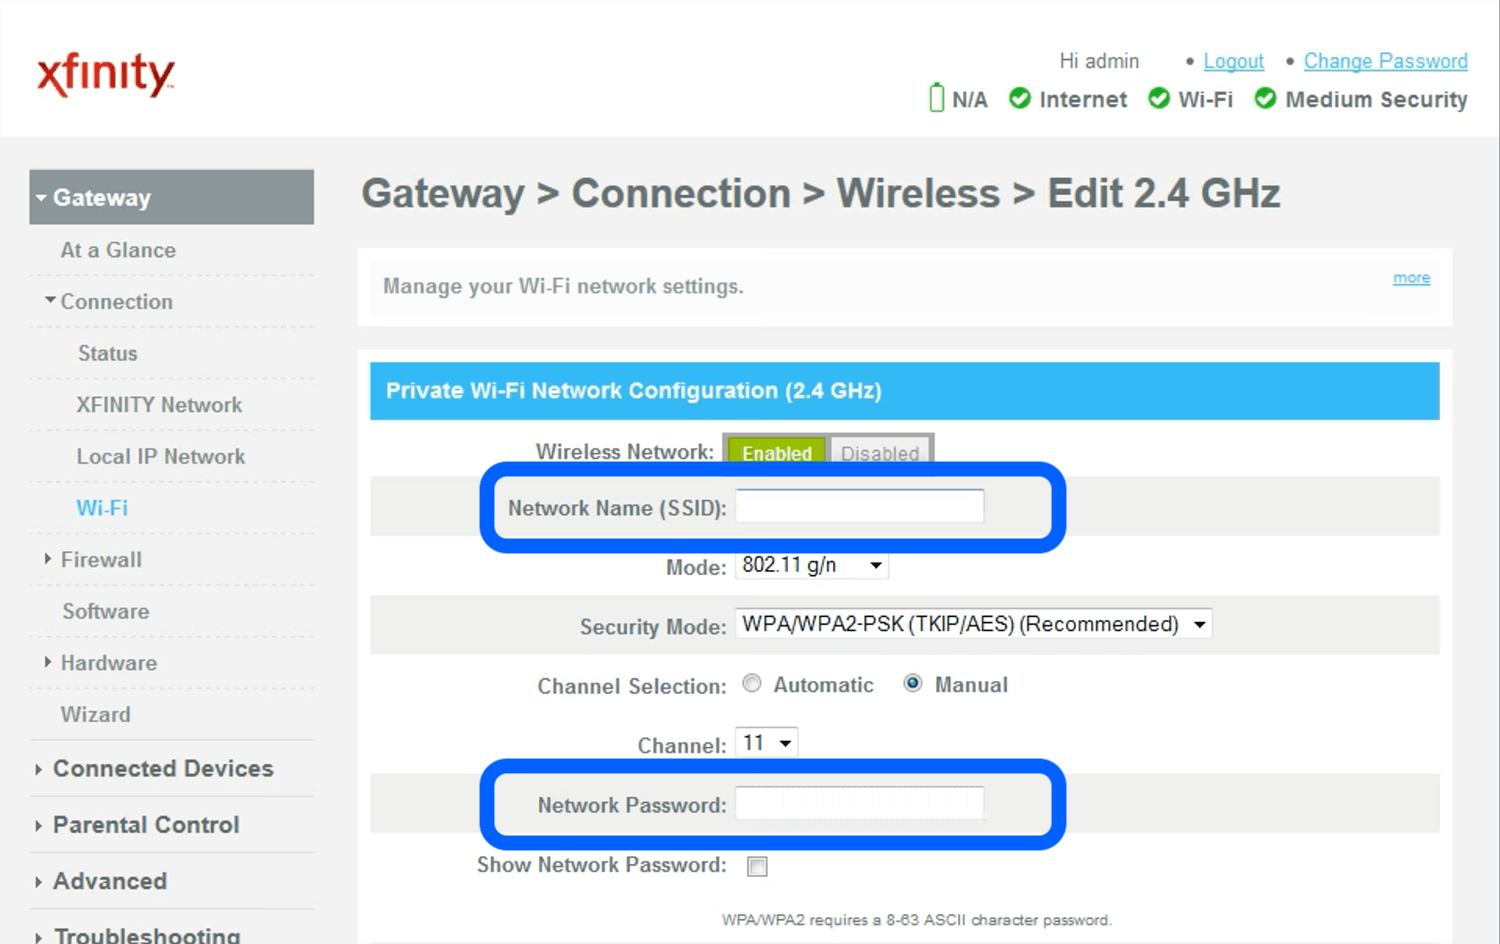
Once your devices are connected to the Xfinity WiFi box, it’s important to configure the WiFi settings to customize and optimize your wireless network. This step involves setting the network name (SSID), password, and other security features to enhance the performance and protect your connection.
To access the WiFi settings, open a web browser on a device that is connected to the Xfinity WiFi network. In the address bar, enter the default IP address provided in the documentation or on the sticker attached to the WiFi box. Press Enter to access the Xfinity WiFi box administration interface.
Log in to the administration interface using the default username and password. Again, these credentials are usually mentioned in the documentation or on the sticker. It is recommended to change the default password for security purposes, so make sure to do so after logging in.
Once you’re logged in, navigate to the WiFi settings section. Here, you can customize the network name (SSID) to a name of your choice. It’s a good practice to choose a unique and easily recognizable name to differentiate your WiFi network from others in your vicinity.
In addition to the network name, you can also set a new WiFi password. A strong and secure password is essential to keep unwanted users from accessing your network. Create a password that combines uppercase and lowercase letters, numbers, and special characters for maximum security.
Depending on your WiFi box model, you may have additional options to configure other settings, such as the WiFi broadcast frequency (2.4 GHz or 5 GHz), channel selection, and encryption type. It’s recommended to select the appropriate settings based on your specific requirements and the capabilities of your devices.
Furthermore, some WiFi boxes offer advanced features like guest networks and parental controls. Guest networks can provide a separate WiFi network for guests to access without compromising the security of your main network, while parental controls allow you to restrict access to certain websites and manage internet usage for specific devices.
Once you have made the necessary changes and configured the WiFi settings according to your preferences, don’t forget to save the changes and restart the WiFi box if prompted. This ensures that the new settings take effect.
By configuring the WiFi settings on your Xfinity WiFi box, you can optimize the performance, enhance security, and customize your wireless network to suit your needs. Now, you can enjoy a fast, reliable, and secure WiFi connection for all your devices.
In the next step, we will explore how to set up parental controls on your Xfinity WiFi box to create a safer online environment for your family.
Step 6: Setting up Parental Controls
Creating a safe online environment for your family is important, and your Xfinity WiFi box provides built-in parental control features to help you achieve this. By setting up parental controls, you can regulate and monitor the internet usage of your children, ensuring that they have a secure and age-appropriate online experience.
To begin setting up parental controls, access the administration interface of your Xfinity WiFi box by entering the default IP address in a web browser on a device connected to the WiFi network. Log in using the administrator credentials, which you should have set up during the initial configuration.
Navigate to the parental controls section in the administration interface. Here, you will find various options to customize your parental control settings. These options may include content filtering, time restrictions, and device-specific controls.
Content filtering allows you to block access to certain websites or web categories that may be inappropriate or unsafe for children. You can choose from pre-defined filtering levels or create custom filters based on your preferences. Make sure to review and update the filtering settings regularly to ensure they align with your family’s needs.
Time restrictions enable you to set limits on the amount of time your children can spend online. This feature allows you to define specific time periods during which internet access is permitted or blocked for selected devices. This helps you promote a healthy balance between online and offline activities.
Device-specific controls allow you to apply different settings to individual devices connected to your Xfinity WiFi box. This can be useful if you want to customize the level of restriction or access for each device based on the age or responsibility of your children.
Once you have configured the desired parental control settings, remember to save the changes and restart the WiFi box if required. This ensures that the settings are applied correctly and go into effect immediately.
It’s important to regularly review and update the parental control settings as your children grow and their internet needs change. Consider having open conversations with your children about internet safety and responsible online behavior to complement the effectiveness of the parental controls.
By setting up parental controls on your Xfinity WiFi box, you can create a safer and more controlled online environment for your family. Now, you can have peace of mind knowing that your children are enjoying the internet in a secure and age-appropriate manner.
In the final step, we will provide some troubleshooting tips to help you resolve common issues and ensure the smooth operation of your Xfinity WiFi box.
Step 7: Troubleshooting Tips
While setting up your Xfinity WiFi box is generally a smooth and straightforward process, you may encounter some common issues along the way. Here are some troubleshooting tips to help you resolve them and ensure the smooth operation of your WiFi connection.
1. No internet connection: If you’re unable to connect to the internet, check that all cables are securely connected. Restart your Xfinity WiFi box and wait a few minutes for it to establish a connection. If the issue persists, contact your internet service provider for assistance.
2. Weak WiFi signal: If you experience weak or spotty WiFi coverage, consider repositioning your WiFi box to a central location in your home or office. Avoid placing it near walls or obstructions that may interfere with the signal. Additionally, you can try switching to a different WiFi channel to minimize interference from neighboring networks.
3. Slow internet speed: If you’re experiencing slow internet speeds, ensure that you’re not exceeding your internet service plan’s data usage limit. You can also try resetting your WiFi box and checking if there are any firmware updates available. If the issue persists, contact your internet service provider to troubleshoot further.
4. Forgetting WiFi password: If you’ve forgotten your WiFi password, don’t worry. You can access the administration interface of your WiFi box and reset the password to a new one. Make sure to choose a strong password that is difficult for others to guess.
5. Device connection issues: If a specific device is having trouble connecting to your WiFi network, try disconnecting and reconnecting it to the network. Restarting the device and ensuring that it is within range of the WiFi signal can also help resolve connectivity issues.
6. Slow performance on specific devices: If only certain devices are experiencing slow performance, check if there are any software or app updates available for those devices. Clearing the device’s cache or resetting its network settings may also help improve performance.
7. Inconsistent WiFi speeds: If you’re experiencing inconsistent WiFi speeds, consider upgrading your internet service plan for higher speeds. Additionally, limiting the number of devices connected to the WiFi network simultaneously can alleviate congestion and improve overall performance.
If you’ve tried the troubleshooting tips mentioned above and are still facing issues with your Xfinity WiFi box, it’s recommended to contact your internet service provider’s customer support. They will be able to provide specific assistance and guide you through further troubleshooting steps.
By following these troubleshooting tips, you can resolve common issues and ensure the smooth operation of your Xfinity WiFi box. Now, you can enjoy a reliable and efficient internet connection for all your online activities.
Conclusion
Congratulations! You have successfully set up your Xfinity WiFi box and are now ready to enjoy fast, reliable, and secure internet access. Throughout this guide, we have walked you through the step-by-step process of unboxing the WiFi box, connecting the power and coaxial cables, setting up the internet connection, connecting devices, configuring WiFi settings, setting up parental controls, and troubleshooting common issues.
By following these instructions and tips, you have transformed your home or office into a hub of connectivity, allowing you to browse the web, stream media, and connect with others seamlessly. The Xfinity WiFi box offers advanced features like dual-band technology, parental controls, and guest networks, enhancing your overall online experience.
Remember, as your internet needs evolve or if you encounter any difficulties, don’t hesitate to refer back to the user manual and contact Xfinity’s customer support. They are readily available to assist you and ensure that your WiFi connection remains optimized and trouble-free.
Now that your Xfinity WiFi box is up and running, take a moment to explore the various features and settings available to you. Customize your WiFi network, set time restrictions, and utilize parental controls to create a safe and enjoyable internet environment for your family. Stay informed about software updates and periodic maintenance to ensure that your WiFi connection remains in top shape.
We hope this guide has helped you set up your Xfinity WiFi box with ease. Enjoy the benefits of fast internet speeds, secure connections, and a wealth of online possibilities. Whether you’re working, studying, or simply enjoying your favorite content, your Xfinity WiFi box will provide the reliable performance you need.
Thank you for choosing Xfinity and happy browsing!