Introduction
Welcome to this tutorial on how to schedule a Zoom meeting! Whether you’re a seasoned Zoom user or new to video conferencing, scheduling a meeting is an essential skill to bring people together virtually. In this guide, we’ll walk you through the step-by-step process of scheduling a Zoom meeting, so you can effortlessly connect with colleagues, friends, and family members from anywhere in the world.
In today’s fast-paced world, video conferencing has become an invaluable tool for communication and collaboration. With Zoom’s user-friendly interface and robust features, you can conduct face-to-face meetings, host webinars, or even catch up with loved ones in a secure and convenient way.
Whether you’re a business professional conducting virtual conferences, a teacher delivering online lessons, or simply catching up with friends, scheduling a Zoom meeting allows you to plan your sessions in advance, ensuring that everyone is on the same page and ready to connect at the designated time.
By scheduling a Zoom meeting, you can take advantage of features such as screen sharing, virtual backgrounds, chat messaging, and so much more. Plus, Zoom offers a wide range of options to customize your meetings, from setting passwords for added security to enabling the waiting room feature to control participant access.
Ready to get started? In the following sections, we’ll guide you through each step of the scheduling process. By the end of this tutorial, you’ll have all the knowledge you need to confidently schedule your own Zoom meetings and bring people together in a virtual space.
Step 1: Sign in to Zoom
Before you can schedule a Zoom meeting, you’ll need to sign in to your Zoom account. If you don’t have an account yet, you can easily create one for free on the Zoom website. Once you have your account set up, follow these steps to sign in:
- Open a web browser and go to the Zoom website.
- Click on the “Sign In” button located at the top right corner of the page.
- Enter your username and password in the respective fields.
- Click on the “Sign In” button to access your Zoom account.
If you’re using the Zoom desktop application, you can also sign in directly from there. Here’s how:
- Open the Zoom application on your computer.
- Click on the “Sign In” button on the home screen.
- Enter your username and password in the provided fields.
- Click on the “Sign In” button to log in to your Zoom account.
Once you’re signed in, you’ll have access to all the features and settings that Zoom has to offer, including the ability to schedule meetings. It’s important to sign in before scheduling a meeting, as this ensures that the meeting is associated with your account and allows you to manage it effectively.
Remember to keep your Zoom account credentials secure and avoid sharing them with others. This will help protect your personal information and prevent unauthorized access to your Zoom meetings.
Now that you’re signed in to your Zoom account, you’re ready to move on to the next step: scheduling a new meeting. Keep reading to learn more!
Step 2: Schedule a New Meeting
Once you’re signed in to your Zoom account, scheduling a new meeting is a breeze. Follow these simple steps to schedule your next Zoom session:
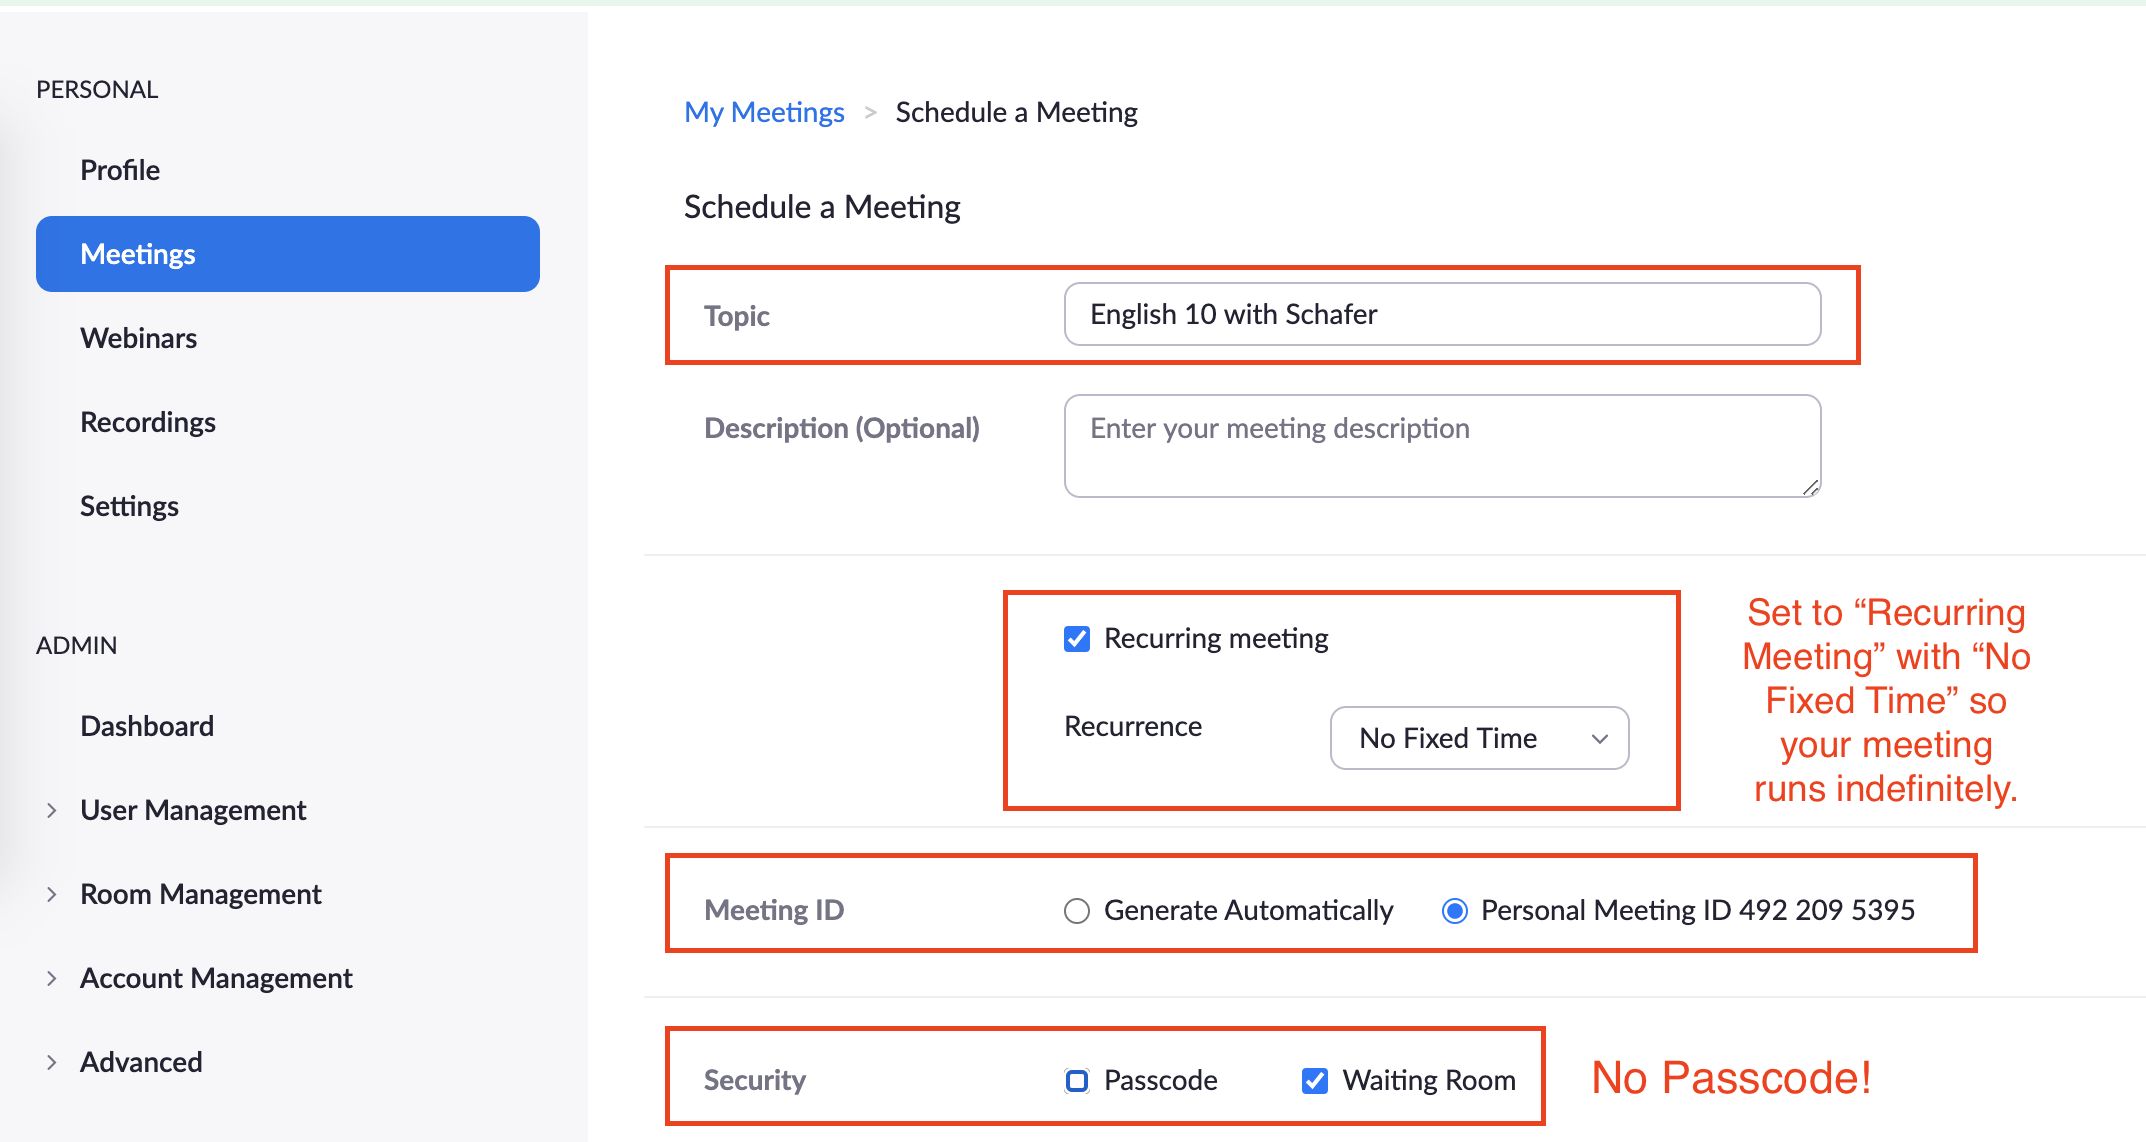
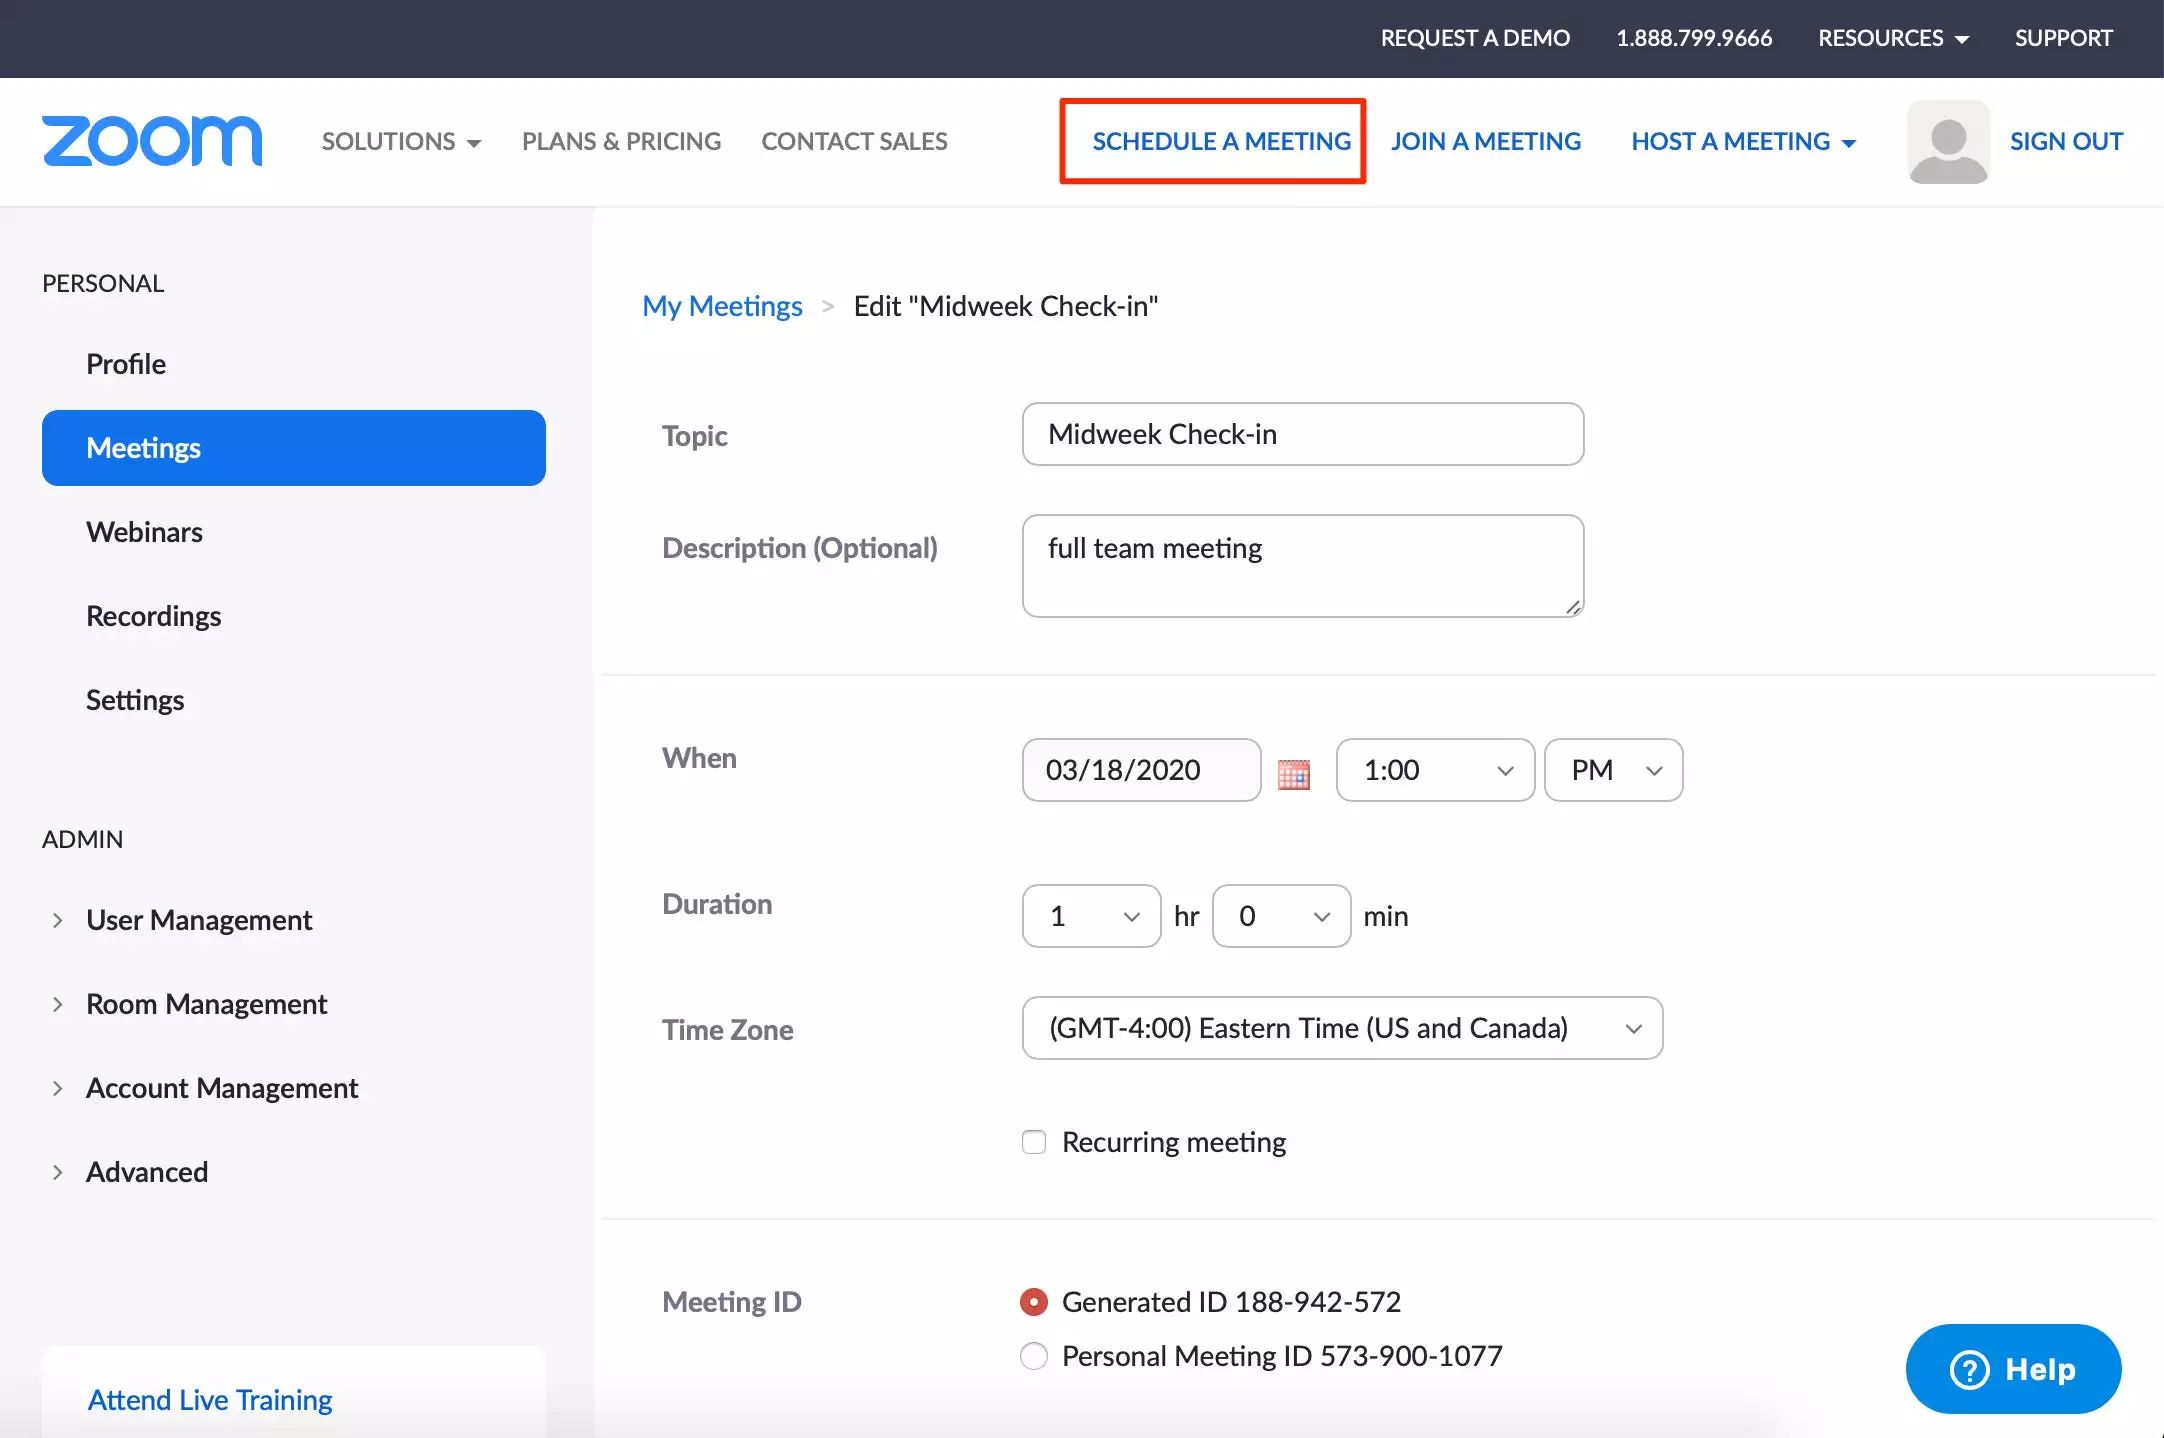
- Click on the “Schedule a Meeting” button located at the top right corner of the Zoom dashboard. Alternatively, you can go to the “Meetings” tab and click on the “Schedule a New Meeting” button.
- A new page will appear, prompting you to enter the meeting details. Start by providing a descriptive title for your meeting in the “Topic” field. This title will be visible to the participants and give them an idea of the meeting’s purpose.
- Next, choose the date and time for your meeting. You can select a specific date and enter the start and end times, or you can choose the “Recurring meeting” option if you want the meeting to repeat at the same time on a regular basis.
- Set the duration of your meeting in the “Duration” field. This will help you plan your schedule and ensure that you allocate enough time for your meeting’s objectives.
- Below the date and time options, you’ll find additional settings to customize your meeting. You can enable or disable video and audio for both the host and the participants, choose whether to allow participants to join before the host, and decide whether to use the Personal Meeting ID (PMI) or generate a unique meeting ID for this session.
- If you want to add password protection to your meeting, you can check the box next to “Require meeting password” and enter a strong password that participants will need to enter in order to join the meeting.
- Scrolling further down, you can find options for enabling the waiting room feature, which allows you to control when participants join the meeting, and the option to record the meeting automatically.
- Once you’ve set all the desired options, click on the “Save” button at the bottom of the page to save your meeting settings.
That’s it! You have successfully scheduled a new meeting in Zoom. The next step is to invite participants to join your meeting, and we’ll show you how to do that in the next step. So let’s keep going!
Step 3: Set up the Meeting Details
Now that you have scheduled your Zoom meeting, it’s time to set up the meeting details to ensure a smooth and productive session. Follow these steps to customize the meeting settings:
- Click on the “Meetings” tab on the Zoom dashboard. This will display a list of all your scheduled meetings.
- Locate the meeting you just scheduled and click on the “Edit” button next to it. Alternatively, you can click on the meeting title to access the meeting settings.
- A new page will open with various options to customize your meeting. Start with the “Meeting Options” section, where you can specify additional settings.
- If you want to allow participants to join the meeting before the host, check the box next to “Enable join before host.” This can be useful if you want to give participants some time to socialize or prepare before the official start of the meeting.
- If you want to enable the waiting room feature, which places participants in a virtual waiting area before joining the meeting, check the box next to “Enable waiting room.” This provides an extra layer of security and control over who enters the meeting.
- In the “Video” section, you can specify whether to start the meeting with video on or off for both the host and the participants. You can also choose to allow the participants to turn their video on or off during the meeting.
- In the “Audio” section, you can choose to allow participants to join using computer audio, phone dial-in, or both. You can also set the default audio option for participants.
- Scrolling further down, you’ll find options to enable or disable features such as screen sharing, chat messaging, and file transfer. These settings can be adjusted based on the nature of your meeting and the level of interaction you want to encourage.
- Once you’ve set up the meeting details to your liking, click on the “Save” button to save your changes.
That’s it! You have now set up the meeting details for your Zoom session. The next step is to invite participants to join your meeting, and we’ll cover that in the next step. So let’s move on!
Step 4: Configure Meeting Options
Now that you have set up the basic meeting details, it’s time to configure additional options to enhance your Zoom meeting experience. Follow these steps to customize the meeting options:
- Click on the “Meetings” tab on the Zoom dashboard to access your scheduled meetings.
- Locate the meeting you want to configure and click on the meeting title or the “Edit” button.
- In the meeting settings page, you’ll find various options to customize the meeting experience. Let’s start with the “Advanced Options” section.
- If you want to enable an alternative host for the meeting, you can enter the email address of the desired co-host in the “Alternative Host” field. This allows them to take over hosting duties in case the original host is unavailable.
- Next, you can choose whether or not to enable the “Join from a browser” option. Enabling this option allows participants to join the meeting using a web browser instead of the Zoom application.
- In the “Meeting ID” section, you can choose to use your Personal Meeting ID (PMI) or a randomly generated meeting ID. The PMI is a static ID that remains the same for all your meetings, while a randomly generated ID provides a unique ID for each meeting.
- If you want to allow participants to join the meeting without waiting in the waiting room, you can uncheck the box next to “Enable waiting room.” This can be useful for meetings with a large number of participants.
- Scroll down further to find options such as allowing participants to rename themselves, allowing participants to chat with everyone or only the host, and allowing participants to share their screen during the meeting.
- In the “Recording” section, you can choose whether to automatically record the meeting or allow participants to manually start recording. You can also choose where the recorded meeting file is saved.
- Once you have configured the meeting options to your requirements, click on the “Save” button to save your changes.
With the meeting options configured, your Zoom meeting is now personalized to cater to your specific needs. The next step is to invite participants, and we’ll cover that in the next section. Let’s keep moving forward!
Step 5: Invite Participants
Now that you have configured the meeting options, it’s time to invite participants to join your Zoom meeting. You can easily send out invitations to attendees through various methods. Follow these steps to invite participants:
- Navigate to the “Meetings” tab on your Zoom dashboard and locate the meeting you want to invite participants to.
- Click on the meeting title or the “Edit” button to access the meeting settings.
- In the meeting settings page, you’ll find a variety of options to invite participants. One of the easiest ways to invite participants is by clicking on the “Copy the invitation” button. This will copy the meeting details and invitation text to your clipboard.
- You can now paste the invitation text into an email, messaging platform, or calendar event to send it to your participants. The invitation text will include important details such as the meeting ID, date, time, and any additional instructions you have set for the meeting.
- If you prefer to invite participants directly from the Zoom interface, you can click on the “Invite” button next to the “Copy the invitation” button. This will open a window where you can select participants from your Zoom contacts or enter their email addresses manually. You can send the invitation using email or by copying the invitation link to share it through other communication channels.
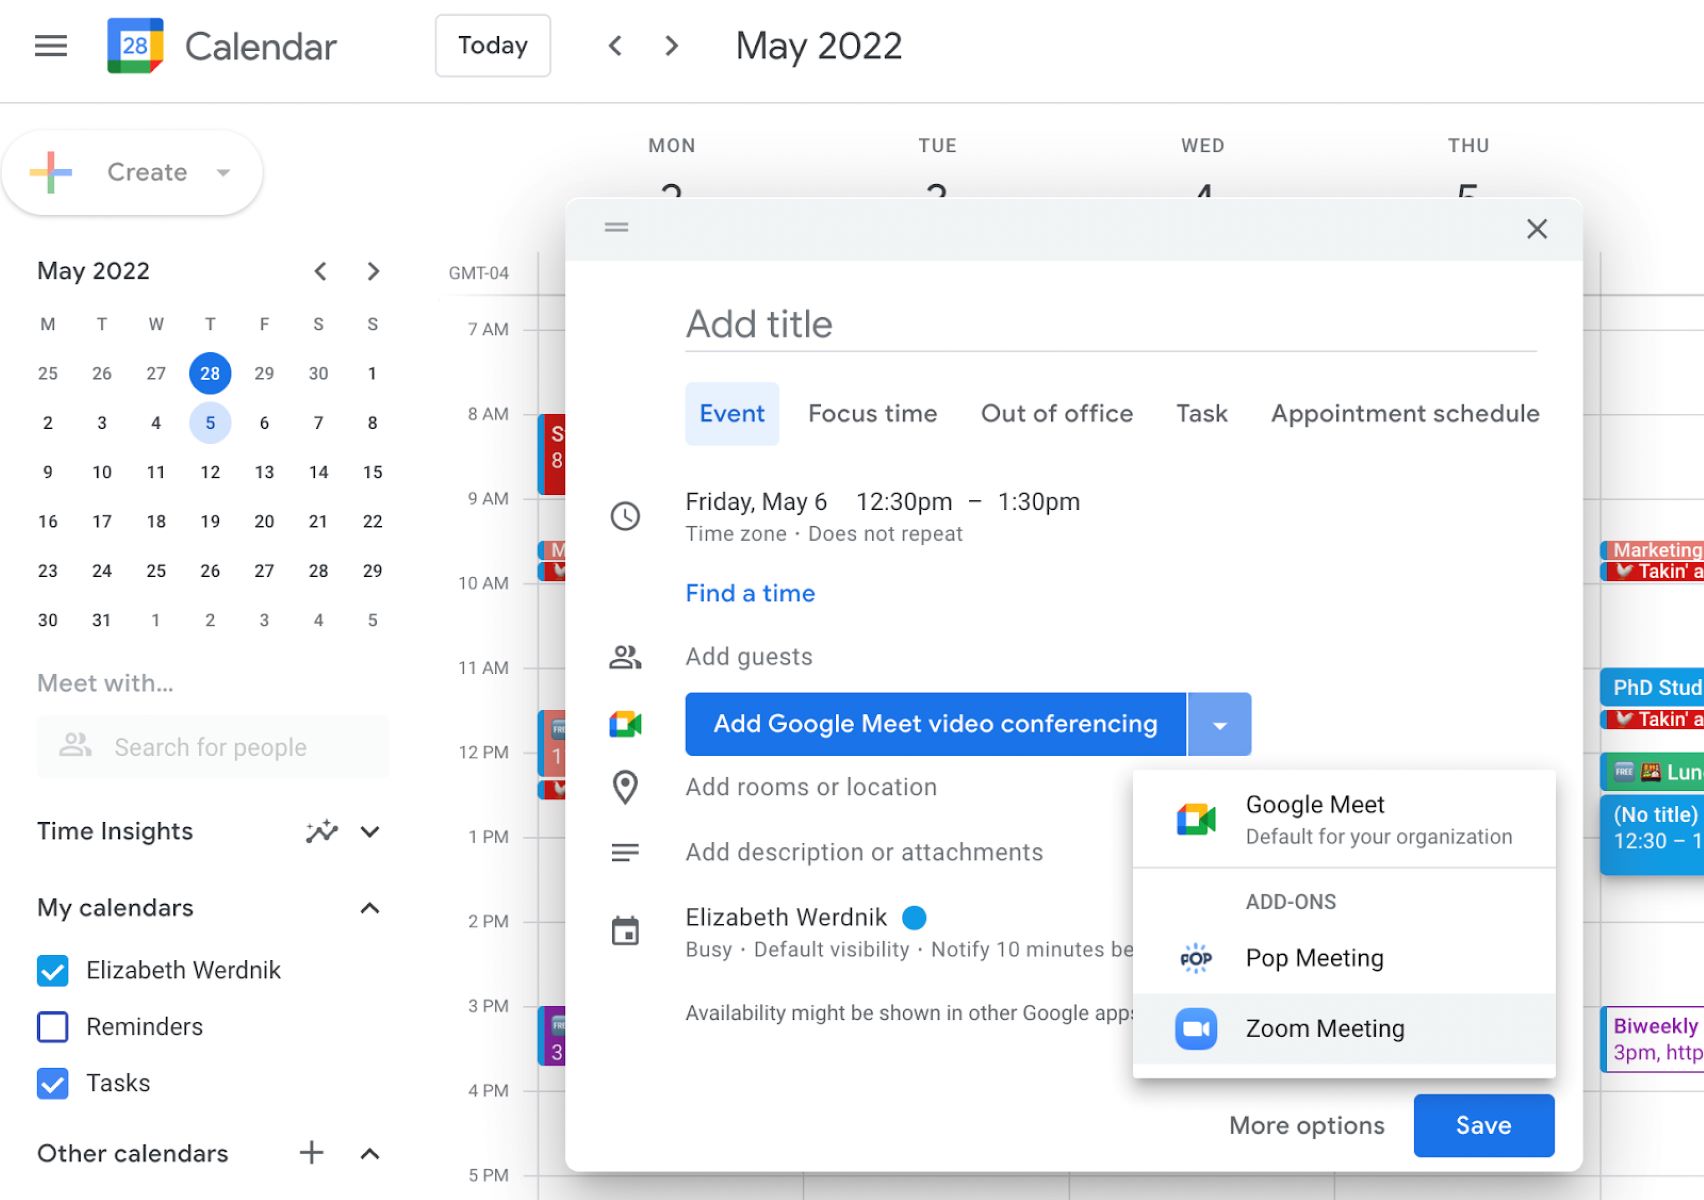
- You can also find other invitation options in the meeting settings page, such as the ability to add the meeting to your Google Calendar or Outlook calendar, or to share the invitation on social media platforms.
- Once you have sent out the invitations, your participants will receive the meeting details and instructions on how to join the Zoom session.
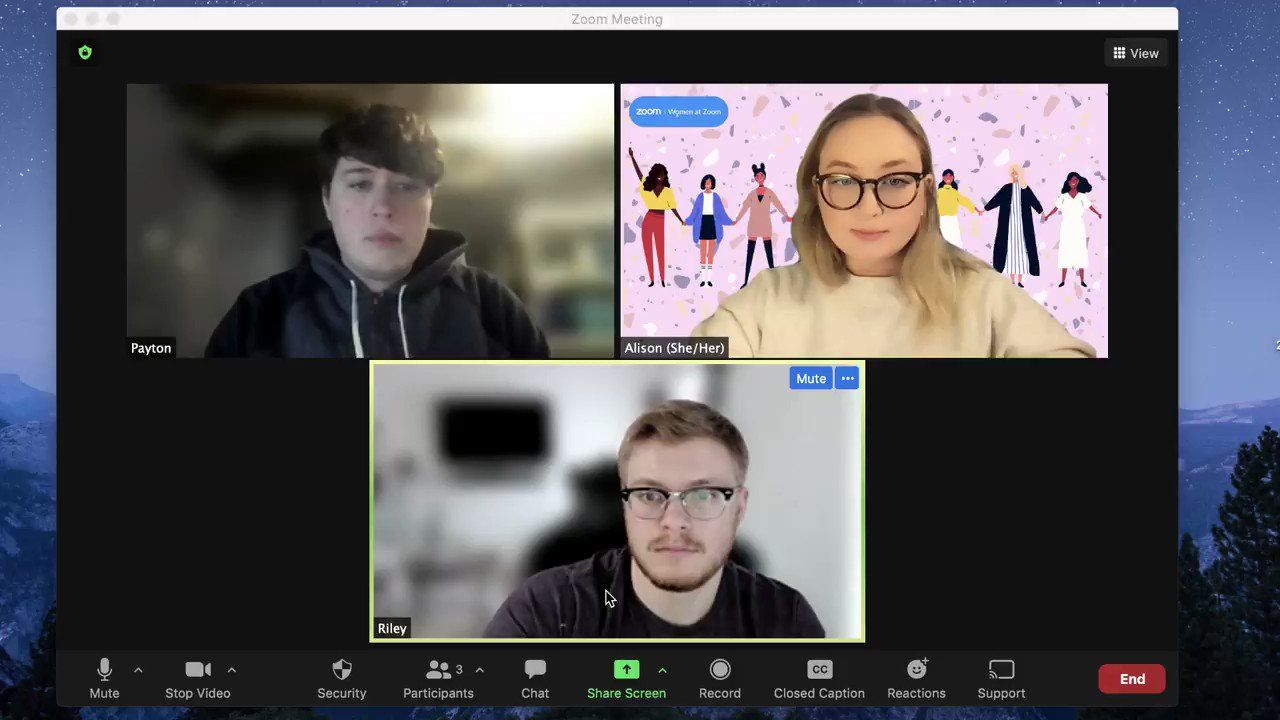
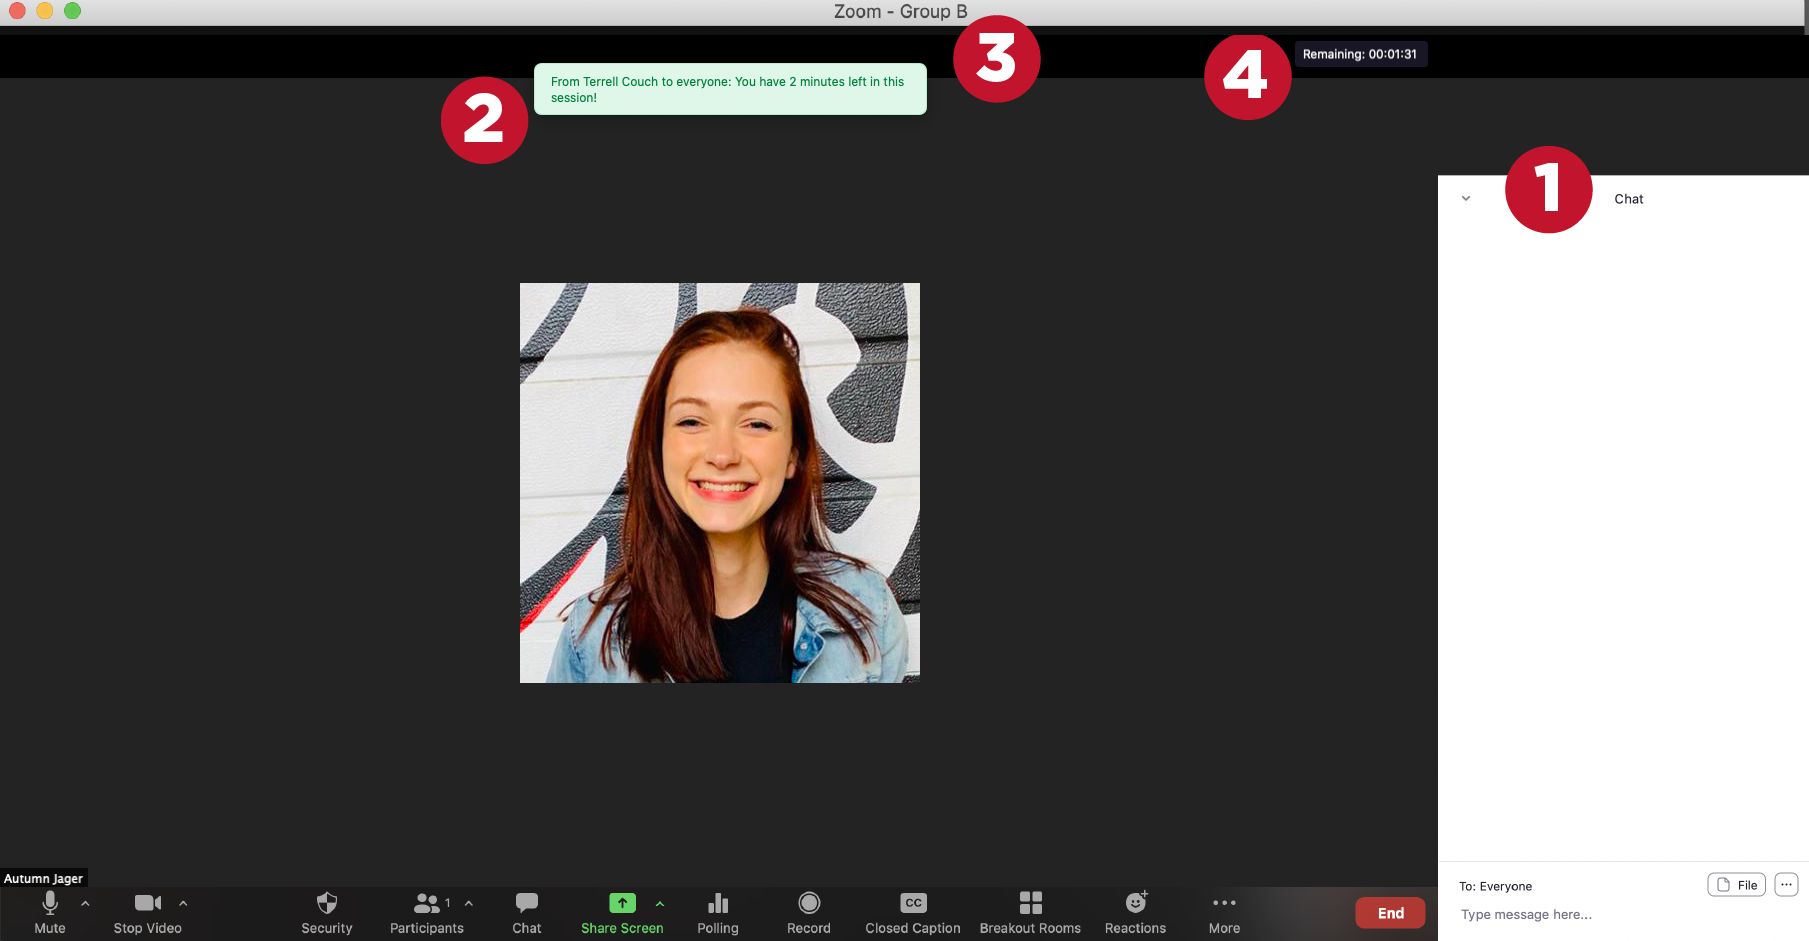
- As the meeting host, you can also manage participants during the meeting by using the Zoom interface to mute or unmute them, disable video, or remove participants if necessary.
By inviting participants to your Zoom meeting, you can ensure that everyone is aware of the scheduled time, has the necessary meeting details, and knows how to join the session. With the invitations sent, it’s time to move on to the next step: adding a meeting password (optional). Let’s continue!
Step 6: Add a Meeting Password (Optional)
To add an extra layer of security to your Zoom meeting, you can choose to set a meeting password. A meeting password ensures that only authorized participants can join the session. Follow these steps to add a meeting password:
- Go to the Zoom dashboard and locate the meeting for which you want to add a password.
- Click on the meeting title or the “Edit” button to access the meeting settings.
- In the meeting settings page, scroll down until you find the “Meeting Password” section.
- Check the box next to “Require meeting password” to enable the password feature.
- Enter a strong password in the “Password” field. Make sure to create a unique password that is not easily guessable.
- You can also choose to enable the “Embed password in meeting link for one-click join” option. This option allows participants to join the meeting directly with the link without manually entering the password.
- Once you have set the password, click on the “Save” button to save your changes.
- Now, when participants receive the meeting invitation, they will need to enter the password to join the Zoom meeting.
Adding a meeting password adds an extra layer of security by preventing unauthorized access to your Zoom session. It is especially useful for confidential or sensitive meetings where you want to ensure that only invited participants can join. Just remember to inform your participants about the password so they can successfully join the meeting.
With the meeting password option set, you have enhanced the security of your Zoom meeting. The next step is to set the meeting schedule, and we’ll cover that in the next section. Let’s move forward!
Step 7: Set the Meeting Schedule
Setting the schedule for your Zoom meeting is vital to ensure that all participants are aware of the designated date and time. Follow these steps to set the meeting schedule:
- Access the Zoom dashboard and locate the meeting for which you want to set the schedule.
- Click on the meeting title or the “Edit” button to access the meeting settings.
- In the meeting settings page, scroll down to find the “Meeting Schedule” section.
- Select the desired date for your meeting using the calendar tool or by manually entering it in the “Date” field.
- Specify the start time and end time for your meeting. You can choose the hours and minutes from the provided dropdown menus.
- Consider enabling the “Recurring meeting” option if your meeting will be a recurring event that takes place at the same time periodically. This allows you to set up a series of meetings with the same settings and schedule.
- If you have enabled the recurring meeting option, you can choose the frequency of the meetings such as daily, weekly, or monthly, and set an end date if needed.
- Once you have set the desired schedule for your Zoom meeting, click on the “Save” button to save your changes.
- The participants you have invited will now be aware of the date and time of the meeting, and they will be able to join at the specified schedule.
By setting the meeting schedule, you ensure that all participants have a clear understanding of when the Zoom meeting will take place. Having a well-defined schedule eliminates any confusion and ensures that everyone can plan their time accordingly to attend the meeting.
With the schedule set, the next optional step is to enable the waiting room feature, which we will cover in the next section. Let’s keep moving forward!
Step 8: Enable Waiting Room (Optional)
The waiting room feature in Zoom allows you to control when participants can enter your meeting, adding an extra layer of security and ensuring that you only admit authorized attendees. Follow these steps to enable the waiting room:
- Access the Zoom dashboard and locate the meeting for which you want to enable the waiting room.
- Click on the meeting title or the “Edit” button to access the meeting settings.
- In the meeting settings page, scroll down to find the “Meeting Options” section.
- Check the box next to “Enable waiting room” to activate this feature.
- With the waiting room enabled, participants joining the meeting will be placed in a virtual waiting area where you, as the host, have control over admitting them to the meeting.
- If you prefer, you can also customize a waiting room message to provide any necessary instructions or greetings to participants.
- Once you have enabled the waiting room and made any desired changes, click on the “Save” button to save your settings.
- Now, when participants join your meeting, they will wait in the waiting room until you admit them one by one or all at once.
Enabling the waiting room feature adds an additional level of control over who can join your Zoom meeting, allowing you to verify participants before granting them access to the session. This is particularly useful for meetings that require a higher level of security or when you need to carefully manage participant entry.
With the waiting room feature activated, you have taken another step towards ensuring the security and smooth operation of your Zoom meeting. The next step is to save and send the meeting invitation, which we’ll cover in the next section. Let’s continue!
Step 9: Save and Send the Meeting Invitation
After you have set up all the necessary details for your Zoom meeting, it’s time to save your changes and send out the meeting invitation to your participants. Follow these steps to save and send the meeting invitation:
- Review all the settings for your Zoom meeting to ensure they are accurate and meet your requirements.
- After making any necessary adjustments, click on the “Save” button located at the bottom of the meeting settings page.
- Once you have saved the meeting settings, you have successfully scheduled and configured your Zoom meeting.
- To send the meeting invitation, you can choose from several options depending on your preferred method of communication.
- One convenient option is to click on the “Copy the invitation” button. This will copy the meeting details and invitation text to your clipboard, which you can then paste into an email, messaging platform, or calendar event.
- If you prefer to invite participants directly from the Zoom interface, you can click on the “Invite” button. From there, you can select participants from your Zoom contacts or manually enter their email addresses. Zoom allows you to send the invitation using email or by copying the invitation link to share it through other channels.
- Alternatively, you can find other invitation options in the meeting settings page, such as adding the meeting to your Google or Outlook calendar or sharing the invitation on social media platforms.
- Choose the method that works best for you and your participants to ensure they receive the meeting details and know how to join the Zoom session.
- Once the invitation is sent, participants will have all the necessary information needed to join the scheduled Zoom meeting.
By saving and sending the meeting invitation, you have successfully completed the final step in the process of scheduling a Zoom meeting. Now you and your participants can look forward to a productive and engaging virtual session.
With your Zoom meeting invitation sent, you’re now ready to host and facilitate the meeting. Make sure to be present at the scheduled time and access the meeting using your Zoom account. Enjoy your virtual gathering and make the most of Zoom’s powerful features!
Conclusion
Scheduling a Zoom meeting is a simple yet essential skill that allows you to connect with others virtually, whether for work or personal purposes. By following the step-by-step guide outlined in this tutorial, you now have the knowledge and confidence to schedule your own Zoom meetings.
We have covered various steps, from signing in to your Zoom account to configuring meeting options and inviting participants. Each step plays a crucial role in ensuring a successful and productive Zoom meeting experience.
Remember to customize your meeting details, such as setting the schedule, enabling a waiting room, and adding a meeting password for added security. Additionally, take advantage of Zoom’s useful features like screen sharing, chat messaging, and recording to enhance collaboration and engagement.
Once you have set up and saved your meeting settings, don’t forget to send out the meeting invitation to your participants. Clear communication and timely distribution of the meeting details ensure that everyone is prepared and ready to join the Zoom session when the time comes.
As you become more familiar with scheduling Zoom meetings, you’ll be able to plan and host virtual gatherings efficiently, making use of the various customizable options and features available to you.
So, whether you’re organizing professional meetings, educational webinars, or virtual social gatherings, scheduling a Zoom meeting opens up a world of possibilities for bringing people together remotely. Stay connected, collaborate effectively, and enjoy the benefits of virtual communication with the help of Zoom!