Introduction
Scheduling meetings has become an essential part of modern workplaces, and with the rise of remote work, virtual meetings have become the norm. Zoom, a popular video conferencing platform, offers a convenient way to connect with colleagues, clients, or friends from anywhere in the world.
In this article, we will guide you through the process of scheduling a Zoom meeting for someone else. Whether you are an assistant helping your executive set up meetings or a team lead managing a group, this step-by-step guide will ensure a smooth scheduling experience.
By scheduling a Zoom meeting on behalf of someone else, you can save them the hassle of organizing the details themselves. Additionally, as the meeting scheduler, you have more control over managing the participants and ensuring that everyone is notified of the meeting details.
Before we dive into the steps, it’s important to note that you will need access to the Zoom Scheduler tool. This feature is available for both the Zoom desktop application and the web portal. Make sure you have the necessary permissions to schedule meetings on behalf of others, as some organizations may have specific settings. Now, let’s get started with scheduling a Zoom meeting for someone else!
Step 1: Accessing the Zoom Scheduler
The first step in scheduling a Zoom meeting for someone else is accessing the Zoom Scheduler tool. This tool allows you to set up and customize all the details of the meeting. Here’s how you can access it:
- Open the Zoom desktop application on your computer or go to the Zoom web portal in your preferred web browser.
- Log in to your Zoom account using your credentials.
- Once you’re logged in, look for the “Schedule” button or tab. In the desktop application, you can find it at the top left corner of the main window. In the web portal, you may need to navigate to the “Meetings” or “Schedule a Meeting” section.
- Click on the “Schedule” button or tab to access the Zoom Scheduler.
After following these steps, you should be able to see the Zoom Scheduler interface, where you can start filling in the meeting details. It’s important to note that the exact location and appearance of the Scheduler may vary slightly depending on whether you’re using the desktop application or the web portal. However, the functionality remains the same.
Once you have accessed the Zoom Scheduler, you’re ready to proceed to the next step: selecting the meeting type.
Step 2: Selecting the Meeting Type
After accessing the Zoom Scheduler, the next step is to select the meeting type. Zoom offers several meeting options to cater to different needs and preferences. Here’s how you can choose the appropriate meeting type:
- In the Zoom Scheduler interface, you will find a dropdown menu labeled “Meeting ID” or “Meeting Type.” Click on the dropdown menu to view the available options.
- Choose the meeting type that best suits your needs. Zoom offers various options such as “One-time meeting,” “Recurring meeting,” “Personal meeting ID,” and more.
- If you want to schedule a one-time meeting, select the “One-time Meeting” option from the dropdown menu. This is suitable for ad-hoc meetings or one-time gatherings.
- If you need to schedule a recurring meeting, select the “Recurring Meeting” option. This is ideal for regularly scheduled team meetings, classes, or any recurring event.
- For personalized meetings, you can choose the “Personal Meeting ID” option. This allows you to use a specific ID for all your future meetings, making it convenient for participants to remember.
- Once you have selected the appropriate meeting type, proceed to the next step to fill in the meeting details.
Choosing the right meeting type ensures that your meeting is set up in the most suitable manner. Consider the frequency of the meeting, the participants’ preferences, and the purpose of the gathering when selecting the meeting type. With the meeting type selected, you are now ready to move on to the next step: filling in the meeting details.
Step 3: Filling in the Meeting Details
Once you have selected the appropriate meeting type in the Zoom Scheduler, the next step is to fill in the meeting details. These details provide essential information for the participants, such as the date, time, duration, and topic of the meeting. Follow these steps to accurately fill in the meeting details:
- In the Zoom Scheduler interface, locate and fill in the “Topic” field. Use a descriptive and concise title that clearly indicates the purpose or subject of the meeting.
- Next, choose the date and time for the meeting. Navigate to the respective fields and select the desired date and time for the meeting to commence.
- Specify the duration of the meeting by inputting the start and end times. Ensure that you allocate sufficient time for the meeting, considering any discussions or presentations that may take place.
- If applicable, you can set a recurring pattern for the meeting. In the case of a recurring meeting, select the frequency (daily, weekly, monthly, etc.), the days of the week, and the end date for the recurrence.
- It is essential to set the time zone correctly to avoid any confusion. Ensure that you choose the appropriate time zone for the meeting.
- Specify other optional meeting details such as the meeting password, host video, participant video, and audio options. Adjust these settings based on your requirements and the preferences of the organizer.
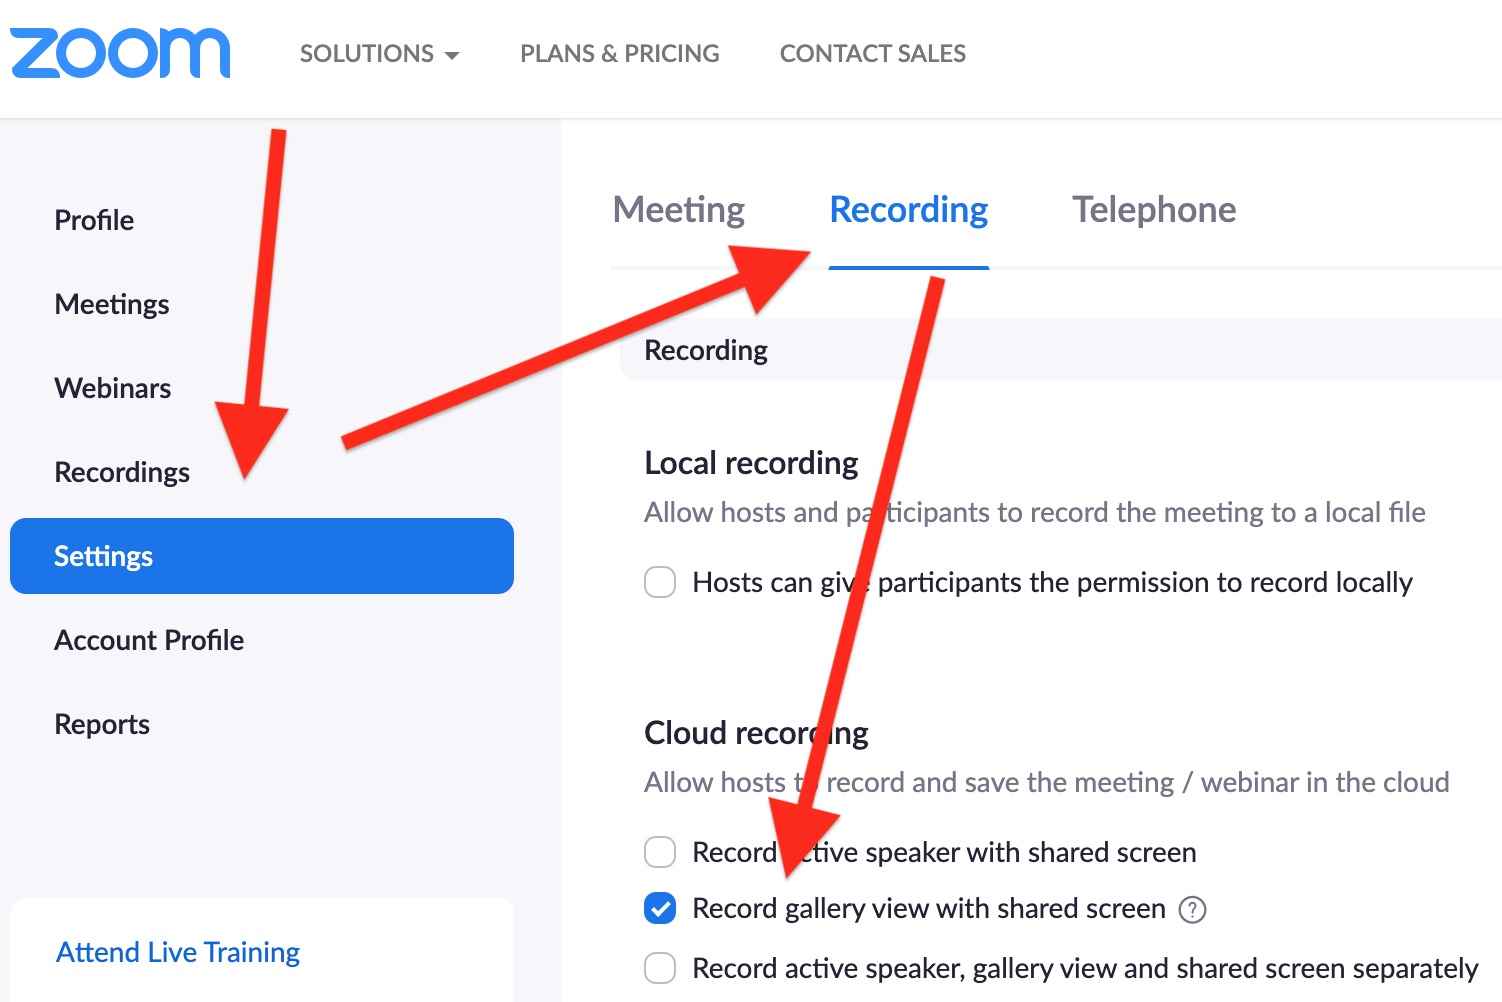
- Utilize the “Advanced Options” section to further customize the meeting settings, such as enabling waiting rooms, allowing participants to join before the host, or automatically recording the meeting.
By accurately filling in the meeting details, you provide clear instructions and expectations for the participants. Make sure to double-check the details to avoid any mistakes or confusion. Once you have filled in the meeting details, it’s time to move on to the next step: inviting participants.
Step 4: Inviting Participants
Inviting participants to your Zoom meeting is an important step to ensure that the right individuals receive the meeting details and can join the virtual gathering. Here’s how you can invite participants:
- In the Zoom Scheduler interface, locate the “Invite” or “Participants” section. This section allows you to add participants to the meeting.
- To invite participants, you have several options. You can manually enter their email addresses in the designated field, separating each address with a comma. This is useful if you have a small number of participants.
- If the participants are already in your Zoom contacts or in your organization’s address book, you can click on the “Contacts” or “Address Book” option and select their names from the list.
- You can also use the “Copy Invitation” button to copy the meeting invitation details and manually send it to participants via email, instant messaging, or any other communication channel.
- If you have a large number of participants or want to automate the invitation process, you can import a CSV file containing the participants’ email addresses. This is done by clicking on the “Import from CSV” option and selecting the file.
Ensure that you include all relevant participants and provide accurate contact information to avoid any confusion or exclusion. You can also customize the invitation message to include any additional instructions or important details.
Once you have invited the participants and customized the invitation message, proceed to the next step: scheduling the meeting.
Step 5: Scheduling the Meeting
After filling in the meeting details and inviting participants, the next step is to schedule the Zoom meeting. Scheduling the meeting ensures that it is added to the calendars of the participants and that they receive reminders and notifications. Follow these steps to schedule the meeting:
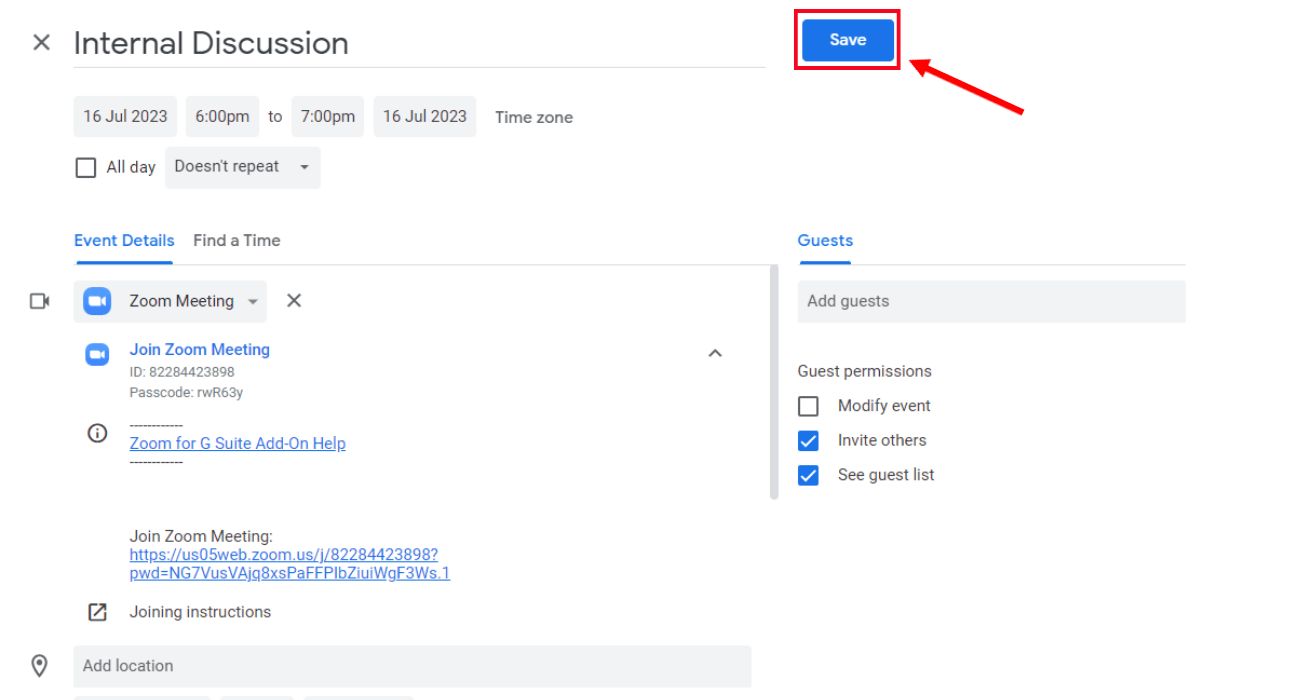
- In the Zoom Scheduler interface, locate the “Schedule” or “Save” button. Click on it to schedule the meeting.
- Once you click on the button, Zoom will generate a unique meeting ID and all the necessary joining details.
- If desired, you can add the meeting to your calendar by selecting the option to “Add to Calendar.” This will help you keep track of your scheduled meetings.
- Review the meeting details carefully to ensure accuracy. Check the date, time, meeting topic, and any additional settings.
- When you are satisfied with the meeting details, click on the “Schedule” or “Save” button to complete the scheduling process.
After scheduling the meeting, Zoom will send out calendar invitations and email notifications to the participants, providing them with all the necessary information to join the meeting. The participants will receive the meeting date, time, meeting link, meeting ID, and any other pertinent details you included in the invitation message.
Congratulations! You have now successfully scheduled a Zoom meeting for someone else. The participants are notified, and the meeting is added to their calendars. All that’s left to do is to inform the organizer about the scheduled meeting and provide any additional instructions or details they may need.
Now that you’ve completed the scheduling process, you can move on to the final step: notifying the organizer.
Step 6: Notifying the Organizer
Once you have scheduled a Zoom meeting for someone else, it’s important to notify the organizer about the details of the scheduled meeting. Keeping the organizer informed ensures they are aware of the meeting and can make any necessary preparations. Here’s how you can notify the organizer:
- Send an email or message to the organizer, informing them about the scheduled meeting. Include the meeting date, time, and any other relevant details.
- Provide the organizer with the meeting link or ID so that they can easily join the meeting at the scheduled time.
- If there are any additional instructions or specific requirements for the meeting, make sure to communicate them clearly to the organizer.
- Offer assistance or support if needed. If the organizer has any questions or concerns about the meeting, be prepared to address them and provide guidance.
By notifying the organizer promptly and providing them with all the necessary information, you ensure that they are fully prepared for the meeting. This also helps to avoid any confusion or miscommunication.
Remember, communication is key when scheduling a meeting for someone else. Stay in touch with the organizer throughout the process and be responsive to their needs and preferences.
With Step 6 completed, you have successfully scheduled the Zoom meeting for someone else and notified the organizer. Now it’s time to wrap up the scheduling process.
Conclusion
Scheduling a Zoom meeting for someone else can streamline the process and save valuable time for busy professionals. By following the steps outlined in this guide, you can confidently schedule meetings on behalf of others and ensure a seamless virtual gathering experience.
In this article, we explored the step-by-step process of scheduling a Zoom meeting for someone else. We began by accessing the Zoom Scheduler tool and selecting the appropriate meeting type. Then, we moved on to filling in the meeting details, including the topic, date, time, duration, and optional settings.
Inviting participants is a crucial step in the scheduling process, allowing you to include all necessary attendees and provide them with the meeting details. From there, we proceeded to schedule the meeting, generating a unique meeting ID and adding the meeting to the participants’ calendars.
Finally, we emphasized the importance of notifying the organizer about the scheduled meeting, providing them with all the necessary information and offering support if needed.
By following these steps and effectively scheduling a Zoom meeting for someone else, you demonstrate your organizational skills and ability to manage virtual gatherings. Remember to have clear and open communication with the organizer throughout the process to ensure a successful meeting.
Now that you have a solid understanding of the process, you’re ready to confidently schedule Zoom meetings for others. Embrace the convenience and efficiency of Zoom, and make virtual collaboration a breeze.