Introduction
Welcome to our guide on how to set up a Zoom meeting in Outlook. In today’s fast-paced world, virtual meetings have become an integral part of our professional lives. Zoom, a popular video conferencing platform, offers a seamless integration with Outlook, allowing you to schedule and manage meetings directly from the Outlook interface.
By leveraging the power of Zoom and the convenience of Outlook, you can easily organize and collaborate with your team, clients, or colleagues without the need for an external scheduling tool. Whether you’re working remotely or just looking for an efficient way to connect with others, this guide will walk you through the step-by-step process of setting up a Zoom meeting in Outlook.
Before we dive into the details, it’s important to note that you need to have both Zoom and Outlook installed on your computer. If you haven’t already done so, make sure to download and install the latest versions of both applications.
In the following steps, we will guide you through the process of downloading and installing the Zoom add-in for Outlook, signing into your Zoom account, enabling the Zoom add-in, scheduling a Zoom meeting, customizing meeting options, and inviting participants. So, let’s get started!
Step 1: Download and Install the Zoom Add-in for Outlook
The first step to setting up a Zoom meeting in Outlook is to download and install the Zoom add-in for Outlook. This add-in allows you to seamlessly integrate Zoom with your Outlook application, making scheduling and managing meetings a breeze.
To download the Zoom add-in, follow these steps:
- Open your web browser and navigate to the official Zoom website.
- Click on the “Resources” tab in the top navigation menu.
- Scroll down and click on “Download” under the “Plugins” section.
- Locate the Zoom add-in for Outlook and click on the “Download” button.
- Once the download is complete, open the installation file.
- Follow the on-screen instructions to install the Zoom add-in on your computer.
After successfully installing the add-in, you will need to restart your Outlook application to activate it.
Once your Outlook application has restarted, you should see the Zoom add-in integrated into the Outlook interface. It will appear as a new tab or option in the ribbon, usually labeled as “Zoom” or “Zoom Meeting”. This tab contains all the tools and features you need to schedule and manage your Zoom meetings directly from Outlook.
Now that you have downloaded and installed the Zoom add-in for Outlook, you are ready to move on to the next step: signing into your Zoom account.
Step 2: Sign into Your Zoom Account
In order to utilize the Zoom add-in for Outlook and schedule meetings seamlessly, you need to sign into your Zoom account within the application. Here’s how you can do it:
- Open your Outlook application and navigate to the Zoom tab or option in the ribbon.
- Click on the “Sign In” button. This will prompt a sign-in window to appear.
- Enter your Zoom account credentials, including your email address and password.
- If you have enabled two-factor authentication for your Zoom account, you will need to provide the required verification code.
- Once you have entered the necessary information, click on the “Sign In” button.
If the sign-in process is successful, you will be logged into your Zoom account within Outlook. This allows you to seamlessly access your Zoom meetings, manage settings, and schedule new meetings directly from the Outlook interface.
If you encounter any issues during the sign-in process, double-check that you have entered your credentials correctly and ensure that you have an active internet connection. If you’re still having trouble signing in, you can reach out to the Zoom support team for assistance.
With your Zoom account now linked to Outlook, you’re ready to move on to the next step: enabling the Zoom add-in for Outlook.
Step 3: Enable the Zoom Add-in for Outlook
Once you have signed into your Zoom account within Outlook, you need to enable the Zoom add-in to start using its features and functionalities. Here’s how you can do it:
- Open your Outlook application and navigate to the Zoom tab or option in the ribbon.
- Click on the “Settings” or “Options” button. This will open the Zoom add-in settings.
- Look for the option that enables the Zoom add-in. It is usually labeled as “Enable Add-in” or “Turn On Add-in”.
- Toggle the switch or checkbox to enable the Zoom add-in. It should now be active and ready to use.
Enabling the Zoom add-in allows you to access all the features and functionalities of Zoom directly within Outlook. You can schedule meetings, join meetings, and customize meeting options without the need to switch between applications.
If you do not see the Zoom add-in option in your Outlook ribbon, make sure that you have installed the add-in correctly and have restarted your Outlook application. You may also need to check if your organization’s IT policies allow the use of third-party add-ins.
With the Zoom add-in now enabled, you are ready to move on to the next step: scheduling a Zoom meeting in Outlook.
Step 4: Schedule a Zoom Meeting in Outlook
Now that you have the Zoom add-in enabled in Outlook, you can easily schedule a Zoom meeting directly from your Outlook calendar. Here’s how you can do it:
- Open your Outlook application and navigate to the calendar view.
- Click on the “New Meeting” button or go to the date and time you want to schedule the Zoom meeting and double-click on the time slot.
- A new meeting form will open. Fill in the meeting details such as the meeting title, date, and duration.
- Click on the “Zoom Meeting” button in the ribbon to initiate the creation of a Zoom meeting.
- In the Zoom Meeting window, configure additional settings such as your video and audio preferences, meeting passwords, and other advanced options.
- Once you have set up all the necessary details and options, click on the “Send” button to schedule the Zoom meeting.
After scheduling the Zoom meeting, the meeting details will be added to your Outlook calendar, and an invitation email will be sent to the participants with the necessary meeting information, including the Zoom meeting link and dial-in details (if applicable).
You can also make changes to the Zoom meeting by opening the meeting appointment on your Outlook calendar. From there, you can update the meeting details, invite additional participants, or cancel the meeting if needed.
Scheduling Zoom meetings directly from Outlook not only saves you time but also keeps all your meeting-related information in one place, making it convenient for you and your participants.
Now that you have successfully scheduled a Zoom meeting in Outlook, it’s time to move on to the next step: customizing your Zoom meeting options.
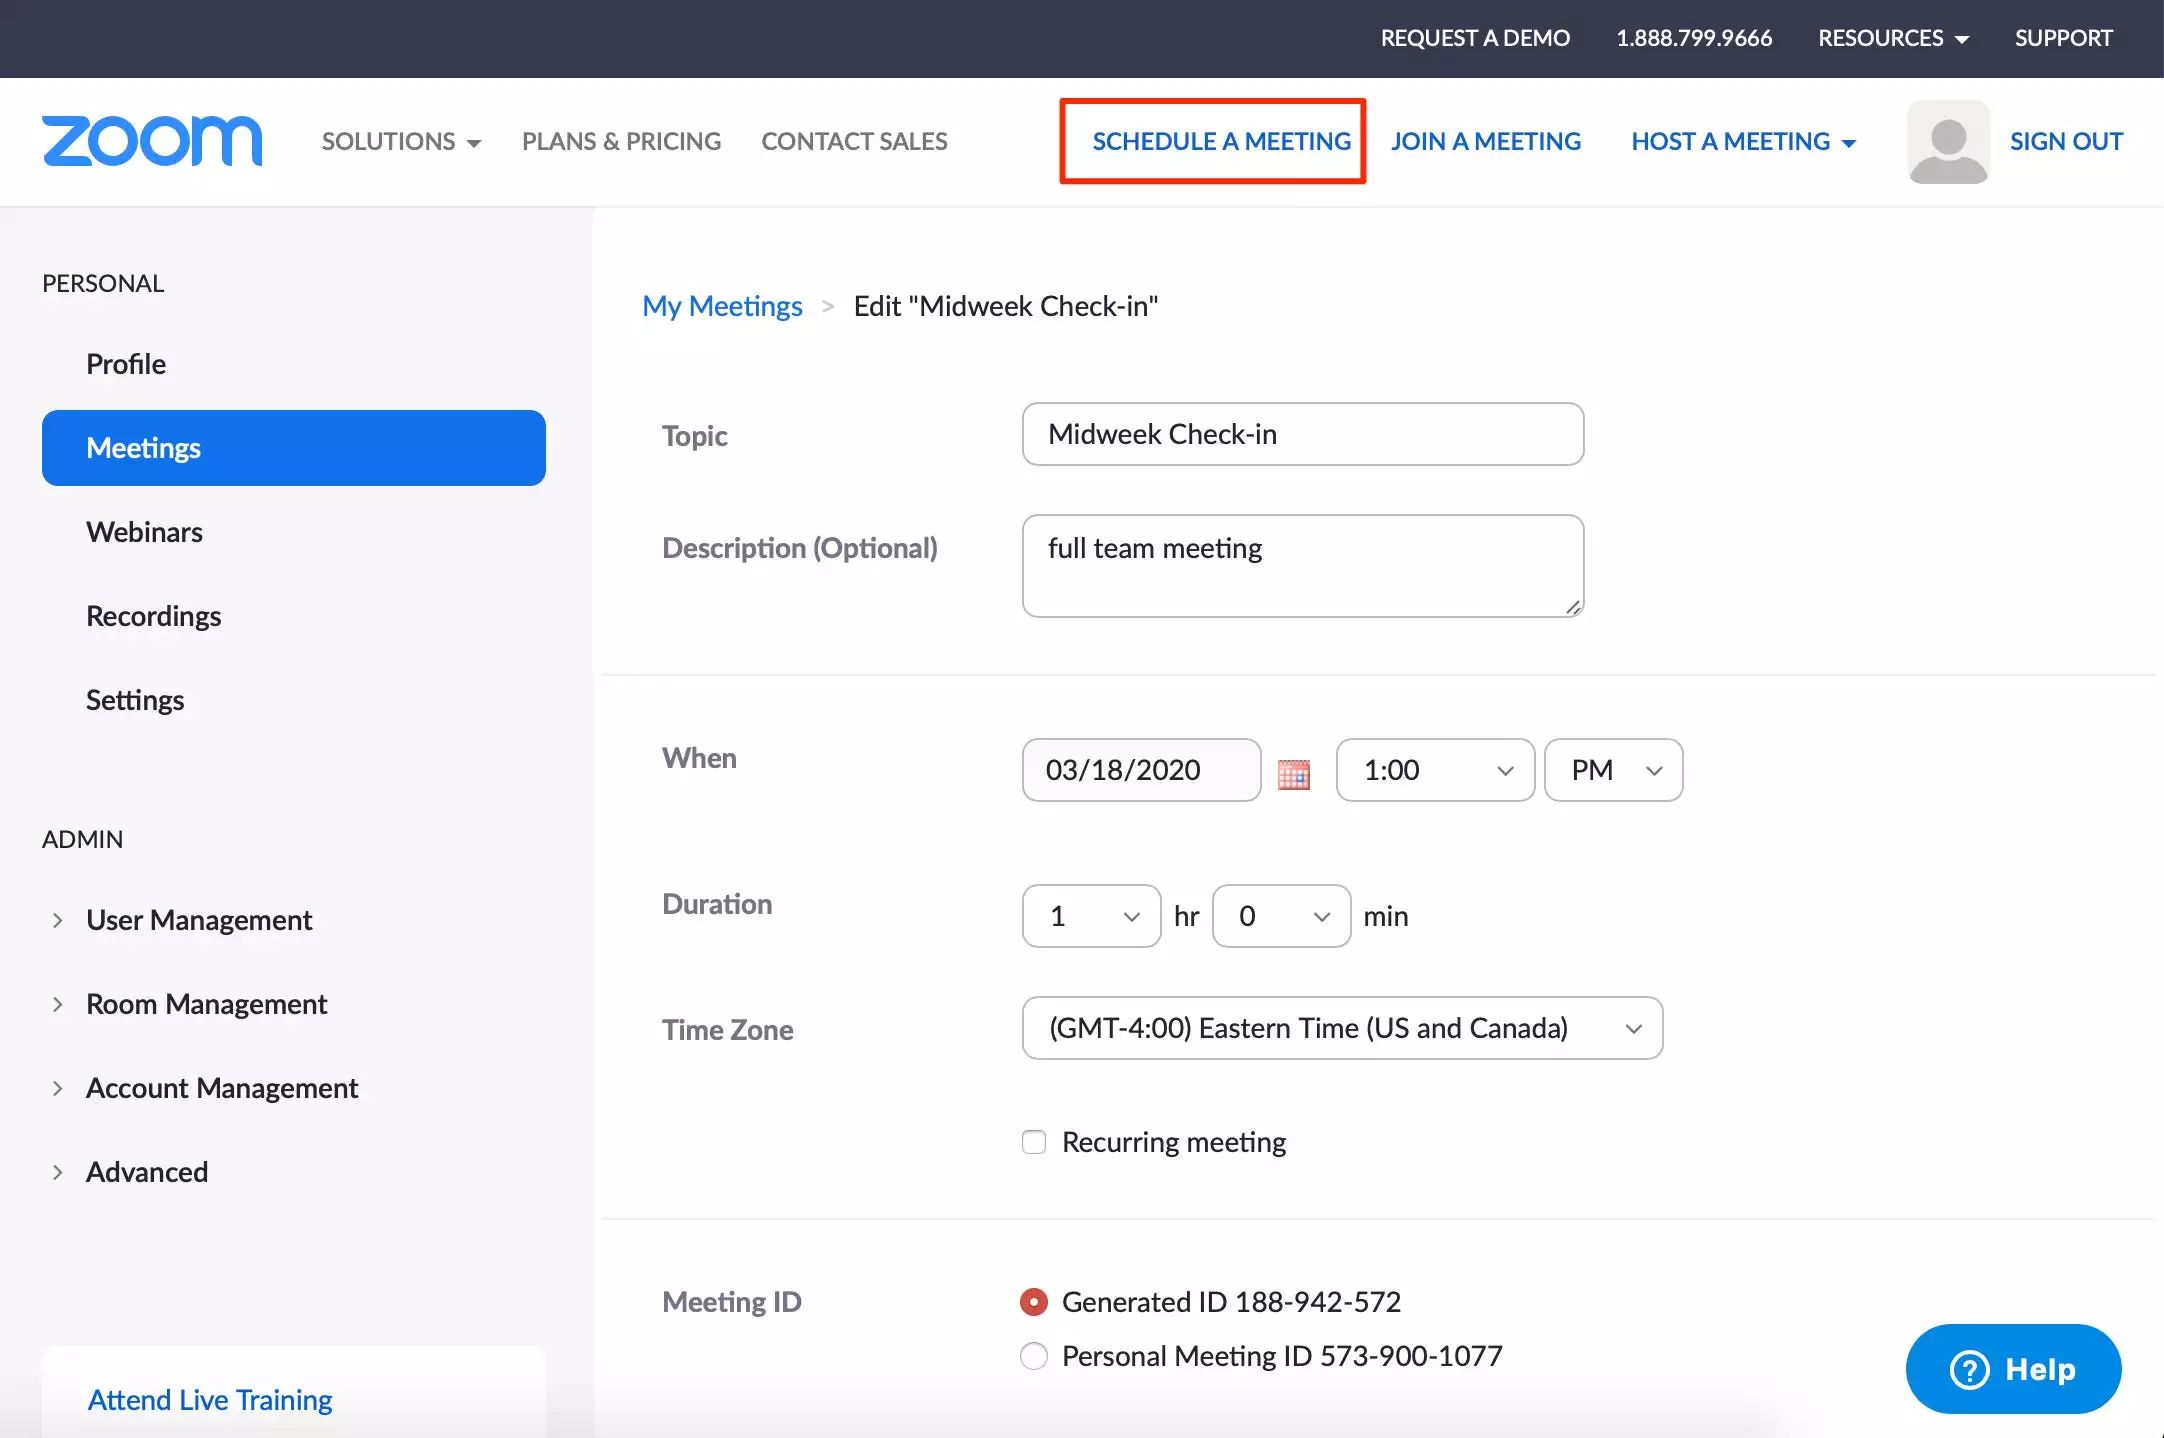
Step 5: Customize Your Zoom Meeting Options
Customizing your Zoom meeting options allows you to tailor the meeting settings according to your specific requirements. Here’s how you can customize your Zoom meeting options:
- Open the Zoom meeting invite from your Outlook calendar.
- Click on the “Zoom Meeting” tab in the ribbon to access the Zoom meeting options.
- Review and modify the following settings based on your preferences:
- Video and Audio Options: Choose whether to start the meeting with video on or off, and whether participants should join with their audio muted or unmuted.
- Meeting Password: Set a password for the meeting to enhance security. Participants will need to enter the password to join the meeting.
- Join Before Host: Determine whether participants can join the meeting before the host joins.
- Waiting Room: Enable the waiting room feature to control the entry of participants into the meeting. You can manually admit participants from the waiting room.
- Meeting Recording: Decide whether to allow participants to record the meeting or only allow the host to record.
- Advanced Options: Explore additional settings such as enabling or disabling in-meeting chat, screen sharing, and annotation features.
By customizing your Zoom meeting options, you can ensure a smooth and secure meeting experience for all participants. It’s important to consider factors such as privacy, security, and the specific needs of your meeting when configuring these settings.
Once you have customized your Zoom meeting options, make sure to save the changes before proceeding to the next step. This will ensure that your desired settings are applied to the meeting.
Now that you have customized your Zoom meeting options to suit your needs, let’s move on to the final step: inviting participants to your Zoom meeting.
Step 6: Invite Participants to Your Zoom Meeting
Inviting participants to your Zoom meeting is an essential step to ensure that everyone you want to attend is aware of the meeting details. Here’s how you can invite participants to your Zoom meeting:
- Open the Zoom meeting invite from your Outlook calendar.
- Click on the “Invite Attendees” or “Invite” button. This will open a window where you can select the participants you want to invite.
- You can choose to invite attendees by email, by copying the meeting invitation link, or by using the Outlook calendar to invite participants directly.
- If you choose to invite attendees by email, enter their email addresses in the designated field and customize the message as needed.
- If you choose to copy the meeting invitation link, simply click on the “Copy Invitation” button and paste the link in a communication method of your choice (such as email or instant messaging).
- If you choose to use the Outlook calendar to invite participants, select the participants from your Outlook contacts or manually enter their email addresses.
- Once you have selected or entered the participants, click on the “Send” button to send out the meeting invitations.
The invited participants will receive an email with the necessary meeting information, including the Zoom meeting link, meeting date and time, and any other customized message you included in the invitation. They can then join the meeting by clicking on the provided meeting link at the scheduled time.
It’s a good practice to send out meeting invitations well in advance to give participants enough time to prepare and ensure their availability. Providing clear instructions and any relevant materials or documents ahead of the meeting can help facilitate a productive and successful Zoom session.
Now that you have invited participants to your Zoom meeting, you’re all set to conduct your virtual gathering!
Conclusion
Setting up a Zoom meeting in Outlook is a straightforward process that allows you to seamlessly integrate two powerful tools and enhance your virtual collaboration experience. By following the steps outlined in this guide, you can easily download and install the Zoom add-in, sign into your Zoom account, enable the add-in in Outlook, schedule a Zoom meeting, customize meeting options, and invite participants.
With the Zoom add-in for Outlook, you can schedule and manage your Zoom meetings directly from your Outlook calendar. This integration streamlines the process, saving you time and ensuring all your meeting-related information is in one place.
Customizing your Zoom meeting options is crucial for tailoring the meeting experience to your specific requirements. You can configure video and audio preferences, set meeting passwords for added security, enable features like waiting rooms and recording, and explore advanced options for more control over your meetings.
Inviting participants to your Zoom meetings is as simple as selecting their email addresses or sharing the meeting invitation link. This step ensures that everyone you want to attend is aware of the meeting details and can join the virtual gathering smoothly.
With the power of Zoom and the convenience of Outlook, you can conduct effective virtual meetings, collaborate with your team, and connect with clients and colleagues no matter where they are located.
So go ahead and start leveraging the combination of Zoom and Outlook to enhance your remote collaboration and communication. Happy Zoom meetings!