Introduction
Welcome to the world of remote communication! In today’s digital age, connecting with others has become easier and more convenient than ever before. Whether you are organizing a business meeting, hosting a virtual event, or simply catching up with friends and family, Zoom is here to revolutionize the way you communicate.
Zoom is a leading video conferencing platform that offers a wide range of features, making it the ideal choice for both personal and professional use. With its intuitive interface and user-friendly functionalities, setting up and managing a Zoom meeting is a breeze.
In this article, we’ll guide you through the step-by-step process of setting up a Zoom meeting, from signing up for an account to hosting your first virtual gathering. So, whether you’re a seasoned Zoom pro or are just getting started, read on to discover how you can harness the power of Zoom to connect with others from the comfort of your own home.
Throughout this guide, we’ll cover various aspects of hosting a Zoom meeting, such as scheduling meetings, customizing settings, sharing screens and files, and even recording your sessions for future reference. By the end of this article, you’ll have a comprehensive understanding of how to effectively utilize Zoom to facilitate seamless virtual communication.
So grab a cup of coffee, sit back, and get ready to learn how to set up your very own Zoom meeting. Whether you’re an individual looking to connect with colleagues or a business owner seeking to engage with clients, Zoom has something to offer for everyone. Let’s dive in and explore the wonderful possibilities that Zoom brings to the table!
Step 1: Sign Up for a Zoom Account
Before you can start hosting Zoom meetings, you need to sign up for a Zoom account. Signing up is quick and simple, and you have a couple of options to choose from.
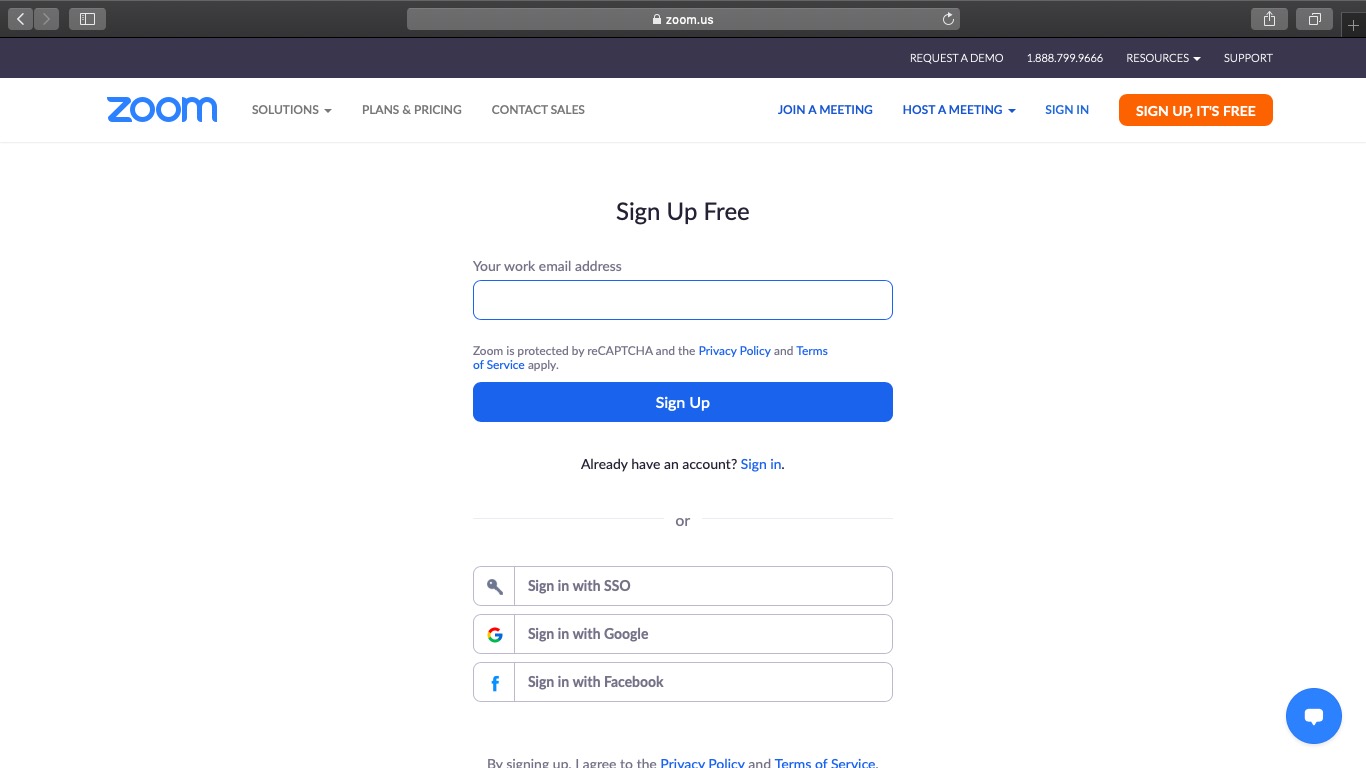
The first option is to visit the Zoom homepage at zoom.us and click on the “Sign Up, It’s Free” button. You will be prompted to provide your email address and a password. Once you have entered this information, click on “Sign Up” to create your Zoom account.
If you prefer, you can also sign up for a Zoom account using your existing Google or Facebook credentials. Simply click on the “Sign In with Google” or “Sign In with Facebook” button on the Zoom homepage and follow the instructions to link your Zoom account to your chosen platform.
After signing up, you will receive an email from Zoom with a confirmation link. Click on the link to verify your email address and activate your Zoom account. Once activated, you’re ready to move on to the next step.
It’s important to note that Zoom offers different account types to cater to different needs. The most common types are Basic, Pro, and Business. The Basic account is free and allows you to host meetings with up to 100 participants for 40 minutes per session. If you require more participants or longer meeting durations, you may need to consider upgrading to a Pro or Business account.
Now that you have successfully signed up for a Zoom account, you’re one step closer to hosting your own virtual meetings. In the next section, we’ll guide you through the process of downloading and installing the Zoom application, so you can start connecting with others effortlessly.
Step 2: Download and Install the Zoom Application
Once you have signed up for a Zoom account, the next step is to download and install the Zoom application on your device. The Zoom application can be installed on a wide range of devices, including computers, smartphones, and tablets. Follow the instructions below to get started:
- If you’re using a computer, visit the Zoom Download Center at zoom.us/download. From there, you can download the Zoom application for your operating system. If you’re on a Windows computer, click on the “Download” button under the “Zoom Client for Meetings” section. If you’re on a Mac, click on the “Download” button under the “Zoom Client for Meetings” or “Zoom Rooms” section, depending on your needs.
- If you’re on a mobile device, such as a smartphone or tablet, you can download the Zoom application from the App Store (iOS) or Google Play Store (Android). Open your device’s app store, search for “Zoom Cloud Meetings,” and tap on the “Install” or “Get” button to download and install the application.
- Once the download is complete, locate the downloaded file on your computer or the Zoom application on your mobile device and open it.
- Follow the on-screen prompts to install the Zoom application. Depending on your computer’s settings, you may be required to provide administrative access to complete the installation.
- Once the installation is complete, launch the Zoom application by double-clicking on the desktop shortcut (on a computer) or tapping on the Zoom icon (on a mobile device).
After launching the Zoom application, you will be prompted to log in using your Zoom account credentials. Enter your email address and password and click on the “Sign In” button.
Congratulations! You have successfully downloaded and installed the Zoom application on your device. In the next section, we’ll guide you through the process of logging into your Zoom account and getting ready to host your first meeting.
Step 3: Log In to Your Zoom Account
Now that you have installed the Zoom application, it’s time to log in to your Zoom account. This will give you access to all the features and settings that Zoom has to offer. Follow the steps below to log in:
- Launch the Zoom application on your device by double-clicking on the desktop shortcut (on a computer) or tapping on the Zoom icon (on a mobile device).
- On the main screen of the Zoom application, you will see the option to log in. Click on the “Sign In” button.
- In the login window, enter the email address and password associated with your Zoom account.
- If you signed up using your Google or Facebook credentials, you can click on the “Sign In with Google” or “Sign In with Facebook” button to log in using those platforms.
- After entering your credentials, click on the “Sign In” button to log in to your Zoom account.
Once you have successfully logged in, you will be greeted with the Zoom application’s main dashboard, where you can access your profile, settings, and features such as scheduling and joining meetings.
It’s important to note that if you have opted for a Pro or Business account, you may have additional features and settings available to you. Take some time to explore the different options and customize your account settings according to your needs.
Now that you’re logged in, you’re ready to start hosting and joining Zoom meetings. In the next section, we’ll walk you through the process of scheduling a Zoom meeting so you can start connecting with others.
Step 4: Schedule a Zoom Meeting
Now that you’re logged in to your Zoom account, it’s time to schedule your first Zoom meeting. Scheduling a meeting in advance allows you to plan, invite participants, and ensure that everyone is available at the designated time. Follow the steps below to schedule a Zoom meeting:
- On the Zoom application’s main dashboard, click on the “Schedule” button. Alternatively, you can also click on the “New Meeting” button and select “Schedule Meeting” from the drop-down menu.
- In the meeting scheduling window, you’ll need to fill out the necessary details for your meeting. This includes the meeting topic, date, time, and duration.
- You can also customize various settings for your meeting, such as enabling or disabling video and audio for participants, allowing screen sharing, and controlling the level of participant interaction.
- Additionally, you have the option to set a password for your meeting. This adds an extra layer of security and ensures that only invited participants can join the meeting.
- Once you have entered all the necessary details and customized the settings to your preference, click on the “Schedule” button to save the meeting.
- After scheduling the meeting, you will be provided with a unique meeting ID and a join link. These will be used by participants to access the meeting at the scheduled time.
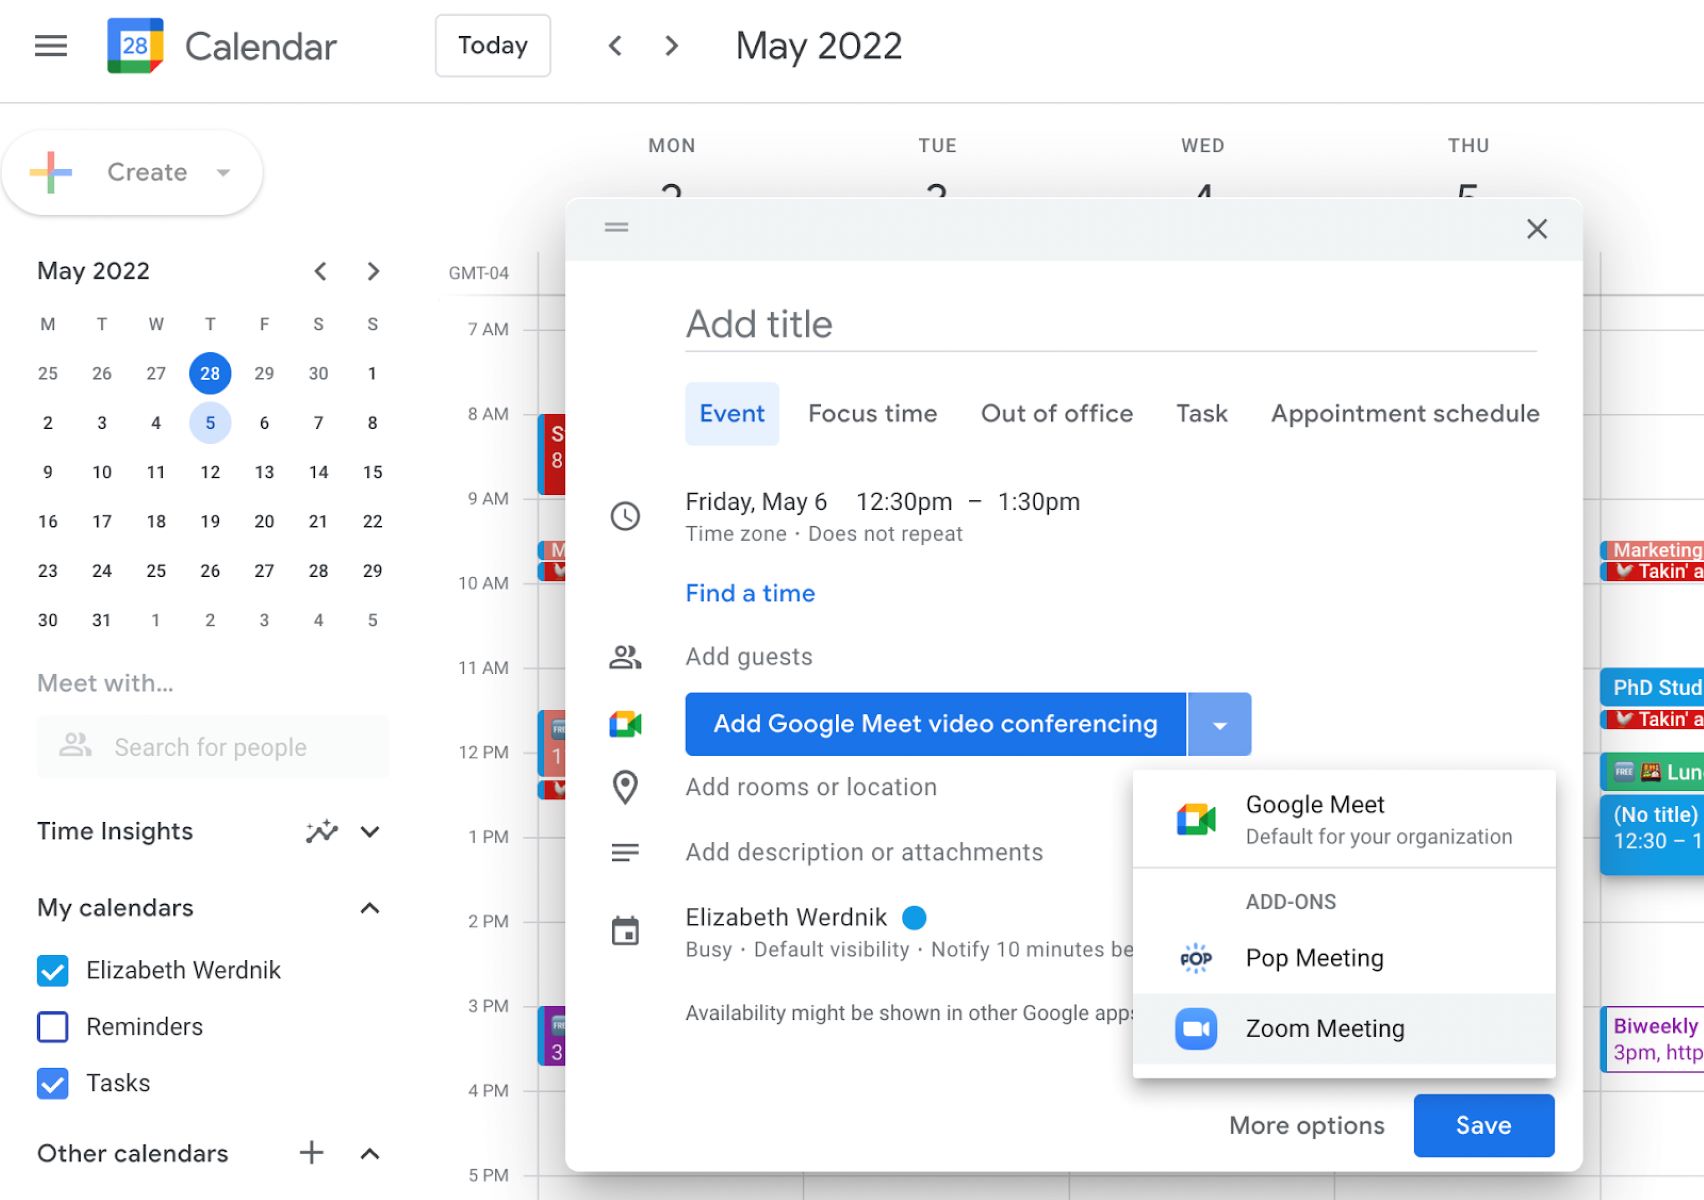
- You can also add the meeting to your calendar, such as Google Calendar or Outlook, by clicking on the respective icons provided in the scheduling window.
Now that you have successfully scheduled a Zoom meeting, you can invite participants to join. In the next section, we’ll show you how to invite participants and send out meeting invitations, so you can ensure that all attendees are aware of the meeting details.
Step 5: Customize Your Meeting Settings
Once you have scheduled a Zoom meeting, it’s time to customize the meeting settings according to your preferences. Zoom provides a wide range of options that allow you to tailor the meeting experience to best suit your needs. Follow the steps below to customize your meeting settings:
- After scheduling a meeting, locate the meeting in your Zoom application’s dashboard or calendar.
- Click on the meeting to open its settings and options.
- In the meeting settings, you can customize various aspects of the meeting, such as video and audio settings, screen sharing options, participant permissions, and more. Take some time to explore these settings and adjust them according to your requirements.
- If you want to enable or disable video for participants, you can choose to do so in the settings. You can also decide whether participants can join with or without audio.
- Additionally, you can choose to allow or restrict screen sharing for participants. This allows you to have more control over the content that is shared during the meeting.
- In the participant permissions section, you can decide whether participants can chat, annotate, or rename themselves during the meeting. Adjust these settings based on the level of interactivity you want to allow.
- Remember to save your settings once you have made the desired adjustments.
Customizing your meeting settings allows you to create a tailored and seamless meeting experience. By adjusting the settings to your preferences, you can ensure that the meeting runs smoothly and efficiently.
In the next section, we’ll guide you through the process of inviting participants to your Zoom meeting. Sending out meeting invitations helps to ensure that all participants are aware of the meeting details and can join at the scheduled time.
Step 6: Invite Participants to Your Zoom Meeting
Now that you have customized your meeting settings, it’s time to invite participants to join your Zoom meeting. Zoom provides several convenient options for inviting participants, making it easy to share the meeting details with your intended audience. Follow the steps below to invite participants to your Zoom meeting:
- After scheduling a meeting, locate the meeting in your Zoom application’s dashboard or calendar.
- Click on the meeting to open its settings and options.
- In the meeting settings, you will find the options to invite participants. Click on the “Invite” button to access these options.
- You have the option to invite participants via email, by copying a URL link, or by sharing the meeting details through integrations with your favorite calendar or messaging applications, such as Google Calendar, Microsoft Outlook, or Slack.
- If you choose to invite participants via email, a new email message will open with a pre-populated meeting invitation. Enter the email addresses of the participants you want to invite and customize the message if needed. Then, click on the “Send” button to send out the invitation.
- If you prefer to copy the meeting URL link, you can do so by clicking on the “Copy Invitation” button. You can then paste the link into your preferred communication channel, such as a chat message or a calendar event.
- If you have integrated Zoom with your calendar or messaging applications, you can use the respective options to easily share the meeting details with participants.
Remember to include important information in the meeting invitation, such as the date, time, and duration of the meeting, as well as any necessary passcodes or meeting IDs.
By taking the time to invite participants and share the meeting details in advance, you can ensure that everyone is aware of the meeting and has the necessary information to join at the scheduled time.
In the next section, we’ll cover the process of starting and managing your Zoom meeting, so you can confidently host and facilitate an engaging virtual gathering.
Step 7: Start and Manage Your Zoom Meeting
Now that you have invited participants to your Zoom meeting, it’s time to start and manage the meeting. Zoom provides a host of features and tools to help you facilitate a smooth and productive virtual gathering. Follow the steps below to start and manage your Zoom meeting:
- At the scheduled time of your meeting, open the Zoom application on your device and log in to your Zoom account, if you haven’t already.
- In the Zoom application’s main dashboard, locate the scheduled meeting and click on the “Start” button. Alternatively, you can also start the meeting directly from your calendar or by clicking on the meeting link.
- Once the meeting has started, you will have access to various controls and options. These include audio and video settings, participant management tools, screen sharing options, and more.
- If needed, you can use the audio settings to adjust your microphone and speaker settings. Ensure that your audio is clear and participants can hear you properly.
- You can also toggle your video on or off, depending on your preference and the nature of the meeting. If you choose to share your video, make sure you’re in a well-lit area and your camera is positioned appropriately.
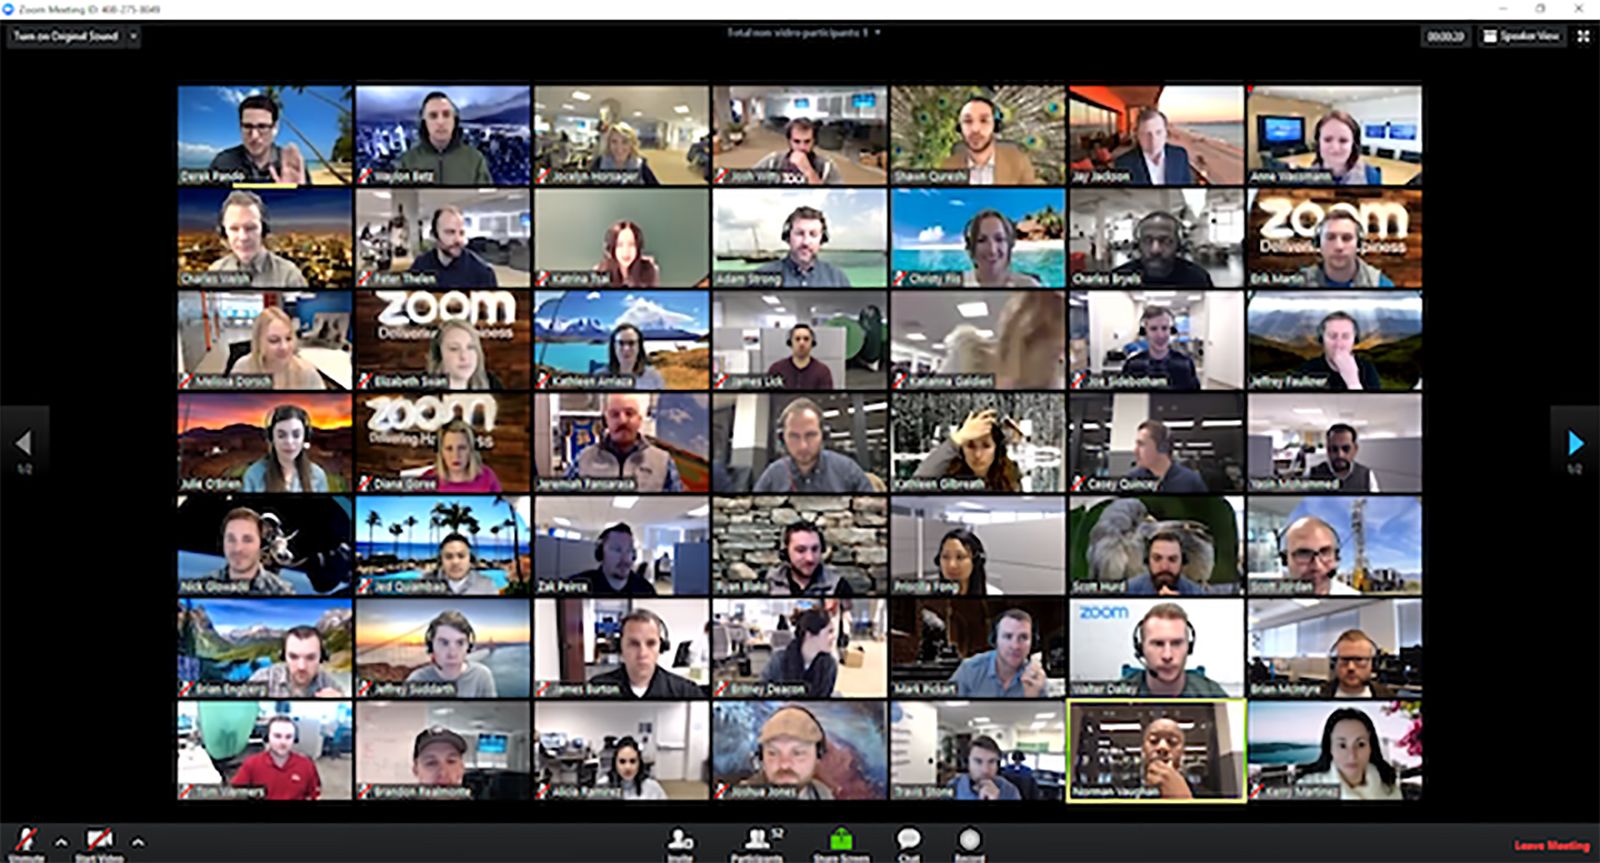
- Throughout the meeting, you can manage participants by muting or unmuting their audio, enabling or disabling their video, and controlling their screen sharing capabilities. These options can be accessed through the “Participants” panel.
- If you want to share your screen with participants, click on the “Share Screen” button. You can then choose to share your entire screen or a specific application or window.
- Throughout the meeting, be mindful of the engagement levels of participants and encourage active participation, such as asking for input, posing questions, or facilitating discussions.
Remember to keep track of time and ensure that the meeting stays on schedule. If needed, you can also use the built-in timer feature in Zoom to keep everyone informed about the remaining meeting time.
By effectively starting and managing your Zoom meeting, you can create a productive and engaging virtual environment for all participants.
In the next section, we’ll explore how you can share your screen and files during a Zoom meeting, allowing you to present information and collaborate seamlessly with others.
Step 8: Sharing Screen and Files
Sharing your screen and files during a Zoom meeting enables you to present information, collaborate with participants, and provide visual aids. Zoom offers intuitive screen sharing options that allow you to share your entire screen or specific applications and files. Follow the steps below to share your screen and files during a Zoom meeting:
- While in a Zoom meeting, locate the toolbar at the bottom of the Zoom window.
- Click on the “Share Screen” button. A new window will appear, presenting you with various screen sharing options.
- If you want to share your entire screen, click on the “Desktop” option. This will share everything visible on your screen, including open applications and files.
- If you prefer to share a specific application or window, click on the respective option in the screen sharing window. You can then select the specific application or window you want to share.
- If you have any files or documents you want to share, you can click on the “File” option in the screen sharing window. This allows you to browse your computer and select the file you wish to share.
- Once you have selected the desired screen or file to share, click on the “Share” button.
- Your screen or file will now be visible to all meeting participants. They can follow along, view the content, and collaborate as needed.
- To stop screen sharing, click on the “Stop Share” button located in the toolbar at the bottom of the Zoom window.
Sharing your screen and files during a Zoom meeting enhances collaboration and provides visual support to your discussions. It allows you to effectively present information, showcase presentations, and even collaborate on documents or spreadsheets.
Keep in mind that screen sharing may differ depending on the device and operating system you’re using. Make sure to familiarize yourself with the specific screen sharing options available on your device for the best experience.
In the next section, we’ll discuss how to record your Zoom meeting, allowing you to capture important discussions and reference them later.
Step 9: Recording Your Zoom Meeting
Recording your Zoom meetings can be a valuable tool for future reference, sharing with absent participants, or for creating training materials. With Zoom’s built-in recording feature, you can easily capture your meetings and save them for later use. Follow the steps below to record your Zoom meeting:
- While in a Zoom meeting, locate the toolbar at the bottom of the Zoom window.
- Click on the “Record” button. A menu will appear with recording options.
- Select whether you want to record the meeting to the cloud or to your local device. The cloud option allows you to save the recording directly to your Zoom account, while the local option saves the recording on your computer.
- If you choose the cloud option, the recording will start automatically. If you opt for the local option, a file explorer window will open, allowing you to choose the folder where you want to save the recording.
- During the meeting, the “Record” button will change to a red “Recording” icon, indicating that the meeting is being recorded.
- To stop the recording, click on the “Stop Recording” button in the toolbar at the bottom of the Zoom window.
- If you recorded the meeting to the cloud, the recording will automatically be processed and saved to your Zoom account. If you recorded the meeting locally, the recording file will be saved to the designated folder on your computer.
- After the meeting, you can access and manage your recorded meetings in the Zoom application or on the Zoom website, depending on where you chose to save the recording.
Keep in mind that recording meetings may be subject to privacy and consent considerations. Always ensure that you have obtained the necessary permissions from participants before recording the meeting, and be mindful of any sensitive or confidential information that may be shared during the recording.
By recording your Zoom meetings, you can create a valuable library of resources that can be revisited, shared, and utilized for various purposes.
Congratulations! You have now completed all the essential steps to set up and manage your Zoom meetings. Whether you’re using Zoom for work, education, or personal connections, these steps will help you navigate the platform with ease and confidence. Embrace the power of virtual communication and make the most of your Zoom meetings!
Conclusion
Congratulations on completing the journey of setting up and managing your Zoom meetings! In this article, we explored the step-by-step process of signing up for a Zoom account, downloading and installing the Zoom application, logging in to your account, scheduling meetings, customizing settings, inviting participants, starting and managing meetings, sharing your screen and files, as well as recording your meetings for future reference.
Zoom has revolutionized the way we communicate and connect with others, especially in the era of remote work and virtual gatherings. With its intuitive interface, user-friendly features, and powerful capabilities, Zoom offers a seamless and efficient platform for hosting productive and engaging meetings.
By following these steps, you can confidently navigate the Zoom application, tailor your meeting settings, invite participants, and effectively manage your meetings. Whether you’re organizing business meetings, conducting virtual classes, or simply staying connected with friends and family, Zoom provides a versatile and reliable solution for all your communication needs.
Remember to make the most of Zoom’s features, such as screen sharing, file sharing, and recording capabilities, to enhance collaboration, engagement, and productivity during your meetings. Additionally, always prioritize the privacy and consent of participants when recording meetings or sharing sensitive information.
So, embrace the power of Zoom and enjoy the convenience of seamless virtual meetings. Whether you’re a seasoned Zoom pro or just starting, you now have the knowledge and tools to make your meetings a success.
Thank you for joining us on this journey, and happy Zooming!