Introduction
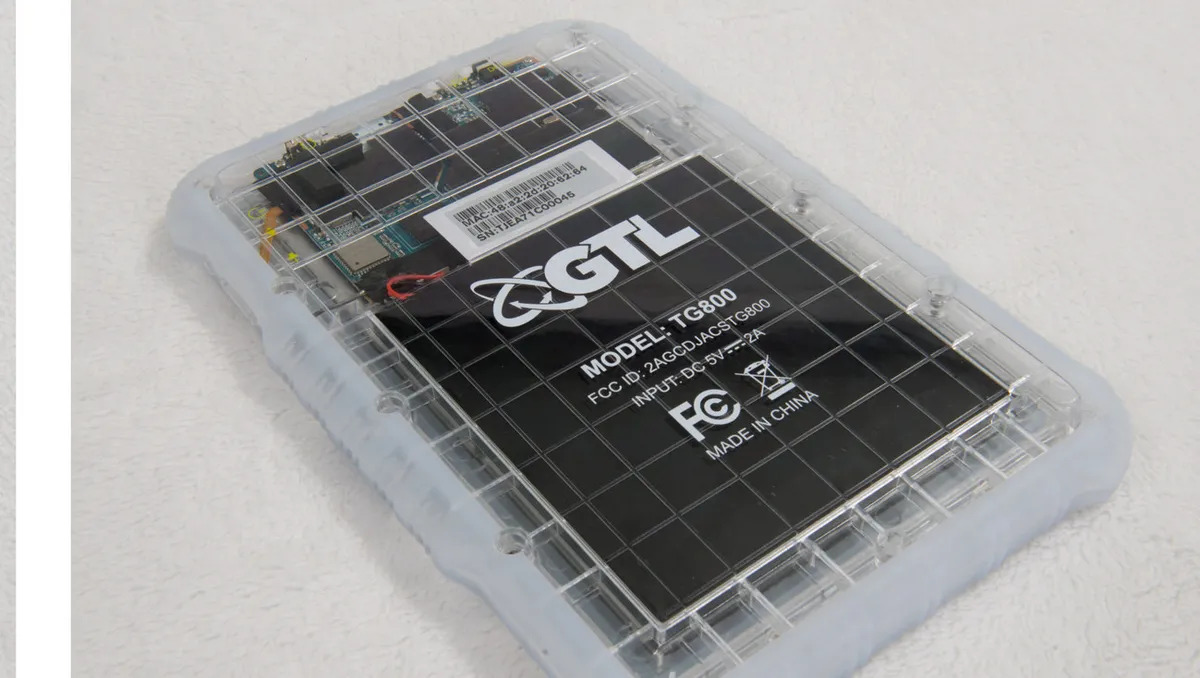
Welcome to the world of GTL Tablets! These sleek and powerful devices can offer a wide range of features and functionalities, but if you’re looking to take control of your tablet and unlock its full potential, you may want to consider rooting it. Rooting a GTL tablet gives you administrator access to the operating system, allowing you to customize and optimize your device in ways that were previously inaccessible. In this guide, we’ll take you through the step-by-step process of rooting your GTL tablet, ensuring that you have all the necessary precautions in place and providing you with the necessary tools to complete the rooting process successfully.
Before we dive into the technical details, it’s important to note that rooting your GTL tablet can void its warranty and potentially lead to the loss of data or even bricking your device if not done correctly. Therefore, it’s crucial to approach this process with caution and follow the steps carefully. While rooting offers many benefits, it’s essential to weigh the pros and cons and understand the risks involved before proceeding.
Rooting your GTL tablet allows you to:
- Remove pre-installed bloatware: Often, GTL tablets come with pre-installed apps that you may not use or want. By rooting your tablet, you can remove these unnecessary apps and free up valuable storage space.
- Customize your tablet’s appearance: With root access, you can install custom ROMs and themes to personalize the look and feel of your tablet. You can also tweak settings and customize the user interface to suit your preferences.
- Boost performance: Rooting gives you the ability to overclock the processor, optimize system resources, and improve battery life. This can result in a smoother and more efficient experience when using your tablet.
- Access blocked features: Some features and settings on GTL tablets may be restricted by the manufacturer. By rooting, you can unlock these hidden features and gain full control over your tablet’s capabilities.
Now that you have a clearer understanding of what rooting your GTL tablet entails and the potential benefits it offers, let’s move on to the necessary precautions to take before starting the rooting process.
Understanding Rooting
Rooting is the process of gaining privileged control, known as root access, over the operating system of your GTL tablet. With root access, you can modify system files, install custom ROMs, remove restrictions imposed by the manufacturer, and perform other advanced operations that are not possible on a non-rooted device.
Rooting your GTL tablet essentially grants you administrative rights, similar to the “Administrator” account on a Windows computer. This elevated access lets you make changes to core system files and settings that are otherwise inaccessible. It’s important to note that rooting your tablet also comes with its risks and considerations, so it’s essential to have a good understanding of the process before proceeding.
Here are a few key things to keep in mind when it comes to rooting:
- Warranty implications: Rooting your GTL tablet typically voids the manufacturer’s warranty. This means that if you encounter any issues or require technical support, the manufacturer may refuse to assist you, as rooting is considered an unauthorized modification.
- Risks of bricking: Rooting your tablet can potentially lead to bricking, which refers to rendering your device inoperable. While the risk is relatively low if you follow the instructions carefully, there is still a possibility of encountering errors or compatibility issues that could cause your tablet to become unusable.
- Security concerns: Rooting your GTL tablet removes certain security measures put in place by the manufacturer. This can expose your device to potential vulnerabilities and make it more susceptible to malware or other security threats. It’s important to exercise caution and only install apps and software from trusted sources.
- Updates and compatibility: Rooting your tablet may affect future software updates or compatibility with certain apps and services. Manufacturers often release updates to patch vulnerabilities or introduce new features, and these updates may not be compatible with rooted devices. You may need to manually update your tablet or revert to the original software to install the latest updates.
By understanding the implications and risks associated with rooting, you can make an informed decision about whether it’s the right choice for you. Now that you have a clear understanding of what rooting entails, let’s move on to the precautions you should consider before proceeding with the rooting process.
Precautions Before Rooting
Before proceeding with the rooting process for your GTL tablet, it’s crucial to take certain precautions to minimize risks and ensure a smooth and successful experience. These precautions will help protect your device and data, and also provide you with a backup plan in case something goes wrong during the rooting process.
Here are some essential precautions to consider:
- Backup Your Data: Before you start rooting your GTL tablet, it’s essential to back up all your important data, including contacts, photos, videos, and any other files you don’t want to lose. This backup can be done using the built-in backup feature of your tablet or by connecting it to a computer and transferring the data.
- Research and Gather Information: Familiarize yourself with the rooting process specific to your GTL tablet model. Search online forums, tutorials, and user experiences to understand the potential pitfalls, common issues, and successful methods used by others. This will give you a better understanding of what to expect and help you make informed decisions.
- Ensure Sufficient Battery Level: Make sure your tablet has enough battery charge or is connected to a power source during the rooting process. Sudden power loss can lead to complications or even bricking of your device. It’s recommended to have at least 50% battery before proceeding.
- Verify Compatibility: Ensure that the rooting software you are planning to use is compatible with your GTL tablet model and the specific version of the operating system installed on your device. Using incompatible software can lead to errors or issues during the rooting process, so double-check before proceeding.
- Enable USB Debugging: Go to your tablet’s settings and enable USB debugging mode. This option allows your computer to communicate with your tablet during the rooting process. You can find the USB debugging option under “Developer options” in the device settings.
- Install Required Drivers: Connect your GTL tablet to your computer and ensure that the necessary USB drivers are installed. These drivers allow your computer to recognize and establish a connection with your tablet. You can often find the required drivers on the manufacturer’s website or through the rooting software you are using.
By taking these precautions before starting the rooting process, you reduce the chances of encountering issues or data loss. It’s important to approach the rooting process with care and attention to detail, as it involves making significant changes to your tablet’s operating system. In the next sections, we will guide you through the step-by-step process of rooting your GTL tablet, ensuring a seamless and successful rooting experience.
Step 1: Enable USB Debugging
Before you can begin the process of rooting your GTL tablet, you must enable USB debugging mode on your device. USB debugging allows your tablet to communicate with your computer and establish a connection that is necessary for the rooting process.
Follow these steps to enable USB debugging on your GTL tablet:
- Open the Settings app on your tablet. You can usually find it in the app drawer or by swiping down from the top of the screen and tapping the gear icon.
- Scroll down and find the “About phone” or “About tablet” option. Tap on it to access the device information.
- Look for the “Build number” or “Build version” option. Tap on it several times quickly until you see a message indicating that you are now a developer. This will enable developer options on your tablet.
- Go back to the main Settings menu and scroll down to find the newly enabled “Developer options.”
- Tap on “Developer options” and locate the “USB debugging” option. It is usually listed under the “Debugging” or “Developer tools” section.
- Toggle the switch next to “USB debugging” to enable it. You may see a warning message informing you about the potential risks of enabling USB debugging. Confirm to proceed.
Once you have successfully enabled USB debugging on your GTL tablet, you are ready to connect it to your computer and proceed with the rooting process. By enabling USB debugging, you allow your tablet and the rooting software to communicate effectively and make the necessary modifications to your device’s operating system.
It’s important to remember that USB debugging mode should be enabled only during the rooting process. After rooting is complete, it is recommended to disable USB debugging to ensure the security of your device.
In the next step, we will guide you through installing the required drivers for your GTL tablet, which will enable your computer to recognize and establish a connection with your device.
Step 2: Install Required Drivers
Before you can proceed with rooting your GTL tablet, you need to ensure that the necessary USB drivers are installed on your computer. These drivers allow your computer to recognize and establish a connection with your tablet, enabling smooth communication during the rooting process.
Follow these steps to install the required drivers for your GTL tablet:
- Start by connecting your GTL tablet to your computer using a USB cable. Make sure your tablet is powered on and in USB debugging mode (as explained in the previous step).
- Your computer should automatically attempt to install the necessary drivers. If prompted, choose the option to search for drivers online or install them automatically. This will allow your computer to download and install the appropriate drivers for your tablet.
- If your computer doesn’t automatically install the drivers, you can search for them manually. Visit the official website of the GTL tablet manufacturer or search for your tablet model’s support page. Look for the “Downloads” or “Drivers” section and locate the drivers specific to your tablet model and operating system.
- Download the drivers onto your computer and locate the installer file. Double-click on the installer file to run it and follow the on-screen instructions to install the drivers.
- Once the drivers are successfully installed, disconnect your tablet from your computer and then reconnect it.
- Your computer should now recognize your GTL tablet and establish a proper connection, allowing you to proceed with the rooting process.
Installing the required drivers is crucial to ensure a seamless connection between your GTL tablet and your computer. Without the proper drivers, your computer may not be able to recognize your tablet, and the rooting process may encounter errors or difficulties.
It’s important to note that the steps for installing drivers may vary depending on your tablet model and operating system. Refer to the manufacturer’s instructions or support resources for specific guidance tailored to your device.
With the drivers successfully installed and your tablet properly connected to your computer, you’re now ready to move on to the next step: downloading and installing the rooting software. This software will facilitate the rooting process and allow you to gain root access on your GTL tablet.
Step 3: Download and Install Rooting Software
Now that you have enabled USB debugging and installed the necessary drivers for your GTL tablet, the next step is to download and install the rooting software onto your computer. The rooting software will facilitate the process of gaining root access on your tablet.
Follow these steps to download and install the rooting software:
- Start by researching and identifying a reputable rooting software that supports your specific GTL tablet model. Look for well-known options such as KingoRoot, OneClickRoot, or SuperSU. Visit their official websites or trusted software repositories to download the software.
- Once you have chosen the rooting software, locate the download link on the website or repository. Click on the download button or link to begin downloading the software installer.
- Once the download is complete, navigate to the location where the installer file has been saved on your computer. Double-click on the installer file to run it.
- Follow the on-screen instructions provided by the rooting software’s installer. This may include accepting the software’s terms and conditions, selecting an installation location, and choosing any additional options or settings.
- Once the installation is complete, launch the rooting software on your computer.
- Connect your GTL tablet to your computer using a USB cable.
- Ensure that your tablet is still in USB debugging mode and that it is properly recognized by your computer.
- Within the rooting software, you may need to locate the “Start,” “Root,” or “Go” button to initiate the rooting process. Click on this button to begin the rooting process for your GTL tablet.
- Wait for the rooting software to perform the necessary operations. This may involve installing scripts, modifying system files, or executing other actions to gain root access on your tablet.
- Once the rooting process is complete, you will receive a notification or a message indicating that your GTL tablet has been successfully rooted. You can then proceed to the next steps to verify root access and customize your tablet further.
It’s important to note that different rooting software may have slightly different procedures and interfaces. Follow the instructions provided by the specific software you have chosen, and refer to the software’s documentation or support resources for any specific guidance or troubleshooting.
Now that you have successfully downloaded and installed the rooting software, and your GTL tablet is connected to your computer, you are ready for the next steps in the rooting process. In the upcoming steps, we will guide you through connecting your tablet to your computer and performing the actual rooting process.
Step 4: Connect Tablet to Computer
With the rooting software downloaded and installed on your computer, it’s time to connect your GTL tablet to your computer. This connection is crucial as it allows the rooting software to communicate with your tablet and perform necessary operations to gain root access.
Follow these steps to connect your tablet to your computer:
- Ensure that your tablet is powered on and in USB debugging mode (enabled in Step 1).
- Using a USB cable, connect your GTL tablet to an available USB port on your computer.
- Wait for your computer to detect and recognize your tablet. This may take a few moments.
- Once your tablet is recognized, make sure there is a stable connection between your tablet and your computer. Ensure that the USB cable is securely plugged in on both ends.
It’s important to note that in some cases, you may need to unlock your tablet’s screen and choose the “File Transfer” or “MTP” (Media Transfer Protocol) option on your tablet’s notification panel to establish a proper connection with your computer. The specific steps may vary depending on your tablet’s manufacturer and operating system version.
When your GTL tablet is successfully connected to your computer, you’re ready to move on to the next step: starting the rooting process. We’ll guide you through the steps to initiate and complete the rooting process in the upcoming sections.
Step 5: Start the Rooting Process
Now that your GTL tablet is successfully connected to your computer, it’s time to start the rooting process. The rooting software you previously installed will guide you through the necessary steps to gain root access on your tablet and unlock its full potential.
Follow these steps to initiate the rooting process:
- Launch the rooting software on your computer.
- Ensure that your GTL tablet is still connected to your computer via the USB cable.
- Within the rooting software’s interface, locate the “Start,” “Root,” or “Go” button. This button is typically prominently displayed as it initiates the actual rooting process.
- Click on the “Start,” “Root,” or “Go” button to begin the rooting process.
- Wait for the rooting software to perform the necessary operations on your tablet’s operating system. This may involve installing scripts, modifying system files, or executing other actions to gain root access.
- During the rooting process, it’s crucial to follow any instructions or prompts provided by the rooting software. This may include granting permissions on your tablet, confirming actions, or rebooting the device.
- Be patient and allow the software to complete the rooting process. This may take several minutes, so do not interrupt or disconnect your tablet during this time.
- Once the rooting process is complete, you will receive a notification or message indicating that your GTL tablet has been successfully rooted.
It’s important to note that the rooting process may differ slightly depending on the rooting software you have chosen and specific instructions provided by the software. It’s essential to carefully follow the instructions and prompts given by the software to ensure a successful rooting process.
With the rooting process completed, you are now one step closer to unlocking the full potential of your GTL tablet. In the following steps, we will guide you through post-rooting tasks, such as verifying root access and rebooting your tablet, to ensure a smooth transition to the rooted state.
Step 6: Wait for Rooting to Complete
Once you have initiated the rooting process on your GTL tablet, it’s important to exercise patience and allow the rooting software to complete its operations. This step requires you to wait while the software performs the necessary tasks to gain root access on your device.
Here are a few things to keep in mind during this waiting period:
- Do not interrupt the process: It is crucial not to interrupt or interfere with the rooting process. Any disruption or premature disconnection of your tablet from the computer can lead to potential errors or issues. Allow the software to complete its operations without interruption.
- Be mindful of processing time: The rooting process may take some time to complete, depending on various factors such as your tablet model, software, and computer speed. It could take a few minutes or longer. During this time, it’s normal for the software to display progress indicators or messages indicating the current state of the process. Stay patient and let the software do its work.
- Monitor the rooting software: While waiting, you can keep an eye on the rooting software’s interface for any updates or prompts. Some rooting software may provide additional instructions for you to follow during the process. Make sure to read and follow these instructions carefully.
- Avoid unnecessary interactions: It’s generally recommended to avoid unnecessary interactions with your GTL tablet during the rooting process. Avoid launching additional apps, making system changes, or performing any actions that may interfere with the rooting software’s operations.
Remember, the length of time required for the rooting process will depend on various factors. It’s crucial to exercise patience and let the software complete its operations. Interrupting or terminating the process prematurely can potentially lead to errors or an incomplete rooting of your GTL tablet.
Once the rooting process is successfully completed, you can proceed to the next step to verify root access on your tablet. This step will help you confirm if the rooting process was successful and if you now have full administrative control over your device.
Step 7: Reboot and Verify Root Access
After the rooting process of your GTL tablet is complete, it’s important to reboot your device to finalize the changes made to the operating system. Additionally, you’ll need to verify if the rooting process was successful and if you now have root access on your tablet. This step will allow you to confirm that your tablet is effectively rooted and ready for further customization and optimization.
Follow these steps to reboot your tablet and verify root access:
- Make sure all applications and processes are closed on your GTL tablet.
- Disconnect your tablet from the computer by removing the USB cable.
- On your tablet, press and hold the power button until a menu appears.
- Select the “Restart” or “Reboot” option from the menu. This will prompt your tablet to restart.
- Allow your tablet to fully reboot and reach the lock screen or home screen.
- Once your tablet is booted up, open the app drawer or home screen on your GTL tablet.
- Look for an app called “Superuser” or “SuperSU.” This app is a common indicator that your tablet has been successfully rooted and has root access.
- Launch the “Superuser” or “SuperSU” app to verify root status.
- If you see a prompt asking for root permissions or access, the rooting process was successful, and your tablet now has root access.
- Additionally, you can download and install a root checker app from the Google Play Store to confirm root access. These apps will provide a definitive confirmation if your tablet is rooted.
If you encounter any issues during the reboot or verification process, ensure that the rooting software you used is compatible with your GTL tablet model and that the rooting process was completed successfully. You may need to repeat the rooting process or seek further assistance from online forums or support resources.
With verified root access, you now have full control and administrative privileges over your GTL tablet. You can now proceed with customizing your tablet’s appearance, optimizing performance, and unlocking advanced features that were previously inaccessible.
Congratulations! You have successfully rooted your GTL tablet and unlocked its full potential. Enjoy exploring the possibilities and taking your tablet experience to the next level!
Conclusion
Congratulations! You have successfully completed the process of rooting your GTL tablet. By gaining root access, you have unlocked a wealth of customization options and capabilities that were previously unavailable. Rooting your tablet allows you to remove bloatware, personalize the appearance, optimize performance, and access features that were restricted by the manufacturer.
Throughout this guide, you learned about the precautions to take before rooting, how to enable USB debugging, install required drivers, download and install rooting software, connect your tablet to the computer, start the rooting process, and verify root access. Following these steps diligently ensured a smooth and successful rooting experience.
It’s important to remember that rooting your GTL tablet may void its warranty and carries potential risks, such as bricking the device or compromising security. Proceed at your own discretion and weigh the benefits against the risks involved.
Now that your GTL tablet is rooted, you can explore a variety of possibilities to enhance your user experience. Take advantage of custom ROMs, themes, and root-only apps available in the Android community to personalize and optimize your tablet to suit your needs and preferences.
Remember to exercise caution when installing apps or making system modifications and only download from trusted sources to mitigate security risks. Regularly backup your data to prevent any potential loss, and stay updated with the latest security patches and system updates to maintain the smooth functioning of your rooted tablet.
Rooting can be an exciting journey, allowing you to make the most of your GTL tablet’s capabilities. Enjoy the freedom and customization it offers as you unlock new potential and expand the possibilities of your device.