Introduction
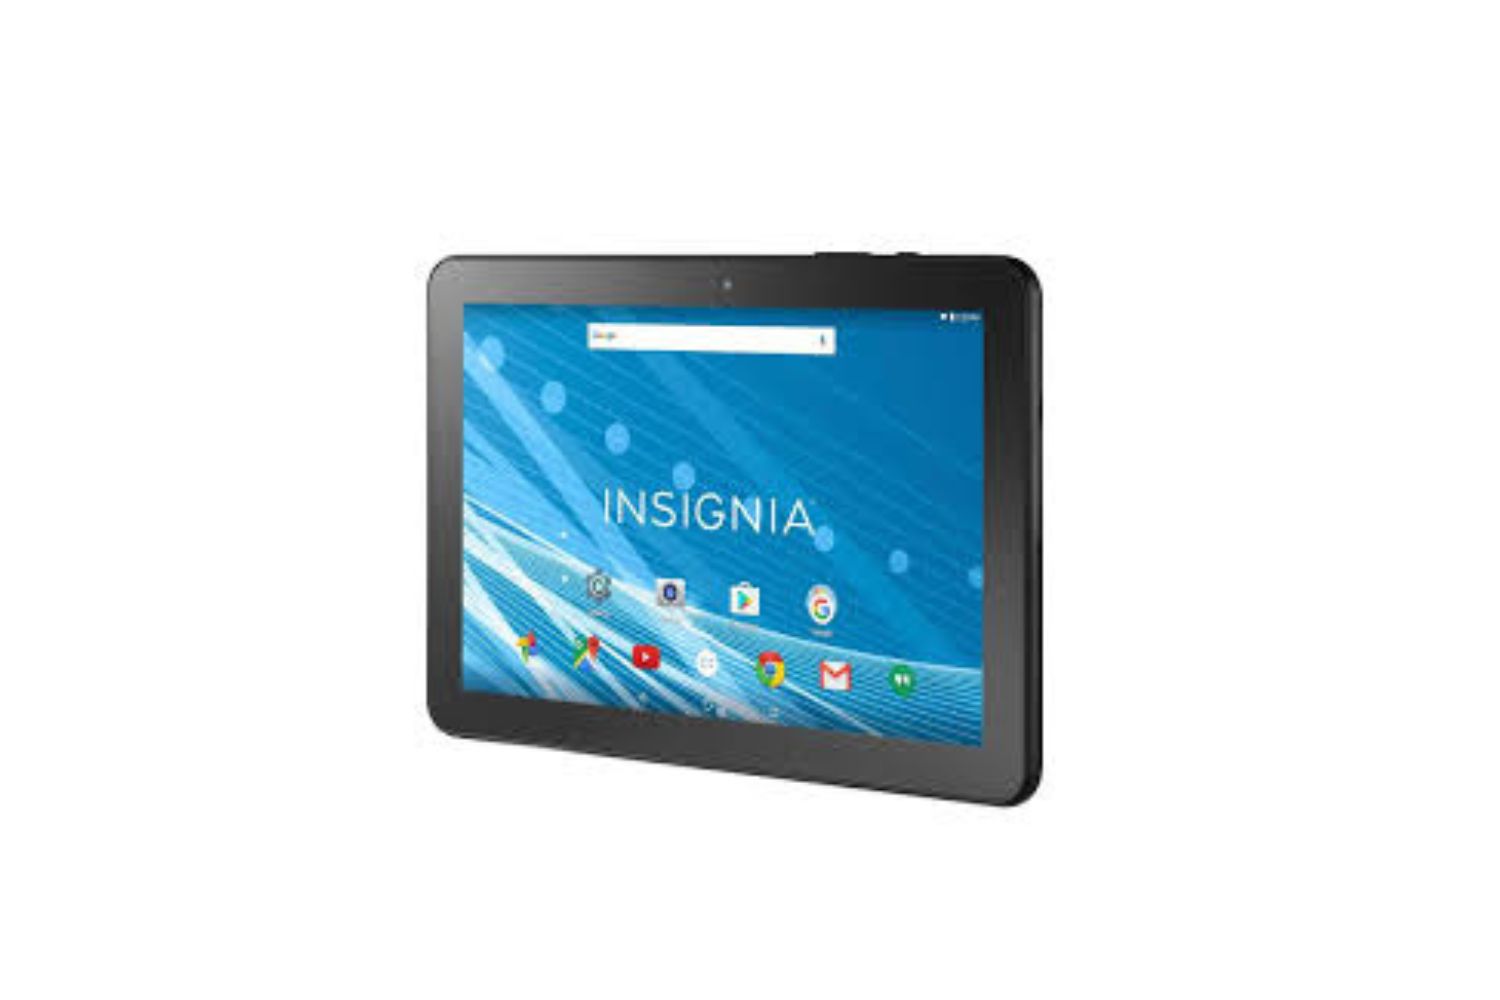
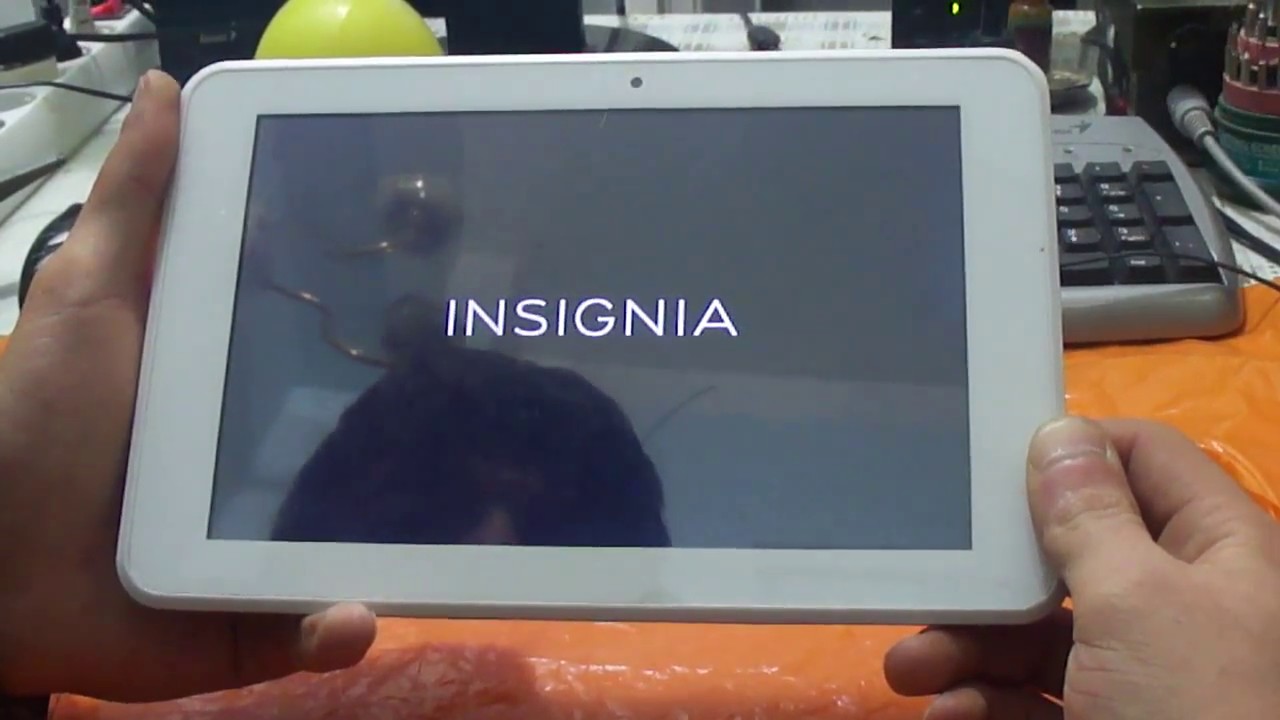
Welcome to this guide on how to root your Insignia Flex Tablet. If you’re looking to unleash the full potential of your tablet and gain more control over its functionalities, then rooting is the way to go. Rooting your Insignia Flex Tablet will allow you to customize your device, install custom ROMs, remove bloatware, and access powerful apps that require root access.
But what exactly is rooting? Rooting is the process of gaining privileged control, often referred to as “root access,” over the Android operating system. Android devices are typically locked down to prevent unauthorized modifications, but by gaining root access, you can bypass these restrictions and have the freedom to make changes that you couldn’t before.
Rooting your Insignia Flex Tablet comes with several advantages. First and foremost, it allows you to install custom ROMs. Custom ROMs are modified versions of the Android operating system that offer additional features, improved performance, and even the latest Android updates for devices that may no longer receive official software updates.
Another advantage of rooting is the ability to remove bloatware. Bloatware refers to the pre-installed apps that come with your device from the manufacturer or carrier. These apps often take up valuable storage space and consume system resources, which can slow down your device. By rooting your tablet, you have the power to uninstall these unwanted apps and free up space.
Additionally, rooting enables you to use powerful apps that require root access. These apps can perform advanced tasks such as backup and restore, deep system customization, and extensive app management. Some popular root-enabled apps include Titanium Backup, Greenify, and Tasker.
Before we begin the rooting process, there are a few things you need to know and do to ensure a smooth and successful root. It’s important to follow the steps carefully and proceed with caution, as rooting your device can void the warranty and potentially brick your device if done incorrectly.
In the next sections, we will guide you through the step-by-step process of rooting your Insignia Flex Tablet. So, grab your tablet, and let’s get started!
What is Rooting?
Rooting is the process of gaining administrator or “root” access to the Android operating system. It allows users to have privileged control over the device, enabling them to customize and modify various aspects of the system that are otherwise restricted. Think of it as gaining administrative rights on a computer – it gives you complete control over your Android device.
When you purchase an Android device, it comes with certain limitations imposed by the manufacturer or carrier. These limitations are intended to prevent users from making changes that could potentially harm the device or compromise its security. By rooting your Insignia Flex Tablet, you are essentially breaking free from these restrictions and gaining the ability to make changes to the system files and settings that are not normally accessible.
Root access allows you to access and modify system files, install custom ROMs, remove bloatware, and use apps that require root privileges. Let’s take a closer look at what each of these entails:
Access and Modify System Files: Rooting grants you access to the system files of your device, which are usually off-limits to regular users. This means that you can make changes to system-level settings, tweak the performance and appearance of your device, and even remove or replace system apps.
Custom ROMs: A custom ROM is a modified version of the Android operating system that is developed by third-party developers. By installing a custom ROM, you can enjoy additional features, improved performance, and a more streamlined user experience. Custom ROMs often provide the latest Android updates for devices that are no longer supported by the manufacturer.
Remove Bloatware: Bloatware refers to pre-installed apps that come with your device. These apps are often unnecessary, take up valuable storage space, and can’t be uninstalled without root access. By rooting your Insignia Flex Tablet, you can uninstall or disable these bloatware apps, freeing up space and improving the overall performance of your device.
Root-Enabled Apps: There are numerous apps available on the Google Play Store that require root access to unlock their full potential. These apps can perform advanced tasks such as data backup and restoration, advanced system customization, and deep app management. Popular root-enabled apps include Titanium Backup, Greenify, and AdAway.
It’s important to note that rooting your Insignia Flex Tablet comes with both advantages and risks. While rooting can enhance your device’s capabilities and provide a more personalized experience, it also voids your warranty and carries the risk of potentially bricking your device if not done correctly. Therefore, it is crucial to follow the rooting process carefully and ensure that you fully understand the risks involved.
In the next sections, we will guide you through the process of rooting your Insignia Flex Tablet, providing step-by-step instructions to help you achieve root access safely and successfully.
Advantages of Rooting Insignia Flex Tablet
Rooting your Insignia Flex Tablet offers a plethora of advantages that can greatly enhance your device’s functionality and user experience. By gaining root access, you can unlock a whole new level of customization and control over your tablet. Below, we will explore some of the main benefits of rooting your Insignia Flex Tablet:
1. Custom ROMs: One of the major advantages of rooting is the ability to install custom ROMs. These custom versions of the Android operating system offer a wide range of features, optimizations, and customization options that can transform your tablet’s performance and interface. Custom ROMs often provide access to the latest Android updates, even if your device is no longer officially supported.
2. Removing Bloatware: Pre-installed apps, also known as bloatware, are a common nuisance on Android devices. They take up storage space, consume system resources, and cannot be uninstalled without root access. Rooting allows you to remove or disable these unwanted apps, freeing up valuable space and improving system speed and responsiveness.
3. Boosting Performance: With root access, you can optimize your Insignia Flex Tablet’s performance by tweaking various system parameters. You can overclock or underclock the CPU, adjust the scaling of the screen resolution, and control other hardware and software settings to achieve the perfect balance between performance and battery life.
4. Backup and Restore: Rooting opens up the possibility of using powerful backup and restore apps that require root access. These apps allow you to create complete system backups, including app data, settings, and even the operating system. In the event of a system crash or data loss, you can easily restore your device to a previous state, ensuring that your important files and settings are safe.
5. Ad-Blocking: Tired of intrusive ads popping up on your tablet? Rooting allows you to use ad-blocking apps that can effectively remove ads from apps, websites, and even system-level advertisements. This not only eliminates distractions but also improves overall browsing speed and reduces data usage.
6. Advanced Customization: Root access enables you to customize your Insignia Flex Tablet in ways that are not possible on a non-rooted device. You can install custom themes, customize the system fonts, change the boot animation, and apply various modifications to the user interface. This level of personalization allows you to create a truly unique and tailored experience.
7. Enhanced App Management: Rooting gives you deeper control over the apps installed on your tablet. You can use root-enabled apps to freeze or uninstall system apps, manage app permissions in a more granular manner, and even run certain apps as system services for additional functionalities.
It’s important to note that rooting your Insignia Flex Tablet carries some risks and drawbacks. The process can void your warranty, and there is a small chance of damaging your device if not done correctly. However, the benefits and possibilities that come with rooting often outweigh these risks for those seeking a more personalized and powerful Android experience.
In the next sections, we will provide you with a step-by-step guide on how to root your Insignia Flex Tablet, ensuring you have all the information you need to safely and successfully gain root access.
Before You Begin
Before diving into the rooting process for your Insignia Flex Tablet, there are a few essential steps and considerations that you need to keep in mind. Following these guidelines will help ensure a smooth and successful root, minimizing the risks and maximizing the benefits of the process. Here’s what you need to do before you begin:
1. Backup Your Data: Rooting your device involves making system-level changes, which can potentially result in data loss. It’s essential to back up all your important files, photos, videos, and any other data that you don’t want to lose. You can use various backup apps available on the Google Play Store or manually copy your files to an external storage device or cloud service.
2. Research and Understand: Take the time to research and understand the rooting process specific to your Insignia Flex Tablet model. Each device may have different methods and requirements for rooting, so it’s crucial to find reliable resources, such as forums or dedicated websites, that provide detailed instructions and user experiences relating to your particular tablet model.
3. Check Warranty and Risks: Rooting your Insignia Flex Tablet typically voids the manufacturer’s warranty. It’s important to understand this risk before proceeding. Additionally, improper rooting procedures can potentially brick your device, rendering it unusable. However, with proper research, caution, and following the steps carefully, the risks can be minimized.
4. Charge Your Tablet: It is highly recommended to have your Insignia Flex Tablet fully charged or at least around 70% before starting the rooting process. This ensures that your device has enough power to complete the rooting process without the risk of sudden power loss interrupting the procedure.
5. Enable USB Debugging: USB Debugging needs to be enabled on your Insignia Flex Tablet to allow the connection and communication with your computer during the rooting process. To enable USB Debugging, go to Settings > Developer Options (if Developer Options are not visible, go to Settings > About Tablet > Tap on Build Number 7 times to enable Developer Options) > Enable USB Debugging.
6. Install USB Drivers: To establish a proper connection between your Insignia Flex Tablet and your computer, you need to install the necessary USB drivers. These drivers ensure that your computer recognizes and communicates with your tablet. You can find the appropriate USB drivers for your tablet model on the manufacturer’s official website.
7. Prepare ADB and Fastboot: ADB (Android Debug Bridge) and Fastboot are essential tools for the rooting process. They allow you to execute commands on your device via a computer. You will need to set up ADB and Fastboot on your computer by installing the Android SDK Platform Tools or by using standalone packages available on various online resources.
8. Understand the Consequences: Rooting your device grants you more control and customization options, but it also increases the level of responsibility. Carelessly modifying system files or using root-enabled apps without proper knowledge can lead to system instability or security vulnerabilities. Always ensure you understand the potential consequences of your actions and proceed with caution.
By taking these precautionary steps and familiarizing yourself with the necessary prerequisites, you’ll be better prepared to root your Insignia Flex Tablet successfully. Next, we will guide you through the step-by-step process, providing detailed instructions on each stage of the rooting process.
Step 1: Enable Developer Options
In order to unlock the developer options on your Insignia Flex Tablet, follow the step-by-step guide outlined below. Enabling Developer Options is necessary to access advanced settings that will be required for the rooting process:
1. Go to Settings: Start by opening the Settings app on your Insignia Flex Tablet. You can usually find the Settings app in your app drawer or by swiping down from the top of the screen and tapping the gear icon.
2. Open About Tablet: Scroll down in the Settings menu until you find an option called “About Tablet” or “About Device.” Tap on it to proceed.
3. Locate Build Number: In the “About Tablet” section, look for an option called “Build Number” or “Build Version.” This option contains information about the current version of the software running on your tablet. You need to tap on it multiple times to enable the developer options.
4. Tap Build Number: Start tapping on the Build Number option repeatedly. You will typically need to tap it around seven times. As you tap, you will see a message like “You are now X steps away from being a developer” displayed on the screen.
5. Developer Options Activated: After tapping the Build Number option multiple times, you will see a notification or a pop-up message stating “You are now a developer!” This indicates that you have successfully enabled Developer Options on your Insignia Flex Tablet.
6. Access Developer Options: Now, go back to the main Settings menu and scroll down. You should see a new option called “Developer Options” or “Developer Settings.” Tap on it to open the Developer Options menu.
7. Enable Developer Options: Inside the Developer Options menu, you will find numerous advanced settings that are typically hidden from regular users. To enable Developer Options, toggle the switch at the top of the screen. It will prompt you to enter your device’s PIN or password for security purposes.
8. Developer Options Enabled: Once you’ve entered your PIN or password, the Developer Options will be enabled. You can now access and modify the various advanced settings available in this menu.
Enabling Developer Options gives you access to critical settings that will be required in the subsequent steps of the rooting process. It’s important to note that making changes to these settings without proper knowledge can lead to system instability or other issues. Proceed to the next step in the rooting process once you have successfully enabled Developer Options on your Insignia Flex Tablet.
Step 2: Enable USB Debugging
In order to proceed with the rooting process for your Insignia Flex Tablet, it is essential to enable USB Debugging. USB Debugging allows your tablet to communicate with your computer and execute commands during the rooting process. Follow the steps below to enable USB Debugging:
1. Open Settings: Start by opening the Settings app on your Insignia Flex Tablet. You can usually find the Settings app in your app drawer or by swiping down from the top of the screen and tapping the gear icon.
2. Navigate to Developer Options: Scroll down in the Settings menu until you find the “Developer Options” or “Developer Settings” option. Tap on it to open the Developer Options menu.
3. Confirm Developer Options: If you have previously enabled Developer Options, you can skip this step. However, if you haven’t enabled Developer Options yet, you will need to go to “About Tablet” or “About Device” in the Settings menu. Locate the “Build Number” option and tap on it multiple times until you see a notification stating that you are now a developer.
4. Enable USB Debugging: Inside the Developer Options menu, locate the “USB Debugging” option and toggle the switch next to it to enable USB Debugging mode. You may see a prompt asking you to confirm your action. Tap “OK” to enable USB Debugging.
5. Connect Tablet to Computer: Now, using a USB cable, connect your Insignia Flex Tablet to your computer. Make sure to use a reliable and original USB cable for a secure connection.
6. USB Debugging Prompt: Once the tablet is connected to the computer, a prompt should appear on the tablet’s screen asking for permission to allow USB Debugging. Check the box next to “Always allow from this computer” and tap “OK” to grant permission.
7. Verify USB Debugging: To verify that USB Debugging is properly enabled, open the command prompt on your computer and type the command “adb devices” (without quotes) and press Enter. If your Insignia Flex Tablet is listed, along with a device ID, it means that USB Debugging is successfully enabled and your tablet is connected properly.
Enabling USB Debugging is a crucial step in the rooting process, as it allows your computer to communicate with your Insignia Flex Tablet during the rooting procedure. Once USB Debugging is enabled, you can proceed to the next steps in the rooting process with confidence.
Step 3: Install USB Drivers
In order to establish a proper connection between your Insignia Flex Tablet and your computer during the rooting process, you need to install the necessary USB drivers. These drivers ensure that your computer can recognize and communicate with your tablet effectively. Follow the steps below to install the USB drivers for your Insignia Flex Tablet:
1. Identify Tablet Model: Before proceeding, determine the exact model of your Insignia Flex Tablet. You can usually find this information in the “About Tablet” or “About Device” section of the Settings menu on your tablet. Note down the model number as this will help you find the correct USB drivers.
2. Manufacturer’s Website: Visit the official website of Insignia or the tablet’s manufacturer. Look for a support or downloads section where you can find drivers specifically designed for your tablet model. Manufacturers often provide USB drivers for their devices, which can be downloaded directly from their website.
3. Download and Install: Once you have located the correct USB drivers for your Insignia Flex Tablet, download them to your computer. The drivers may come in the form of an executable installer file or as a compressed folder. Extract the contents if necessary, and then run the installer file to begin the installation process.
4. Follow Installation Instructions: Follow the on-screen instructions provided by the USB driver installer. Typically, you will need to agree to the terms and conditions, select the destination folder for the installation, and proceed with the installation. Allow the installation process to complete before moving on.
5. Connect Tablet to Computer: After installing the USB drivers, connect your Insignia Flex Tablet to your computer using a USB cable. Ensure that the cable is securely connected to both the tablet and the computer.
6. Verify Driver Installation: If the USB drivers were installed correctly, your computer should now be able to recognize your Insignia Flex Tablet. To verify this, open the Device Manager on your computer (Windows users can search for “Device Manager” in the Start menu). Expand the “Portable Devices” or “Other Devices” section in the Device Manager window. Your Insignia Flex Tablet should be listed without any warning symbols.
7. Reboot Computer: In some cases, a computer reboot may be necessary to ensure that the USB drivers are fully recognized and functional. Restart your computer after the USB drivers have been installed to ensure a smooth and stable connection with your Insignia Flex Tablet.
By installing the appropriate USB drivers for your Insignia Flex Tablet, you have established a reliable connection between your tablet and your computer. This connection is crucial for the rooting process, enabling seamless communication between the two devices. With the USB drivers successfully installed, you are ready to proceed to the next steps of the rooting process.
Step 4: Unlock Bootloader
In order to proceed with rooting your Insignia Flex Tablet, you’ll need to unlock the bootloader first. The bootloader is a piece of software that determines which operating system and apps will run during the device startup process. Unlocking the bootloader will allow you to install custom software and gain root access. Follow the steps below to unlock the bootloader of your Insignia Flex Tablet:
1. Backup Your Data: Before proceeding, it is highly recommended to backup all your important data stored on your Insignia Flex Tablet. Unlocking the bootloader will wipe all the data on your device, so backup your photos, videos, documents, and any other files you want to keep. You can use cloud storage services, external storage, or backup apps to securely save your data.
2. Enable Developer Options and USB Debugging: Ensure that Developer Options and USB Debugging are enabled on your Insignia Flex Tablet, as explained in the earlier steps. These options are necessary to communicate with your tablet during the bootloader unlocking process.
3. Power Off Your Tablet: Turn off your Insignia Flex Tablet completely by holding down the power button and selecting “Power off” from the menu.
4. Boot Tablet into Fastboot Mode: Press and hold the Volume Down button and the Power button simultaneously on your tablet for a few seconds. This will boot your tablet into Fastboot mode, also known as bootloader mode. You should see a menu with various options on the screen.
5. Connect Tablet to Computer: Using a USB cable, connect your Insignia Flex Tablet to your computer while it is in Fastboot mode. Ensure that the connection is secure, and the tablet is recognized by the computer.
6. Open Command Prompt or Terminal: On your computer, open the Command Prompt (for Windows) or Terminal (for macOS or Linux) application. This will allow you to enter the necessary commands to unlock the bootloader of your tablet.
7. Verify Fastboot Connection: In the Command Prompt or Terminal, type the command “fastboot devices” and press Enter. This command will verify that your Insignia Flex Tablet is properly connected to your computer in Fastboot mode. If the tablet’s device ID is displayed, you can proceed to the next step.
8. Unlock Bootloader: Enter the command “fastboot oem unlock” and press Enter. This command will initiate the bootloader unlocking process on your Insignia Flex Tablet. A confirmation prompt may appear on your tablet’s screen. Use the Volume buttons to navigate and the Power button to select “Yes” or “Unlock.” The unlocking process may take a few moments to complete.
9. Reboot Your Tablet: Once the bootloader is successfully unlocked, enter the command “fastboot reboot” and press Enter. This command will reboot your Insignia Flex Tablet. It may take a bit longer than usual for your tablet to boot up, as the bootloader has been modified.
By following these steps, you have successfully unlocked the bootloader of your Insignia Flex Tablet. This step is essential for the rooting process, as it allows you to make customizations and gain root access. Now, you can proceed with the next steps of the rooting process to unleash the full potential of your Insignia Flex Tablet.
Step 5: Download Required Files
Before proceeding with the rooting process for your Insignia Flex Tablet, it is important to have all the necessary files ready on your computer. These files include the rooting tool, custom recovery, and any other specific files required for your tablet model. Follow the steps below to download the required files:
1. Research and Identify Files: Conduct thorough research to identify the specific files required for rooting your Insignia Flex Tablet. Visit reliable Android forums, dedicated websites, or trusted developer communities that provide detailed instructions and resources for your tablet model. Pay attention to the compatibility of the files with your tablet’s model and Android version.
2. Rooting Tool: Look for a rooting tool that is compatible with your Insignia Flex Tablet. One popular rooting tool is Magisk, which allows for systemless root and provides a wide range of customization options. Visit the official Magisk website or a reputable source to download the latest version of the Magisk rooting tool.
3. Custom Recovery: Find a suitable custom recovery for your Insignia Flex Tablet. TWRP (Team Win Recovery Project) is a widely used custom recovery that supports various Android devices. Visit the official TWRP website or a trusted source to find a compatible TWRP recovery image for your tablet model.
4. Other Files: Depending on your specific rooting method or tablet requirements, there may be additional files to download. These could include firmware files, ROMs, or specific files needed for the rooting process. Ensure that you download these files from trusted sources to avoid any potential security risks.
5. Save Files on Your Computer: Once you have identified the necessary files, download them to your computer. Create a new folder on your computer and name it something like “Rooting Files” or “Insignia Flex Tools.” Save all the downloaded files into this folder for easy access during the rooting process.
6. Verify File Integrity: After downloading the files, it is important to verify their integrity to ensure they are not corrupted or tampered with. Check for file checksums or MD5/SHA1 values provided by the source and compare them to the downloaded files. If the values match, the files are intact and can be used safely for the rooting process.
7. Antivirus and Security: Before proceeding with the rooting process, temporarily disable any anti-virus or security software on your computer. Some security tools may flag rooting files as potentially harmful due to their nature, but this is expected for rooting procedures. Exercise caution, and only download files from reputable sources to minimize any potential risks.
By following these steps, you have successfully downloaded all the required files for rooting your Insignia Flex Tablet. Ensure that the files are safely stored on your computer and are readily accessible for the next steps in the rooting process. With the necessary files in hand, you are ready to proceed with the following steps to gain root access on your tablet.
Step 6: Connect Insignia Flex Tablet to PC
In order to proceed with the rooting process of your Insignia Flex Tablet, you will need to establish a secure connection between your tablet and your computer. Follow the steps below to connect your tablet to your PC:
1. Turn on your Tablet: Ensure that your Insignia Flex Tablet is powered on and ready to connect to your PC.
2. USB Cable: Use a USB cable to connect your Insignia Flex Tablet to your PC. Ensure that the cable is in good condition and capable of data transfer. It is recommended to use the original USB cable provided with your tablet or a high-quality replacement.
3. USB Port: Plug one end of the USB cable into your Insignia Flex Tablet’s USB port. The USB port is typically located at the bottom or sides of the tablet, depending on the model. Ensure a proper and secure connection.
4. Connect to PC: Plug the other end of the USB cable into an available USB port on your PC. It is recommended to directly connect to a USB port on your computer rather than using a USB hub or an extension cable. This ensures a stable and reliable connection.
5. Enable File Transfer or MTP Mode: On your Insignia Flex Tablet, you may see a notification indicating that it is connected as a media device or storage device. Swipe down from the top of your tablet’s screen to access the notification panel and make sure the USB connection is set to “File Transfer” or “MTP” mode. This mode allows file transfer between your tablet and computer.
6. USB Debugging: Having USB Debugging enabled, as mentioned in the previous steps, is important to establish a successful connection between your Insignia Flex Tablet and your PC. Ensure that USB Debugging is still enabled in the Developer Options settings on your tablet.
7. Verify Connection: Open the File Explorer or Finder on your computer and check if your Insignia Flex Tablet is recognized. It should appear as a connected device or a storage device. You may need to install or update the USB drivers on your computer if your tablet is not recognized correctly. Ensure that all necessary drivers are installed, and the connection is established.
8. Testing Connection: To test the connection, you can try transferring a small file from your computer to your Insignia Flex Tablet or vice versa. If the transfer is successful, it means the connection is working correctly, and you can proceed to the next steps in the rooting process.
By following these steps, you have successfully connected your Insignia Flex Tablet to your PC. Establishing a stable and reliable connection is crucial for the rooting process, as it allows smooth communication between the devices. With the connection established, you are now ready to proceed with the subsequent steps to root your Insignia Flex Tablet and unlock its full potential.
Step 7: Launch ADB and Fastboot
In order to continue with the rooting process for your Insignia Flex Tablet, you need to launch ADB (Android Debug Bridge) and Fastboot on your computer. These tools are essential for executing commands and interacting with your tablet during the rooting process. Follow the steps below to launch ADB and Fastboot:
1. Open Command Prompt or Terminal: On your computer, open the Command Prompt (for Windows) or Terminal (for macOS or Linux) application. This will allow you to run commands necessary for launching ADB and Fastboot.
2. Navigate to ADB and Fastboot Directory: Once the Command Prompt or Terminal is open, you need to navigate to the directory where the ADB and Fastboot files are located. If you installed the Android SDK Platform Tools, you can navigate to the platform tools directory using the “cd” command. For example, if the platform tools folder is located in C:\Android\platform-tools, you would enter the command: cd C:\Android\platform-tools
3. Verify ADB Connection: With the Command Prompt or Terminal open and in the platform tools directory, you can now verify the connection between your computer and your Insignia Flex Tablet. Enter the command adb devices and press Enter. This command will display the connected devices, and you should see your tablet listed along with its device ID. If no device is listed, ensure that the USB debugging and USB connection modes are properly enabled on your tablet and that the USB cable is securely connected.
4. Launch Fastboot: Once the ADB connection is verified, you can launch Fastboot by entering the command adb reboot bootloader and press Enter. This command instructs your tablet to reboot into Fastboot mode, where you can execute further commands.
5. Verify Fastboot Connection: In Fastboot mode, enter the command fastboot devices and press Enter. This command will verify that your Insignia Flex Tablet is properly connected to your computer in Fastboot mode. If your tablet’s device ID is displayed, it means that the Fastboot connection is successful.
6. Test ADB and Fastboot: To further test the connection and functionality of ADB and Fastboot, you can enter commands such as adb devices or fastboot devices (depending on your current mode) to check if your tablet is recognized and ready for further interactions.
With ADB and Fastboot launched and the connection between your computer and your Insignia Flex Tablet established, you are now prepared to proceed with executing the necessary commands for the rooting process. Ensure that you have successfully followed the previous steps and that your tablet is in Fastboot mode before proceeding to the next steps of the rooting process.
Step 8: Verify Connection
Before proceeding further with the rooting process for your Insignia Flex Tablet, it is crucial to verify the connection between your tablet and your computer. Ensuring a stable and reliable connection is essential for carrying out the subsequent steps seamlessly. Follow the steps below to verify the connection:
1. Open Command Prompt or Terminal: On your computer, open the Command Prompt (for Windows) or Terminal (for macOS or Linux) application. This will allow you to run commands necessary for verifying the connection.
2. Navigate to ADB and Fastboot Directory: Enter the command to navigate to the directory where the ADB and Fastboot files are located. If you have already opened the Command Prompt or Terminal for a previous step, you can skip this step. Ensure that you are in the correct directory using the “cd” command, such as cd C:\Android\platform-tools.
3. Verify ADB Connection: In the Command Prompt or Terminal, enter the command adb devices and press Enter. This command will display the connected devices, and you should see your Insignia Flex Tablet listed with its device ID. If no device is listed, recheck the USB connection, ensure that USB debugging is properly enabled, and that the USB cable is securely connected.
4. Verify Fastboot Connection: If you are in Fastboot mode, enter the command fastboot devices and press Enter. This command will verify that your Insignia Flex Tablet is properly connected to your computer in Fastboot mode. If your device’s device ID is displayed, it means that the Fastboot connection is successful.
5. Test Connection with Command: To further test the connection, you can try running a command such as adb shell or fastboot devices (depending on the mode) to check if your Insignia Flex Tablet is recognized and ready for further interactions. If you receive the appropriate response, it indicates that the connection is working correctly.
6. Test Connection with File Transfer: Connect your Insignia Flex Tablet to your computer and attempt to transfer a small file between the two devices. If the file transfer is successful and there are no connectivity issues, it indicates that the connection is stable and reliable.
Verifying the connection ensures that your Insignia Flex Tablet is properly recognized by your computer and establishes a smooth communication channel for executing the necessary commands during the rooting process. If you encounter any connection issues or errors, double-check the previous steps and ensure that all prerequisites are met. Once the connection is successfully verified, you can proceed confidently to the next steps of the rooting process.
Step 9: Start the Rooting Process
Now that you have successfully completed all the necessary preparations and verified the connection between your Insignia Flex Tablet and your computer, you are ready to begin the rooting process. Follow the steps below to start rooting your tablet:
1. Install TWRP Recovery (optional): If you plan to install a custom ROM or flash any modifications, it is recommended to install TWRP (Team Win Recovery Project) custom recovery on your Insignia Flex Tablet. TWRP provides a touch-based interface to perform advanced functions. You can find a guide specific to your tablet model on the official TWRP website or other reliable sources. Follow the instructions carefully to successfully install TWRP recovery on your tablet.
2. Boot into TWRP Recovery: Turn off your Insignia Flex Tablet completely. Once powered off, press and hold the Volume Up button and the Power button simultaneously until the device boots into recovery mode. From the TWRP recovery menu, you can perform various functions such as making backups, flashing custom ROMs, and installing root files.
3. Transfer Root Files: Connect your Insignia Flex Tablet to your computer using a USB cable and ensure that it is recognized. Transfer the root files, such as the Magisk rooting tool or any specific files required for your tablet model, to the internal storage or SD card of your tablet. Disconnect the USB cable once the transfer is complete.
4. Install Root Files: In TWRP recovery mode, select the “Install” option from the main menu. Navigate to the location where you transferred the root files in the previous step. Select the root files and initiate the installation process. Follow any on-screen instructions provided by TWRP to confirm and proceed with the installation.
5. Allow System Modifications: After the root files are successfully installed, return to the TWRP main menu and tap on “Reboot.” When prompted, choose to reboot your Insignia Flex Tablet into the system. Once the device boots up, you may receive a prompt to allow system modifications. It is important to allow these modifications to ensure full root access.
6. Verify Root Access: After your Insignia Flex Tablet has rebooted, you can verify if the rooting process was successful. Download a root checker app from the Google Play Store and run it on your tablet. The app will confirm whether your device has gained root access or not.
Congratulations! You have now successfully rooted your Insignia Flex Tablet. You have gained full administrative rights, allowing you to customize your tablet, install custom ROMs, and enjoy various root-enabled apps. With root access, be cautious when making system-level changes and installing third-party apps, as they may have an impact on your device’s stability and security. Always exercise caution and make informed decisions when making any modifications or changes to your rooted tablet.
Keep in mind that rooting your device may void your warranty. If you encounter any issues or decide to unroot your tablet in the future, you can typically restore the stock firmware or unroot through the TWRP recovery interface or by flashing the original firmware provided by the manufacturer.
Step 10: Reboot and Verify Root Access
After completing the rooting process for your Insignia Flex Tablet, the final step is to reboot your device and verify that root access has been successfully gained. Follow the steps below to reboot your tablet and confirm root access:
1. Exit Recovery Mode: If you were in TWRP recovery mode, exit the recovery mode by selecting the “Reboot” option from the TWRP main menu. Choose the option to reboot your system. Your Insignia Flex Tablet will now boot up into the normal operating system.
2. Wait for Boot-up: Allow your tablet to boot up completely. This may take a few minutes, depending on your device’s specifications and the number of installed apps.
3. Open App Drawer: Once your tablet is fully booted, go to the app drawer by tapping on the app icon in the lower-middle or lower-right corner of your tablet’s screen. Alternatively, swipe up from the bottom of the screen to access the app drawer.
4. Locate Root Checker App: In the app drawer, search for a “Root Checker” app. There are several available in the Google Play Store. Choose a reputable and highly rated app to ensure accurate results.
5. Run Root Checker: Open the Root Checker app. It will perform a comprehensive check to verify if your Insignia Flex Tablet has root access. Allow the app a few moments to analyze your device’s status.
6. Verify Root Access: After the analysis is complete, the Root Checker app will display a message indicating whether your Insignia Flex Tablet has root access or not. If it confirms that root access has been achieved, congratulations! Your tablet is now rooted and you can start enjoying the benefits of full control over your device.
With root access, you have the freedom to customize and modify various aspects of your Insignia Flex Tablet, including installing custom ROMs, removing bloatware, and using root-enabled apps. Take advantage of this newfound control, but also exercise caution when making system-level changes and installing third-party apps. Make informed decisions and ensure that you protect the security and stability of your tablet.
Keep in mind that rooting your device may void your warranty. Should you encounter any issues or choose to unroot your tablet in the future, you can typically restore the stock firmware or unroot through the TWRP recovery interface or by flashing the original firmware provided by the manufacturer. Always refer to reliable sources and follow instructions specific to your tablet model.
Enjoy the benefits of rooting your Insignia Flex Tablet and explore the endless possibilities that come with having full administrative access to your device.
Conclusion
Congratulations on successfully rooting your Insignia Flex Tablet! You have unlocked the full potential of your device and gained control over its functionalities. Rooting allows you to customize your tablet, install custom ROMs, remove bloatware, and enjoy root-enabled apps that offer advanced features and customization options.
Throughout the rooting process, you have followed a series of steps, including enabling developer options, enabling USB debugging, installing USB drivers, unlocking the bootloader, downloading the required files, establishing a connection with your computer, launching ADB and Fastboot, and finally starting and completing the rooting process. Each step has been carefully designed to ensure a smooth and successful root, while considering the risks and precautions associated with rooting.
It’s important to remember that rooting your Insignia Flex Tablet carries some risks, such as voiding the warranty and potentially compromising the stability and security of your device. Therefore, it is crucial to make informed decisions, exercise caution, and be mindful of the actions you take with root access.
With root access, you have the freedom to personalize your Insignia Flex Tablet to suit your preferences and needs. However, it is important to understand that modifications made at the system level can affect the stability and functionality of your device. Always research and proceed with caution when making changes to system files or installing third-party apps.
If you encounter any issues or decide to unroot your tablet in the future, you can rely on the resources you used during the rooting process to restore your device to its original state. This may involve flashing the original firmware, restoring from a backup, or using the TWRP recovery interface to revert any modifications made during the rooting process.
By successfully rooting your Insignia Flex Tablet, you have opened up a world of possibilities for customization and enhanced performance. Take advantage of the benefits that root access brings, and enjoy an even more powerful and personalized Android experience.
Remember to stay up to date with the ever-evolving Android ecosystem and continue exploring new ways to make the most out of your rooted Insignia Flex Tablet. As technologies advance, new rooting methods and tools may become available, offering even greater customizations and optimizations for your device.
Enjoy your newly rooted Insignia Flex Tablet and make the most of its capabilities!