Introduction
Welcome to this guide on how to connect a hotspot to your tablet. In today’s digital world, staying connected to the internet has become a necessity, and having a tablet provides you with the convenience of browsing the internet, streaming videos, and accessing your favorite apps wherever you go. However, there may be situations where you don’t have access to a Wi-Fi network, but you do have a smartphone or another device that can act as a hotspot. In such cases, you can easily connect your tablet to the hotspot and get online.
Using a hotspot is essentially using your smartphone or another device as a portable Wi-Fi router. It allows you to share your cellular data connection with other devices so that they can connect to the internet through your device. This means that even if you don’t have access to a traditional Wi-Fi network, you can still get online with your tablet, as long as you have a cellular data plan on your device.
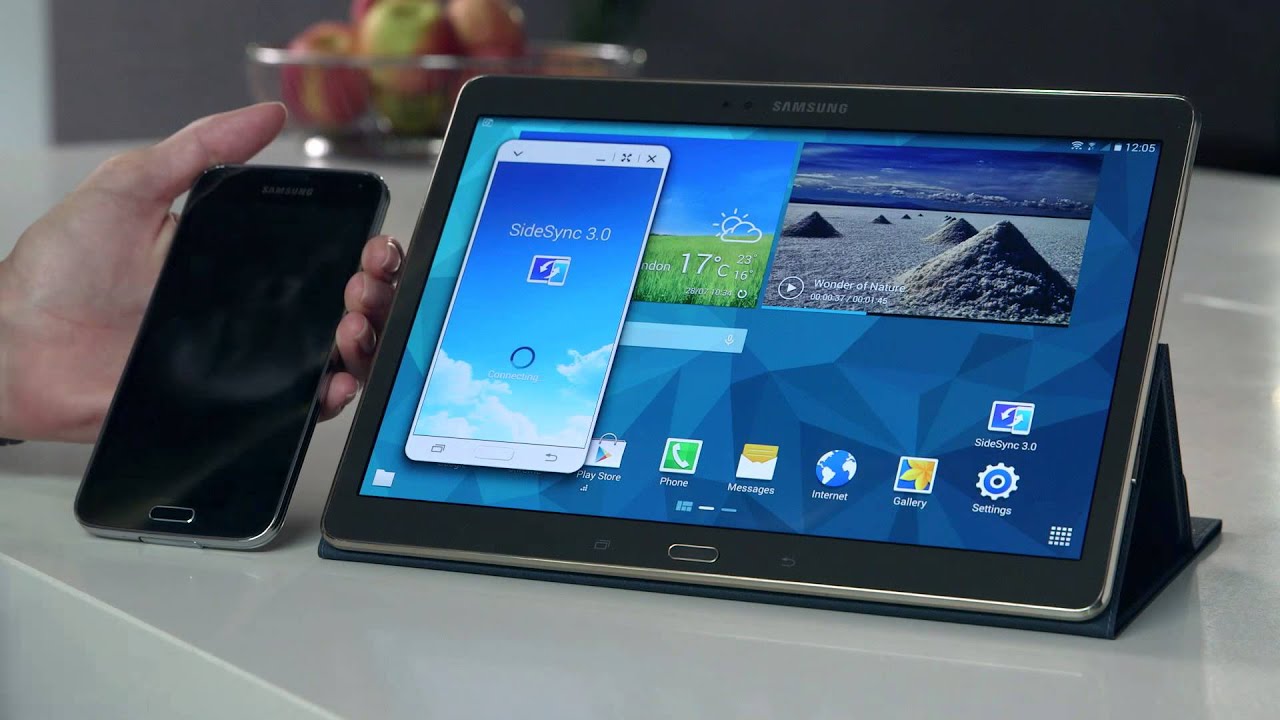
In this guide, we will walk you through the step-by-step process of connecting a hotspot to your tablet. Whether you’re using an Android tablet or an iPad, the general steps remain the same. By following these instructions, you’ll be able to enjoy a seamless internet connection on your tablet whenever a Wi-Fi network is not available.
Please note that the exact steps may vary slightly depending on the make and model of your tablet and the operating system it is running. However, the overall process should be similar, and we will provide you with the necessary guidelines to help you connect your tablet to a hotspot.
Now, without further ado, let’s dive into the steps required to connect a hotspot to your tablet.
Step 1: Turn on the Hotspot
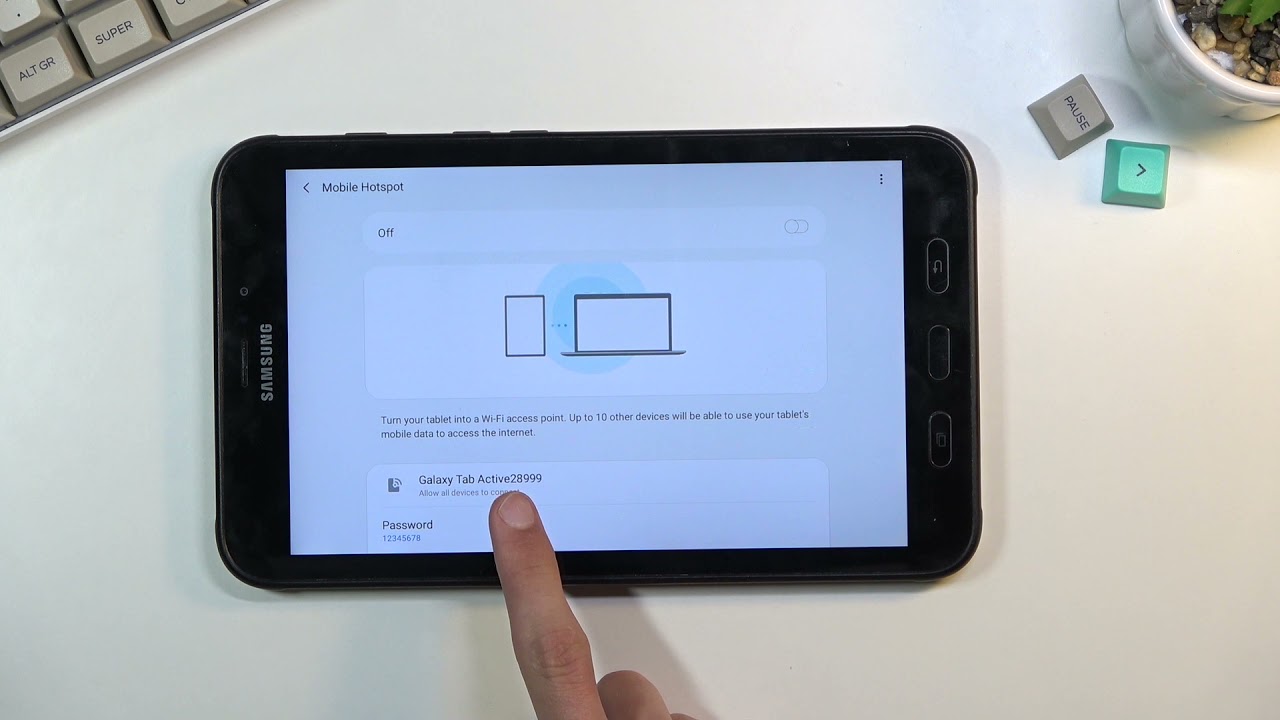
The first step in connecting your tablet to a hotspot is to ensure that the hotspot feature is enabled on your smartphone or device. The process of turning on the hotspot may vary depending on the make and model of your device, but generally, it can be found in the device’s settings menu.
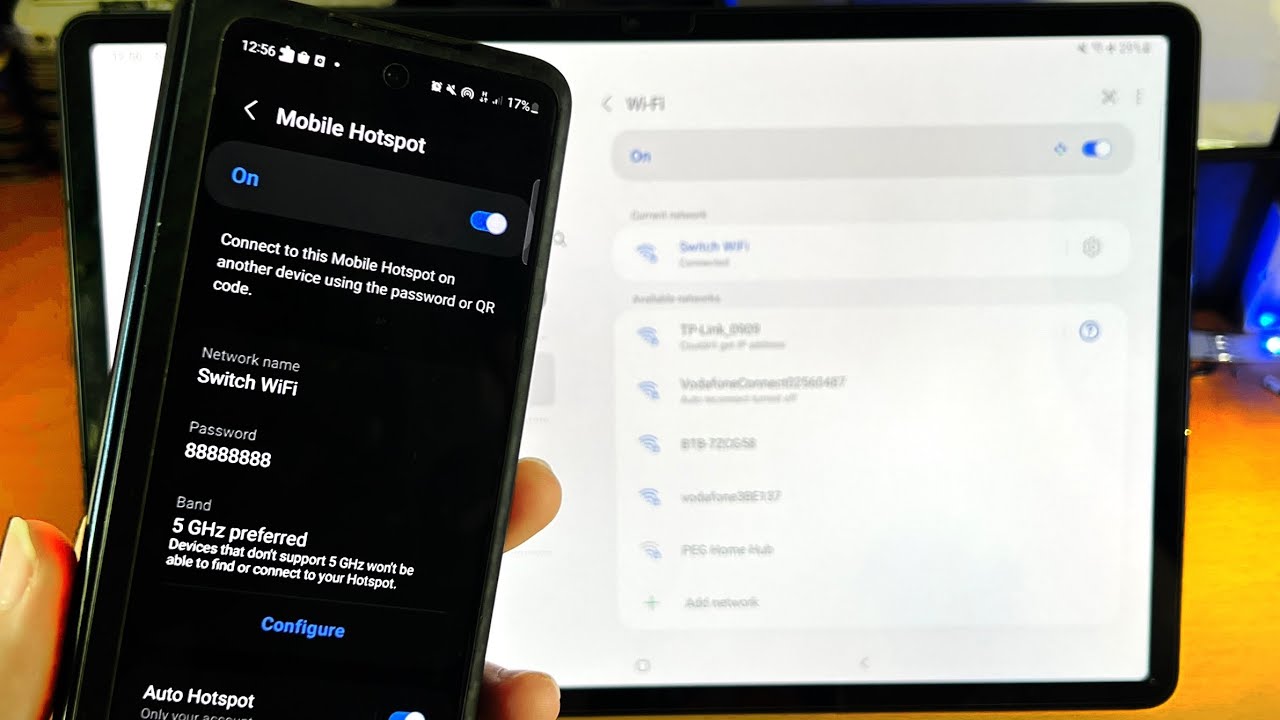
If you’re using an Android device, you can typically find the hotspot option by going to the “Settings” menu and selecting the “Network & internet” or “Connections” section. Look for the “Hotspot & tethering” or “Mobile hotspot” option and tap on it. From there, you should be able to toggle the hotspot feature on.
On an iPhone, you can enable the hotspot feature by going to the “Settings” app and selecting the “Personal Hotspot” option. Toggle the “Personal Hotspot” switch to turn it on. You may also need to set a Wi-Fi password for your hotspot if it’s your first time using it.
Once you have successfully turned on the hotspot feature on your device, you are now ready to connect your tablet to the hotspot network. Proceed to the next step in this guide to learn how to access the settings menu on your tablet.
Step 2: Access the Settings Menu on Your Tablet
Now that your hotspot is turned on, the next step is to access the settings menu on your tablet to begin the process of connecting to the hotspot network. The location and appearance of the settings menu may vary depending on the make and model of your tablet, but it is typically represented by a gear or cogwheel icon.
To access the settings menu on an Android tablet, swipe down from the top of the screen to bring up the notification shade, and then tap on the gear icon or the “Settings” option. Alternatively, you can find the settings app in the app drawer or on the home screen of your tablet.
If you are using an iPad, the settings app can usually be found on the home screen. Look for the gear icon labeled “Settings” and tap on it to open the settings menu.
Once you have opened the settings menu on your tablet, you are now ready to proceed to the next step and enable Wi-Fi on your tablet. Keep your hotspot turned on and continue with the following steps to establish a connection between your tablet and the hotspot network.
Step 3: Enable Wi-Fi on Your Tablet
Now that you have accessed the settings menu on your tablet, the next step is to enable the Wi-Fi feature. Enabling Wi-Fi allows your tablet to search for and connect to available networks, including the hotspot network provided by your smartphone or device.
To enable Wi-Fi on an Android tablet, navigate to the Wi-Fi settings within the settings menu. It is usually located under the “Network & internet” or “Connections” section. Tap on the Wi-Fi option to toggle it on. Once enabled, your tablet will start scanning for nearby Wi-Fi networks.
If you are using an iPad, locate the Wi-Fi option within the settings menu. On most iPads, this can be found on the left-hand side of the settings menu. Tap on the Wi-Fi option to toggle it on, and your iPad will begin searching for available networks.
After enabling Wi-Fi on your tablet, give it a few moments to scan for networks. Once the hotspot network created by your smartphone or device appears in the list of available networks, you are ready to establish a connection by connecting to the hotspot network. Proceed to the next step to learn how to connect to the hotspot network on your tablet.
Step 4: Connect to the Hotspot Network
Now that your tablet has detected the hotspot network, it’s time to connect to it. Follow the steps below to establish a connection between your tablet and the hotspot network.
In the Wi-Fi settings menu on your tablet, you should see a list of available networks. Look for the name of your hotspot network, which is usually the name of your smartphone or device. Tap on the network’s name to initiate the connection.
If the hotspot network is secured with a password, you will be prompted to enter it. On your tablet’s screen, a keyboard will appear for you to input the password. Type in the password correctly and proceed to the next step.
After entering the correct password, your tablet will attempt to establish a connection to the hotspot network. It may take a few moments for the connection to be established, so be patient. You may see a notification or an icon indicating that your tablet is connected to the hotspot network.
Once the connection is successfully established, your tablet is now connected to the hotspot network and can access the internet using the cellular data connection from your smartphone or device. You can proceed to the next step to confirm the connection and ensure that you can browse the web and use apps on your tablet.
Step 5: Enter the Hotspot Password
If the hotspot network you are trying to connect to is secured with a password, you will need to enter it on your tablet to establish a successful connection. The password ensures that only authorized users can connect to the hotspot and access its internet connection.
When you select the hotspot network from the list of available networks on your tablet, a prompt will appear asking for the password. This is a security measure designed to protect your hotspot from unauthorized access.
To enter the hotspot password, tap on the password field on your tablet’s screen. A keyboard will appear, allowing you to type in the password. Make sure to enter the password exactly as it is, taking note of uppercase and lowercase letters, numbers, and special characters.
If you are unsure of the password, you can ask the person who created the hotspot or refer to the device’s settings to find the correct password. Alternatively, you can check the documentation or user manual that came with the device for the hotspot password.
Once you have entered the correct password, double-check to ensure accuracy. Then, proceed to the next step to confirm the connection and verify that you can use the hotspot network on your tablet.
Step 6: Confirm the Connection
After entering the hotspot password, it’s important to confirm that the connection between your tablet and the hotspot network has been successfully established. This step ensures that you can browse the web, use apps, and make full use of the internet connection provided by the hotspot.
To confirm the connection, open a web browser or any application that requires an internet connection on your tablet. Try accessing a website or performing any online activity that requires an internet connection. If the webpage loads successfully or the app functions properly, it indicates that the connection is working.
If you encounter any issues or the webpage fails to load, double-check the hotspot password you entered in the previous step. Ensure that it is correct and entered without any typos. You may need to re-enter the password if it was incorrect or try restarting both your tablet and the device creating the hotspot.
Additionally, ensure that you are within a reasonable distance from the device creating the hotspot. Wi-Fi signals can weaken with distance, so it’s important to be relatively close for a stable connection.
During this step, if you encounter any further difficulties in confirming the connection, refer to the troubleshooting section in your tablet’s user manual or seek help from the device’s manufacturer or service provider for assistance.
Once you have successfully confirmed the connection and verified that your tablet can access the internet through the hotspot network, you’re ready to proceed to the final step: testing the connection.
Step 7: Test the Connection
Now that you have confirmed the connection between your tablet and the hotspot network, it’s time to test the connection to ensure that everything is functioning as expected. Testing the connection will help you verify that you can browse the web, use apps, and perform any online activities seamlessly.
To test the connection, open a web browser on your tablet and try accessing different websites. Load a few webpages to ensure that they open quickly and without any errors. This will give you an idea of the speed and stability of the hotspot connection.
Next, you can try using various apps on your tablet that require an internet connection. Check if you can browse social media, stream videos, send emails, or use any other specific apps that you frequently use. Ensure that you can perform these tasks without any interruptions or challenges.
During the testing phase, pay attention to any error messages, slow loading times, or difficulties in accessing certain websites or apps. If you encounter any issues, it could be an indication of a problem with the hotspot connection or the device creating the hotspot. In such cases, you may need to troubleshoot the issue or seek further assistance from the device manufacturer or service provider.
In addition to testing web browsing and app usage, you can also check the signal strength of the hotspot connection. Most devices display signal strength bars to indicate the quality of the connection. Examine the signal bars on your tablet to ensure that you have a strong and stable connection.
By thoroughly testing the connection, you can ensure that your tablet is successfully connected to the hotspot network and that you can enjoy a seamless internet experience while using your tablet on the go.
Conclusion
Congratulations! You have successfully learned how to connect a hotspot to your tablet. This guide has provided you with a step-by-step process to enable the hotspot feature on your device, access the settings menu on your tablet, enable Wi-Fi, connect to the hotspot network, enter the hotspot password, confirm the connection, and test the connection to ensure a seamless internet experience on your tablet.
Having the ability to connect your tablet to a hotspot is incredibly useful, especially in situations where a traditional Wi-Fi network is not available. Whether you’re traveling, in a remote location, or simply want to share your cellular data connection with other devices, the hotspot feature offers convenience and flexibility.
Remember to keep your hotspot turned on and secure it with a strong password to prevent unauthorized access. Additionally, be mindful of data usage as connecting a tablet to a hotspot consumes cellular data. It’s advisable to monitor your data usage and make sure you have an adequate data plan to avoid unexpected charges.
If you encounter any issues while following the steps outlined in this guide, consult the user manual of your tablet or contact the manufacturer or service provider for further assistance. They will be able to provide you with specific troubleshooting steps or address any concerns you may have.
Now that you are equipped with the knowledge of how to connect a hotspot to your tablet, you can stay connected to the internet no matter where you are. Enjoy browsing the web, streaming videos, or using your favorite apps on your tablet with the convenience of a hotspot.