Introduction
The Amazon Fire tablet has become immensely popular for its affordability and versatile functionality. While it is primarily designed for media consumption, did you know that you can also use it as a mobile hotspot to share your internet connection with other devices? Whether you’re on the go or facing connectivity issues at home, the hotspot feature on your Amazon Fire tablet can prove to be a lifesaver.
In this article, we will guide you through the process of enabling and using the hotspot feature on your Amazon Fire tablet, allowing you to connect your laptop, smartphone, or any other Wi-Fi enabled device to the internet effortlessly. We will break down the steps in a simple and comprehensive manner, ensuring that you can easily follow along, even if you’re not tech-savvy.
By enabling and utilizing the hotspot feature, you can stay connected wherever you are, transforming your Amazon Fire tablet into a portable Wi-Fi hub. Whether you need to access emails, browse the web, or even stream your favorite show, a hotspot provides you with the flexibility to stay connected without relying solely on external Wi-Fi networks.
So, if you’re ready to unlock the potential of your Amazon Fire tablet and become the ultimate hotspot provider, let’s dive into the step-by-step guide on how to enable and use the hotspot feature on your device. Whether you want to connect your laptop for work or share your internet connection with friends, this guide has got you covered!
What is a Hotspot?
In today’s connected world, the term “hotspot” has become increasingly common, but what exactly does it mean? A hotspot refers to a wireless network that allows devices in its range to connect to the internet. It serves as a gateway, providing internet access to devices without the need for a physical wired connection.
In the context of the Amazon Fire tablet, a hotspot allows you to share your device’s internet connection with other devices, such as laptops, smartphones, or tablets, enabling them to access the internet through your Fire tablet’s cellular data or Wi-Fi connection. Essentially, your Fire tablet becomes a portable router, providing network connectivity to other devices in its vicinity.
Hotspots are incredibly convenient, especially when you’re on the go or in an area with limited or no available Wi-Fi networks. By using the hotspot feature on your Amazon Fire tablet, you can create a personal Wi-Fi network wherever you are, allowing you to connect your devices and stay connected to the internet, even when traditional Wi-Fi networks are unavailable.
It is important to note that using your Amazon Fire tablet as a hotspot may consume additional cellular data, depending on your mobile data plan. Be sure to monitor your data usage and keep an eye on any associated costs or limitations from your service provider.
Now that you have a basic understanding of what a hotspot is and how it works, let’s move on to the process of enabling and using the hotspot feature on your Amazon Fire tablet. With just a few simple steps, you’ll be able to share your internet connection with other devices and stay connected wherever you go.
How to Enable Hotspot on Amazon Fire Tablet
Enabling the hotspot feature on your Amazon Fire tablet allows you to share your internet connection with other devices. Follow the step-by-step guide below to get started:
Step 1: Go to Settings
Open the Settings on your Amazon Fire tablet by swiping down from the top of the screen and tapping on the gear icon.
Step 2: Tap on “Network & Internet”
In the Settings menu, scroll down and tap on “Network & Internet” to access the network settings.
Step 3: Tap on “Hotspot & Tethering”
Within the “Network & Internet” menu, locate and tap on “Hotspot & Tethering” to proceed with configuring the hotspot settings.
Step 4: Toggle On the “Mobile Hotspot”
In the “Hotspot & Tethering” menu, you will find the “Mobile Hotspot” option. Tap on the toggle switch next to it to turn on the hotspot feature.
Step 5: Customize Hotspot Settings (Optional)
If you want to customize your hotspot settings, such as changing the network name (SSID) or the password, you can do so by tapping on “Mobile Hotspot Settings.” Here, you can modify the settings according to your preferences.
That’s it! Once you have followed these steps, the hotspot feature on your Amazon Fire tablet will be enabled, and you can start sharing your internet connection with other devices.
Keep in mind that enabling the hotspot feature may consume additional cellular data, so be aware of your data usage and any associated costs or limitations from your service provider. Additionally, make sure to secure your hotspot with a strong password to prevent unauthorized access.
Now that the hotspot is set up on your Amazon Fire tablet, it’s time to connect other devices to the hotspot. In the next section, we will guide you through the process of connecting to a hotspot on your Amazon Fire tablet.
Step 1: Go to Settings
The first step to enabling the hotspot feature on your Amazon Fire tablet is to access the Settings menu. Here’s how you can do it:
1. Start by unlocking your Amazon Fire tablet and navigating to the home screen.
2. Swipe down from the top of the screen to reveal the notification panel.
3. Locate and tap on the gear icon in the top right corner of the screen. This will open the Settings menu.
The Settings menu is where you can customize various aspects of your Amazon Fire tablet, including network and internet settings.
Once you have tapped on the gear icon, the Settings menu will appear, providing you with a list of options to choose from. From here, you can adjust various settings related to your device’s display, battery, sound, and more.
Additionally, you can access specific settings related to Wi-Fi, Bluetooth, and other connectivity options, which will be important later on in the process.
By going to the Settings menu, you are taking the first step towards enabling the hotspot feature on your Amazon Fire tablet. This step is crucial as it allows you to access the necessary settings to enable and configure your hotspot effectively.
Now that you have successfully reached the Settings menu, let’s move on to the next step, which is tapping on “Network & Internet.” This will lead you further into the network settings, where you can explore and enable the hotspot feature on your Amazon Fire tablet.
Step 2: Tap on “Network & Internet”
Now that you have accessed the Settings menu on your Amazon Fire tablet, you are ready to navigate to the network settings to enable the hotspot feature. Follow the steps below to proceed:
1. Within the Settings menu, scroll through the available options until you find “Network & Internet.” This option is usually located towards the top of the menu.
2. Tap on “Network & Internet” to enter the network settings.
The “Network & Internet” menu contains various connectivity options and settings related to Wi-Fi, data usage, and more.
When you tap on “Network & Internet,” a new screen will open, allowing you to explore and modify various network-related settings on your Amazon Fire tablet.
In this menu, you will find options such as Wi-Fi, Bluetooth, Data usage, and more. These settings play a crucial role in managing your device’s network connectivity. However, for the purpose of enabling the hotspot feature, you will need to proceed to the next step.
By tapping on “Network & Internet,” you are one step closer to enabling the hotspot feature on your Amazon Fire tablet. In the next step, we will guide you through the process of locating and tapping on the “Hotspot & Tethering” option, which will bring you closer to enabling the hotspot functionality.
Let’s move on to the next step and continue the process of enabling the hotspot on your Amazon Fire tablet.
Step 3: Tap on “Hotspot & Tethering”
After accessing the “Network & Internet” settings on your Amazon Fire tablet, you are now ready to navigate to the “Hotspot & Tethering” option. Follow the steps below to proceed:
1. Within the “Network & Internet” settings menu, scroll through the available options until you find “Hotspot & Tethering.” This option is usually located towards the bottom of the menu.
2. Tap on “Hotspot & Tethering” to access the hotspot settings.
The “Hotspot & Tethering” menu contains the necessary settings and configurations to enable and manage the hotspot feature on your Amazon Fire tablet.
When you tap on “Hotspot & Tethering,” a new screen will open, providing you with options for enabling and customizing your hotspot settings.
In this menu, you will find options such as “Mobile Hotspot,” “USB Tethering,” and “Bluetooth Tethering.” For now, we will focus on the “Mobile Hotspot” option, as this is what you will need to enable to use your Amazon Fire tablet as a hotspot.
By tapping on “Hotspot & Tethering,” you have successfully reached the hotspot settings on your Amazon Fire tablet. In the next step, we will guide you through the process of enabling the “Mobile Hotspot” feature, which will allow you to share your internet connection with other devices.
Let’s move on to the next step and continue the process of enabling the hotspot on your Amazon Fire tablet.
Step 4: Toggle On the “Mobile Hotspot”
Once you have accessed the “Hotspot & Tethering” settings on your Amazon Fire tablet, the next step is to toggle on the “Mobile Hotspot” feature. Follow the instructions below to enable the hotspot functionality:
1. In the “Hotspot & Tethering” menu, locate the option labeled “Mobile Hotspot.”
2. To enable the hotspot, simply tap on the toggle switch next to “Mobile Hotspot.” When the switch turns blue or indicates that it is in the “on” position, it means that the hotspot feature is now activated and ready to use.
Enabling the “Mobile Hotspot” feature on your Amazon Fire tablet effectively turns your device into a portable Wi-Fi hub, allowing other devices to connect and access the internet through your tablet’s cellular data or Wi-Fi connection.
With the “Mobile Hotspot” feature enabled, you are now ready to share your internet connection with other devices, such as laptops, smartphones, or tablets within the hotspot’s range.
Please note that enabling the hotspot feature on your Amazon Fire tablet may consume additional cellular data, especially if other devices are actively using the internet connection. Keep an eye on your data usage and consider your mobile data plan’s limitations and costs.
Congratulations! You have successfully enabled the “Mobile Hotspot” feature on your Amazon Fire tablet. In the next step, we will discuss how you can customize your hotspot settings, such as changing the network name (SSID) or the password, to personalize your hotspot experience.
Let’s move on to the next step and continue the process of enabling and configuring the hotspot on your Amazon Fire tablet.
Step 5: Customize Hotspot Settings (Optional)
After enabling the “Mobile Hotspot” feature on your Amazon Fire tablet, you have the option to customize your hotspot settings according to your preferences. While these settings are optional, they allow you to personalize your hotspot experience and enhance your security. Follow the steps below to customize your hotspot settings:
1. In the “Hotspot & Tethering” menu, look for the option labeled “Mobile Hotspot Settings.”
2. Tap on “Mobile Hotspot Settings” to access the customization options.
Within the “Mobile Hotspot Settings,” you will find various options you can modify, such as:
– Network Name (SSID): By default, your hotspot’s network name will be the name of your Amazon Fire tablet. However, you can change it to something more personal or identifiable.
– Password: To protect your hotspot from unauthorized access, it is recommended to set a strong password. Tap on the “Password” option to change or create a new password.
– Security Type: You can choose the security type for your hotspot network, such as WPA2 or WPA3.
3. Once you have made the desired changes to your hotspot settings, tap on the “Save” or “Apply” button to save the changes.
Customizing your hotspot settings provides you with greater control over your hotspot network. By changing the network name and setting a strong password, you can better identify your hotspot and protect it from unwanted access.
It is important to note that when customizing your hotspot settings, ensure that you remember the network name (SSID) and password you have set. This information will be required when connecting other devices to your hotspot.
Congratulations! You have successfully customized your hotspot settings on your Amazon Fire tablet. Now, your hotspot is ready to be used, and you can connect other devices to it to access the internet.
In the next section, we will discuss how you can connect to a hotspot on your Amazon Fire tablet and start using the shared internet connection on your other devices.
Let’s move on to the next step and continue the process of connecting to a hotspot on your Amazon Fire tablet.
How to Connect to a Hotspot on Amazon Fire Tablet
After enabling the hotspot feature on your Amazon Fire tablet, you can now connect other devices to it and start using the shared internet connection. Follow the step-by-step guide below to connect to a hotspot on your Amazon Fire tablet:
Step 1: Go to Settings
Start by unlocking your Amazon Fire tablet and accessing the home screen. Swipe down from the top of the screen to reveal the notification panel. Tap on the gear icon in the top right corner to open the Settings menu.
Step 2: Tap on “Wi-Fi”
In the Settings menu, scroll down and tap on “Wi-Fi” to access the Wi-Fi settings.
Step 3: Select the Hotspot Network
In the Wi-Fi settings, you will see a list of available networks. Locate the name of the hotspot network you created on your Amazon Fire tablet. Tap on the network name to connect to it.
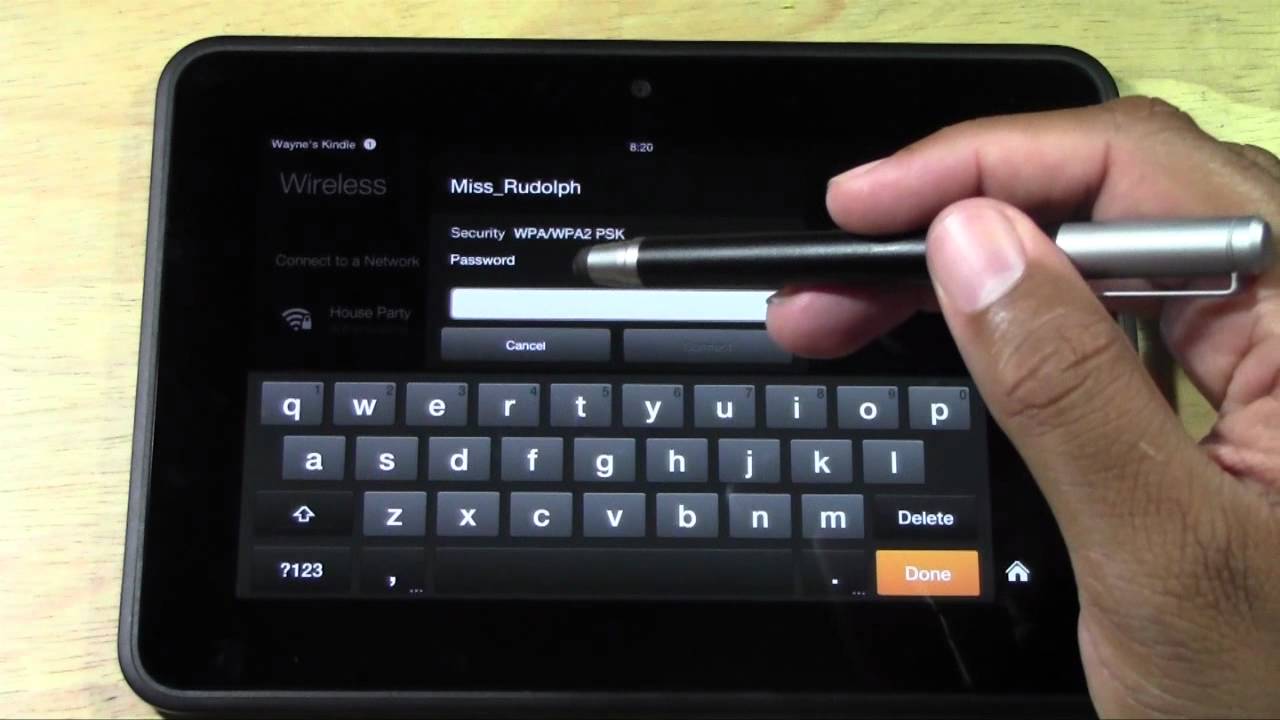
Step 4: Enter the Hotspot Password
If you have set a password for your hotspot, a password prompt will appear after selecting the network. Enter the hotspot password, ensuring it is accurate and case-sensitive.
After successfully entering the password, your Amazon Fire tablet will attempt to connect to the hotspot network.
Note: If the hotspot network does not appear in the list of available networks, ensure that the hotspot feature is enabled on your Amazon Fire tablet and that the tablet is within the range of the hotspot.
Once connected, your Amazon Fire tablet will display a Wi-Fi icon in the status bar, indicating a successful connection.
Congratulations! You have successfully connected your Amazon Fire tablet to the hotspot network. Now, you can start using the shared internet connection on your tablet and any other connected devices.
Remember, the hotspot feature on your Amazon Fire tablet uses your device’s cellular data or Wi-Fi connection, so keep an eye on your data usage and any associated costs from your service provider.
In the next section, we will wrap up the article and provide a summary of the main points discussed.
Step 1: Go to Settings
To connect to a hotspot on your Amazon Fire tablet, the first step is to access the Settings menu. Here’s how you can do it:
1. Start by unlocking your Amazon Fire tablet and navigating to the home screen.
2. Swipe down from the top of the screen to reveal the notification panel.
3. Tap on the gear icon in the top right corner of the screen. This will open the Settings menu.
The Settings menu on your Amazon Fire tablet is where you can customize various aspects of your device, including network settings, display settings, and more.
By tapping on the gear icon, you will be taken to the Settings menu, which serves as a hub for all the configuration options available on your tablet.
In the Settings menu, you can adjust settings such as Wi-Fi, Bluetooth, Display, and more, depending on your specific needs.
Additionally, the Settings menu also enables you to control other aspects of your tablet, such as app preferences, security settings, and device storage.
By accessing the Settings menu, you are taking the first step towards connecting to a hotspot on your Amazon Fire tablet. In the next step, we will guide you through the process of tapping on “Wi-Fi” to access the Wi-Fi settings.
Let’s move on to the next step and continue the process of connecting to a hotspot on your Amazon Fire tablet.
Step 2: Tap on “Wi-Fi”
Once you have accessed the Settings menu on your Amazon Fire tablet, the next step is to tap on “Wi-Fi” to access the Wi-Fi settings. Follow the instructions below:
1. In the Settings menu, scroll through the options until you find “Wi-Fi.” This option is usually located towards the top of the menu.
2. Tap on “Wi-Fi” to enter the Wi-Fi settings.
The “Wi-Fi” settings menu on your Amazon Fire tablet allows you to manage and connect to available Wi-Fi networks. It provides you with options to configure wireless network connections and access the internet.
When you tap on “Wi-Fi,” a new screen will open, displaying a list of available Wi-Fi networks in your vicinity.
In the Wi-Fi settings, you will see a list of network names (SSIDs) along with their signal strengths and security status. The networks with a lock icon require a password to connect.
By tapping on “Wi-Fi,” you are one step closer to connecting to a hotspot on your Amazon Fire tablet. In the next step, we will guide you through the process of selecting the hotspot network from the available Wi-Fi networks.
Let’s move on to the next step and continue the process of connecting to a hotspot on your Amazon Fire tablet.
Step 3: Select the Hotspot Network
After accessing the Wi-Fi settings on your Amazon Fire tablet, the next step is to select the hotspot network from the list of available Wi-Fi networks. Follow the instructions below:
1. In the Wi-Fi settings menu, you will see a list of available networks. Scan the list and look for the name of the hotspot network you want to connect to.
2. Once you have identified the hotspot network, tap on its name to select it.
When you tap on the hotspot network, your Amazon Fire tablet will attempt to establish a connection with it. This process may take a few seconds.
If the hotspot network is password-protected, a prompt will appear asking you to enter the password. Type in the correct password and ensure that it is case-sensitive.
It is important to note that the hotspot network name (SSID) and password are set up by the person who created the hotspot. If you are connecting to your own Amazon Fire tablet’s hotspot, ensure that you remember the password you set during the configuration process in the previous steps.
Once you have entered the password, your Amazon Fire tablet will attempt to connect to the hotspot network. If the connection is successful, you will see a “Connected” status next to the hotspot network name in the Wi-Fi settings.
Congratulations! You have successfully selected and connected to the hotspot network on your Amazon Fire tablet. Now, you can start using the shared internet connection to browse the web, stream videos, or perform any other online activities.
In the next step, we will discuss how to secure your hotspot connection by setting up a strong password. This ensures that only authorized devices can connect to your hotspot.
Let’s move on to the next step and continue the process of connecting to a hotspot on your Amazon Fire tablet.
Step 4: Enter the Hotspot Password
After selecting the hotspot network on your Amazon Fire tablet, the next step is to enter the password (if required) to establish a secure connection. Follow the instructions below:
1. If the selected hotspot network is password-protected, a prompt will appear asking you to enter the password.
2. Carefully type in the password for the hotspot network. Make sure to pay attention to lowercase and uppercase letters as passwords are case-sensitive.
3. Once you have entered the password, tap on the “Connect” or “Join” button to proceed.
Your Amazon Fire tablet will attempt to authenticate the password and establish a connection with the hotspot network. This process may take a few moments.
It is important to note that the password for the hotspot network is set by the person who created the hotspot. If you are connecting to your own Amazon Fire tablet’s hotspot, ensure that you remember the password you set during the hotspot configuration.
If the password is correct, and the connection is successfully established, you will see a “Connected” status next to the hotspot network name in the Wi-Fi settings.
By entering the correct hotspot password, you are ensuring that only authorized devices can connect to your hotspot network, protecting your shared internet connection and maintaining the privacy of your hotspot.
Congratulations! You have successfully entered the hotspot password and established a secure connection on your Amazon Fire tablet. Now, you can enjoy the shared internet connection on your tablet and any other connected devices.
In the next section, we will wrap up the article and provide a summary of the main points discussed.
Conclusion
Enabling and using the hotspot feature on your Amazon Fire tablet allows you to convert your device into a portable Wi-Fi hub, providing internet connectivity to other devices. By following the step-by-step guide outlined in this article, you can easily set up and connect to a hotspot on your Amazon Fire tablet.
We began by understanding the concept of a hotspot and its functionality. A hotspot acts as a wireless network gateway, allowing devices to connect to the internet without relying on traditional wired connections.
To enable the hotspot feature on your Amazon Fire tablet, you navigated to the Settings menu, tapped on “Network & Internet,” and accessed the “Hotspot & Tethering” option. From there, you toggled on the “Mobile Hotspot” feature, which turned your tablet into a Wi-Fi hotspot.
Customizing your hotspot settings, such as changing the network name (SSID) or setting up a password, adds a personal touch and enhances the security of your hotspot network.
Once your hotspot was enabled, you connected other devices by accessing the Wi-Fi settings, selecting the hotspot network from the available list, and entering the password if required. This allowed you to share the internet connection and enjoy seamless connectivity on all devices.
Remember to monitor your data usage and consider the limitations and costs associated with your mobile data plan while using the hotspot feature.
By leveraging the hotspot functionality on your Amazon Fire tablet, you have the flexibility to stay connected wherever you go. Whether you need internet access for work, entertainment, or everyday tasks, the hotspot feature provides a convenient solution.
Now that you have successfully learned how to enable, customize, and connect to a hotspot on your Amazon Fire tablet, you can make the most of its versatility and enjoy uninterrupted internet connectivity on all your devices.
So go ahead, turn your Amazon Fire tablet into a hotspot and stay connected on the go!