Introduction
Overclocking your CPU can be a thrilling and effective way to enhance the performance of your laptop. By pushing your processor beyond its factory-set limits, you can experience faster and more responsive computing. However, it’s important to approach overclocking with caution, especially when it comes to laptops.
Before we delve into the details of how to overclock your CPU on a laptop, let’s briefly understand what overclocking actually means. In simple terms, overclocking involves adjusting the clock speed of your CPU to make it run faster than its default settings. By increasing the clock speed, you can achieve better processing power and potentially boost the performance of resource-intensive tasks like gaming, video editing, and 3D rendering.
While overclocking can yield impressive results, it’s crucial to consider the safety implications, especially for laptops. Unlike desktop PCs, laptops typically have limited cooling capabilities, as they are designed to be portable and compact. Excessive heat buildup may lead to system instability, reduced lifespan of components, and even irreversible damage. Therefore, it’s important to ensure that your laptop is well-equipped to handle the increased temperature and stress that overclocking can impose.
Before diving into the steps of overclocking your laptop’s CPU, it’s necessary to assess the cooling system of your device. Check if the cooling fans are clean and free from dust, and if the airflow vents are unobstructed. Additionally, consider investing in a laptop cooling pad or a cooling stand to dissipate heat effectively.
Before embarking on the journey of overclocking, it’s essential to take some precautions to prevent any potential damage to your laptop. Backup your important data to an external storage device or cloud storage, as overclocking can sometimes lead to unstable systems or crashes. It’s also advisable to keep a record of your laptop’s default settings in case you need to revert back to them.
In the next section, we’ll explore the first step to overclocking your laptop’s CPU: updating your BIOS software. This crucial step will provide you with the necessary foundation to safely and effectively overclock your CPU.
Understanding Overclocking
Overclocking is the process of increasing the clock speed of your CPU, allowing it to perform at a higher frequency than its default settings. This technique essentially pushes the processor to work harder and faster, resulting in improved performance for demanding tasks.
By overclocking your CPU, you can potentially achieve significant performance gains, especially during resource-intensive operations like gaming, video editing, and rendering. However, it’s important to note that overclocking may not always be necessary or beneficial for all users.
The clock speed of a CPU is measured in gigahertz (GHz), and it represents the number of cycles the processor can execute in one second. The higher the clock speed, the faster the CPU can process instructions and carry out computations.
By increasing the clock speed, you can effectively make your CPU work faster, completing tasks more quickly. This can result in smoother multitasking, reduced rendering times, and improved overall system responsiveness.
It’s crucial to understand that while overclocking can offer impressive performance gains, there are potential drawbacks and risks to consider. Overclocking generates more heat, which can strain the cooling system of your laptop. This increased heat can lead to instability, crashes, and even permanent hardware damage if not properly managed.
Additionally, not all CPUs are created equal, and not all chips are capable of achieving the same level of overclocking. Factors such as the quality of the chip’s silicone, the efficiency of the cooling system, and the CPU’s power limitations can influence how far you can push the clock speed.
It’s also worth mentioning that overclocking your CPU will consume more power, which can result in higher energy bills. Therefore, it’s important to strike a balance and find a stable overclocking configuration that offers significant performance gains without compromising the stability and longevity of your laptop.
Next, we’ll discuss the crucial question of whether it’s safe to overclock your laptop’s CPU and the steps you can take to ensure a safe and successful overclocking experience.
Is Overclocking Safe for Your Laptop?
Overclocking can offer tempting performance boosts, but it’s important to consider the safety implications, particularly when it comes to laptops. Unlike desktop computers, laptops typically have limited cooling capabilities, making them more susceptible to heat-related issues. So, is overclocking safe for your laptop? Let’s explore.
The safety of overclocking largely depends on two factors: the cooling system of your laptop and the extent to which you push your CPU’s clock speed. Laptops are designed to balance performance and portability, often sacrificing extensive cooling systems to maintain a slim form factor.
Excessive heat generation can pose serious risks to your laptop’s components. Overclocking your CPU increases its power consumption and heat output, which can overwhelm the cooling system’s capacity to dissipate heat. This can lead to system instability, thermal throttling, or even permanent damage to the CPU and other sensitive hardware.
Before embarking on the overclocking process, it’s essential to ensure that your laptop’s cooling system is up to the task. Check for any dust or debris clogging the cooling vents or obstructing the fans. Keep in mind that consistent airflow and efficient heat dissipation are essential for maintaining a stable and cool operating temperature.
If your laptop’s cooling system is already struggling to keep temperatures in check during normal usage, it may not be suitable for overclocking. Overclocking could push the temperatures beyond safe limits, posing a significant risk to your hardware’s life expectancy and overall stability.
Another crucial factor to consider is your laptop’s power supply. Overclocking increases power consumption, and if your laptop’s power brick or adapter doesn’t have adequate headroom, it may not deliver the needed power, leading to instability or system crashes.
It’s important to note that not all laptops are designed to support overclocking. Some manufacturers lock the CPU’s multiplier or heavily restrict the voltage and clock speed settings, making it impossible to overclock. Before attempting to overclock, verify if your laptop actually allows for such customization in the BIOS settings.
In the next sections, we’ll discuss the essential steps and precautions you should take before embarking on the overclocking journey with your laptop. These steps will help maximize the chances of a successful and safe overclocking experience.
Checking Your Laptop’s Cooling System
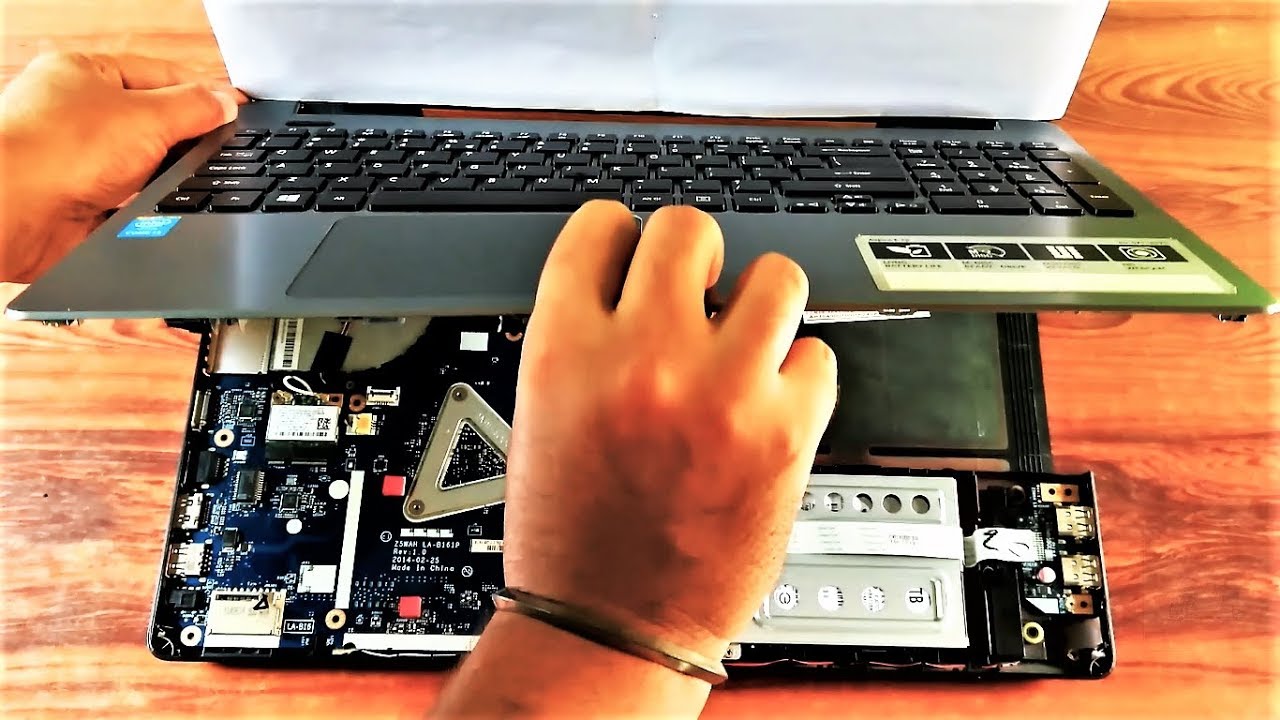
Before delving into the process of overclocking your laptop’s CPU, it’s crucial to assess the condition and effectiveness of your laptop’s cooling system. Overclocking generates additional heat, and without proper cooling, it can lead to system instability and potential damage to your laptop’s components.
Here are some essential steps to check your laptop’s cooling system:
- Remove Dust and Debris: Over time, dust and debris can accumulate in the cooling vents and fans, obstructing airflow. Use compressed air or a soft brush to carefully clean out these areas, helping to improve ventilation and cooling efficiency.
- Inspect Fan Functionality: Turn on your laptop and listen for the sound of the cooling fans. If you don’t hear any airflow or notice that the fans aren’t spinning, it might indicate a problem with the cooling system. In such cases, consult a technician or contact the laptop manufacturer for assistance.
- Elevate the Laptop: Using your laptop on a flat surface can restrict airflow, causing heat to accumulate. Consider using a laptop cooling pad or a stand to elevate the laptop, allowing for better airflow and heat dissipation.
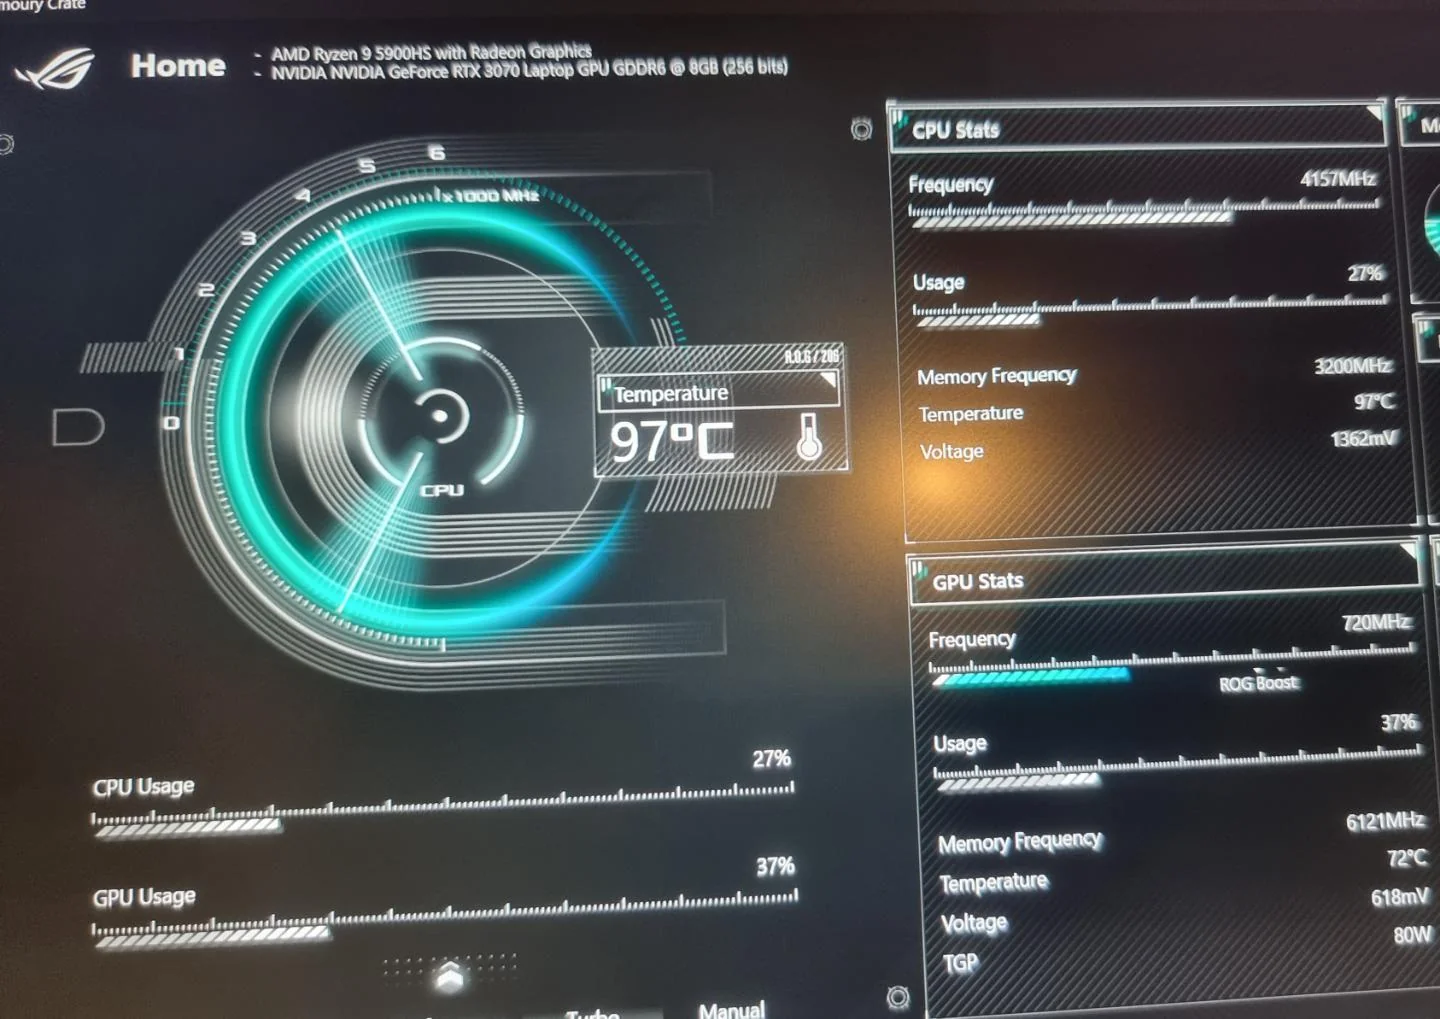
- Monitor Temperatures: Install temperature monitoring software to keep an eye on your laptop’s internal temperatures. This will help you identify if your laptop is running hot or experiencing thermal throttling. Ideal temperature ranges will vary depending on the laptop model, so check the manufacturer’s specifications for reference.
By checking and ensuring your laptop’s cooling system is in good working order, you’re setting the foundation for a safer overclocking process. Adequate cooling is essential to maintain stable system performance and prevent overheating during the increased workload brought about by overclocking.
However, it’s important to remember that even with a well-functioning cooling system, there are limits to how far you can push your laptop’s thermal capabilities. If your laptop tends to run hot even during regular usage, it may not be suitable for overclocking. In such cases, it’s better to prioritize the longevity and stability of your laptop over the potential performance gains that overclocking can offer.
Now that we’ve assessed the cooling system, let’s proceed to the precautions you should take before diving into the overclocking process.
Precautions Before Overclocking
Before embarking on the exciting process of overclocking your laptop’s CPU, it’s crucial to take necessary precautions to ensure a safe and successful overclocking experience. These precautions will help minimize the risk of damaging your laptop’s hardware or encountering stability issues.
Here are some important precautions to consider:
- Backup Your Data: Overclocking involves tweaking settings that can potentially lead to system instability or crashes. Before proceeding, make sure to back up all your important files and documents to an external storage device or cloud storage. This way, you can safeguard your important data in case anything goes wrong during the overclocking process.
- Research Your Laptop Model: Not all laptops are created equal when it comes to overclocking capabilities. Research your specific laptop model to determine if it is suitable for overclocking and if there are any specific recommendations or limitations provided by the manufacturer.
- Record Default Settings: Before making any changes, take note of your laptop’s default BIOS settings. This will allow you to easily revert back to the original settings if needed or if you encounter any stability issues or unexpected behavior after overclocking.
- Update BIOS and Drivers: Ensure that your laptop’s BIOS (Basic Input/Output System) and drivers are up to date. Manufacturers often release updates that address performance and stability issues, so it’s important to have the latest firmware and driver versions installed before attempting to overclock.
- Start with Conservative Settings: It’s advisable to start with conservative overclocking settings initially. Gradually increase the clock speed and voltage in small increments, and test the stability of your laptop after each adjustment. This will help you find the optimal balance between performance gains and system stability.
- Monitor CPU Temperatures: Install software to monitor your CPU temperatures during the overclocking process. Keep a close eye on the temperature readings to ensure they stay within safe limits. If temperatures exceed the maximum recommended threshold, dial back the overclocking settings or consider investing in additional cooling solutions.
- Accept the Risks: It’s essential to understand and accept the risks associated with overclocking. Pushing your laptop’s CPU beyond its designed specifications carries the potential for instability, reduced hardware lifespan, or even irreparable damage. Make an informed decision and be prepared for any consequences that may arise.
By following these precautions, you’ll be better equipped to handle the overclocking process and minimize any potential risks. Remember, overclocking is not without its hazards, and it’s important to proceed with caution and prioritize the long-term stability and longevity of your laptop.
Now that we’ve covered the necessary precautions, let’s move on to the first step: updating your laptop’s BIOS software.
Step 1: Updating Your BIOS
Before you begin overclocking your laptop’s CPU, it’s crucial to ensure that your laptop’s BIOS (Basic Input/Output System) is up to date. BIOS updates often include improvements in system stability and may offer enhanced performance options that can support overclocking.
Updating your BIOS can vary depending on the laptop manufacturer and model, so it’s important to follow the specific instructions provided by the manufacturer. Here’s a general guide to updating your BIOS:
- Identify the Manufacturer and Model: Start by identifying the manufacturer and model of your laptop. This information can usually be found on the laptop’s bottom panel or in the system specifications.
- Visit the Manufacturer’s Website: Go to the official website of your laptop’s manufacturer and navigate to the support or downloads section. Look for the BIOS or firmware updates for your specific laptop model.
- Download the Latest BIOS Update: Locate the latest BIOS update for your laptop model and download it. The file may be in the form of a ZIP package or an executable file.
- Backup Important Data: Before proceeding with the BIOS update, it’s always a good idea to back up your important data, as a failed BIOS update can potentially render your laptop inoperable. Save your important files to an external storage device or cloud storage to ensure their safety.
- Follow Installation Instructions: Open the downloaded BIOS update file and carefully follow the installation instructions provided by the manufacturer. These instructions may include specific steps to execute the update, such as running an executable file or applying a firmware update from within the BIOS settings.
- Ensure Power and Stability: During the BIOS update process, it’s important to maintain a stable power source. Ensure that your laptop is connected to a reliable power outlet or use a fully charged battery to prevent any disruptions during the update. Avoid interrupting the process or turning off your laptop.
- Verify Successful Update: After the BIOS update is complete, restart your laptop and enter the BIOS settings to verify that the new version has been successfully installed. Consult the manufacturer’s documentation or support if you have any doubts or concerns.
By updating your laptop’s BIOS to the latest version, you can benefit from any performance enhancements, bug fixes, and increased compatibility that the update provides. This will ensure that your laptop is optimized for overclocking and can handle the additional stress that comes with pushing the CPU beyond its default settings.
With the BIOS updated, we’re now ready to proceed to the next step of adjusting voltage settings to prepare your laptop for overclocking.
Step 2: Adjusting Voltage Settings
After updating your laptop’s BIOS, the next step in overclocking your CPU is adjusting the voltage settings. This process ensures that your laptop’s CPU receives the necessary power to handle the increased clock speed without compromising stability.
Here’s a step-by-step guide on adjusting voltage settings:
- Enter BIOS Settings: Start by restarting your laptop and accessing the BIOS settings. This is usually done by pressing a specific key (such as F2, Delete, or Escape) during the boot process. Consult your laptop’s manual or the manufacturer’s website for the specific key to enter the BIOS.
- Navigate to Voltage Control: Once inside the BIOS settings, look for the voltage control options. The location and labeling of these options can vary depending on the laptop manufacturer and BIOS version. Common labels include “Vcore,” “CPU Voltage,” or “CPU VCore.
- Set a Baseline Value: Start by setting the voltage to a slightly higher value than the default. This ensures stability during the overclocking process. Usually, a small increase of around 0.05-0.1 volts is sufficient to provide adequate power to the CPU.
- Save and Restart: After adjusting the voltage setting, save the changes and exit the BIOS. Your laptop will restart, applying the new voltage settings.
- Stress Test and Monitor: Once your laptop has restarted, it’s important to stress test your CPU to ensure stability. There are various benchmarking and stress-testing tools available, such as Prime95 or IntelBurnTest. Monitor the temperatures and stability of your laptop during the stress test, keeping an eye out for any signs of overheating or crashes.
- Gradually Adjusting Voltage: If your laptop remains stable during the stress test, you can further fine-tune the voltage settings. Gradually decrease the voltage by small increments (e.g., 0.01 volts) until instability or crashes occur. Once instability is detected, set the voltage back to the last stable value.
- Repeating the Stress Test: After adjusting the voltage, repeat the stress test to ensure continued stability. Monitor the temperatures and system performance to ensure that the new voltage settings are delivering optimal results.
Adjusting the voltage settings is a crucial step in ensuring your laptop’s CPU receives the right amount of power while overclocking. It helps maintain stability and prevents system crashes or hardware damage due to insufficient or excessive power delivery.
Once you have successfully adjusted the voltage settings and confirmed stability, you can proceed to the next step: increasing the CPU clock speed to unleash the full potential of your laptop’s performance.
Step 3: Increasing CPU Clock Speed
Now that you have adjusted the voltage settings, it’s time to increase the clock speed of your laptop’s CPU. This step will further optimize the performance by allowing the processor to handle more instructions per second. Here’s a guide on increasing the CPU clock speed:
- Enter BIOS Settings: Restart your laptop and enter the BIOS settings by pressing the designated key during the boot process. The specific key may vary depending on your laptop model.
- Locate CPU Clock Speed Options: Within the BIOS settings, search for options related to the CPU clock speed, often labeled as “CPU Ratio,” “Multiplier,” or “CPU Clock.” Depending on the BIOS version and laptop model, the options may be found in different locations.
- Increment the Clock Speed: Increase the CPU clock speed by a small increment, such as 100 MHz. It’s important to take conservative steps to maintain stability while overclocking. Be cautious and avoid jumping to high clock speeds immediately.
- Save and Exit BIOS: Save the changes made to the clock speed and exit the BIOS. Your laptop will restart, applying the new clock speed settings.
- Stress Test and Monitor: After the laptop restarts, perform stress tests to ensure stability. Use software like Prime95 or AIDA64 to put your CPU under load and monitor its temperatures and performance. If stability issues or excessive temperatures are observed, revert to the previous clock speed and re-evaluate the stability.
- Gradual Clock Speed Increase: If your laptop remains stable during the stress tests, consider gradually increasing the clock speed. Incrementally raise the clock speed by another small amount (e.g., 100 MHz) and repeat the stress testing process to verify stability.
- Keep Monitoring Temps and Stability: Continuously monitor the temperatures and stability of your laptop throughout the process. If temperatures exceed safe limits or if instability occurs, dial back the clock speed to the last stable setting.
Increasing the CPU clock speed allows your laptop’s CPU to process instructions at a faster rate, resulting in improved performance for tasks that require heavy processing power. However, it’s important to find a balance between performance gains and system stability.
Remember that every CPU is different, and not all laptops will be capable of achieving the same level of overclocking. Factors like the quality of the chip and the efficiency of the cooling system will influence how far you can push the clock speed. It’s essential to monitor temperatures and stability during the overclocking process to ensure that your laptop operates within safe limits.
Once you’ve successfully increased the CPU clock speed and obtained a stable configuration, you can proceed to the next step: stress testing and monitoring the system for further adjustments.
Step 4: Stress Testing and Monitoring
After adjusting the clock speed and voltage settings, it’s crucial to stress test and monitor your laptop to ensure stability and optimal performance. Stress testing helps identify any potential issues or instability that may arise during intense usage scenarios. Here’s a guide on stress testing and monitoring your laptop:
- Choose a Stress Testing Software: There are various stress testing tools available, such as Prime95, AIDA64, or IntelBurnTest. Select a reliable stress testing software that is known for its ability to put the CPU under heavy load.
- Run the Stress Test: Launch the stress testing software and initiate the stress test. These tests typically simulate intense workloads, pushing the CPU to its limits. Monitor the CPU temperatures and system performance during the test.
- Monitor Temps and Stability: Keep a close eye on the CPU temperatures throughout the stress test. High temperatures can indicate inadequate cooling or an unstable overclock. If temperatures exceed the safe operating range or if the system becomes unstable, it’s crucial to address the issue by adjusting clock speeds, voltage settings, or improving cooling.
- Monitor System Performance: Pay attention to the overall system performance during the stress test. Look for signs of instability, such as crashes, blue screens, or abnormal system behavior. Note any errors or failures that occur during the stress test.
- Record Observations: Take note of the temperatures and system performance observed during the stress test. This information will serve as a reference for future adjustments or troubleshooting if necessary.
- Adjust Settings as Needed: Based on the stress test results and observations, determine if any adjustments are necessary. If the system is stable and temperatures are within acceptable limits, you may proceed to further fine-tuning your overclocking settings. However, if instability or high temperatures are observed, consider adjusting clock speeds, voltage settings, or improving cooling solutions.
Stress testing and monitoring are crucial steps in overclocking your laptop’s CPU. These tests help ensure that your system can handle the increased workload and that it remains stable under prolonged and demanding usage.
It’s important to note that stress testing puts additional load on your laptop’s components, including the CPU and cooling system. Make sure to monitor temperatures closely and address any signs of overheating or instability promptly to prevent potential damage or performance degradation.
With stress testing and monitoring complete, you can proceed to the final step: further tweaking and fine-tuning your overclocking settings to achieve optimal performance while maintaining system stability.
Step 5: Tweaking Further
Once you have completed the initial steps of overclocking and have achieved stability through stress testing, you can proceed to further tweaking and fine-tuning your overclocking settings. This step allows you to optimize your laptop’s performance while maintaining stability. Here’s a guide on how to tweak your overclocking settings:
- Incremental Adjustments: Make small, incremental adjustments to your clock speed and voltage settings. Gradually increase the clock speed or decrease the voltage in small steps, such as 10-20 MHz or 0.005-0.01 volts, and repeat the stress testing process to check for stability. This method helps you find the perfect balance between performance gains and system stability.
- Monitor Temperatures: Keep a close eye on the temperatures of your CPU during the stress testing process and regular usage. As you further tweak your overclocking settings, there is a possibility that temperatures may increase. If temperatures exceed the safe operating range, adjust your settings accordingly or consider improving your laptop’s cooling system.
- Verify Stability: After each adjustment, stress test your laptop to ensure stability. Monitor for any signs of instability, such as crashes, freezes, or errors. If instability occurs, revert to the previous stable settings or make further adjustments to restore stability.
- Record Your Settings: Keep a record of the settings that provide a stable and optimal overclocking configuration. This will allow you to easily revert back to those settings if needed or to reference them for future performance tweaking.
- Experiment with Memory: If desired, you can experiment with overclocking your laptop’s memory (RAM) as well. However, it’s important to approach memory overclocking with caution, as it can be more complex and may require adjusting timings and voltages. Ensure you have a good understanding of memory overclocking and follow recommended guidelines for your specific memory modules.
- Balance Performance and Stability: As you continue to tweak and fine-tune your overclocking settings, it’s crucial to find the right balance between performance gains and system stability. Pushing your laptop’s CPU to its limit may offer significant performance improvements, but it’s important to prioritize the stability and longevity of your system.
Remember, overclocking is not without risks, and pushing your laptop’s components beyond their design specifications can lead to instability or damage. Ensure that you are comfortable with the process and have a good understanding of your laptop’s capabilities and limitations.
By following these guidelines and taking a cautious approach to tweaking and fine-tuning your overclocking settings, you can achieve an optimal balance between performance and stability for your laptop.
With the tweaking process complete, you can now enjoy the enhanced performance of your overclocked laptop. Keep in mind that monitoring temperatures and system stability on an ongoing basis is important to ensure that your laptop continues to operate within safe limits. Happy computing!
Conclusion
Overclocking your laptop’s CPU can be an exciting endeavor that allows you to squeeze maximum performance out of your device. However, it’s crucial to approach overclocking with caution and prioritize the safety and stability of your laptop. By following the steps outlined in this guide and taking necessary precautions, you can safely and successfully overclock your CPU.
Understanding the basics of overclocking, checking your laptop’s cooling system, and taking necessary precautions are essential steps before diving into the overclocking process. Updating your BIOS and adjusting voltage settings lay the foundation for a stable and optimized overclocking experience.
Increasing the CPU clock speed and stress testing your laptop will help you achieve the desired performance gains while ensuring system stability. Continuously monitor temperatures and stability during the overclocking process, making necessary adjustments to keep them within safe limits.
Further tweaking and fine-tuning your overclocking settings allows you to discover the optimal balance between performance and stability. By gradually experimenting with small adjustments and recording your stable settings, you can maximize your laptop’s performance potential while maintaining its integrity.
Remember that every laptop is unique, and not all laptops will be capable of achieving the same level of overclocking. The results and limits of overclocking can vary depending on factors like your specific CPU, cooling capabilities, and power supply.
Lastly, it’s important to note that overclocking your laptop’s CPU may void the warranty and carry some risks. It’s essential to understand and accept these risks before proceeding. If at any point you encounter instability, excessive temperatures, or other issues, it’s recommended to revert back to the default settings and consult with an expert if needed.
With proper care, caution, and monitoring, you can safely and effectively overclock your laptop’s CPU, unlocking enhanced performance for demanding tasks. Enjoy the benefits of a faster and more responsive laptop while achieving a seamless and enjoyable computing experience.