Introduction
In today’s digital age, computers and laptops have become an integral part of our daily lives. Whether we use them for work, gaming, or simply browsing the internet, we rely on these machines to perform tasks seamlessly. However, there is nothing more frustrating than experiencing a CPU overheating issue. Not only does it hinder our productivity, but it also poses a potential threat to the health and longevity of our devices.
CPU overheating occurs when the central processing unit (CPU) of a computer or laptop reaches abnormally high temperatures. This can result in system instability, crashes, and even permanent damage to the hardware. Understanding the causes and signs of CPU overheating is crucial in preventing such issues and ensuring the optimal performance of our devices.
In this article, we will delve into the various causes of CPU overheating and discuss effective solutions to address the problem. Whether you are a tech enthusiast or a casual computer user, the information provided here will help you keep your CPU running at an optimal temperature, preventing unnecessary headaches and costly repairs.
Understanding CPU Overheating
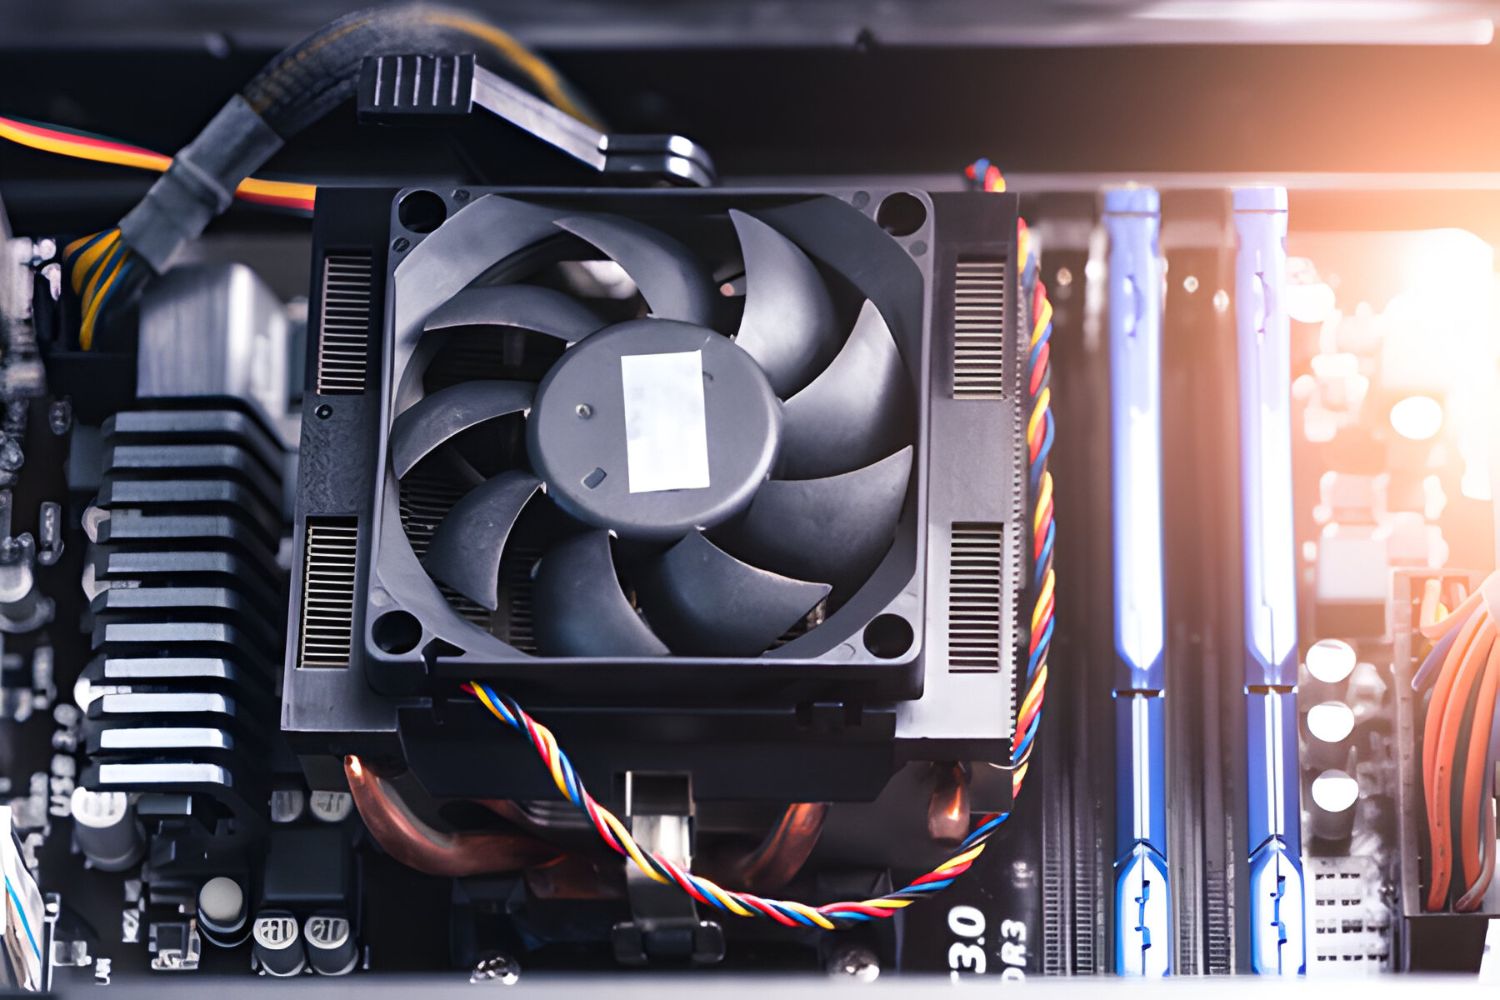
CPU overheating refers to the situation when the central processing unit of a computer or laptop exceeds its maximum temperature threshold. CPUs generate heat during their operation as they process millions of instructions per second. To dissipate this heat, computers are equipped with cooling systems, which typically include a combination of fans, heat sinks, and thermal paste.
When the CPU temperature rises above the recommended limit, it can result in a variety of issues that negatively impact the performance and stability of the system. Excessive heat can cause the CPU to throttle, reducing its speed to prevent damage. In extreme cases, the CPU may shut down the system altogether to protect itself from permanent harm.
Understanding the causes of CPU overheating is essential for effectively addressing the issue. It allows users to take the necessary steps to prevent or resolve the problem before it causes significant damage to the hardware. By monitoring and managing CPU temperatures, users can ensure the longevity and optimal performance of their computers.
Proper ventilation, the presence of cooling solutions, and maintaining a suitable operating environment are all crucial factors in maintaining the temperature of the CPU within acceptable limits. In the next sections, we will explore the common causes of CPU overheating and discuss practical solutions to alleviate the problem.
Causes of CPU Overheating
CPU overheating can be attributed to a variety of factors, ranging from hardware-related issues to environmental conditions. Identifying the root cause is crucial in effectively addressing the problem. Let’s explore some common causes of CPU overheating:
- Inadequate Cooling System: Insufficient cooling systems, such as improperly sized or malfunctioning fans, can fail to effectively dissipate the heat generated by the CPU. This can lead to an increase in temperatures and subsequent overheating.
- Dust Accumulation: Over time, dust and debris can build up on the cooling components, inhibiting airflow and heat transfer. This reduces the cooling efficiency and can result in CPU overheating.
- Improper Placement of Computer: Placing a computer in a cramped or poorly ventilated area restricts airflow around the system, hindering proper heat dissipation. This can cause the CPU to overheat, especially during extended periods of usage.
- Overclocking: Overclocking refers to increasing the clock speed of the CPU beyond its default settings. While this can boost performance, it also generates more heat. If not accompanied by adequate cooling measures, it can easily lead to CPU overheating.
- Insufficient Thermal Paste: Thermal paste is used to ensure proper contact and heat transfer between the CPU and the cooling components. If the thermal paste is improperly applied or has degraded over time, it can impede heat dissipation and contribute to CPU overheating.
- High Ambient Temperatures: Operating a computer in a hot environment, especially without adequate cooling, can amplify the effects of CPU heat generation and lead to overheating.
- Heavy Workload: Running resource-intensive tasks, such as gaming or demanding software applications, can cause the CPU to work harder and generate more heat. If not properly managed, this can result in overheating.
Understanding the causes of CPU overheating helps in implementing appropriate measures to prevent or mitigate the issue. In the next sections, we will discuss practical solutions to address these causes and keep the CPU temperatures within safe limits.
Inadequate Cooling System
An inadequate cooling system is one of the primary causes of CPU overheating. The cooling system of a computer consists of fans, heat sinks, and sometimes liquid cooling solutions, all working together to dissipate heat generated by the CPU. When this system fails to function properly, it can lead to an increase in CPU temperatures. Let’s look at some reasons why the cooling system may be inadequate:
- Malfunctioning Fans: Fans play a crucial role in cooling the CPU and other components of a computer. When fans malfunction or fail altogether, they are unable to efficiently remove heat from the CPU. This can result in increased temperatures and eventual overheating. Regularly checking the fans for any signs of damage, cleaning them, and replacing them if necessary can prevent this issue.
- Improperly Sized Cooling Components: Ensuring that the cooling components, such as fans and heat sinks, are correctly sized for the specific CPU and its cooling requirements is essential. Using undersized or incompatible cooling components will impede heat dissipation and lead to overheating. When building or upgrading a computer, it is crucial to select cooling solutions that are suitable for the CPU being used.
- Insufficient Airflow: Proper airflow is crucial for maintaining optimal CPU temperatures. A lack of adequate airflow within the computer case can trap heat and prevent it from being effectively dissipated. This can be caused by cables obstructing the path of airflow, too many components packed into a small space, or a lack of ventilation. Ensuring that cables are properly managed, removing any obstructions, and providing proper ventilation can help alleviate this issue.
- Inadequate Case Fans: Case fans are responsible for circulating air throughout the computer case, ensuring that hot air is expelled and replaced by cooler air. If the case is not equipped with sufficient fans or they are not properly positioned, the airflow may be limited, leading to higher CPU temperatures. Adding additional or better-placed case fans can improve the overall cooling system’s efficiency.
Resolving inadequate cooling system issues is crucial in preventing CPU overheating. Regular maintenance, such as cleaning dust from fans and heat sinks, checking for any signs of malfunctioning fans, and ensuring proper airflow, can go a long way in keeping the CPU cool and preventing potential damage.
Dust Accumulation
Dust accumulation is a common cause of CPU overheating and can significantly impact the efficiency of the cooling system. Over time, dust particles can build up on the fans, heat sinks, and other components, restricting airflow and impeding the heat dissipation process. This can lead to increased CPU temperatures and potential overheating issues. Let’s explore the impact of dust accumulation and how to address it:
Impact of Dust Accumulation:
When dust accumulates on the fans and heat sinks, it acts as an insulating layer, hindering the transfer of heat. As a result, the cooling components are unable to effectively dissipate the heat generated by the CPU, causing the temperatures to rise. Additionally, dust can block the air intake and exhaust vents, further impeding airflow and exacerbating the problem.
Addressing Dust Accumulation:
To prevent dust accumulation and ensure optimal cooling, regular cleaning is essential. Here are some steps to address dust accumulation:
- Compressed Air: Using compressed air can effectively remove dust from hard-to-reach areas. Gently blow the compressed air on the fans, heat sinks, and vents to dislodge the accumulated dust. Be cautious not to use excessively high pressure, as it may damage delicate components.
- Cotton Swabs or Soft Brushes: For areas that are difficult to clean with compressed air, use cotton swabs or soft brushes to gently remove dust. Be careful not to apply excessive force or damage any components.
- Vacuum Cleaner: A vacuum cleaner with a small brush attachment can be used to remove loose dust particles from fans and vents. Ensure that the vacuum cleaner is on a low setting to avoid damaging any sensitive components.
- Professional Cleaning: If you are not comfortable performing the cleaning yourself, consider taking your computer or laptop to a professional technician who can clean the internal components thoroughly.
Regularly cleaning your computer or laptop can significantly reduce the risk of CPU overheating caused by dust accumulation. Aim to clean the system every three to six months, depending on the environment in which the computer operates. Implementing preventive measures such as using dust filters on intake fans or keeping the computer in a clean, dust-free area can also help minimize the accumulation of dust and prolong the lifespan of your system.
Improper Placement of Computer
The placement of a computer or laptop plays a crucial role in ensuring proper ventilation and preventing CPU overheating. If a computer is placed in a cramped or poorly ventilated area, it can restrict airflow around the system and hinder the cooling process. Let’s explore the impact of improper placement and how to address it:
Impact of Improper Placement:
When a computer is placed in a confined space, such as inside a cabinet or against a wall, it restricts the flow of air around the system. This can lead to stagnant hot air, preventing the cooling components from effectively dissipating heat. Additionally, placing a laptop on soft surfaces like bedding or carpets can block the air intake vents, further restricting airflow and causing the CPU to overheat.
Addressing Improper Placement:
To ensure proper placement of your computer or laptop and prevent CPU overheating, consider the following tips:
- Adequate Space: Provide sufficient space around your computer or laptop to allow for proper airflow. Avoid placing it in cramped spaces or against walls. Ideally, leave a few inches of space on all sides to ensure adequate ventilation.
- Elevate Laptops: If using a laptop, avoid placing it on soft surfaces like bedding, carpets, or pillows. Instead, use a hard, flat surface such as a desk or laptop cooling pad. This allows for better airflow and keeps the laptop cooler.
- Clean Workspace: Ensure that your workspace is clean and free from dust and debris. Dust can accumulate inside the computer and hinder the cooling system’s efficiency. Regularly clean your workspace to prevent dust from entering the computer case.
- Ventilation: Ensure that the computer has access to proper ventilation. Avoid blocking air intake and exhaust vents by keeping the surrounding area clear. If necessary, use external cooling solutions, such as additional fans or cooling pads, to improve airflow.
By properly placing your computer or laptop, you can optimize airflow and prevent CPU overheating. Remember to periodically check and clean the vents and fans to remove any dust accumulation. These simple steps will go a long way in maintaining optimal temperatures and prolonging the lifespan of your device.
Overclocking
Overclocking is a popular technique among computer enthusiasts and gamers to push their CPUs beyond their default operating frequencies. While overclocking can provide a significant boost in performance, it also generates more heat. Without appropriate cooling measures, overclocking can easily lead to CPU overheating. Let’s explore the impact of overclocking and how to address it:
Impact of Overclocking:
When you overclock a CPU, you increase its clock speed and voltage to achieve higher computational performance. However, this increase in clock speed also results in the generation of additional heat. The cooling system that was originally designed for the CPU’s default settings may not be sufficient to handle the increased heat output. As a result, the CPU can overheat and cause stability issues or even permanent damage.
Addressing Overclocking:
While overclocking can be enticing, it requires careful consideration and appropriate cooling measures. Here’s how you can address the potential overheating issues caused by overclocking:
- CPU Cooler Upgrade: An efficient CPU cooler with a higher heat dissipation capacity can help manage the increased heat generated during overclocking. Consider upgrading the stock cooler that comes with the CPU to a more powerful aftermarket cooler to ensure better cooling performance.
- Adequate Airflow: Ensure that your computer case has adequate airflow to prevent heat buildup. Use additional case fans or liquid cooling solutions to maintain lower temperatures during overclocking.
- Thermal Compound: Applying high-quality thermal compound between the CPU and the heat sink is essential. The thermal compound helps improve heat transfer, ensuring that the heat generated by the overclocked CPU is effectively dissipated.
- Monitoring Software: Use monitoring software to keep an eye on the CPU temperatures while overclocking. This will allow you to detect any excessive temperature increases and take necessary measures, such as adjusting clock speeds or adding additional cooling, to prevent overheating.
It is important to note that overclocking can void the warranty of your CPU, and there is always a risk involved in pushing the limits of the hardware. If you are not comfortable with the complexities of overclocking or if your cooling system is inadequate, it is recommended to stick with the default settings to ensure the longevity and stability of your CPU.
Insufficient Thermal Paste
Thermal paste, also known as thermal compound or thermal grease, is a crucial component in ensuring effective heat transfer between the CPU and the cooling system. Insufficient or improper application of thermal paste can lead to inadequate heat dissipation, resulting in CPU overheating. Let’s explore the impact of insufficient thermal paste and how to address it:
Impact of Insufficient Thermal Paste:
Thermal paste is applied between the CPU and the heat sink to fill microscopic imperfections on their surfaces. This improves the contact between the two components and enhances heat transfer. Insufficient thermal paste or improper application can create air gaps or uneven coverage, leading to reduced heat dissipation. This can result in higher CPU temperatures and potential overheating.
Addressing Insufficient Thermal Paste:
Ensuring proper application of thermal paste is crucial for effective heat transfer and preventing CPU overheating. Here are some steps to address insufficient thermal paste:
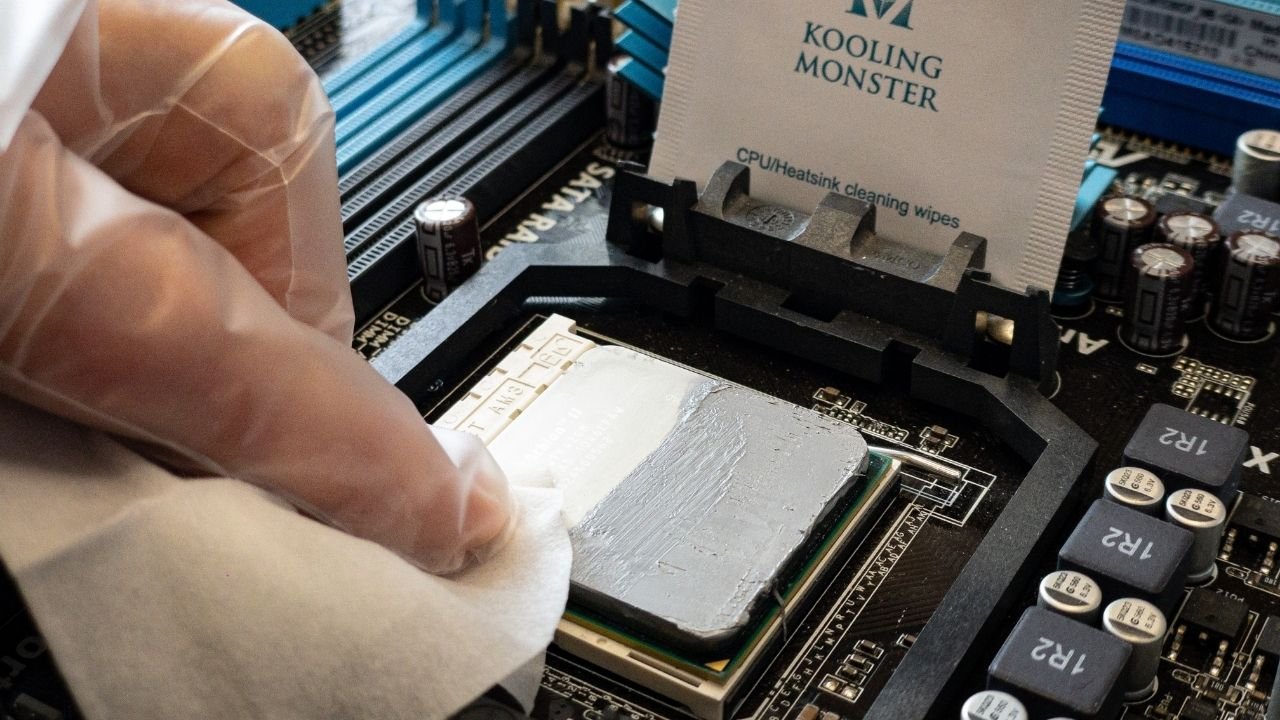
- Clean the Surfaces: Before applying thermal paste, clean the surfaces of the CPU and the heat sink using isopropyl alcohol and a lint-free cloth. This removes any residue or old thermal paste, ensuring a clean and smooth surface for better thermal conductivity.
- Apply the Right Amount: Apply a small pea-sized or rice-sized amount of thermal paste at the center of the CPU. Too much or too little thermal paste can hinder heat transfer, so it’s important to apply it in the correct quantity. The pressure of mounting the heat sink will help spread the paste evenly.
- Spread the Thermal Paste: Using a clean plastic card or applicator, spread the thermal paste evenly across the surface of the CPU. Ensure that the entire surface is covered, but be cautious not to apply excessive pressure or create air pockets.
- Reinstall the Heat Sink: Carefully reattach the heat sink onto the CPU, ensuring a firm and secure connection. Follow the manufacturer’s instructions for proper installation, including mounting pressure, screw tightening sequence, and any specific guidelines for your specific cooling solution.
Proper application of thermal paste is critical in maximizing heat transfer efficiency and preventing CPU overheating. Remember to periodically check the thermal paste condition and reapply it if necessary, especially during system upgrades or maintenance. This will help maintain optimal CPU temperatures and ensure the longevity and stability of your system.
High Ambient Temperatures
The ambient temperature refers to the temperature of the surrounding environment in which a computer operates. If the ambient temperature is high, it can significantly impact the temperature of the CPU and contribute to overheating. Let’s explore the impact of high ambient temperatures and how to address them:
Impact of High Ambient Temperatures:
When the ambient temperature is high, it becomes more challenging for the cooling system to dissipate heat effectively. The temperature difference between the CPU and the surrounding environment decreases, reducing the efficiency of heat transfer. This can cause the CPU to operate at higher temperatures, increasing the risk of overheating and potentially causing stability issues or damage to the hardware.
Addressing High Ambient Temperatures:
Addressing high ambient temperatures is crucial in preventing CPU overheating and maintaining optimal operating conditions for your computer. Here are some tips to address high ambient temperatures:
- Proper Ventilation: Ensure that your computer has proper ventilation. Keep the air vents clear from any obstructions and ensure that there is enough space around the computer for proper airflow.
- Air Conditioning: If the ambient temperature is consistently high, consider using air conditioning or fans to cool the room. Lowering the ambient temperature will help in maintaining lower CPU temperatures.
- Improved Cooling Solutions: Consider upgrading your cooling system with more efficient components, such as better fans or liquid cooling solutions. These can help maintain lower temperatures even in high ambient conditions.
- Reduced Workload: During periods of high ambient temperatures, avoid running resource-intensive tasks or applications that put a heavy load on the CPU. This will help in reducing heat generation and preventing CPU overheating.
- Relocate the Computer: If possible, move your computer to a cooler area with better air circulation. Placing it away from direct sunlight or sources of heat, such as radiators or other electronic devices, can help in maintaining lower CPU temperatures.
By addressing high ambient temperatures, you can help mitigate the risk of CPU overheating. Keeping your computer in a cool and well-ventilated environment will promote efficient heat dissipation and ensure the longevity and reliability of your system.
Heavy Workload
Running resource-intensive tasks or operating demanding software applications can put a heavy workload on the CPU. This increased workload leads to higher heat generation, which, if not properly managed, can result in CPU overheating. Let’s explore the impact of heavy workloads and how to address them:
Impact of Heavy Workload:
When the CPU is subjected to a heavy workload, it operates at higher frequencies and uses more power. This results in increased heat generation. If the cooling system is unable to effectively dissipate this excess heat, the CPU temperatures can rise, leading to potential overheating and system instability.
Addressing Heavy Workload:
Effectively managing heavy workloads is crucial in preventing CPU overheating and maintaining optimal operating conditions for your computer. Here are some tips to address heavy workloads:
- Multitasking Optimization: If you frequently run resource-intensive tasks, consider optimizing your multitasking habits. Close unnecessary applications or processes that are not essential to the task at hand. This reduces the overall workload on the CPU and helps in maintaining lower temperatures.
- Task Scheduling: If possible, schedule resource-intensive tasks during periods of lower utilization. This allows the CPU to operate at lower temperatures since it is not under sustained heavy stress for extended periods.
- Firmware and Software Updates: Ensure that your computer’s firmware, operating system, and software applications are up to date. Often, updates include performance optimizations and bug fixes that can reduce the CPU workload and improve efficiency.
- Overclocking Adjustment: If you have overclocked your CPU, consider reducing the overclocking settings during heavy workloads. This allows for lower temperatures and reduces the risk of overheating. However, it is crucial to monitor the temperatures and stability after making any adjustments.
- Cooling System Upgrade: If heavy workloads are a regular occurrence, consider upgrading your cooling system to better handle the increased heat generation. This could involve installing more powerful fans, improved heat sinks, or even liquid cooling solutions.
By effectively managing heavy workloads and ensuring that the CPU remains within acceptable temperature limits, you can prevent CPU overheating and maintain the overall performance and stability of your computer.
Signs of CPU Overheating
Identifying the signs of CPU overheating is crucial in preventing serious damage to your computer and taking timely action to address the issue. Here are some common signs that indicate your CPU may be overheating:
- Blue Screen of Death (BSOD): If your computer crashes and displays a blue screen error message, it could be a sign of CPU overheating. The operating system automatically shuts down to prevent damage when the CPU reaches critical temperatures.
- Frequent System Crashes: If your computer consistently crashes or randomly shuts down during normal usage, it could be due to CPU overheating. The thermal protection mechanisms built into the CPU can trigger an automatic shutdown when temperatures exceed safe limits.
- Sluggish Performance: Overheating can cause your computer to slow down and become unresponsive. If you notice decreased performance, lag, or slow response times, it could be a result of the CPU working at higher temperatures, which affects its processing capability.
- Abnormal Fan Noises: A properly functioning cooling system should operate quietly. If you notice unusually loud or constant fan noises, it could indicate that the cooling system is working harder than usual to cool down an overheating CPU.
- Excessive Heat: If you feel excessive heat emanating from your computer’s chassis, particularly near the CPU area, it is a clear indicator that the CPU is running hot. However, beware that it is normal for computers to generate some level of heat during operation.
- Unusual Error Messages or Software Glitches: CPU overheating can disrupt the normal functioning of software applications, leading to error messages, freezes, or unexpected behavior. If you encounter frequent software-related issues that are not related to other factors, overheating could be the underlying cause.
If you notice any of these signs, it is essential to take immediate action to prevent further damage to your computer. Ignoring CPU overheating can lead to permanent hardware failure and costly repairs. The following section will cover various methods to address CPU overheating and keep your system running smoothly.
Blue Screen of Death (BSOD)
The Blue Screen of Death (BSOD) is a critical error message displayed by the Windows operating system when it encounters a system error which it cannot recover from. CPU overheating is one of the frequent causes of the BSOD. When the CPU reaches abnormally high temperatures, the operating system initiates a protective measure to prevent damage by abruptly shutting down the system, resulting in the appearance of the BSOD.
Significance of BSOD:
The appearance of the BSOD is a clear indication that CPU overheating is occurring. It serves as a warning mechanism to prevent further damage to the hardware. When the CPU temperature exceeds the specified threshold, the system is halted to protect the CPU from potential permanent harm.
Resolving the BSOD:
Addressing CPU overheating to resolve the BSOD requires immediate attention and appropriate measures. Here are some steps to resolve the BSOD issue caused by CPU overheating:
- Cooling System Inspection: Check the fans and heat sinks in your computer to ensure they are functioning correctly. Clean any dust or debris that may be obstructing airflow and impeding proper cooling.
- Thermal Paste Application: Reapply thermal paste between the CPU and heat sink if it is degraded or improperly applied. This helps improve heat transfer and optimize cooling efficiency.
- Adequate Ventilation: Ensure that the computer and its surroundings have proper airflow and ventilation. Keep air vents clear and avoid placing the computer in confined spaces where heat can build up.
- Upgrade Cooling System: Consider upgrading your cooling system if the existing components are inadequate. Installing better fans, heat sinks, or liquid cooling solutions can help prevent CPU overheating.
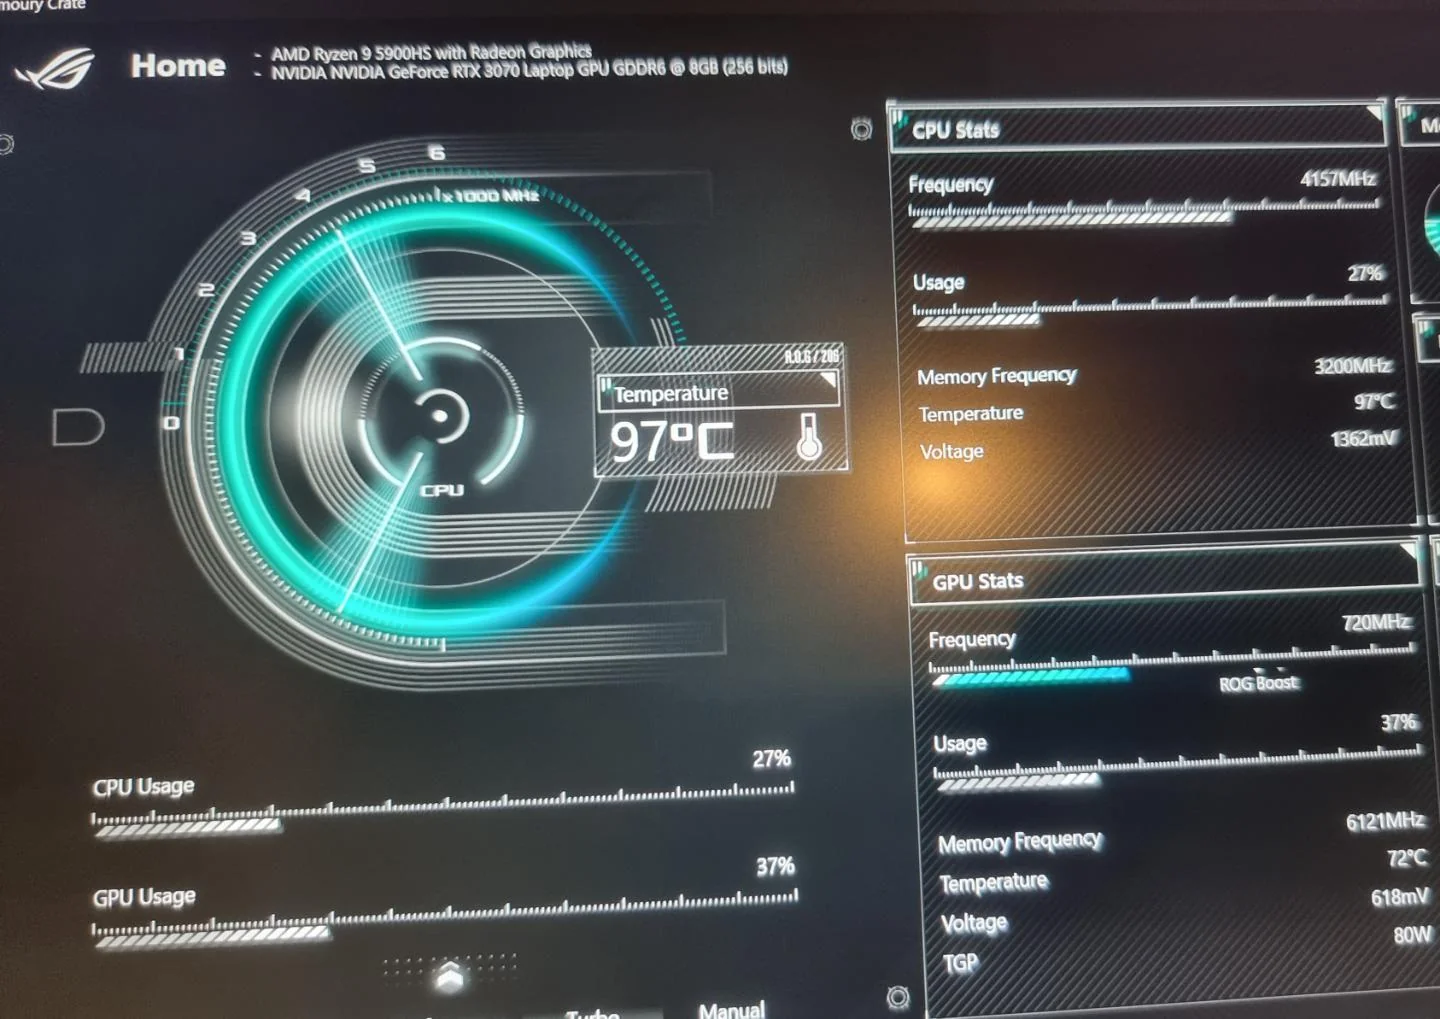
- Monitor CPU Temperatures: Use software utilities to monitor the CPU temperature in real-time. This will help you keep track of any potential overheating issues and take immediate action if required.
By promptly addressing the BSOD caused by CPU overheating, you can prevent further damage to your computer and ensure its stable and reliable operation. It is essential to regularly monitor your CPU’s temperature and take preventive measures to maintain optimal temperatures and prevent future occurrences of the BSOD.
Frequent System Crashes
Frequent system crashes are a common symptom of CPU overheating. When the CPU temperature rises above safe operating limits, the system may automatically shut down or crash to protect the hardware from potential damage. Understanding the connection between CPU overheating and frequent system crashes is essential in addressing the issue effectively.
Significance of Frequent System Crashes:
Frequent system crashes serve as a warning sign that the CPU is overheating and unable to maintain stable operating conditions. The thermal protection mechanisms built into the CPU trigger these crashes to prevent permanent damage. It is essential not to ignore these crashes, as they can cause data loss and potential hardware failure.
Resolving Frequent System Crashes:
To address the issue of frequent system crashes caused by CPU overheating, it is crucial to identify and resolve the root cause. Here are some steps you can take to resolve frequent system crashes:
- Cooling System Maintenance: Check the cooling system components such as fans and heat sinks to ensure they are functioning properly. Clean them from any dust or debris that could impair their performance.
- Proper Airflow: Ensure that your computer has sufficient airflow by keeping the air vents clear and avoiding obstructing the airflow with objects or cables. Consider repositioning the computer to a more open area if necessary.
- Temperature Monitoring: Use hardware monitoring software to keep an eye on the CPU temperature in real-time. This will allow you to identify any patterns or sudden spikes in temperature that may be causing the frequent crashes.
- Thermal Paste Application: Check the thermal paste between the CPU and the heat sink. If the thermal paste is old, dried out, or poorly applied, it could impede heat transfer. Clean off the old paste and apply a fresh, even layer to ensure optimal thermal conductivity.
- Cooling System Upgrade: If the current cooling system is insufficient for your CPU’s cooling needs, consider upgrading to a more powerful cooling solution such as enhanced heat sinks, fans, or liquid cooling. This will help dissipate heat more effectively, reducing the risk of CPU overheating.
Resolving frequent system crashes caused by CPU overheating requires addressing the root cause and implementing appropriate measures to maintain optimal temperatures. By taking proactive steps to prevent CPU overheating, you can ensure the stability and reliability of your system and avoid potential data loss or hardware damage.
Sluggish Performance
Sluggish performance is a common indication of CPU overheating. When the CPU operates at higher temperatures due to inadequate cooling, it can result in decreased performance and responsiveness. Understanding the connection between CPU overheating and sluggish performance is crucial in addressing the issue effectively.
Significance of Sluggish Performance:
Sluggish performance refers to a noticeable slowdown in computer operations, including slower application launches, delayed response times, and overall system lag. High CPU temperatures can cause the processor to throttle its speed, reducing its performance to prevent overheating. This leads to a decrease in computational power and overall system efficiency.
Resolving Sluggish Performance:
To address the issue of sluggish performance caused by CPU overheating, it is essential to identify and resolve the root cause. Here are some steps you can take to resolve sluggish performance:
- Cooling System Maintenance: Ensure that the cooling system components, such as fans and heat sinks, are clean and functioning correctly. Remove any dust or debris that could impede their efficiency and hinder heat dissipation.
- Optimal Airflow: Verify that your computer has sufficient airflow by keeping the air vents unobstructed and ensuring proper cable management. Proper cable routing and management can contribute to better airflow and cooling within the system.
- Reducing Workload: If the sluggishness occurs during resource-intensive tasks, consider reducing the CPU workload by closing unnecessary applications or limiting multitasking. This will help reduce heat generation and alleviate performance issues.
- Thermal Paste Application: Evaluate the condition of the thermal paste between the CPU and heat sink. If it is dried out or improperly applied, it can hinder heat transfer. Clean off the old paste and apply a fresh, even layer to maximize thermal conductivity.
- Cooling System Upgrade: If the current cooling system is insufficient for the CPU’s cooling needs, consider upgrading to a more advanced cooling solution. This may involve installing more efficient fans, larger heat sinks, or even liquid cooling to dissipate heat effectively.
By addressing the root causes of sluggish performance due to CPU overheating, you can restore the optimal performance and responsiveness of your system. Maintaining proper cooling and airflow within your computer is essential for ensuring consistent performance and extending the lifespan of your hardware.
Abnormal Fan Noises
Abnormal fan noises can be a warning sign of CPU overheating and an indicator of issues within the cooling system. Fans play a crucial role in maintaining optimal CPU temperatures by circulating air and dissipating heat. Unusual noises coming from the fans can suggest underlying problems that may contribute to CPU overheating. Understanding the significance of abnormal fan noises is essential in addressing the issue effectively.
Significance of Abnormal Fan Noises:
The cooling system fans should typically operate smoothly and quietly. If you notice unusual fan noises, such as grinding, rattling, or whirring sounds, it is an indication of potential issues within the cooling system. These noises can be a result of fan bearing problems, misalignment, or increased resistance due to dust accumulation or mechanical failures. Addressing these problems promptly is crucial to prevent CPU overheating and further damage to the system.
Resolving Abnormal Fan Noises:
To address abnormal fan noises and prevent CPU overheating, follow these steps:
- Cleaning: Inspect the fans for any dust or debris buildup, as this can restrict airflow and cause abnormal noises. Clean the fans using compressed air or a soft brush, being cautious not to damage the delicate components.
- Fan Replacement: If the fan noises persist, it may be necessary to replace the affected fan. Failed or malfunctioning fans can lead to ineffective cooling and increased CPU temperatures.
- Fan Realignment: Check if any fans have become misaligned or are hitting obstructions. In some cases, readjusting the fan position can resolve the abnormal noises.
- Cooling System Inspection: Examine the heat sinks and other components of the cooling system for any signs of damage or loose connections. Ensure that all components are properly secured and functioning as intended.
- Professional Assistance: If you are unable to identify or resolve the abnormal fan noises, consider seeking help from a professional technician. They can diagnose the issue and provide appropriate solutions or recommend fan replacements if necessary.
Addressing abnormal fan noises is crucial in maintaining optimal cooling and preventing CPU overheating. Regular maintenance, such as cleaning and proper inspection of the fans, can help prolong the lifespan of your cooling system and ensure the efficient operation of your computer.
Resolving CPU Overheating Issues
To effectively resolve CPU overheating issues and prevent potential damage to your computer, it is essential to implement appropriate measures to maintain optimal temperatures. Here are several methods to address and prevent CPU overheating:
- Cleaning the Cooling System: Regularly clean the fans, heat sinks, and air vents to remove dust and debris that can obstruct airflow. Use compressed air or a soft brush to gently dislodge any buildup and ensure the cooling system functions efficiently.
- Ensuring Proper Airflow: Check for any obstructions around the computer case that may restrict the flow of air. Keep cables organized and away from air vents to allow for unobstructed airflow. Consider using cable management solutions to maintain proper airflow within the case.
- Applying Thermal Paste: Ensure that the thermal paste between the CPU and heat sink is correctly applied and in good condition. Clean off any old or dried-out thermal paste and apply a fresh, even layer to maximize heat transfer and cooling efficiency.
- Adjusting Overclocking Settings: If you have overclocked your CPU, consider adjusting the settings to decrease the clock speeds and voltage. This will reduce the heat generated by the CPU during operation and minimize the risk of overheating.
- Monitoring System Temperatures: Install software utilities that monitor CPU temperatures in real-time. This allows you to keep track of temperature fluctuations and identify any signs of overheating. Take immediate action if temperatures exceed safe operating limits.
- Proper Cooling System: If the existing cooling system is inadequate, consider upgrading to a more powerful one. Install additional fans, upgrade to larger heat sinks, or even opt for liquid cooling solutions to enhance heat dissipation and maintain lower CPU temperatures.
- Optimizing Workload: Avoid running excessive, resource-intensive tasks simultaneously. This puts unnecessary strain on the CPU, leading to increased heat generation. Optimize your workload by closing unnecessary applications and processes to reduce the CPU’s overall usage.
By implementing these solutions and adopting preventive measures, you can effectively resolve CPU overheating issues and maintain a cooler and more efficient system. Regular maintenance, adequate cooling, and mindful usage will ensure the longevity and optimal performance of your computer.
Cleaning the Cooling System
Cleaning the cooling system is a crucial step in preventing CPU overheating and maintaining optimal temperatures for your computer. Over time, dust and debris can accumulate on the fans, heat sinks, and air vents, obstructing airflow and hindering the cooling system’s efficiency. Let’s explore the importance of cleaning the cooling system and how to perform this task effectively:
Significance of Cleaning:
A clean cooling system plays a vital role in dissipating the heat generated by the CPU. When dust and debris accumulate on the cooling components, they restrict airflow and reduce the system’s ability to cool down the CPU effectively. This can lead to higher temperatures and potential CPU overheating. Regular cleaning helps maintain proper airflow and ensures the cooling system operates efficiently.
Steps to Clean the Cooling System:
Follow these steps to clean the cooling system of your computer effectively:
- Power Off and Disconnect: Turn off your computer and unplug it from the power source. This ensures your safety and prevents any accidental damage during the cleaning process.
- Open the Case: Depending on your computer model, remove the side panel of the case to access the internal components. Consult your computer’s manual or online resources for specific instructions on removing the case.
- Inspect the Cooling Components: Examine the fans and heat sinks for any visible dust or debris buildup. Pay attention to the air vents and other areas where dust may accumulate.
- Use Compressed Air: Use compressed air to blow away the dust from the fans, heat sinks, and other components. Hold the can of compressed air upright and use short bursts in a sweeping motion. Be cautious not to tilt the can or shake it vigorously, as this can release moisture or cold liquid that may damage the components.
- Clean Air Vents: Use compressed air or a soft brush to clean the air vents on the computer case. Clear away any dust or debris that may be blocking the airflow.
- Reassemble and Power On: After ensuring that all the components are clean and free from debris, carefully reassemble the case and secure the panels. Plug in the power and turn on your computer to verify that everything is functioning correctly.
Regularly cleaning the cooling system, ideally every three to six months, will help maintain optimal airflow and prevent CPU overheating. However, the frequency may vary depending on the environment and usage conditions. By keeping the cooling system clean, you ensure that your computer runs efficiently and the CPU remains within safe operating temperatures.
Ensuring Proper Airflow
Proper airflow within your computer is vital for maintaining optimal temperatures and preventing CPU overheating. Adequate airflow allows cool air to circulate around the components and helps in dissipating the heat generated by the CPU. Ensuring proper airflow involves managing cables, maintaining clear air vents, and optimizing the internal layout of your computer. Let’s explore the significance of proper airflow and how to achieve it:
Significance of Proper Airflow:
Proper airflow is essential for several reasons. It helps keep the components within the computer case cool, reducing the risk of overheating. It also prevents the buildup of stagnant hot air, which can hinder the cooling system’s efficiency. By maintaining proper airflow, you ensure that the cooling system can effectively dissipate heat, allowing your CPU to operate within safe temperature limits.
Tips for Ensuring Proper Airflow:
Follow these tips to ensure proper airflow within your computer:
- Cable Management: Organize and route cables in a way that does not obstruct or restrict airflow. Use cable ties or twist ties to secure and bundle cables neatly, keeping them away from fans and air vents.
- Clear Air Vents: Regularly check the air vents on your computer case and ensure they are clear of any obstructions. Remove any dust or debris that may have accumulated around the vents, as this can impede airflow.
- Avoid Overcrowding: Avoid overcrowding the inside of your computer case with unnecessary components. Ensure that there is enough space for air to flow freely around the components, preventing hotspots and promoting efficient cooling.
- Optimize Fan Placement: If your computer allows for additional fans, strategically place them to enhance airflow. Intake fans should be positioned to draw in cool air, while exhaust fans should expel hot air. This helps create a more efficient cooling airflow pattern.
- Consider Fan Speeds: If your computer allows for fan speed control, adjust the speeds to achieve a balance between effective cooling and acceptable noise levels. Higher fan speeds increase airflow but also increase noise. Find a balance that suits your preferences and cooling needs.
- Manage Ambient Environment: Ensure that the ambient environment around your computer contributes to proper airflow. Keep the computer away from walls, curtains, or any objects that may hinder proper ventilation.
By implementing these tips and maintaining proper airflow within your computer, you can help prevent CPU overheating and ensure the longevity and optimal performance of your system. Remember to periodically check and clean the air vents and fans to maintain sufficient airflow and efficient cooling.
Applying Thermal Paste
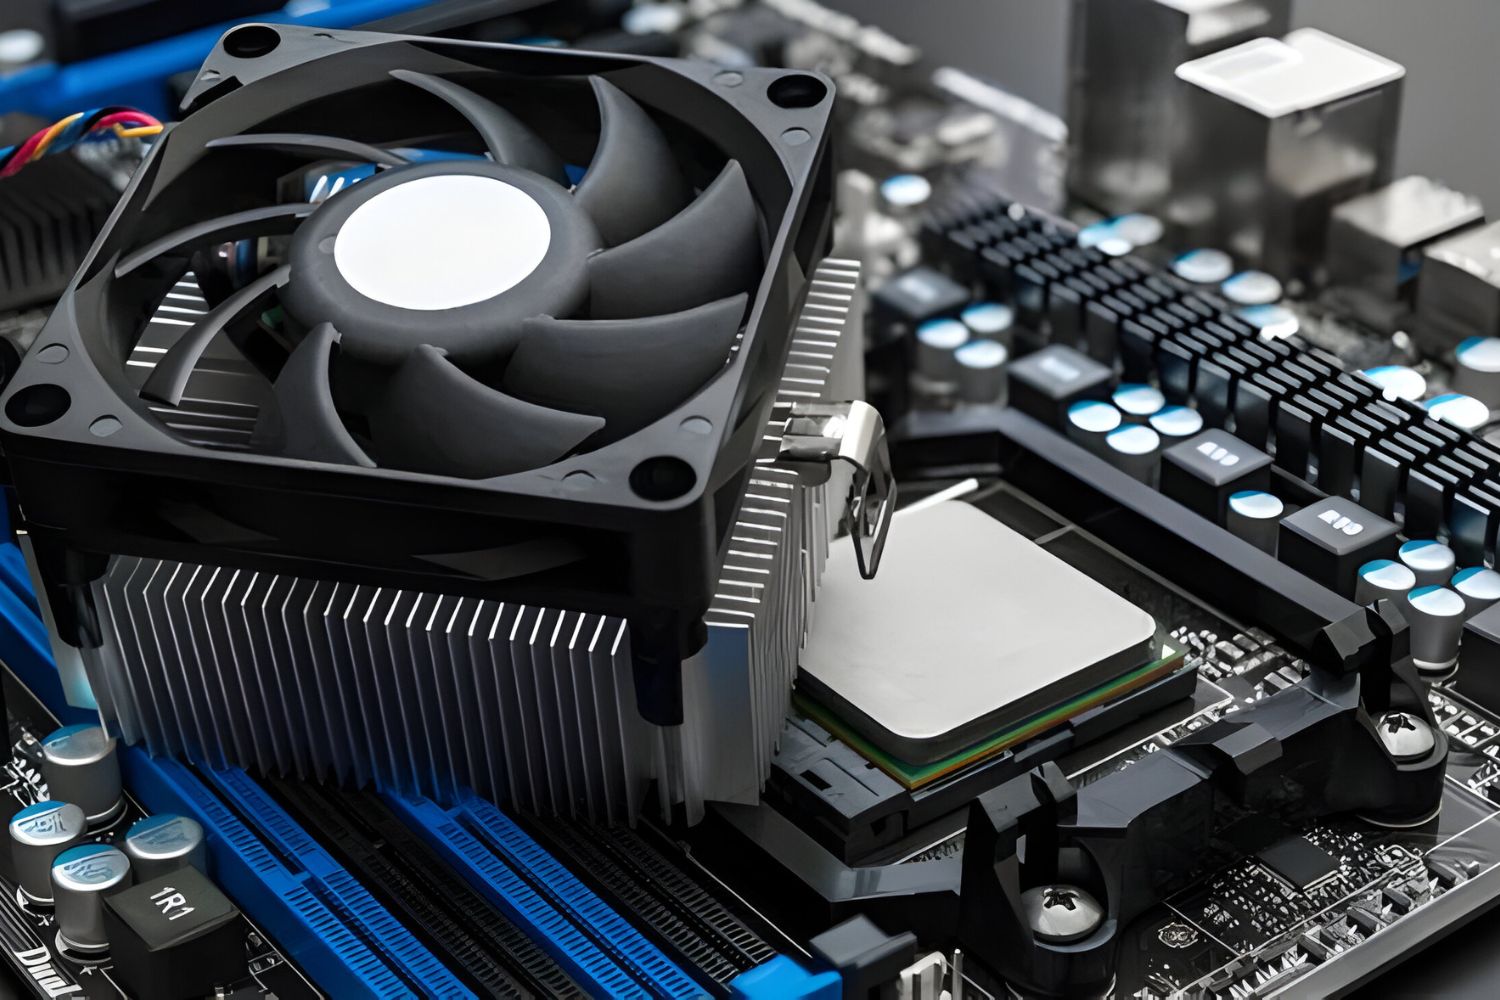
Applying thermal paste is an important step in optimizing heat transfer between the CPU and the cooling system. Thermal paste fills microscopic gaps and imperfections on the surface of the CPU and the heat sink, ensuring efficient heat dissipation. Proper application of thermal paste is crucial for maintaining optimal CPU temperatures and preventing overheating. Let’s explore the significance of thermal paste and how to apply it correctly:
Significance of Thermal Paste:
Thermal paste, also known as thermal compound or thermal grease, serves as an interface between the CPU and the heat sink. It improves heat conduction, compensating for any microscopic unevenness between the two surfaces. By filling the gaps, thermal paste maximizes heat transfer and helps maintain lower CPU temperatures, promoting system stability and longevity.
Steps to Apply Thermal Paste:
Follow these steps to correctly apply thermal paste to your CPU:
- Cleaning: Clean the CPU and the heat sink surfaces using isopropyl alcohol and a lint-free cloth. Ensure that both surfaces are free from any old thermal paste or debris. Allow them to dry completely before moving to the next step.
- Applying Thermal Paste: Apply a small amount of thermal paste, roughly the size of a pea or a grain of rice, at the center of the CPU. Avoid using excessive amounts, as this can lead to poor heat transfer or cause thermal paste to spill over the edges of the CPU.
- Spreading the Paste: Using a plastic card, a spatula, or even a clean fingertip with a glove, gently spread the thermal paste in a thin, even layer across the entire surface of the CPU. Ensure that the paste covers the entire CPU, leaving no uncovered areas or air pockets.
- Mounting the Heat Sink: Position the heat sink over the CPU, aligning the mounting screws or clips with the holes on the motherboard. Apply firm and even pressure while attaching the heat sink to ensure proper contact between the CPU and the heat sink.
- Verifying Pressure: Confirm that the heat sink is mounted correctly and exerting sufficient pressure on the CPU. Ensure that it is firmly secured according to the manufacturer’s instructions. This will help facilitate optimal heat transfer between the CPU and the cooling system.
Proper application of thermal paste is crucial for effective heat transfer and maintaining optimal CPU temperatures. Keep in mind that different thermal paste brands may have specific instructions, so it’s essential to follow the guidelines provided. By applying thermal paste correctly, you can ensure the efficient operation of your cooling system and prevent CPU overheating.
Adjusting Overclocking Settings
Overclocking is a technique used to increase the clock speed of a CPU beyond its default settings, aiming to achieve higher performance. While overclocking can boost CPU performance, it also generates more heat. Without proper cooling measures, overclocking can lead to CPU overheating. Adjusting overclocking settings is essential to ensure stable operation and prevent potential damage caused by excessive heat. Let’s explore the significance of adjusting overclocking settings and how to do it effectively:
Significance of Adjusting Overclocking Settings:
When you overclock a CPU, you increase its clock speed and often adjust the voltage to achieve higher performance. However, this also increases the heat output of the CPU. If the cooling system is not adequate to handle the additional heat, it can lead to CPU overheating, instability, and potential damage to the hardware. Adjusting overclocking settings helps strike a balance between performance and heat generation, ensuring the CPU operates within safe temperature limits.
Steps to Adjust Overclocking Settings:
Here are steps to adjust overclocking settings effectively:
- Stress Testing: Before adjusting any overclocking settings, conduct stress tests to determine the stability of your system. Use stress-testing software to put a sustained load on the CPU and monitor temperatures to ensure they remain within safe limits.
- Adjust Clock Speed and Voltage: If you encounter CPU overheating issues during stress tests, consider reducing the clock speed and/or voltage settings. Lower clock speeds and voltages result in reduced heat generation, allowing for better temperature management.
- Gradual Adjustments: Make small adjustments to the clock speed or voltage at a time rather than making drastic changes. This allows for incremental testing and monitoring of temperatures to ensure stability and prevent sudden overheating.
- Monitor Temperatures: Continuously monitor CPU temperatures during stress tests and regular usage. Use software utilities to track temperature levels in real-time, ensuring they remain within acceptable limits and not causing excessive heat buildup.
- Consider Cooling Solutions: If you are planning to overclock your CPU, ensure that your cooling system is sufficient to handle the increased heat generation. Upgrading to a better CPU cooler, such as an aftermarket air cooler or liquid cooling solution, can help maintain lower temperatures.
- Keeping System Clean: Proper maintenance of the cooling system, including regular cleaning of fans and heat sinks, is crucial for effective heat dissipation. Dust and debris buildup can hinder cooling efficiency and contribute to CPU overheating.
By adjusting overclocking settings, monitoring temperatures, and ensuring a reliable cooling system, you can optimize performance while mitigating the risk of CPU overheating. It is important to strike a balance between performance gains and temperature management for the longevity and stability of your system.
Monitoring System Temperatures
Continuously monitoring system temperatures is essential in preventing CPU overheating and maintaining optimal operating conditions for your computer. By regularly checking CPU temperatures, you can identify potential issues, take necessary action, and ensure that your cooling system is effectively managing heat. Let’s explore the significance of monitoring system temperatures and how to do it effectively:
Significance of Monitoring System Temperatures:
Monitoring system temperatures provides valuable insights into the thermal performance of your computer. This is especially important for the CPU, as it generates the most heat during operation. By keeping an eye on CPU temperatures, you can detect any excessive or abnormal increases in temperature, which can indicate potential cooling system issues, inadequate airflow, or CPU overclocking instability. Monitoring temperatures allows you to intervene proactively to prevent CPU overheating and ensure the reliable and efficient operation of your computer.
Effective Monitoring Practices:
Follow these practices to effectively monitor system temperatures:
- Software Utilities: Install temperature monitoring software that displays real-time CPU temperatures. Many reputable monitoring programs provide detailed information about temperatures, including maximum and average readings, to help you track and detect any temperature abnormalities.
- Stress Testing: Conduct stress tests to push the CPU to its limits and monitor temperatures under high workload conditions. Stress testing tools analyze the system’s stability, performance, and temperature tolerance, helping you evaluate the effectiveness of your cooling system.
- Utilize BIOS Features: Some computer systems offer temperature monitoring features within the BIOS settings. By accessing the BIOS, you can view real-time temperature information, set temperature thresholds for automated alerts, and adjust cooling system-related settings to optimize thermal performance.
- Regular Monitoring: Continuously monitor CPU temperatures while performing routine tasks, gaming, or using resource-intensive applications. Pay attention to any sudden spikes or consistently high temperatures that may indicate cooling system or thermal paste issues.
- Preventive Measures: Utilize the temperature monitoring data to identify potential problems early on and take preventive measures. For example, if you notice consistently high temperatures, consider cleaning the cooling system, adjusting fan speeds, or reapplying thermal paste to improve heat dissipation.
By actively monitoring system temperatures and staying vigilant to any significant changes or abnormalities, you can address potential cooling system issues in a timely manner, prevent CPU overheating, and ensure the overall stability and longevity of your computer.
Conclusion
Properly managing CPU overheating is crucial for maintaining the optimal performance and longevity of your computer. By understanding the causes and signs of CPU overheating, you can take proactive measures to prevent potential damage. Inadequate cooling systems, dust accumulation, improper placement of the computer, overclocking, insufficient thermal paste, high ambient temperatures, heavy workloads, and abnormal fan noises are all factors that can contribute to CPU overheating.
To resolve CPU overheating issues effectively, ensure that your cooling system is adequate and operating optimally. Regularly clean the cooling components, such as fans and heat sinks, and maintain proper airflow within your computer. Apply thermal paste correctly to enhance heat transfer between the CPU and the cooling system. Adjust overclocking settings and monitor system temperatures to prevent excessive heat generation.
By implementing these measures, you can prevent CPU overheating, reduce the risk of system instability and crashes, and extend the lifespan of your computer. Regular maintenance, attention to cooling system efficiency, and actively monitoring temperature levels will help keep your CPU running at optimal temperatures. Remember, a well-cooled CPU is a happy CPU!