Introduction
CPU overheating is a common issue that many computer users face. Whether you are a casual user or a hardcore gamer, a hot CPU can lead to performance degradation, system instability, and even permanent hardware damage.
Understanding the causes of CPU overheating and knowing how to prevent it is crucial for maintaining the longevity and optimal performance of your computer. In this article, we will explore the reasons behind CPU overheating, the signs to look out for, and the steps you can take to keep your CPU cool.
One of the primary causes of CPU overheating is inadequate cooling. CPUs generate a significant amount of heat during operation, and without proper cooling mechanisms in place, this heat can build up and cause the CPU to overheat. Other factors, such as overclocking, dust accumulation, and faulty cooling systems, can also contribute to CPU overheating.
Identifying the signs of CPU overheating is essential for taking timely action. Common signs include system crashes, random shutdowns, slow performance, and abnormal fan noise. If you notice any of these symptoms, it is crucial to address the issue promptly to prevent long-term damage.
Why is CPU overheating a concern? Well, apart from the obvious performance issues, overheating can significantly reduce the lifespan of your CPU. Continuous exposure to high temperatures can lead to thermal degradation, affecting the integrity and functionality of the CPU over time. Additionally, overheating can also damage other components in your computer, such as the motherboard and RAM.
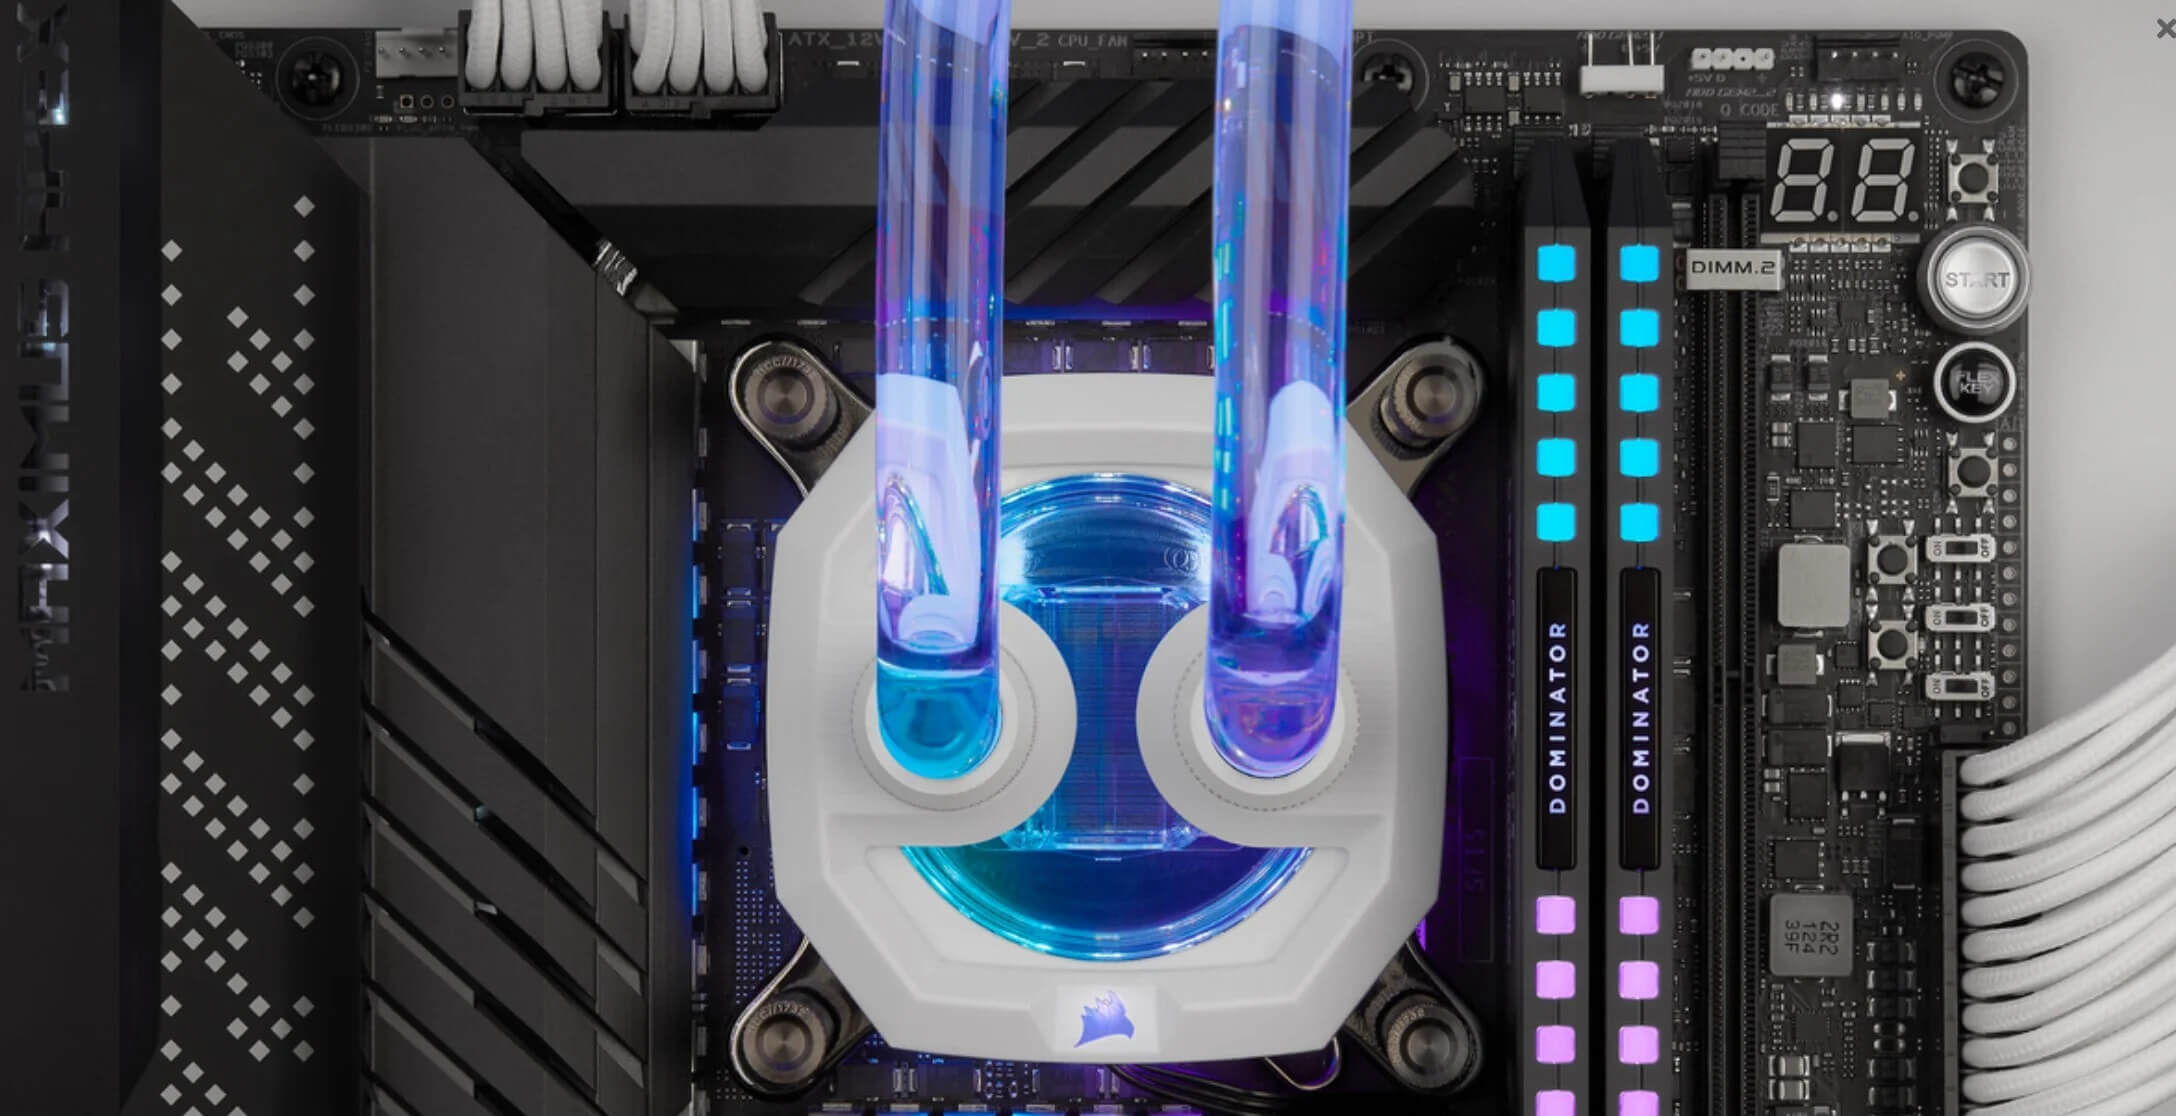
To prevent CPU overheating, proper ventilation is key. Ensuring that your computer has adequate airflow and cooling can go a long way in keeping the CPU temperature at optimal levels. This can be accomplished by maintaining a clean and dust-free environment, optimizing fan placement, and considering additional cooling solutions like CPU coolers or liquid cooling systems.
In the next sections of this article, we will delve into specific steps that you can take to prevent CPU overheating. These include cleaning dust and debris from the CPU and cooling system, applying thermal paste correctly, checking the condition of fans, and monitoring CPU temperature regularly. By implementing these preventative measures, you can significantly reduce the risk of CPU overheating and maintain the stability and performance of your system.
Causes of CPU Overheating
There are several factors that can contribute to CPU overheating. Understanding these causes is essential for effectively preventing and addressing the issue. Let’s explore the common culprits behind CPU overheating:
- Inadequate cooling: The most common cause of CPU overheating is insufficient cooling. CPUs generate a significant amount of heat during operation, and without proper cooling mechanisms, this heat can accumulate, causing the CPU to overheat. Inadequate airflow, improperly placed fans, or malfunctioning cooling systems can all contribute to inadequate cooling.
- Overclocking: Overclocking is the practice of running a CPU at a higher clock speed than its default setting. While this can boost performance, it also generates more heat. Overclocking without proper cooling or voltage adjustments can push the CPU beyond its thermal limits, leading to overheating. It is crucial to monitor temperatures when overclocking and ensure that cooling solutions can handle the increased heat.
- Dust and debris accumulation: Over time, dust and debris can build up on the CPU heatsink, cooling fans, and other components of the cooling system. This accumulation acts as an insulator, hindering heat dissipation and causing the CPU temperature to rise. Regular cleaning and maintenance are necessary to prevent dust-related CPU overheating.
- Faulty cooling system: A malfunctioning or faulty cooling system can also lead to CPU overheating. This can include a malfunctioning fan, a broken heatsink, or a failed liquid cooling system. It is important to regularly inspect and test the cooling system to ensure it is functioning correctly.
- Insufficient thermal paste: Thermal paste is a compound applied between the CPU and heatsink to improve heat transfer. Over time, the thermal paste can dry out or degrade, reducing its effectiveness. If the thermal paste is insufficient or improperly applied, it can hinder heat dissipation and contribute to CPU overheating.
By being aware of these causes, you can take appropriate measures to prevent CPU overheating. In the following sections, we will explore practical steps to address these causes and maintain a cool and efficient CPU.
Signs of CPU Overheating
Identifying the signs of CPU overheating is crucial for taking prompt action and preventing further damage to your computer. Here are some common signs that indicate your CPU may be overheating:
- System crashes and instability: If your computer suddenly crashes or experiences frequent system freezes, it could be a sign of CPU overheating. When the CPU temperature reaches critical levels, the system may shut down or become unstable to protect itself from damage.
- Random shutdowns: Overheating CPU can trigger the computer to shut down abruptly without any warning. If your system powers off unexpectedly, especially during demanding tasks or when the CPU is under load, it is likely due to overheating.
- Slow performance: CPU overheating can cause decreased performance in your computer, leading to sluggishness and longer response times. You may notice programs taking longer to load, delayed input response, or overall system slowdown.
- Abnormal fan noise: As the CPU temperature rises, the cooling fans work harder to dissipate heat. If you notice unusually loud or constant fan noise, it could be an indication that the CPU is overheating and the fans are operating at higher speeds to compensate.
- Unexpected reboots: If your computer restarts suddenly, especially during resource-intensive tasks, it could be a result of CPU overheating. The system may reboot to prevent thermal damage to the CPU.
- High CPU temperature readings: Monitoring the CPU temperature through software utilities or BIOS can help identify overheating. If the temperature consistently exceeds the recommended operating range for your CPU model, it indicates possible overheating.
If you notice any of these signs, it is essential to take immediate action to address the CPU overheating issue. Ignoring the problem can lead to permanent hardware damage and affect the overall performance and longevity of your computer.
In the next sections, we will explore various methods to prevent CPU overheating and keep your system running smoothly and reliably.
Why CPU Overheating is a Concern
CPU overheating is not just a minor inconvenience; it is a significant concern that should not be taken lightly. Here are some reasons why CPU overheating should be a top priority for computer users:
- Performance degradation: Overheating can significantly impact the performance of your computer. When the CPU temperature rises above the recommended levels, it can lead to reduced processing power, slower performance, and increased response times. Tasks that would normally run smoothly may become sluggish or even freeze altogether.
- System instability: An overheating CPU can cause system instability, leading to frequent crashes, random freezes, and unexpected shutdowns. These sudden interruptions can result in data loss, disrupt your workflow, and even damage the operating system, requiring time-consuming reinstallation.
- Hardware damage: Continuous exposure to high temperatures can damage the internal components of your computer, including the CPU itself. Overheating can degrade the performance and lifespan of your CPU, potentially leading to permanent hardware failure. Additionally, other components like the motherboard, RAM, and graphics card can also be susceptible to damage from excessive heat.
- Increased energy consumption: An overheating CPU typically requires more power to continue functioning properly. This can result in increased energy consumption and a higher electricity bill. By addressing CPU overheating, you not only improve the performance and longevity of your computer but also save on energy costs.
- Reduced lifespan: Prolonged exposure to high temperatures can significantly reduce the lifespan of your CPU. Excessive heat can cause thermal degradation, affecting the internal components and overall functionality of the CPU. By keeping your CPU temperature within the recommended range, you can extend its lifespan and avoid costly replacements.
- Data loss: In extreme cases of CPU overheating, your system may become so unstable that it can lead to data loss. Sudden shutdowns and crashes can result in the corruption or loss of important files, documents, or projects. Regularly backing up your data and addressing CPU overheating helps mitigate the risk of unexpected data loss.
Given these factors, it is clear that CPU overheating should be a significant concern for any computer user. By actively monitoring and managing CPU temperatures, implementing proper cooling measures, and following best practices, you can safeguard your computer’s performance, longevity, and data integrity.
The Importance of Proper Ventilation
Proper ventilation is crucial in preventing CPU overheating and maintaining the optimal performance of your computer. Ensuring adequate airflow within your computer case allows heat to dissipate effectively, keeping the CPU temperature at safe levels. Here’s why proper ventilation is essential:
- Heat dissipation: CPUs generate a significant amount of heat during operation. Without proper ventilation, this heat can build up and lead to thermal throttling or overheating. Well-designed computer cases with efficient airflow channels and strategically placed vents allow hot air to escape and cool air to enter, effectively dissipating the heat generated by the CPU.
- Stability and performance: Overheating can cause your CPU to become unstable and lead to performance degradation. When the CPU temperature exceeds certain limits, the system may automatically reduce performance to prevent damage. Proper ventilation helps maintain lower CPU temperatures, resulting in stable performance and the ability to handle demanding tasks without throttling or slowdowns.
- Component longevity: Excessive heat not only affects the CPU but can also damage other components of your computer, including the motherboard and RAM. Components subjected to high temperatures over extended periods are more likely to fail prematurely. By ensuring proper ventilation, you can extend the lifespan of your computer’s components and avoid expensive hardware replacements.
- Dust control: Proper ventilation can also aid in reducing the accumulation of dust and debris inside your computer. Dust can act as an insulator, hindering effective heat dissipation. By ensuring adequate airflow and using dust filters, you can minimize the amount of dust entering your system and prevent it from clogging the cooling components.
- Noise reduction: Inadequate ventilation can result in higher fan speeds as the cooling system works harder to compensate for the lack of airflow. This can lead to increased fan noise, which can be distracting and annoying. With good ventilation, fans can operate at lower speeds, reducing overall noise levels and creating a more pleasant computing environment.
To achieve proper ventilation, consider the layout of your computer case, the position of cooling fans, and the availability of airflow channels. Place fans strategically to create a positive airflow, with cool air being drawn in from the front or bottom and hot air being expelled from the rear or top of the case. Additionally, regular cleaning and maintenance, including dusting and removing any obstructions around vents and fans, help ensure optimal ventilation.
By prioritizing proper ventilation, you can significantly reduce the risk of CPU overheating, increase system stability and performance, and prolong the lifespan of your computer’s components. The next sections will explore specific steps you can take to maintain proper ventilation and prevent CPU overheating.
Cleaning Dust and Debris from the CPU
Regularly cleaning the dust and debris from your CPU and its surrounding components is crucial for maintaining proper airflow and preventing CPU overheating. Over time, dust and debris can accumulate on the cooling fans, heatsink, and other areas, hampering heat dissipation and increasing the risk of overheating. Here are the steps you can take to clean the dust and debris:
- Gather the necessary tools: Before you begin, gather some compressed air, a soft brush, and a lint-free cloth. Compressed air is useful for removing dust from hard-to-reach areas, while a soft brush and lint-free cloth are suitable for cleaning the visible surfaces.
- Power down and unplug: Start by shutting down your computer and unplugging it from the power source. This ensures your safety and prevents any potential damage to the components during the cleaning process.
- Open the case: Carefully open your computer case, following the manufacturer’s instructions. Some cases require the removal of screws, while others may have latch systems. Ensure you are working in an anti-static environment to prevent any static electricity discharge that could damage delicate components.
- Identify dusty areas: Once the case is open, visually inspect the CPU cooling fan, heatsink, and other components for excessive dust accumulation. Pay attention to the areas where air is drawn in or expelled, as these tend to collect the most dust.
- Use compressed air: Holding the compressed air canister upright, use short bursts of air to blow away the dust from the components. Be careful not to tilt the canister as it can release liquid propellant, which can damage the computer. Pay close attention to the spaces between the fins of the heatsink and the fan blades, as these areas often trap significant amounts of dust.
- Clean visible surfaces: After using compressed air, use a soft brush to gently remove any remaining dust from the surfaces. Be cautious not to apply excessive pressure to prevent accidentally dislodging any small components or damaging delicate parts. Once the dust is loosened, use a lint-free cloth to wipe away the dust from the CPU and other components.
- Reassemble the case: Once the cleaning process is complete, carefully put the case back together, ensuring all screws or latches are secured properly. Double-check that all cables and connections are intact and in their correct places.
- Perform regular cleaning: It’s important to establish a regular cleaning routine to prevent dust from accumulating quickly. Aim to clean your computer every three to six months, but adjust the frequency based on your environment and usage patterns. If you notice excessive dust accumulation or signs of overheating, consider cleaning the CPU more frequently.
By regularly cleaning the dust and debris from your CPU, you can maintain optimal airflow, prevent CPU overheating, and prolong the lifespan of your components. Remember to exercise caution during the cleaning process and seek professional assistance if you are unsure or uncomfortable performing these tasks yourself.
Applying Thermal Paste
Thermal paste is a crucial component in maintaining proper heat transfer between the CPU and its heatsink. Over time, the thermal paste can dry out or become less effective, leading to decreased heat dissipation and increased CPU temperatures. Here are the steps to properly apply thermal paste:
- Gather the necessary tools: Before you begin, ensure you have thermal paste, rubbing alcohol, cotton swabs or a lint-free cloth, and a plastic spatula or credit card for spreading.
- Clean the CPU and heatsink: Start by cleaning any existing thermal paste from the CPU and heatsink. Apply a small amount of rubbing alcohol to a cotton swab or cloth and gently clean both surfaces until they are free from any residue. Allow the surfaces to dry completely before proceeding.
- Apply a small amount of thermal paste: Squeeze a small pea-sized dot of thermal paste onto the center of the CPU. Remember, a little goes a long way, so avoid applying too much, as it can lead to excessive paste oozing out and potentially causing short circuits or interfering with other components.
- Spread the paste: Using a plastic spatula or credit card, spread the thermal paste evenly across the surface of the CPU. The goal is to create a thin, uniform layer that covers the entire CPU without any gaps or excess paste. Be gentle to avoid scratching or damaging the CPU surface.
- Attach the heatsink: Carefully place the heatsink back onto the CPU, aligning the mounting screws or clips with the corresponding holes on the motherboard. Apply even pressure to ensure proper contact between the CPU and the heatsink. Follow the manufacturer’s instructions for securing the heatsink in place.
- Double-check placement and contact: Once the heatsink is securely attached, double-check that it is properly aligned and making full contact with the CPU. Ensure there are no gaps or misalignments that could impede heat transfer. Improper heatsink placement can lead to inadequate cooling and potential CPU overheating.
- Power on and check temperatures: After applying thermal paste and securing the heatsink, power on your computer and monitor the CPU temperatures. Use software utilities or BIOS settings to monitor the temperature readings and ensure they are within acceptable ranges. If temperatures are still higher than expected, it may be necessary to reapply the thermal paste and check for proper contact.
Remember to follow the instructions provided by the manufacturer of your CPU and thermal paste. Different CPUs and pastes may have specific application recommendations, so it’s essential to consult the appropriate guidelines for your hardware.
Applying thermal paste correctly helps maximize heat transfer between the CPU and the heatsink, improving cooling efficiency and reducing the risk of overheating. By maintaining the integrity of the thermal interface, you ensure the longevity and stability of your CPU.
Checking the Fans and Cooling System
Regularly inspecting and maintaining the fans and cooling system of your computer is vital for preventing CPU overheating. The fans play a crucial role in dissipating heat from the CPU and other components, and any issues with the cooling system can lead to inadequate cooling and increased temperatures. Here’s how to check and maintain your fans and cooling system:
- Power down and unplug: Before inspecting the fans and cooling system, make sure to power down your computer and unplug it from the power source. This ensures your safety and prevents any risk of electric shock.
- Remove the side panel: Open your computer case by removing the side panel. This will provide access to the internal components, including the fans and cooling system.
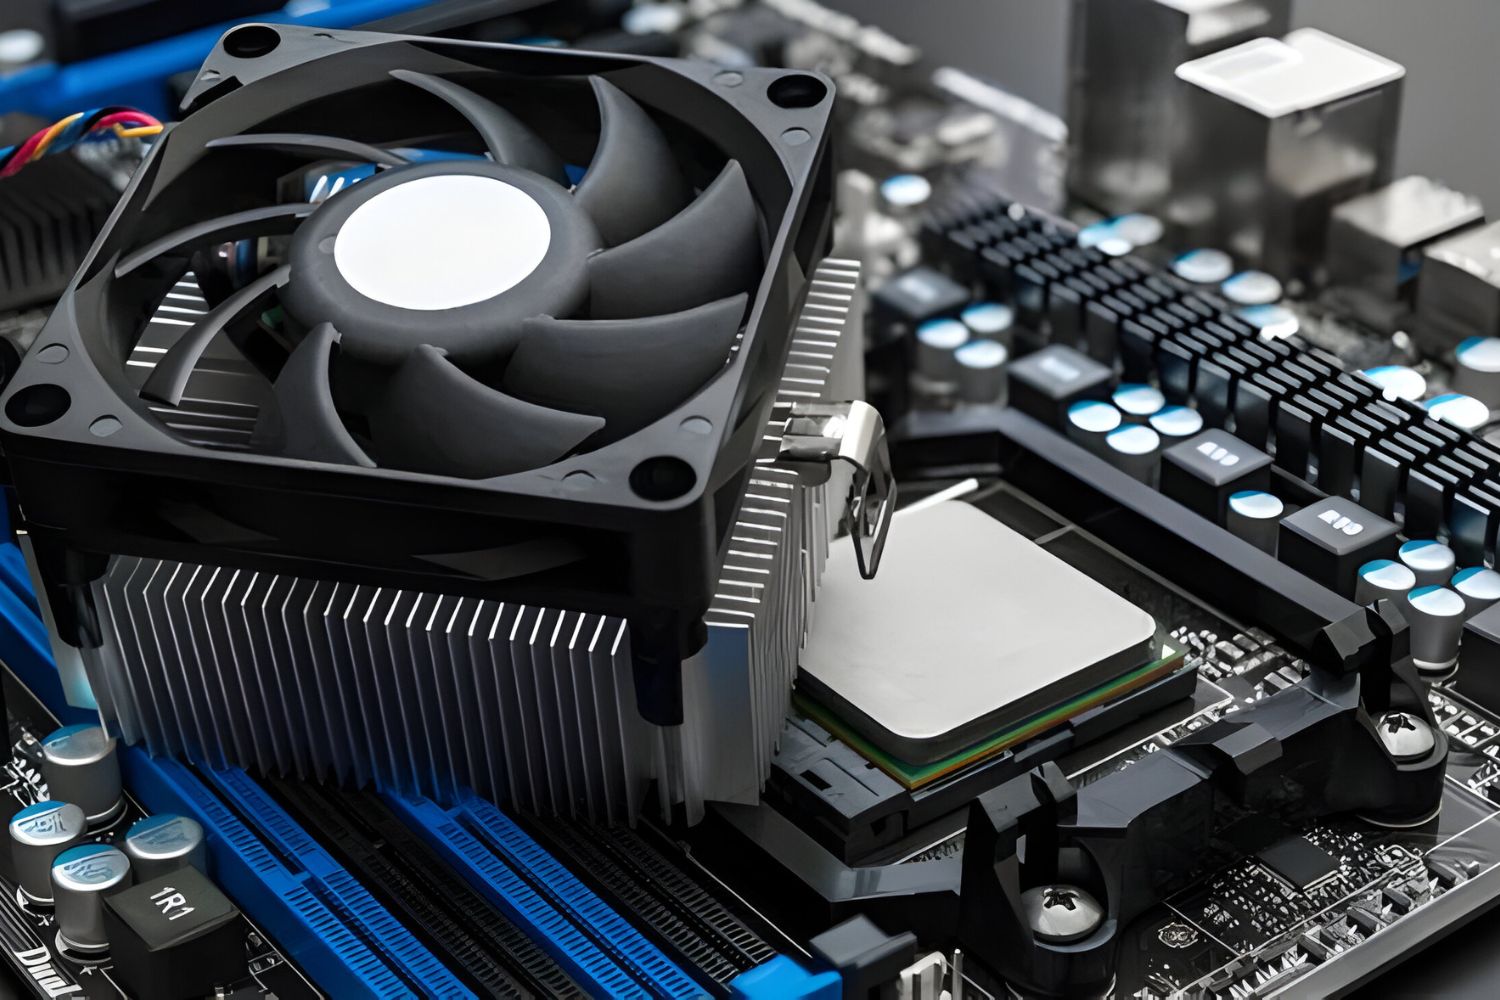
- Inspect the fans: Take a close look at the fans inside your computer case, paying attention to the CPU fan, case fans, and any other mounted fans. Ensure that the fans are spinning freely and without obstruction. Look for any visible signs of dust buildup, damage, or unusual noises coming from the fans.
- Clean the fans: If you notice dust or debris on the fans, use a can of compressed air or a soft brush to carefully remove the buildup. Ensure that you hold the fans securely during cleaning to prevent them from spinning uncontrollably.
- Check the fan cables and connections: Examine the cables that connect the fans to the motherboard or fan controller. Ensure that the cables are securely plugged in and not damaged or frayed. Loose or faulty connections can lead to fan malfunction and inadequate cooling.
- Inspect the heatsink and cooling system: Examine the heatsink and pipes of the cooling system for any signs of dust accumulation or damage. Use compressed air or a soft brush to remove any dust buildup, paying close attention to the spaces between the fins of the heatsink. Ensure that the airflow channels are clear and unobstructed.
- Monitor fan speed: Use software utilities or BIOS settings to monitor the fan speed. Ensure that the fans are running at appropriate speeds, as excessively slow or fast fan speeds may indicate a problem with the fan controller or an issue with cooling efficiency.
- Replace or repair faulty fans or cooling system: If you notice any signs of damage, excessive noise, or malfunctioning fans, you may need to replace them. Contact the manufacturer or consult a computer technician for guidance on replacing or repairing the fans or cooling system.
- Reassemble the case: Once you have finished inspecting and cleaning the fans and cooling system, carefully reattach the side panel, ensuring that all screws or latches are securely fastened.
Regularly checking and maintaining the fans and cooling system of your computer is vital for proper heat dissipation and preventing CPU overheating. By ensuring the fans are clean, in good working condition, and properly connected, you can help maintain optimal airflow and keep your CPU and other components cool and functioning efficiently.
Monitoring CPU Temperature
Monitoring the temperature of your CPU is essential for detecting early signs of overheating and taking preventive action before it causes damage to your computer. By regularly checking the CPU temperature, you can ensure that it stays within acceptable limits and maintain optimal performance. Here’s how to monitor your CPU temperature:
- Software utilities: Use specialized software tools designed to monitor CPU temperature. There are several popular applications available, such as HWMonitor, Core Temp, and SpeedFan. These tools provide real-time temperature readings and often offer additional features like fan speed monitoring and alert notifications.
- Built-in BIOS settings: Many computer motherboards have built-in BIOS settings that allow you to monitor CPU temperature. Access your computer’s BIOS by restarting it and pressing the designated key (usually Del, Esc, or F2) during the startup process. Look for the hardware monitoring section, where you can find temperature readings and customize alerts.
- Hardware monitor panels: Some computer cases come equipped with built-in hardware monitor panels. These panels display vital system information, including CPU temperature, without the need for additional software or entering the BIOS. If your case has this feature, familiarize yourself with the panel’s controls and customization options.
- Third-party hardware monitors: Hardware monitoring devices, such as digital temperature displays or fan controllers with temperature sensors, can be installed in your case. These devices provide real-time temperature information without relying on software or BIOS settings. Connect the monitoring device according to the manufacturer’s instructions and ensure the temperature sensor is placed near the CPU for accurate readings.
- Check for abnormal readings: Regularly monitor your CPU temperature and familiarize yourself with the normal temperature ranges for your specific CPU model. If you notice sudden spikes or consistently high temperatures, it could be a sign of CPU overheating. In such cases, take immediate action to identify and resolve the underlying cause.
- Keep an eye on CPU temperature during demanding tasks: Pay particular attention to CPU temperature during resource-intensive activities like gaming, video editing, or running complex software. These tasks often generate more heat, pushing the CPU to its limits. Monitoring the temperature during these periods can help you identify any potential overheating issues and take appropriate measures to prevent damage.
- Regularly clean and maintain your computer: Dust accumulation can impede heat dissipation and lead to higher CPU temperatures. By regularly cleaning your computer and ensuring proper ventilation and airflow, you can help maintain lower temperatures and prevent overheating.
- Address cooling system or component issues: If you consistently observe high CPU temperatures, even after cleaning and optimizing airflow, there may be an issue with your cooling system or CPU. Consider consulting a professional or contacting the hardware manufacturer for further assistance and guidance in resolving the issue.
By monitoring your CPU temperature regularly, you can quickly identify any abnormalities and take the necessary steps to prevent CPU overheating. Remember that early detection and timely action can save your computer from potential damage and ensure its longevity and optimal performance.
Preventative Measures to Avoid CPU Overheating
Preventing CPU overheating is essential for maintaining the stability and longevity of your computer. By implementing these proactive measures, you can minimize the risk of overheating and ensure optimal CPU performance:
- Maintain proper ventilation: Ensure that your computer case has adequate airflow and proper ventilation. Keep the vents free from obstructions and position the case in a well-ventilated area. Consider adding additional case fans or upgrading to more efficient cooling solutions if necessary.
- Clean regularly: Regularly clean the dust and debris from your computer, especially the CPU heatsink, fans, and vents. Use compressed air or a soft brush to remove accumulated dust, as it can hinder heat dissipation and contribute to CPU overheating. Aim to clean your computer every three to six months, or more frequently if you work in a dusty environment.
- Apply thermal paste correctly: Ensure that you apply an appropriate amount of thermal paste to create a thin, even layer between the CPU and heatsink. This improves heat transfer and helps keep temperatures lower. Follow the manufacturer’s guidelines and recommendations for your specific CPU and thermal paste product.
- Check and maintain fans: Regularly inspect and clean the fans in your computer, including the CPU fan and case fans. Ensure that they are spinning freely and not obstructed by dust or debris. Replace any faulty or worn-out fans to maintain proper cooling efficiency. Additionally, monitor fan speed through software or BIOS settings to ensure they are functioning correctly.
- Monitor temperature and use fan speed controls: Continuously monitor the CPU temperature using software utilities or BIOS settings. Adjust fan speeds accordingly to maintain optimal cooling and reduce noise levels. Some motherboards offer automatic fan speed controls based on temperature, which can help maintain consistent cooling under varying workloads.
- Avoid overclocking without proper cooling: Overclocking increases the CPU clock speed but also increases heat generation. If you plan to overclock your CPU, ensure that you have adequate cooling solutions in place to manage the increased heat. Monitor temperatures closely during overclocked sessions to prevent overheating and potential damage.
- Avoid blocking airflow: Ensure that cables and other components within your computer case do not obstruct airflow. Keep cables organized and away from fans, preventing them from impeding proper cooling. Use cable management solutions to keep your components tidy and maximize airflow.
- Keep your computer in a cool environment: Avoid placing your computer in direct sunlight or near sources of excessive heat. High ambient temperatures can make it more challenging for your cooling system to dissipate heat effectively. Optimal room temperature for computer operation is generally around 20-25 degrees Celsius (68-77 degrees Fahrenheit).
- Consider additional cooling solutions: For high-performance systems or environments with elevated temperatures, consider investing in additional cooling solutions, such as liquid cooling systems or CPU coolers. These advanced cooling options offer enhanced heat dissipation and can help keep CPU temperatures within safe limits.
- Regularly update and maintain your operating system: Keeping your operating system up to date ensures that you have the latest drivers and patches, including those related to power management and cooling. Regularly update your BIOS firmware as well, as motherboard manufacturers often release updates that improve system stability and cooling functionality.
By following these preventative measures, you can significantly reduce the risk of CPU overheating and maintain a cooler and more stable computer system. Your CPU will perform optimally, and your hardware will remain in good condition, allowing you to enjoy a reliable and efficient computing experience.
Conclusion
CPU overheating can have detrimental effects on your computer’s performance, stability, and longevity. However, by understanding the causes of overheating and implementing preventative measures, you can maintain optimal CPU temperatures and protect your system from potential damage.
In this article, we explored the various causes of CPU overheating, including inadequate cooling, overclocking, dust accumulation, and faulty cooling systems. We also discussed the importance of proper ventilation to facilitate heat dissipation and prevent overheating.
We highlighted the significance of regularly cleaning your computer to remove dust and debris from the CPU, cooling fans, and heatsinks. Additionally, we discussed the proper application of thermal paste to improve heat transfer between the CPU and heatsink.
Furthermore, we emphasized the importance of checking and maintaining the fans and cooling system, as well as monitoring CPU temperature to detect early signs of overheating. By regularly monitoring the temperature and taking appropriate actions, you can prevent CPU overheating and maintain optimal performance.
We outlined preventative measures, including maintaining proper ventilation, cleaning regularly, applying thermal paste correctly, checking and maintaining fans, monitoring temperature, and considering additional cooling solutions when necessary. Implementing these measures can significantly reduce the risk of CPU overheating and help ensure the longevity and reliability of your computer.
Remember, preventing CPU overheating is a proactive approach that requires regular maintenance and monitoring. By following the best practices outlined in this article, you can enjoy a stable and efficient computing experience while safeguarding your valuable hardware investment.
So, take the necessary steps to keep your CPU cool, prevent overheating, and enjoy optimal performance from your computer for years to come.