Possible Reasons for CPU Cooler Not Running
A CPU cooler is an essential component in maintaining the optimal temperature of your computer’s processor. If you find that your CPU cooler is not running, it can lead to overheating issues and potential damage to your hardware. There can be several reasons why your CPU cooler is not functioning properly. Let’s explore some possible causes and solutions.
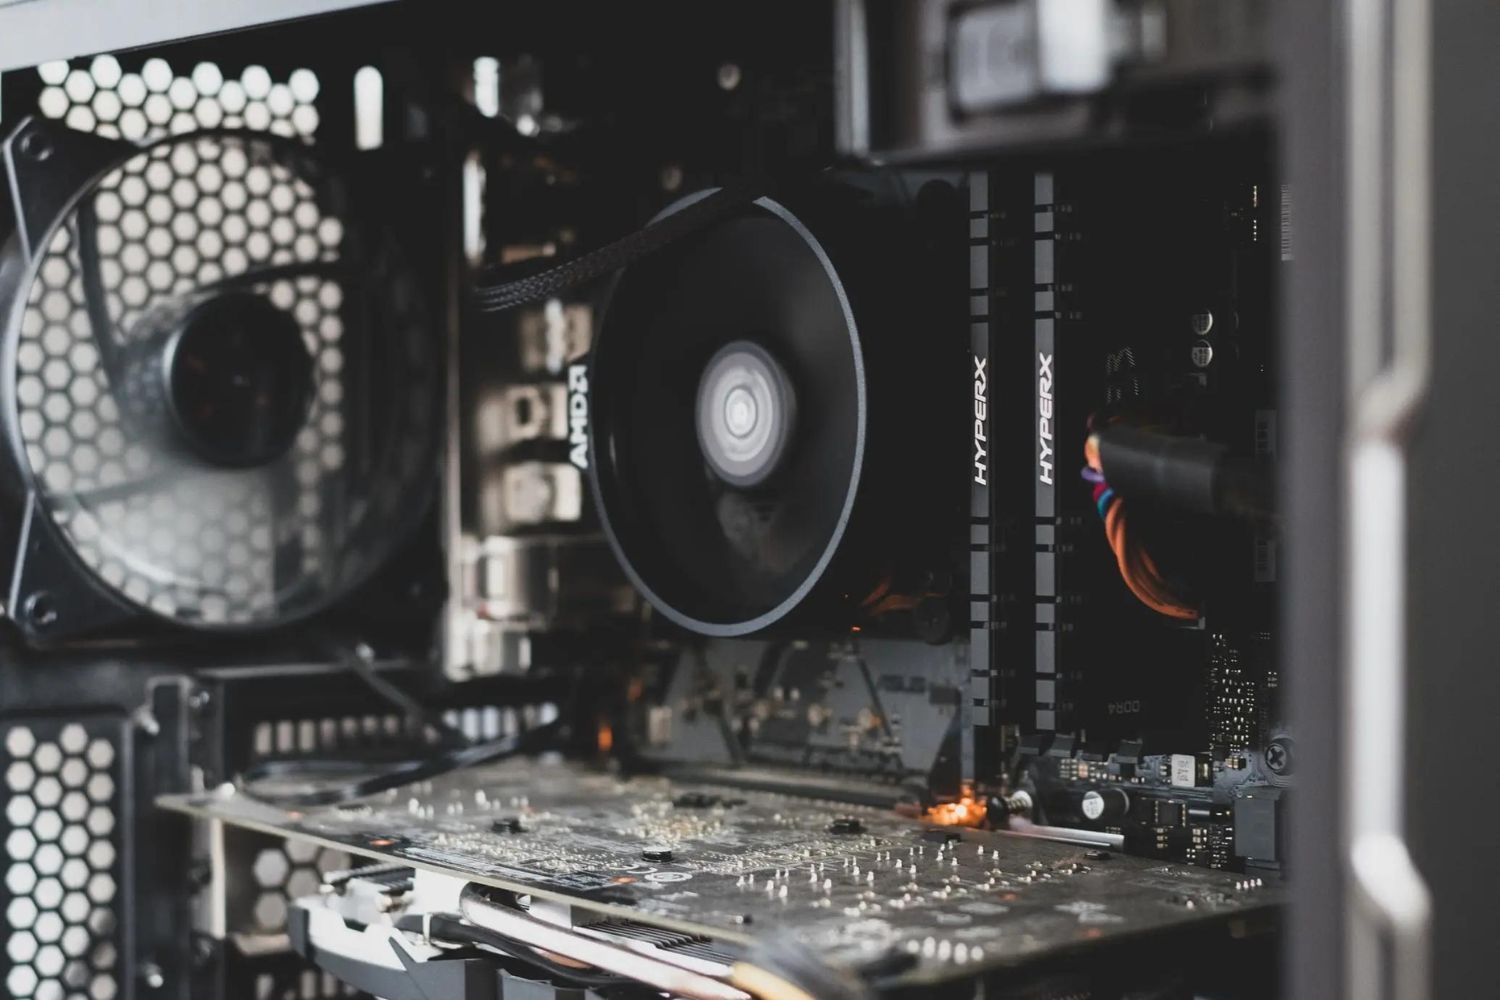
- Loose or Unplugged Connection: One of the most common reasons for a CPU cooler not running is a loose or unplugged connection. Ensure that the power cables to the cooler are securely attached to the motherboard.
- Faulty Power Connection: Check if the power supply unit (PSU) is delivering adequate power to the CPU cooler. Faulty power connections can cause the cooler to not receive enough power, resulting in it not running.
- Malfunctioning Fan: If the fan in your CPU cooler is not working, it may need to be replaced. Over time, fans can wear out or become clogged with dust, preventing them from spinning properly. Cleaning or replacing the fan can fix this issue.
- BIOS Settings: Incorrect or outdated BIOS settings can also lead to a CPU cooler not running efficiently. Make sure that the BIOS settings related to the fan control are configured properly.
- Overheating Issues: If your CPU is overheating, it can cause the cooler to stop running as a safety precaution. Check if your CPU is reaching high temperatures and consider applying new thermal paste or upgrading to a more powerful cooler.
- Dust and Dirt Accumulation: Accumulated dust and dirt can obstruct airflow and cause the CPU cooler to malfunction. Regularly clean your PC case, fans, and heatsinks to prevent dust buildup.
- Incorrect Installation: Improper installation of the CPU cooler can lead to it not running. Make sure that it is securely mounted on the CPU and that there is proper contact between the cooler and the processor.
- Hardware Compatibility Issues: In some cases, the CPU cooler may not be compatible with your motherboard or CPU. Check the specifications and compatibility guidelines to ensure that you have the correct cooler for your system.
- Faulty Motherboard or CPU: If none of the above solutions work, there is a possibility that the issue lies with your motherboard or CPU. Consider seeking professional assistance to diagnose and resolve the problem.
- Software Issues: Occasionally, software conflicts or driver issues can cause the CPU cooler to stop running. Update your drivers and ensure that your operating system is running smoothly.
By troubleshooting these possible causes, you can identify and resolve the issue with your CPU cooler not running. Remember to exercise caution and seek professional help if needed to avoid causing further damage to your hardware.
Loose or Unplugged Connection
A common reason for a CPU cooler not running is a loose or unplugged connection. When the connection between the cooler and the motherboard is not secure, the cooler may fail to receive the necessary power to function properly. Fortunately, this is a relatively easy issue to fix.
To resolve this problem, start by shutting down your computer and unplugging it from the power source. Then, open the case and locate the CPU cooler. Check the power cables that connect the cooler to the motherboard. Ensure that these cables are securely attached and properly seated in their respective ports.
If you find that the cables are loose, gently push them back into place. You may also want to consider disconnecting and reconnecting the cables to ensure a secure connection. Once you have done this, close the case and plug your computer back into power.
Now, power on your computer and check if the CPU cooler is running. Monitor the fan speed or listen for the sound of the cooler operating. If the cooler is still not running, it is possible that the cables themselves may be damaged or faulty. In this case, replacing the cables with new ones can solve the issue.
Remember to handle the cables with care and avoid pulling them forcefully as this may cause damage to other components or the cables themselves.
In some cases, the issue may not be with the cables, but rather with the cooler’s power connector on the motherboard. Ensure that the power connector is clean and free from any debris or dust. If there is any dirt or grime, gently clean the connector using a can of compressed air or an anti-static brush.
Once you have cleaned the power connector, try reconnecting the cooler to see if it starts running. If the cooler still does not operate, it is possible that there may be an underlying issue with another component or the cooler itself. At this point, seeking professional assistance may be necessary to diagnose and resolve the problem.
In summary, if your CPU cooler is not running, a loose or unplugged connection could be the culprit. By ensuring that the power cables are securely attached and properly seated, you can often resolve this issue and get your CPU cooler up and running again without any further complications.
Faulty Power Connection
Another possible reason for a CPU cooler not running is a faulty power connection. If the cooler is not receiving adequate power, it will not be able to function properly. This issue can occur due to various reasons, but it is typically easy to diagnose and resolve.
Start by shutting down your computer and disconnecting it from the power source. Open your computer case and locate the power supply unit (PSU).
Check the power cables that are connected to the PSU. Make sure they are securely plugged in and not loose. If any cables are loose, gently push them back into place and ensure they are properly seated.
Inspect the power cable that connects the PSU to the CPU cooler. This cable typically has a 4-pin or 8-pin connector. Ensure that it is securely connected to both the PSU and the CPU cooler. Be careful not to force the connection as it may damage the pins or connector.
If you have a modular PSU (one with removable cables), try using a different cable to connect the PSU to the CPU cooler. Sometimes, faulty cables can cause power connection issues.
After checking and securing the power connections, close the computer case and plug it back into the power source.
Power on your computer and check if the CPU cooler is running. Monitor the fan speed or listen for the sound of the cooler operating. If the cooler is still not running, try connecting the CPU cooler to a different power connector on the PSU, if available.
If, after these troubleshooting steps, the CPU cooler is still not running, it is possible that the power supply unit itself is faulty. In this case, replacing the PSU with a new one may be necessary.
Keep in mind that faulty power connections can also be caused by issues with the motherboard. Ensure that the motherboard’s power connectors are securely connected to the PSU and that they are not damaged. If you suspect a motherboard-related issue, consider consulting a professional for further assistance.
In summary, a faulty power connection can prevent the CPU cooler from running. By checking the power cables, connectors, and using a different cable or power connector if necessary, you can often resolve this issue and restore the proper functioning of your CPU cooler.
Malfunctioning Fan
A malfunctioning fan can be a common cause of a CPU cooler not running. The fan in the CPU cooler is responsible for dissipating heat generated by the processor. If the fan is not functioning properly, it can lead to overheating issues and potential damage to your CPU.
Over time, fans can wear out or become clogged with dust, hindering their ability to spin properly. If your CPU cooler’s fan is not running, it may need to be replaced or cleaned.
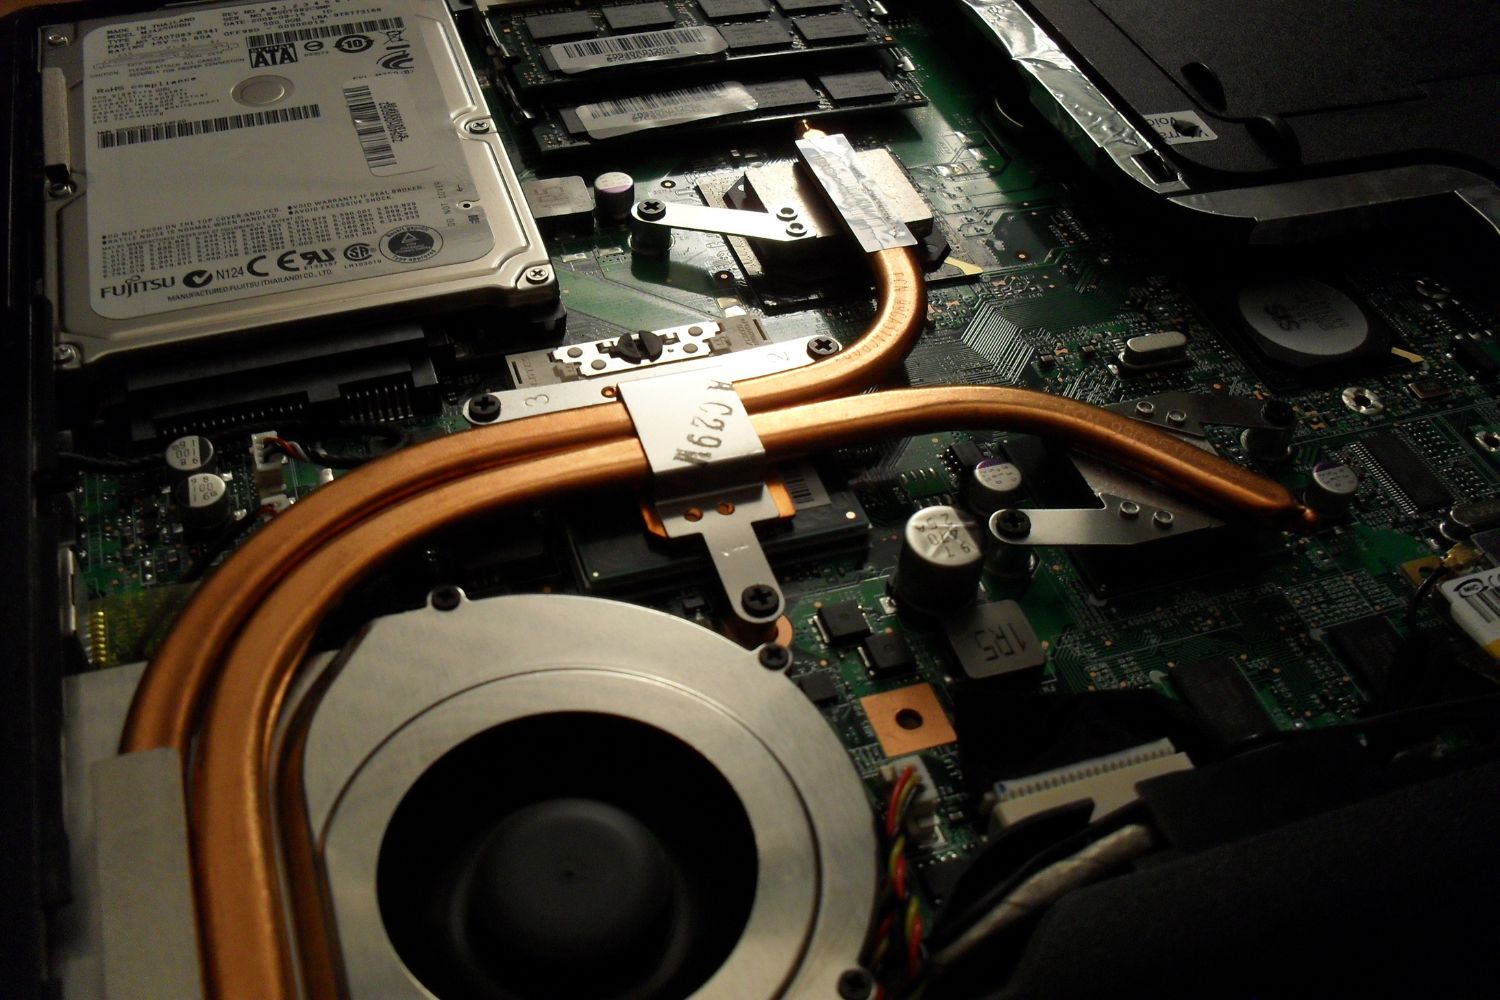
Start by shutting down your computer and unplugging it from the power source. Open your computer case and locate the CPU cooler fan. It is usually attached to the heatsink on top of the CPU.
Inspect the fan for any visible signs of damage, such as broken blades or loose connections. If you notice any damaged components, it is recommended to replace the fan with a new one compatible with your CPU cooler.
If there are no physical damages, but the fan is not running, it may be clogged with dust and dirt. Use a can of compressed air or a soft brush to carefully remove any accumulated dust from the fan. Ensure that the computer is off and the fan is not spinning before attempting to clean it.
If cleaning the fan does not resolve the issue, you can try connecting the fan to a different header on the motherboard. This will help determine if the issue lies with the fan or the motherboard’s fan connector.
If the fan still does not operate after these steps, it is likely that the fan motor itself is faulty and needs to be replaced. Consider purchasing a new fan and following the manufacturer’s instructions for installation.
When replacing the fan, ensure that it is compatible with your CPU cooler and that it is correctly mounted on the heatsink. Improper installation can result in suboptimal cooling performance or noisy operation.
In some cases, upgrading to a higher-quality or more powerful CPU cooler may be necessary if the current cooler’s fan consistently fails or does not provide adequate cooling. Consider researching and selecting a suitable replacement based on your system’s requirements.
In summary, a malfunctioning fan can cause a CPU cooler to not run efficiently. By inspecting and replacing the fan if necessary, or cleaning it to remove dust and dirt, you can restore proper cooling functionality to your CPU and prevent overheating issues.
BIOS Settings
Incorrect or outdated BIOS settings can also result in a CPU cooler not running properly. The BIOS (Basic Input/Output System) on your motherboard controls various hardware settings, including fan control for the CPU cooler. If the BIOS settings related to the fan control are set incorrectly, the CPU cooler may not receive the necessary power or may not operate at the desired speed.
To check and adjust the BIOS settings, start by restarting your computer and entering the BIOS setup. The specific key to access the BIOS setup may differ depending on your motherboard manufacturer (common keys include Del, F2, or F10).
Once inside the BIOS setup, navigate to the section that controls the fan settings or hardware monitoring. The exact location and options may vary depending on your motherboard model.
Look for options related to fan control or fan speed. Ensure that the CPU fan control setting is enabled and set to the appropriate mode, such as “PWM” (Pulse Width Modulation) or “DC” (Direct Current) control. These settings may differ depending on your motherboard’s BIOS interface.
Additionally, some motherboards offer a “Smart Fan” or “Fan Profile” option that automatically adjusts fan speed based on CPU temperature. Consider enabling this feature if available.
If you have recently updated your BIOS, it is possible that the new firmware version has reset your fan control settings. Make sure to review and reconfigure the settings if necessary.
Once you have adjusted the fan control settings to your desired configuration, save and exit the BIOS setup. Your computer will restart and any changes made to the BIOS settings will take effect.
Monitor your CPU cooler to see if it is now running properly. Use monitoring software or enter the BIOS setup again to check if the fan speed is displayed correctly.
If the CPU cooler is still not running or the fan speed is not being detected correctly, there may be an issue with the BIOS itself. Consider updating the BIOS to the latest version provided by the motherboard manufacturer. However, exercise caution when updating the BIOS as improper flashing can cause irreversible damage to your system.
In summary, incorrect BIOS settings can prevent a CPU cooler from running efficiently. By accessing the BIOS setup and adjusting the fan control settings appropriately, you can ensure that the CPU cooler receives the necessary power and operates at the desired speed.
Overheating Issues
Overheating is a critical concern for computer systems, and it can also lead to a CPU cooler not running as it should. When a CPU overheats, the motherboard may trigger a safety mechanism that stops the CPU cooler from running to prevent potential damage to the processor. If you suspect overheating to be the cause of your CPU cooler not running, there are several steps you can take to address this issue.
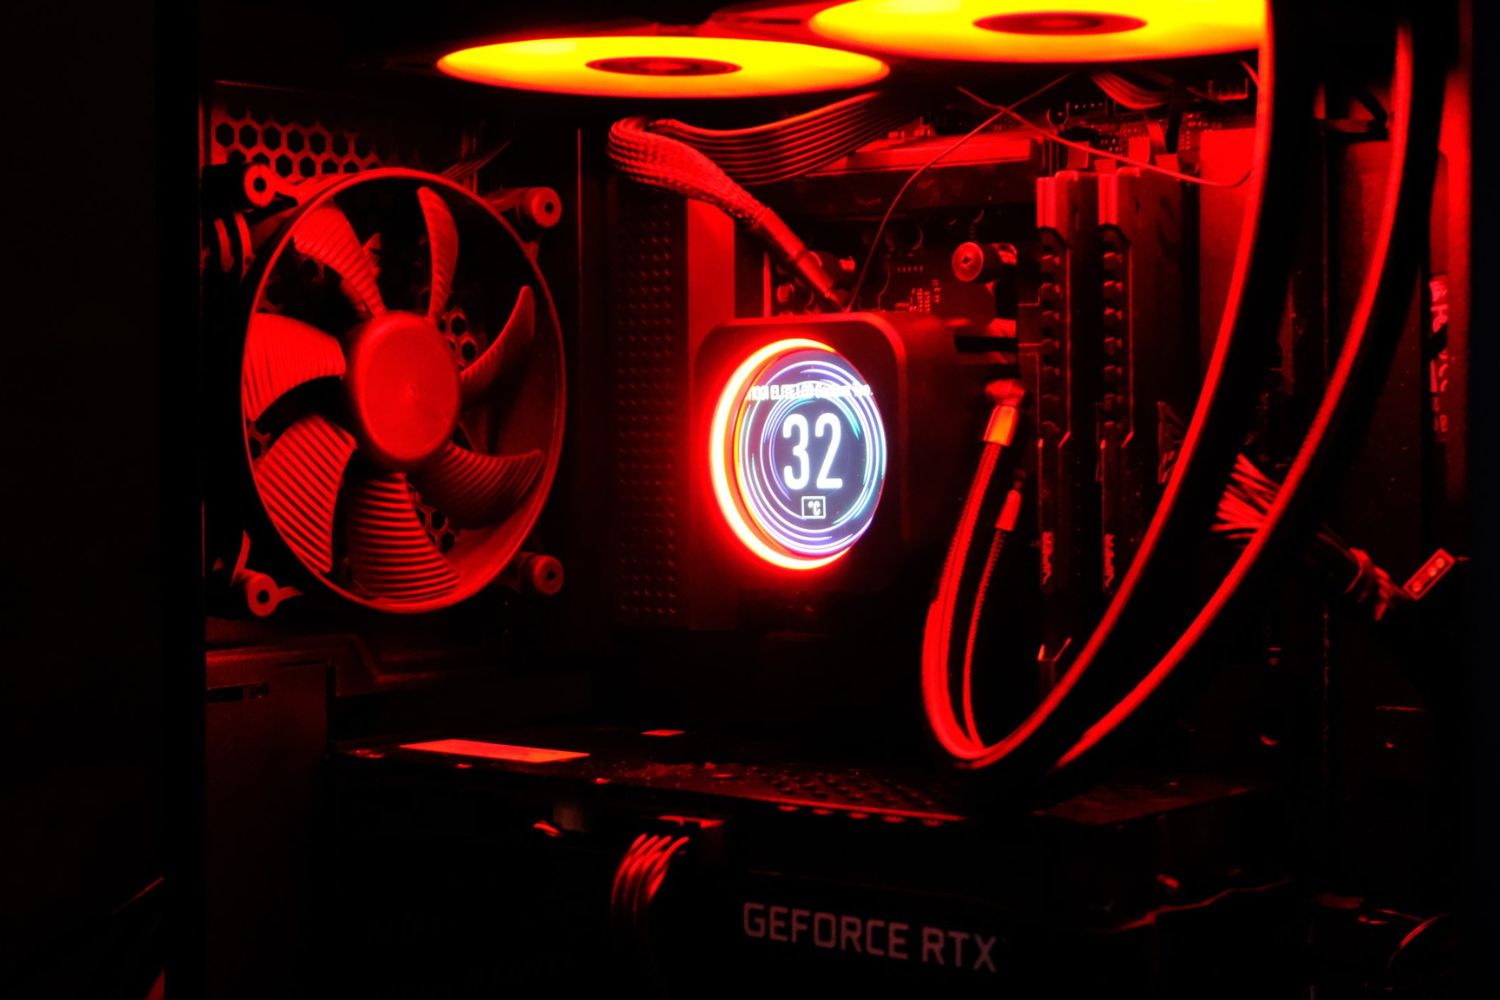
Start by monitoring the temperature of your CPU using software such as CPUID HWMonitor or Core Temp. These programs provide real-time temperature readings and can help you determine if your CPU is experiencing overheating.
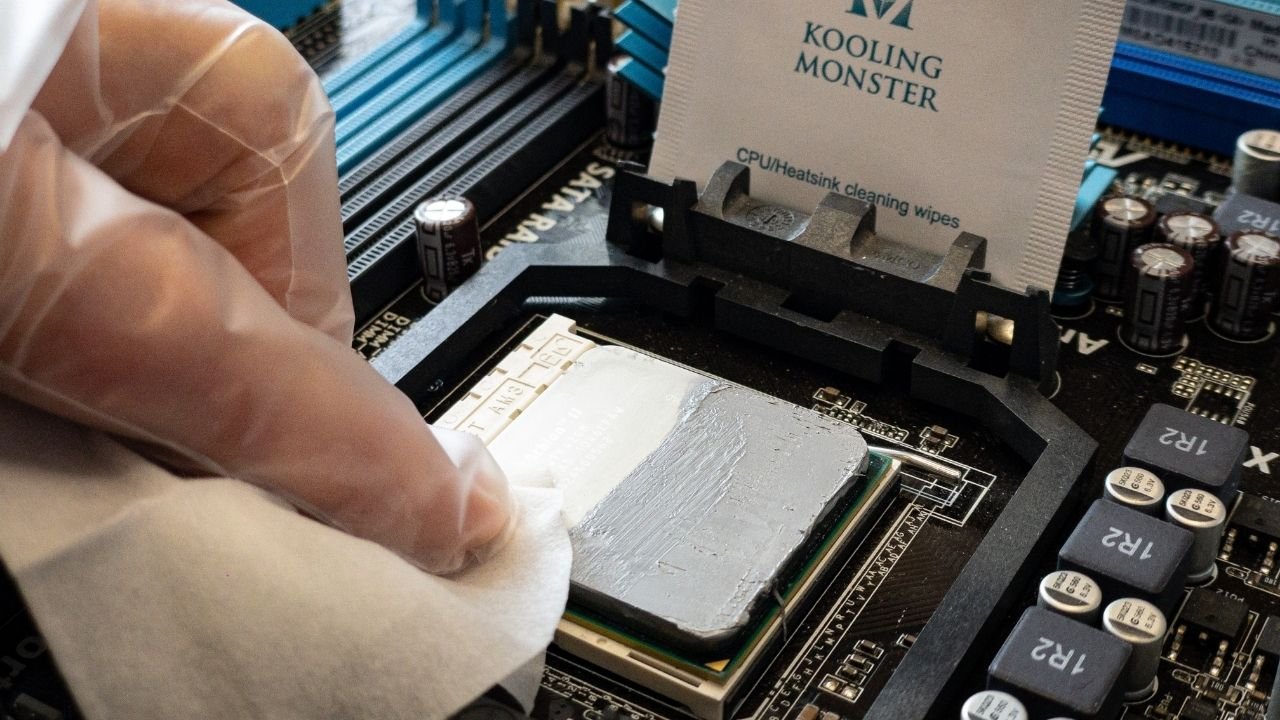
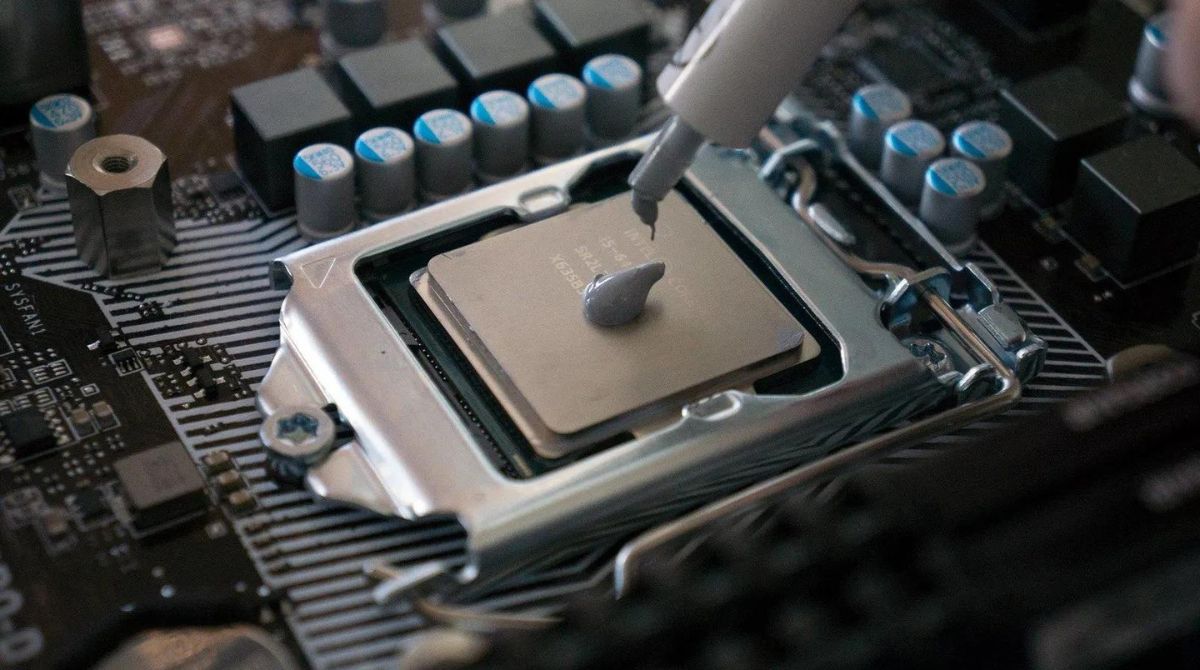
If you find that your CPU temperatures are reaching high levels, the first step is to check the thermal paste. Over time, thermal paste can degrade or dry out, compromising its ability to efficiently transfer heat from the CPU to the cooler.
To reapply thermal paste, first, turn off your computer and unplug it from the power source. Remove the CPU cooler from the CPU, clean off the old thermal paste using isopropyl alcohol and a lint-free cloth, and apply a thin, even layer of fresh thermal paste on the CPU surface. Ensure that the CPU cooler is properly reinstalled, making good contact with the CPU.
If reapplying thermal paste does not resolve the issue, it may be worth considering upgrading your CPU cooler to a more powerful one. A larger heatsink or a liquid cooling solution can provide better heat dissipation and help prevent overheating.
Another factor that can contribute to overheating is poor airflow within the computer case. Ensure that all intake and exhaust fans are clean and functioning correctly. If necessary, add additional fans or rearrange their positions to improve airflow.
You can also consider adjusting the fan curves or speeds through BIOS or fan control software. Increasing the fan speeds can help dissipate heat more effectively, but it may result in increased noise levels.
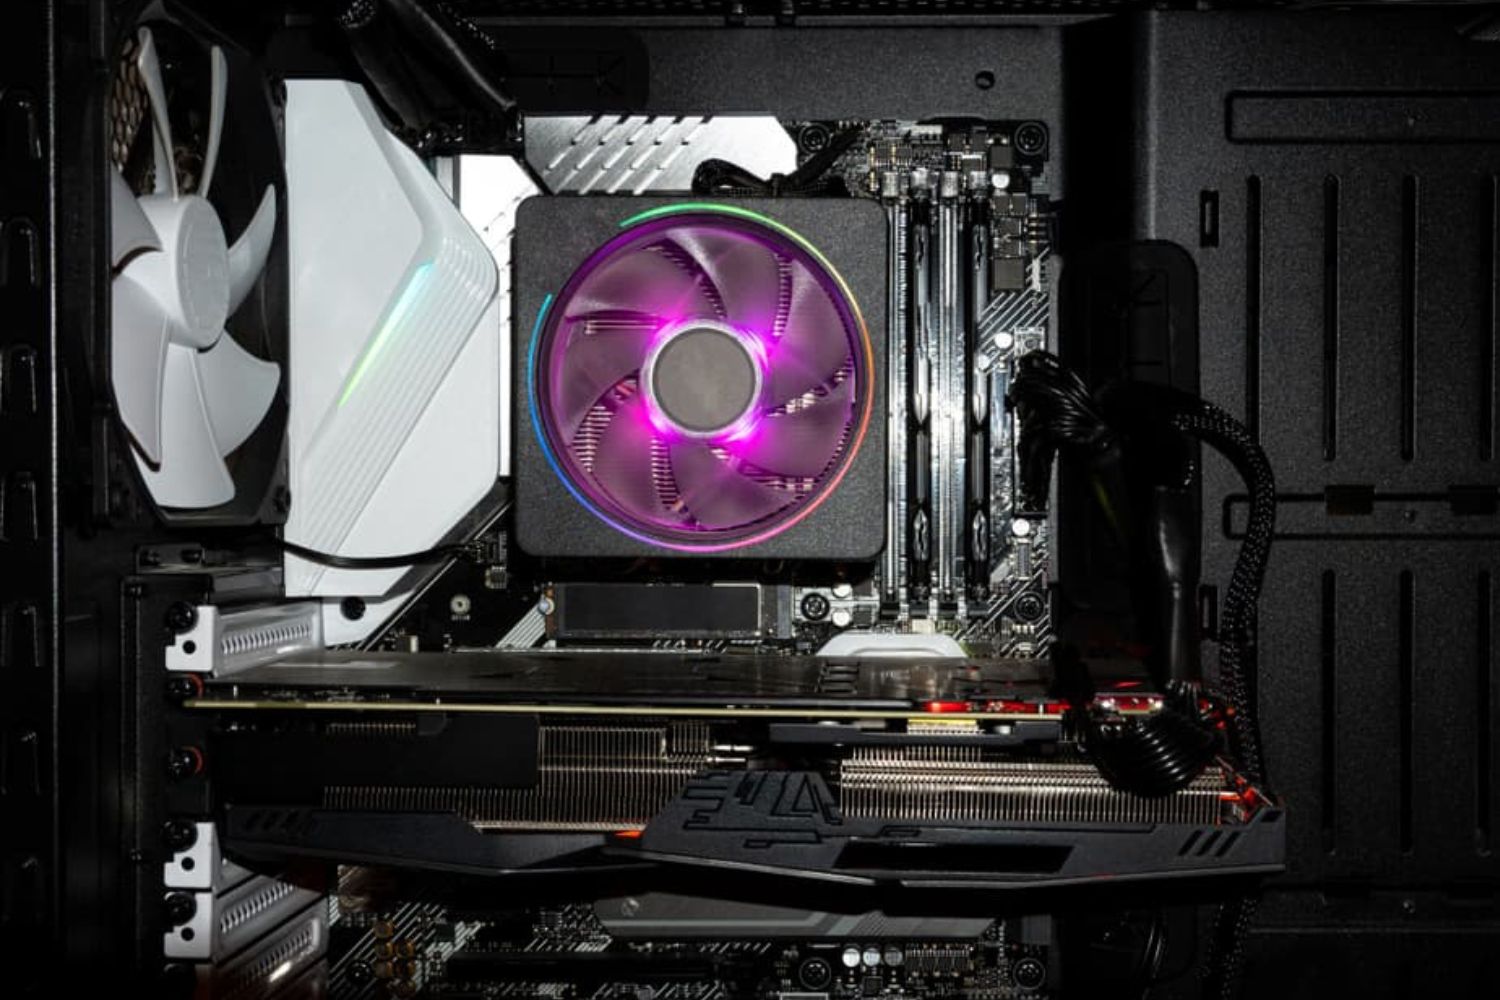
In some cases, the CPU cooler itself may not be properly installed. Ensure that the cooler is tightly and evenly mounted on the CPU, and that there is proper contact between the cooler and the processor. This ensures that heat can be efficiently transferred from the CPU to the cooler.
Finally, if you are overclocking your CPU, it is essential to consider the temperature limits and ensure that your cooler can handle the increased heat generated by overclocking. Overclocking can significantly increase the temperature of the CPU, necessitating a more robust cooling solution.
In summary, addressing overheating issues is crucial when dealing with a CPU cooler that is not running as it should. By checking thermal paste, improving airflow, upgrading the cooler if necessary, and addressing any overclocking concerns, you can prevent overheating and ensure optimal performance of your CPU cooler.
Dust and Dirt Accumulation
Dust and dirt accumulation can negatively impact the performance of your CPU cooler, causing it to not run efficiently or even fail completely. Over time, dust particles can block the airflow through the CPU cooler and hinder heat dissipation, leading to higher temperatures and potential overheating issues. Cleaning the CPU cooler and removing dust and dirt can help restore proper functionality.
To begin, power off your computer and unplug it from the power source. Open the computer case and locate the CPU cooler. It typically consists of a fan and a heatsink.
Inspect the fan and heatsink for any visible dust or dirt buildup. You may use compressed air or a can of compressed air to blow away the dust, ensuring that the fan blades and heatsink fins are clear of debris. Hold the can of compressed air upright and use short bursts to prevent liquid from being expelled.
If the dust and dirt accumulation is significant, you may need to remove the CPU cooler for deeper cleaning. Gently disconnect the CPU cooler from the CPU socket by following the manufacturer’s instructions. Take caution to avoid any excessive force that could damage the CPU or motherboard.
Once the CPU cooler is removed, use a soft brush or a clean, dry cloth to carefully remove any dust or dirt from both the fan and heatsink. Be gentle and avoid bending the fan blades or damaging the heatsink fins.
While cleaning, pay attention to the areas between the heatsink fins, as dust tends to accumulate in these narrow spaces. Use a brush or compressed air to dislodge stubborn dust particles from these areas.
After cleaning the CPU cooler components, reattach the cooler securely to the CPU socket, ensuring proper alignment and contact. Make sure all screws or clips are tightened appropriately.
Finally, close the computer case and reconnect the power source. Power on your computer and monitor the CPU cooler to ensure it is running smoothly. Use monitoring software or enter the BIOS to check the fan speed and temperature readings.
Regularly cleaning your computer case can help prevent dust and dirt accumulation in the future. Consider investing in dust filters for intake fans to reduce the amount of dust entering the case.
By regularly cleaning your CPU cooler and keeping it free from dust and dirt, you can improve its performance, prevent overheating, and extend its lifespan. Remember to follow proper cleaning procedures and avoid using liquid-based cleaning agents or excessive force that could cause damage.
Incorrect Installation
Incorrect installation of the CPU cooler can be a common reason for it not running properly. If the cooler is not properly mounted on the CPU or if there is not proper contact between the cooler and the processor, it can affect the cooling performance and cause the cooler to not run efficiently.
When installing a CPU cooler, it is crucial to ensure that it is compatible with your CPU socket. Different CPUs have different socket types, and using an incompatible cooler can result in improper installation and functionality.
Start by referring to the CPU cooler’s installation manual or the manufacturer’s instructions. Make sure to follow the specific steps outlined for your particular cooler model. The manual should provide detailed instructions on how to properly install and mount the cooler on the CPU.
Before installing the cooler, clean off any existing thermal paste from the CPU and the cooler’s base using isopropyl alcohol and a lint-free cloth. This ensures that you have a clean surface for applying fresh thermal paste.
Apply a small pea-sized amount of thermal paste onto the center of the CPU. Avoid applying too much paste as it can lead to poor heat transfer.
Next, carefully place the CPU cooler onto the CPU, ensuring that the mounting brackets or screws align with the corresponding holes or hooks on the motherboard. The cooler should make even contact with the CPU.
Tighten the mounting screws or the cooler’s mounting mechanism, following the recommended tightening sequence provided in the manual. Take care not to overtighten the screws, as this can lead to damage to the CPU or motherboard.
Once the CPU cooler is securely installed, connect the power cables from the cooler to the appropriate fan headers on the motherboard. Ensure that the cables are correctly plugged in and properly seated.
After completing the installation, power on your computer and check if the CPU cooler is running. Monitor the fan speed or listen for the sound of the cooler operating. If the cooler is not running, double-check the installation to ensure that it was done correctly.
If you suspect that the CPU cooler may be installed incorrectly, you can try removing it and reinstalling it following the manufacturer’s instructions carefully.
It is worth noting that certain CPU coolers may require additional brackets or adapters for specific motherboard sockets. Ensure that you have the necessary components and ensure compatibility before attempting installation.
In summary, incorrect installation of the CPU cooler can hinder its performance and cause it to not run efficiently. By carefully following the manufacturer’s instructions and ensuring proper contact with the CPU, you can resolve installation-related issues and allow the CPU cooler to cool the processor effectively.
Hardware Compatibility Issues
Hardware compatibility issues can sometimes be the cause of a CPU cooler not running as expected. It is important to ensure that the CPU cooler you choose is compatible with your motherboard and CPU in terms of socket type, size, and power requirements. Mismatched or incompatible hardware can prevent the cooler from running or fitting properly.
Start by checking the specifications of your motherboard and CPU. Look for compatible socket types and physical dimensions that are supported. For example, if your CPU uses an Intel LGA1151 socket, make sure that the CPU cooler you choose is specifically designed for that socket type.
In addition to socket compatibility, consider the physical dimensions of the CPU cooler. Ensure that it will fit within your computer case without interfering with other components such as RAM modules or graphics cards. The cooler’s height can sometimes be a limiting factor, especially for smaller form factor cases.
Power requirements are another important consideration. High-performance CPU coolers and liquid cooling solutions often require dedicated power connectors, such as SATA or Molex connectors. Verify that your power supply unit (PSU) has the necessary connectors to properly power the cooler.
Some motherboards have additional features, such as RGB lighting or fan control headers. If you desire these features, make sure that the CPU cooler you choose is compatible and can be controlled using your motherboard’s software or BIOS.
If you have already installed a CPU cooler and it is not running, double-check the compatibility of the cooler with your motherboard and CPU. Consult the manufacturer’s documentation or website for compatibility information.
If you discover that the cooler is indeed incompatible, you will need to replace it with a compatible one. Ensure that you carefully select a cooler that matches the required specifications for your CPU and motherboard.
It’s important to note that some CPU coolers come with multiple mounting brackets or adapters to accommodate different socket types. If the cooler does not include the necessary accessories for your specific motherboard, check with the manufacturer to see if they offer compatible brackets or adapters as separate purchase options.
Before purchasing a new CPU cooler, consider consulting online forums or community discussions to see if other users have successfully used the cooler with the same motherboard and CPU combination. This can give you an idea of the compatibility and performance of the cooler in your specific setup.
By ensuring proper hardware compatibility, you can avoid potential issues and ensure that your CPU cooler operates effectively and efficiently in conjunction with your motherboard and CPU.
Faulty Motherboard or CPU
In some cases, a CPU cooler not running properly could be indicative of a faulty motherboard or CPU. While this is less common, it is still a possibility and should be considered if all other troubleshooting steps have been exhausted.
A faulty motherboard can result in inadequate power delivery to the CPU cooler or malfunctioning fan headers that prevent the cooler from working correctly. Similarly, a faulty CPU may be unable to communicate with the motherboard, leading to a lack of proper cooling control or fan operation.
If you suspect that your motherboard or CPU may be at fault, there are a few steps you can take to help diagnose the issue.
First, check if there are any visible signs of physical damage or burn marks on the motherboard. Inspect the CPU socket for any bent or broken pins, as this can lead to connectivity issues with the CPU cooler. If you notice any irregularities or damage, it is likely that the motherboard is faulty and may require repair or replacement.
Additionally, you can try testing the CPU cooler on a different motherboard or testing a different cooler on your current motherboard. This can help determine if the problem lies specifically with the motherboard or if it is an issue with the CPU cooler itself.
If possible, test your CPU in a different system to see if it operates correctly with a different motherboard. This can help you determine if the CPU is functioning properly or if it is the source of the issue.
It is important to note that diagnosing faulty motherboard or CPU issues can be complicated, and it may require professional assistance or consultation with a trusted technician or service center. These components are critical to the functioning of your system, so it is crucial to handle them with care and seek expert advice if needed.
In some cases, warranty coverage may be applicable for your motherboard or CPU. If your system is still under warranty, contact the manufacturer or your place of purchase to explore potential repair or replacement options.
While a faulty motherboard or CPU is less common as a cause for a CPU cooler not running, it is important to consider this possibility if all other troubleshooting steps have been unsuccessful. Seeking professional assistance can help identify and resolve the issue effectively.
Software Issues
Software issues can also contribute to a CPU cooler not running as expected. Problems with drivers, conflicts, or settings within the operating system or fan control software can prevent the cooler from operating properly. Addressing these software-related issues can often resolve the problem.
The first step in troubleshooting software issues is to ensure that you have the latest drivers installed for your motherboard, CPU, and CPU cooler. Manufacturers regularly release updates to improve compatibility and address known issues. Visit the manufacturer’s website to download and install the latest drivers.
If you have recently updated your operating system, some settings may have been reset or changed. Check the power management settings in your operating system to ensure that the CPU cooler is set to run at its optimal performance and that any power-saving options are disabled.
Another software-related issue can be conflicts between fan control software or monitoring utilities. These programs can sometimes interfere with the proper functioning of the CPU cooler. Consider uninstalling any unnecessary or conflicting software and then reinstalling the fan control software specific to your motherboard or CPU.
Some motherboards come with their own fan control software that allows you to customize fan speeds and monitor temperatures. Ensure that you have properly configured the software to control the CPU cooler’s fan. Refer to the motherboard manual or manufacturer’s website for guidance on setting up and adjusting the fan control software.
Additionally, check for any BIOS updates for your motherboard. BIOS updates can often address software bugs or compatibility issues that may affect the CPU cooler’s performance. Consult the motherboard manufacturer’s website for instructions on how to update the BIOS.
If you have made recent changes to your BIOS settings, consider restoring the defaults to rule out any misconfigured settings that may be affecting the CPU cooler’s operation.
It is also essential to ensure that your operating system is running smoothly without any background processes or programs that could be using excessive CPU resources. Close any unnecessary applications and monitor your system’s performance to identify any potential software-related bottlenecks.
If you have exhausted all software troubleshooting steps and the CPU cooler is still not running, there is a possibility of an underlying hardware issue. Consider seeking professional assistance to diagnose and resolve the problem.
In summary, software issues can impact the proper functioning of a CPU cooler. By updating drivers, checking power management settings, addressing conflicts, and ensuring that fan control software is properly configured, you can often resolve software-related issues and restore the functionality of your CPU cooler.