Introduction
Welcome to the world of computer cooling – where fans spin, temperatures are regulated, and performance is optimized. One crucial component of this system is the CPU fan, which is responsible for keeping your processor nice and cool during intense computing tasks. However, if you’ve noticed that your CPU fan isn’t spinning, it’s natural to be concerned about the potential consequences for your computer’s performance and longevity.
A non-spinning CPU fan can be caused by various factors, ranging from simple issues like a loose cable connection to more complex problems like a faulty fan motor. While it may seem like a cause for worry, it’s important to remember that not all situations involving a stagnant CPU fan require panic or immediate repairs. In some cases, it could be perfectly normal for the fan to remain stationary, especially when the computer is idle or running in low-load situations.
In this article, we’ll explore the possible reasons why your CPU fan isn’t spinning, discuss whether it’s normal for the fan to be stationary at times, and provide a troubleshooting guide to help you address the issue if necessary. So, let’s dive in and unravel the mystery behind your non-spinning CPU fan!
Possible Reasons Why Your CPU Fan Isn’t Spinning
There can be several reasons why your CPU fan isn’t spinning. Understanding these possible causes will help you diagnose and resolve the issue effectively. Here are some common reasons:
- Fan power cable disconnected: One of the most basic explanations for a non-spinning CPU fan is that its power cable has become disconnected. This can occur if the cable wasn’t properly connected during installation or if it became loose over time.
- Faulty fan motor: The fan motor may have malfunctioned or burned out, leading to the fan not spinning at all. This can happen due to wear and tear, excessive dust accumulation, or power surges.
- Overheating protection: Many modern computer motherboards come with built-in mechanisms to protect the processor from overheating. As part of this protection, the motherboard may temporarily stop the CPU fan from spinning to safeguard the system. This is especially common in low-load situations or when the computer is idle.
- BIOS settings: The fan settings in the computer’s BIOS may be misconfigured, causing the CPU fan to remain stationary. It’s possible that the fan speed control is set to manual or a low threshold, preventing the fan from spinning at higher speeds.
- Software conflicts: Certain software conflicts or compatibility issues can interfere with the CPU fan’s operation. For example, conflicting motherboard utility software or outdated system drivers may prevent the fan from spinning properly.
Understanding these potential causes can help you narrow down the issue and take the appropriate steps to troubleshoot and fix your non-spinning CPU fan. In the following sections, we’ll explore whether it’s normal for the CPU fan to not spin and provide you with troubleshooting tips to address this issue effectively.
Is It Normal for Your CPU Fan to Not Spin?
If you’ve noticed that your CPU fan isn’t spinning, it’s natural to wonder if this is a cause for concern. The answer, as is often the case in the world of technology, is: it depends.
In certain situations, it is perfectly normal for your CPU fan to remain stationary. Modern computer systems employ various fan control mechanisms to optimize cooling and energy consumption. These mechanisms may cause the CPU fan to spin at different speeds or even stop spinning altogether when certain conditions are met.
One common scenario where the CPU fan may not spin is when your computer is in an idle state or running low-load applications. During these periods, the processor generates less heat, and the fan may not need to spin to maintain optimal temperatures.
Additionally, many motherboards come equipped with intelligent fan control features that can adjust the fan speed based on temperature readings. As a result, the CPU fan may spin at lower speeds during normal operations and ramp up only when the processor reaches higher temperatures.
However, it’s important to note that if your CPU fan consistently remains motionless or fails to spin even during intensive tasks, it could indicate a potential issue or malfunction. In such cases, further investigation and troubleshooting are recommended to ensure the proper cooling of your CPU and to prevent any damage or performance degradation.
Now that we’ve established when it may be normal for your CPU fan not to spin, let’s dive into some troubleshooting steps to address the issue if it persists or occurs at inappropriate times.</p
Troubleshooting Steps to Fix a CPU Fan That Is Not Spinning
When faced with a non-spinning CPU fan, it’s important to take a systematic approach to troubleshoot and resolve the issue. Here are some steps you can take to fix a CPU fan that is not spinning:
- Check the fan power cable connection: Ensure that the power cable connecting the CPU fan to the motherboard is securely plugged in. Sometimes, the cable can become loose during installation or due to movement inside the computer case.
- Clean the fan and heatsink: Dust and debris can accumulate on the fan blades and heatsink over time, impeding the fan’s ability to spin freely. Carefully remove any visible dust using a can of compressed air or a soft brush.
- Replace or repair the fan: If the fan motor is faulty or burned out, you may need to replace it. Consult your computer’s manual or contact the manufacturer for instructions on how to remove and replace the CPU fan. Alternatively, if the fan is repairable, you might consider seeking professional assistance.
- Check the fan settings in the BIOS: Access the BIOS settings on your computer and navigate to the fan control or power management section. Ensure that the fan speed control is set to automatic or an appropriate manual setting, allowing the fan to spin at higher speeds when needed.
- Update your motherboard’s BIOS: Sometimes, outdated or incompatible BIOS versions can cause issues with the CPU fan’s functionality. Visit the manufacturer’s website and check if there are any BIOS updates available. Follow the instructions provided to update your motherboard’s BIOS to the latest version.
These troubleshooting steps should help you identify and resolve common issues causing your CPU fan not to spin. However, if the problem persists even after performing these steps, it’s recommended to reach out to a professional technician or contact the manufacturer for further assistance.
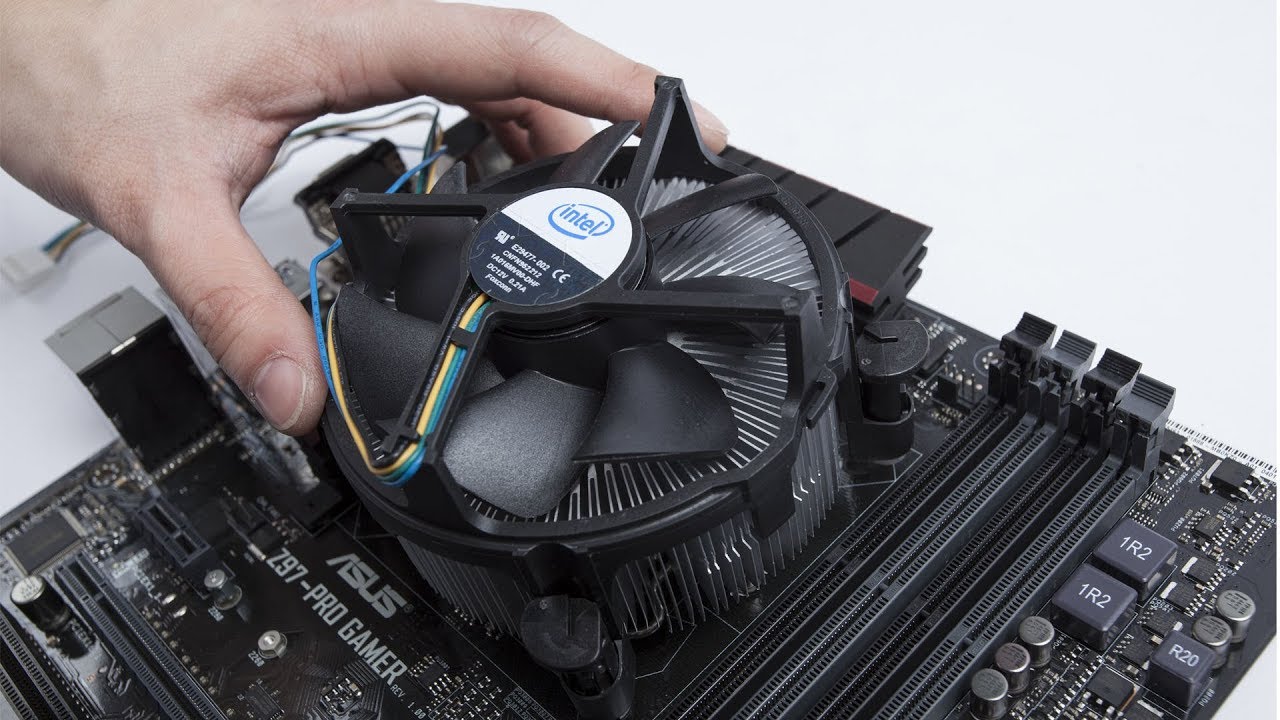
Check the Fan Power Cable Connection
One of the most basic yet crucial steps in troubleshooting a CPU fan that is not spinning is to check the power cable connection. Over time, the cable connecting the CPU fan to the motherboard may become loose or dislodged, causing the fan to stop spinning. Here’s how you can check the fan power cable connection:
- First, shut down your computer and unplug it from the power source.
- Open the computer case by removing the screws or latches on the side or back panel.
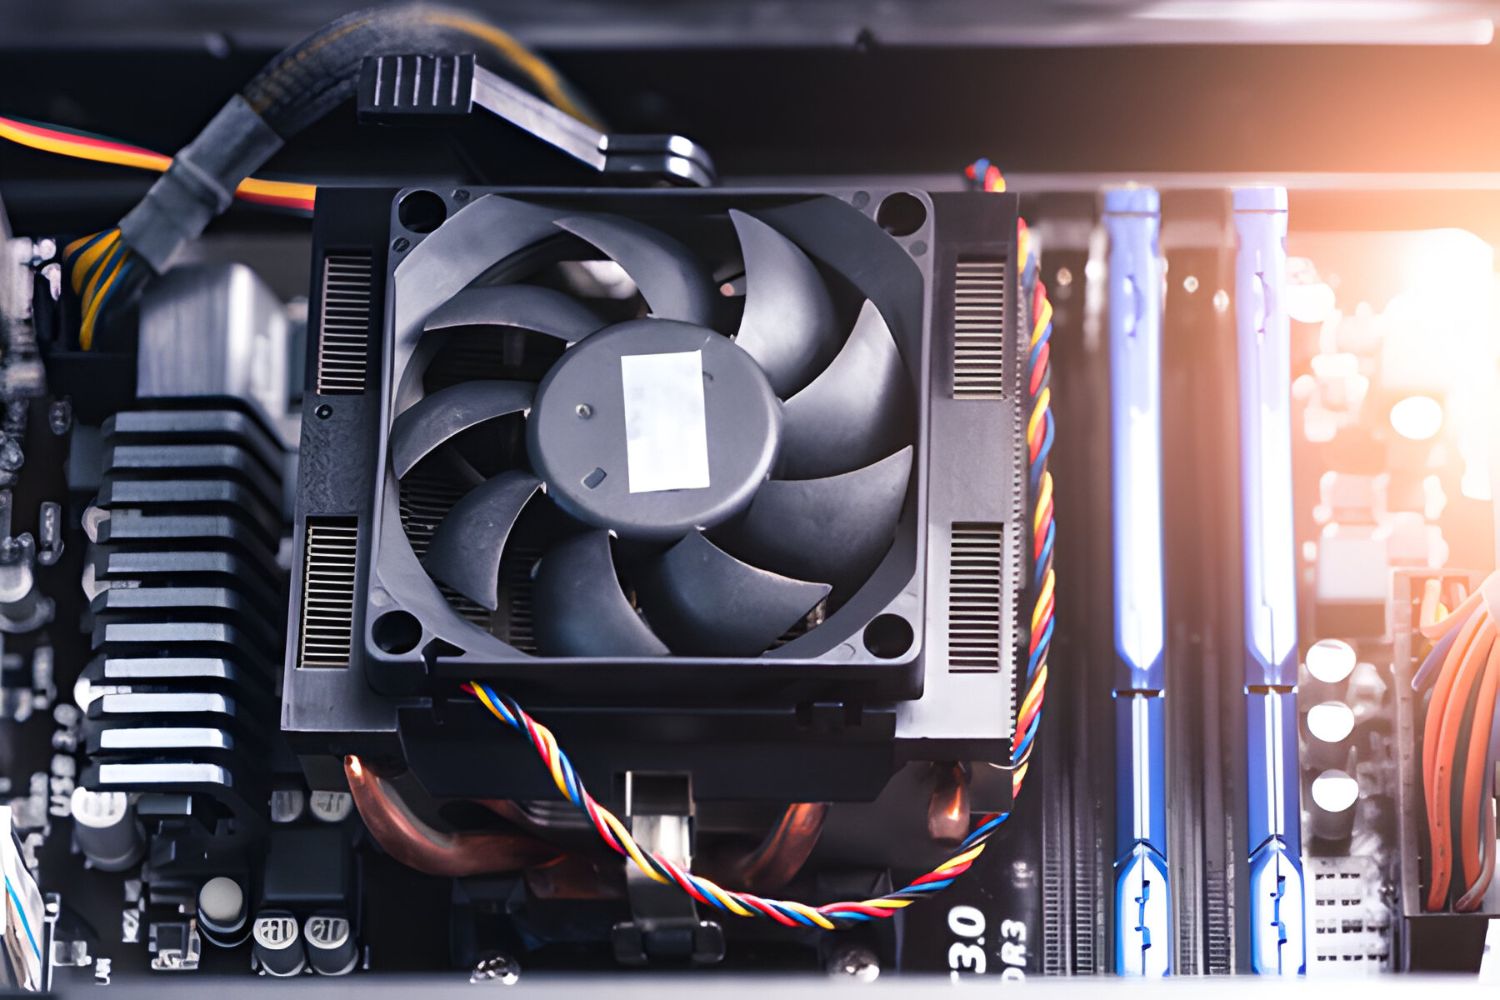
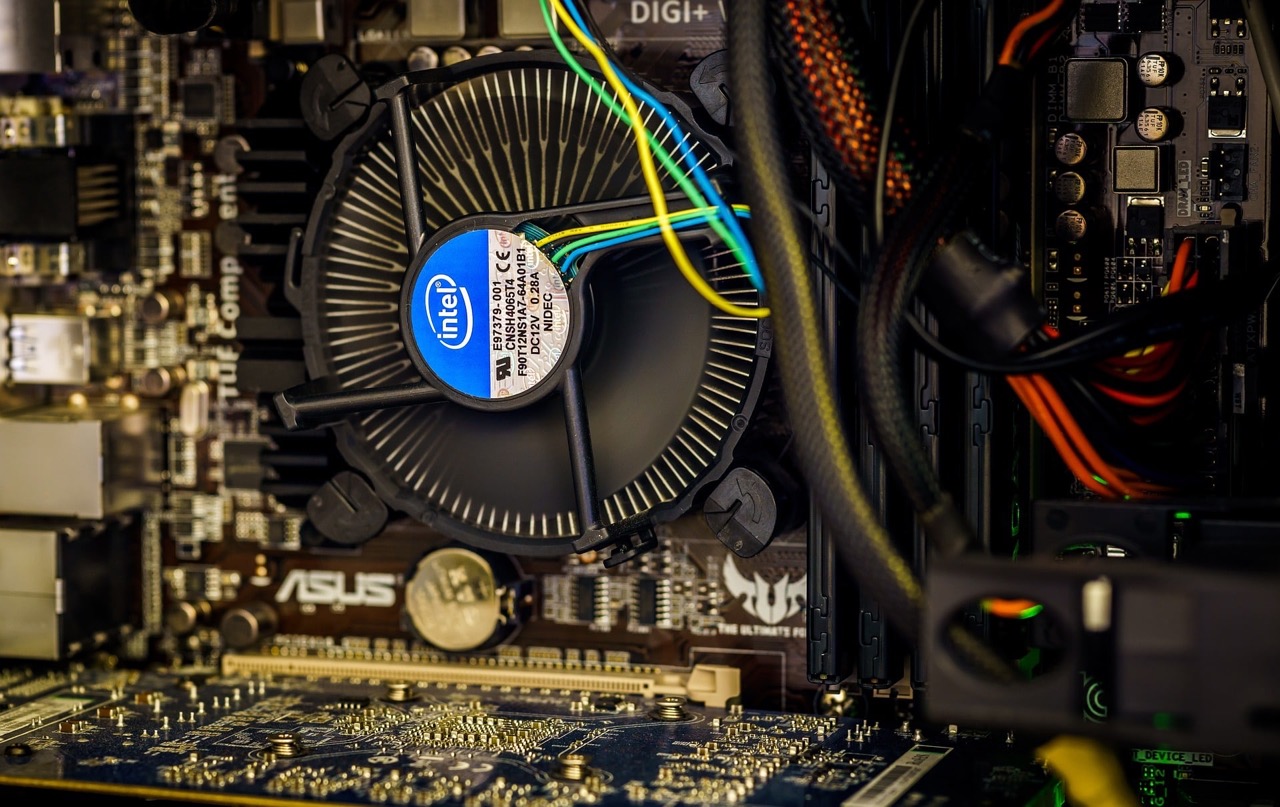
- Locate the CPU fan, which is typically mounted near the central processor on the motherboard.
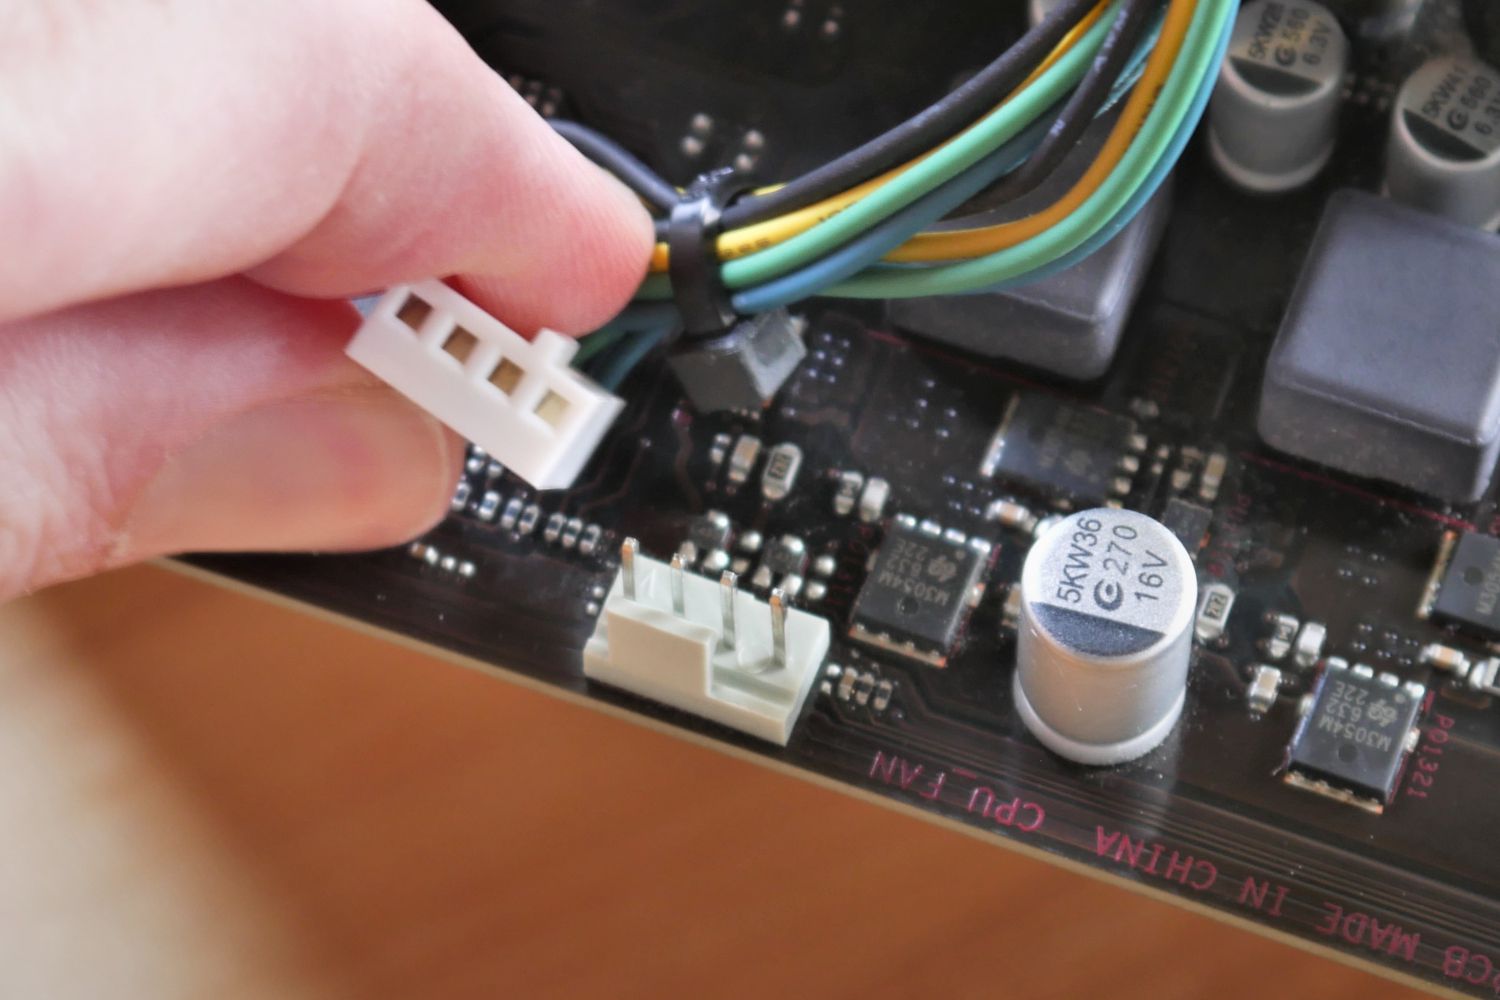
- Carefully inspect the power cable that connects the fan to the motherboard. Ensure that it is securely plugged into the appropriate fan header on the motherboard.
- If the cable appears loose, gently push it back into the fan header until it clicks into place. Double-check that it is firmly connected and there are no visible gaps.
- Once you have confirmed a secure connection, reassemble the computer case by replacing the screws or latches.
- Plug your computer back into the power source and power it on.
- Observe the CPU fan to see if it starts spinning. You may also want to monitor the CPU temperature using software utilities or the BIOS to ensure that the fan is effectively cooling the processor.
If the fan power cable was indeed disconnected or loose, securing the connection should resolve the issue, and the CPU fan should start spinning again. However, if the fan remains motionless, you might need to consider other troubleshooting steps mentioned earlier in this article or seek professional assistance.
Remember, ensuring a proper power cable connection is a fundamental step in troubleshooting a non-spinning CPU fan. Taking the time to check and secure the fan power cable can save you from unnecessary worry and potential computer performance issues in the long run.
Clean the Fan and Heatsink
Dust and debris can accumulate on the fan blades and heatsink over time, hindering the proper functioning of the CPU fan. Cleaning these components can often solve the issue of a non-spinning CPU fan. Follow these steps to clean the fan and heatsink:
- Ensure your computer is turned off and unplugged from the power source before beginning the cleaning process.
- Open your computer case by removing the screws or latches on the side or back panel. Take note of any precautions or instructions specific to your computer model.
- Locate the CPU fan, which is typically mounted near the central processor on the motherboard.
- Use a can of compressed air to blow away any loose dust and debris from the fan blades, ensuring that you hold the can upright and use short, controlled bursts. Be careful not to tilt the can or let any liquid escape while cleaning.
- Next, focus on the heatsink, which is the metal component that the fan is attached to. Again, use the can of compressed air to blow away any dust and debris that may have accumulated on the heatsink fins.
- If necessary, you can use a soft brush to gently remove any stubborn dust particles from the fan and heatsink. Ensure that the brush is clean and dry before using it.
- After cleaning, you can use the compressed air once more to blow away any dislodged dust or debris from the fan and heatsink.
- Once you’re satisfied with the cleaning, reassemble the computer case by replacing the screws or latches.
- Finally, plug your computer back into the power source and power it on. Monitor the CPU fan to see if it starts spinning and check the CPU temperature to ensure effective cooling.
Regularly cleaning the fan and heatsink helps maintain proper airflow and prevents dust buildup, allowing the CPU fan to spin freely and cool the processor effectively. By following these simple steps, you can often resolve the issue of a non-spinning CPU fan without needing to replace any components.
If cleaning the fan and heatsink does not solve the problem or if the fan continues to experience issues, you may need to consider other troubleshooting steps or consult a professional technician for further assistance.
Replace or Repair the Fan
If the previous troubleshooting steps have not resolved the issue of a non-spinning CPU fan, it may be necessary to consider replacing or repairing the fan. Here are some steps to help you determine whether a replacement or repair is needed:
- First, ensure that the fan power cable is securely connected to the motherboard and that there are no loose or damaged wires.
- If the power connection is secure, but the fan still does not spin, it’s likely that the fan motor has malfunctioned. In this case, you will need to obtain a suitable replacement fan.
- Consult your computer’s manual or the manufacturer’s website for information on the compatible fan models for your specific motherboard and CPU socket.
- Once you have obtained the replacement fan, refer to the manual or online resources for instructions on how to remove the old fan and install the new one. Take note of any precautions or specific steps needed for your computer model.
- If the fan is repairable, you might consider seeking professional assistance. A technician experienced in fan repairs can diagnose the issue and determine if it can be fixed through repairs instead of a complete replacement.
- When attempting fan repairs, it’s important to follow proper safety guidelines and handle delicate components with care. If you’re unsure or uncomfortable with the repair process, it’s recommended to seek professional assistance to avoid causing further damage to your computer.
Replacing or repairing a non-spinning CPU fan requires careful consideration and adherence to proper procedures. It’s essential to ensure compatibility between the fan and your motherboard/CPU, and to handle delicate components with care to avoid any potential damage.
If the fan replacement or repair is successful, the CPU fan should start spinning again, providing the necessary cooling for your processor. However, if the fan still does not spin or if you encounter difficulties during the replacement or repair process, it’s advisable to seek professional help to ensure the proper functioning of your CPU fan and to avoid any further complications.
Check the Fan Settings in the BIOS
If you have determined that the fan power cable is properly connected and the physical components of the CPU fan are in good working order, the issue of a non-spinning fan could be due to misconfigured settings in the BIOS. Checking and adjusting the fan settings in the BIOS can help resolve this issue. Here’s how to do it:
- Restart your computer and access the BIOS settings by pressing a specific key during the boot process. The key to enter the BIOS varies depending on the motherboard manufacturer, but commonly used keys include F2, Delete, or F10. Refer to your computer’s manual or the manufacturer’s website for the specific key.
- Navigate through the BIOS menu using the arrow keys on your keyboard.
- Look for a section related to fan control or power management. The location and name of this section can vary depending on the BIOS manufacturer and version.
- Check the settings related to the CPU fan. Make sure that the fan speed control is set to automatic or an appropriate manual setting.
- If the CPU fan speed control is set to manual, ensure that the fan speed is sufficient for the cooling requirements of your processor. You can adjust the values as necessary. If you’re unsure, you can usually find recommended fan speed values in your processor’s documentation or on the manufacturer’s website.
- If the fan speed controls are already configured correctly, but the fan is still not spinning, try resetting the BIOS settings to their default values. Look for an option to reset the BIOS or load default settings, usually located in the Exit or Main menu of the BIOS.
- Save any changes made to the BIOS settings and exit the BIOS. Your computer will then continue to boot up.
- Observe the CPU fan to check if it starts spinning after the changes made in the BIOS. Monitor the CPU temperature to ensure that the fan is effectively cooling the processor.
By checking and adjusting the fan settings in the BIOS, you can ensure that the CPU fan is correctly configured for optimal performance. If the fan settings were misconfigured, making the necessary adjustments should resolve the issue of the non-spinning fan. However, if the problem persists, additional troubleshooting or professional assistance may be required.
Update Your Motherboard’s BIOS
If you have checked the fan power cable connection, cleaned the fan and heatsink, and adjusted the fan settings in the BIOS, but the CPU fan still refuses to spin, it may be worth considering updating your motherboard’s BIOS. Outdated or incompatible BIOS versions can sometimes cause issues with fan functionality. Here’s how you can update the BIOS:
- Visit the manufacturer’s website and navigate to the support or downloads section. Look for the latest BIOS update for your specific motherboard model.
- Carefully read the instructions provided on the website and download the appropriate BIOS update file. It is crucial to download and install the correct BIOS version to avoid any potential issues.
- Create a backup of any important data on your computer, as updating the BIOS involves making changes to the motherboard’s firmware.
- Extract the downloaded BIOS update file to a USB flash drive or another storage device that is compatible with your system.
- Restart your computer and enter the BIOS settings by pressing the appropriate key during the boot process. The key to access the BIOS varies depending on the motherboard manufacturer. Common keys include F2, Delete, or F10.
- In the BIOS settings, look for an option related to updating or flashing the BIOS. This option may be located in the Advanced or Tools section.
- Select the option to update the BIOS and follow the on-screen instructions. You will likely be prompted to select the BIOS update file from the storage device you prepared earlier.
- Caution: Do not interrupt the BIOS update process while it is in progress. Doing so can result in irreversible damage to your motherboard. Ensure that your computer is connected to a reliable power source during the update.
- Once the BIOS update is complete, restart your computer and check if the CPU fan starts spinning. Monitor the CPU temperature to ensure proper cooling.
Updating your motherboard’s BIOS can sometimes resolve compatibility issues and provide bug fixes that may affect the proper functioning of the CPU fan. It’s essential to follow the manufacturer’s instructions carefully and exercise caution during the update process to avoid any potential complications or damage to your system.
If the BIOS update does not rectify the non-spinning fan issue, further troubleshooting or professional assistance may be required.
Conclusion
A non-spinning CPU fan can be a cause for concern, but it’s important to approach the issue systematically and consider various factors. In some cases, a non-spinning CPU fan may be normal, especially during low-load situations or when your computer is idle. However, if the fan consistently remains motionless or fails to spin during intensive tasks, it may indicate an underlying problem.
In this article, we discussed possible reasons for a CPU fan not spinning, including loose power cable connections, faulty fan motors, overheating protection mechanisms, misconfigured BIOS settings, and software conflicts. We also provided troubleshooting steps to address these issues, such as checking power cable connections, cleaning the fan and heatsink, replacing or repairing the fan if needed, adjusting fan settings in the BIOS, and updating the motherboard’s BIOS.
Remember to follow safety precautions, consult your computer’s manual, and consider seeking professional assistance if necessary. Properly maintaining and troubleshooting your CPU fan will help ensure the optimal performance and longevity of your computer.
If you’ve exhausted the troubleshooting steps mentioned in this article and are still experiencing issues with your CPU fan or are unsure about performing any repairs or updates yourself, it’s always recommended to consult a professional technician or contact the manufacturer for further assistance.