Introduction
Welcome to the world of PC building! Whether you’re a gamer looking to create the ultimate gaming rig, a content creator in need of a powerful workstation, or simply someone who wants to experience the satisfaction of building your own computer, this guide is here to help you every step of the way.
Building a PC may seem like a daunting task, but with a little bit of knowledge and the right components, you’ll be surprised at how straightforward the process can be. Not only does building your own PC give you the freedom to customize every aspect of your machine, but it can also be a cost-effective option compared to buying a pre-built computer.
In this guide, we will break down the PC building process into simple steps, ensuring that you have a clear understanding of each stage.
Disclaimer: Before we dive in, it’s important to note that building a PC requires careful handling of delicate components. It’s crucial to follow the manufacturer’s instructions and take necessary precautions to avoid damage or injury. If you’re unsure about any step, it’s always a good idea to seek assistance from a professional or experienced PC builder.
Now that we’ve got that out of the way, let’s get started with Step 1: Gathering the necessary components.
Step 1: Gathering the necessary components
Before diving into the exciting process of assembling your PC, it’s important to gather all the necessary components. Having everything in place before you begin will help streamline the building process and ensure that you have everything you need.
The essential components you’ll need include:
- Processor (CPU): This is the brain of your computer and will dictate its performance. Ensure compatibility with your motherboard.
- Motherboard: This is where all the components of your PC will connect. Choose a motherboard that supports your desired CPU and has the features you need.
- Memory (RAM): Determine the amount of RAM you’ll need based on your usage, such as gaming or video editing.
- Storage: Decide between a solid-state drive (SSD) or a traditional hard drive (HDD) for your operating system and files.
- Graphics Card: If you’re a gamer or work with graphically demanding applications, invest in a powerful graphics card.
- Power Supply Unit (PSU): Choose a PSU with sufficient wattage to support all your components.
- Case: Select a case that accommodates your motherboard form factor and offers good airflow for cooling.
- Peripherals: Don’t forget the essentials like a keyboard, mouse, and monitor.
- Operating System: Choose between Windows, macOS, or Linux, depending on your preferences and software compatibility.
It’s also worth considering additional components such as cooling solutions, extra storage drives, and peripherals like speakers or a headset.
Do thorough research, read reviews, and compare prices before making your purchases. Make sure that all the components you select are compatible with each other and meet the requirements of your intended usage.
Once you have all the necessary components, you’re ready to move on to the next step: Preparing the workspace.
Step 2: Preparing the workspace
Now that you have all the components ready, it’s time to set up a proper workspace for your PC building project. A clean, well-lit, and spacious area will ensure that you have enough room to work comfortably and reduce the risk of accidents or damages.
Here are some key steps to prepare your workspace:
- Clean and organize: Clear your workspace of any clutter, ensuring that you have enough surface area to lay out your components and tools. Remove any obstacles that could hinder your movement or damage the components.
- Use an ESD mat: To protect your components from electrostatic discharge (ESD), place an ESD mat on your workspace. Ground yourself by wearing an antistatic wrist strap or frequently touching a grounded object.
- Gather necessary tools: Ensure you have all the tools you’ll need, such as a screwdriver set (preferably magnetic), cable ties, thermal paste, and a flashlight. Having these tools readily available will make the process smoother.
- Arrange cables and power outlets: Arrange power outlets to ensure easy access for all the cables you’ll be connecting. Organizing cables neatly will prevent tangling and make troubleshooting easier later on.
- Consider proper lighting: Adequate lighting will help you see the intricate details and make it easier to connect components. If your workspace’s lighting is insufficient, consider using an adjustable desk lamp or a portable LED light.
- Prepare a comfortable setup: Since the PC building process can take some time, make sure your workspace is comfortable. Use an ergonomic chair and consider placing a cushion or some padding on the work desk for added comfort.
By investing time in setting up a well-organized and comfortable workspace, you’ll be able to work efficiently and enjoy the building process.
With your workspace prepared, it’s time to move on to the next step: Installing the motherboard and CPU.
Step 3: Installing the motherboard and CPU
Now that you have your workspace ready, it’s time to start assembling your PC! The first major step is installing the motherboard and CPU (Central Processing Unit). This is the foundation of your computer and where all the other components will connect.
Follow these steps to install the motherboard and CPU:
- Prepare the motherboard: Remove the motherboard from its packaging and place it on the ESD mat. Make sure to handle it by its edges to avoid touching any sensitive components.
- Identify the CPU socket: Locate the CPU socket on the motherboard. Lift the protective cover to reveal the socket.
- Prepare the CPU: Gently remove the CPU from its packaging, being careful not to touch the pins or any delicate components on the underside. Align the notches on the CPU with the socket and carefully place it into position.
- Secure the CPU: Once the CPU is correctly aligned, gently lower the socket cover and secure it in place. Be careful not to apply too much pressure.
- Apply thermal paste: Apply a small amount of thermal paste to the surface of the CPU. This will help transfer heat from the CPU to the cooling solution.
- Install the CPU cooler: Depending on the type of cooler you’re using, follow the manufacturer’s instructions to install it. This may involve attaching mounting brackets, securing screws, or using a pre-applied cooler.
- Mount the motherboard: Carefully position the motherboard within the case, aligning the mounting holes with the standoffs. Use the screws provided with your case to secure the motherboard in place. Make sure it is snug, but not overly tightened.
- Connect power cables and peripherals: Connect the power cables from the PSU to the motherboard, including the 24-pin ATX power connector and the CPU power connector. Also, connect any necessary peripherals such as the case fans or USB headers.
Once you have successfully installed the motherboard and CPU, you have laid the foundation for your PC. It’s now time to move on to the next step: Installing memory and storage devices.
Step 4: Installing memory and storage devices
After successfully installing the motherboard and CPU, it’s time to add memory (RAM) and storage devices to your PC. Memory and storage play crucial roles in the performance and functionality of your computer.
Follow these steps to install memory and storage devices:
- Identify the RAM slots: Locate the RAM slots on your motherboard. These are typically long, narrow slots located near the CPU socket.
- Prepare the RAM modules: Remove the RAM modules from their packaging. Hold them by the edges and avoid touching the gold or silver contacts. Make sure to align the notch on the RAM modules with the notch on the RAM slot.
- Insert the RAM modules: Gently insert the RAM modules into the RAM slots, applying even pressure to seat them properly. You may need to press down firmly until the retaining clips on the side of the slot click into place.
- Install storage devices: Determine whether you’re using a solid-state drive (SSD), a hard disk drive (HDD), or both. Locate the drive bays in your case and slide the drives into place. Secure them using screws or brackets, depending on the case design.
- Connect data cables: Connect the SATA data cables to the storage drives and the motherboard. These cables are typically included with the motherboard or the storage devices.
- Connect power cables: Connect the SATA power cables from the power supply unit (PSU) to the storage drives. Make sure the connections are secure.
Once you have installed the memory and storage devices, your PC is one step closer to being fully functional. The memory will allow your computer to handle multiple tasks simultaneously, while the storage devices will provide space for your operating system and files.
With memory and storage in place, it’s time to move on to the next step: Connecting the power supply and cables.
Step 5: Connecting power supply and cables
Now that you have installed the essential components like the motherboard, CPU, memory, and storage devices, it’s time to connect the power supply and all the necessary cables. The power supply unit (PSU) is responsible for providing power to all the components of your PC.
Follow these steps to connect the power supply and cables:
- Identify the PSU: Locate the PSU in your PC case. It is usually positioned at the bottom or top, depending on your case design.
- Position the PSU: Align the PSU so that the fan faces the correct direction for optimal airflow. In most cases, the PSU fan should face downwards (towards the bottom of the case).
- Attach the PSU: Use the screws provided to secure the PSU in place. Ensure that it is firmly mounted, but not overly tightened.
- Connect the 24-pin ATX power connector: Locate the 24-pin power connector on your motherboard. Connect the corresponding cable from the PSU to the motherboard, aligning the notches and applying gentle pressure until it clicks into place.
- Connect the CPU power connector: Locate the CPU power connector near the CPU socket on the motherboard. Connect the appropriate CPU power cable from the PSU, ensuring that it is securely plugged in.
- Connect SATA power cables: Connect the SATA power cables from the PSU to your storage devices (hard drives, solid-state drives). Secure the connections and ensure that they are snug.
- Connect case fans and peripherals: If your case has additional fans or peripherals (such as LED strips or cooling systems), connect their corresponding power cables to the PSU, following the manufacturer’s instructions.
- Organize and secure cables: Use cable ties or other cable management solutions to organize and secure the cables inside your PC case. This will improve airflow and aesthetics.
By connecting the power supply and cables properly, you ensure that your PC components receive the necessary power to operate. Take your time to ensure that all connections are secure and properly aligned.
With the power supply and cables connected, it’s time to move on to the next step: Installing the graphics card and other peripherals.
Step 6: Installing the graphics card and other peripherals
Installing the graphics card and other peripherals is an exciting step in building your PC. The graphics card (GPU) is responsible for rendering images and providing smooth visuals, especially during gaming or graphic-intensive tasks.
Follow these steps to install the graphics card and other peripherals:
- Locate the PCIe slot: Identify the PCIe slot on your motherboard where the graphics card will be installed. It is usually positioned close to the CPU socket.
- Prepare the PCIe slot: Remove the PCIe slot cover from the case, if any, by unscrewing it. This creates an open space for the graphics card to be inserted.
- Insert the graphics card: Hold the graphics card by its edges and gently align it with the PCIe slot. Firmly press the card down into the slot until it is fully seated. You may need to release the latch on the PCIe slot before inserting the card.
- Secure the graphics card: Once the graphics card is inserted, secure it in place by screwing it onto the case using the provided screws. This prevents any movement or dislodging of the card.
- Connect power cables to the graphics card: Depending on your graphics card, it may require additional power. Locate the necessary PCIe power connectors from the PSU and connect them to the graphics card. Ensure that the connections are secure.
- Install other peripherals: Connect any other peripherals you have, such as a Wi-Fi card, sound card, or additional USB devices. Follow the manufacturer’s instructions for each peripheral to install them properly.
- Connect display cables: Connect your monitor or displays to the graphics card using the appropriate display cables, such as HDMI, DisplayPort, or DVI cables.
- Check connections and peripherals: Double-check that all the connections are secure, and everything is properly installed. Ensure that any additional peripherals are correctly connected and functioning.
Installing the graphics card and other peripherals brings your PC closer to completion. With the graphics card in place, you’ll be able to enjoy stunning visuals and enhanced performance in your favorite games and applications.
With the graphics card and peripherals installed, it’s time to move on to the next step: Powering on and testing the PC.
Step 7: Powering on and testing the PC
After assembling all the components and connecting all the necessary cables, it’s time to power on your newly built PC for the first time. This step allows you to ensure that everything is functioning correctly and identify any potential issues before proceeding further.
Follow these steps to power on and test your PC:
- Double-check connections: Before powering on, double-check all connections, such as cables, components, and peripherals, to ensure that everything is properly connected and secured.
- Flip the PSU switch: Locate the power supply unit (PSU) switch at the back of your computer case and make sure it is in the “Off” position.
- Connect the power cord: Plug the power cord into the PSU and connect it to a surge protector or wall outlet.
- Switch on the PSU: Flip the PSU switch to the “On” position. You may see a small LED light on the motherboard indicating that it is receiving power.
- Power on the PC: Press the power button on your computer case or motherboard to turn on the PC.
- Observe startup: As the PC powers on, listen for any unusual sounds or beeps. Ensure that all fans are spinning and lights are turning on. Monitor your display to see if the BIOS screen appears or if any error messages are displayed.
- Enter BIOS: If your PC successfully boots to the BIOS screen, enter the BIOS by pressing the designated key (usually Del, F2, or Esc) as indicated on the screen. Check that the BIOS recognizes all installed components and that the system settings are correct.
- Complete hardware tests: Run hardware diagnostic tests using software like CPU-Z or GPU-Z to verify that all components, such as the CPU, memory, and graphics card, are functioning properly.
- Boot into operating system: If everything appears to be working fine, exit the BIOS and proceed with installing the operating system of your choice.
By following these steps, you can ensure that your PC is powered on correctly and that all components are functioning as expected. If you encounter any issues or errors during the testing phase, refer to the component manuals or seek assistance from the manufacturer or a knowledgeable source.
Once you have successfully powered on and tested your PC, you’re ready to move on to the next step: Installing the operating system.
Step 8: Installing the operating system
With your PC successfully powered on and tested, it’s time to install the operating system (OS) of your choice. The operating system is the software that manages and controls all the hardware and software components of your computer.
Follow these steps to install the operating system:
- Choose your operating system: Decide on the operating system you want to install, such as Windows, macOS, or Linux. Ensure that your chosen OS is compatible with your hardware and any specific software requirements.
- Prepare the installation media: Obtain the installation media for your chosen operating system. This can be a USB drive, DVD, or downloaded ISO file.
- Insert the installation media: Insert the installation media into the appropriate drive, whether it’s a USB port or DVD drive.
- Boot from the installation media: Restart your PC and enter the BIOS by pressing the designated key (usually Del, F2, or Esc) displayed on the screen during startup. Modify the boot order to prioritize the installation media, so the PC boots from it.
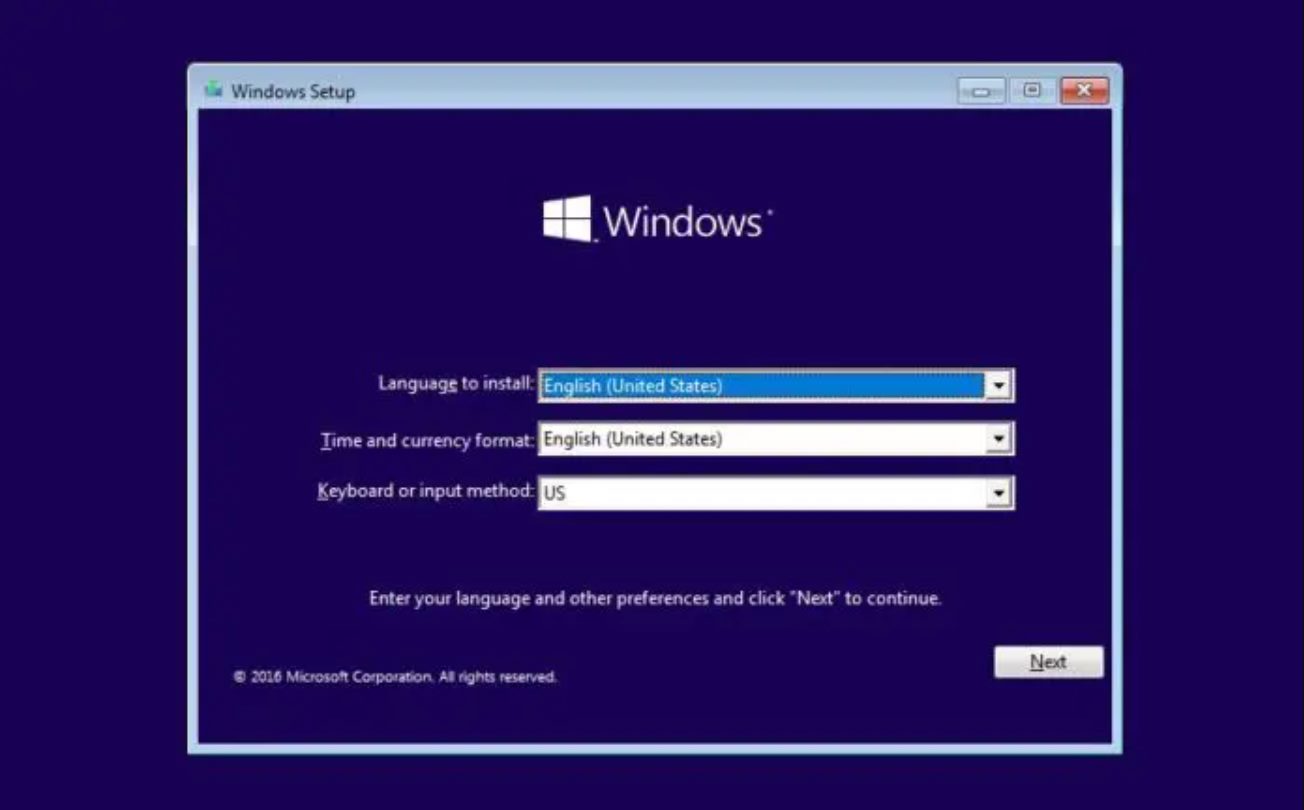
- Follow the installation wizard: Once the operating system installer loads, follow the prompts and instructions provided by the installation wizard. Select the desired language, region, and other preferences.
- Format and partition drives: During the installation process, you will be prompted to format and partition your storage drives. Decide on the drive configuration and allocate the appropriate space for your operating system and other files.
- Enter the product key: If required, enter the product key for your operating system. This key is typically provided with the installation media or on the product packaging.
- Customize settings: Customize any additional settings as needed, such as user accounts, network configuration, and privacy preferences.
- Wait for installation: Once you’ve completed the necessary settings, wait for the operating system to install. This process may take some time, so be patient.
- Restart and configure: After the installation is complete, restart your PC. Follow any on-screen instructions to finalize the installation and configure your operating system.
Once the operating system installation is complete, you’ll have a fresh and functional operating system ready to use on your newly built PC.
With the operating system successfully installed, it’s time to move on to the next step: Installing drivers and software.
Step 9: Installing drivers and software
After installing the operating system, the next step is to install the necessary drivers and software to ensure that all hardware components are functioning optimally and to enhance the functionality of your PC.
Follow these steps to install drivers and software:
- Identify hardware drivers: Determine the drivers required for your hardware components, such as the graphics card, motherboard chipset, network adapters, and audio devices. Visit the manufacturer’s website to download the latest drivers for each component.
- Download and install drivers: Download the drivers from the manufacturer’s website and install them one by one. Follow the prompts and instructions provided by the installer for each driver. It’s essential to install the drivers in the correct order as specified by the manufacturer.
- Check for updates: After installing the drivers, check for any updates or patches available for your hardware components. This ensures that your PC is up to date with the latest features, bug fixes, and security patches.
- Install essential software: Install essential software, such as antivirus protection, productivity suites, web browsers, and media players, to suit your specific needs and preferences. Download these software applications from their official websites or trusted sources.
- Configure software settings: Customize the settings for your installed software, such as adjusting antivirus scanning preferences, setting up email clients, or configuring media player settings. Personalize each application according to your requirements.
- Activate licenses: If you have purchased software that requires activation, enter the license key or perform the necessary steps to activate the software. This is typically required for productivity suites, operating system upgrades, or specialized applications.
- Install additional software: Install any additional software or applications that you regularly use or require for your specific tasks, such as photo editing software, video editing tools, or gaming platforms.
- Restart if necessary: Depending on the software installations, some may require you to restart your PC. If prompted, restart your computer to finalize installations and ensure proper functionality of the software.
By installing the necessary drivers and software, you’ll ensure that your hardware components are appropriately recognized and functioning optimally. Additionally, software installations will enhance your productivity, entertainment, and overall PC experience.
With the drivers and software successfully installed, your PC is almost ready for full usage and enjoyment. The final step is to finalize the setup.
Step 10: Finalizing the setup
Congratulations on reaching the final step of building your PC! At this stage, you will complete the final touches and ensure that your setup is fully optimized for your needs.
Follow these steps to finalize the setup of your PC:
- Cable management: Take the time to organize and manage the cables inside your PC case. Use cable ties or Velcro straps to secure and bundle cables together, creating a clean and efficient setup that improves airflow and aesthetics.
- Optimize cooling: Adjust fan speeds or install additional case fans if necessary to improve cooling performance. Proper airflow helps maintain lower temperatures, enhancing the longevity and performance of your PC components.
- Personalize your desktop: Customize your desktop background, icons, and other visual elements to reflect your personal style and preferences. Make your PC feel like your own by organizing desktop icons and creating shortcuts for frequently used applications.
- Set up backups: Implement a backup strategy to protect your important data. Consider using cloud storage services or external hard drives to regularly back up your files and ensure you have a copy in case of any emergencies.
- Install additional peripherals: If you have other peripherals like printers, scanners, or external storage devices, connect and configure them according to the manufacturer’s instructions. Make sure they are recognized and working correctly.
- Install necessary plugins or extensions: Depending on your web browsing habits, install any necessary plugins or extensions for web browsers to enhance your online experience. This could include ad blockers, password managers, or other productivity tools.
- Update and maintain: Regularly check for and install operating system updates, driver updates, and software updates. Keeping your PC up to date ensures that you benefit from security patches, bug fixes, and new features.
- Create a recovery drive or system image: Create a recovery drive or system image of your PC to have a backup in case of system failures or crashes. This can save you time and effort in restoring your PC to a previous state.
- Test functionality: Perform a final round of testing to ensure that all hardware and software components are functioning properly. Check for any remaining issues and troubleshoot as needed.
- Enjoy your new PC: With everything in order, take a moment to appreciate the fruits of your labor. Your newly built PC is now ready to provide you with incredible performance, seamless productivity, and endless entertainment.
Congratulations! You have successfully completed the final step of setting up your PC. Take the time to familiarize yourself with the capabilities of your new system and enjoy the incredible possibilities it brings.
Conclusion
Building your own PC is an exciting and rewarding endeavor that allows you to create a personalized and powerful machine tailored to your specific needs. Throughout the ten-step process, you’ve learned how to gather the necessary components, prepare the workspace, install the motherboard and CPU, add memory and storage devices, connect the power supply and cables, install the graphics card and peripherals, power on and test the PC, install the operating system, install drivers and software, and finalize the setup.
By following these steps and paying attention to detail, you have successfully built a functional and optimized PC. It’s important to note that as technology evolves, new hardware and software may be introduced, and industry standards may change. Therefore, it’s always helpful to stay informed and consult up-to-date resources when building or upgrading your PC.
Remember, building a PC is not a one-time process. It’s a journey of continuous learning and exploration, allowing you to upgrade and customize your system as your needs evolve. Don’t hesitate to experiment, try new components, and stay engaged in the rapidly evolving world of technology.
Now, take a moment to enjoy the fruits of your labor. Your meticulously assembled PC is ready to serve as a reliable companion for gaming, creative work, productivity, or any other tasks you have in mind. Embrace the flexibility, power, and satisfaction that come with a self-built PC and make the most of what it has to offer.