Introduction
The MP965-D Mini PC Duo Core 2 is a compact and versatile device that offers powerful computing capabilities in a small form factor. Whether you’re a casual user looking for a convenient home entertainment solution or a professional in need of a reliable workstation, this mini PC is designed to meet your needs. With its dual-core processor, ample RAM, and expandable storage options, the MP965-D is perfect for a wide range of tasks, including web browsing, multimedia streaming, office work, and light gaming.
As a novice user, setting up and getting started with the MP965-D might seem daunting at first. However, with the right guidance and tools, the process can be straightforward and enjoyable. In this guide, we will walk you through the step-by-step instructions to unbox, connect, and configure your MP965-D Mini PC. Additionally, we will cover topics such as exploring the BIOS settings, installing an operating system, connecting to the internet, and troubleshooting common issues. By the end of this guide, you will have a fully functional and optimized MP965-D Mini PC.
To ensure a smooth setup process, there are a few tools you will need. These include a HDMI or VGA monitor, a keyboard, a mouse, a power adapter, and an internet connection (either wired or wireless). It’s also beneficial to have the latest drivers and software available for installation, which can be downloaded from the manufacturer’s website. Now, let’s dive into the exciting journey of unpacking and setting up your MP965-D Mini PC.
Required Tools
Before you begin setting up your MP965-D Mini PC, it’s essential to ensure that you have all the necessary tools at hand. Having these tools ready will make the setup process smoother and more efficient. Here is a list of the required tools:
- HDMI or VGA Monitor: You will need a monitor with either an HDMI or VGA port to connect to the MP965-D Mini PC. Make sure your monitor supports one of these video output options.
- Keyboard: A USB keyboard is necessary for entering commands and configuring settings during the setup process. Make sure you have a functioning keyboard available.
- Mouse: Similarly, you will need a USB mouse to navigate through the setup screens and control the MP965-D Mini PC’s interface. Have a mouse ready for use.
- Power Adapter: The MP965-D Mini PC requires a power source to operate. Ensure that you have the appropriate power adapter that is compatible with your region’s power supply.
- Internet Connection: To download drivers, software updates, and to connect to the internet, you will need either a wired or wireless internet connection. Make sure you have a stable internet connection available during the setup process.
Having these tools prepared in advance will save you time and frustration when setting up your MP965-D Mini PC. Additionally, it is recommended to have the latest drivers and software downloaded from the manufacturer’s website. This will ensure that you can install the most up-to-date versions and have the best possible experience with your mini PC.
Now that you have gathered all the necessary tools, let’s move on to the exciting part – unboxing and connecting your MP965-D Mini PC.
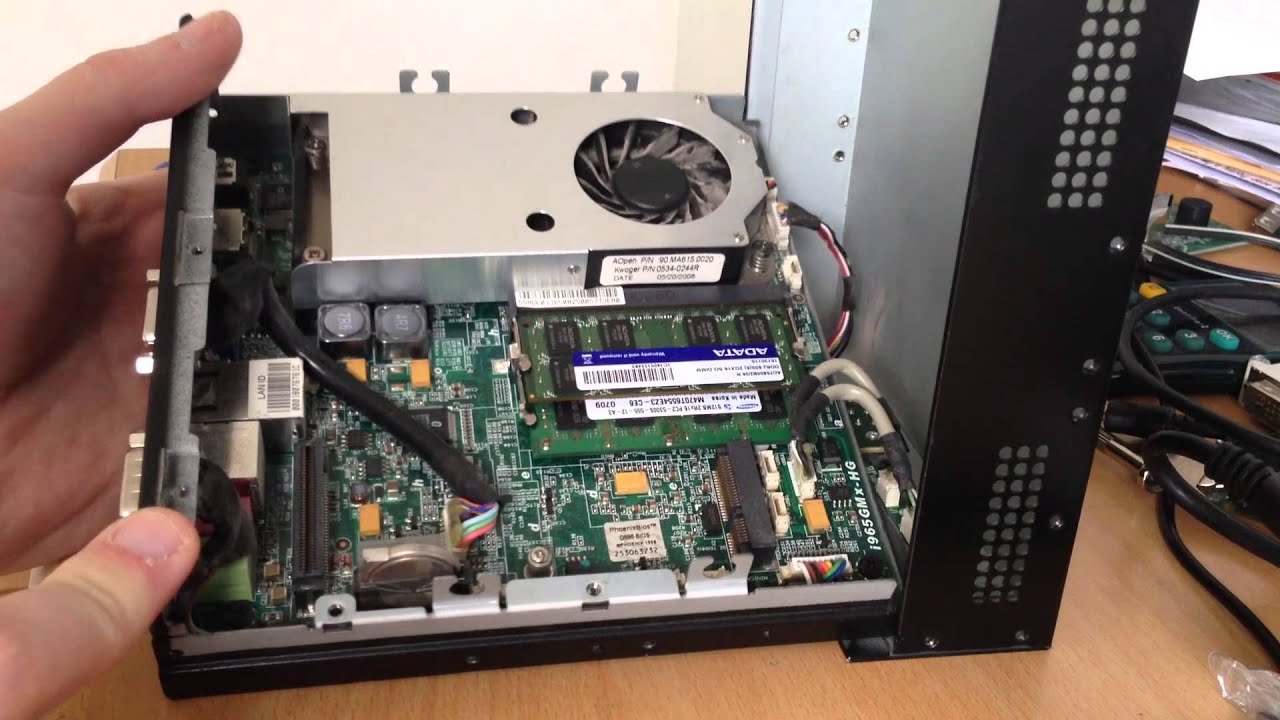
Step 1: Unboxing the MP965-D Mini PC
Congratulations on your new MP965-D Mini PC! Before you can start using it, you’ll need to unbox and set it up properly. Follow these steps to unbox your MP965-D:
- Prepare a clean and spacious workspace. Clear an area on a table or desk where you can unpack and assemble your mini PC.
- Locate the box containing your MP965-D Mini PC. Carefully open the box and remove all the contents.
- Inspect the items to ensure that everything is included and in good condition. The contents should typically include the mini PC unit, power adapter, user manual, and any additional accessories.
- Take out the MP965-D Mini PC unit from the packaging. Be gentle and handle it with care to avoid any damage.
- Check the mini PC for any visible signs of damage or loose components. If you notice any issues, contact the manufacturer for assistance.
- Next, identify the ports and connectors on the back of the mini PC. These will be used to connect peripherals later on in the setup process.
Now that you have successfully unpacked and inspected your MP965-D Mini PC, you’re ready to move on to the next step of connecting the necessary peripherals.
Note: It’s important to keep the packaging and documentation in a safe place in case you need them for future references or troubleshooting. You may also want to retain the original packaging in case you need to transport or store the mini PC in the future.
Step 2: Connecting Peripherals
Now that you have unboxed your MP965-D Mini PC, it’s time to connect the necessary peripherals. Follow these steps to ensure a proper connection:
- Identify the ports and connectors on the back of the MP965-D Mini PC. These will vary depending on the specific model but typically include USB ports, HDMI or VGA ports, audio jacks, Ethernet port, and power input.
- Connect your monitor to the mini PC using either an HDMI or VGA cable. Ensure that the cable is securely attached to both the mini PC and the monitor.
- Plug in your keyboard and mouse into the available USB ports on the MP965-D Mini PC. Make sure they are firmly connected.
- If you plan to connect your mini PC to the internet using a wired connection, plug in an Ethernet cable into the Ethernet port on the back of the mini PC. For wireless internet connection, skip this step for now.
- Now, it’s time to connect the power adapter to the MP965-D Mini PC. Locate the power input port on the back of the mini PC and plug in the power adapter. Then, connect the adapter to a power outlet.
- Double-check all the connections to ensure that everything is securely attached. Take a moment to arrange the cables neatly to avoid any unnecessary tangling.
Once you have successfully connected all the necessary peripherals, you are ready to move on to the next step of powering on the MP965-D Mini PC.
Note: If you are using a wireless internet connection, you will need to set it up later in the process. For now, ensure that you have a stable internet connection to proceed with the setup.
Step 3: Powering On the Device
Now that you have connected all the necessary peripherals to your MP965-D Mini PC, it’s time to power on the device and start the setup process. Follow these steps to properly power on your mini PC:
- Ensure that the power adapter is securely connected to both the MP965-D Mini PC and a power outlet.
- Locate the power button on the mini PC. It is typically located on the front or top panel.
- Press and hold the power button for a few seconds until you see the device starting to power on. You may notice LED lights or hear a fan noise.
- Wait for the boot-up process to complete. This may take a few moments as the operating system initializes.
- You should see the manufacturer’s logo or a boot screen on your connected monitor. If the screen remains blank or shows an error message, double-check the connections and try again.
Once the boot-up process is complete, you will be guided through the initial setup and configuration of your MP965-D Mini PC. Follow the on-screen instructions to select your language preferences, set up user accounts, and personalize system settings.
It’s important to note that during the initial setup, you may be prompted to connect to a wireless network or enter your internet settings if you are using a wired connection. If using a wired connection, ensure that the Ethernet cable is connected and the network is active.
Now that you have successfully powered on your MP965-D Mini PC, you can proceed with the initial setup and configuration. Stay tuned for the next step, where we will explore the BIOS settings of your mini PC.
Step 4: Initial Setup and Configuration
After powering on your MP965-D Mini PC, you will be prompted to go through the initial setup and configuration process. This step ensures that your mini PC is personalized according to your preferences. Follow these steps to complete the initial setup:
- Choose your preferred language from the options provided on the screen. Select the appropriate language and click “Next” to proceed.
- Read and accept the End-User License Agreement (EULA) if prompted. It is important to review and agree to the terms before continuing.
- Create a user account. Enter your name, desired username, password, and any other required information to set up your account. Having a user account allows you to securely access your MP965-D Mini PC and personalize your settings.
- Set up your network connection. If you are using a wired connection, ensure that the Ethernet cable is connected and click “Next” to proceed. If you are using a wireless connection, select your network from the available options and enter the necessary credentials.
- Customize system settings. You will have the opportunity to personalize various settings, such as display resolution, time zone, and privacy preferences. Take the time to adjust these settings according to your preferences.
- Complete the initial setup process. Once you have finished configuring the settings, click “Finish” or a similar button to complete the initial setup.
After completing the initial setup and configuration, your MP965-D Mini PC will be ready for use. You can now start exploring the features and capabilities of your mini PC.
It’s worth noting that during the initial setup, you may also have the option to sign in with a Microsoft account or link your device to an existing account. This allows you to sync your settings and access additional Microsoft services and features. Choose this option if desired or proceed with a local account if preferred.
Now that you have successfully completed the initial setup, it’s time to delve deeper into the BIOS settings of your MP965-D Mini PC. The BIOS settings allow you to customize and optimize your mini PC to suit your specific needs. Stay tuned for the next step!
Step 5: Exploring the BIOS Settings
The BIOS (Basic Input/Output System) settings of your MP965-D Mini PC allow you to access and modify various system configurations. These settings can be accessed during the boot-up process and provide you with the ability to customize and optimize the performance of your mini PC. Follow these steps to explore the BIOS settings:
- Restart or power on your MP965-D Mini PC. As the manufacturer’s logo or boot screen appears, look for a message indicating the key or keys you need to press to enter the BIOS settings. Common keys include F2, Del, or Esc.
- Press the indicated key repeatedly to enter the BIOS settings. Be sure to do this before the operating system starts loading.
- You will now be in the BIOS interface, where you can navigate through various menus and options using the arrow keys on your keyboard.
- Explore the different BIOS menus to access specific configurations. Common menus include “Main,” “Advanced,” “Boot,” “Security,” “Power,” and “Exit.” Each menu contains different settings related to different aspects of your mini PC.
- Make any desired changes or adjustments to the BIOS settings. However, exercise caution as incorrect configurations may cause issues with your system’s functionality.
- Once you have made the desired changes, save the settings and exit the BIOS interface. Typically, there will be an option to save and exit, or you can press a specific key like F10 to exit and save changes.
It’s important to note that specific BIOS settings and options may vary depending on the manufacturer and model of your MP965-D Mini PC. It’s recommended to refer to the user manual or the manufacturer’s website for detailed information regarding the BIOS settings specific to your mini PC.
Exploring and adjusting the BIOS settings of your MP965-D Mini PC allows you to fine-tune and optimize the performance of your system. However, it’s crucial to exercise caution and only make changes if you are confident in your understanding of the implications. If you are uncertain about a particular setting, it’s best to leave it at its default value or consult with the manufacturer’s support for guidance.
Now that you are familiar with the BIOS settings, it’s time to move on to the next step: installing an operating system on your MP965-D Mini PC.
Step 6: Installing an Operating System
With the BIOS settings explored, it’s time to install an operating system (OS) on your MP965-D Mini PC. The operating system serves as the foundation for all software and applications on your mini PC. Follow these steps to install an operating system:
- Obtain an installation media or disk for the operating system of your choice. This could be a DVD, USB drive, or a downloadable ISO file.
- If you are using a DVD or USB drive, insert it into the corresponding port on your MP965-D Mini PC.
- Restart your mini PC and enter the BIOS settings again by pressing the indicated key during the boot-up process.
- Navigate to the “Boot” menu in the BIOS settings and set the boot order to prioritize the installation media or disk. This ensures that the mini PC boots from the installation media rather than the internal hard drive.
- Save the changes and exit the BIOS settings. Your MP965-D Mini PC will now restart.
- Follow the on-screen prompts to begin the installation process. The steps may vary depending on the operating system you are installing, but generally, you will be prompted to select the language, agree to the license terms, and choose the installation location.
- Once you have selected the desired options, proceed with the installation. The process may take some time, so be patient and allow the installation to complete.
- After the installation finishes, your MP965-D Mini PC will need to restart. Remove the installation media or disk from the drive.
- Upon restart, your mini PC will boot from the newly installed operating system.
It’s important to note that during the installation process, you may have the opportunity to customize additional settings or create user accounts. Follow the on-screen instructions accordingly to set up your operating system to your preferences.
Remember to keep your operating system updated with the latest security patches and updates to ensure the best performance and security for your mini PC.
Now that you have successfully installed an operating system, you’re ready to connect to the internet and proceed with the next steps to fully utilize the capabilities of your MP965-D Mini PC.
Step 7: Connecting to the Internet
Now that you have installed an operating system on your MP965-D Mini PC, the next step is to connect to the internet. Whether you prefer a wired or wireless connection, establishing internet connectivity is essential to fully utilize the functionality of your mini PC. Follow these steps to connect to the internet:
- Ensure that your modem or router is properly set up and functioning. If needed, consult your internet service provider (ISP) for assistance.
- If you are using a wired connection, connect one end of an Ethernet cable to the Ethernet port on your MP965-D Mini PC, and the other end to an available LAN port on your modem or router.
- If you prefer a wireless connection, locate the network icon in the system tray on your mini PC. Click on the icon to view available wireless networks.
- Select your wireless network from the list of available networks. If prompted, enter the network security key or password.
- Allow your MP965-D Mini PC a few moments to establish a connection to the selected network. Once connected, you will see a status indicating a successful connection to the internet.
- To ensure a stable and reliable connection, make sure that your mini PC is within the range of your wireless router and that any potential sources of interference are minimized.
Once connected to the internet, you can now take advantage of online services, browse the web, download updates, and enjoy the full range of internet-connected functionalities offered by your MP965-D Mini PC.
Note: If you encounter any connectivity issues, double-check your network settings and ensure that your modem or router is functioning correctly. If necessary, follow troubleshooting guides provided by your ISP or consult their technical support.
Now that you are connected to the internet, let’s move on to the next step of installing drivers and essential software for your MP965-D Mini PC.
Step 8: Installing Drivers and Software
Now that your MP965-D Mini PC is connected to the internet, it’s time to install the necessary drivers and software to ensure optimal performance and functionality. Drivers are essential software components that allow your operating system to communicate with the hardware components of your mini PC, while additional software enhances your computing experience. Follow these steps to install drivers and software:
- Visit the manufacturer’s website for your MP965-D Mini PC or the website of the hardware component manufacturers.
- Locate the “Support” or “Downloads” section of the website.
- Search for and download the latest drivers for your mini PC’s hardware components, including the chipset, graphics card, sound card, and network adapter.
- Once downloaded, run the driver installation files and follow the on-screen prompts to install the drivers.
- After installing the drivers, restart your MP965-D Mini PC to apply any changes and ensure proper functionality.
- Next, consider installing additional software that can enhance your computing experience. This may include productivity tools, antivirus software, media players, or any other software that aligns with your needs and preferences.
- Download the desired software from trusted sources, such as the official websites or reputable software repositories.
- Run the software installation files and follow the provided instructions to install the software on your mini PC.
- After installing the desired software, verify that it is functioning correctly and check for any available updates.
Regularly updating your installed software, including drivers and applications, is crucial for security, performance, and compatibility. Check for updates periodically or configure automatic updates if available.
By installing the necessary drivers and software, you can ensure that your MP965-D Mini PC’s hardware components are fully utilized and that you have access to the tools and features you need for a seamless computing experience.
Now that you have installed the drivers and software, let’s explore how to set up additional features on your MP965-D Mini PC in the next step.
Step 9: Setting Up Additional Features
Now that you have installed the necessary drivers and software on your MP965-D Mini PC, it’s time to set up additional features to enhance your computing experience. Follow these steps to configure and customize additional features:
- Customize your desktop: Personalize your desktop by choosing a wallpaper, arranging icons, and adding useful widgets or gadgets.
- Configure energy-saving options: Adjust power settings to optimize energy usage and extend battery life (if applicable). You can access these settings in the Control Panel or System Preferences.
- Set up security measures: Enable and customize security features such as password protection, biometric authentication, and firewall settings to ensure the safety of your data.
- Connect additional peripherals: If you have other peripherals like printers, scanners, or external storage devices, connect them to your MP965-D Mini PC and install any necessary drivers or software.
- Explore multimedia capabilities: Install media players, photo editors, or video editing software to enjoy and create multimedia content on your mini PC.
- Configure backup and storage options: Set up automatic backup solutions or cloud storage to protect your important files and ensure they are easily accessible from anywhere.
- Install productivity tools: Enhance your productivity by installing productivity suites, note-taking apps, or project management software.
- Customize accessibility settings: Adjust accessibility options to cater to specific needs or preferences, such as font sizes, color schemes, or screen reader support.
- Explore additional features: Take the time to discover other features and capabilities of your MP965-D Mini PC that can enhance your overall experience, such as voice assistants, virtual desktops, or tablet mode.
Remember, the configuration and setup of additional features will depend on your specific needs and preferences. Take your time to explore and experiment with different options to tailor your mini PC to your liking.
Once you have set up the additional features, your MP965-D Mini PC is now fully optimized and ready for efficient and enjoyable use. However, it’s always a good idea to periodically revisit these settings to make any necessary updates or adjustments based on your evolving needs and preferences.
Congratulations! You have successfully set up additional features on your MP965-D Mini PC. Now, you can fully enjoy the enhanced functionality and capabilities of your mini PC!
Step 10: Troubleshooting Common Issues
Even with proper setup and configuration, it’s not uncommon to encounter certain issues or glitches with your MP965-D Mini PC. Thankfully, many common issues have simple solutions that you can try before seeking further assistance. Follow these troubleshooting steps to address common issues:
- No power or boot: Check the power connection and ensure that the power adapter is securely plugged in. If necessary, try a different power outlet or power adapter.
- Display issues: Ensure that the monitor is properly connected and powered on. If the screen remains blank or distorted, try connecting the monitor to a different port on your mini PC or try a different monitor.
- Internet connectivity problems: Check your network settings and ensure that you are connected to the correct wireless network or that the Ethernet cable is securely connected. Restart your modem/router if necessary.
- Driver issues: If certain hardware components are not working correctly, ensure that you have installed the appropriate drivers. Check for any available driver updates from the manufacturer’s website.
- Software compatibility: If you encounter issues with specific software or applications, ensure that they are compatible with your operating system and have the latest updates installed. Try reinstalling the software if necessary.
- Performance slowdown: If your MP965-D Mini PC is running slowly, check for any background processes or applications that may be consuming excessive system resources. You may need to close unnecessary programs or perform routine maintenance tasks like disk cleanup or defragmentation.
- Overheating: If your mini PC is overheating, ensure that the vents are clear of dust and debris. Consider using a cooling pad or increasing airflow in the surrounding area. If the issue persists, you may need to consult the manufacturer for further assistance.
- Hardware malfunctions: If hardware components are not functioning correctly, such as malfunctioning USB ports or audio issues, check the connections and ensure that the drivers are properly installed. Consult the user manual or seek technical support if needed.
If you have attempted these troubleshooting steps and the issue persists, it may be necessary to seek further assistance from the manufacturer’s technical support or consult with a professional IT technician to diagnose and resolve the problem.
Remember, it’s important to back up your important data regularly to avoid data loss in case of any unforeseen issues or system failures.
By following these troubleshooting steps, you can address and resolve common issues that may arise with your MP965-D Mini PC, ensuring a smooth and enjoyable computing experience.
Conclusion
Congratulations on successfully setting up your MP965-D Mini PC! By following the step-by-step guide, you have unboxed the mini PC, connected peripherals, powered it on, and gone through the initial setup and configuration process. You have also explored the BIOS settings, installed an operating system, connected to the internet, installed drivers and software, set up additional features, and learned how to troubleshoot common issues.
With your MP965-D Mini PC up and running, you can now enjoy the power and versatility of this compact computing device. Whether you use it for entertainment, work, or both, your mini PC is designed to meet your needs and provide a seamless computing experience.
Remember to keep your mini PC updated with the latest drivers and software updates to ensure optimal performance and security. Regularly check for updates from the manufacturer’s website and consider enabling automatic updates whenever possible.
Should you encounter any technical issues or have specific questions about your MP965-D Mini PC, don’t hesitate to reach out to the manufacturer’s technical support or consult online forums and communities.
We hope this guide has provided you with the knowledge and confidence to make the most out of your MP965-D Mini PC. Take the time to explore its features, expand its capabilities with compatible peripherals and software, and personalize it to suit your preferences. Your mini PC is a versatile tool that can enhance your productivity, entertainment, and connectivity.
Enjoy your computing journey with the MP965-D Mini PC, and may it bring you countless hours of joy and efficiency!