Introduction
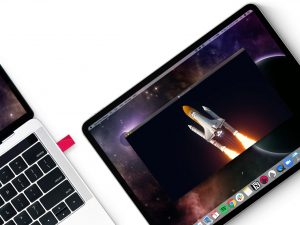
Connecting your iPad as a display to a mini PC with Windows 10 can be a great way to extend your workspace or enjoy multimedia content on a larger screen. Whether you’re a professional looking for a dual-display setup or simply want to enjoy movies and videos on a bigger screen, this guide will walk you through the process of connecting your iPad to a mini PC.
By utilizing the iPad’s high-resolution display and touch functionalities, you can enhance your productivity and user experience. Additionally, connecting your iPad as a display allows you to make the most of your existing devices, eliminating the need to invest in a separate monitor.
However, before you begin, it’s important to ensure compatibility between your iPad and the mini PC. Check if your iPad model supports the necessary connectivity options, such as AirPlay or a Lightning to HDMI adapter. Additionally, make sure your mini PC is running Windows 10, as older versions might not have the required settings and software support.
In this step-by-step guide, we will cover everything you need to know to successfully connect your iPad as a display to your Windows 10 mini PC. From preparing your devices to configuring the display settings and enabling touch functionality, we aim to provide you with a comprehensive and user-friendly experience.
Step 1: Check Compatibility
Before you start connecting your iPad as a display to your mini PC, it’s crucial to ensure compatibility between the two devices. Here are a few things to consider:
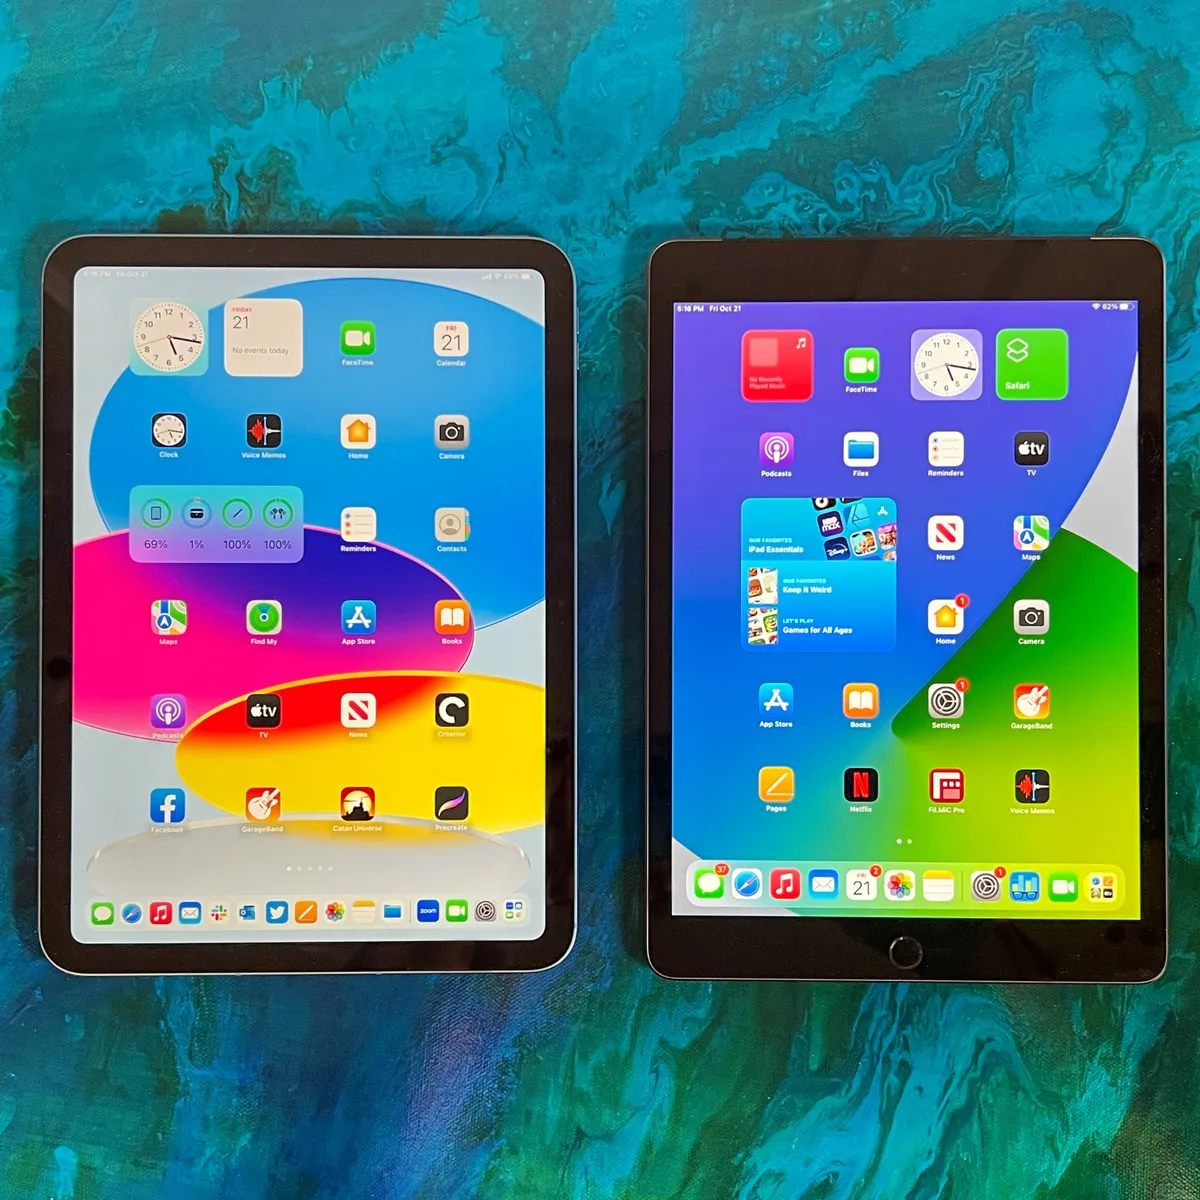
- iPad Model: Check if your iPad model supports the necessary connectivity options, such as AirPlay or a Lightning to HDMI adapter. Newer models have built-in AirPlay capabilities, allowing you to wirelessly mirror your display to a compatible device, such as a mini PC.
- Windows 10 Compatibility: Ensure that your mini PC is running on Windows 10. Older versions of Windows might not have the required settings and software support to connect your iPad as a display.
- Connectivity Options: Depending on your iPad model, you may need specific adapters or cables to connect it to your mini PC. For example, if your iPad has a Lightning port, you will need a Lightning to HDMI adapter to establish a physical connection.
Once you have checked the compatibility between your iPad and mini PC, you can proceed with the setup process. It’s important to note that not all iPads support display mirroring or touch functionality when connected to a mini PC. Ensure that your iPad supports the features you require before proceeding.
By ensuring compatibility between your iPad and mini PC, you can eliminate any potential issues and have a smoother experience when connecting the two devices. Now that you have checked compatibility, let’s move on to the next step: preparing your devices.
Step 2: Prepare Your Devices
Before connecting your iPad to your mini PC, it’s essential to prepare both devices for the setup process. Here’s what you need to do:
- Connectivity Options: Determine the best connectivity option based on your iPad model and available ports on your mini PC. If your iPad supports AirPlay, make sure both devices are connected to the same Wi-Fi network. If you’re using a physical connection, such as a Lightning to HDMI adapter, ensure you have the necessary cables or adapters ready.
- Update Software: To avoid any compatibility issues, make sure both your iPad and mini PC are running on the latest software versions. Check for updates and install any available updates on both devices before proceeding.
- Optimize Display Settings: Open the display settings on your mini PC and adjust the resolution and orientation settings to match your iPad’s display preferences. This step will ensure a seamless and visually appealing experience when using your iPad as a display.
- Prepare Workspace: Clear out an area on your desk or workspace to set up your mini PC and iPad. Ensure that you have enough space for both devices and any necessary cables or accessories. Organizing your workspace will make the setup process easier and more efficient.
By properly preparing your devices, you can minimize setup difficulties and ensure a smoother connection process. Taking the time to check connectivity options, update software, optimize display settings, and prepare your workspace will contribute to a hassle-free experience when connecting your iPad as a display to your mini PC.
Now that you have prepared your devices, it’s time to move on to the next step: installing the necessary software on your mini PC.
Step 3: Install Necessary Software on Your Mini PC
In order to connect your iPad as a display to your mini PC, you will need to install the necessary software. Follow these steps to ensure a successful installation:
- Research Software Options: Explore different software options available for connecting your iPad to a Windows 10 mini PC. Some popular choices include Duet Display, Splashtop Wired XDisplay, and iDisplay. Research these options, read reviews, and choose the software that best fits your needs.
- Download and Install Software: Once you’ve selected the software, visit the official website or app store and download it onto your mini PC. Follow the installation instructions provided by the software developer to install the application correctly.
- Configure Software Settings: Once the software is installed, open the application and configure the necessary settings. This may include selecting your iPad as the secondary display, adjusting the resolution, and enabling touch support if applicable.
- Restart Your Mini PC: After configuring the software settings, it’s recommended to restart your mini PC. This will ensure that all changes are applied correctly and that the software is running smoothly.
Installing the appropriate software is crucial for establishing the connection between your iPad and mini PC. Take the time to research different software options, choose one that meets your requirements, and follow the installation instructions carefully.
Now that you have installed the necessary software on your mini PC, it’s time to move on to the next step: connecting your iPad to the mini PC.
Step 4: Connect Your iPad to the Mini PC
Now that you have installed the necessary software on your mini PC, it’s time to connect your iPad as a display. Follow these steps to establish the connection:
- Wireless Connection: If your iPad supports AirPlay, ensure that both your iPad and mini PC are connected to the same Wi-Fi network. On your mini PC, open the software you installed in the previous step and look for the option to connect a wireless display. Follow the on-screen instructions to detect and connect to your iPad.
- Physical Connection: If you’re using a physical connection, such as a Lightning to HDMI adapter, connect one end of the adapter to your iPad, and the other end to an available HDMI port on your mini PC. Make sure the adapter is securely connected to both devices.
- Switch Display Mode: On your mini PC, open the display settings and switch to the extended display mode. This allows you to use your iPad as a secondary display while keeping your mini PC’s main display active. Adjust the resolution and orientation settings as needed.
Once you have successfully connected your iPad to your mini PC, you will be able to see your iPad’s display on the extended display mode. Your iPad will act as a second monitor, providing you with additional screen real estate or a dedicated display for specific tasks.
It’s important to note that the specific steps and options may vary depending on the software you have installed and the capabilities of your iPad. Refer to the software’s documentation or support resources for more detailed instructions if needed.
Now that you have connected your iPad to your mini PC, it’s time to move on to the next step: configuring your iPad’s display settings.
Step 5: Configure Your iPad Display Settings
After successfully connecting your iPad as a display to your mini PC, it’s important to configure the display settings to ensure optimal performance and usability. Follow these steps to configure your iPad’s display settings:
- Display Arrangement: Open the display settings on your mini PC and arrange the displays according to your preference. You can choose to have your iPad as an extended display to expand your workspace or configure it as a mirrored display to show the same content as your mini PC’s main display.
- Resolution and Orientation: Adjust the resolution and orientation settings of your iPad’s display to best suit your needs. Depending on the software you’ve installed and the capabilities of your iPad, you may have options to customize the resolution and rotate the display to portrait or landscape mode.
- Scaling and Zoom: Fine-tune the scaling and zoom settings on your iPad to ensure that the content displayed on the extended display appears clear and properly proportioned. Experiment with different settings to find the most comfortable and visually appealing configuration.
- Touch Support: If your iPad supports touch functionality when connected to a mini PC, ensure that the touch settings are enabled. Some software applications may require additional configuration to fully utilize the touch capabilities of your iPad.
By configuring your iPad’s display settings, you can optimize your workflow and enhance your user experience when using it as a display for your mini PC. Take the time to experiment with different settings and find the configuration that works best for you.
Now that you have configured your iPad’s display settings, you can enjoy the benefits of using your iPad as a secondary display for your mini PC. Whether you’re extending your workspace, watching videos, or multitasking, your iPad will provide you with a versatile and convenient display solution.
Next, if desired, you can move on to the optional step of enabling touch functionality on your iPad.
Step 6: Enable Touch Functionality (Optional)
If your iPad supports touch functionality when connected to a mini PC, you have the option to enable this feature and take advantage of a more interactive experience. Follow these steps to enable touch functionality on your iPad:
- Check Touch Support: Verify that your iPad model supports touch functionality when connected to a mini PC. Not all iPad models have this capability, so it’s essential to ensure compatibility before proceeding.
- Software Configuration: Open the software you installed on your mini PC and navigate to the touch settings. Enable touch support and adjust any additional touch-related preferences available. This step ensures that the software recognizes and utilizes the touch input from your iPad.
- Test and Calibrate: Once touch support is enabled, test the touch functionality on your iPad by interacting with the display. Ensure that the touch inputs are accurately registered and that the response is smooth and precise. If needed, calibrate the touch sensitivity settings to match your preferences.
- Touch-Optimized Applications: Some applications may offer specific touch optimizations to enhance the user experience. Explore touch-optimized applications that are compatible with your mini PC to make the most of the touch functionality on your iPad.
Enabling touch functionality on your iPad can transform it into a truly interactive display, providing you with the flexibility to navigate, scroll, tap, and swipe directly on the screen. Whether you’re drawing, designing, or simply browsing, touch support adds a new level of convenience and ease of use.
Remember, this step is optional and depends on the capabilities of your iPad and the software you’ve installed. If your iPad does not support touch functionality, you can still enjoy the benefits of using it as a display without the touch feature.
With your iPad connected to your mini PC and touch functionality enabled (if applicable), you can now enjoy the full potential of using your iPad as a second display. Take some time to explore and experiment with different applications, workflows, and multimedia content to make the most of this setup.
Congratulations on successfully connecting and configuring your iPad as a display for your mini PC. Enjoy the expanded workspace and enhanced user experience!
Conclusion
Connecting your iPad as a display to a mini PC with Windows 10 can greatly enhance your productivity, create a more immersive multimedia experience, and maximize the functionality of your existing devices. By following the step-by-step guide provided in this article, you can successfully set up and utilize your iPad as a secondary display.
Throughout the process, it’s important to ensure compatibility between your iPad and mini PC, adequately prepare your devices, install the necessary software, establish the connection, and customize the display and touch settings according to your preferences. This will enable you to seamlessly extend your workspace, enjoy multimedia content, and benefit from touch functionality (if supported).
Remember to consider the specific capabilities of your iPad model, choose the right software for your needs, and maintain up-to-date software versions on both your iPad and mini PC for optimal performance and compatibility.
By utilizing your iPad as a display, you can improve productivity, multitask efficiently, and create a more versatile computing setup without the need for an additional monitor. This can be particularly beneficial for professionals, students, designers, and anyone looking to optimize their workflow and make the most of their devices.
We hope this guide has been helpful in assisting you with connecting your iPad as a display to your mini PC with Windows 10. Now, it’s time for you to explore, create, and enjoy the benefits of your extended workspace. Happy computing!