Introduction
The Samsung Galaxy S7 is a popular smartphone known for its sleek design and high-performance features. However, like any electronic device, there may come a time when you need to open it up to replace a broken part or perform repairs. Opening the Samsung Galaxy S7 may seem like a daunting task, but with the right tools and a little guidance, it can be a relatively straightforward process.
In this article, we will guide you through the step-by-step process of opening a Samsung Galaxy S7. Whether you need to replace a cracked screen, a malfunctioning battery, or any other internal component, this guide will provide you with the necessary information to safely open your device and perform the necessary repairs.
Before we begin, please note that opening your Samsung Galaxy S7 may void your warranty. If your device is still under warranty, it is recommended to contact the manufacturer or an authorized service center for assistance. However, if your warranty has expired or if you feel comfortable performing the repairs yourself, continue reading to learn how to open your Samsung Galaxy S7.
Tools Needed
Before you start opening your Samsung Galaxy S7, it’s important to gather the necessary tools to ensure a smooth and safe process. Here are the tools you’ll need:
- Small Phillips screwdriver: This will be used to remove the screws holding the device together.
- Plastic pry tool: A plastic pry tool will come in handy to safely separate the front and back housing of the device without causing any damage.
- Tweezers: Tweezers will help you handle small screws and delicate components with precision.
- Spudger: A spudger tool, made of nylon or plastic, will be useful for prying and disconnecting connectors inside the device.
- Heat gun or hairdryer: You may need to heat the adhesive holding certain parts of the device together, and a heat gun or hairdryer can be used for that purpose. Be careful not to overheat the device.
- Anti-static wrist strap: While not mandatory, using an anti-static wrist strap can help prevent static discharge that could damage sensitive electronic components.
Having these tools ready before you start the process will make it much easier to open your Samsung Galaxy S7 without causing any unnecessary damage. It’s important to note that using the correct tools and following the instructions carefully can significantly reduce the risk of accidents or further damage to your device.
Step 1: Power off the Device
The first step in opening your Samsung Galaxy S7 is to power off the device. This is crucial to ensure your safety and prevent any potential damage to the internal components. Follow these steps to power off your device:
- Press and hold the power button located on the right side or top of your device, depending on the model.
- A menu will appear on the screen. Select “Power off” or “Restart” from the options.
- If you chose to restart the device, wait for it to power off and then proceed to the next step.
Once your Samsung Galaxy S7 is powered off, it’s a good idea to wait a few minutes before continuing to ensure that all components have cooled down. This will reduce the risk of any potential heat-related accidents during the opening process.
Remember to handle your device gently and avoid applying excessive pressure or force during these steps. If you encounter any difficulties, consult the user manual or seek professional assistance.
Now that your Samsung Galaxy S7 is powered off, you’re ready to move on to the next step: removing the SIM card and memory card.
Step 2: Remove the SIM Card and Memory Card
Before you can proceed with opening your Samsung Galaxy S7, it’s essential to remove the SIM card and memory card from the device. This step ensures that these components are safely detached and prevents any damage while accessing the internal parts. Here’s how you can remove the SIM card and memory card:
- Locate the SIM card tray on either the top or side of your device.
- Insert the SIM ejector tool (or a small paperclip) into the small hole on the card tray.
- Apply gentle pressure until the tray pops out.
- Remove the SIM card and memory card from their respective slots in the tray.
- Keep the SIM card and memory card in a safe place to avoid misplacing them.
It’s important to note that different models of the Samsung Galaxy S7 may have variations in the location of the SIM card tray. Refer to the user manual or check online resources for specific instructions based on your device model.
Removing the SIM card and memory card ensures that these components are protected and prevents any accidental damage or loss during the opening process. It also minimizes the risk of static electricity discharge that could potentially harm the device’s internal circuitry.
With the SIM card and memory card safely removed, you’re now ready to move on to the next step: removing the back cover of your Samsung Galaxy S7.
Step 3: Remove the Back Cover
Now that you have removed the SIM card and memory card from your Samsung Galaxy S7, it’s time to remove the back cover. The back cover is held in place by adhesive and needs to be carefully detached to access the internal components. Follow these steps to remove the back cover:
- Start by heating the back cover of your device using a heat gun or a hairdryer on a low heat setting. This will soften the adhesive.
- Apply heat evenly to the back cover for about 1-2 minutes, ensuring not to overheat the device.
- Once the adhesive is softened, use a plastic pry tool to gently insert it between the back cover and the frame of the device.
- Slowly and carefully pry around the edges of the device to separate the back cover from the frame.
- Continue prying along the edges until the entire back cover is loosened.
- Lift off the back cover and set it aside.
When removing the back cover, it’s essential to exercise caution and not apply excessive force. Take your time to ensure a smooth and gentle separation without damaging the components or the back cover itself. If you encounter resistance, stop and re-evaluate your approach, making sure not to force anything.
With the back cover successfully removed, you now have access to the internal components of your Samsung Galaxy S7. In the next step, we will guide you through the process of disconnecting the battery.
Step 4: Disconnect the Battery
Once you have removed the back cover of your Samsung Galaxy S7, the next step is to disconnect the battery. Disconnecting the battery is crucial to ensure your safety and prevent any accidental damage while working on the device’s internal components. Follow these steps to disconnect the battery:
- Locate the battery connector on the motherboard of your device.
- Using a plastic pry tool or tweezers, carefully lift the connector latch securing the battery cable.
- Gently disconnect the battery cable from the motherboard by pulling it straight up.
- Once the battery cable is disconnected, ensure it does not come into contact with the motherboard to avoid any short circuits.
Disconnecting the battery ensures that there is no power flowing through the device, minimizing the risk of electrical shock or damage to the internal components. It is important to handle the battery cable with care and avoid applying excessive force to prevent any potential damage to the connectors or the motherboard.
With the battery safely disconnected, you can now proceed with confidence to the next step, which involves removing the screws that hold the device together.
Step 5: Remove the Screws
With the battery disconnected, you can now proceed to remove the screws that hold your Samsung Galaxy S7 together. These screws secure the front housing and the internal components, and removing them is necessary to gain access to these parts. Follow these steps to remove the screws:
- Using a small Phillips screwdriver, carefully unscrew the screws located on the back of the device.
- Place the screws in a safe location to prevent them from getting lost.
- Keep in mind that there may be different types and sizes of screws, so make sure to keep track of which screws go where.
As you remove each screw, take note of its location and consider creating a diagram or using a screw organizer to keep them organized. This will make the reassembling process much easier later on.
Remember to handle the screws and the screwdriver with care to avoid damaging the threads or the screw holes. Apply gentle, consistent pressure when unscrewing and avoid using excessive force. If a screw feels stuck or resistant, double-check your approach and ensure you are using the correct size and type of screwdriver before proceeding.
Once all the screws are removed, you’re now ready to move on to the next step: separating the front and back housing of your Samsung Galaxy S7.
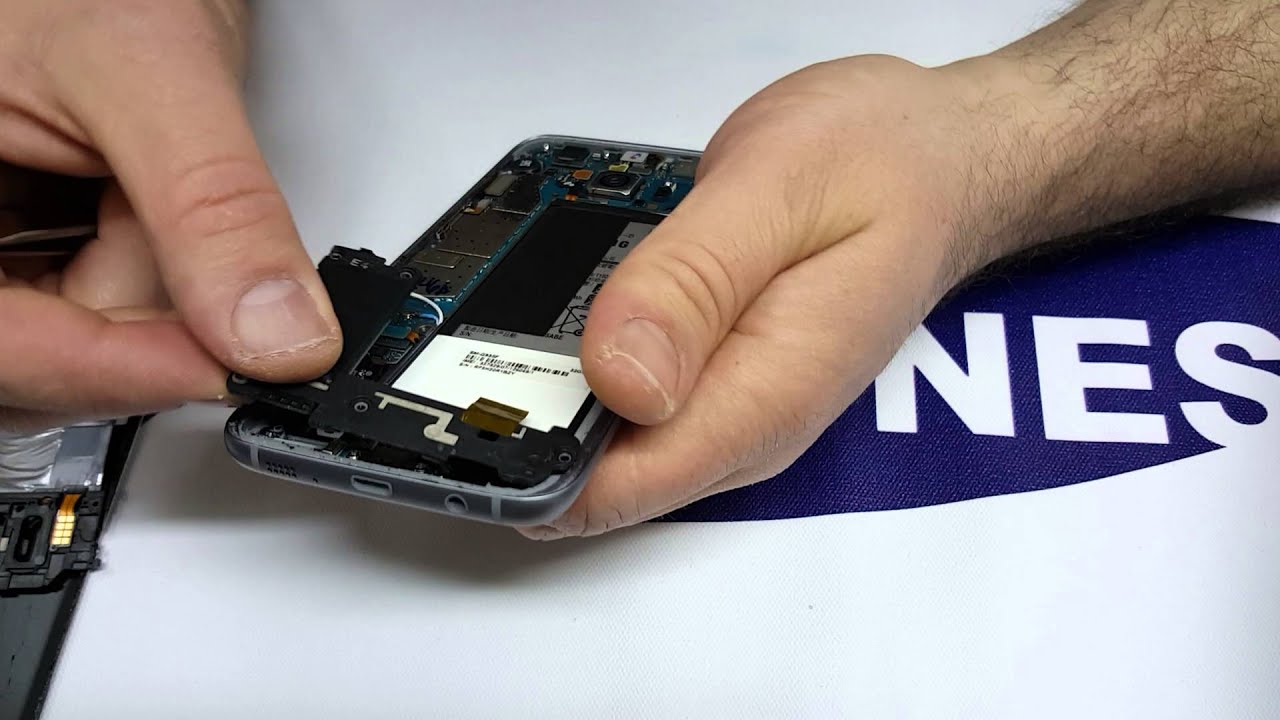
Step 6: Separate the Front and Back Housing
Now that you have removed the screws holding your Samsung Galaxy S7 together, it’s time to separate the front and back housing of the device. This step will give you access to the internal components that may need repair or replacement. Follow these steps to separate the front and back housing:
- Starting from one side of the device, insert a plastic pry tool between the front and back housing
- Gently and slowly run the plastic pry tool along the edges of the device. Apply even pressure to gradually separate the front and back housing.
- Continue prying along the edges, working your way around the device until the front and back housing are completely separated.
It’s essential to exercise caution and be patient when separating the front and back housing to avoid causing any damage to the internal components or the device’s exterior. Take care to avoid applying too much force or bending the device.
During this step, you may encounter some resistance due to the adhesive that holds the housing together. If you find that the housing is not separating easily, you can apply heat using a heat gun or hairdryer to soften the adhesive. Be careful not to overheat the device or the plastic components.
Once the front and back housing are detached, set the back housing aside in a safe place. Now you have full access to the internal components of your Samsung Galaxy S7 and can proceed with replacing or repairing any necessary parts.
Step 7: Replace or Repair Internal Components
With the front and back housing of your Samsung Galaxy S7 separated, you now have access to the internal components that may require replacement or repair. This step involves identifying the specific components that need attention and carefully working on them. Here are some guidelines to follow:
- Assess the internal components of your device to identify any damaged or malfunctioning parts.
- If a component needs to be replaced, refer to the manufacturer’s instructions or seek professional assistance for the specific replacement process.
- Handle the internal components with care and avoid touching any sensitive connectors or circuitry.
- Ensure a clean and organized work environment to prevent the loss of small parts or damage caused by debris or dust.
- If you are unsure about how to proceed with a repair or replacement, consult online resources, forums, or technical support for guidance.
It’s crucial to exercise caution and follow proper procedures when working on internal components. If you are uncomfortable or inexperienced with handling intricate electronic parts, it’s recommended to seek professional help to avoid any potential damage to your device.
Remember to keep track of all the screws and components you remove during this step. Creating a diagram or using small containers to organize the parts can be helpful for an easier reassembling process.
Once you have successfully replaced or repaired the necessary internal components, you’re ready to move on to the final step: reassembling your Samsung Galaxy S7.
Step 8: Reassemble the Device
After replacing or repairing the internal components of your Samsung Galaxy S7, it’s time to reassemble the device. This step involves putting all the parts back together in the reverse order of the disassembly process. Follow these steps to reassemble your device:
- Retrieve the back housing of your Samsung Galaxy S7.
- Ensure that all the internal components are properly aligned and in their correct positions.
- Carefully place the front housing over the internal components, aligning the edges with the corresponding slots on the back housing.
- Gently press the front and back housing together, applying even pressure along the edges to ensure a secure fit.
- Once the housing is properly aligned, use your fingertips to press along the edges to ensure the housing is securely attached.
- Retrieve the screws you removed earlier and carefully screw them back into their respective positions.
- Ensure that each screw is tightened securely but not overly tightened to prevent damage to the device.
During the reassembly process, take care not to force any parts into place, as this can cause damage or misalignment. If you encounter any difficulties in aligning the housing or inserting the screws, double-check that all components are properly seated and aligned.
Once all the screws are back in place, you can proceed to insert the SIM card and memory card back into their respective slots. Finally, power on your Samsung Galaxy S7 to ensure that it is functioning properly after the reassembly process.
Congratulations! You have successfully reassembled your Samsung Galaxy S7 after replacing or repairing internal components. Always handle your device with care and follow proper procedures to maintain its functionality and longevity.
Conclusion
Opening a Samsung Galaxy S7 may seem like a daunting task, but with the right tools and step-by-step guidance, it can be a relatively straightforward process. By following these instructions, you can safely open your device to replace or repair internal components, ensuring its optimal performance and longevity.
Remember to gather all the necessary tools before you start, including a small Phillips screwdriver, plastic pry tool, tweezers, spudger, heat gun or hairdryer, and an anti-static wrist strap if available. These tools will help make the process smooth and prevent damage to your device.
Throughout the process, be patient and cautious when handling your Samsung Galaxy S7. Power off the device before starting, remove the SIM card and memory card, detach the battery, and carefully remove the screws to separate the front and back housing. Then, you can replace or repair any necessary components.
Once you have completed the repairs or replacements, carefully reassemble your device in reverse order. Align all the parts correctly, secure the housing, and tighten the screws. Finally, reinsert the SIM card and memory card, and power on your Samsung Galaxy S7 to ensure it is functioning properly.
If you feel uncomfortable or unsure about any part of the process, it’s recommended to seek professional assistance to avoid causing further damage to your device. Opening your Samsung Galaxy S7 may void your warranty, so be aware of the risks involved.
With proper care and maintenance, your Samsung Galaxy S7 can continue to serve you well. By being proactive in opening and repairing your device, you can save on repair costs and prolong its lifespan. Remember to follow best practices and consult official documentation or professional assistance whenever necessary.