Introduction
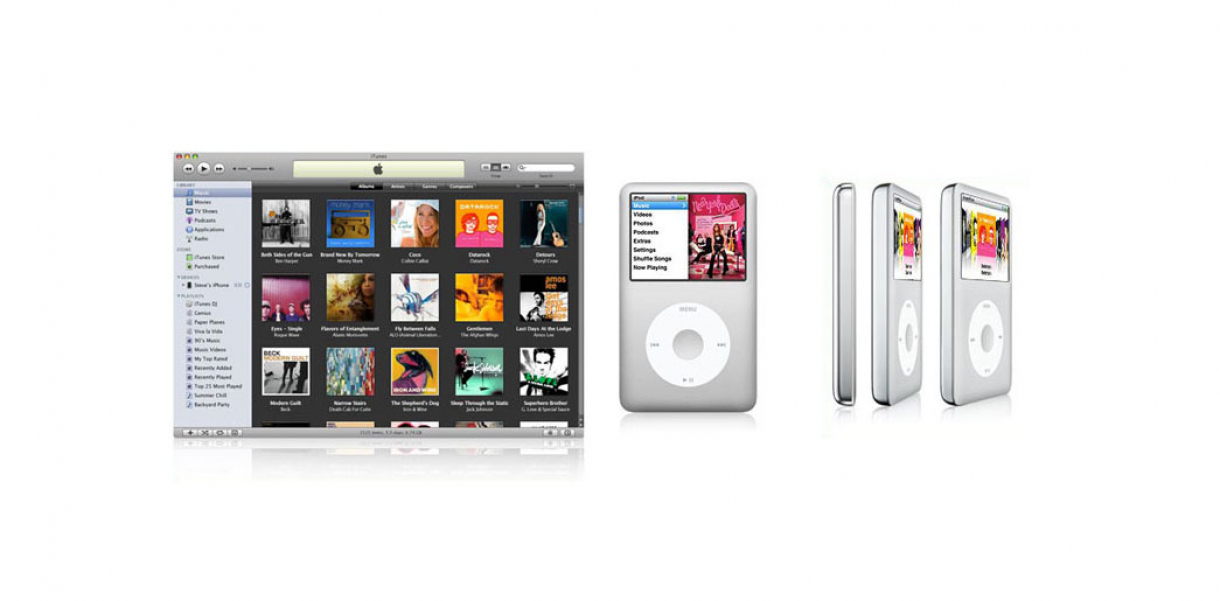
Today, music lovers have an extensive collection of songs in their iTunes library. However, as the library grows, the need for additional storage space becomes inevitable. This is where an external hard drive comes into play. By moving your iTunes music library to an external hard drive, you can free up valuable space on your computer’s internal storage, ensuring that your favorite tunes are easily accessible without compromising performance.
Whether you’re running out of storage on your computer, switching to a new device, or simply looking to backup your precious music collection, transferring iTunes music to an external hard drive offers a practical solution. Not only does it create more room for other files and applications on your computer, but it also provides a convenient way to access your music from multiple devices.
In this article, we’ll guide you through the process of moving your iTunes music to an external hard drive, ensuring that your cherished tunes are safely stored and readily available whenever you desire. We’ll cover everything from preparing your external hard drive to updating iTunes library settings, as well as managing and organizing your library on the external drive. So, let’s dive in and discover how to effortlessly transfer your iTunes music to an external hard drive.
Why Move iTunes Music to an External Hard Drive?
There are several compelling reasons to move your iTunes music to an external hard drive. Let’s explore some of the key advantages:
1. Storage Space: As your iTunes library continues to expand, it can consume a significant amount of space on your computer’s internal hard drive. Transferring your music to an external hard drive enables you to free up valuable space and ensure that your computer runs smoothly.
2. Portability: With your iTunes music stored on an external hard drive, you can easily carry your entire music collection wherever you go. Whether you’re traveling or switching between devices, having your music on a portable drive grants you convenient access to your favorite tunes.
3. Data Security: An external hard drive provides an additional layer of protection for your iTunes music. If your computer crashes or experiences data loss, your music will remain safe and untouched on the external drive. This peace of mind ensures that your cherished collection is safeguarded against unforeseen events.
4. Backup Solution: Moving your iTunes music to an external hard drive serves as an effective backup strategy. It protects your music from accidental deletion, file corruption, or hardware failure. With a proper backup in place, you can restore your music library effortlessly and avoid the hassle of trying to recover lost files.
5. Flexibility: By storing your iTunes music on an external hard drive, you gain flexibility in managing your library. You can easily connect the drive to different devices and access your music from various platforms. This allows you to enjoy your music on multiple devices and ensures seamless synchronization across your preferred devices.
With these advantages in mind, it becomes clear why moving your iTunes music to an external hard drive is a wise decision. Not only does it optimize your computer’s storage capacity, but it also provides convenience, security, and backup options for your treasured music collection. So, let’s proceed to the next steps and learn how to prepare your external hard drive for the transfer process.
Preparing Your External Hard Drive
Before transferring your iTunes music library, it’s important to ensure that your external hard drive is properly prepared. Follow these steps to get your drive ready:
1. Select an External Hard Drive: Choose a reliable and spacious external hard drive that meets your storage requirements. Ensure that it is compatible with your computer and has a sufficient capacity to accommodate your iTunes music library.
2. Format the External Hard Drive: If your external hard drive is new or not formatted specifically for your computer’s operating system, you may need to format it before use. Formatting ensures compatibility and allows your computer to recognize the drive. However, be cautious as formatting erases all data on the drive. Make sure to back up any necessary files before proceeding.
3. Create a New Folder: On the external hard drive, create a new folder specifically for your iTunes music library. This folder will serve as the destination for the transferred files.
4. Assign an Appropriate Name: Give the new folder an appropriate and easily recognizable name, such as “iTunes Music” or “Music Library.” This will help you quickly locate and access the folder in the future.
5. Ensure Sufficient Space: Verify that the available space on your external hard drive is more than enough to accommodate your iTunes music library. Keep in mind that your library may grow over time, so it’s always better to have extra space for future additions.
6. Connect and Test the External Hard Drive: Connect the external hard drive to your computer using the appropriate cable. Once connected, ensure that it is recognized by your computer and appears in the file explorer or Finder window. Test the drive by opening and accessing the newly created folder to confirm its functionality.
Once you’ve completed these preparations, your external hard drive will be ready to receive the transfer of your iTunes music library. In the next section, we’ll guide you through the process of transferring your iTunes music to the external drive.
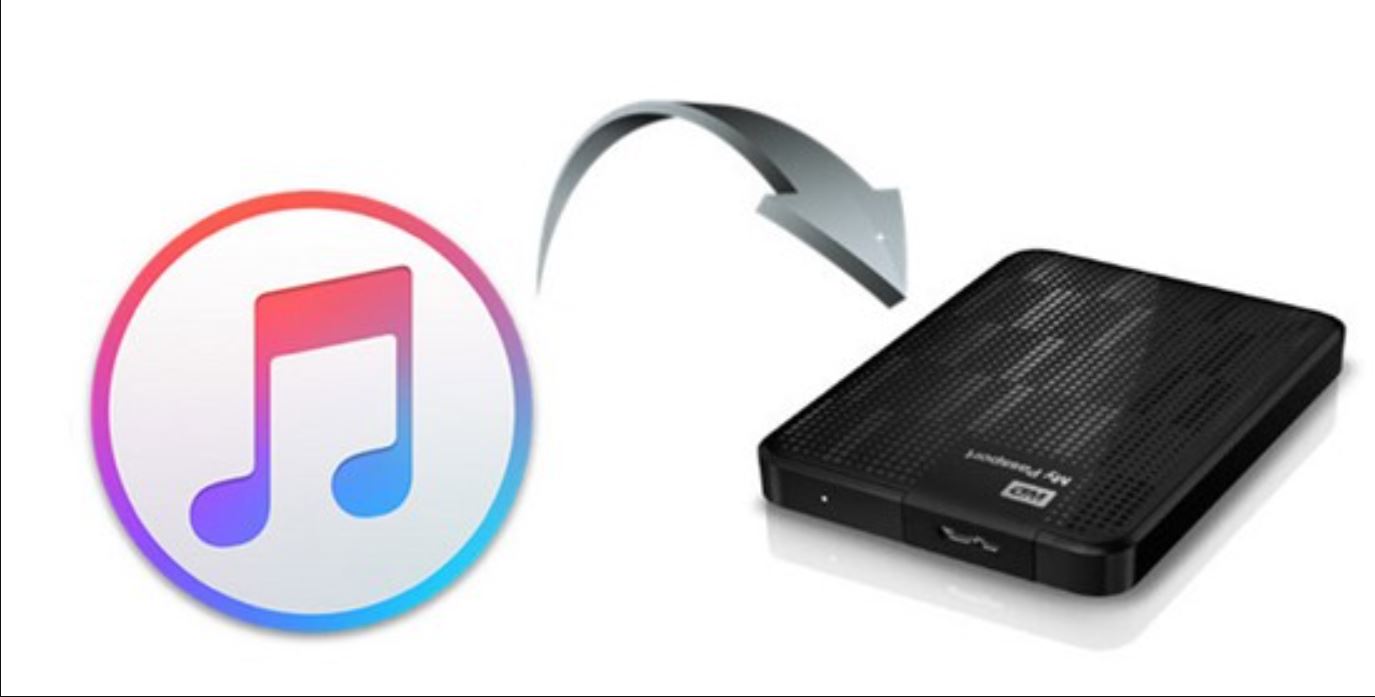
Transferring iTunes Music to the External Hard Drive
Now that you have prepared your external hard drive, it’s time to transfer your iTunes music library. Follow these steps to complete the transfer process:
- Open iTunes: Launch the iTunes application on your computer.
- Go to Preferences: On a Mac, click on the iTunes menu and select “Preferences.” On a Windows PC, click on “Edit” and choose “Preferences.”
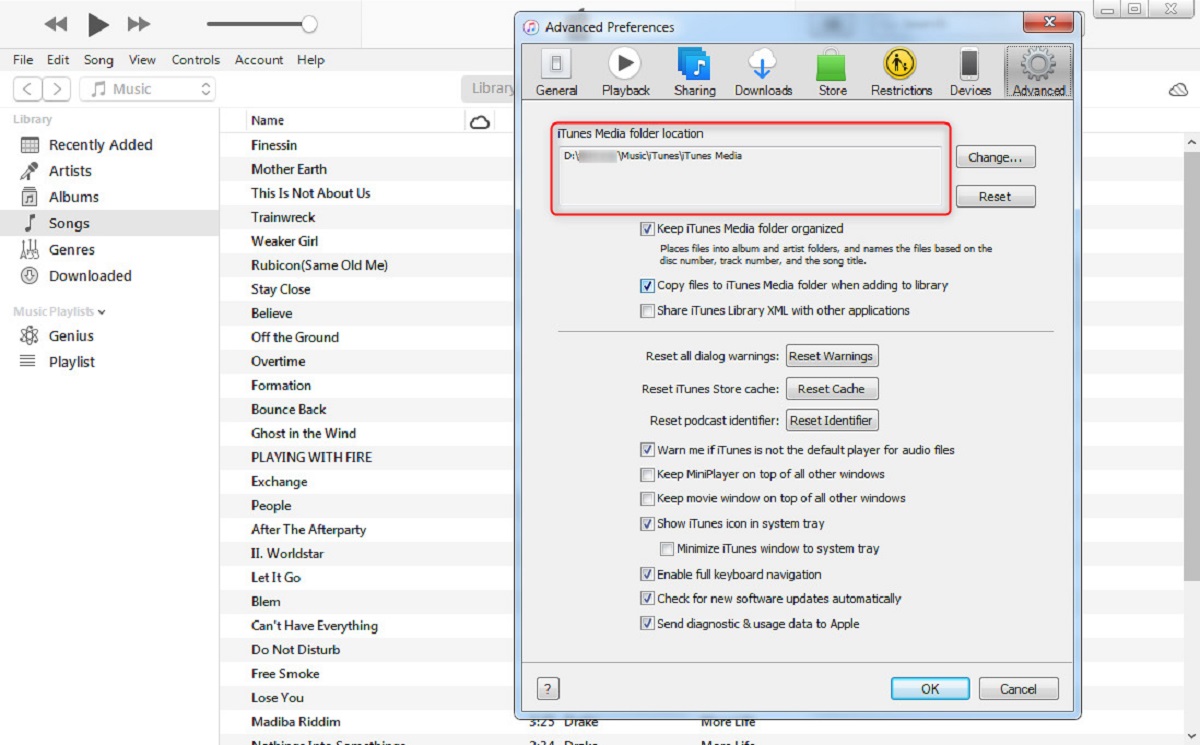
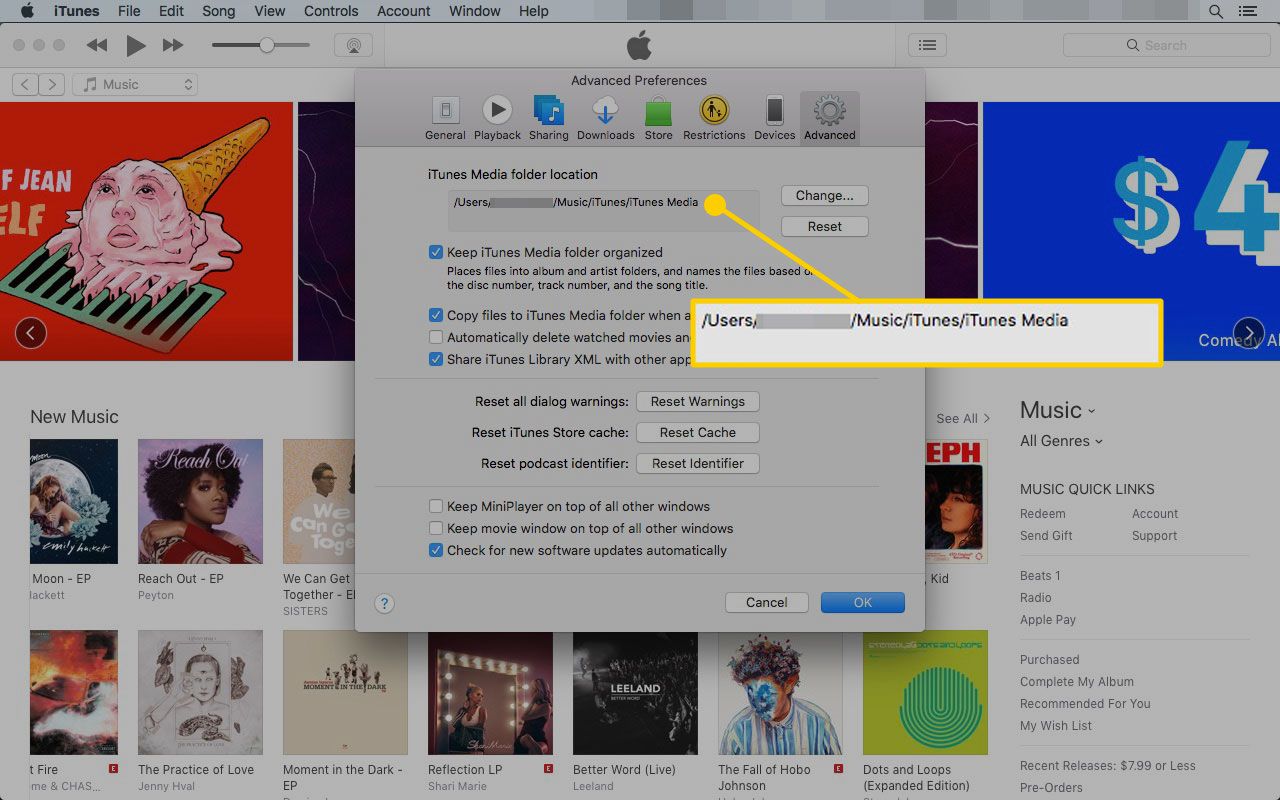
- Select Advanced Preferences: Within the Preferences window, click on the “Advanced” tab.
- Note the Current iTunes Media Folder Location: Take note of the current location of your iTunes media folder. This is the folder on your computer’s internal hard drive where your music library is currently stored.
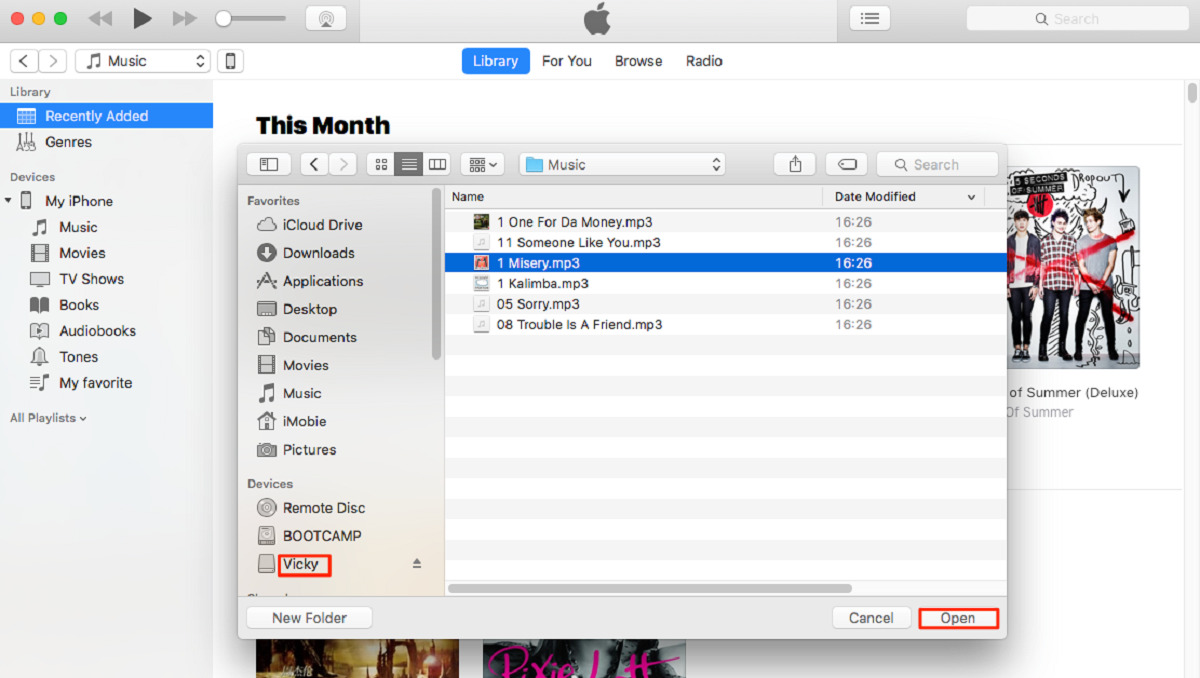
- Change the iTunes Media Folder Location: Click on the “Change” button next to the iTunes Media Folder Location option. A file browser window will appear.
- Select the External Hard Drive Folder: Navigate to the newly created folder on your external hard drive and select it as the new iTunes media folder.
- Confirm the Change: Click on the “OK” button to confirm and close the Preferences window.
- Consolidate Your Library: To ensure that all your music files are copied to the new location, go to the File menu and choose “Library.” Then, select “Organize Library” and check the box that says “Consolidate files.” Click “OK” to start the consolidation process.
- Wait for the Transfer to Complete: Depending on the size of your iTunes library, the transfer process may take some time. Allow iTunes to copy all the files from the current location to the new location on the external hard drive. Do not interrupt the process until it is complete.
- Verify the Transfer: Once the transfer is finished, double-check the new iTunes media folder on the external hard drive to ensure that all your music files and folders have been successfully copied.
Congratulations! You have successfully transferred your iTunes music library to the external hard drive. In the next section, we’ll guide you on updating your iTunes library settings to ensure smooth accessibility of your music from the external drive.
Updating iTunes Library Settings
After transferring your iTunes music library to the external hard drive, you need to update your iTunes library settings to ensure seamless accessibility and management. Follow these steps to update your iTunes library settings:
- Open iTunes: Launch the iTunes application on your computer.
- Go to Preferences: On a Mac, click on the iTunes menu and select “Preferences.” On a Windows PC, click on “Edit” and choose “Preferences.”
- Select Advanced Preferences: Within the Preferences window, click on the “Advanced” tab.
- Ensure the “Keep iTunes Media folder organized” Option is Checked: Check the box next to “Keep iTunes Media folder organized.” This option ensures that iTunes automatically organizes your music files within the iTunes media folder on the external hard drive.
- Ensure the “Copy files to iTunes Media folder when adding to library” Option is Checked: Check the box next to “Copy files to iTunes Media folder when adding to library.” This option ensures that any new music files you add to iTunes will be copied to the iTunes media folder on the external hard drive.
- Click on the “OK” button: Apply the changes and close the Preferences window.
By updating these iTunes library settings, you are ensuring that any future additions or changes to your music library within iTunes will be automatically managed and stored on the external hard drive. This makes it easier to maintain and access your iTunes music collection without any manual intervention.
Now that your iTunes library settings are updated, it’s time to explore how to access your iTunes music from the external hard drive.
Accessing iTunes Music from the External Hard Drive
After transferring your iTunes music library to the external hard drive and updating the necessary settings, you can now easily access your music from the external drive. Here’s how:
- Connect the External Hard Drive: Connect the external hard drive to your computer using the appropriate cable or method.
- Open iTunes: Launch the iTunes application on your computer.
- Go to Preferences: On a Mac, click on the iTunes menu and select “Preferences.” On a Windows PC, click on “Edit” and choose “Preferences.”
- Select Advanced Preferences: Within the Preferences window, click on the “Advanced” tab.
- Note the Current iTunes Media Folder Location: Take note of the current location of your iTunes media folder on the external hard drive.
- Change the iTunes Media Folder Location: If necessary, click on the “Change” button next to the iTunes Media Folder Location option and navigate to the iTunes media folder on the external hard drive.
- Click on the “OK” button: Apply the changes and close the Preferences window.
- Allow iTunes to Update: When you first connect the external hard drive and open iTunes, the software may need some time to update and recognize the new location of your iTunes media folder. Allow iTunes to complete this process.
- Access Your Music: Once iTunes has finished updating, you can access your iTunes music library from the external hard drive. All your albums, playlists, and songs will be available just as they were when stored on your computer’s internal hard drive.
Now, you can enjoy your iTunes music collection directly from the external hard drive. Whether you’re at home or using a different computer, simply connect the drive and open iTunes to access your music. The portable nature of the external hard drive allows you to enjoy your favorite tunes on multiple devices without having to transfer files back and forth.
Next, let’s explore how you can organize and manage your iTunes music library on the external hard drive.
Organizing and Managing iTunes Music on the External Hard Drive
With your iTunes music library now stored on the external hard drive, you have the opportunity to organize and manage your music collection in a way that suits your preferences. Here are some tips for organizing and managing your iTunes music on the external hard drive:
- Create Folders and Subfolders: To keep your music library organized, consider creating folders and subfolders based on genres, artists, albums, or any other categorization that makes sense to you. This will make it easier to navigate through your library and locate specific songs or albums.
- Edit Song Information: If any song information is missing or incorrect, you can edit the metadata within iTunes. Right-click on a song, select “Get Info,” and then modify the artist name, album title, track number, and other relevant information as needed. These changes will be reflected in iTunes and any music players that read the metadata.
- Import New Music: When you acquire new music, it’s important to ensure that it gets added to your iTunes library on the external hard drive. Open iTunes, go to “File,” select “Add Folder to Library,” and navigate to the folder or location where the new music is stored. iTunes will import and organize the new songs in your library.
- Organize Playlists: Create playlists to group together specific songs for different moods, occasions, or preferences. You can create playlists based on genres, artists, decades, or any other criteria you prefer. To create a new playlist, go to the “File” menu, select “New,” and then choose “Playlist.” Name the playlist and add songs to it by dragging and dropping them into the playlist.
- Back Up Your Library Regularly: Since your iTunes library is now stored on the external hard drive, it’s crucial to regularly back up your library to ensure the safety of your music collection. Consider using cloud storage services or making periodic backups to another external hard drive to protect against data loss.
- Synchronize with Multiple Devices: If you have multiple devices, such as smartphones or tablets, you can sync your iTunes library to enjoy your music on those devices as well. Connect your device to your computer, open iTunes, and follow the instructions for syncing your library. With proper synchronization, you can enjoy your iTunes music across all your devices.
By organizing and managing your iTunes music on the external hard drive, you can maintain a well-structured library and easily find and enjoy your favorite songs. Take advantage of the flexibility and versatility that the external hard drive offers, and customize your music collection to suit your personal preferences.
Now that we have explored various aspects of organizing and managing your iTunes music on the external hard drive, let’s delve into the benefits of having your iTunes music on an external hard drive.
Benefits of Having iTunes Music on an External Hard Drive
Moving your iTunes music library to an external hard drive offers several noteworthy benefits. Let’s explore the advantages of having your iTunes music stored on an external hard drive:
- Expanded Storage: By transferring your iTunes music to an external hard drive, you can significantly expand your storage capacity. This allows you to keep a larger music collection without worrying about running out of space on your computer’s internal hard drive.
- Improved Performance: Offloading your iTunes music to an external hard drive can enhance the performance of your computer. It frees up valuable space on your internal hard drive, allowing your operating system and other applications to run smoother and faster.
- Portability: With your iTunes music on an external hard drive, you can easily take your music collection with you wherever you go. Simply connect the external hard drive to a compatible device, and you’ll have instant access to your entire library, making it convenient for travel or sharing your favorite tunes with friends and family.
- Data Backup: Storing your iTunes music on an external hard drive provides an additional layer of data backup. In the event of a computer crash, data loss, or other unforeseen circumstances, your music collection remains secure on the external drive. This ensures that you can quickly recover and restore your iTunes library without any loss of music files.
- Multi-Device Access: Having your iTunes music on an external hard drive allows you to access your library from multiple devices. Whether you’re using a desktop computer, laptop, or even a smart TV, you can easily connect the external hard drive and enjoy your music collection without the need for file transfers or syncing.
- Flexibility and Compatibility: Storing your iTunes music on an external hard drive offers flexibility in terms of device compatibility. You can switch between different operating systems, such as Windows and Mac, without worrying about compatibility issues. The external hard drive acts as a universal storage solution for your music.
- Easy Library Management: With your iTunes music on an external hard drive, you have more control over managing your library. You can easily organize and categorize your music files, create playlists, and make updates without impacting the storage capacity of your computer’s internal hard drive.
These benefits make storing your iTunes music on an external hard drive a practical solution for music enthusiasts. It optimizes storage, improves performance, and provides portability and flexibility in accessing and managing your music collection.
Now that we’ve explored the advantages of having your iTunes music on an external hard drive, let’s conclude our guide to transferring and managing iTunes music on an external hard drive.
Conclusion
Transferring your iTunes music library to an external hard drive can be a game-changer for managing and accessing your music collection. Not only does it provide additional storage space on your computer’s internal hard drive, but it also offers portability, flexibility, and better performance. With the steps outlined in this guide, you can successfully move your iTunes music to an external hard drive and enjoy the benefits it brings.
By preparing your external hard drive, transferring the music, updating iTunes library settings, and accessing your music from the external drive, you can seamlessly enjoy your favorite tunes across multiple devices. Organizing and managing your library becomes easier, and you have the added advantage of data backup and secure storage.
Remember to regularly back up your library and keep it organized for a smooth and enjoyable music experience. Whether you’re a music enthusiast with an extensive collection or simply looking to clear up space on your computer, the use of an external hard drive for your iTunes music offers convenience, accessibility, and peace of mind.
So, take the leap and start transferring your iTunes music to an external hard drive. Enjoy the freedom of having your music collection at your fingertips, ready to be played anytime and anywhere. Embrace the benefits of expanded storage, improved performance, and the ability to easily manage and access your beloved tunes.
With your iTunes music safely stored on an external hard drive, you can sit back, relax, and embark on a musical journey that knows no bounds.