Introduction
Welcome to the world of Amazon Music! With millions of songs at your fingertips, the Amazon Music app is a fantastic platform to enjoy your favorite tunes. Whether you’re a long-time user of the app or just starting out, knowing how to import your music is essential to create a personalized and immersive music library. In this article, we will guide you through the process of importing music to the Amazon Music app, making your listening experience even more enjoyable.
Importing music to the Amazon Music app allows you to access your favorite tracks, albums, and playlists directly from your device. Whether you have a vast collection of songs stored on your computer, in iTunes, or on other music streaming services, Amazon Music makes it easy to bring all your music together in one place.
In this guide, we will explore different methods to import music to the Amazon Music app. We’ll cover how to import music from your computer and iTunes, as well as how to import music from other popular streaming platforms. Additionally, we’ll discuss how to import music from external devices, such as USB drives or external hard drives.
Moreover, we’ll walk you through the process of creating playlists in the Amazon Music app, allowing you to organize your music according to your preferences. We’ll also teach you how to sync your music across devices, ensuring that your favorite songs are readily available wherever you go.
If you encounter any issues during the import process, don’t worry. We’ve got you covered with troubleshooting tips to help you overcome common obstacles, ensuring a smooth and hassle-free music import experience.
So, let’s dive into the world of importing music to the Amazon Music app and unlock the full potential of your music library. Get ready to enjoy an immersive and personalized music experience like never before!
Sign Up for Amazon Music App
To begin importing music to the Amazon Music app, you first need to sign up for an Amazon Music account. If you already have an Amazon account, you can use those credentials to log in. If not, follow these simple steps to create a new account:
- Visit the Amazon Music website or download the Amazon Music app from your preferred app store.
- Click on the “Sign In” or “Create Account” button.
- Fill in the required information, including your name, email address, and a secure password.
- Agree to the terms and conditions, as well as any additional privacy agreements.
- Complete the verification process, which may involve confirming your email address or providing a verification code sent to your mobile device.
- Once your account is set up, sign in to the Amazon Music app using your newly created credentials.
By completing this simple sign-up process, you gain access to the vast music library offered by Amazon Music. You can enjoy unlimited streaming, curated playlists, personalized recommendations, and more.
Remember to keep your Amazon Music account credentials handy, as you will need them to sign in to the app on all your devices. This ensures that you can access your imported music seamlessly across various platforms and enjoy your favorite songs anywhere, anytime.
Now that you’re signed up for Amazon Music, let’s move on to the next step: downloading and installing the Amazon Music app.
Download and Install the Amazon Music App
To import music to the Amazon Music app, you’ll need to have the app installed on your device. Follow these steps to download and install the Amazon Music app:
- Open the app store on your device. This could be the Apple App Store for iOS devices or the Google Play Store for Android devices.
- Search for “Amazon Music” in the app store’s search bar.
- Locate the official Amazon Music app from Amazon Mobile LLC and tap on it.
- Click the “Download” or “Install” button to start the download process.
- Wait for the app to download and install on your device. The time taken may vary depending on your internet connection speed.
- Once the installation is complete, locate the Amazon Music app icon on your device’s home screen and tap on it to launch the app.
Now that you have successfully downloaded and installed the Amazon Music app, you are one step closer to importing your favorite music to the app. The next sections will guide you through different methods of importing music to Amazon Music, catering to various sources like your computer or other music streaming services.
Before we proceed, make sure you have signed in to the Amazon Music app using your account credentials. This will ensure that the imported music is synced with your account and accessible across all devices logged in with the same Amazon Music credentials.
Now, let’s explore how to import music from your computer, starting with the next section.
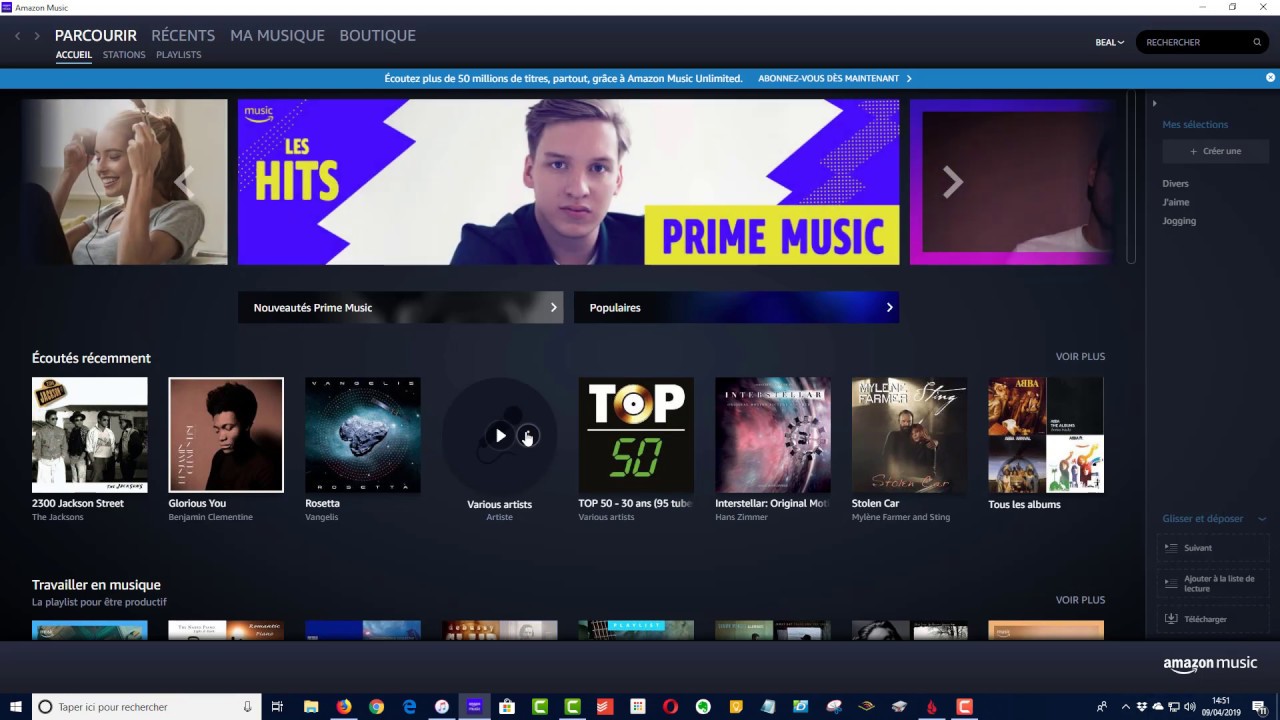
Import Music from Your Computer
If you have a collection of music stored on your computer, you can easily import it to the Amazon Music app. Follow these steps to import music from your computer to the app:
- Open the Amazon Music app on your computer. If you haven’t installed it yet, refer to the previous section on how to download and install the app.
- Once the app is open, click on the “Settings” or “Preferences” option. This is usually represented by a gear icon.
- Select the “Import” or “Upload” tab in the settings menu.
- Click on the “Select Folder” or “Choose Folder” button to browse and select the folder where your music is stored on your computer.
- Wait for the app to scan and import your music. This process may take some time, depending on the size of your music library.
- Once the import process is complete, you will see your imported music in the Amazon Music app’s library.
It’s important to note that only supported file types can be imported to the Amazon Music app. Ensure that your music files are in a compatible format such as MP3, AAC, FLAC, or ALAC. If any of your music files are in an unsupported format, consider converting them to a compatible format using a third-party audio conversion tool before importing.
By importing music from your computer, you can now enjoy your extensive music collection directly through the Amazon Music app. It’s worth mentioning that imported music is available for offline playback, meaning you can listen to your favorite tracks even without an internet connection.
Now that you know how to import music from your computer, let’s move on to the next section, which covers importing music from iTunes.
Import Music from iTunes
If you have your music collection organized in iTunes, you can easily import it to the Amazon Music app. Follow these steps to import music from iTunes:
- Ensure that iTunes is installed and your music library is organized within the application.
- Open the Amazon Music app on your computer. If you haven’t installed it yet, refer to the previous section on how to download and install the app.
- In the Amazon Music app, click on the “Settings” or “Preferences” option.
- Select the “Import” or “Upload” tab in the settings menu.
- Click on the “Import from iTunes” or “Import iTunes Library” button.
- Wait for the app to scan and import your iTunes library. This process may take some time, depending on the size of your library.
- Once the import process is complete, your iTunes music collection will be available within the Amazon Music app’s library.
By importing your music from iTunes, you can seamlessly transition your organized music library to the Amazon Music app. This makes it easier to access and enjoy your favorite tracks, playlists, and albums through the Amazon Music platform.
It’s important to note that importing your iTunes library does not remove the original files from your computer. It only creates a copy within the Amazon Music app. This ensures that you can continue to use iTunes or any other application to manage your music files alongside Amazon Music.
Now that you know how to import music from iTunes, let’s move on to the next section, which covers importing music from other popular streaming services.
Import Music from Other Music Streaming Services
If you are subscribed to other music streaming services and want to bring your favorite tracks and playlists to the Amazon Music app, you’re in luck! Follow these steps to import music from other popular streaming services:
- Open the Amazon Music app on your computer or mobile device. If you haven’t installed it yet, refer to the previous section on how to download and install the app.
- In the Amazon Music app, click on the “Settings” or “Preferences” option.
- Select the “Import” or “Upload” tab in the settings menu.
- Look for the option to “Import from Other Music Streaming Services” or a similar label.
- Click on this option and select the streaming service from which you want to import your music.
- Follow the on-screen instructions to authorize the connection between the Amazon Music app and the selected streaming service.
- Once the connection is established, the app will begin importing your music, playlists, and other media from the selected streaming service.
- Wait for the import process to complete. The time taken may vary depending on the amount of music you have in the selected service.
- Once the import process is finished, you will find your imported music from the selected streaming service in the Amazon Music app’s library.
By importing music from other streaming services, you can consolidate your entire music library into one convenient location, making it easier to access and enjoy your favorite songs across different platforms.
It’s important to note that not all streaming services may be supported for direct importing. Make sure to check the compatibility of your desired streaming service with the Amazon Music app before attempting to import your music.
Now that you know how to import music from other music streaming services, let’s move on to the next section, which covers importing music from external devices.
Import Music from External Devices
If you have music stored on external devices like USB drives, external hard drives, or SD cards, you can easily import it to the Amazon Music app. Follow these steps to import music from external devices:
- Connect your external device, such as a USB drive or external hard drive, to your computer.
- Open the Amazon Music app on your computer. If you haven’t installed it yet, refer to the previous section on how to download and install the app.
- In the Amazon Music app, click on the “Settings” or “Preferences” option.
- Select the “Import” or “Upload” tab in the settings menu.
- Look for the option to “Import from External Device” or a similar label.
- Click on this option and select your connected external device from the list.
- Choose the specific folders or files you want to import from the external device.
- Click the “Import” or “Upload” button to begin the import process.
- Wait for the app to scan and import your selected music from the external device. The time taken may vary depending on the size of your music collection.
- Once the import process is complete, you’ll find your imported music from the external device in the Amazon Music app’s library.
By importing music from external devices, you can easily access and enjoy your music collection through the Amazon Music app, eliminating the need to carry multiple devices or swap out storage media.
It’s important to note that only supported music file types, such as MP3, AAC, FLAC, or ALAC, can be imported to the Amazon Music app. Ensure that your music files are in a compatible format before attempting the import process.
Now that you know how to import music from external devices, let’s move on to the next section, which covers creating playlists in the Amazon Music app.
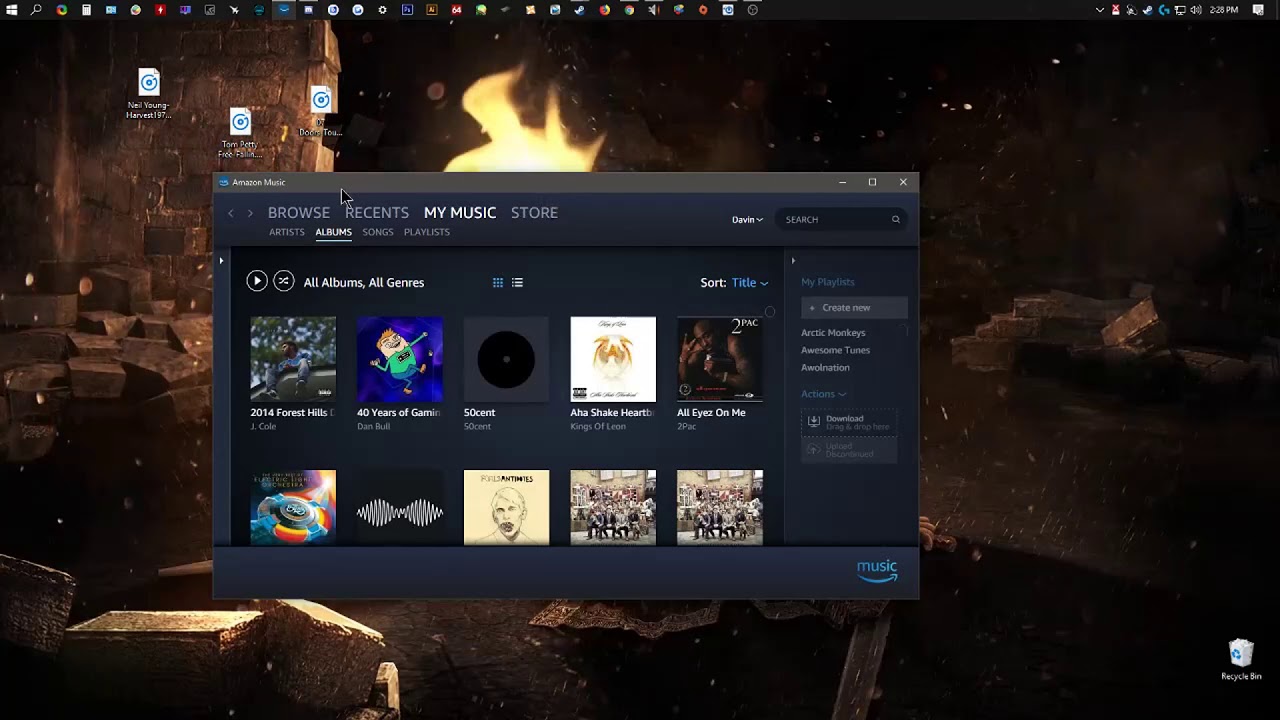
Create Playlists in Amazon Music App
One of the great features of the Amazon Music app is the ability to create custom playlists. Playlists allow you to curate a collection of your favorite songs and organize them based on your preferences. Follow these steps to create playlists in the Amazon Music app:
- Open the Amazon Music app on your computer or mobile device.
- Navigate to the “Library” or “My Music” section of the app.
- Click on the “Create Playlist” or “New Playlist” button, usually represented by a plus (+) icon.
- Give your playlist a name that represents the theme or mood you want to capture.
- Start adding songs to your playlist by browsing your library or searching for specific songs, albums, or artists.
- Click on the “+” or “Add” button next to a song to include it in your playlist.
- Continue adding songs until you have a well-curated collection.
- Optionally, you can rearrange the songs within the playlist by dragging and dropping them in your preferred order.
- Once your playlist is complete, save it by clicking the “Save” or “Done” button.
Creating playlists allows you to tailor your music listening experience according to your mood, activities, or specific genres. You can create playlists for working out, road trips, relaxing, or any other occasion.
Furthermore, you can share your playlists with friends and family who also use Amazon Music. This adds an element of collaboration and discovery to your music experience, as you can exchange and explore new songs and artists through shared playlists.
Now that you know how to create playlists in the Amazon Music app, let’s move on to the next section, which covers syncing music across devices.
Sync Music Across Devices
Syncing your music across devices ensures that your imported music and playlists are accessible and up to date on all your devices. Amazon Music provides seamless syncing capabilities, allowing you to enjoy your favorite tunes across multiple platforms. Follow these steps to sync music across devices:
- Ensure that you are signed in to the Amazon Music app on all the devices you want to sync.
- Connect your devices to the internet.
- Open the Amazon Music app on each device.
- Make sure you are signed in using the same Amazon Music account credentials on all devices.
- Existing music and playlists that you have imported or created should automatically sync and appear on each device.
- If you make any changes to your music library or playlists on one device, such as adding new songs to a playlist or creating new playlists, these changes will be synced and reflected on all your other devices.
- The syncing process may take a few moments, especially if you have made extensive changes to your music library. Patience is key as the app ensures that your music is up to date.
With music syncing enabled, you can seamlessly switch between devices and enjoy a consistent music experience. Whether you’re at home, on the go, or switching between your computer and mobile devices, your music library and playlists will always be in sync.
It’s important to note that syncing relies on an active internet connection. Make sure your devices are connected to the internet for the syncing process to occur. Additionally, give the app some time to sync all the changes before expecting them to appear on other devices.
Now that you know how to sync music across devices, let’s move on to the next section, which provides troubleshooting tips in case you encounter any issues during the import process.
Troubleshooting Tips
While importing music to the Amazon Music app is usually a straightforward process, you may occasionally encounter some issues. Here are a few troubleshooting tips to help you resolve any potential problems:
- Ensure your music files are in the correct format: Make sure your music files are in a supported format such as MP3, AAC, FLAC, or ALAC. If you are trying to import files in an unsupported format, consider converting them using an audio conversion tool.
- Check your internet connection: A stable internet connection is crucial for the import process. Ensure that you have a reliable internet connection to avoid any disruptions or errors during the import process.
- Clear app cache: If you encounter any issues with the app, such as songs not appearing or playlists not syncing, try clearing the app’s cache. This can help resolve any temporary data or cache-related issues that may be affecting the app’s functionality.
- Update the app: Make sure you are using the latest version of the Amazon Music app. Updates often include bug fixes and performance improvements that can help resolve any import or syncing issues.
- Restart the app or device: Sometimes, simply restarting the app or device can resolve temporary glitches or conflicts that may be preventing a successful import. Try closing the app or restarting your device and then relaunching the app.
- Double-check account credentials: Ensure that you are using the correct Amazon Music account credentials to sign in to the app on all your devices. If you have multiple accounts, make sure you are using the correct one to access your imported music.
- Contact customer support: If you have tried the above troubleshooting tips and are still experiencing issues, don’t hesitate to reach out to Amazon Music customer support. They can provide further assistance and help resolve any specific issues you may be facing.
By following these troubleshooting tips, you can overcome common issues and ensure a smooth import and syncing process on the Amazon Music app. Remember, the goal is to enjoy your music hassle-free, and with a little troubleshooting, you can get back to grooving to your favorite tunes in no time!
Now that you’re armed with these troubleshooting tips, you’re all set to import and enjoy your music library in the Amazon Music app.
Conclusion
Congratulations! You’ve learned how to import your music to the Amazon Music app, allowing you to enjoy your favorite tracks, albums, and playlists within a single, convenient platform. Whether you imported music from your computer, iTunes, other music streaming services, or external devices, you now have a unified music library at your fingertips.
By signing up for an Amazon Music account, downloading and installing the app, and following the step-by-step instructions for importing music, you have taken the first steps towards creating a personalized and immersive music experience.
Additionally, you discovered how to create your own playlists, sync your music across devices, and troubleshoot common issues that may arise during the import process. With these skills and knowledge, you’ll be able to curate a collection of music that suits your mood, activities, and preferences, and enjoy it seamlessly across all your devices.
The world of music awaits you on the Amazon Music app. Explore millions of songs, discover new artists, and create a soundtrack for every moment of your life. Whether you’re at home, commuting, or on a road trip, your music library is just a tap away.
So, what are you waiting for? Start importing your music to the Amazon Music app and embark on a musical journey like no other. Experience the joy of having your entire music collection in one place, always accessible and ready to accompany you wherever you go.
Happy listening!