Introduction
In today’s digital age, music streaming services have become incredibly popular, allowing music lovers to access their favorite songs and artists with just a few clicks. Amazon Music is one such platform that offers a vast library of music for users to enjoy. While Amazon Music offers an extensive collection of songs, it also provides users with the option to upload their own music to the platform.
Why would you want to upload your music to Amazon Music? Well, there are several reasons. Firstly, uploading your music allows you to access your favorite songs and albums across multiple devices, enabling you to listen to your personalized collection wherever you go. Secondly, uploading your music to Amazon Music gives you the convenience of having all your music in one place, eliminating the need to switch between different music apps.
In this article, we will guide you through the process of uploading your music to Amazon Music, ensuring that you can enjoy your personal music collection alongside the vast library offered by the platform. Whether you have your music stored on your computer or an external device, we have you covered with step-by-step instructions on how to upload your music to Amazon Music.
So, if you’re ready to embark on a musical journey with your own personalized music collection on Amazon Music, let’s dive into the steps required to upload your music and start enjoying your favorite tunes.
Step 1: Sign Up for an Amazon Music Account
Before you can start uploading your music to Amazon Music, you’ll need to create an account. If you already have an Amazon account, you can use those credentials to sign in to Amazon Music. If not, follow these steps to sign up:
- Visit the Amazon Music website or download the Amazon Music app on your mobile device.
- Click on the “Sign in” or “Create Account” button.
- If you don’t have an Amazon account, click on “Create your Amazon account” and fill in the required information, including your name, email address, and password. If you have an Amazon account, simply sign in using your existing credentials.
- Review the terms of use and privacy policy, then click on “Create your Amazon account” to proceed.
- Complete the account verification process, which may involve entering a verification code sent to your email or phone number.
- Congratulations! You now have an Amazon Music account and are ready to proceed with uploading your music.
It’s important to note that Amazon Music offers both free and premium subscription options. The free version allows you to access and upload music, but with limitations. The premium subscription, known as Amazon Music Unlimited, provides an ad-free experience and additional benefits, including unlimited access to millions of songs. You may choose to upgrade to the premium version for a more enhanced music streaming experience.
Now that you have successfully signed up for an Amazon Music account, let’s move on to the next step: downloading and installing the Amazon Music app.
Step 2: Download and Install Amazon Music App
In order to upload your music to Amazon Music, you need to have the Amazon Music app installed on your device. Follow these steps to download and install the app:
- Open the app store on your device. If you’re using an Android device, open the Google Play Store. If you’re using an iOS device, open the App Store.
- Search for “Amazon Music” in the app store’s search bar.
- Locate the official Amazon Music app from the search results and tap on it.
- Tap on the “Install” or “Get” button to begin the download and installation process. You may be prompted to enter your device’s password or use biometric authentication.
- Wait for the app to download and install on your device. The time it takes will depend on your internet connection speed.
- Once the installation is complete, you will see the Amazon Music app icon on your device’s home screen.
Alternatively, if you prefer to use Amazon Music on your computer, you can access it through your web browser. Simply visit the Amazon Music website and sign in using your Amazon account credentials.
Having the Amazon Music app installed on your device or accessing it through your web browser will provide you with the necessary platform to upload and enjoy your music collection. Now that you have installed the app, it’s time to move on to the next step: opening the Amazon Music app.
Step 3: Open Amazon Music App
Now that you have downloaded and installed the Amazon Music app on your device, it’s time to open it and get started with uploading your music. Follow these simple steps to open the Amazon Music app:
- Locate the Amazon Music app icon on your device’s home screen or app drawer. It is represented by a white icon with a blue music note.
- Tap on the app icon to open it. The Amazon Music app will launch, and you will see the login screen.
- If you are not already logged in, enter your Amazon account credentials (email address and password) to sign in. If you are already logged in, you will be directly taken to the app’s main interface.
Once you have successfully logged in to the Amazon Music app, you will have access to various features and options, including the ability to upload your own music. The main interface of the app will display the latest releases, featured playlists, and your personalized recommendations based on your music preferences.
It’s worth exploring the app’s interface and familiarizing yourself with its layout and navigation. This will help you navigate through the app more efficiently and make the most out of your music streaming experience.
Now that you have the Amazon Music app open and are logged in to your account, you are ready to proceed to the next step: accessing the “My Music” library where you can upload your music files.
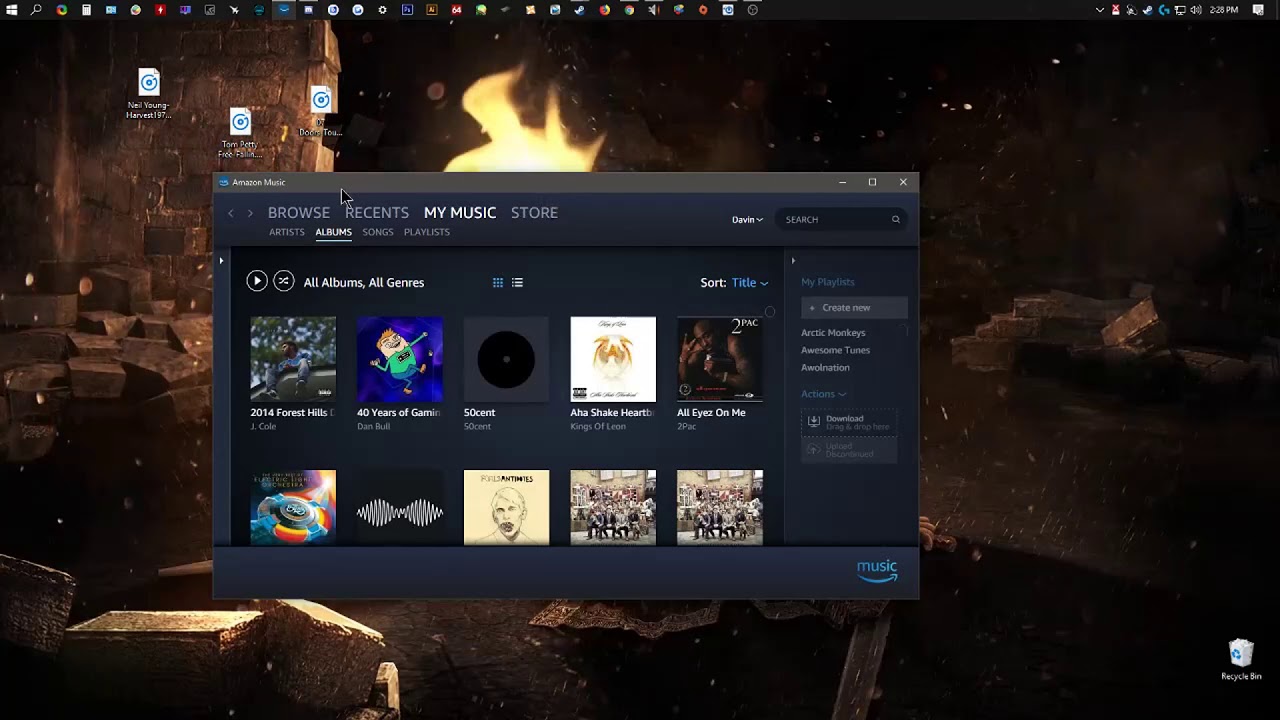
Step 4: Go to “My Music” Library
Once you have opened the Amazon Music app and logged in to your account, you need to navigate to the “My Music” library section where you can manage and upload your music files. Follow these steps to access the “My Music” library:
- On the app’s main interface, look for the “My Music” tab or option. It is usually located at the bottom navigation menu or on the sidebar.
- Tap on the “My Music” tab to access your personal music library.
Upon entering the “My Music” library, you will have access to various features and sections, including playlists, artists, albums, and songs. This is where you can organize and manage your music collection.
It’s important to note that if you haven’t uploaded any music yet, your library will be empty. Don’t worry, we will walk you through the process of uploading your music in the upcoming steps.
Once you are in the “My Music” library, you are ready to move on to the next step: clicking on the “Upload your music” option, which will allow you to start the process of uploading your own music files.
Step 5: Click on “Upload your music”
After accessing the “My Music” library in the Amazon Music app, the next step is to locate and click on the “Upload your music” option. This will initiate the process of uploading your own music files to Amazon Music. Follow these simple steps:
- Within the “My Music” library, look for the “Options” or “Settings” icon, typically represented by three vertical dots or lines. It is usually located at the top right corner of the screen.
- Tap on the “Options” or “Settings” icon to open the menu.
- From the menu options, select and click on the “Upload your music” option. This will navigate you to the upload interface.
By clicking on “Upload your music,” you are now ready to select and upload your music files to Amazon Music.
Please note that if you have already uploaded music to your account, you may see the option to “Manage your music” instead of “Upload your music.” This option allows you to view and make changes to your uploaded music, including adding or removing songs, editing metadata, and more.
Now that you have successfully clicked on “Upload your music” and are in the upload interface, it’s time to move on to the next step: selecting the music files you want to upload.
Step 6: Select Music Files to Upload
With the upload interface open in the Amazon Music app, you can now proceed to select and upload your music files. Follow these steps to select the music files you want to upload:
- In the upload interface, you will see a button that says “Select files” or “Choose files.” Tap on this button.
- A file manager or explorer will open, allowing you to navigate through the files on your device.
- Navigate to the location where your music files are stored. You can select individual files or entire folders by tapping on them.
- Once you have selected the music files you want to upload, tap on the “Open” or “Choose” button to confirm your selection.
Amazon Music supports a variety of music file formats, including MP3, AAC, FLAC, and more. You can upload up to 250,000 songs to your Amazon Music account, providing you with ample space to store and access your personal music collection.
It’s worth noting that the time it takes to upload your music files will depend on the size of the files and your internet connection speed. Larger files and slower internet connections may result in a longer upload duration.
Once you have selected your music files and confirmed your selection, you are ready to move on to the next step: customizing the music metadata before starting the upload process.
Step 7: Customize Music Metadata
After selecting the music files to upload in the Amazon Music app, the next step is to customize the music metadata before initiating the upload process. This allows you to add essential details such as song titles, artists, albums, genres, and more. Follow these steps to customize the music metadata:
- In the upload interface, you will see a list of the selected music files along with their basic information.
- Review the information for each file and make any necessary changes or additions. You can edit the song title, artist name, album name, track number, genre, and other relevant metadata fields.
- To edit a specific music file’s metadata, click on the “Edit” or “Edit info” button next to the file. This will open a text field where you can make changes.
- Once you have made the necessary edits, click on the “Save” or “Apply” button to save the changes.
- Repeat the above steps for each music file you have selected to upload, ensuring that the metadata is accurate and reflects the correct information for each song.
Customizing the music metadata is important as it helps you organize and identify your music files more effectively within your Amazon Music library. It also improves the overall user experience when searching and browsing through your uploaded music collection.
Once you have reviewed and customized the music metadata, you are now ready to proceed to the next step: starting the upload process to upload your music files to Amazon Music.
Step 8: Start the Upload Process
After customizing the music metadata for your selected files in the Amazon Music app, it’s time to start the upload process. This will initiate the transfer of your music files from your device to your Amazon Music account. Follow these steps to begin the upload process:
- In the upload interface, review the music files and their metadata to ensure everything is accurate and as desired.
- Once you are satisfied with the selected files and metadata, look for the “Start upload” or “Begin upload” button. This button is usually located at the bottom or top of the upload interface.
- Tap on the “Start upload” or “Begin upload” button to initiate the upload process.
The upload process will now begin, and the progress will be displayed on the screen. You may also see an estimated time remaining for the upload to complete, depending on the size and number of files being uploaded.
During the upload process, it’s important to ensure that your device is connected to a stable and reliable internet connection. Interruptions in the internet connection could result in delays or disruptions in the upload process.
It’s worth noting that the duration of the upload process will depend on various factors, including the size of the files, your internet connection speed, and the number of files being uploaded. Larger files and slower internet connections may result in a longer upload duration.
Once the upload process is complete, you can move on to the next step: monitoring the upload progress and ensuring that all your music files have been successfully uploaded to Amazon Music.
Step 9: Monitor the Upload Progress
After initiating the upload process of your music files to Amazon Music, it’s important to monitor the progress to ensure that the transfer is completed successfully. Follow these steps to monitor the upload progress:
- In the Amazon Music app, navigate back to the “My Music” library where you initiated the upload process.
- Look for an upload progress bar, upload status, or a similar indicator to track the progress of the upload.
- Depending on the number and size of the files being uploaded, there may be a percentage or a progress bar indicating the completion status.
- While the upload is in progress, avoid closing the app or interrupting the internet connection to ensure a smooth transfer of your music files.
During the upload process, it’s normal for the progress to take some time, especially for larger music files. The duration of the upload process will vary depending on factors such as file size, internet connection speed, and the number of files being uploaded.
If you encounter any issues during the upload process, such as interruptions or errors, you may need to troubleshoot or retry the upload. Ensure that your internet connection is stable and try restarting the app or your device if necessary.
Once the upload progress reaches 100% or is marked as complete, you can proceed to the next step: accessing your uploaded music in the Amazon Music app.
Step 10: Access Your Uploaded Music on Amazon Music
Now that you have successfully uploaded your music files to Amazon Music, it’s time to access and enjoy your personalized collection. Follow these steps to access your uploaded music in the Amazon Music app:
- In the Amazon Music app, navigate to the “My Music” library.
- You will now see your uploaded music files displayed alongside the other sections such as playlists, artists, albums, and songs.
- To browse through your uploaded music, you can tap on specific albums, artists, or songs to play them.
- Utilize the search bar in the app to search for specific songs or artists within your uploaded music library.
- Depending on your preferences, you can create playlists, add songs to your favorites, or organize your music library using the available features and options within the app.
By accessing your uploaded music on Amazon Music, you can enjoy your personalized collection alongside the vast library of songs offered by the platform. This allows you to have all your favorite tunes in one place, making it easy to listen to your preferred tracks anytime, anywhere.
It’s important to note that the availability of your uploaded music may vary depending on your subscription type. With a free Amazon Music account, you may have limitations on the number of times you can listen to your uploaded songs. Consider upgrading to the premium subscription, Amazon Music Unlimited, for unlimited access to your uploaded music and the entire Amazon Music library.
Congratulations! You have successfully uploaded and accessed your music on Amazon Music. Now you can enjoy your favorite songs and curated playlists wherever you go.
Conclusion
Uploading your music to Amazon Music opens up a world of possibilities, allowing you to enjoy your personalized collection alongside the vast library of songs available on the platform. In this article, we have walked you through the step-by-step process of uploading your music to Amazon Music, ensuring that you can easily access and listen to your favorite tunes.
From signing up for an Amazon Music account to downloading the app, navigating to the “My Music” library, selecting and customizing your music files, and monitoring the upload process, each step has been carefully outlined to help you successfully upload your music. By following these steps, you can ensure that your music collection is organized, accessible, and ready for your listening pleasure.
Remember, Amazon Music offers both free and premium subscription options, so consider upgrading to Amazon Music Unlimited for an enhanced music streaming experience with unlimited access to millions of songs.
Now that you know how to upload your music to Amazon Music, it’s time to start enjoying your personalized collection alongside the vast library of songs available on the platform. Sit back, relax, and dive into your favorite tunes, knowing that your music is always just a few clicks away.