Finding the Right Location
Choosing the perfect location to mount your projector is essential for achieving optimal viewing experience. Here are some key considerations to keep in mind when finding the right spot:
1. Distance from the Screen: Determine the ideal distance between the projector and the screen. Consider the throw ratio of your projector and the size of the screen to ensure proper image size and clarity. Take into account factors such as screen resolution and native aspect ratio to maximize picture quality.
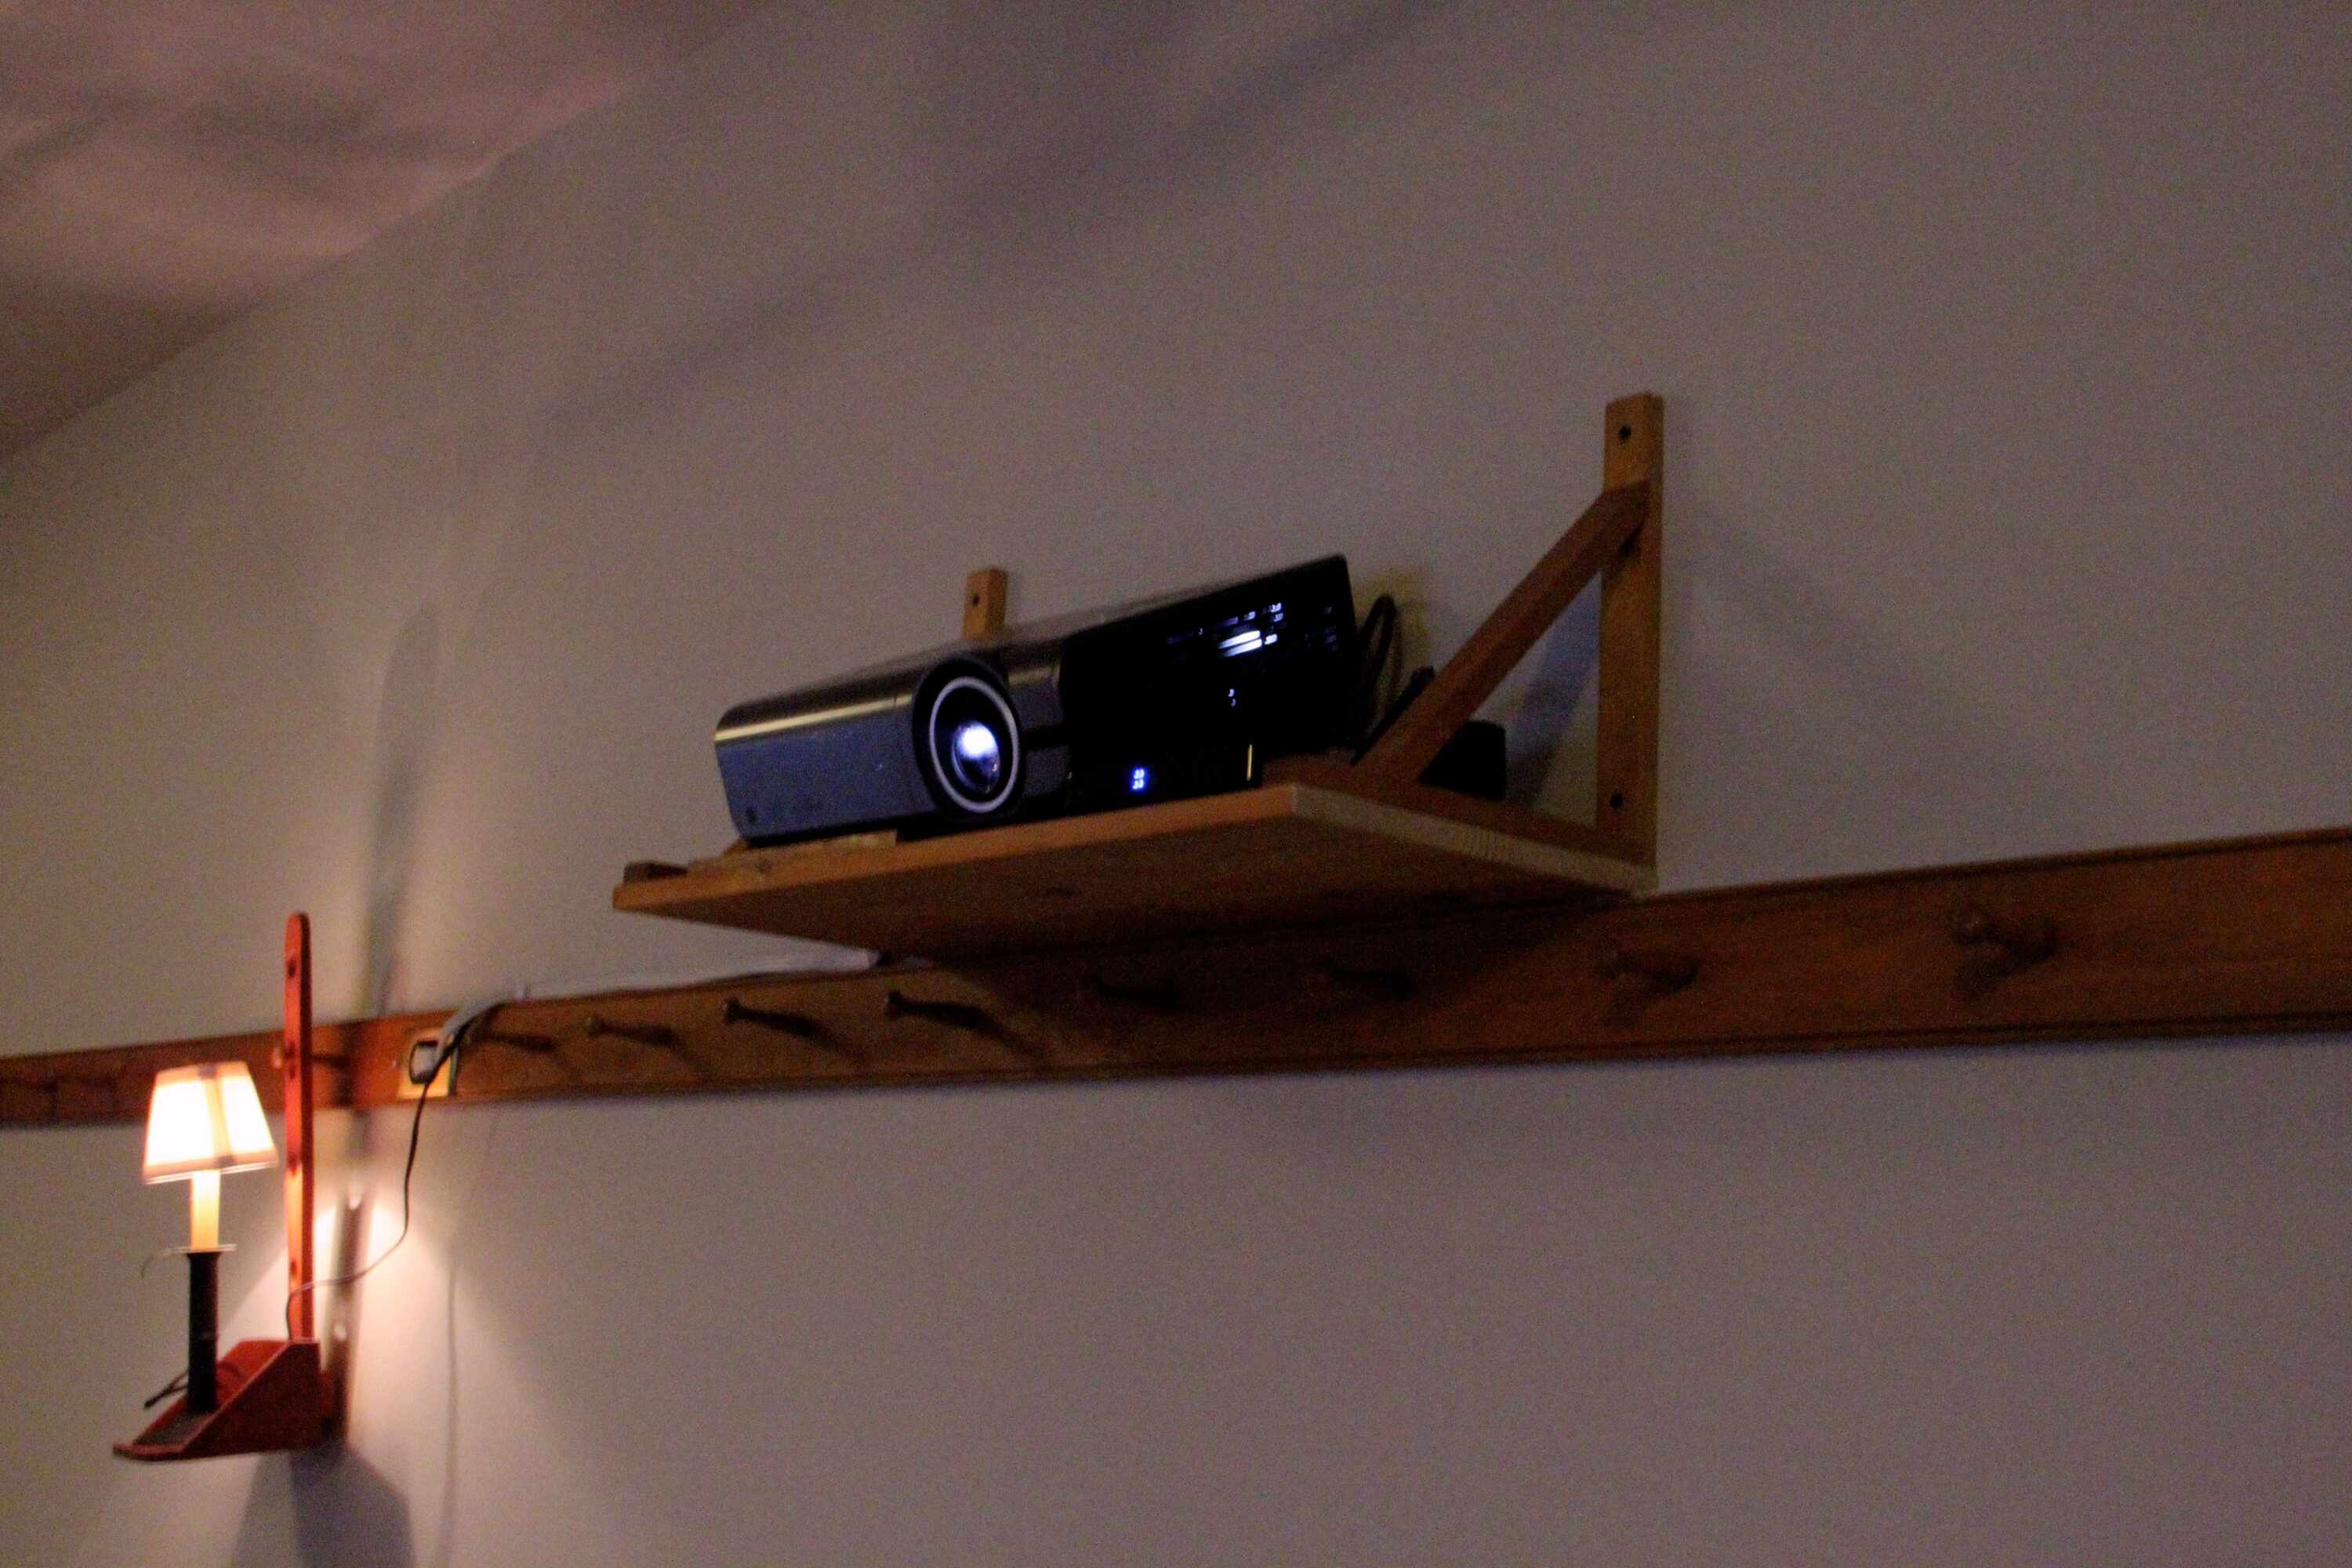
2. Ceiling or Wall: Decide whether you want to mount the projector on the ceiling or the wall. Ceiling mounting provides a clean and unobtrusive setup, while wall mounting may be more suitable for smaller spaces or rooms with low ceilings.
3. Line of Sight: Make sure there is a clear line of sight between the projector and the screen. Avoid any obstructions, such as light fixtures or furniture, that could hinder the projected image and cause shadows or distortions.
4. Ambient Light: Consider the level of ambient light in the room. If the room tends to be brightly lit, opt for a projector with higher brightness levels or choose a location that can be easily dimmed to enhance image quality and contrast.
5. Power and Connectivity: Ensure that the chosen location has convenient access to power outlets and connectivity options. This will make it easier to connect the projector to other devices, such as media players or gaming consoles.
6. Room Layout: Take into account the layout of the room to determine the best viewing angle for all occupants. Consider seating arrangements and sightlines to ensure that everyone can enjoy a clear and comfortable view of the projected content.
By carefully considering these factors, you can find the ideal location to mount your projector and create a captivating and immersive viewing experience.
Marking the Mounting Point
Once you’ve found the perfect location for your projector, the next step is to mark the mounting point. Follow these steps to accurately mark the spot:
1. Use a Measuring Tape: Measure the distance between the projector and the screen to determine the exact placement of the mounting point. Take accurate measurements to ensure that the projected image falls within the desired range.
2. Locate Wall Studs: Use a stud finder to locate the wall studs in the chosen area. Mounting your projector directly into the studs will provide the necessary stability and support for the weight of the device.
3. Use a Level: Place a level vertically against the wall to ensure that the mounting point is straight. Adjust the positioning as needed to maintain a level surface for mounting.
4. Mark the Spot: Once you’ve determined the precise location, mark the mounting point on the wall with a pencil or marker. Use a measuring tape or ruler to ensure that the distance from the screen and the height from the floor are both accurate.
5. Double-Check the Alignment: Before proceeding further, double-check the alignment of the marked spot with the projector’s position. Make any necessary adjustments to ensure that the projected image will be properly aligned with the screen.
6. Consider Cable Management: Along with marking the mounting point, take a moment to consider cable management. Plan how you will run the necessary cables from the projector to your audiovisual equipment to minimize clutter and maintain a clean setup.
By carefully marking the mounting point, you can ensure that your projector is installed in the desired location with precision and accuracy. This will result in a seamless and visually appealing installation that enhances your overall viewing experience.
Attaching the Mounting Plate
Once you have marked the mounting point for your projector, the next step is to attach the mounting plate. Follow these steps to securely install the mounting plate:
1. Gather the Necessary Tools: Before beginning the installation, gather all the necessary tools, including a screwdriver, screws, and any provided mounting hardware.
2. Position the Mounting Plate: Align the mounting plate with the marked mounting point on the wall. Ensure that it is level and centered according to your measurements.
3. Mark the Screw Holes: Use a pencil or marker to mark the screw holes on the wall through the pre-drilled holes of the mounting plate. This will guide you during the screwing process.
4. Drill Pilot Holes: Using an appropriate-sized drill bit, carefully drill pilot holes into the marked screw holes. Pilot holes ensure that the screws will go in smoothly and help prevent any damage to the wall.
5. Attach the Mounting Plate: Position the mounting plate over the pilot holes and insert screws into each hole. Begin by tightening them lightly and gradually increase the pressure to securely fasten the mounting plate to the wall.
6. Double-Check Stability: Once the mounting plate is attached, double-check its stability by gently shaking it. Make sure it is firmly fixed to the wall and can support the weight of the projector.
7. Follow Manufacturer Instructions: Refer to the manufacturer’s instructions for any additional steps or specific guidelines on attaching the mounting plate. Each projector model may have slightly different installation requirements.
By carefully following these steps, you can attach the mounting plate securely to the wall, ensuring a stable foundation for mounting your projector. This step is crucial in maintaining the safety and stability of your projector installation.
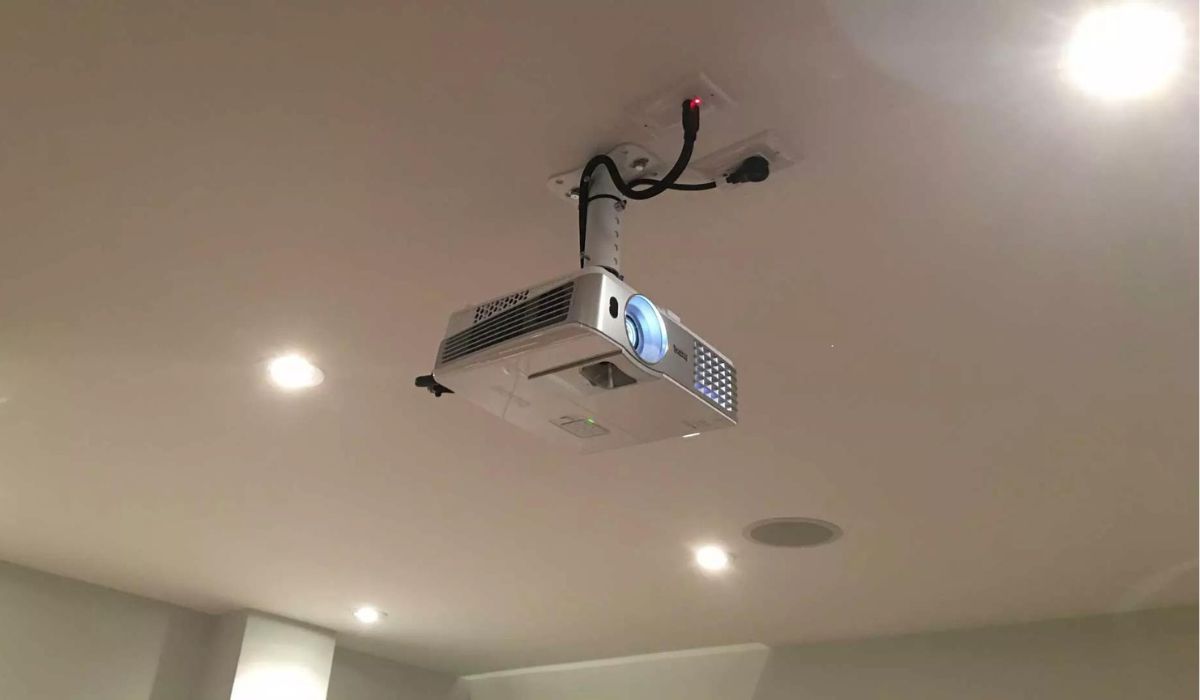
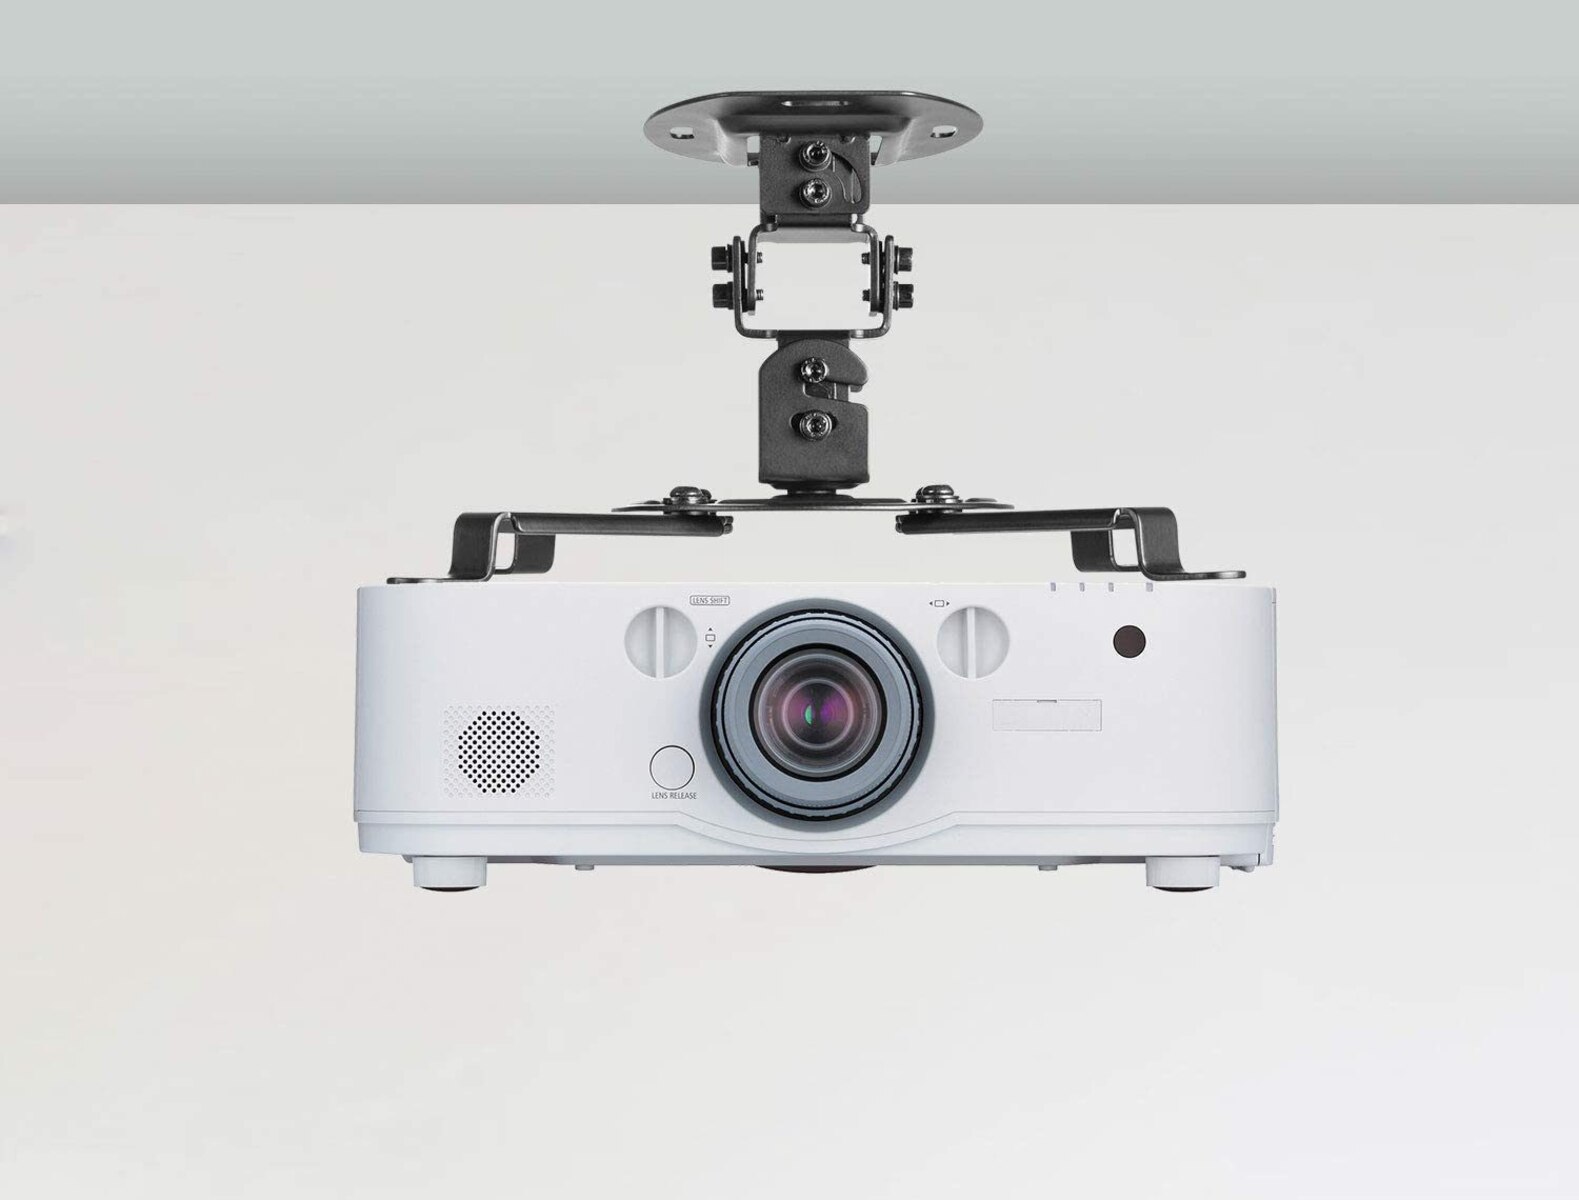
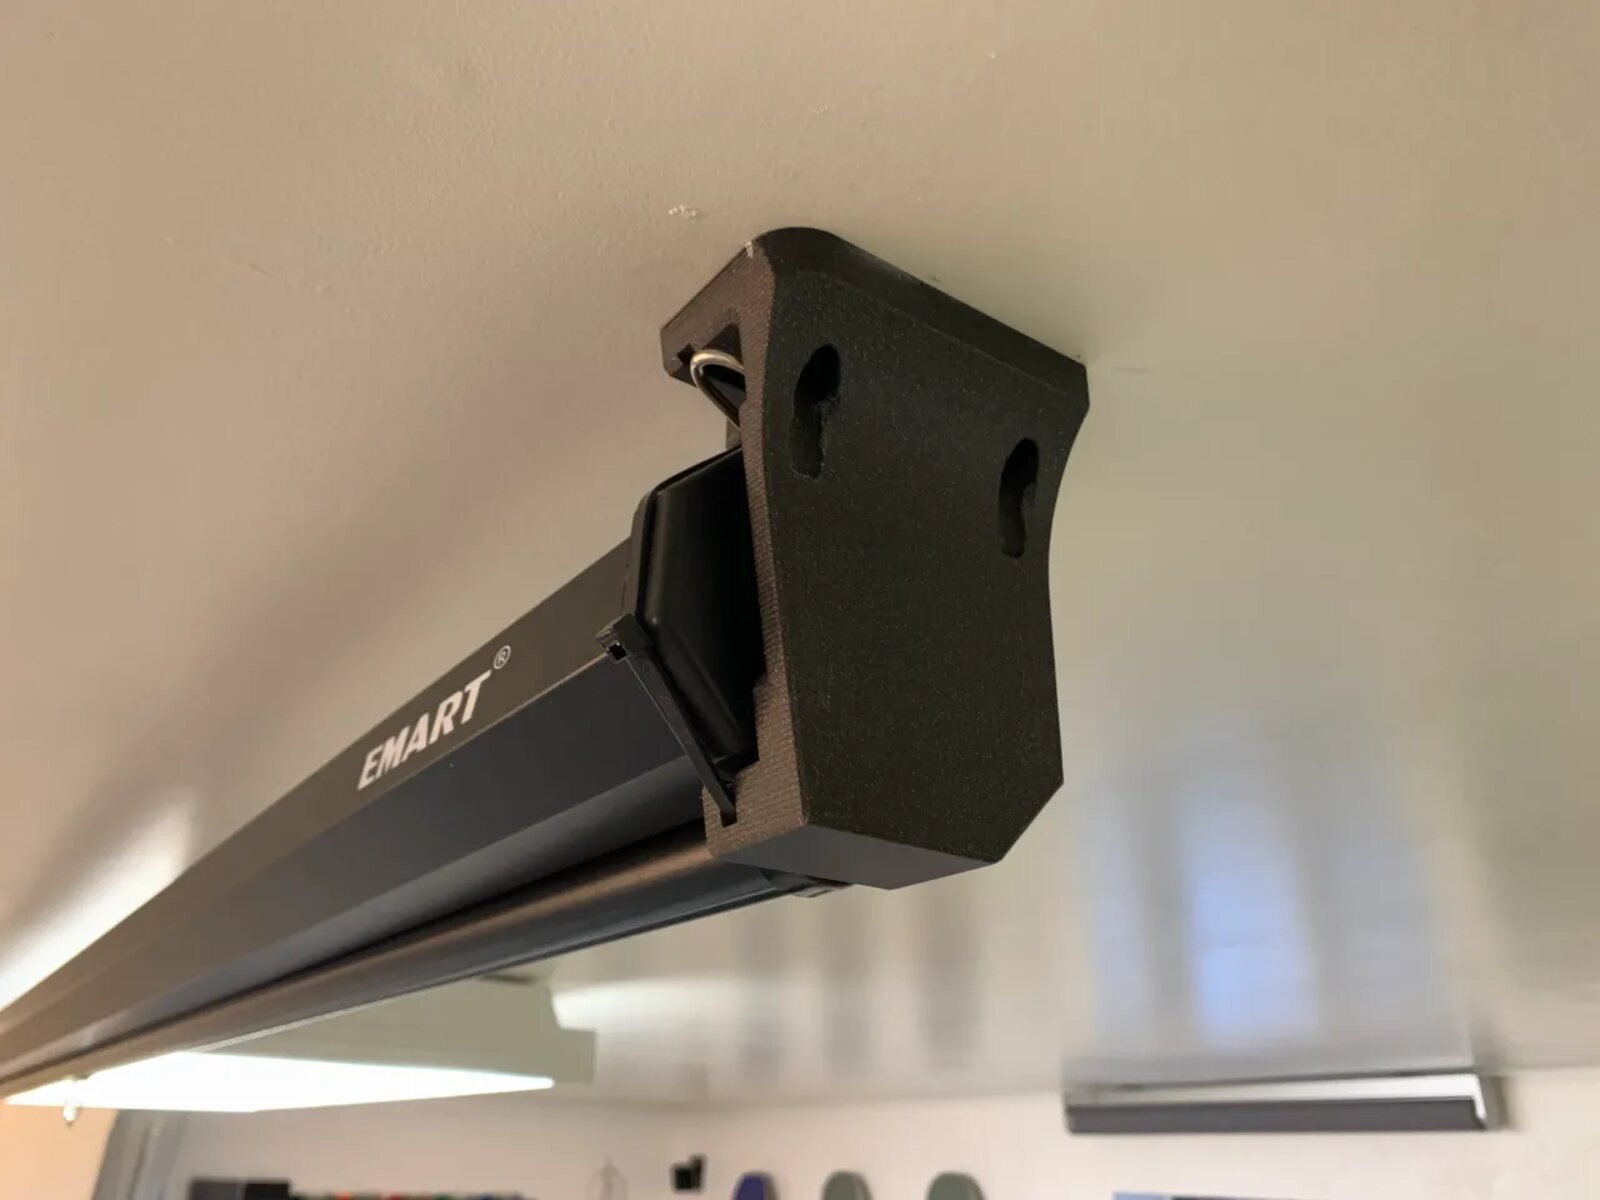
Mounting the Projector Bracket
Now that the mounting plate is securely attached to the wall, it’s time to mount the projector bracket. Follow these steps to properly install the projector bracket:
1. Prepare the Projector: Before mounting the bracket, make sure your projector is turned off and disconnected from any power source. Remove any cables or accessories that may obstruct the mounting process.
2. Attach the Bracket: Place the projector bracket over the mounting plate, aligning the mounting holes on the bracket with the corresponding holes on the plate. Insert the provided screws into the holes and tighten them to secure the bracket in place.
3. Adjust the Tilt and Swivel: Most projector brackets allow for tilt and swivel adjustments to help you achieve the desired projection angle. Follow the instructions provided with the bracket to adjust these settings as needed.
4. Verify Alignment: Once the bracket is attached and adjusted, verify that the projector is properly aligned with the screen. Make any necessary adjustments to ensure that the projected image is centered and level with the screen.
5. Secure the Projector: Once the alignment is confirmed, use the provided security screws or other locking mechanisms to secure the projector to the bracket. This will prevent the projector from accidentally detaching or shifting during use.
6. Double-Check Stability: After securing the projector, give it a gentle shake to ensure that it is securely mounted on the bracket. Verify that it remains stable and doesn’t wobble or move excessively.
7. Test the Projector: Connect the necessary cables to the projector, including power and signal cables. Power on the projector and test the image projection to ensure that everything is functioning correctly.
By following these steps, you can confidently mount your projector onto the bracket, allowing for a secure and adjustable installation. This ensures that your projector is properly positioned for optimal viewing and performance.
Connecting the Cables
Now that your projector is securely mounted, it’s time to connect the necessary cables for power and signal transmission. Follow these steps to properly connect the cables:
1. Power Cable: Locate the power input on your projector and plug one end of the power cable into the projector. Ensure that the other end of the cable is connected to a nearby power outlet or an extension cord that can handle the power requirements of the projector.
2. Signal Source: Determine the type of signal source you will be using to connect your projector. This could be an HDMI cable, VGA cable, or any other compatible connector based on the available ports on your projector and device.
3. Connect the Signal Cable: Insert one end of the signal cable into the appropriate port on your projector. Take note of the labeling on the ports to ensure correct connection. Connect the other end of the cable to the corresponding output port on your signal source device, such as a laptop or DVD player.
4. Audio Connection: If your projector has built-in speakers or if you plan to connect external speakers, check if there is an audio input port on your projector. Connect the audio cable from the audio output port of your signal source to the audio input port of the projector. Alternatively, you can use a separate audio cable to connect the signal source directly to your speakers.
5. Other Connections: Depending on your specific setup, you may need to connect additional cables such as USB, Ethernet, or component video cables. Refer to the instructions provided with your projector and signal source devices to determine the necessary cable connections.
6. Organize the Cables: Once all the necessary cables are connected, take a moment to organize them for a clean and clutter-free setup. Use cable ties or cable management solutions to neatly secure and bundle the cables together, preventing tangling and tripping hazards.
7. Test the Connections: Power on the projector and signal source device. Verify that the projector displays the desired content and that the audio is properly transmitted if applicable. Make any necessary adjustments to the settings or cable connections to ensure optimal performance.
By carefully connecting the cables, you can ensure that your projector receives the necessary power and signal to deliver a high-quality and seamless audiovisual experience. Take the time to organize the cables for a neat and professional setup that enhances the overall aesthetics of your projector installation.
Adjusting the Projector Position
Once the projector is connected and powered on, it’s time to adjust its position to achieve the optimal projection quality. Follow these steps to accurately adjust the projector position:
1. Keystone Correction: Many projectors have a keystone correction feature that allows you to adjust the image shape and correct any distortion caused by the projector being angled. Use the keystone correction controls, either manual or digital, to ensure a rectangular and proportionate image.
2. Zoom and Focus: Adjust the zoom and focus settings to achieve the desired image size and sharpness. Turn the zoom ring or use the zoom controls on the projector to adjust the image size. Then, use the focus ring to fine-tune the image clarity. Ensure that the projected image is crisp and well-defined.
3. Image Shift and Lens Shift: Some projectors offer image shift or lens shift features, allowing you to move the projected image up, down, left, or right without physically moving the projector. Use these controls to adjust the image horizontally or vertically to perfectly align with the screen.
4. Aspect Ratio: Set the aspect ratio of the projector to match the content you’re projecting. Most projectors offer options for widescreen (16:9) or standard (4:3) aspect ratios. Choose the appropriate setting based on your content or personal preference to avoid any distortion or cropping of the image.
5. Screen Alignment: Use the projector’s screen alignment tools, such as test patterns or grid overlays, to align the projected image with the screen’s edges. Adjust the position of the projector on its mount or adjust the mount itself to achieve perfect alignment.
6. Test Different Locations: If you’re not satisfied with the initial position, don’t hesitate to experiment with different mounting locations or projector angles. Test the projection quality and image alignment after making adjustments to find the most suitable position for your projector.
7. Take Lighting Conditions into Account: Consider the lighting conditions of the room and how they may affect the projection quality. Adjust the curtains or blinds to control the amount of ambient light entering the room. This will help ensure optimal image brightness and contrast.
By carefully adjusting the projector’s position, you can achieve a precise and well-aligned projection that enhances the overall viewing experience. Take the time to fine-tune the settings and test different positions to find the perfect setup for your specific environment.
Securing the Projector in Place
After adjusting the position of the projector to your liking, it is important to secure it in place to avoid any accidental movement or damage. Follow these steps to ensure that your projector remains securely mounted:
1. Tighten Mounting Screws: Check the mounting screws of the projector bracket and ensure they are securely tightened. Use a screwdriver or the appropriate tool to tighten them if necessary. This will prevent any looseness or wobbling of the projector.
2. Lock Projector Adjustments: Many projectors have locking mechanisms or knobs to secure the projector’s tilt, swivel, zoom, and focus adjustments once you have achieved the desired position. Engage these locks to prevent any accidental changes to the projector’s settings.
3. Use Security Cables: If desired, consider using security cables or anti-theft devices to further secure the projector. These cables are typically attached to the projector and then anchored to a stable object, such as a wall or furniture. This provides an additional layer of protection against theft or unauthorized movement.
4. Conceal Cable Connections: Neatly organize and conceal cables to prevent them from being accidentally pulled or damaged. Use cable management solutions such as cable clips or cable channels to secure the cables along the wall or ceiling. This not only improves the overall aesthetics but also reduces the risk of tripping hazards.
5. Consider Ventilation: Ensure that the projector has proper ventilation to prevent overheating. Leave adequate space around the projector for air circulation. Avoid covering the vents or placing the projector in an enclosed space that may impede airflow.
6. Regular Maintenance: Periodically inspect the projector and its mounting to ensure that everything is still secure. Check for any signs of looseness or damage and make any necessary adjustments or repairs. Dust the projector and clean its lenses to maintain optimal performance.
7. Keep the Area Clear: Avoid placing objects or furniture near the projector that could accidentally interfere with its operation or cause damage if knocked over. Keep the area around the projector clear of clutter to minimize any potential risks.
By taking these steps to secure the projector in place, you can enjoy peace of mind knowing that your installation is stable and protected. This will ensure a long-lasting and hassle-free use of your projector for all your viewing needs.
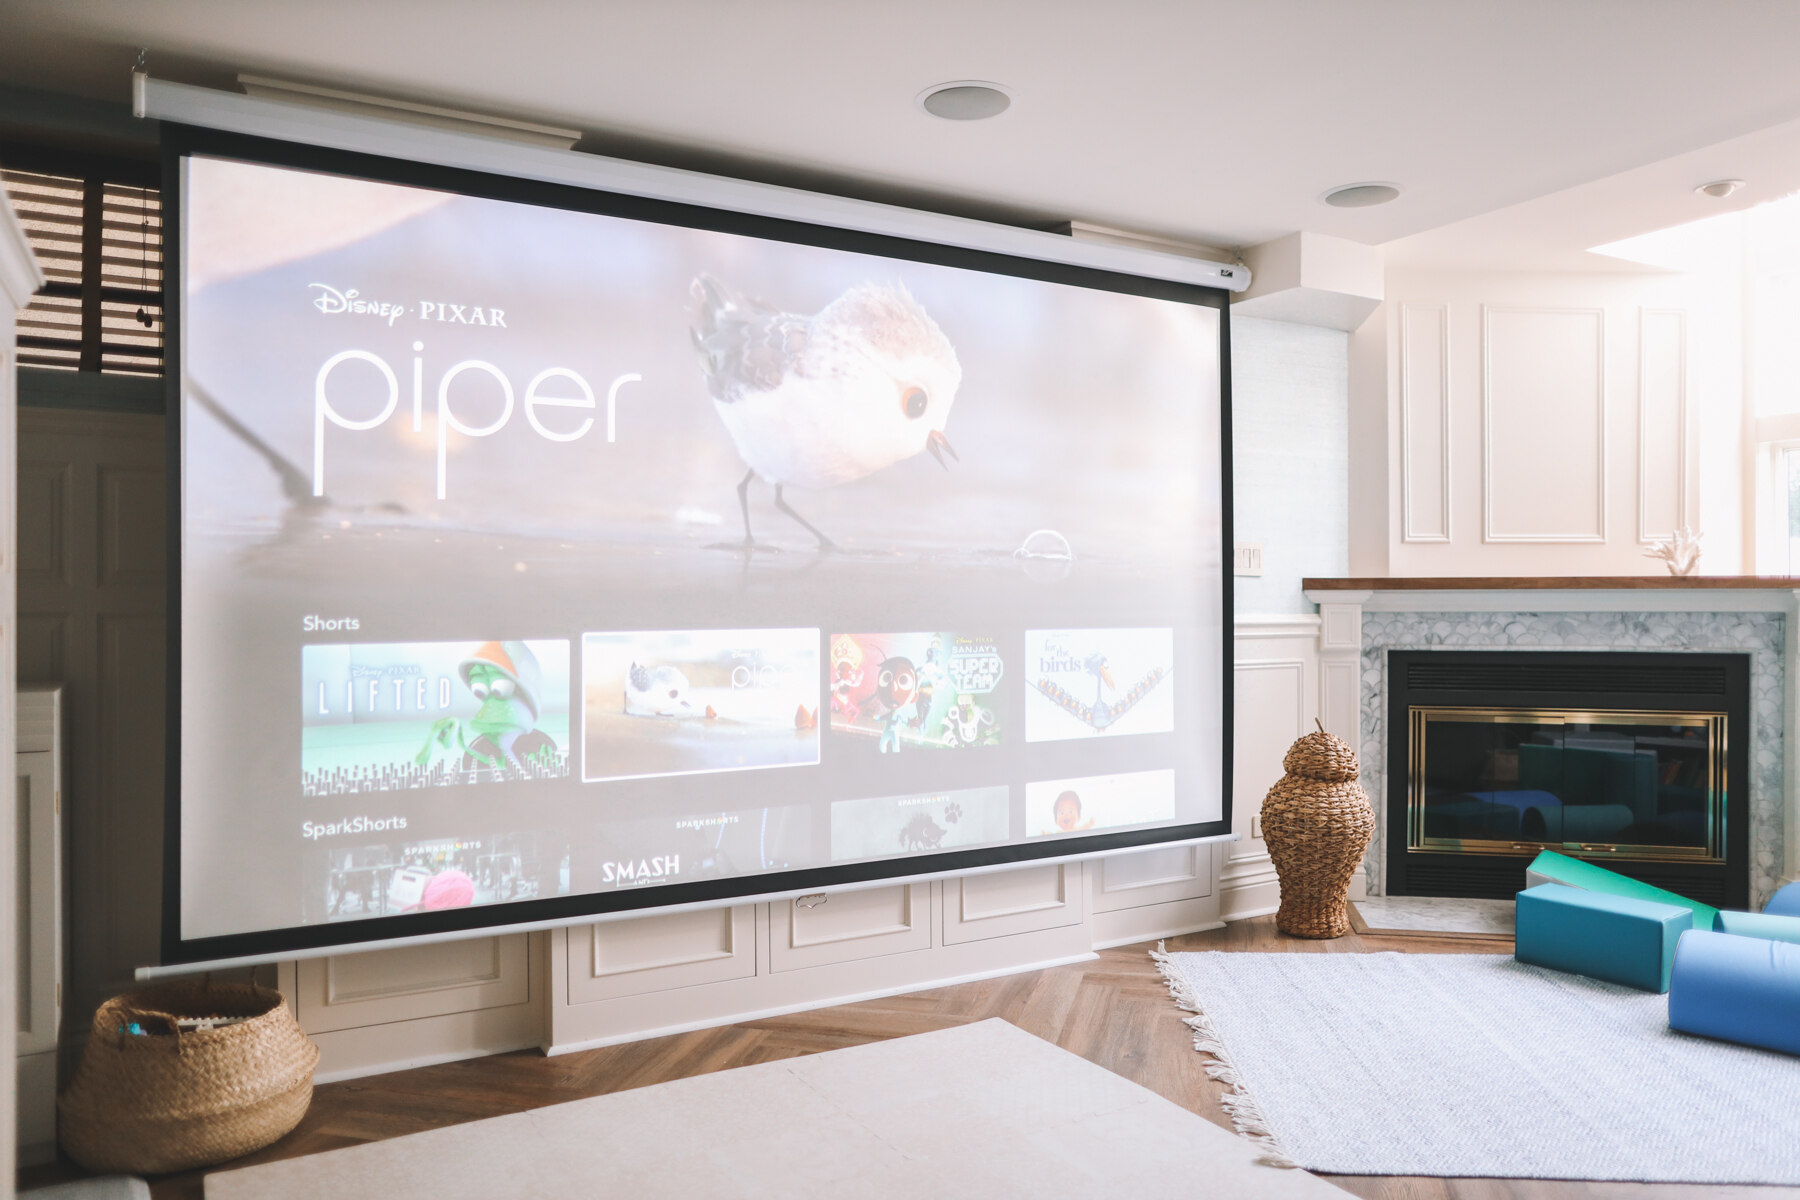
Testing the Projection
After securing the projector and making all the necessary adjustments, it’s time to test the projection to ensure optimal performance. Follow these steps to properly test the projection:
1. Adjust Image Settings: Access the projector’s menu settings to fine-tune the image quality according to your preferences. Adjust settings such as brightness, contrast, color temperature, and sharpness to achieve the desired visual experience.
2. Test Different Content: Display various types of content, such as movies, presentations, or images, to assess the projector’s performance across different scenarios. Pay attention to the clarity, color accuracy, and overall visual quality of the projected image.
3. Evaluate Image Size and Position: Verify that the image size and position are appropriate for your viewing needs. Ensure that the projected image fits within the screen dimensions without any cropping or distortion. Adjust the zoom or position if necessary.
4. Check for Keystone Correction: Assess the keystone correction adjustments you made earlier to ensure that the projected image is aligned and rectangular. Look for any remaining distortions or tilted lines and make additional adjustments if needed.
5. Assess Color and Contrast: Pay attention to the colors and contrast of the projected image, especially in dark and light areas. Ensure that the colors appear vibrant and accurate, and that there is sufficient contrast for a visually appealing and immersive experience.
6. Test Different Viewing Angles: Move around the room to test the image visibility from different viewing angles. Make sure that the projection remains clear and watchable even from the sides or corners of the room. Adjust the projector or seating positions if necessary.
7. Check for Audio Quality: If your projector has built-in speakers or if you have connected external speakers, test the audio quality. Ensure that the sound is clear, balanced, and at an appropriate volume level. Adjust the audio settings if needed.
8. Evaluate Overall Performance: Take into consideration all aspects of the projection, including image quality, color accuracy, audio quality, and overall viewing experience. Compare it to your expectations and adjust any settings or positioning as required to achieve optimal results.
By thoroughly testing the projection, you can identify any issues or areas for improvement and make the necessary adjustments. This will ensure that you enjoy a high-quality and immersive viewing experience with your projector.