Introduction
Setting up a home theater projector can transform your living space into a cinematic haven, offering an immersive viewing experience for movies, sports, and gaming. Whether you're a movie buff, a sports enthusiast, or a gaming aficionado, a home theater projector can elevate your entertainment to new heights. However, before you can bask in the glory of your favorite content on the big screen, you'll need to mount and set up your projector properly.
In this comprehensive guide, we'll walk you through the essential steps to mount a home theater projector like a pro. From selecting the optimal location to fine-tuning the image, we've got you covered. By the end of this tutorial, you'll be well-equipped to create your very own home theater oasis, where you can kick back, relax, and indulge in a captivating visual feast.
So, grab your tools and let's dive into the exciting world of home theater projector installation. Whether you're a tech-savvy enthusiast or a novice DIYer, this guide will equip you with the knowledge and confidence to embark on this rewarding journey. Let's bring the magic of the big screen into your home!
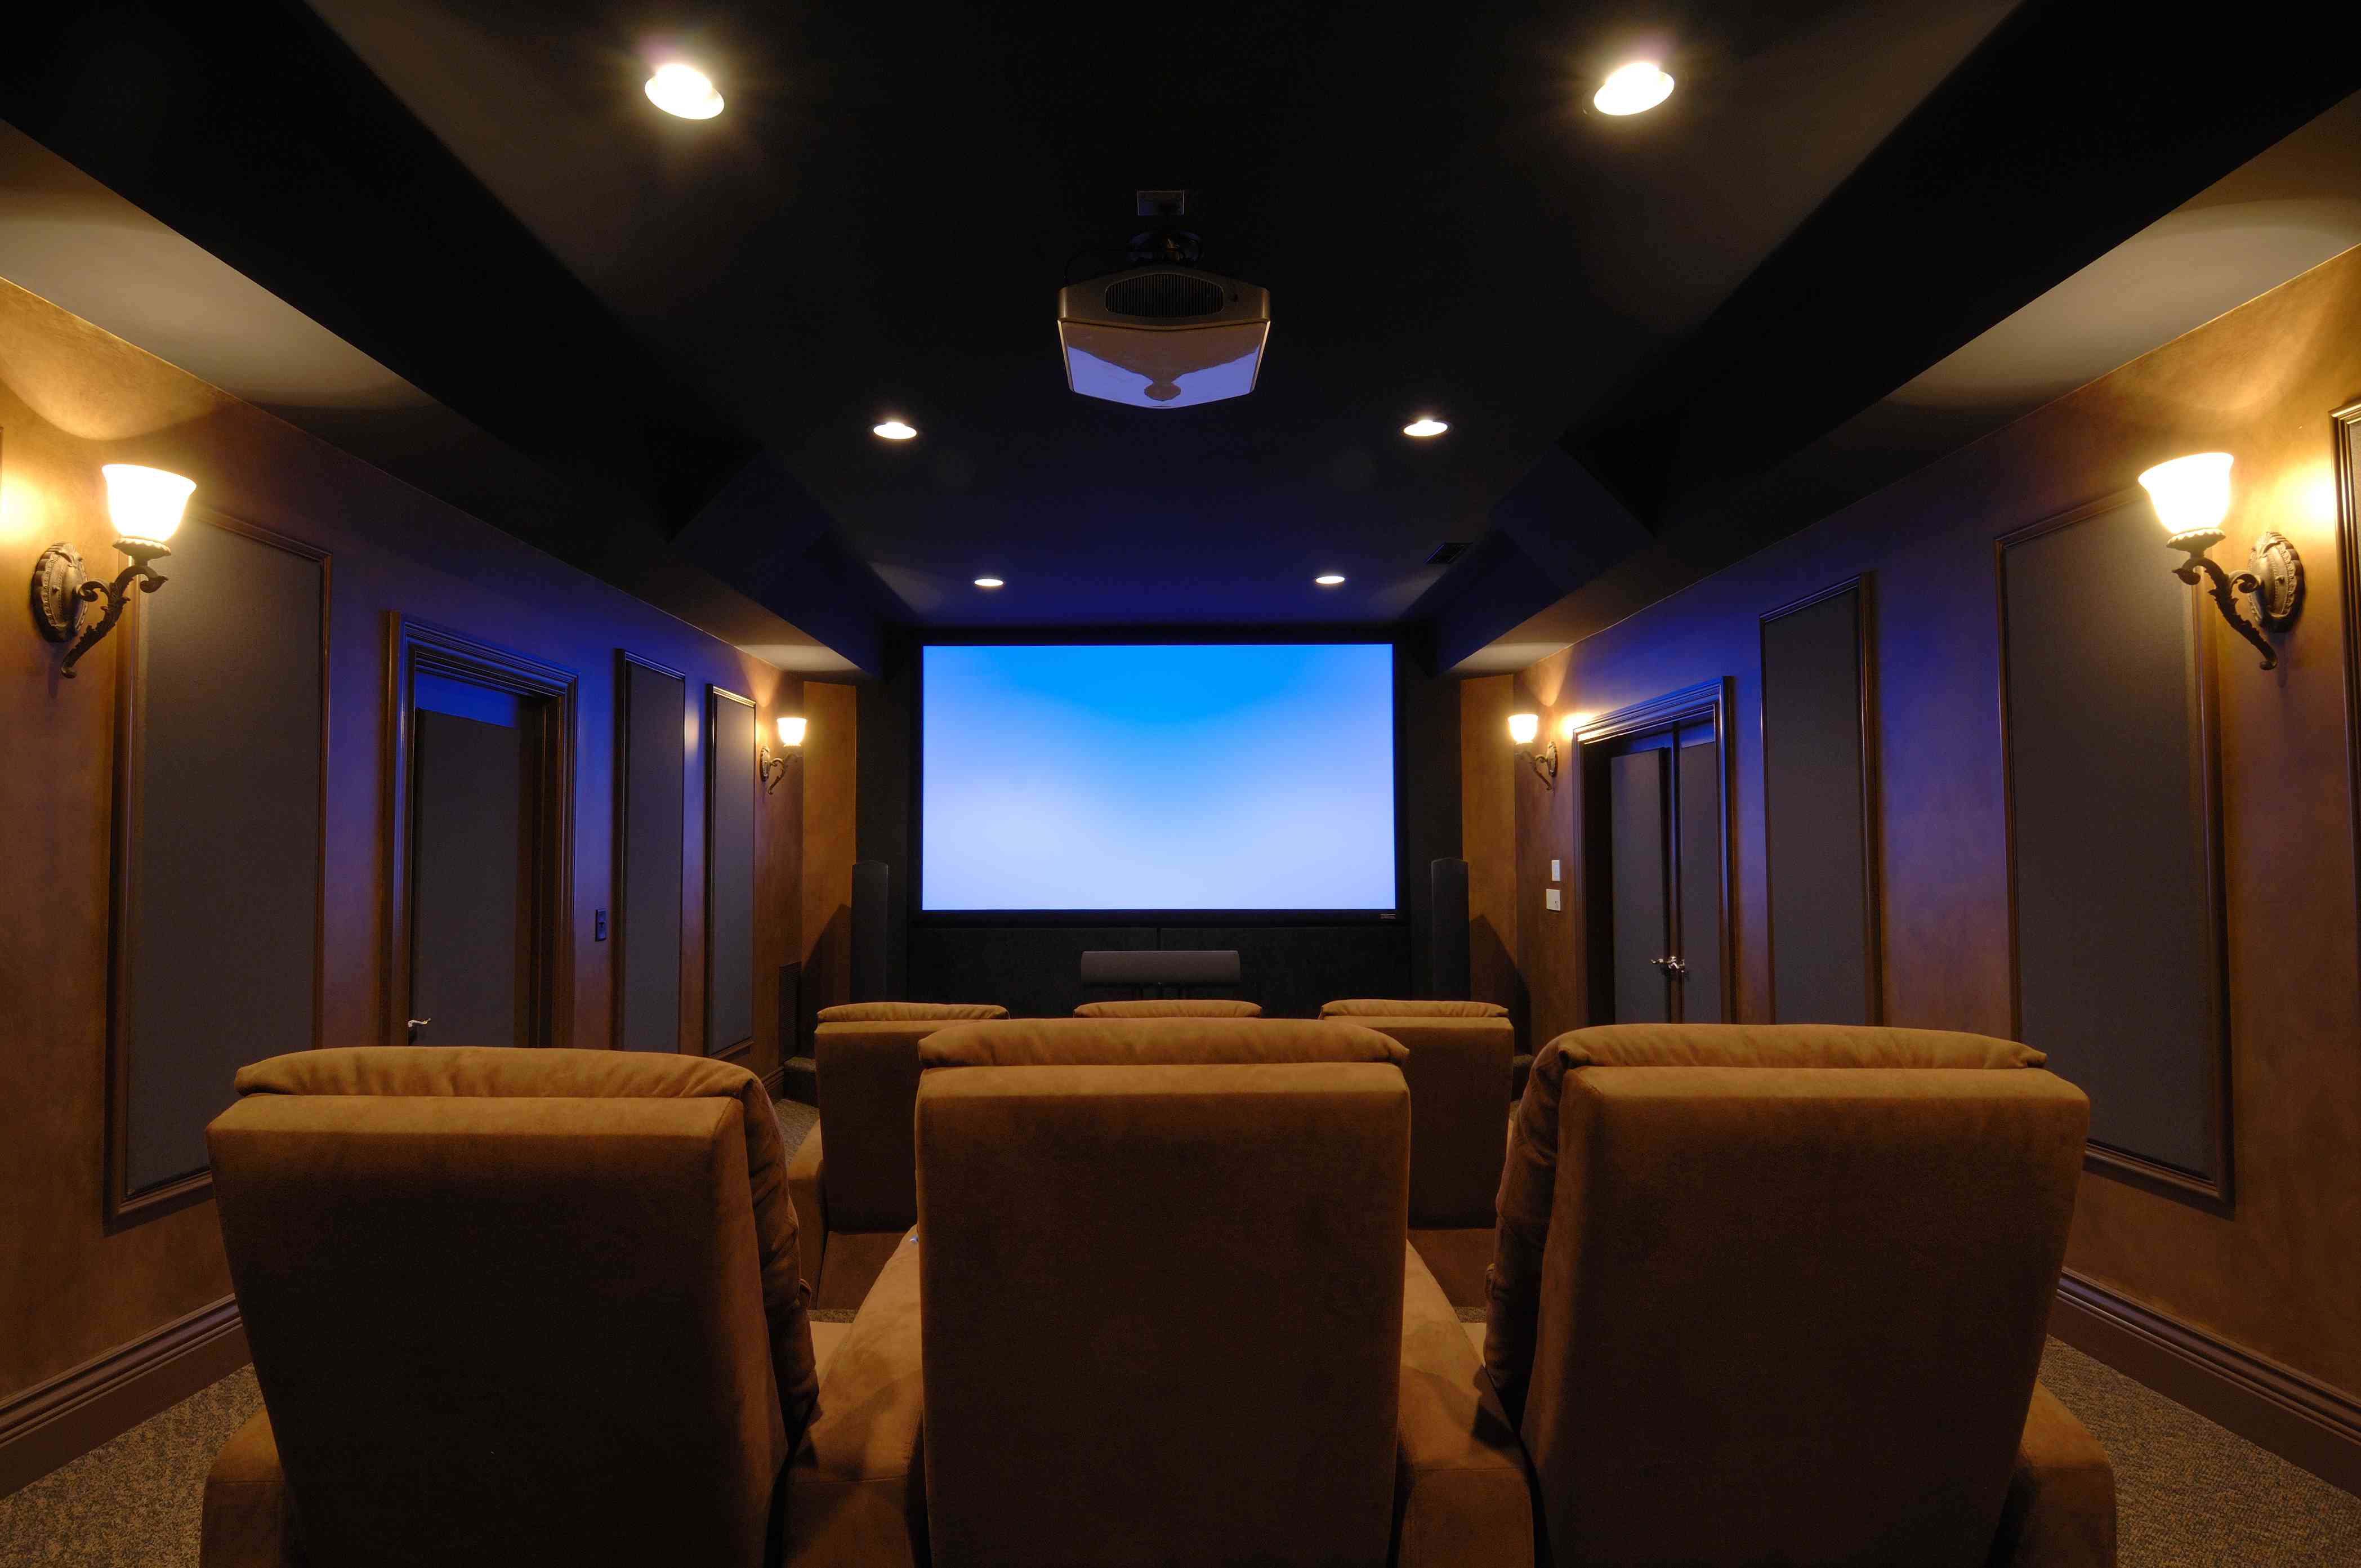
Choosing the Right Location
Before diving into the technical aspects of mounting your home theater projector, it’s crucial to carefully select the ideal location for installation. The chosen space will significantly impact the overall viewing experience, so consider the following factors when determining the placement:
- Room Size: Assess the dimensions of the room where you plan to set up the projector. Larger rooms may require a projector with higher lumens to ensure a bright, clear image, while smaller spaces may benefit from a more compact model.
- Screen Size: Determine the desired screen size and aspect ratio. This will influence the projector’s throw distance and placement, ensuring that the image fills the screen without distortion.
- Lighting Conditions: Evaluate the ambient light in the room. Opt for a location with minimal natural or artificial light to enhance image clarity and contrast. Consider light control options such as blackout curtains or adjustable lighting.
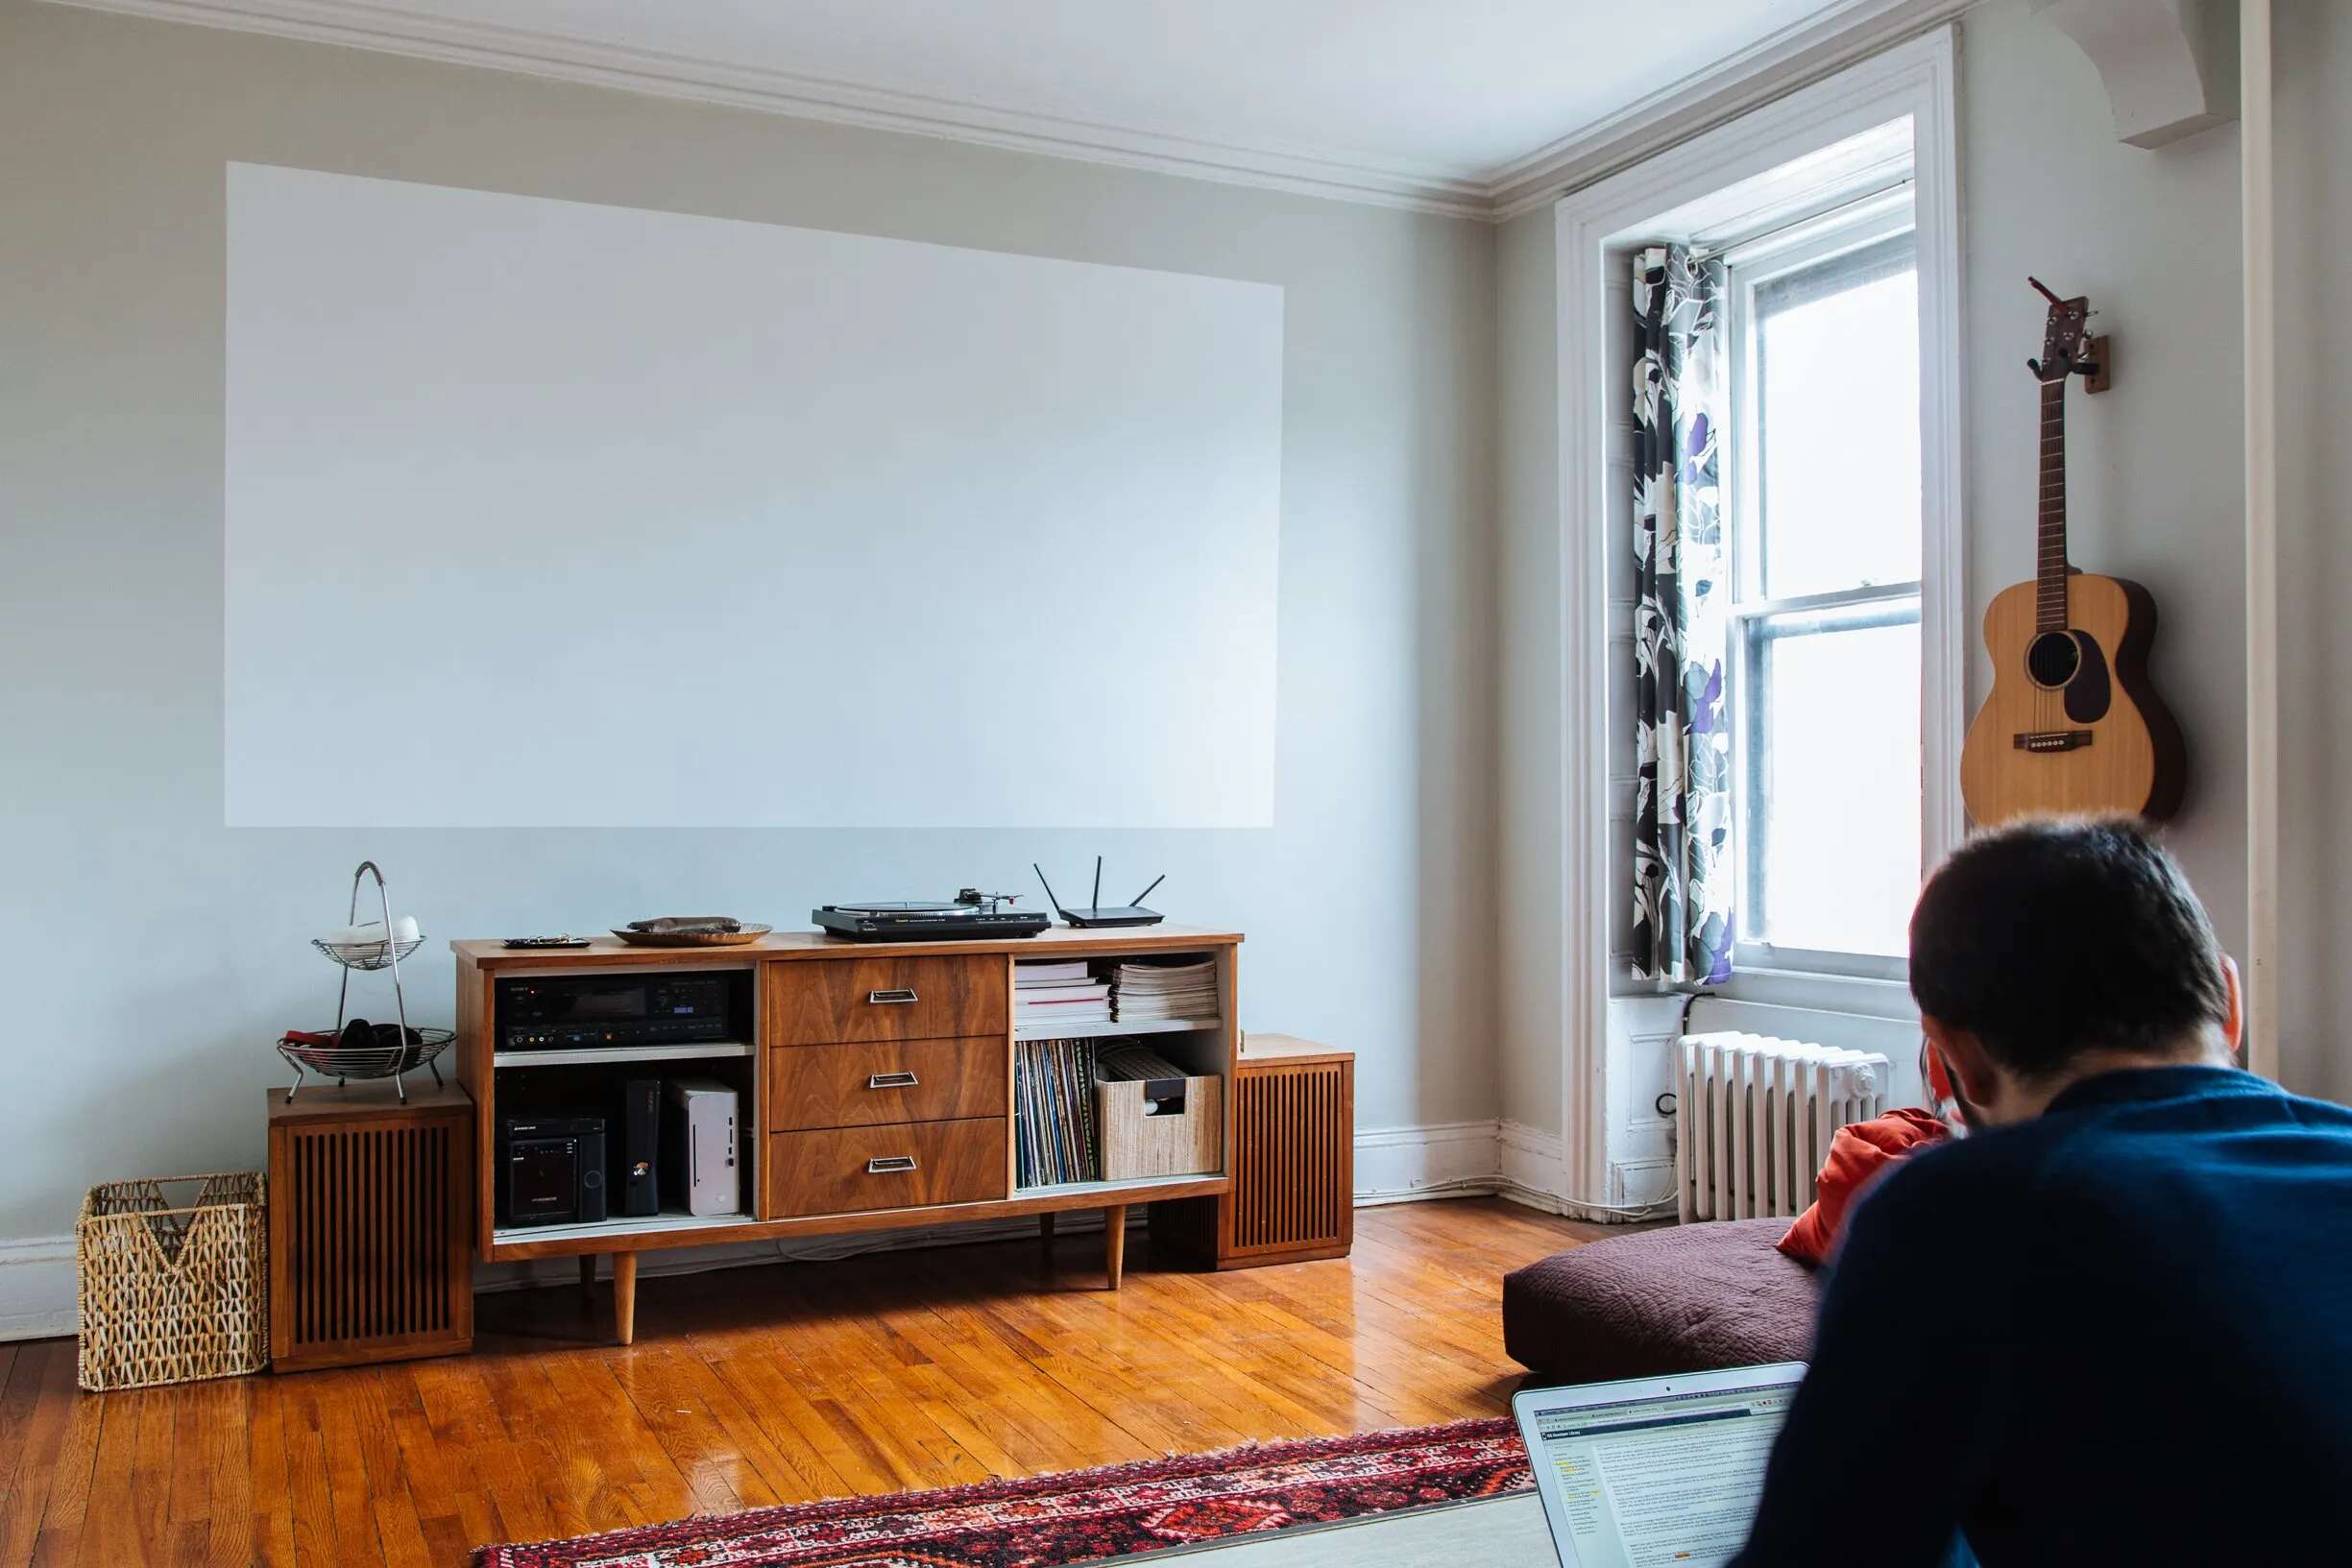
- Projection Surface: Choose a suitable wall or screen for projection. Ensure that the surface is smooth, flat, and light in color to reflect the projected image effectively.
- Accessibility: Position the projector within reach of power outlets and audiovisual sources. This facilitates convenient cable management and reduces the need for long, unsightly wires.
By carefully considering these factors, you can pinpoint the optimal location for your home theater projector, setting the stage for a captivating viewing experience. Once you’ve identified the perfect spot, it’s time to move on to the next crucial step: mounting the projector.
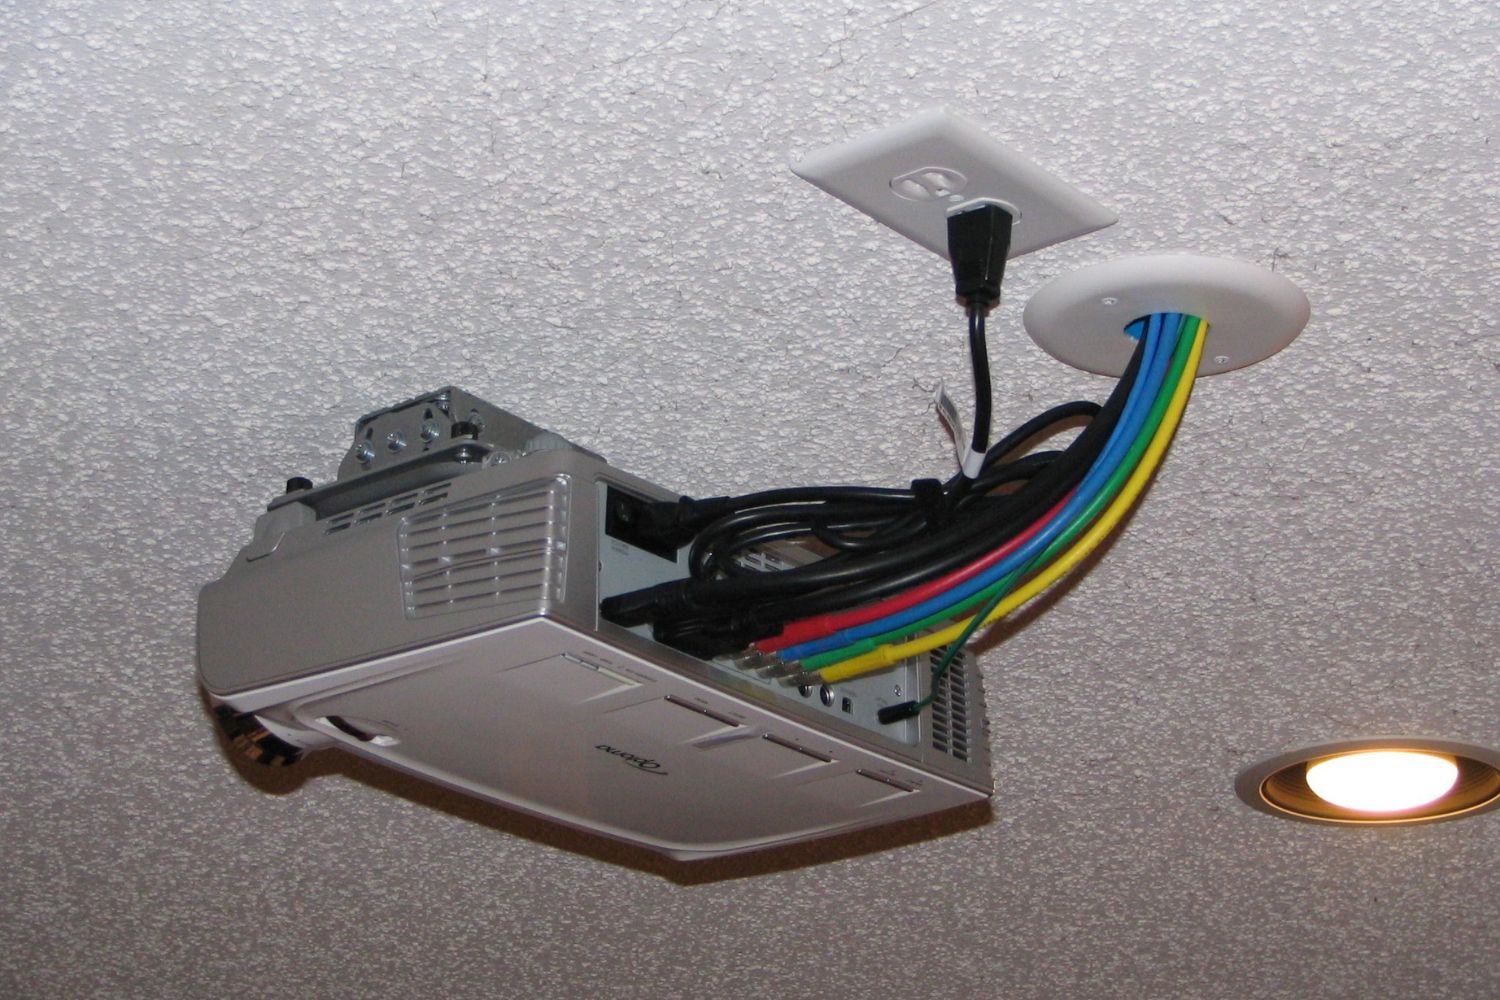
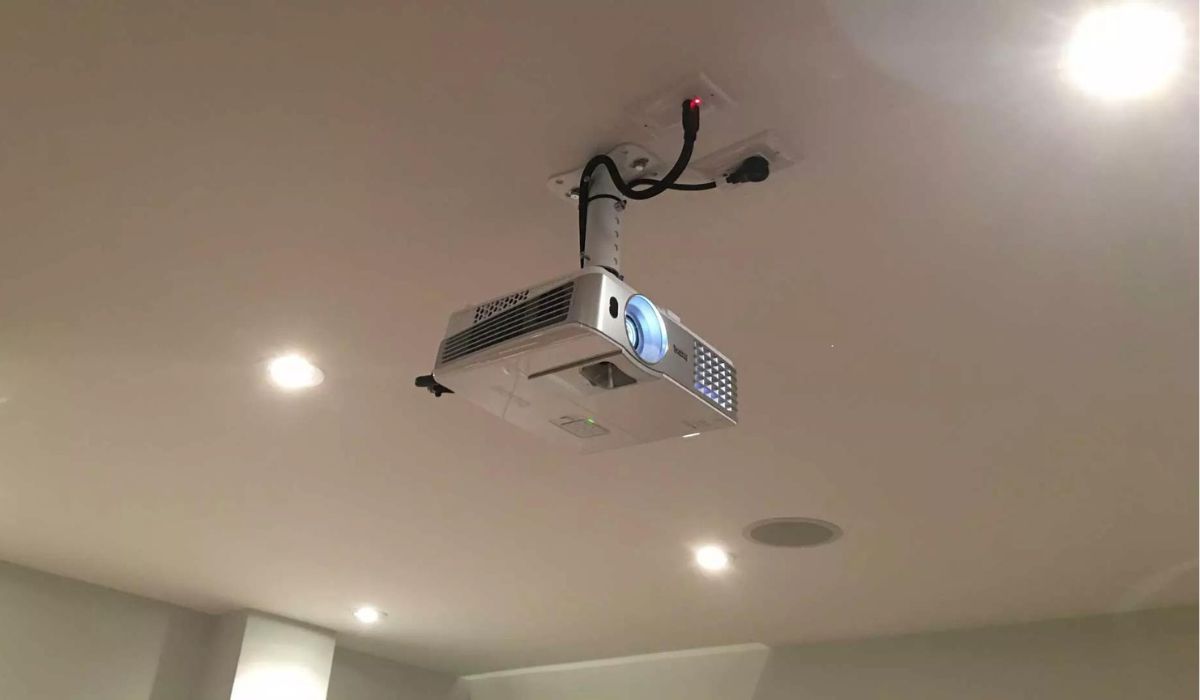
Mounting the Projector
With the location selected, it’s time to embark on the exciting task of mounting your home theater projector. Follow these steps to ensure a secure and professional installation:
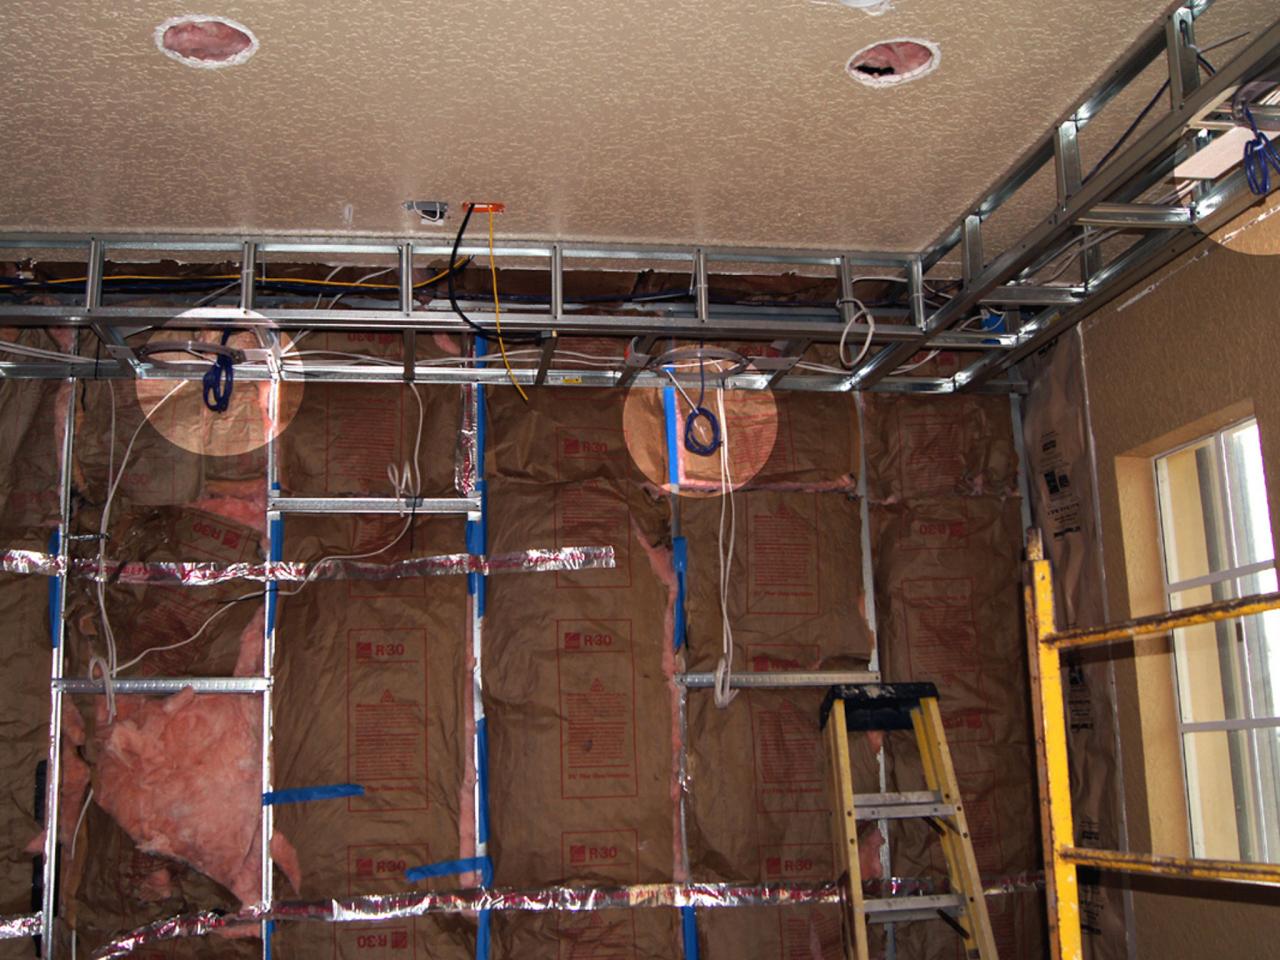
- Prepare the Mounting Surface: Begin by clearing the chosen wall or ceiling space where the projector will be mounted. Ensure that the surface is clean and free from any obstructions or protrusions that could affect the mounting process.
- Choose the Mounting Method: Select the appropriate mounting method based on the projector model and the desired placement. Options include ceiling mounts, wall mounts, and adjustable brackets, each offering unique benefits for specific installation requirements.
- Secure the Mounting Hardware: Use a stud finder to locate solid support structures within the wall or ceiling. Secure the mounting hardware, such as brackets or mounting arms, to these sturdy anchor points to ensure stability and reliability.
- Attach the Projector: Carefully affix the projector to the mounting hardware according to the manufacturer’s instructions. Take care to align the projector properly and tighten all fasteners to prevent any movement or misalignment.
- Adjust the Projection Angle: Once the projector is securely mounted, adjust the projection angle to ensure that the image is aligned with the screen or projection surface. Use the projector’s keystone and lens shift adjustments, if available, to fine-tune the image geometry.
By following these steps, you can confidently mount your home theater projector, creating a visually striking focal point for your entertainment space. With the projector securely in place, the next crucial phase involves connecting the necessary cables to bring your home theater system to life.
Connecting the Cables
Once the projector is securely mounted, the next step is to connect the essential cables to unleash the full potential of your home theater system. Follow these guidelines to ensure a seamless and organized cable connection:
- Power Connection: Locate a nearby power outlet and connect the projector to a reliable power source using the supplied power cable. Ensure that the power cable is routed safely and does not present a tripping hazard.
- Video Source: Identify the video source devices, such as a Blu-ray player, gaming console, or streaming device, that will be connected to the projector. Use high-quality HDMI or other compatible cables to establish the video connections, ensuring a high-definition signal transmission.
- Audio Setup: Determine the audio output options for your video sources. Connect the audio cables to the projector or an external sound system for immersive audio playback. Consider utilizing digital audio connections for optimal sound quality.
- Network and Control: If your projector supports network connectivity or remote control functionality, establish the necessary network connections and configure the control settings as per the manufacturer’s instructions. This enables convenient access to online content and seamless control of the projector.
- Cable Management: Organize the connected cables using cable ties, clips, or cable channels to prevent tangling and maintain a tidy installation. Conceal cables along walls or use cable covers to minimize visual clutter and create a polished, professional look.
By carefully connecting the power, video, audio, and network cables, you can unleash the full potential of your home theater projector, creating a cohesive and efficient entertainment setup. With the cables in place, the final step involves fine-tuning the projector’s settings to achieve the perfect image for an unparalleled viewing experience.
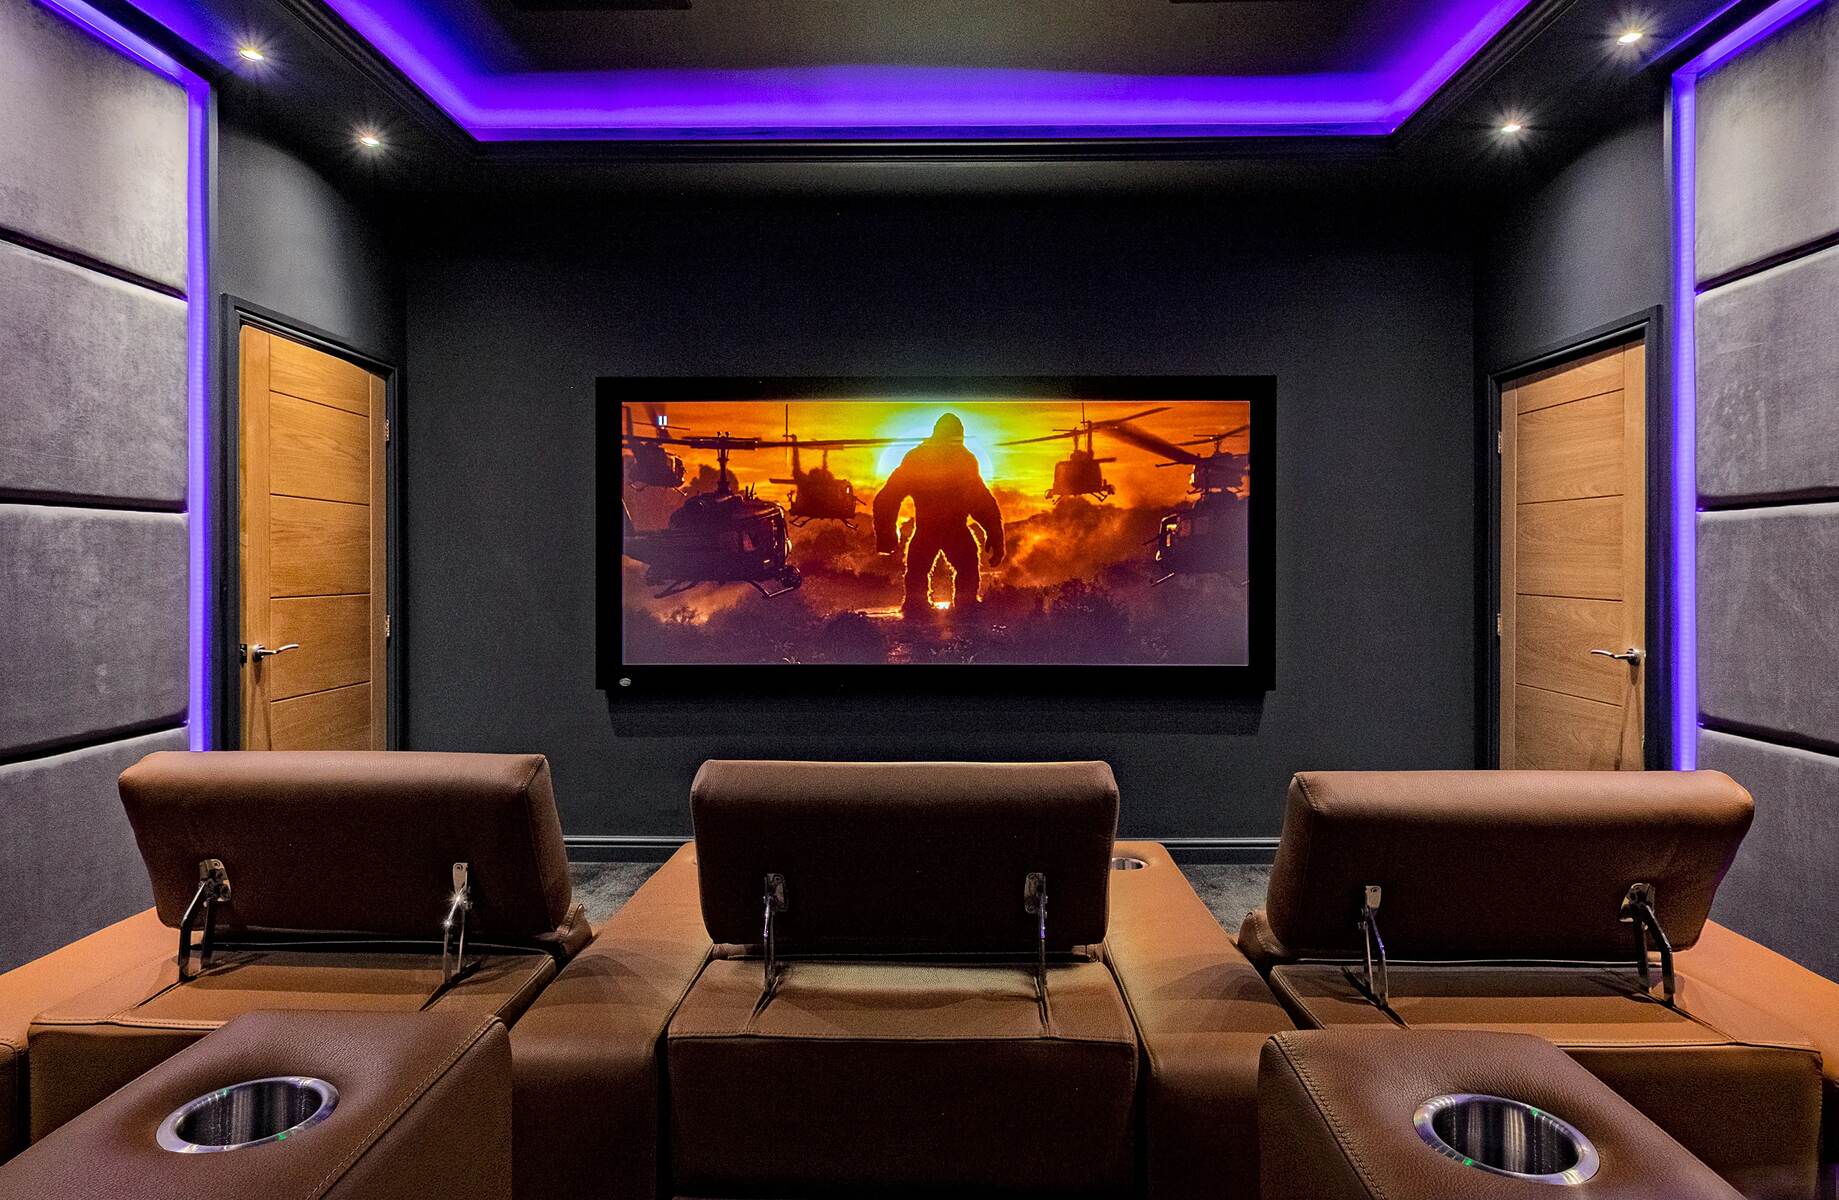
Adjusting the Image
With the projector mounted and the cables connected, the last critical step in setting up your home theater system is to fine-tune the image for optimal clarity and visual impact. Follow these steps to adjust the projector settings and achieve a stunning, well-defined image:
- Focusing the Image: Use the projector’s focus adjustment to sharpen the image. Ensure that text and details appear crisp and clear, indicating that the image is in focus across the entire projection surface.
- Keystone Correction: If the projector is not perfectly aligned with the screen or projection surface, utilize the keystone correction feature to adjust the image geometry and eliminate any distortion, ensuring a perfectly rectangular image.
- Color Calibration: Access the projector’s color settings to fine-tune the color temperature, saturation, and hue. Aim for natural, vibrant colors that accurately represent the content being displayed.
- Aspect Ratio Adjustment: Ensure that the projector’s aspect ratio matches the content being displayed. Select the appropriate aspect ratio to prevent image stretching or distortion, maintaining the correct proportions for movies, games, and presentations.
- Optimizing Brightness and Contrast: Adjust the projector’s brightness and contrast settings to achieve an optimal balance for the viewing environment. Consider ambient light conditions and screen material to enhance image clarity and contrast.
- Testing and Refinement: Play various types of content, including movies, games, and presentations, to assess the image quality across different scenarios. Make minor adjustments as needed to refine the image to your preference.
By meticulously adjusting the image settings, you can ensure that your home theater projector delivers a visually stunning and immersive viewing experience. With the image fine-tuned to perfection, sit back, relax, and immerse yourself in the captivating world of big-screen entertainment within the comfort of your own home.
Conclusion
Congratulations on successfully mounting and setting up your home theater projector! By following the comprehensive steps outlined in this guide, you’ve taken a significant stride toward creating an immersive entertainment space within your home. The careful selection of the installation location, meticulous mounting process, organized cable connections, and precise image adjustments have culminated in a captivating visual experience that rivals traditional movie theaters.
As you bask in the glory of your newly installed home theater projector, take a moment to appreciate the meticulous attention to detail that has gone into creating this cinematic oasis. The immersive visuals and enveloping audio have transformed your living space into a hub for unforgettable movie nights, thrilling gaming sessions, and captivating presentations.
With the projector securely mounted, cables neatly organized, and the image finely tuned, you’re now ready to embark on a journey of endless entertainment possibilities. Whether you’re delving into the latest blockbuster, immersing yourself in the world of gaming, or hosting engaging presentations, your home theater projector stands as the centerpiece of your multimedia experience.
Embrace the magic of the big screen, and relish the convenience and comfort of enjoying your favorite content within the confines of your home. Your dedication to setting up the home theater projector has paved the way for countless hours of enjoyment and shared experiences with family and friends.
So, dim the lights, grab some popcorn, and let the captivating visuals transport you to new realms of entertainment. Your home theater projector is not just a piece of technology; it’s a gateway to unforgettable moments and cherished memories, all within the comfort of your own home.