Introduction
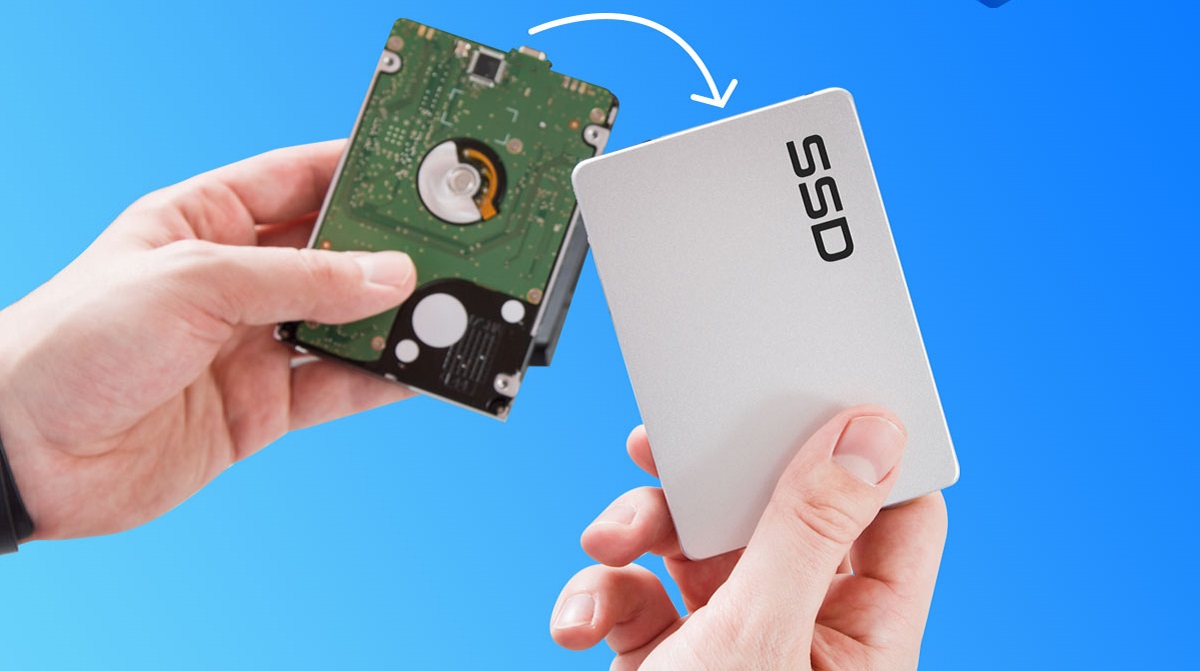
Migrating your operating system (OS) to a solid-state drive (SSD) can significantly enhance the performance and speed of your computer. Unlike traditional hard disk drives (HDDs), SSDs utilize flash memory technology, offering faster read and write speeds, quicker boot times, and improved overall system responsiveness.
Upgrading to an SSD is a cost-effective and efficient way to breathe new life into an older computer or enhance the performance of a new one. By transferring your OS to an SSD, you can enjoy faster load times for applications, shorter boot-up times, and smoother multitasking.
In this article, we will explore the benefits of migrating your OS to an SSD and guide you through the step-by-step process. Whether you are a tech enthusiast or a novice computer user, this guide will help you make the most of your SSD upgrade.
It is important to note that the migration process involves backing up and transferring your operating system files to a new drive. Therefore, it is crucial to have a backup of your important data stored on a separate device or cloud storage before proceeding with the migration.
There are two main options when it comes to migrating your OS to an SSD: using the built-in tools provided by Windows or utilizing third-party software. Both methods have their advantages and limitations, and we will discuss both options in detail throughout this article.
So, if you are ready to unlock the full potential of your computer and enjoy faster and more efficient performance, continue reading to learn how to migrate your operating system to an SSD.
Why should you migrate your OS to an SSD?
Upgrading to a solid-state drive (SSD) offers a wide range of benefits that can greatly improve your computing experience. Here are some compelling reasons why you should consider migrating your operating system (OS) to an SSD:
1. Faster boot times: One of the most noticeable improvements when using an SSD is the significantly reduced boot-up time. With an SSD, your computer can start up in a matter of seconds, allowing you to quickly get to work or play without any frustrating delays.
2. Improved system responsiveness: SSDs have faster read and write speeds compared to traditional hard disk drives (HDDs). This means that you will experience faster application launches, smoother multitasking, and quicker file transfers. Your computer will feel more responsive and snappy, enhancing your overall productivity and enjoyment.
3. Enhanced application performance: Applications installed on an SSD will load and run faster, resulting in shorter wait times and improved efficiency. Whether you are editing photos, creating videos, or playing demanding games, you will experience a noticeable boost in performance and smoothness.
4. Reduced power consumption: SSDs consume less power than HDDs because they have no moving parts. This not only helps to extend the battery life of laptops and mobile devices but also reduces the energy consumption of desktop computers, making them more environmentally friendly.
5. Durability and reliability: SSDs are more durable than HDDs as they do not have any mechanical parts. This makes them less susceptible to damage from physical shocks or drops. Additionally, SSDs have a longer lifespan and are less prone to failure, ensuring that your data is safe and secure.
6. Noise-free operation: With no moving parts, SSDs operate silently, providing a noise-free computing experience. You can work or enjoy multimedia content without the distraction of spinning HDD disks, creating a more peaceful and enjoyable atmosphere.
7. Space optimization: SSDs are typically smaller and lighter than HDDs, allowing for more flexible storage options. This is particularly beneficial for laptops and portable devices that often have limited space. You can enjoy the benefits of faster performance and increased storage capacity without compromising on portability.
Migrating your OS to an SSD can be a game-changer, rejuvenating your computer’s performance and transforming your user experience. Whether you are a professional requiring speedy application performance or a casual user seeking a responsive and efficient system, upgrading to an SSD is a worthwhile investment.
In the next section, we will discuss the steps you need to take to prepare for the migration process, ensuring a smooth and successful transition to your new SSD.
Preparing for the migration process
Before you begin the migration process of transferring your operating system (OS) to a solid-state drive (SSD), there are a few important steps you should take to ensure a smooth and successful transition. This section will guide you through the necessary preparations:
1. Backup your data: It is crucial to create a backup of all your important files and data before migrating your OS to an SSD. This ensures that your data remains safe in case of any unforeseen issues during the migration process. Consider copying your files to an external hard drive, cloud storage, or another computer.
2. Check disk health: Before migrating, it is advisable to check the health of your current hard drive. You can use disk diagnostic tools such as CrystalDiskInfo or SSD-specific software provided by the manufacturer. This will help identify any potential issues and ensure that your data is in a healthy state for migration.
3. Format the SSD: Once you have acquired your new SSD, you will need to format it before migrating your OS. Formatting prepares the drive for use and ensures compatibility with your computer. You can format the SSD using disk management tools provided by your operating system or through the SSD manufacturer’s software.
4. Determine disk space: Take into consideration the size of your current OS installation and any additional software or data you plan to migrate. Ensure that the capacity of your new SSD is sufficient to accommodate all the files. It is recommended to choose an SSD with a capacity larger than your current OS installation to allow for future expansion and performance optimization.
5. Gather necessary tools and software: Depending on the method you choose for migrating your OS, you may need specific tools or software. If you opt for the built-in Windows tools, ensure that you have the latest version of the operating system installed. If you decide to use third-party software, research and select a reputable program that suits your needs.
6. Familiarize yourself with the migration process: Take the time to read the instructions and familiarize yourself with the steps involved in migrating your OS to an SSD. Understanding the process beforehand will make it easier to follow along and address any potential issues that may arise during the migration.
By following these preparatory steps, you will be well-equipped to proceed with the migration process. Taking the time to backup your data, check disk health, format the SSD, determine disk space, gather necessary tools, and acquaint yourself with the process will ensure a smoother and more successful migration.
Next, we will explore two options for migrating your OS to an SSD: using the built-in Windows tools or utilizing third-party software. Each option has its own advantages, and we will delve into the step-by-step instructions for both methods.
Option 1: Using built-in Windows tools
If you are opting to migrate your operating system (OS) to a solid-state drive (SSD) using the built-in tools provided by Windows, you can take advantage of the following steps:
Step 1: Create Windows installation media: Start by creating a bootable USB drive or DVD with the Windows installation media. This will ensure that you have a copy of the operating system that you can install on the new SSD.
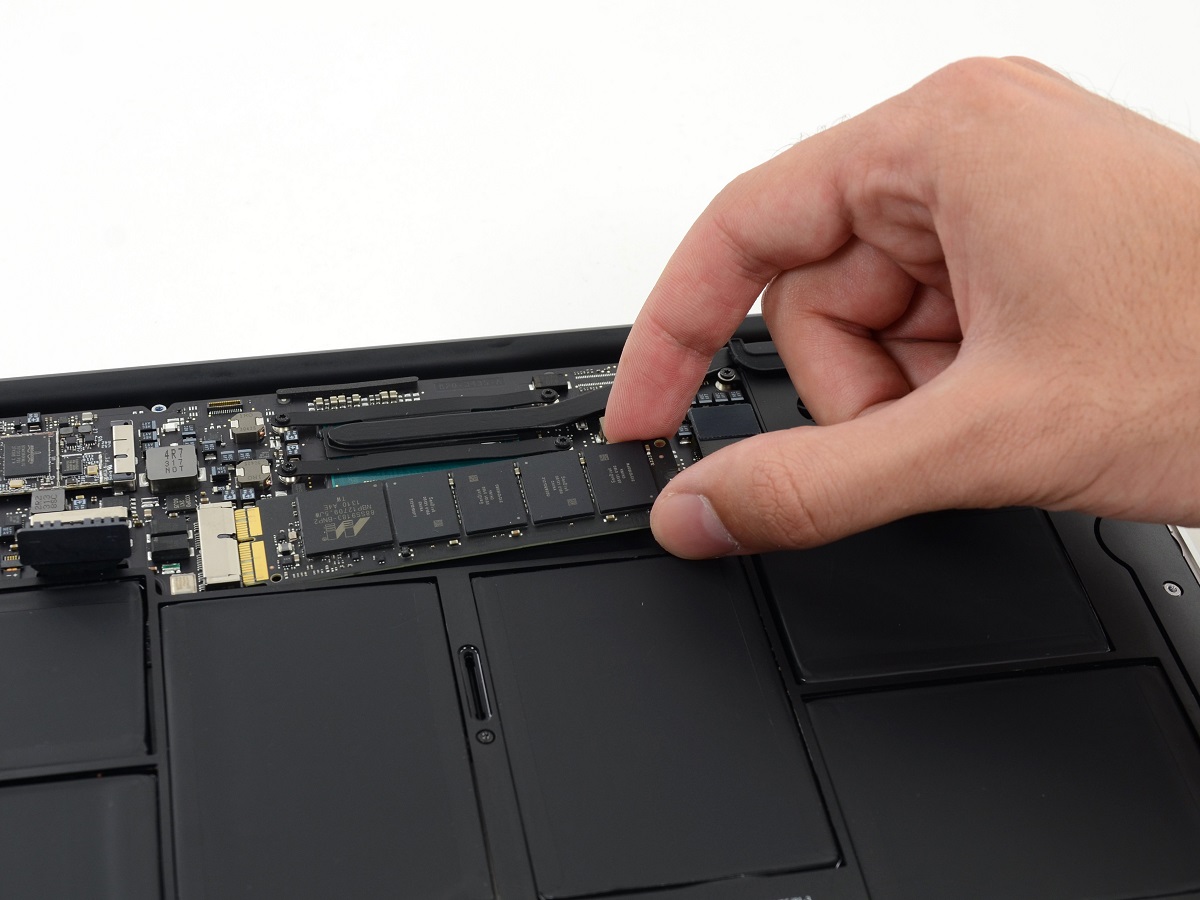
Step 2: Connect the SSD: Connect your new SSD to your computer. You can use an external USB enclosure, SATA-to-USB adapter, or internal connections depending on the form factor of your SSD and your computer.
Step 3: Boot from the Windows installation media: Restart your computer and press the appropriate key (usually the F12 or Del key) to access the boot menu. Select the USB drive or DVD containing the Windows installation media to boot from it.
Step 4: Install Windows on the SSD: Follow the on-screen instructions provided by the Windows installation wizard. When prompted to select the installation location, choose your SSD as the destination. Complete the installation process by following the prompts and allowing Windows to finish installing.
Step 5: Transfer data: Once Windows is installed on your SSD, you can transfer your personal files and data from your backup to the new SSD. This may involve copying files over manually or using Windows migration tools, such as the File History feature or the Windows Easy Transfer tool, to assist with the transfer process.
Step 6: Set SSD as the boot drive: To ensure that your computer boots from the SSD, you will need to modify the BIOS settings. Restart your computer and access the BIOS setup by pressing a specific key (such as F2 or Del) during the boot process. Locate the Boot Order or Boot Priority settings and set the SSD as the first boot device. Save the changes, exit the BIOS, and restart your computer.
Step 7: Verify the migration: After restarting your computer, ensure that everything is working properly. Test the performance of your SSD by launching applications and accessing files. Verify that the OS and your data are now stored on the SSD.
Using the built-in Windows tools provides a straightforward method for migrating your OS to an SSD. However, it is important to note that this method requires a fresh installation of Windows. Make sure to back up any necessary files and have your Windows product key on hand before proceeding.
In the next section, we will explore another option for migrating your operating system to an SSD: utilizing third-party software. This alternative method offers more flexibility and allows for cloning your existing OS installation.
Option 2: Using third-party software
If you prefer a more flexible and customizable approach to migrating your operating system (OS) to a solid-state drive (SSD), you can utilize third-party software. Here’s how you can go about it:
Step 1: Select appropriate software: Research and select a reputable third-party software that specializes in OS migration or disk cloning. Some popular options include Acronis True Image, EaseUS Todo Backup, and Macrium Reflect. Ensure that the software you choose supports OS migration to SSDs.
Step 2: Connect the SSD: Connect your new SSD to your computer using either an external USB enclosure, SATA-to-USB adapter, or internal connections, depending on the form factor of your SSD and your computer.
Step 3: Install and launch the software: Install the third-party software and launch it on your computer. Familiarize yourself with the interface and options provided by the software.
Step 4: Select the source and target drives: In the software, select your current OS drive (usually C:\) as the source drive and your new SSD as the target drive. Double-check these selections to ensure that you are cloning the correct drives.
Step 5: Configure the cloning options: Depending on the software you are using, you will have various options to configure the cloning process. These options may include adjusting partition sizes, excluding certain files or folders from the cloning process, and optimizing the SSD for performance.
Step 6: Initiate the cloning process: Once you have configured the cloning options, initiate the cloning process. The software will begin copying the OS and all associated files from the source drive to the SSD. This process may take some time, depending on the size of your OS and the speed of your computer.
Step 7: Set SSD as the boot drive: After the cloning process is complete, shut down your computer. Remove the old OS drive or set it aside for future use. Connect the SSD to the same port where the old OS drive was connected. Start your computer and enter the BIOS setup by pressing a specific key (such as F2 or Del) during the boot process. Set the SSD as the first boot device in the Boot Order or Boot Priority settings. Save the changes, exit the BIOS, and restart your computer.
Step 8: Verify the migration: Once your computer restarts, all your OS files should be stored on the SSD. Test the performance by launching applications and accessing files to ensure that everything is functioning correctly.
Using third-party software gives you more flexibility and control over the migration process. It allows for cloning your existing OS installation, preserving all your applications, settings, and data as they were on the old drive. Ensure that you choose a reliable software solution and follow the instructions provided by the software developer.
With either option, you can successfully migrate your OS to an SSD and enjoy the benefits of improved speed, responsiveness, and overall performance.
In the next section, we will discuss the final steps to take after the migration process to ensure that everything is working correctly and verify the success of the migration.
Step 1: Backing up your data
Before you proceed with the migration process of transferring your operating system (OS) to a solid-state drive (SSD), it is crucial to create a backup of all your important data. This step ensures that your data remains safe and intact in case of any unforeseen issues during the migration. Here’s how you can back up your data:
1. Identify important files: Take some time to identify the files and folders that contain your critical data. This may include documents, photos, videos, music, and any other files that you can’t afford to lose.
2. Choose a backup method: There are several backup methods available, such as external hard drives, cloud storage, or using backup software. Assess your needs and preferences to determine the most suitable method for you.
3. External hard drive: If you have an external hard drive with sufficient storage capacity, you can manually copy and paste your important files onto the drive. Organize your data into folders for easier management and retrieval.
4. Cloud storage: Cloud storage services, such as Google Drive, Dropbox, or OneDrive, provide convenient and secure options for backing up your data. Upload your important files to the cloud and ensure that they are synchronized or backed up properly.
5. Backup software: Utilize backup software for an automated and comprehensive backup solution. These tools often allow you to schedule regular backups, choose specific folders or file types to backup, and easily restore your data when needed. Research and choose a reputable backup software that suits your requirements.
6. Verify the backup: Regardless of the backup method you choose, it is essential to verify that your files and data have been successfully backed up. Double-check the integrity of the files and make sure that they can be accessed and restored without any issues.
By backing up your data before the migration process, you can avoid the risk of losing important files in case of any unforeseen complications during the migration. It provides you with peace of mind, knowing that your data is secure and can be easily restored if needed.
Once you have completed the backup process, you are ready to proceed with the migration process. Whether you choose to use the built-in Windows tools or third-party software, you can confidently continue knowing that your data is safe and will be transferred to your new SSD.
In the next step, we will discuss how to check the health of your existing hard drive and format the SSD in preparation for the migration process.
Step 2: Checking disk health and formatting the SSD
Before migrating your operating system (OS) to a solid-state drive (SSD), it is important to check the health of your existing hard drive and format the SSD in preparation for the migration process. This step ensures that both drives are in optimal condition and ready for the transfer. Here’s how you can check the disk health and format the SSD:
1. Check disk health: Use disk diagnostic tools to assess the health of your current hard drive. One well-known utility is CrystalDiskInfo, which displays the current status and health of your drive, including temperature, operating hours, and any potential errors or warnings. This will help identify any issues that could affect the migration process.
2. Check for and repair any file system errors: Run the built-in Windows utility, Check Disk (chkdsk), to scan and repair any file system errors on your existing hard drive. Open a command prompt with administrative privileges and type “chkdsk /f” followed by the drive letter of your current OS drive (e.g., “chkdsk /f C:”). Allow the utility to scan and repair any errors it finds.
3. Backup or transfer data: Before formatting the SSD, ensure that all important data and files from your current hard drive are properly backed up or transferred. This will prevent any loss of data during the formatting process.
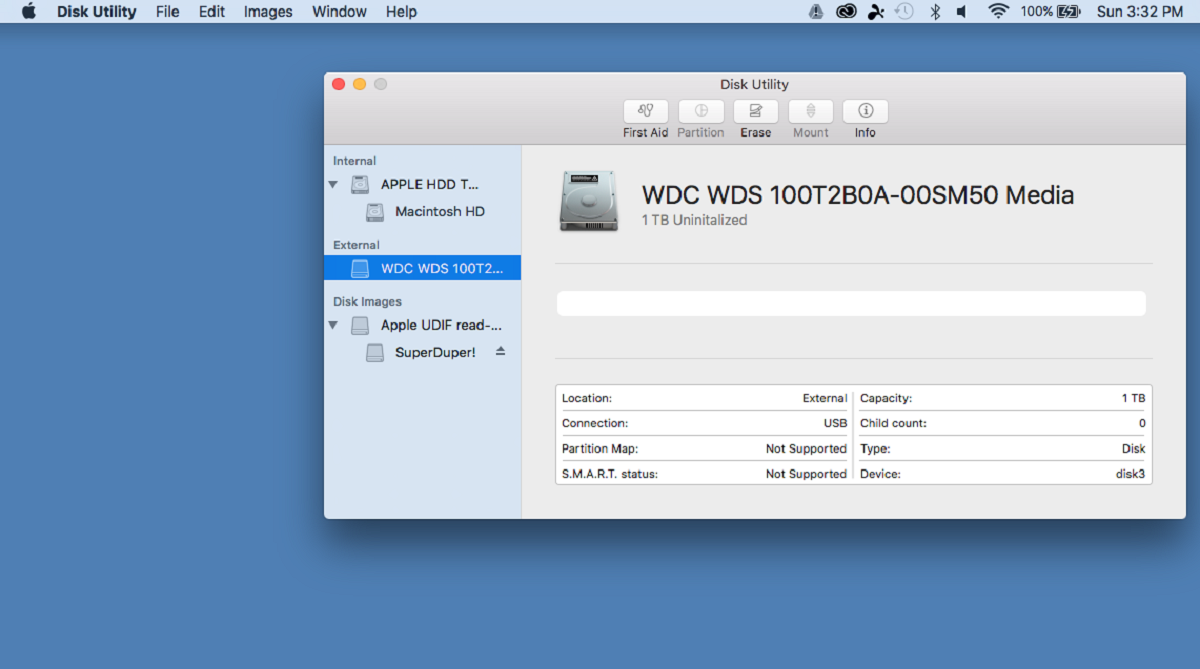
4. Format the SSD: Connect the SSD to your computer and open the Disk Management tool. To access this tool, right-click on the Start button and select “Disk Management” from the context menu. Locate the SSD in the list of drives, right-click on it, and select “Format.” Choose a file system (such as NTFS) and assign a drive letter to the SSD. Click “OK” to start the formatting process.
5. Wait for formatting to complete: The formatting process may take some time, depending on the size of your SSD. Once the formatting is complete, the SSD will be ready for the migration process.
Note: Formatting the SSD will erase all data on the drive, so make sure you have backed up or transferred any important files beforehand.
By checking the disk health and formatting the SSD, you ensure that both the source and destination drives are in optimal condition for the migration process. Checking for errors, repairing file system issues, and formatting the SSD will help prevent any potential problems during the migration and ensure a smooth and successful transfer of your OS to the new SSD.
In the next step, we will discuss how to clone your operating system to the SSD using either the built-in Windows tools or third-party software.
Step 3: Cloning the OS to the SSD
Once you have checked the health of your existing hard drive and formatted the solid-state drive (SSD), you can proceed with cloning your operating system (OS) to the SSD. Cloning allows you to make an exact copy of your OS, including all files, settings, and applications, and transfer it to the SSD. Here’s how you can clone your OS to the SSD:
Using built-in Windows tools:
1. Connect the SSD to your computer using an external USB enclosure, SATA-to-USB adapter, or internal connections, depending on the form factor of your SSD and your computer.
2. Open the “File Explorer” and navigate to “This PC” or “My Computer”. Right-click on “This PC” or “My Computer” and select “Properties”. Take note of the drive letter assigned to your current OS drive (usually C:\).
3. Press the “Windows” key and search for “Create a recovery drive”. Follow the on-screen instructions to create a bootable USB drive. This will be used to boot your computer and initiate the cloning process.
4. Once the recovery drive is created, restart your computer and enter the BIOS setup by pressing the appropriate key (such as F12 or Del) during the boot process. Set the USB drive as the first boot device in the Boot Order or Boot Priority settings. Save the changes, exit the BIOS, and restart your computer.
5. After your computer boots from the USB drive, select your language preferences and click “Next”. Click on “Repair your computer” and choose “Troubleshoot”. From the troubleshoot menu, select “Advanced options” and then “System Image Recovery”. Follow the on-screen instructions to select the system image you want to restore and choose the SSD as the destination drive.
6. Once the cloning process is complete, restart your computer and access the BIOS setup again. Set the SSD as the first boot device in the Boot Order or Boot Priority settings. Save the changes, exit the BIOS, and restart your computer.
Using third-party software:
1. Install and launch the third-party software you have selected for OS cloning.
2. Select your current OS drive (usually C:\) as the source drive and your SSD as the target drive.
3. Configure any specific cloning options provided by the software, such as partition resizing or excluding certain files or folders from the cloning process.
4. Start the cloning process and allow the software to copy all the OS files, settings, and applications from the source drive to the SSD.
5. Once the cloning process is complete, shut down your computer and physically disconnect the old OS drive or set it aside for future use.
6. Connect the SSD to the same port where the old OS drive was connected and start your computer.
7. Enter the BIOS setup and set the SSD as the first boot device in the Boot Order or Boot Priority settings. Save the changes, exit the BIOS, and restart your computer.
Cloning your OS to the SSD allows you to preserve all your files, settings, and applications, ensuring a seamless transition to the new drive. Whether you choose to use the built-in Windows tools or third-party software, following these steps will help you successfully clone your OS to the SSD and take full advantage of its performance benefits.
In the next step, we will discuss how to configure the BIOS to boot from the SSD, allowing your computer to start up with the newly cloned OS.
Step 4: Configuring the BIOS to boot from the SSD
After you have successfully cloned your operating system (OS) to the solid-state drive (SSD), the next step is to configure the Basic Input/Output System (BIOS) settings to ensure that your computer boots from the SSD. Here’s how you can configure the BIOS to boot from the SSD:
1. Restart your computer: Make sure your computer is powered on and then restart it.
2. Enter the BIOS setup: During the boot process, look for the key to access the BIOS setup. This key is usually displayed on the screen for a brief moment and varies depending on the manufacturer. Popular keys include F2, Del, Esc, or F12. Press the corresponding key to enter the BIOS setup.
3. Locate the Boot Order or Boot Priority settings: Once inside the BIOS setup, navigate to the Boot or Boot Order section. The location may vary depending on your specific BIOS version and motherboard. Look for options related to boot priority or the order in which devices are checked for booting.
4. Set the SSD as the first boot device: In the Boot Order or Boot Priority settings, find the option to change the boot order of devices. Move the SSD to the top of the list or select it as the first boot device. This ensures that your computer will attempt to boot from the SSD before other devices.
5. Save and exit the BIOS: Once you have set the SSD as the first boot device, save your changes and exit the BIOS setup. Most BIOS screens have a dedicated key to save and exit, such as F10. Press the appropriate key to save your changes and exit the BIOS.
6. Restart your computer: After exiting the BIOS setup, your computer will restart. It should now boot from the SSD and load your newly cloned OS.
If your computer still does not boot from the SSD even after configuring the BIOS, double-check the BIOS settings and ensure that the SSD is properly connected. Also, verify that the cloning process was successful and that the OS files are correctly copied to the SSD.
Configuring the BIOS to boot from the SSD is a crucial step to complete the migration process. By setting the SSD as the first boot device, you ensure that your computer starts up with the newly cloned OS, allowing you to experience the improved speed and performance of the SSD.
In the next step, we will discuss how to verify the success of the migration and ensure that everything is working correctly.
Step 5: Verifying the migration was successful
After configuring the BIOS to boot from the solid-state drive (SSD), it is crucial to verify that the migration process of your operating system (OS) was successful. Verifying the success of the migration ensures that everything is working correctly and that you can fully utilize the benefits of your new SSD. Here’s how to verify the migration:
1. Boot up your computer: Start your computer and allow it to boot from the SSD. If the computer successfully starts up without any errors or issues, it is a good indication that the migration was successful.
2. Check OS functionality: Ensure that the OS functions as expected. Test basic functionalities, such as opening applications, accessing files, and navigating through menus. Make sure there are no error messages or unusual behavior.
3. Test system speed and responsiveness: Launch resource-intensive applications or tasks to evaluate the speed and responsiveness of the system. Notice if there is a significant improvement in performance compared to when the OS was running on the previous hard drive.
4. Check disk capacity: Open “File Explorer” or “My Computer” and check the available disk space on the SSD. Verify that the capacity matches the specifications of your SSD. Also, check that the SSD is properly recognized by the operating system.
5. Monitor temperature and health: Keep an eye on the temperature and overall health of the SSD. Use software tools provided by the manufacturer or third-party applications to monitor the SSD’s temperature and health status periodically. Ensure that the SSD is running within safe temperature limits and that there are no signs of any issues.
6. Perform system updates and software installations: Make sure to update your operating system to the latest version and install any necessary driver updates or system patches. Install your essential software applications and ensure they are running smoothly on the new SSD.
7. Test file accessibility: Verify that your files and data are accessible and can be opened without any errors. Check different file formats, such as documents, images, videos, and music, to ensure their integrity and proper functioning.
8. Perform system backups: After the migration, set up a regular data backup routine to ensure that your important files are always backed up. Use either an external hard drive or a cloud storage service to safeguard your data from any potential future issues.
By following these steps to verify the success of the migration, you can ensure that your operating system is functioning correctly on the new SSD. Enjoy the improved speed, responsiveness, and overall performance that the SSD brings to your computer.
If you encounter any issues or unusual behavior during the verification process, double-check the steps you’ve followed, review the settings in the BIOS, and consider seeking assistance from technical support or online forums for further troubleshooting.
In the next section, we will conclude the article and summarize the key points discussed in the migration process.
Conclusion
By migrating your operating system (OS) to a solid-state drive (SSD), you can unlock the full potential of your computer and enjoy improved speed, responsiveness, and overall performance. The migration process may seem daunting at first, but with the right approach and careful execution, you can successfully transfer your OS to an SSD with ease.
In this article, we discussed two options for migrating your OS: using the built-in Windows tools or utilizing third-party software. Each option has its own advantages and limitations, so it’s important to choose the one that best suits your needs and preferences.
First, we emphasized the importance of backing up your data before proceeding with the migration. This ensures that your critical files remain safe and intact throughout the process. We then moved on to checking the health of your existing hard drive and formatting the SSD to ensure optimal performance and compatibility.
Next, we explored the steps involved in cloning your OS to the SSD. Whether it was using the built-in Windows tools or third-party software, we provided a comprehensive guide on how to make an exact copy of your OS, including all files, settings, and applications.
To complete the migration process, we discussed the configuration of the BIOS to boot from the SSD, ensuring that your computer starts up with the newly cloned OS. Additionally, we emphasized the importance of verifying the success of the migration by checking OS functionality, testing system speed and responsiveness, and monitoring the health of the SSD.
It’s worth noting that throughout the migration process, data backup and precautionary measures are crucial to avoid any potential data loss or system instability. Regularly backing up your files is essential to ensure the safety and integrity of your data.
In conclusion, migrating your OS to an SSD is a worthwhile investment that can greatly enhance your computing experience. From faster boot times and improved system responsiveness to enhanced application performance and reduced power consumption, the benefits of an SSD are undeniable. With proper preparation, careful execution, and following the steps outlined in this article, you can successfully migrate your OS to an SSD and unlock the full potential of your computer.