Introduction
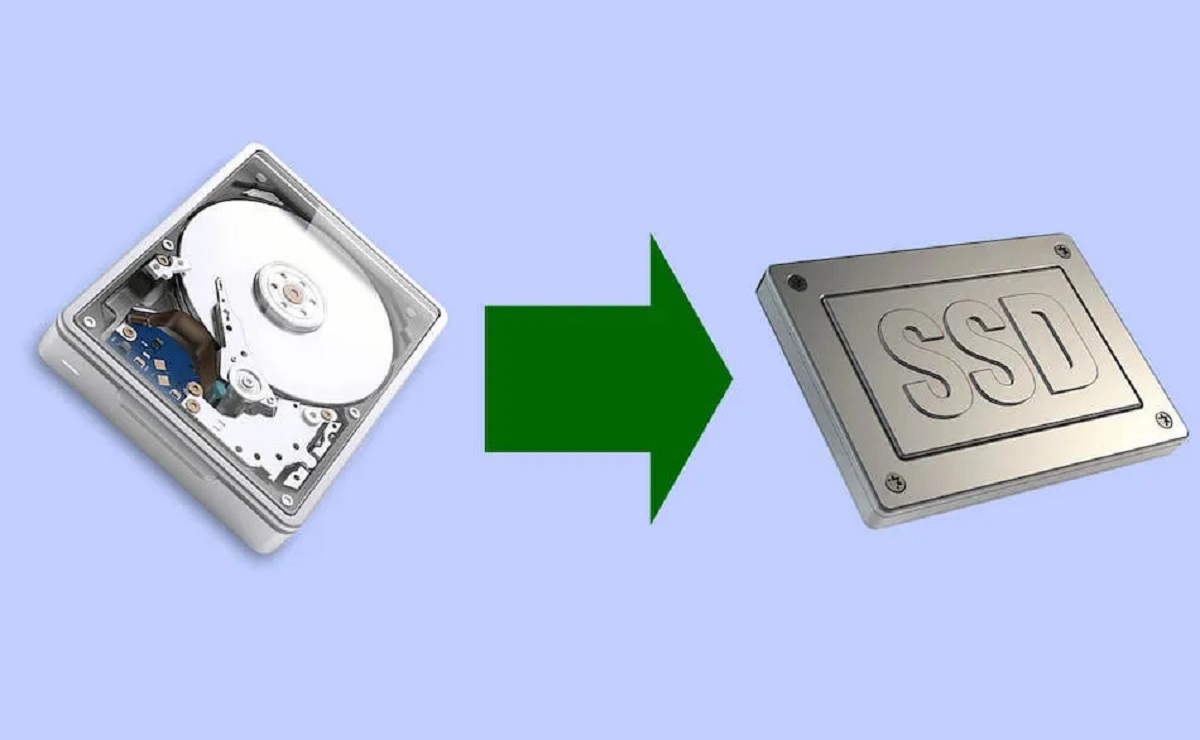
Gone are the days of bulky hard drives that took ages to boot up your computer. Solid State Drives (SSDs) have revolutionized the storage industry with their lightning-fast read and write speeds. Making a switch from an old traditional hard drive to a new SSD can significantly improve your system’s performance and speed. But how do you transfer everything from one SSD to another without losing your precious data and settings?
In this article, we will guide you through the process of transferring all your files, applications, and operating system from one SSD to another. Whether you’re upgrading your SSD or simply replacing a faulty one, understanding the steps involved will ensure a seamless transition and save you from the hassle of reinstalling and reconfiguring everything from scratch.
Before we dive into the nitty-gritty of the transfer process, let’s take a moment to understand what SSDs are and why they have become the preferred choice for storage enthusiasts and professionals alike.
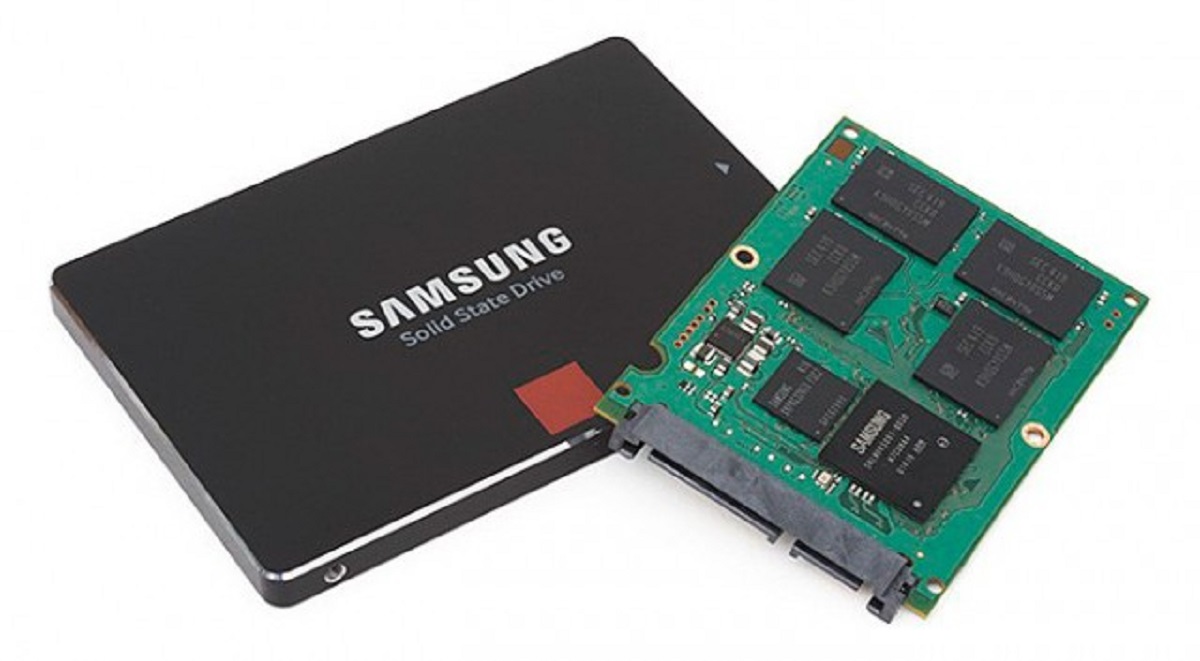
Understanding SSDs
SSDs, or Solid State Drives, are storage devices that use flash memory technology to store and retrieve data. Unlike traditional hard drives that rely on spinning disks and mechanical read/write heads, SSDs have no moving parts, making them much faster and more durable. The absence of mechanical components also reduces the risk of data loss due to physical damage or wear and tear.
SSDs offer several advantages over traditional hard drives, including faster boot times, quicker file transfers, and improved overall system responsiveness. With their compact form factor and silent operation, SSDs are also ideal for laptops and portable devices, allowing for better power efficiency and longer battery life.
Understanding SSDs
In today’s world, where speed and performance are paramount, Solid State Drives (SSDs) have emerged as the go-to storage solution for tech enthusiasts and professionals. Unlike traditional hard drives, which rely on spinning disks and mechanical read/write heads, SSDs are built on flash memory technology, enabling lightning-fast data access and transfer speeds.
An SSD is essentially a collection of memory chips that store data electronically. This means that there are no moving parts involved in the data retrieval process, resulting in near-instantaneous access times. Compared to hard drives, which require time-consuming physical movements to retrieve data, SSDs can read and write data with incredible speed and efficiency.
One of the key advantages of SSDs is their incredible speed. Because there are no moving parts involved, the time it takes to fetch data is significantly reduced. This translates to faster boot times for your operating system and applications, making your overall computing experience much smoother and more responsive.
Furthermore, SSDs excel in random read and write operations, which are essential for multitasking and running demanding applications. With an SSD, you can expect quicker file transfers, faster application launches, and improved system performance.
Another significant benefit of SSDs is their durability. Unlike traditional hard drives, which are susceptible to damage from physical shocks or vibrations, SSDs are more robust and resilient. This is because they do not rely on moving parts that can be easily damaged. As a result, SSDs are more resistant to drops, impacts, and other external factors that could potentially lead to data loss.
Moreover, SSDs consume less power than traditional hard drives. Since there are no spinning disks or moving mechanical parts, SSDs require less energy to operate. This not only leads to improved battery life for laptops and portable devices but also contributes to a more energy-efficient and eco-friendly computing experience.
Overall, SSDs have revolutionized the storage industry by offering improved speed, better performance, enhanced durability, and lower power consumption. Whether you are a gamer looking for faster load times, a professional needing to manage large datasets, or a casual user seeking a snappy user experience, upgrading to an SSD can provide a significant boost in both productivity and enjoyment.
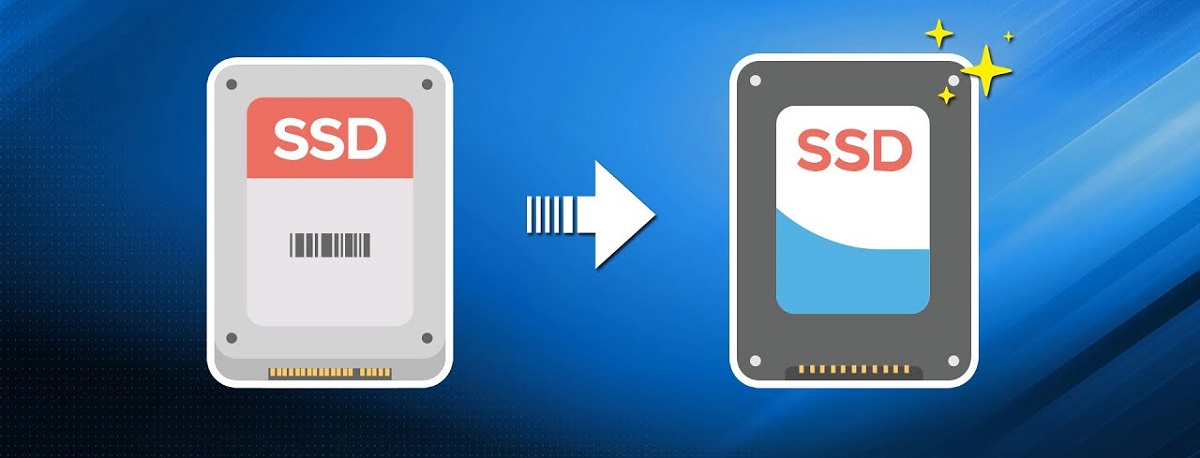
Why Transfer Everything to a New SSD?
Upgrading to a new SSD can bring about a multitude of benefits, making it worth the effort to transfer everything from your old SSD or hard drive. Here are some compelling reasons to consider transferring all your data and settings to a new SSD:
Improved Performance: One of the primary advantages of SSDs is their remarkable speed and responsiveness. By transferring your operating system, applications, and files to a new SSD, you can experience significantly faster boot times, quicker application launches, and smoother overall system performance. Tasks that used to take minutes will be completed in seconds, leading to a more efficient and productive computing experience.
Enhanced Reliability: SSDs are known for their durability and reliability. Unlike traditional hard drives that can fail due to mechanical issues or physical damage, SSDs are more resistant to shock, vibration, and general wear and tear. By transferring your data to a new SSD, you can enjoy peace of mind knowing that your files and applications are stored on a more robust and reliable storage medium.
Better Energy Efficiency: If you’re conscious about energy consumption or use a laptop on the go, switching to an SSD can help prolong battery life. SSDs consume less power compared to traditional hard drives since they don’t have spinning disks or moving mechanical components. This improved energy efficiency not only benefits your device’s battery life but also contributes to a more environmentally friendly computing experience.
Space Optimization: Upgrading to a larger capacity SSD allows you to consolidate all your files, applications, and operating system onto a single storage device. This eliminates the need for multiple drives or external storage solutions, making it easier to manage and access your data. With a new SSD, you can enjoy ample storage space without sacrificing performance or worrying about running out of storage.
Future-Proofing: Technology is constantly evolving, and SSDs offer features and advancements that are not available in older storage devices. By transferring everything to a new SSD, you’re ensuring compatibility with the latest technologies and standards, future-proofing your system. This means you’ll be better equipped to handle future updates, software advancements, and storage requirements without any compatibility issues.
With all these advantages in mind, making the decision to transfer everything to a new SSD is a wise investment in the longevity and performance of your system. Whether you’re a gamer, professional, or casual user, the benefits of upgrading to an SSD are undeniable, and the transfer process is a small price to pay for the enhanced experience it brings.
Preparing for the Transfer
Before you embark on the process of transferring everything to a new SSD, it’s essential to take a few preliminary steps to ensure a smooth and successful transfer. Here are some important tasks to complete before starting the transfer:
Backup Your Data: It’s always crucial to backup your data before making any major changes to your storage system. This ensures that you have a copy of all your important files in case anything goes wrong during the transfer process. You can create a backup on an external hard drive, cloud storage, or use a dedicated backup software to automate the process. Double-check that your backup is complete and accessible before proceeding.
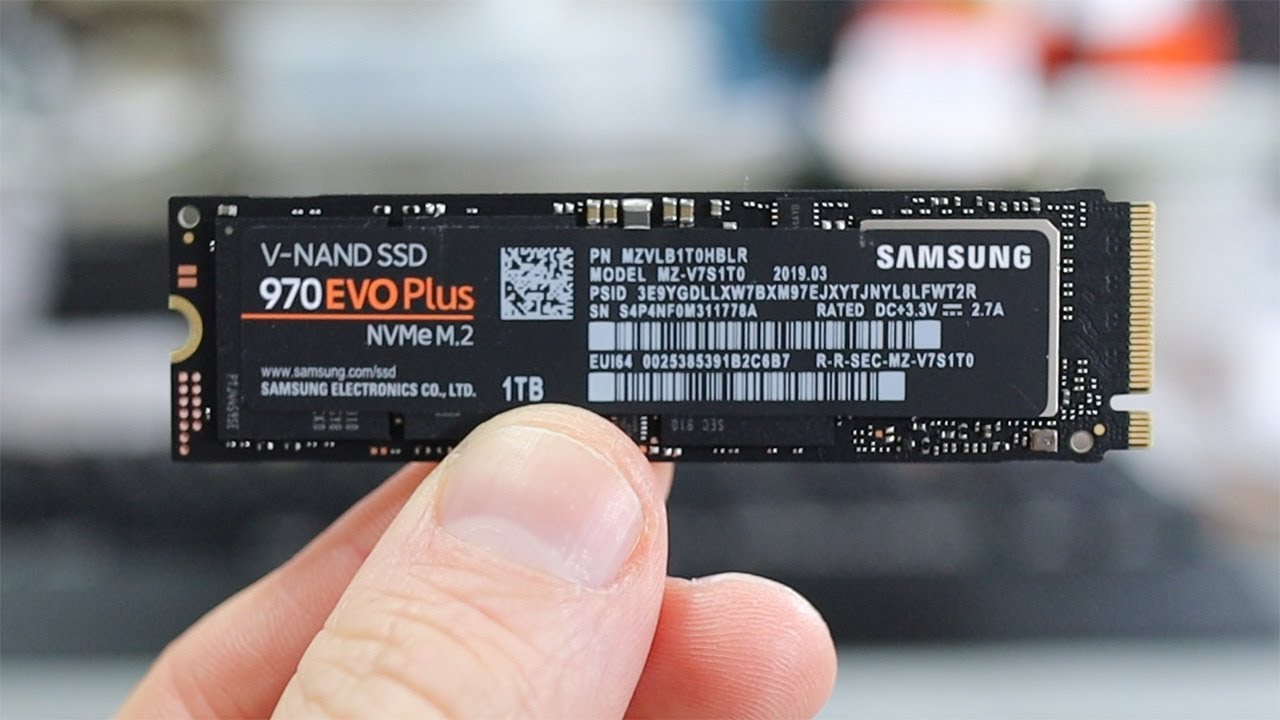
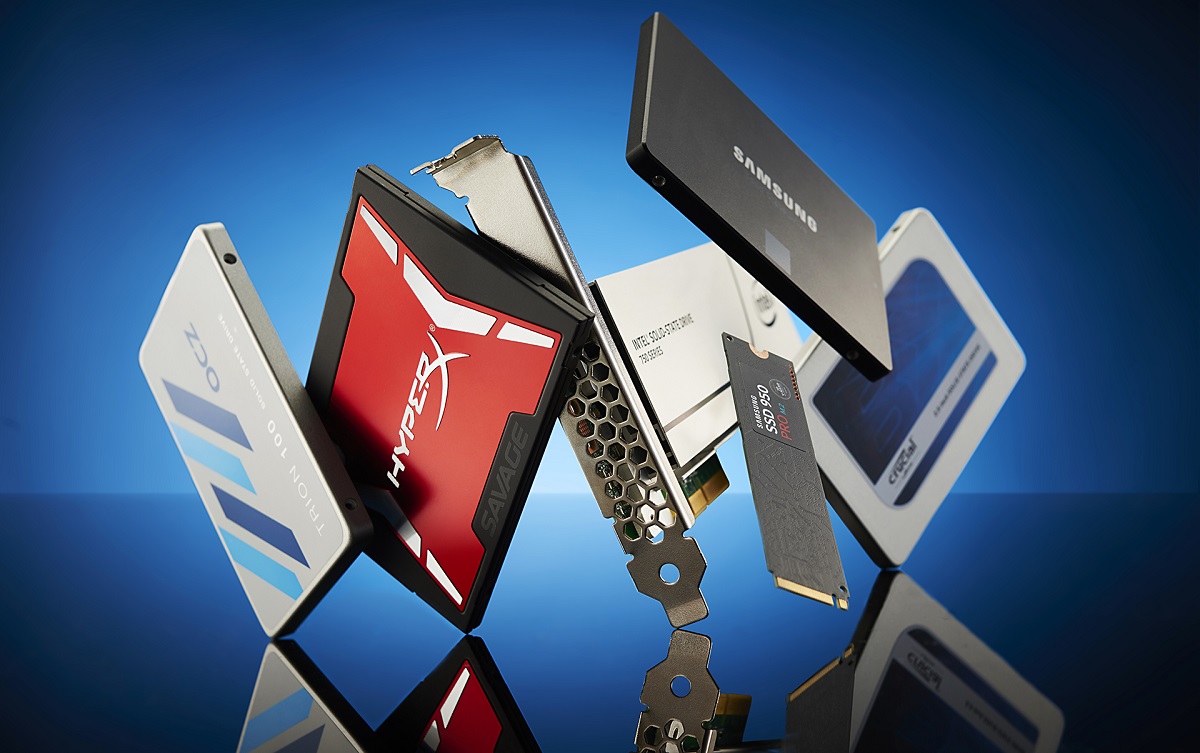
Check SSD Compatibility: Ensure that the new SSD is compatible with your system. Check the specifications of your computer or refer to the manufacturer’s documentation to determine the type of SSD and connector required. Common SSD form factors include 2.5-inch SATA, M.2, and PCIe. Verify that your motherboard supports the chosen SSD type and that you have the necessary cables or adapters for installation if required.
Prepare Necessary Tools: As you proceed with the transfer, you’ll require some tools to successfully complete the task. Make sure you have a screwdriver set, anti-static wristband (optional but recommended), and any other tools specific to your computer model to safely access and replace the SSD.
Free Up Space: If your current SSD or storage drive is nearing full capacity, take this opportunity to free up some space by deleting unnecessary files or moving them to an external storage device. This will ensure that your new SSD has enough room to accommodate all your data without any issues, and it will also help optimize system performance.
Update Your OS and Software: Before transferring your data, it’s best to update your operating system and software to the latest versions. This ensures compatibility with the new SSD and minimizes the risk of any compatibility issues or data corruption. Check for updates from your OS provider and the manufacturers of your installed software applications.
Make a List of Installed Programs: Take note of all the applications you have installed on your current SSD. Having a list handy will make it easier to reinstall and reconfigure your software on the new SSD. This step will save you time and effort once the transfer is complete.
By completing these preparation steps, you’ll be ready to proceed with confidence to transfer everything to your new SSD. Taking the time to backup your data, ensure compatibility, and prepare the necessary tools will greatly minimize any potential issues and help make the transfer process seamless and successful.
Option 1: Cloning Your SSD
Cloning your SSD is a convenient and efficient method of transferring everything from your old SSD to a new one. This process creates an exact replica of your existing SSD, including the operating system, applications, and files. Here’s a step-by-step guide on how to clone your SSD:
Step 1: Choose a Cloning Software: There are several reliable cloning software options available, such as Acronis True Image, Clonezilla, and Macrium Reflect. Research the features and compatibility of each software to find one that suits your needs and is compatible with your SSD.
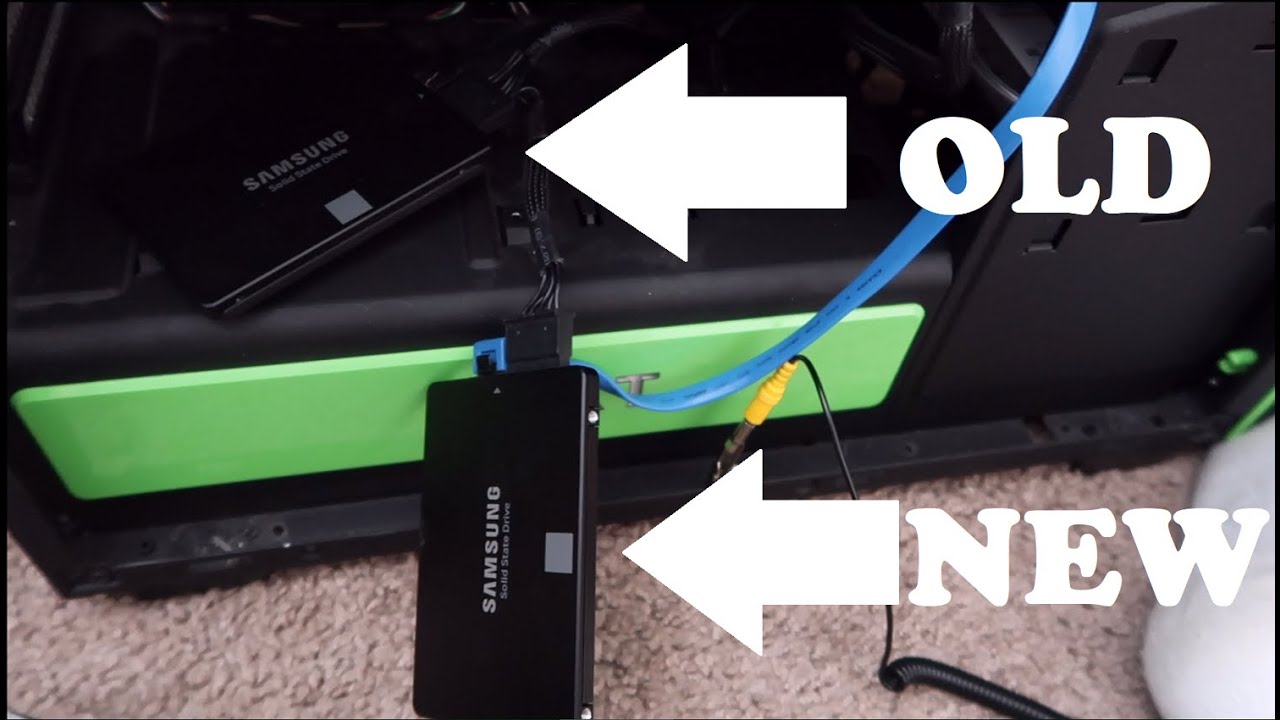
Step 2: Connect the New SSD: Install the new SSD in your computer, either by connecting it as a secondary drive or replacing the existing SSD if you’re upgrading. Ensure that the new SSD is properly connected and recognized by your system.
Step 3: Launch the Cloning Software: Open the cloning software you have chosen and follow the on-screen instructions to begin the cloning process.
Step 4: Select the Source and Destination Drives: In the cloning software, select your old SSD as the source drive and the new SSD as the destination drive. Double-check the drive sizes and confirm that you have selected the correct drives to avoid any data loss.
Step 5: Configure Cloning Options: Depending on the software you’re using, you may have additional options to customize the cloning process. These could include resizing partitions, excluding certain files or folders, or adjusting compression settings. Review and configure these options according to your preferences.
Step 6: Start the Cloning Process: Once you have configured the cloning options, start the cloning process. The software will begin copying all the data from your old SSD to the new one. This process can take some time, depending on the amount of data being transferred and the speed of your SSDs.
Step 7: Verify Cloning Completion: After the cloning process is complete, the software will typically provide a verification or completion status. Verify that the cloning was successful without any errors or warnings.
Step 8: Shutdown and Remove Old SSD: Once you have verified the success of the cloning process, shut down your computer and disconnect the old SSD. If you replaced the original SSD, carefully remove it from the system. Ensure that the new SSD is properly installed as the primary drive.
Step 9: Boot from the New SSD: Start your computer and access the BIOS/UEFI settings to ensure that the new SSD is set as the primary boot device. Save the settings and restart the computer. Your system should now boot from the new SSD, with all your data and settings intact.
Cloning your SSD offers a straightforward and efficient method of transferring everything to a new SSD. With the right cloning software and a careful step-by-step process, you can seamlessly migrate all your data, operating system, applications, and files to a new SSD, ensuring a smooth transition and uninterrupted computing experience.
Option 2: Manually Transferring the Data
If you prefer a more hands-on approach or if you don’t want to use cloning software, manually transferring the data from your old SSD to a new one is another viable option. While it requires a bit more effort and organization, this method allows you to selectively transfer files and gives you more control over the process. Here’s a step-by-step guide on how to manually transfer the data:
Step 1: Connect the New SSD: Install the new SSD in your computer, either as a secondary drive or as a replacement for your old SSD. Ensure that the new SSD is properly connected and recognized by your system.
Step 2: Identify Key Data: Take inventory of the important data you want to transfer, including your personal files, documents, photos, videos, and any other data you wish to keep. Create a checklist or make a note of these files to ensure that you don’t overlook anything during the transfer process.
Step 3: Copy Files and Documents: Use your preferred file manager or Explorer to navigate to your old SSD and locate the files and documents you identified in the previous step. Copy these files and paste them into the appropriate folders on your new SSD. This may include folders such as Documents, Pictures, Videos, or any custom folders you have created.
Step 4: Reinstall Applications: Make a note of the applications you have installed on your old SSD. Refer to your list and identify the necessary installation files or setup programs for these applications. Download the latest versions of the software directly from the official websites or use the original installation discs if available. Install the applications on your new SSD and enter any necessary license keys or activation codes.
Step 5: Transfer Saved Game Data and Profiles: If you’re a gamer, you may have saved game data, profiles, or preferences that you wish to transfer to the new SSD. Locate the relevant files and folders associated with your games, which are typically found in the Documents or AppData directories. Copy these files to the appropriate locations on your new SSD to maintain your progress and settings.
Step 6: Migrate Application Settings: Some applications store specific settings or configurations in hidden folders or registry entries. Research each application’s documentation or user forums to identify these settings and determine the best method to transfer them to your new SSD. This may involve editing configuration files, exporting and importing settings, or using dedicated migration tools provided by the software developers.
Step 7: Verify and Update: Once the transfer is complete, ensure that all your files, documents, and applications are accessible on your new SSD. Test the functionality of your applications and check that your saved data and game profiles are intact. Update your operating system and applications to the latest versions to ensure compatibility and security.
Step 8: Remove the Old SSD: After you have successfully migrated all your data and verified everything on the new SSD, shut down your computer and carefully remove the old SSD. Store it in a safe place as a backup or repurpose it as needed.
Manually transferring the data from your old SSD to a new one allows for a more customized and selective approach. By following the step-by-step process outlined above, you can ensure that all your important files, documents, applications, and settings are transferred seamlessly to the new SSD, providing you with a fresh start without the need for cloning software.
Transferring the Operating System
Transferring your operating system (OS) to a new SSD is a critical step in migrating everything from your old SSD to a new one. Fortunately, there are a few methods available to help you accomplish this task. Here are two common approaches to transferring your OS:
Method 1: Cloning the OS: Cloning the OS involves creating an exact copy of your current operating system from the old SSD to the new SSD. This method is best suited for users who want a seamless transition without having to reinstall and reconfigure the OS and their software.
Cloning the OS can be done using cloning software such as Acronis True Image, EaseUS Todo Backup, or Macrium Reflect. These tools typically offer an option to clone the entire disk, including the OS, applications, and data.
During the cloning process, you will select the old SSD as the source drive and the new SSD as the target drive. The software will then copy all the data, including the OS, to the new SSD. Once the cloning process is complete, you may need to adjust the boot order in your BIOS settings to ensure that the computer boots from the new SSD.
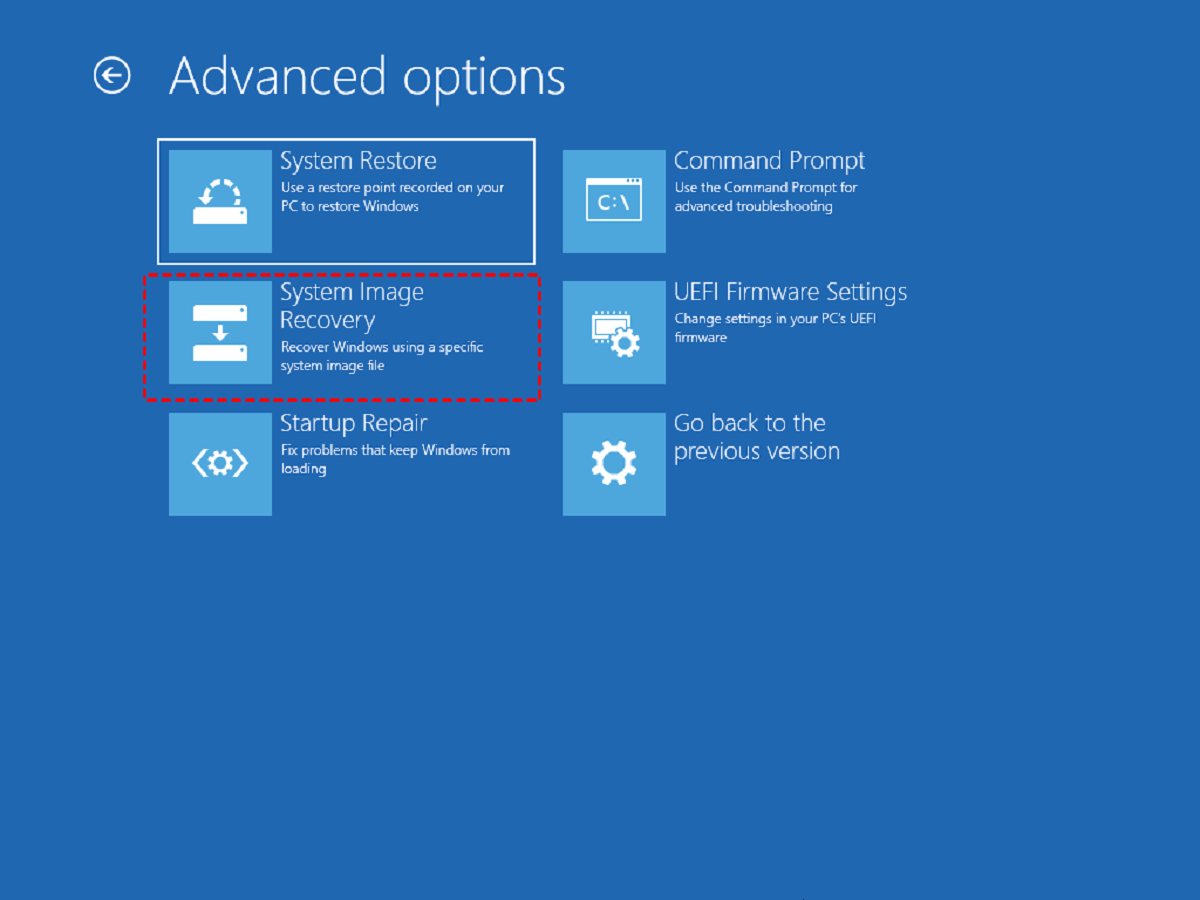
Method 2: Clean OS Installation: Another option is to perform a clean installation of the operating system on the new SSD. This method involves reformatting the new SSD and installing the OS from scratch, along with all the necessary drivers and software.
Before proceeding with a clean installation, ensure that you have a backup of all your important files and documents. You may also want to make note of the applications you have installed on your old SSD to streamline the reinstallation process.
To perform a clean OS installation, you will need an installation media such as a USB drive or a DVD containing the OS installation files. Insert the installation media into your computer and boot from it. Follow the on-screen instructions to format the new SSD and install the OS. Once the installation is complete, you can proceed with reinstalling your applications and restoring your files from the backup.
Both methods have their advantages and considerations. Cloning the OS provides a more seamless transition, allowing you to retain all your settings and configurations. However, a clean OS installation offers a fresh start and eliminates any potential conflicts or issues carried over from the old SSD.
Ultimately, the choice between these methods will depend on your preferences and requirements. If your current OS installation is stable and you want to save time and effort, cloning the OS is a suitable choice. On the other hand, if you’re looking for a fresh start or if your current OS is experiencing issues, a clean installation is recommended.
Regardless of the method you choose, transferring the operating system to the new SSD is a crucial step in ensuring a successful migration. It allows you to maintain familiarity with your system and continue using your computer seamlessly with the improved performance and benefits offered by the new SSD.
Transferring Programs and Applications
Transferring your programs and applications to a new SSD is an essential part of the migration process. While reinstalling them individually might seem time-consuming, it ensures optimal performance and compatibility on your new SSD. Here are the steps to transfer your programs and applications:
Step 1: Make a List of Installed Programs: Begin by creating a list of all the programs and applications installed on your old SSD. This will help you keep track of what needs to be reinstalled on the new SSD.
Step 2: Download the Latest Versions: Visit the official websites or software repositories to download the latest versions of your programs. This ensures that you have the most up-to-date versions, with any bug fixes or improvements.
Step 3: Backup Program Settings and Activation Keys: Some programs store settings, preferences, or activation information in specific files or registry entries. Consult the documentation or support resources for each program to find out how to backup and transfer these configurations. Alternatively, use third-party tools that specialize in backing up program settings.
Step 4: Uninstall Programs: Properly uninstall programs from your old SSD before reinstalling them on the new SSD. This ensures a clean installation and removes any remnants or conflicts that may affect the performance of the new installation.
Step 5: Install Programs on the New SSD: Begin the installation process for each program on your new SSD. Follow the prompts and enter any activation keys or license information as required. Use the settings and preferences you backed up in step 3 to restore your previous configurations.
Step 6: Update Programs: After installing the programs, check for any available updates and install them. This ensures that you have the latest features and security patches for each program.
Step 7: Configure Program Data Locations: Some programs allow you to specify the location where your data will be stored, such as documents, user-profiles, or media files. Configure these settings to ensure that your program files and data are saved on the new SSD, taking advantage of its speed and performance.
Step 8: Test Program Functionality: Launch each program and ensure that it is functioning properly on the new SSD. Verify that all settings, preferences, and customizations are in place and that you can access your data as expected.
Step 9: Remove Unnecessary Files: As you test your programs on the new SSD, delete any unnecessary files or data leftover from the previous installations. This helps optimize storage space and maintain a clean and organized system.
By following these steps, you can effectively transfer your programs and applications to a new SSD. Though it may require some time and effort, reinstalling programs ensures that they are properly configured for the new SSD, maximizing performance and compatibility. Additionally, the process allows for a fresh start, eliminating any potential issues or conflicts that may have arisen on the previous SSD. Enjoy the improved speed and responsiveness of your applications on the new SSD!
Transferring Files and Documents
When migrating to a new SSD, it’s crucial to transfer your files and documents to ensure you have access to all your important data on the new drive. Here are the steps to effectively transfer your files and documents:
Step 1: Identify Your File Locations: Start by identifying the locations of your important files and documents on your old SSD. These may include folders such as Documents, Pictures, Videos, Downloads, or any custom folders you have created.
Step 2: Organize and Clean Up: Before transferring your files, take the opportunity to organize and clean up your data. Delete any unnecessary files or folders, and consider creating a backup of any critical files to an external storage device for added security.
Step 3: Copy Your Files: Use a file manager or Explorer to navigate to the folders containing your files and documents on the old SSD. Select all the files you wish to transfer, right-click, and choose the “Copy” option.
Step 4: Paste onto the New SSD: Navigate to the corresponding folders on your new SSD and right-click on an empty space. Choose the “Paste” option to copy your files from the old SSD to the new one. Alternatively, you can use drag-and-drop to transfer the files.
Step 5: Verify the Transfer: After the transfer is complete, verify that all your files and documents are present on the new SSD. Double-check the file sizes and ensure that the transferred files are accessible and intact.
Step 6: Organize Your New SSD: Take the opportunity to organize your files and documents on the new SSD. Create new folders, categorize your files, and establish a logical file structure to make it easier to locate and access your data in the future.
Step 7: Test File Access: Open a few random files from different folders to ensure that your files are opening properly on the new SSD. Check for any errors or missing content.
Step 8: Remove Files from Old SSD: Once you have confirmed that all your files and documents are successfully transferred and accessible on the new SSD, you can safely delete the files from the old SSD to free up space.
Step 9: Backup Your New SSD: As a precaution, consider creating a backup of your new SSD’s files to avoid any potential data loss. You can use external storage devices, cloud storage, or backup software for this purpose.
By following these steps, you can seamlessly transfer your files and documents to a new SSD. Ensuring that your valuable data is available on the new drive allows you to continue working with your familiar files and maintain continuity in your projects. Enjoy the improved performance and speed of accessing your files on the new SSD!
Updating the Boot Order
After transferring all your data and setting up your new SSD, it’s crucial to update the boot order in your computer’s BIOS (or UEFI) settings. This ensures that your system recognizes the new SSD as the primary boot device. Here’s how you can update the boot order:
Step 1: Restart Your Computer: Start by restarting your computer. As it restarts, be ready to access the BIOS settings. The key to access the BIOS may vary depending on your computer’s manufacturer (common keys include F2, Delete, or F12). Look for the prompt on the screen during startup to identify the correct key.
Step 2: Access the BIOS Settings: Press the designated key repeatedly during the startup process to access the BIOS settings. If you miss it, restart your computer and try again. Once you’re in the BIOS, navigate to the “Boot” or “Startup” section.
Step 3: Change the Boot Order: Within the “Boot” or “Startup” section, locate the boot order or boot priority options. This determines the order in which your computer looks for a bootable device. Select the option to modify the boot order.
Step 4: Set the New SSD as the First Boot Device: In the boot order settings, identify the entry corresponding to your new SSD. Use the provided instructions or options to move the new SSD to the top of the list or set it as the first boot device. This prioritizes the new SSD for booting.
Step 5: Save and Exit: Once you have updated the boot order and ensured that the new SSD is set as the first boot device, save your changes and exit the BIOS settings. Follow the instructions provided to save your changes and restart your computer.
Step 6: Verify Booting from the New SSD: After restarting, pay attention to the startup process and confirm that your computer is booting from the new SSD. Verify that the operating system loads correctly and that you have access to your files and applications on the new drive.
Note: If your computer has a UEFI firmware instead of the traditional BIOS, the steps may differ slightly. Look for options related to boot devices or boot order within the UEFI settings and follow a similar process to prioritize the new SSD.
Updating the boot order is a crucial step to ensure that your computer recognizes and boots from the new SSD. Failing to update the boot order may result in your computer continuing to boot from the old SSD or encountering boot errors. By following these simple steps, you can ensure a seamless transition to the new SSD and take full advantage of its speed and performance benefits.
Verifying the Transfer
After completing the transfer of your data, operating system, programs, and boot order to the new SSD, it is crucial to verify that the transfer was successful and that everything is functioning correctly. Here are some essential steps to ensure that the transfer has been completed accurately:
Step 1: Check System Boot: Restart your computer and pay close attention to the boot process. Verify that your system boots up smoothly and without any errors or interruptions. This confirms that the new SSD is properly recognized as the primary boot device.
Step 2: Test OS Functionality: Once your computer has booted up, test the functionality of your operating system (OS). Open various applications, browse the internet, and perform common tasks to ensure that your OS is running smoothly on the new SSD.
Step 3: Verify Program Installation: Check that all your applications and programs are properly installed and accessible on the new SSD. Launch each program and ensure that it opens without any issues. Test different features and functionalities to verify that they are working as expected.
Step 4: Validate Data Transfer: Go through your files and documents on the new SSD to confirm that all the transferred data is intact. Open various files from different folders to ensure that there are no errors or missing content. Compare the transferred files on the new SSD with the original ones to ensure they match.
Step 5: Test External Device Compatibility: If you have external devices such as printers, scanners, or external hard drives connected to your computer, verify that they are recognized and functioning properly with the new SSD. Test their functionality to ensure there are no issues with compatibility or drivers.
Step 6: Check Performance Metrics: Compare the performance of your computer before and after the transfer. Use benchmarking tools to gauge the speed, responsiveness, and overall performance of the new SSD. Pay attention to the boot-up time, application launch speed, and file transfer performance to determine the improvement brought by the new SSD.
Step 7: Monitor Stability: Keep an eye on the overall stability of your system in the days following the transfer. Ensure that your computer remains stable and that there are no sudden crashes, freezes, or error messages. If any issues arise, troubleshoot and address them promptly to maintain optimal performance.
Step 8: Maintain Regular Backups: Moving forward, continue to maintain regular backups of your data, including any changes or additions you make after the transfer. Regular backups provide an added layer of security in case of any system failures or unforeseen issues.
By following these steps to verify the transfer, you can rest assured that everything has been successfully migrated to the new SSD. Confirming the proper functioning of your operating system, programs, and data ensures that you can seamlessly continue your work and enjoy the improved performance and speed offered by the new SSD.
Conclusion
Transferring everything from one SSD to another may seem like a daunting task, but with careful planning and execution, it can be a smooth and successful process. Whether you choose to clone your SSD or manually transfer your data, following the outlined steps ensures that you can fully leverage the benefits of a new SSD while preserving your files, applications, and settings.
Understanding the advantages of SSDs, such as improved performance, enhanced reliability, better energy efficiency, and space optimization, motivates the decision to upgrade to a new SSD. The preparation phase of backing up data, checking compatibility, and gathering necessary tools sets the stage for a seamless transfer.
Cloning your SSD allows for an exact replica of your old SSD, including the operating system, applications, and data. This method simplifies the process and maintains familiarity within your system. On the other hand, manually transferring data grants more control and customization, letting you selectively transfer files, reinstall programs, and configure settings for optimal performance on the new SSD.
After transferring the data, updating the boot order ensures a smooth transition, allowing your computer to recognize the new SSD as the primary boot device. Verifying the transfer by checking the system boot, testing OS functionality, ensuring program installations, verifying data transfer, testing external device compatibility, monitoring performance metrics, and monitoring stability enhances confidence in the success of the migration process.
Remember to maintain regular backups of your data to safeguard against any unforeseen issues or failures. Regular backups provide an added layer of security and peace of mind.
In conclusion (without using the phrase “in conclusion”), transferring everything from one SSD to another is an essential process for upgrading or replacing your storage device. By following the steps outlined in this article and considering the advantages of SSDs, you can smoothly transition to a new SSD and experience improved performance and reliability on your computer.