Introduction
Welcome to the world of home theaters and immersive movie experiences. If you’re an avid movie enthusiast or simply love to enjoy blockbuster films in the comfort of your own home, having a projector screen is essential.
A projector screen provides a dedicated surface for projecting images and videos, ensuring optimal clarity, color, and contrast. While you can purchase a ready-made screen, making your own screen can save you money and allow for customization to suit your specific needs.
In this guide, we will take you through the step-by-step process of creating your own projector screen. Whether you’re a DIY enthusiast looking for a weekend project or a budget-conscious individual who wants to save some bucks, this article is your comprehensive resource.
Before we dive into the details, let’s note that there are several different types of projector screens available, including fixed-frame screens, retractable screens, and portable screens. For the purpose of this article, we will focus on building a fixed-frame screen, which offers a professional and permanent setup.
Now, let’s grab our tools and get started on showcasing cinema-like quality in your own home!
Step 1: Choosing the Right Fabric
When it comes to creating a projector screen, choosing the right fabric is crucial for achieving optimum image quality. The fabric you select should have excellent color reproduction, minimal light reflection, and a smooth surface for a clear and vibrant image. Here are some factors to consider when choosing the fabric:
- Gain: The gain of a screen refers to its ability to reflect light. A higher gain indicates a brighter image, but it can also result in hotspotting, where the center of the screen appears brighter than the edges. For home theaters with controlled lighting, a screen with a gain between 1.0 and 1.3 is ideal.
- Color: The color of the screen can impact image quality. White screens provide neutral color reproduction, while gray screens enhance contrast. Consider the lighting conditions in your viewing area and choose a color that suits your preferences.
- Material: The material of the fabric should be smooth and wrinkle-free to ensure a flat projection surface. PVC-based materials, such as vinyl, are commonly used due to their smoothness and durability. Alternatively, you can opt for specialized projector screen fabrics available in the market.
- Viewing Angle: The viewing angle determines the optimal range at which viewers can see the screen without experiencing distortion or color shifting. Consider the seating arrangement in your home theater and choose a fabric with a wide viewing angle to accommodate multiple viewers.
It’s important to note that you can purchase projector screen fabrics from various online retailers or dedicated AV stores. Alternatively, you can repurpose blackout curtains or purchase blackout cloth, ensuring it meets the necessary specifications mentioned above.
Take your time to research and compare different fabric options before making a decision. Finding the right fabric will lay the foundation for a high-quality projection experience in your home theater.
Step 2: Measuring and Cutting the Fabric
Now that you’ve chosen the perfect fabric for your projector screen, it’s time to take precise measurements and cut the fabric to the appropriate size. Follow these steps to ensure accurate measurements:
- Measurement 1: Screen Aspect Ratio: Start by determining the aspect ratio of your projector. The most common aspect ratios are 16:9 for widescreen content and 4:3 for standard content. Measure the width and height of your projector’s image area and calculate the aspect ratio.
- Measurement 2: Desired Screen Size: Decide on the desired screen size for your home theater. Consider factors such as viewing distance and room dimensions to determine the ideal screen size. Measure the width and height of the area where you plan to install the screen.
- Calculation: Use the aspect ratio and desired screen size measurements to calculate the final dimensions of your projector screen. Multiply the width measurement by the aspect ratio width value and the height measurement by the aspect ratio height value to get the final dimensions.
- Cutting: Once you have the final dimensions, use a straightedge and a sharp utility knife or fabric scissors to cut the fabric along the measurements. Make sure to cut the fabric straight and even to achieve a professional-looking screen.
Remember to account for any additional fabric needed for wrapping around the frame later on. It’s always better to cut the fabric slightly larger than required, as you can always trim it down later during the installation process.
Take your time and double-check your measurements before cutting the fabric. Accurate measurements are essential for a properly fitting projector screen that delivers an immersive viewing experience.
Step 3: Creating the Frame
Now that you have your fabric cut to size, it’s time to create the frame for your projector screen. The frame provides stability and support for the fabric, ensuring a taut and smooth projection surface. Here’s how you can create the frame:
- Materials: Gather the necessary materials for building the frame. You will need sturdy wooden boards, such as pine, MDF, or plywood, that are at least 2 inches wide and 1 inch thick. Additionally, gather screws, a power drill, and a saw for cutting the boards to size.
- Frame Dimensions: Determine the dimensions of your frame based on the final dimensions of the fabric. The frame should be slightly larger than the fabric to allow for wrapping. Measure and mark the dimensions on the wooden boards, ensuring the corners are square.
- Cutting the Boards: Use a saw to cut the wooden boards according to the measurements. Take your time and ensure the cuts are straight and accurate.
- Assembly: Lay the cut boards on a flat surface and assemble the frame by screwing the boards together at the corners. Pre-drilling pilot holes can help prevent splitting of the wood. Ensure the frame is square by measuring the diagonals and adjusting if needed.
- Adding Support Beams: For larger screens, it’s recommended to add cross-beams along the back of the frame to provide additional stability. Measure and cut the support beams to fit between the vertical boards, then screw them securely into place.
Once you have constructed the frame, give it a thorough inspection to check for any loose connections or misalignments. A sturdy and well-built frame is essential for a durable and long-lasting projector screen.
With the frame complete, it’s time to move on to the next step of attaching the fabric to the frame.
Step 4: Attaching the Fabric to the Frame
Now that you have your frame ready, it’s time to attach the fabric to create the projection surface. This step requires precision to ensure a smooth and wrinkle-free screen. Here’s how you can attach the fabric:
- Prepare the Fabric: Lay the fabric flat on a clean and spacious surface. If necessary, iron the fabric to remove any creases or wrinkles. Ensure the fabric is larger than the frame to allow for wrapping around the edges.
- Position the Frame: Place the frame upside down on top of the fabric. Make sure the fabric is centered and aligned with the frame’s edges. Consider the aspect ratio of the fabric and the frame to ensure proper alignment.
- Stapling: Starting from one side, pull the fabric taut and staple it to the wooden frame. Use a staple gun to secure the fabric to the frame, placing staples every few inches along the edge. Ensure the fabric remains smooth and wrinkle-free as you work your way around the frame.
- Corners: For the corners, fold the fabric neatly to create a clean, mitered corner. Pull the fabric tight and staple it in place. Repeat this technique for each corner, ensuring the fabric is smooth and even.
- Trimming: Once the fabric is securely stapled to the frame, trim off any excess fabric, leaving a clean edge. Take care not to cut too close to the staples, as this may cause the fabric to come loose.
As you staple and trim the fabric, periodically check the tension to ensure it remains taut and smooth across the entire projection surface. Wrinkles or slackness in the fabric can affect the image quality of your projector screen.
With the fabric securely attached to the frame, you’re one step closer to enjoying a cinematic viewing experience in your home theater. Let’s move on to the next step: mounting the screen.
Step 5: Mounting the Screen
Now that you have your projector screen ready, it’s time to mount it in your desired location. Proper mounting ensures stability and allows for optimal viewing angles. Here’s how you can mount your projector screen:
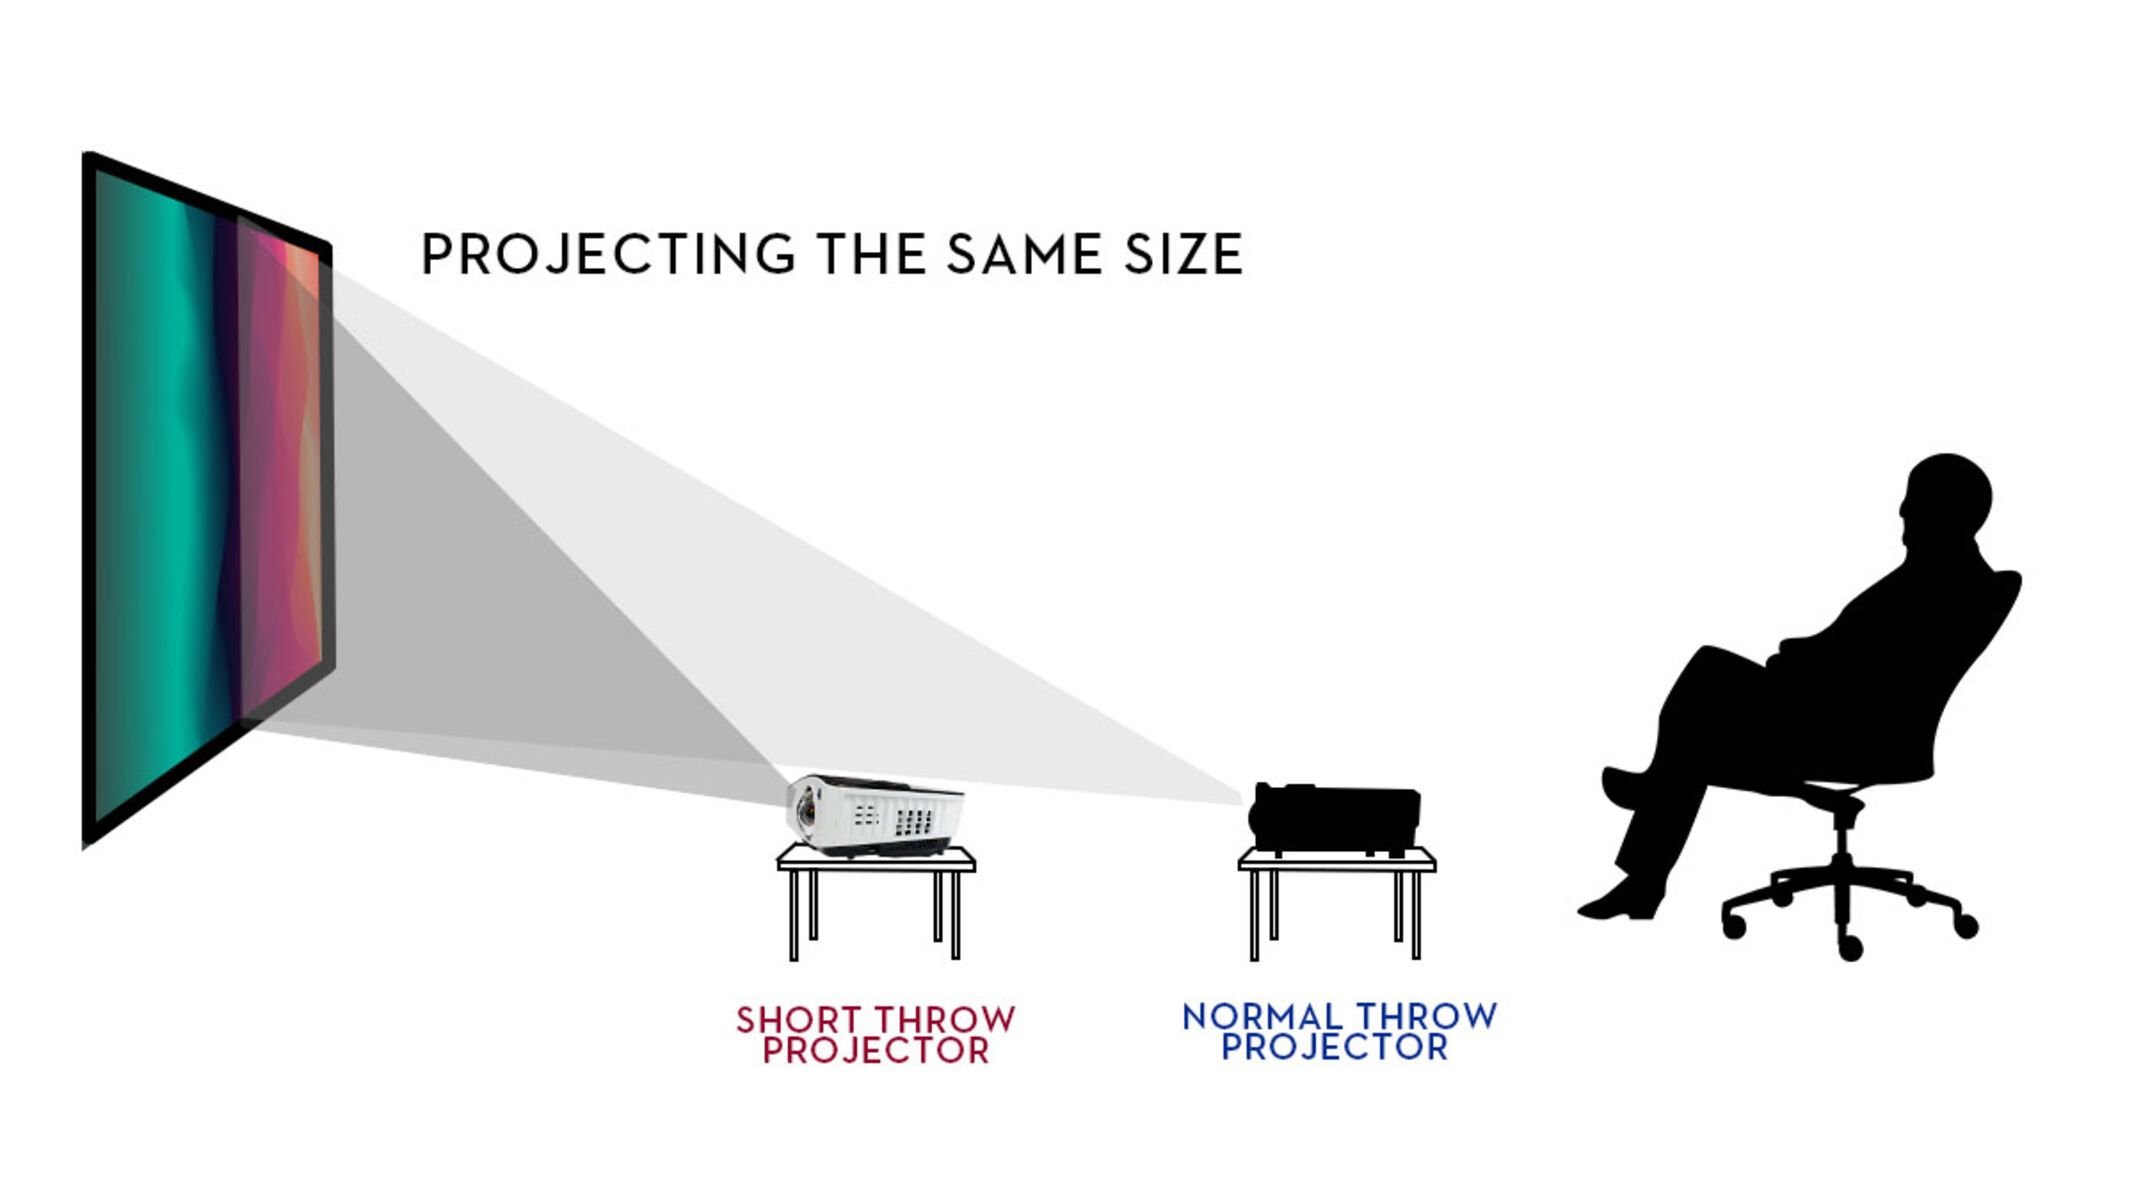
- Choose the Mounting Location: Decide where you want to install your projector screen. Consider the viewing angles, available wall space, and the distance between the screen and the projector for the best viewing experience.
- Locate Studs: Use a stud finder to locate the studs in the wall where you plan to mount the screen. Mounting the screen to the studs ensures secure attachment and prevents the frame from sagging or falling.
- Mark and Drill: Using a pencil, mark the locations of the studs on the wall. Then, with a power drill and appropriate screws, attach the mounting brackets to the wall, ensuring they align with the stud markings.
- Hang the Screen: With the brackets securely attached to the wall, lift the projector screen and hang it on the brackets. Most projector screens come with mounting hooks or tabs that easily slide onto the brackets, allowing for easy installation.
- Check Level and Adjustments: Use a level to ensure the screen is perfectly straight and adjust as necessary. Make sure the screen is at the desired height and provides an optimal viewing angle for everyone in the room.
Once the projector screen is mounted, give it a gentle tug to ensure it is securely attached to the wall. Double-check the level and make any necessary adjustments before moving on to the final step.
Congratulations! You’re almost there. The projector screen is ready to display your favorite movies, TV shows, or presentations. In the next step, we’ll discuss how to adjust the screen tension for the best possible viewing experience.
Step 6: Adjusting the Screen Tension
Now that your projector screen is mounted, it’s important to ensure that the fabric is properly tensioned for optimal image quality. Adjusting the screen tension will help eliminate any wrinkles or sagging, creating a smooth and professional projection surface. Here’s how you can adjust the screen tension:
- Identify Tensioning Mechanism: Examine your projector screen for any tensioning mechanisms. Depending on the type of screen you have, it may include tensioning rods, springs, or straps located on the back of the frame.
- Apply Tension: Follow the instructions provided by the manufacturer to apply tension to the fabric. This may involve tightening screws or adjusting tensioning rods to provide even tension across the entire screen surface.
- Test Tension: After making adjustments, test the tension by gently tapping the center of the screen. It should provide a slight resistance without excessive movement or bouncing. If needed, make further adjustments until the tension feels balanced.
- Check for Wrinkles: Carefully inspect the projection surface for any remaining wrinkles or sagging. If you notice any, readjust the tensioning mechanism as needed to eliminate the wrinkles and achieve a smooth screen surface.
Take your time during this step to ensure the tension is evenly distributed across the fabric. A properly tensioned screen not only improves image quality but also enhances the overall aesthetics of your home theater setup.
With the screen tension adjusted, let’s move on to the final step: enhancing image quality for an immersive viewing experience.
Step 7: Enhancing Image Quality
Now that your projector screen is set up and tensioned, it’s time to enhance the image quality for an immersive viewing experience. Here are a few tips and techniques to help you optimize the image displayed on your projector screen:
- Calibration: Calibrate your projector to ensure accurate color reproduction, brightness, and contrast. Most projectors come with built-in calibration settings, or you can use professional calibration tools for precise adjustments.
- Ambient Lighting: Pay attention to the ambient lighting in your home theater. Ideally, you want to minimize any external light sources that can adversely affect the image quality. Consider installing blackout curtains or blinds to block out unwanted light.
- Screen Cleaning: Regularly clean the surface of your projector screen to keep it free from dust, smudges, and fingerprints. Use a soft microfiber cloth and gentle cleaning solution to wipe the screen, ensuring not to apply too much pressure.
- Optimal Viewing Distance: Position your seating arrangement at an ideal distance from the projector screen. This distance should provide a comfortable viewing experience while allowing you to take full advantage of the screen’s size and resolution.
- Sound System: Pair your projector screen with a quality audio system for a truly immersive experience. Invest in a surround sound system or soundbar to complement the stunning visuals with rich and immersive audio.
Experiment with these techniques to find what works best for your specific home theater setup and personal preferences. Additionally, keep yourself updated with the latest advancements in projector technology and image optimization techniques to further enhance your viewing experience.
Now that your projector screen is complete, tensioned, and optimized for image quality, it’s time to sit back, relax, and enjoy the captivating visuals and stunning audio in your own home theater.
Conclusion
Congratulations on successfully creating your own projector screen! By following the step-by-step process outlined in this guide, you have gained the knowledge and skills to bring a cinematic experience right into your home. Building your own screen not only allows for customization and cost savings but also provides the satisfaction of creating something unique.
Throughout this guide, we discussed the importance of choosing the right fabric, measuring and cutting it to size, creating a sturdy frame, attaching the fabric with precision, mounting the screen securely, adjusting the tension for a smooth surface, and enhancing image quality for an immersive viewing experience. Each step plays a crucial role in ensuring you achieve the best possible results.
Remember, as technology evolves, so do the options available for projector screens and image optimization techniques. Stay informed about the latest advancements and innovation in the industry to constantly improve and refine your home theater setup.
Now that you have your own projector screen, it’s time to invite friends and family over to enjoy movie nights, sports events, or gaming sessions like never before. Immerse yourself in the stunning visuals and captivating audio of your personal home theater created with your own hands.
Enjoy the cinematic experience in the comfort of your own home!