Introduction
Projectors have become an essential tool for presentations, home theaters, and various other applications. However, it can be frustrating when your projector suddenly starts displaying a predominant red color. This issue not only affects the quality of the image or video being projected but also hampers the overall viewing experience. Understanding why your projector is showing a red display is crucial in finding an effective solution. In this article, we will explore the common causes of this issue and provide insights on how to correct it.
Colors play a vital role in projectors, as they are responsible for reproducing accurate and vibrant images. Projectors use a combination of red, green, and blue (RGB) colors to create a full spectrum of colors. When all three colors are working harmoniously, they produce a balanced and natural image. However, if your projector is predominantly displaying red, it indicates an imbalance in the RGB color reproduction.
There are several potential causes for a red display issue in projectors. Firstly, it could be due to incorrect resolution or color settings. Adjusting these settings can help restore the balanced color output. Secondly, cable and connection issues can interfere with the color signal transmission, resulting in a reddish tint. Ensuring proper cable connections and using high-quality cables can resolve this problem. Lastly, lamp or bulb problems can also cause the projector to display red. It is essential to check the lamp or bulb’s condition and replace it if necessary.
In the following sections, we will delve deeper into each of these causes and provide you with step-by-step solutions to correct the red display issue on your projector. By understanding the underlying factors contributing to this problem, you can make informed decisions and effectively troubleshoot your projector.
Understanding the Role of Colors in Projectors
To comprehend why a projector may display a predominant red color, it is crucial to understand the role of colors in projector technology. Projectors utilize the RGB color model, which combines three primary colors (red, green, and blue) to create a wide range of hues and tones.
The combination of these three colors is essential for accurate color reproduction. Each color contributes to the overall visual experience, ensuring that the images displayed by the projector are vibrant and true to life. The absence or imbalance of any of these colors can result in color aberrations, such as the projection appearing predominantly red.
Red, as one of the primary colors, carries a significant role in the color spectrum. It is responsible for the warm, fiery, and intense hues that we perceive. When projected onto a surface, red can evoke emotions, create visual impact, and add depth to images. However, an excessive display of red can distort the overall color balance and compromise the quality of the projected content.
In projectors, the red color is produced by a dedicated red light source or by filtering white light to eliminate other colors. The intensity and brightness of the red color can be adjusted through the projector’s settings to achieve a desirable and natural replication of colors.
When a projector displays a reddish tint, it signifies an imbalance in the RGB color output. This imbalance can occur due to various factors, such as incorrect color settings, cable issues, or problems with the projector’s lamp or bulb. Understanding these potential causes will help you diagnose and rectify the red display issue effectively.
Furthermore, it is worth noting that color calibration plays a crucial role in maintaining accurate color reproduction on projectors. Adjusting the color settings, including color temperature, contrast, and saturation, can significantly improve the overall color accuracy of a projector, reducing the likelihood of a red display issue.
By comprehending the role of colors in projectors and the importance of color balance, you will be better equipped to identify and resolve any red display-related problems that may arise. In the following sections, we will explore the common causes of a red display and provide step-by-step solutions to rectify the issue effectively.
Common Causes of a Red Display
A projector displaying a predominant red color can occur due to several common causes. Understanding these causes is essential in diagnosing and addressing the issue effectively. Let’s explore the most typical reasons behind a red display on a projector:
- Incorrect Resolution and Color Settings: One of the primary culprits behind a red display is incorrect resolution and color settings on the projector. If the resolution setting is not compatible with the source material, or if the color temperature, contrast, or saturation settings are misconfigured, it can result in an imbalanced color output with a predominant red tint. Adjusting and calibrating these settings according to the source material can help restore the correct color balance.
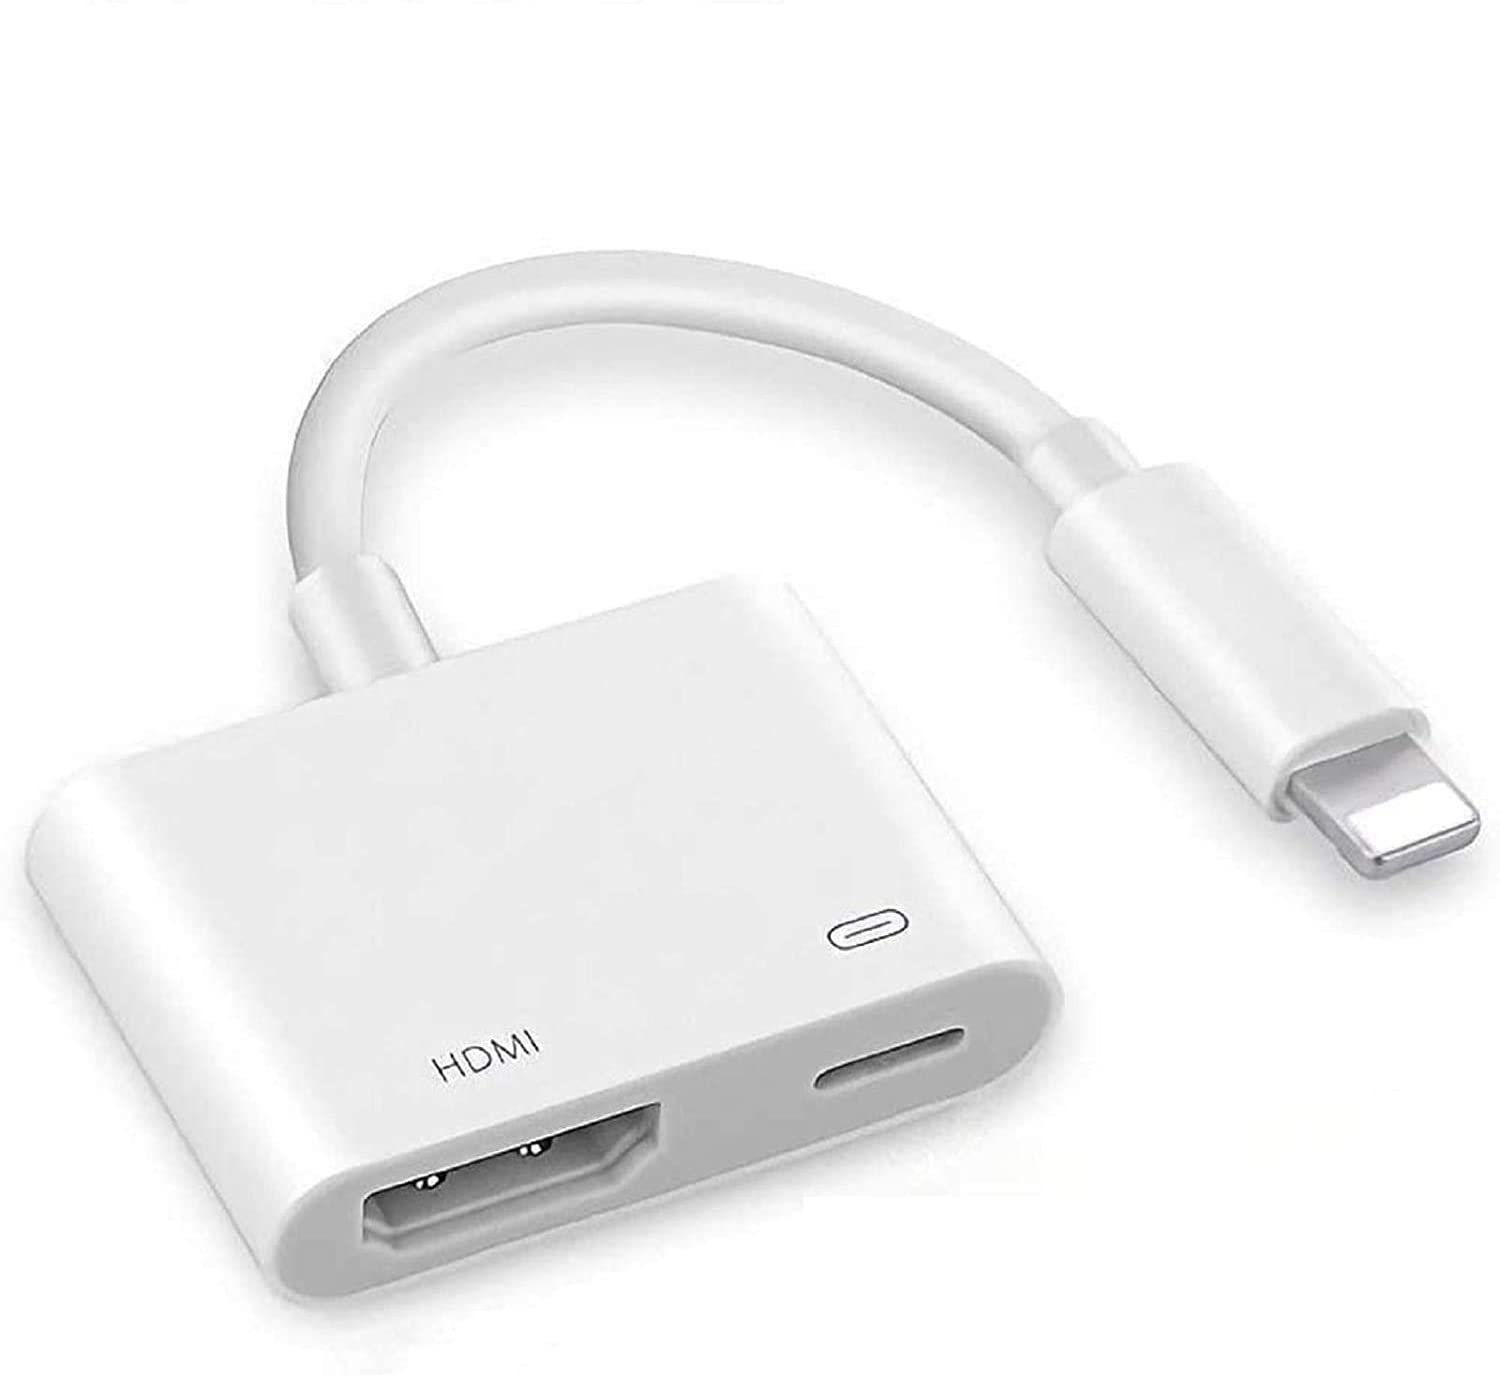
- Cable and Connection Issues: Connectivity problems can also contribute to a red display issue. Faulty cables, loose connections, or poor-quality connections can disrupt the transmission of color signals, causing color aberrations such as a reddish tint. Ensure that all cables are securely connected and in good condition. Consider using high-quality HDMI or VGA cables to ensure a stable and accurate color signal transmission.
- Lamp or Bulb Problems: Projectors rely on a lamp or bulb to emit light and project images. If the lamp or bulb is nearing the end of its lifespan or is faulty, it can affect the color balance and result in a red display. Check the projector’s manual or settings to monitor the lamp or bulb usage time and replace it if necessary. A new lamp or bulb can significantly improve the color accuracy of the projector.
- Color Wheel Issues: Some projectors utilize color wheels to reproduce a wide range of colors. If the color wheel is damaged or malfunctioning, it can affect the color reproduction and result in a predominant red display. If you suspect a problem with the color wheel, it is recommended to seek professional assistance for repair or replacement.
- Environmental Factors: Environmental conditions, such as ambient lighting and reflective surfaces, can also impact the projected color output. Excessive ambient light, especially red-toned light, can influence the perception of colors and contribute to a red display. Ensure that the room is adequately darkened and minimize sources of unwanted light to improve the projected image quality.
By identifying the common causes behind a red display on a projector, you can determine the appropriate actions needed to correct the issue. In the next section, we will discuss practical steps to address and resolve the red display problem on your projector.
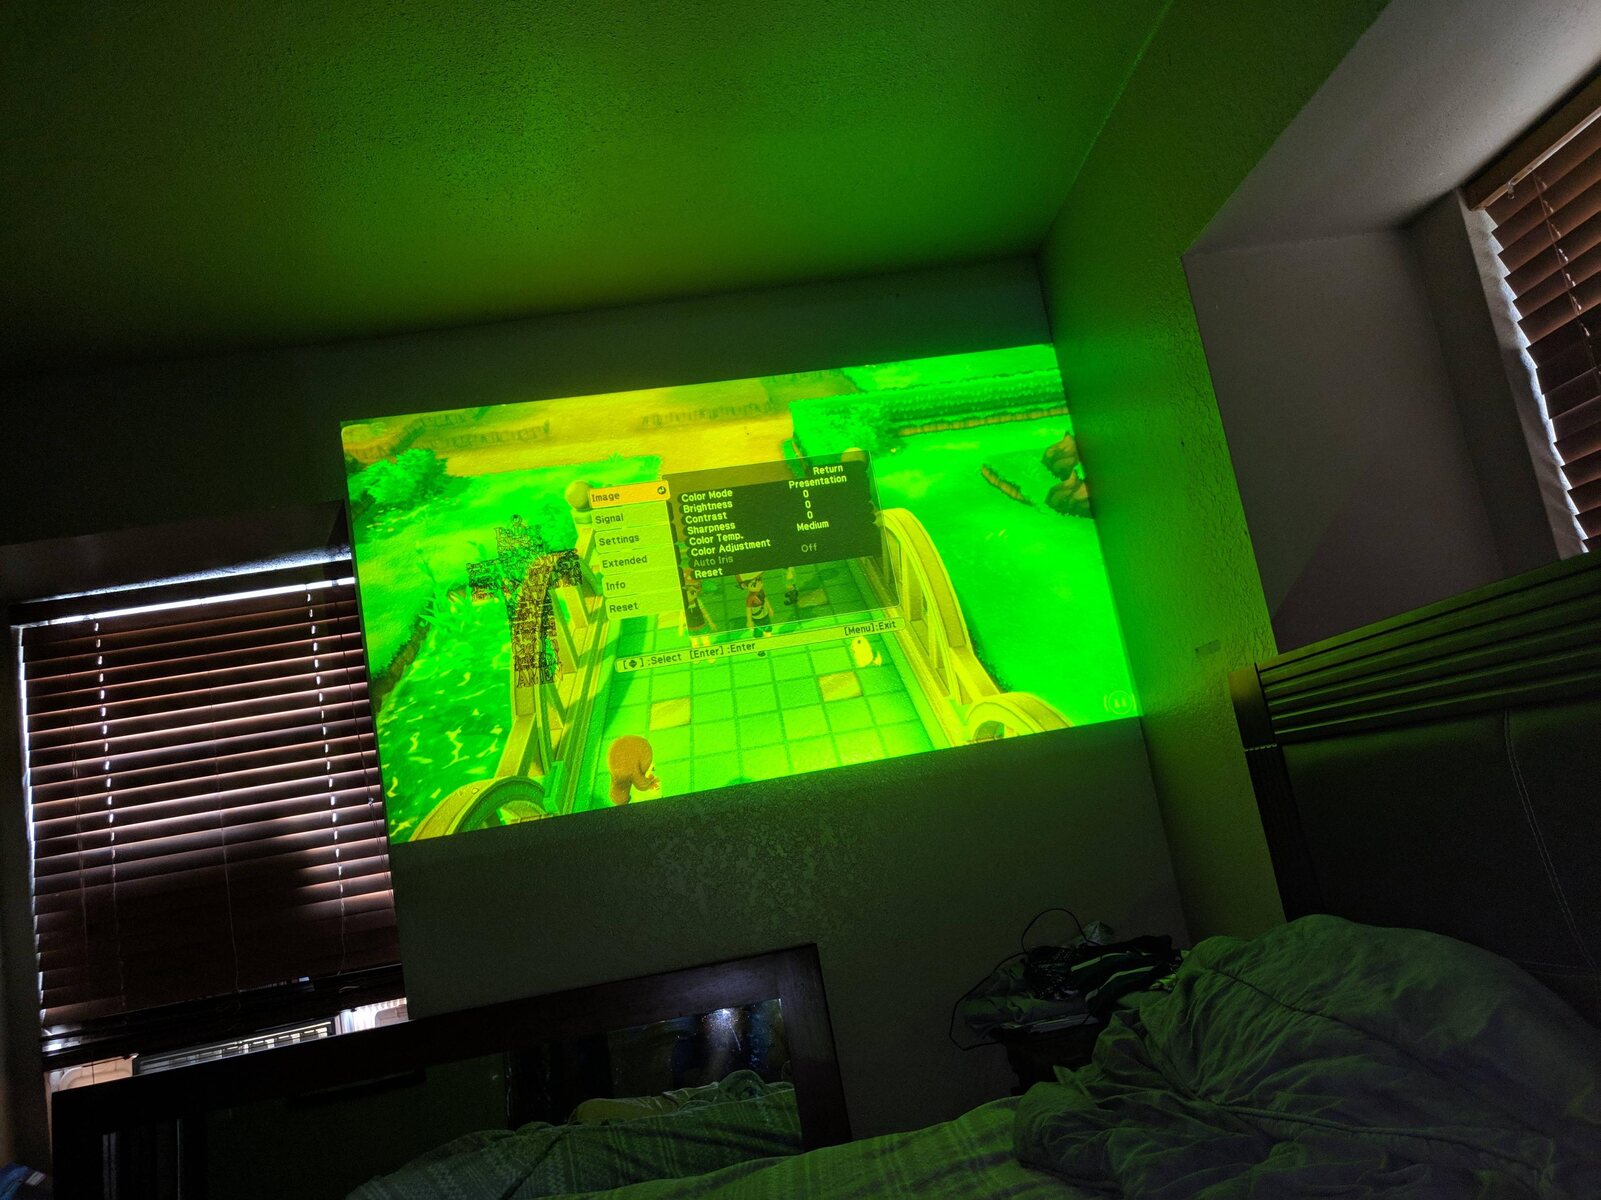
Resolution and Color Settings
Incorrect resolution and color settings on a projector can lead to a red display issue. It is crucial to ensure that the projector’s settings are aligned with the source material and calibrated for accurate color reproduction. Here are some steps you can take to address resolution and color setting-related problems:
- Check the Resolution: Verify that the resolution settings on your projector match the requirements of the source material. If the resolution is too high or too low, it can result in distorted colors, including a prominent red tint. Adjust the resolution settings accordingly to achieve the best possible image quality.
- Adjust the Color Temperature: The color temperature setting determines the overall warmth or coolness of the projected image. If the color temperature is set too high or too low, it can lead to color imbalances, including excessive red tones. Experiment with different color temperature settings to find the most natural-looking and balanced color reproduction.
- Calibrate Contrast and Saturation: Contrast and saturation settings play a vital role in color accuracy. If the contrast is too high or the saturation levels are imbalanced, it can result in inaccurate color reproduction and a red display. Adjust these settings to achieve optimal contrast and saturation levels that enhance color accuracy.
- Use Preset Color Modes: Many projectors offer preset color modes designed for specific content, such as presentations, movies, or gaming. These modes are pre-configured with optimized settings to deliver the best visual experience. Experiment with different preset color modes to see if any of them alleviate the red display issue.
- Perform a Factory Reset: If all else fails, performing a factory reset on your projector can help revert all settings to their default configurations. This can be particularly useful if the red display issue persists despite manual adjustments. However, keep in mind that performing a factory reset will erase any custom settings or configurations you have applied before, so it is advisable to back up your preferred settings if necessary.
By exploring and adjusting the resolution and color settings on your projector, you can significantly improve the color accuracy and eliminate the red display issue. Experiment with different settings and presets to find the combination that provides the best image quality for your specific needs. If the issue persists, continue troubleshooting with the other solutions discussed in the following sections.
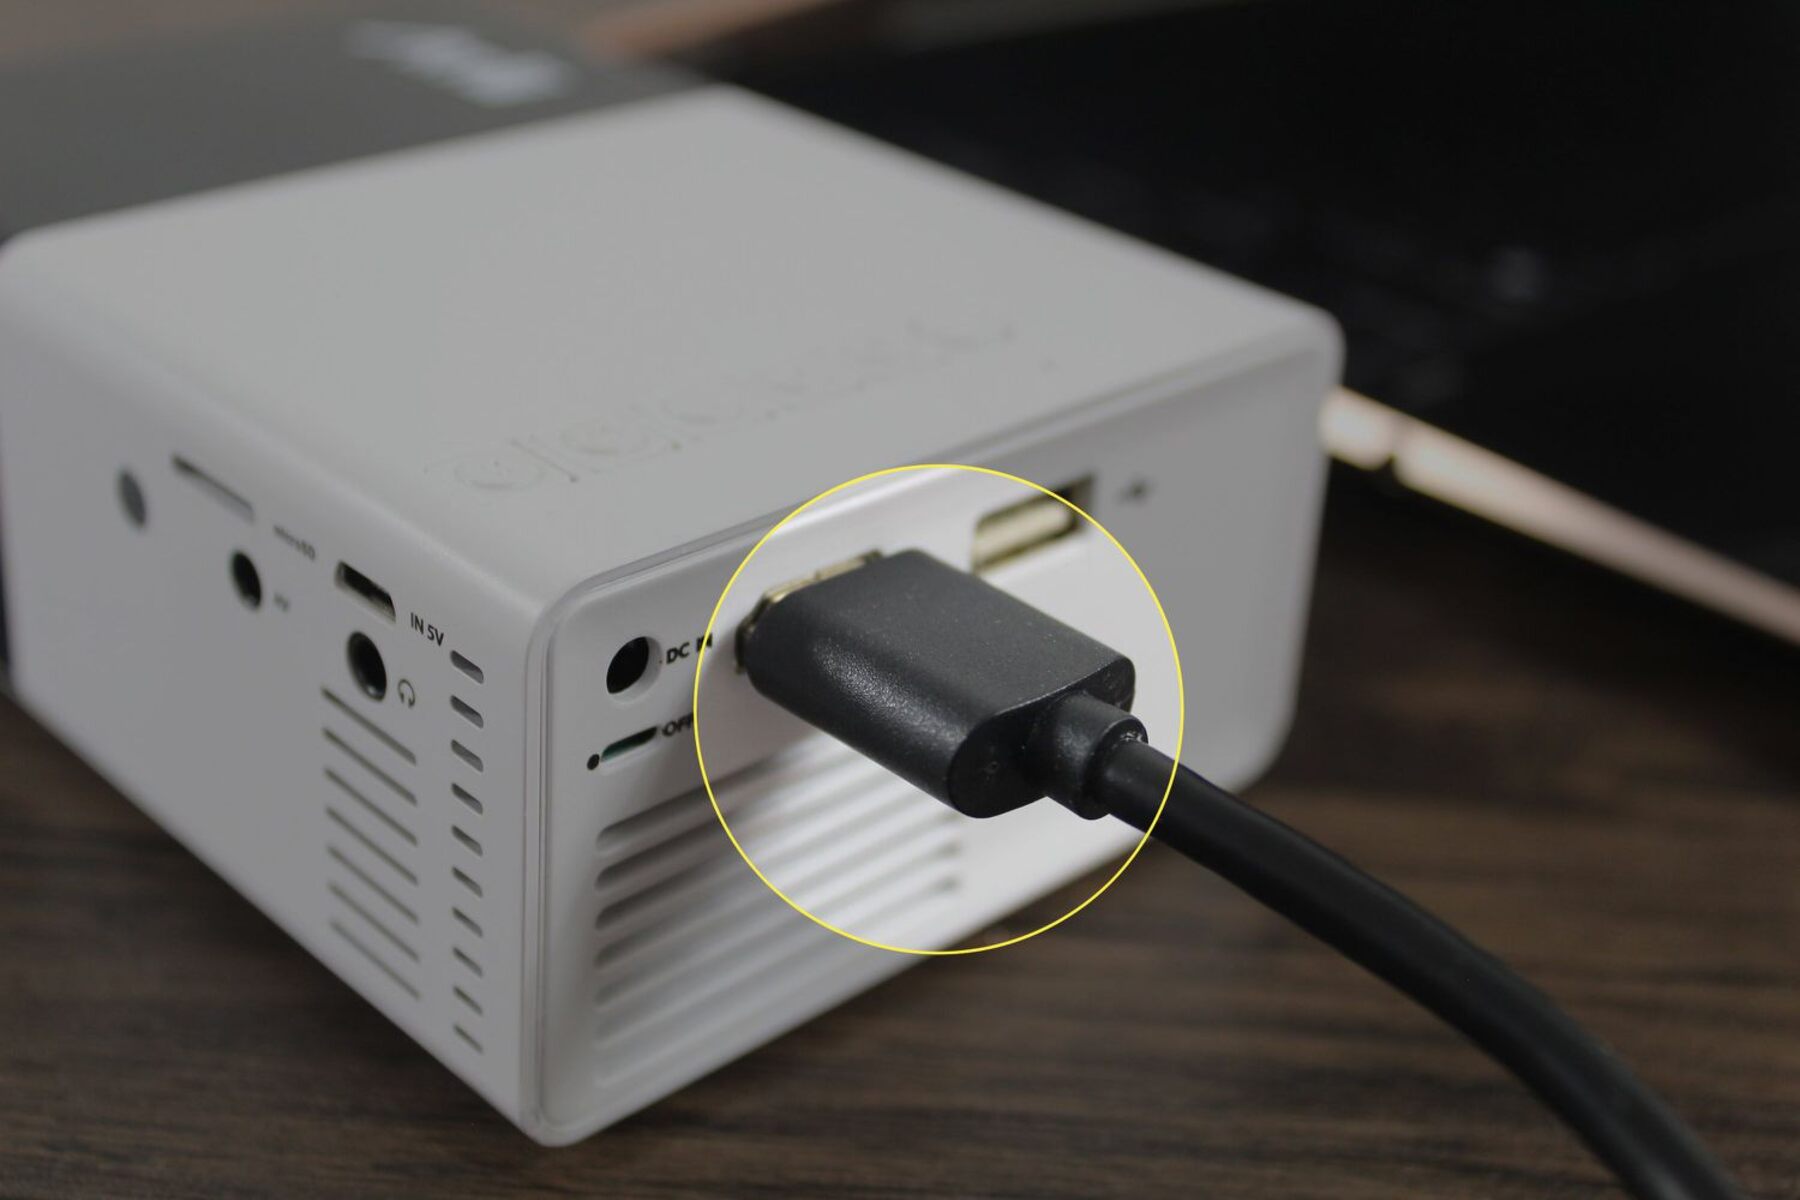
Cable and Connection Issues
Cable and connection issues can contribute to a projector displaying a red tint. A faulty or improperly connected cable can disrupt the transmission of color signals, resulting in color aberrations. Here are some steps you can take to address cable and connection-related problems:
- Check Cable Connections: Ensure that all cables connecting your projector to the video source are securely plugged in. Loose or improperly connected cables can cause signal interruptions, leading to a red display. Take a moment to check and reseat the cable connections to establish a solid and reliable connection.
- High-Quality Cables: Consider using high-quality HDMI or VGA cables that are capable of transmitting high-resolution signals efficiently. Cheap or damaged cables may not provide adequate bandwidth for the color signals, resulting in compromised color reproduction. Investing in high-quality cables can minimize signal degradation and improve overall image quality.
- Test with Different Cables: If you suspect that a specific cable is causing the red display issue, try using a different cable to see if the problem persists. This method helps identify whether the issue lies with a faulty cable or a different component in the projector system.
- Swap Video Inputs: If your projector has multiple video inputs, such as HDMI, VGA, or DisplayPort, try connecting your video source to a different input. Sometimes, a specific video input may have a faulty connection or limited color capabilities, resulting in a red display. Switching to a different input can help isolate the issue and determine if it is related to a specific input or the entire projector system.
- Check for Cable Damage: Carefully inspect the cables for any signs of damage or bent pins. A damaged cable can interfere with the signal transmission, leading to color abnormalities. If you notice any damage, replace the cable with a new one to ensure reliable and accurate color reproduction.
By checking and ensuring proper cable connections, using high-quality cables, and testing with different cables and video inputs, you can eliminate cable and connection-related issues that contribute to a red display on your projector. If the problem persists, continue troubleshooting with the solutions outlined in the following sections.
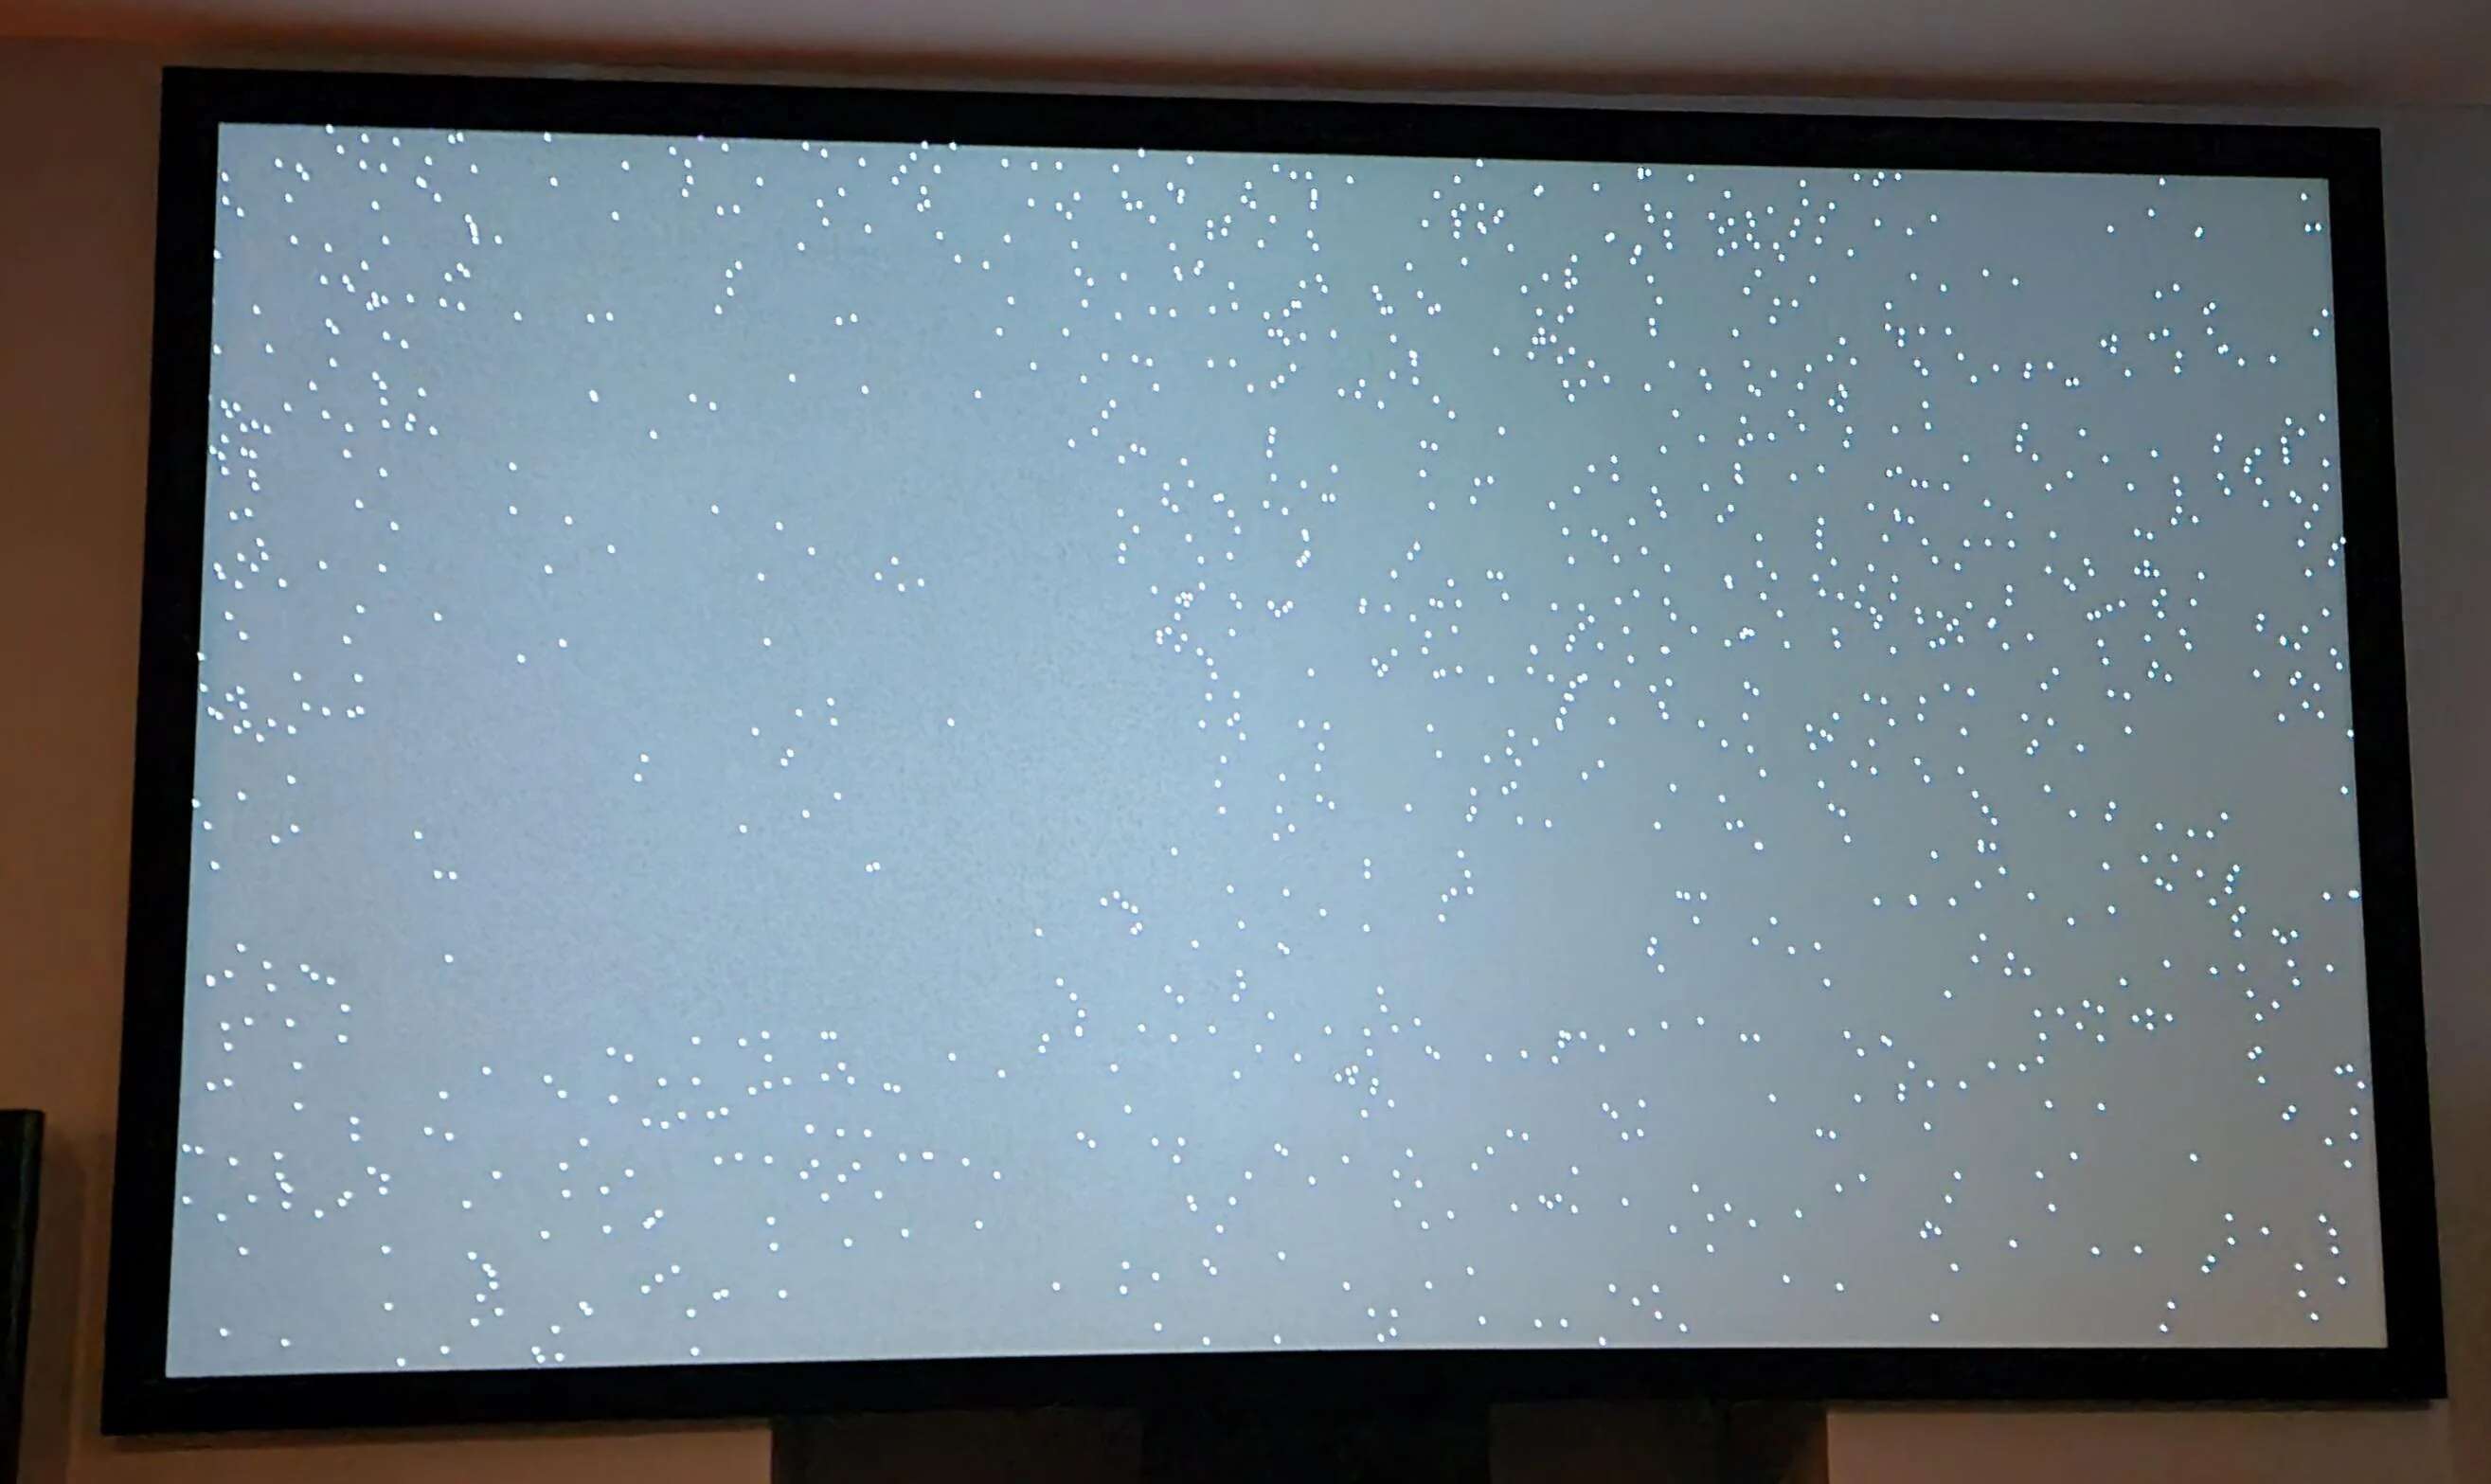
Lamp or Bulb Problems
The lamp or bulb in your projector is responsible for emitting light and ultimately projecting the images onto the screen. If the lamp or bulb is nearing the end of its lifespan or is faulty, it can lead to a red display issue. Here are some steps you can take to address lamp or bulb-related problems:
- Check Lamp/Bulb Usage Time: Consult your projector’s manual or settings to determine the lamp or bulb usage time. Most projectors have a built-in timer that tracks the lamp or bulb usage. If the lamp or bulb has exceeded its recommended hours or is close to its end of life, it may affect the quality of the projected image, including introducing a red tint. Consider replacing the lamp or bulb if it is nearing the end of its lifespan.
- Inspect the Lamp/Bulb Condition: Physically examine the lamp or bulb for any signs of damage or discoloration. A damaged or deteriorating lamp or bulb can impact its light output and color reproduction. If you notice any abnormalities, such as dark spots, flickering, or reduced brightness, it may indicate a problem with the lamp or bulb. Replace it with a new one to ensure optimal image quality.
- Reset Lamp/Bulb Timer: If you have recently replaced the lamp or bulb, make sure to reset the lamp or bulb timer in your projector’s settings. Failure to reset the timer may cause the projector to display inaccurate information regarding the lamp or bulb usage, which can affect its functionality and color performance.
- Use Genuine and Compatible Replacement: When replacing the lamp or bulb, it is essential to use a genuine and compatible replacement recommended by the projector manufacturer. Using counterfeit or incompatible replacements may compromise the projector’s performance and color accuracy. Genuine replacements ensure optimal compatibility and reliable functionality.
- Clean the Projector: Dust and debris can accumulate inside the projector, including around the lamp or bulb area, impacting its performance and color output. Carefully clean the projector, following the manufacturer’s instructions, to remove any dust or obstructions that may affect the lamp or bulb’s efficiency.
By monitoring the lamp or bulb usage time, inspecting their condition, resetting the lamp or bulb timer, using genuine replacements, and maintaining a clean projector, you can address lamp or bulb-related issues that may result in a red display. If the problem persists, continue troubleshooting using the solutions discussed in the following sections.
Correcting the Red Display Issue
If your projector continues to display a predominant red tint despite adjusting the resolution, color settings, addressing cable and connection issues, and verifying the lamp or bulb condition, there are additional steps you can take to correct the red display issue. Here are some potential solutions:
- Update Firmware and Drivers: Check if there are any available firmware updates or driver updates for your projector. Manufacturers often release updates to improve performance, stability, and address common issues. Updating the firmware and drivers may rectify any software-related problems that could be causing the red display.
- Perform a Hard Reset: Performing a hard reset on the projector can help clear any temporary settings or configurations that might be causing the red tint. Consult the projector’s manual or manufacturer’s website for instructions on how to perform a hard reset. Please note that a hard reset will restore the projector to its default settings, so ensure that you have backed up any custom configurations if necessary.
- Seek Professional Assistance: If you have tried all the troubleshooting steps mentioned above and the red display issue persists, it may be time to seek professional assistance. Contact the manufacturer’s customer support or a qualified projector technician who can diagnose and address the underlying issue more effectively.
Remember, each projector model may have unique characteristics and troubleshooting steps. It is always recommended to refer to the projector’s manual or consult the manufacturer’s support resources for tailored guidance specific to your device. Resolving the red display issue may require a combination of different solutions and expert advice depending on the specific circumstances.
By exploring these potential solutions and seeking professional assistance if needed, you can increase the chances of rectifying the red display issue on your projector and enjoy vibrant, true-to-life visuals once again.
Conclusion
Dealing with a projector that displays a predominant red color can be frustrating, especially when it impacts the quality of your presentations or home theater experience. Understanding the causes behind the red display is crucial in finding effective solutions.
Throughout this article, we explored the common causes of a red display on projectors, including resolution and color settings, cable and connection issues, lamp or bulb problems, and more. We discussed various troubleshooting steps to address these issues, such as adjusting settings, checking connections, replacing lamps or bulbs, and seeking professional assistance if needed.
It is important to note that each projector model may have unique characteristics and troubleshooting steps. Refer to the projector’s manual or consult the manufacturer’s support resources for tailored guidance specific to your device.
By taking the time to investigate the underlying causes, adjusting settings, and addressing any hardware or software issues, you can successfully correct the red display issue on your projector and enjoy vibrant, accurate, and immersive visuals once again.
Remember, troubleshooting projector issues can sometimes require patience and persistence. Don’t hesitate to seek professional assistance if you have exhausted all possible solutions or if you are unsure about performing certain procedures.
With the proper steps and care, you can overcome the red display problem and ensure that your projector continues to deliver exceptional performance for all your projection needs.