Introduction
Welcome to our guide on how to fix screen issues on your Macbook Pro. Your MacBook Pro’s screen is the primary interface for all your activities, from reading emails to watching videos. However, sometimes you may encounter problems such as flickering, blank screens, or distorted images, which can be frustrating and hinder your productivity.
In this article, we will provide you with a step-by-step troubleshooting guide to help you resolve screen issues on your MacBook Pro. We will cover both software and hardware-related problems and offer possible solutions to get your screen back to its optimal state.
It is essential to note that troubleshooting your screen issues will depend on the specific problem you are experiencing. Some issues can be resolved easily with a restart or adjusting the display settings, while others may require more advanced troubleshooting techniques or even professional assistance.
Before we begin, please ensure that you have backed up your important files and data. This is a precautionary measure to safeguard your information in case of any unforeseen complications during the troubleshooting process.
Now, let’s delve into the various troubleshooting steps you can take to fix screen issues on your Macbook Pro.
Troubleshooting the Screen Issues
When faced with screen issues on your MacBook Pro, the first step is to identify the root cause of the problem. Is it a software-related issue or a hardware malfunction? This will help determine the appropriate troubleshooting steps to take. Here are some effective methods to get started:
1. Restarting the MacBook Pro: Often, screen issues can be resolved by simply restarting your MacBook Pro. This clears temporary glitches and reloads the operating system, potentially fixing any software-related issues.
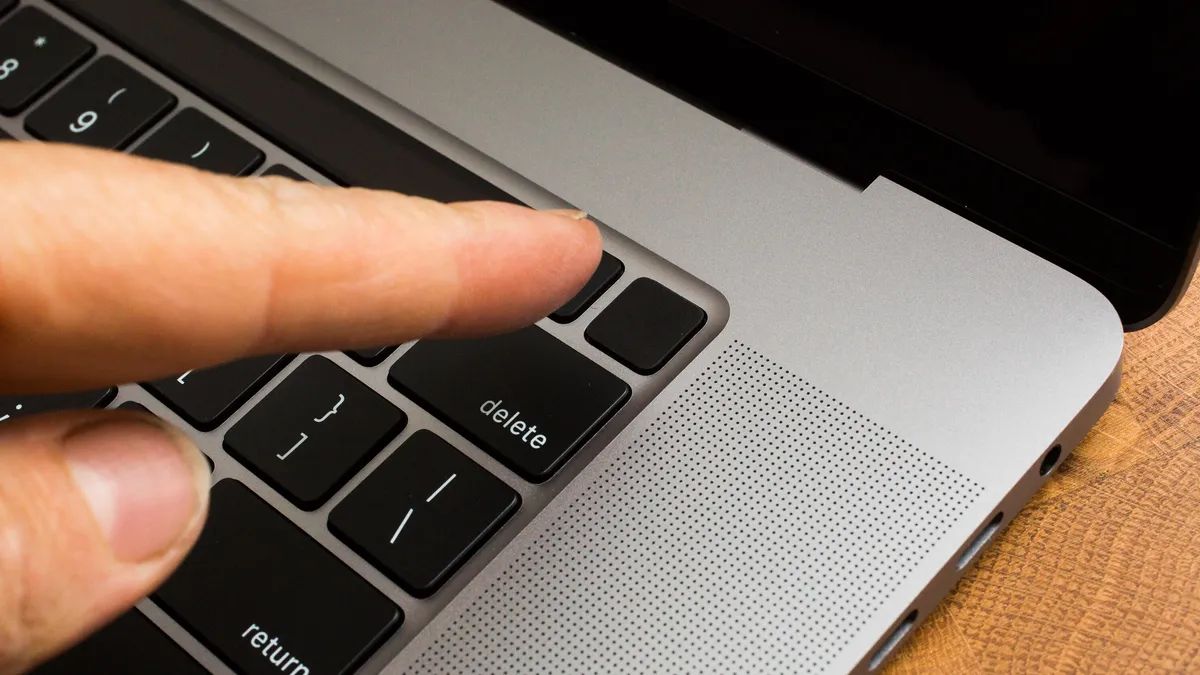
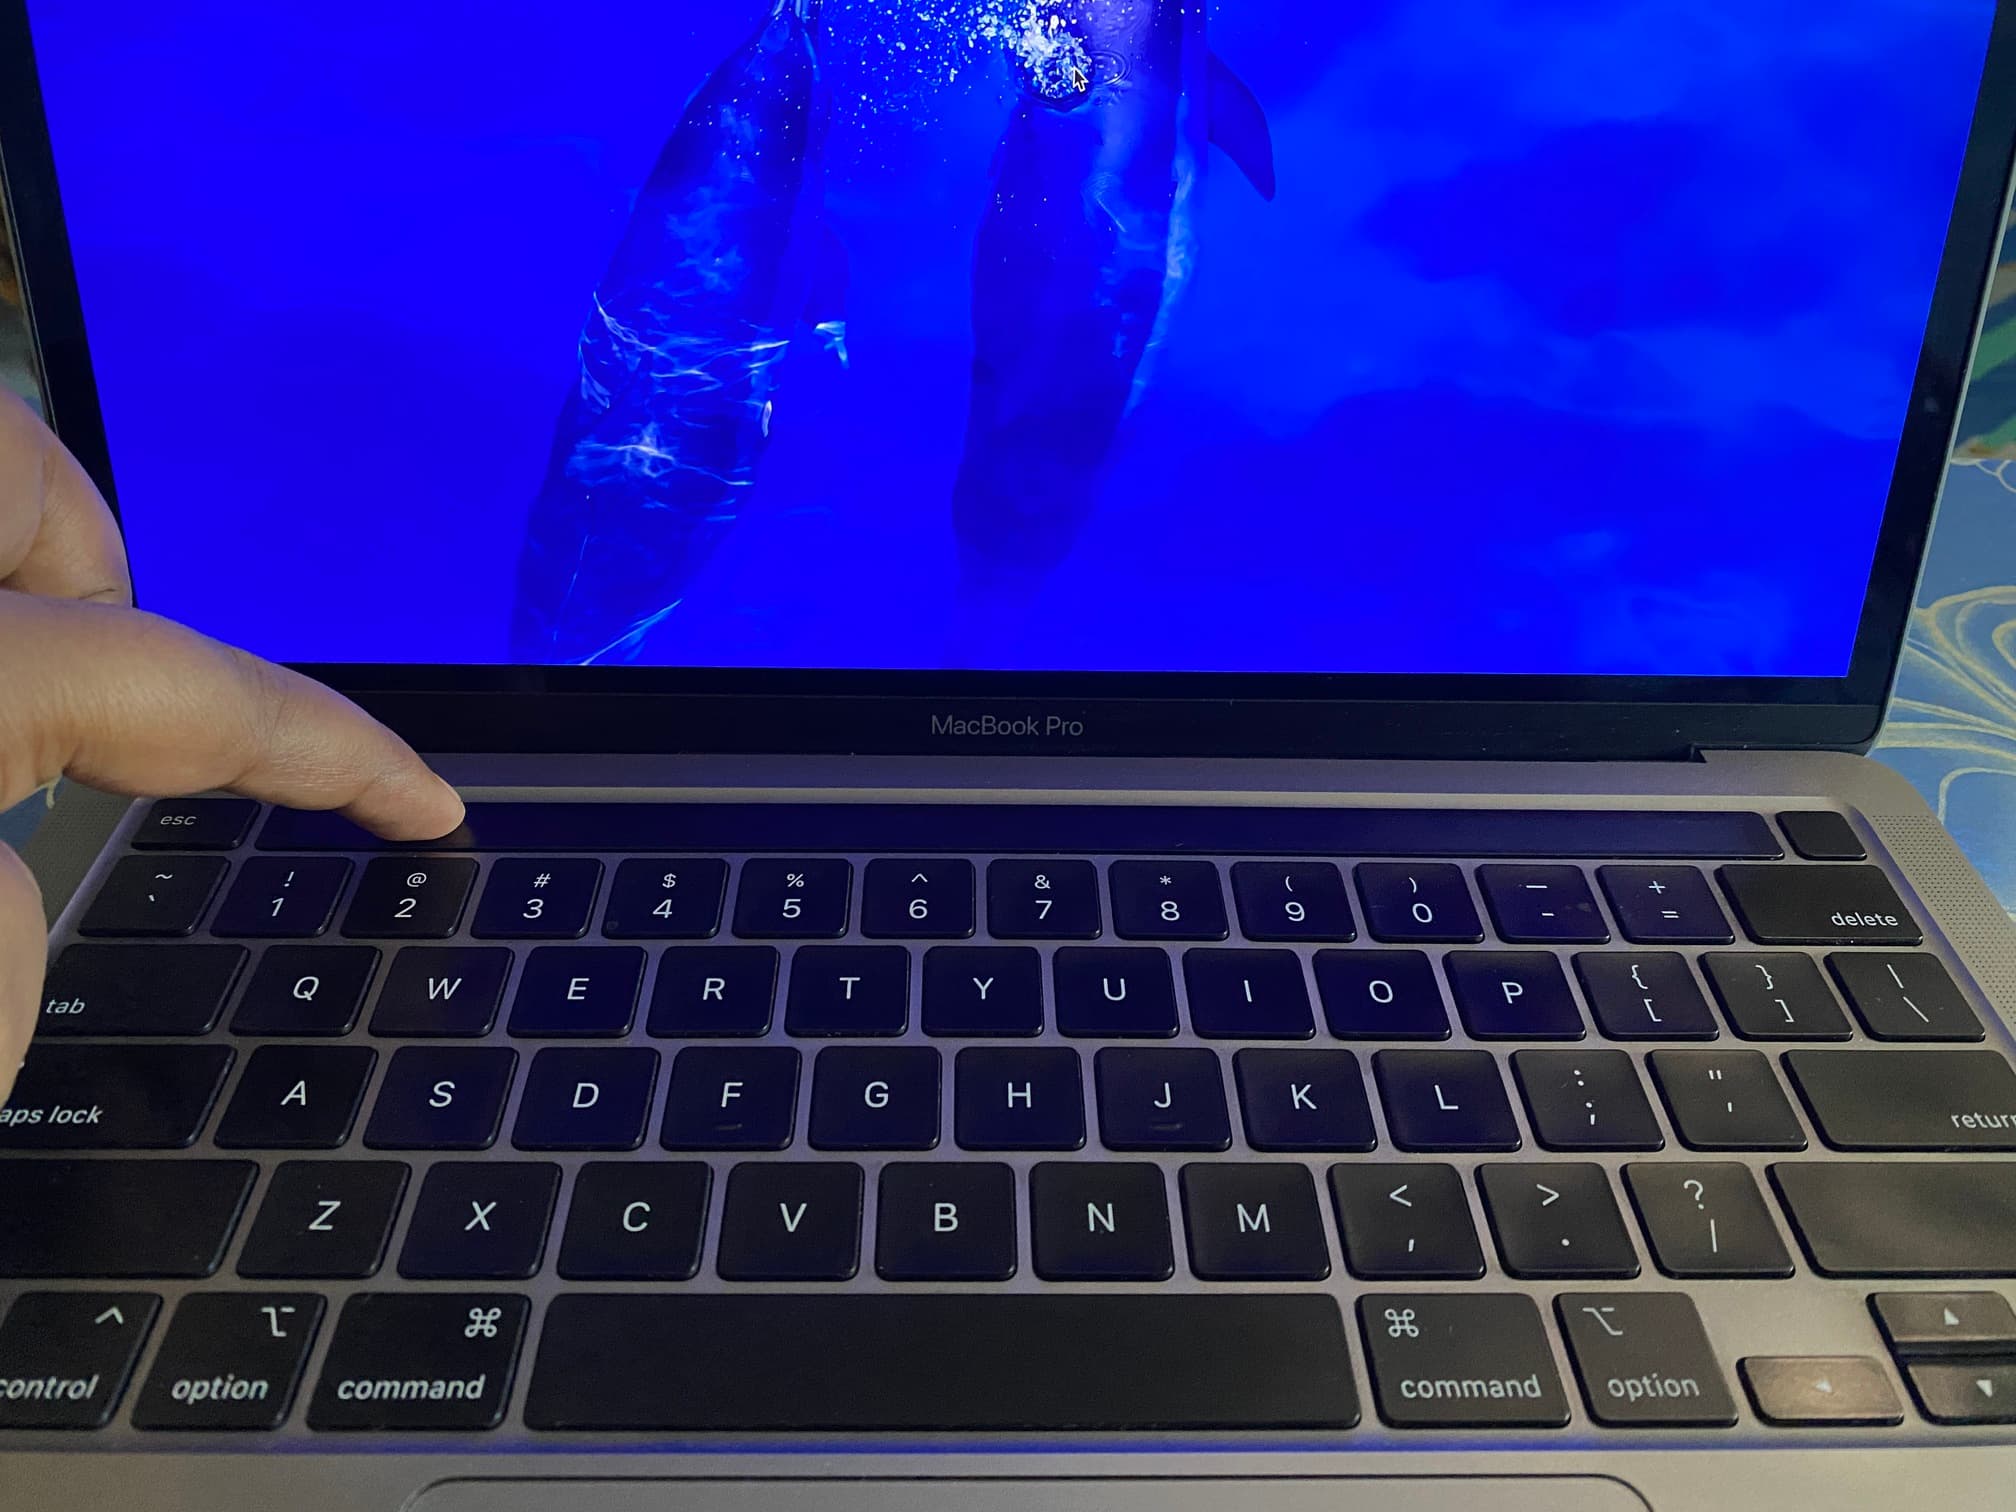
2. Resetting the System Management Controller (SMC): The SMC controls various hardware functions, including the display. Resetting the SMC can help resolve screen issues caused by power management problems or incorrect device behavior. To reset the SMC, shut down your MacBook Pro, then hold down the Shift + Control + Option keys and the power button simultaneously for 10 seconds. Release the keys, then turn on your MacBook Pro.
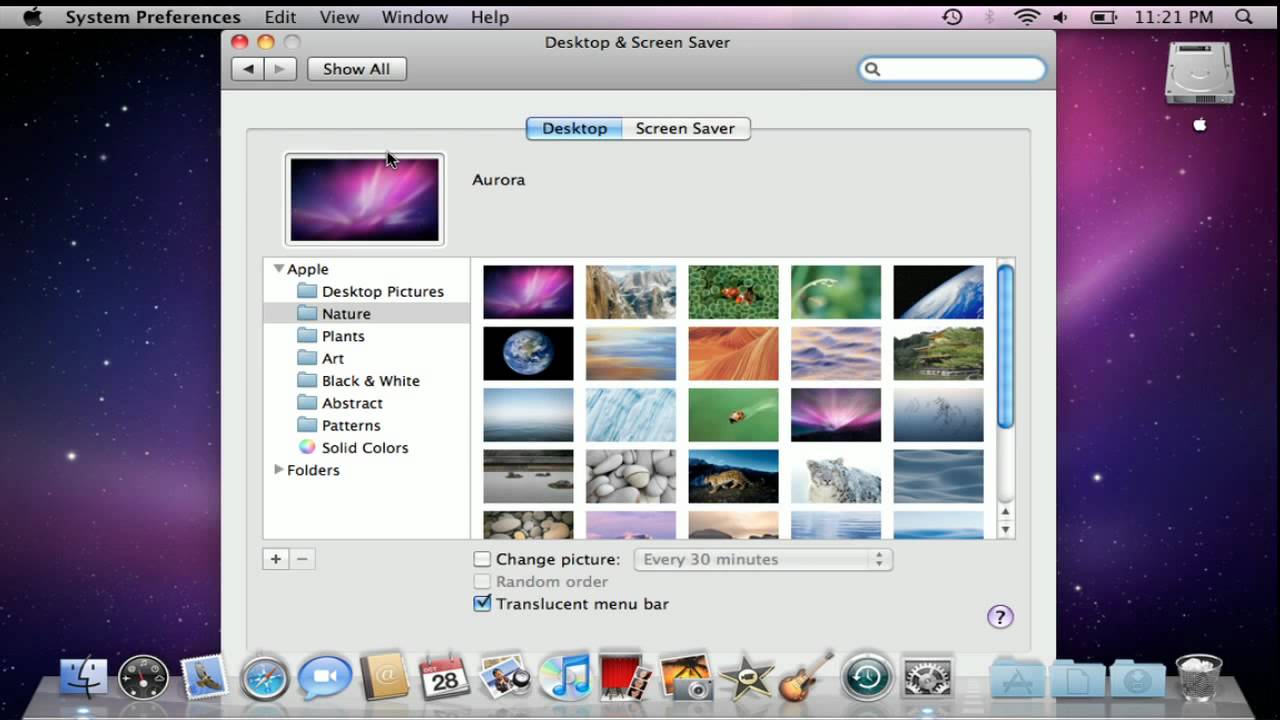
3. Adjusting the Display Settings: If the screen appears too bright, dim, or has incorrect colors, adjusting the display settings can help. Navigate to the Apple menu, select “System Preferences,” then choose “Displays.” From there, you can modify the brightness, contrast, and color settings according to your preferences.
4. Checking for Software Updates: Make sure your MacBook Pro is running the latest version of macOS and has all the necessary software updates installed. Apple regularly releases updates that address known issues and improve system stability. To check for updates, go to the Apple menu, select “System Preferences,” then choose “Software Update.”
5. Using Safe Mode to Identify Software-related Problems: Booting your MacBook Pro in Safe Mode can help determine if the screen issues are caused by third-party software or startup items. To enter Safe Mode, restart your MacBook Pro and hold down the Shift key until the Apple logo appears. If the screen works fine in Safe Mode, it indicates that a software conflict is causing the problem.
By following these troubleshooting steps, you can often identify and resolve software-related screen issues on your MacBook Pro. However, if the problem persists or if you suspect a hardware malfunction, it is crucial to explore further troubleshooting options or seek professional assistance.
Restarting the MacBook Pro
One of the simplest and most effective troubleshooting steps for screen issues on your MacBook Pro is to restart the device. Restarting clears temporary software glitches and can often fix minor issues that may be affecting the screen. Here’s how you can restart your MacBook Pro:
Step 1: Save your work and close any open applications. It’s essential to ensure that you don’t lose any unsaved data during the restart process.
Step 2: Click on the Apple menu located in the top-left corner of the screen.
Step 3: Select “Restart” from the drop-down menu. You can also use the keyboard shortcut by pressing the Control + Command + Eject keys simultaneously.
Step 4: A confirmation window will appear, asking if you’re sure you want to restart. Click on “Restart” to proceed.
Step 5: Your MacBook Pro will now begin the restart process. Wait for the device to shut down and then boot back up.
Step 6: Once the restart is complete, the login screen will appear. Enter your login credentials to access your account.
After restarting the MacBook Pro, check if the screen issues have been resolved. If the problem persists, you may need to try other troubleshooting methods mentioned in this guide.
Restarting your MacBook Pro is a simple yet effective step that can help resolve various software-related issues. It’s a good practice to restart your device regularly as part of general maintenance to keep it running smoothly.
Note that if you’re experiencing persistent screen issues that occur immediately after startup or during the startup process, it may indicate a hardware problem. In such cases, it’s advisable to proceed with the advanced troubleshooting steps or contact an authorized Apple service provider for assistance.
Resetting the System Management Controller (SMC)
When encountering screen issues on your MacBook Pro, one of the troubleshooting steps you can take is resetting the System Management Controller (SMC). The SMC is responsible for managing various hardware functions, including the display. Resetting the SMC can help resolve screen issues caused by power management problems or incorrect device behavior. Here’s how you can reset the SMC on your MacBook Pro:
Step 1: Shut down your MacBook Pro by clicking on the Apple menu in the top-left corner of the screen and selecting “Shut Down.”
Step 2: Ensure that your MacBook Pro is connected to a power source or has sufficient battery power.
Step 3: On the built-in keyboard, press and hold the Shift + Control + Option keys along with the power button simultaneously. Remember to hold all four keys for 10 seconds.
Step 4: Release all the keys, then press the power button to turn on your MacBook Pro.
After resetting the SMC, your MacBook Pro will boot up, and the SMC will be reset to its default settings. It’s important to note that the process of resetting the SMC may vary slightly depending on the model of your MacBook Pro. For specific instructions, refer to Apple’s support documentation or the user manual for your specific model.
Resetting the SMC can help resolve various issues related to power management, display brightness, and incorrect behavior of hardware components. If a temporary glitch or software conflict was causing the screen issues, resetting the SMC may provide a solution.
However, if the screen issues persist even after resetting the SMC, it is advisable to explore further troubleshooting options or seek professional assistance. Persistent screen issues may indicate hardware problems that require specialized knowledge or repairs.
Remember to always back up your important files and data before proceeding with any troubleshooting steps to avoid data loss in case of unexpected complications.
Adjusting the Display Settings
If you are experiencing screen issues on your MacBook Pro, such as brightness, contrast, or color problems, adjusting the display settings can often help resolve these issues. Your MacBook Pro provides you with various options to customize the display settings according to your preferences. Here’s how you can adjust the display settings:
Step 1: Click on the Apple menu located in the top-left corner of the screen.
Step 2: Select “System Preferences” from the drop-down menu.
Step 3: In the System Preferences window, click on the “Displays” option.
Step 4: The Display preferences window will open, presenting you with various display-related options.
Step 5: Adjust the brightness by moving the “Brightness” slider. Drag it to the left to decrease brightness or to the right to increase it.
Step 6: To adjust the contrast, if available, look for a “Contrast” or “Gamma” option in the display settings. Move the slider to adjust the contrast levels according to your preference.
Step 7: If you are experiencing color-related issues, you can calibrate the display to ensure accurate color representation. Click on the “Color” tab and follow the on-screen instructions to calibrate your MacBook Pro’s display colors.
By adjusting the display settings, you can fine-tune the appearance of your screen and potentially resolve issues such as overly bright or dim screen, incorrect colors, or contrast problems. Experiment with different settings until you find the configuration that suits your preferences and resolves the screen issues.
It’s worth mentioning that some MacBook Pro models may have additional display options, such as Night Shift, True Tone, or Ambi-Tone. These features adjust the display’s colors based on the time of day or lighting conditions to provide a more comfortable viewing experience. Explore these options and customize them as desired to improve your screen’s performance.
If adjusting the display settings does not resolve the screen issues, it’s recommended to further explore troubleshooting methods or seek professional assistance to diagnose and resolve any underlying hardware or software problems.
Remember to always restart your MacBook Pro after making display adjustments to ensure the settings take effect.
Checking for Software Updates
Keeping your MacBook Pro’s software up to date is crucial for optimal performance and resolving various issues, including screen-related problems. Apple regularly releases software updates that address known bugs, introduce new features, and improve system stability. Here’s how you can check for and install software updates on your MacBook Pro:
Step 1: Click on the Apple menu located in the top-left corner of the screen.
Step 2: Select “System Preferences” from the drop-down menu.
Step 3: In the System Preferences window, click on the “Software Update” option.
Step 4: Your MacBook Pro will now check for available software updates. If any updates are available, you will see them listed with a brief description.
Step 5: Click on the “Update Now” button to install all available updates. You may need to enter your administrator password to proceed.
Step 6: Follow the on-screen instructions to complete the installation process. You may need to restart your MacBook Pro after installing certain updates.
Checking for and installing software updates can help resolve software-related issues that may be affecting your MacBook Pro’s screen. Updates often include bug fixes and improvements that can address screen flickering, black screens, or other display problems.
It’s essential to periodically check for software updates and install them promptly to ensure your MacBook Pro’s system is up to date. Alternatively, you can enable automatic updates by clicking on the “Advanced” button in the Software Update preferences and selecting “Check for updates” and “Download new updates when available” options.
If you’re experiencing persistent screen issues even after installing the latest software updates, it’s recommended to explore further troubleshooting methods specific to your issue or seek professional assistance. Sometimes, screen issues may require specific fixes or patches provided by Apple or other software developers.
Always remember to back up your important files and data before installing any software updates to prevent data loss in case of unexpected complications. It’s good practice to regularly back up your data to an external storage device or cloud-based service to ensure its safety.
Using Safe Mode to Identify Software-related Problems
If you’re experiencing persistent screen issues on your MacBook Pro, it could be due to conflicting software or startup items. To identify and isolate software-related problems, you can boot your MacBook Pro in Safe Mode. In Safe Mode, your Mac starts up with minimal software and disables third-party extensions. Here’s how you can enter Safe Mode:
Step 1: Ensure your MacBook Pro is powered off.
Step 2: Press the power button to turn on your MacBook Pro.
Step 3: Immediately press and hold the Shift key upon hearing the startup chime. Release the Shift key when you see the Apple logo or a progress bar.
Step 4: Your MacBook Pro will now start up in Safe Mode. The login screen may take longer to appear than usual.
While in Safe Mode, your MacBook Pro performs a basic system check and only loads essential software components. This allows you to determine if the screen issues persist without interference from third-party applications or startup items.
Test the screen performance in Safe Mode. If the screen issues disappear in Safe Mode, it indicates that a software conflict or a problematic startup item is causing the problem.
If the screen works fine in Safe Mode, you can try the following troubleshooting steps:
1. Remove Recently Installed Software: Uninstall any recently installed applications or software updates that might be causing conflicts. Restart your MacBook Pro and check if the screen issues are resolved.
2. Disable Login Items: Open System Preferences, click on “Users & Groups,” and select your user account. Navigate to the “Login Items” tab and remove any unnecessary or problematic startup items. Restart your MacBook Pro and see if the screen issues persist.
3. Reset NVRAM or PRAM: Resetting the NVRAM (non-volatile random-access memory) or PRAM (parameter random-access memory) can help resolve screen issues caused by incorrect display settings. Restart your MacBook Pro and hold the Command + Option + P + R keys simultaneously until you hear the startup chime twice. Release the keys and see if the screen issues are resolved.
If the screen issues persist even in Safe Mode, it’s recommended to explore other troubleshooting methods specific to your issue or seek professional assistance. It may indicate a hardware-related problem that requires further diagnosis or repair.
Remember to exit Safe Mode by restarting your MacBook Pro without pressing any keys during startup. After exiting Safe Mode, observe if the screen issues continue or have been resolved.
Calibrating the Display
Calibrating the display on your MacBook Pro can help ensure accurate color representation and improve the overall visual experience. If you’re experiencing screen issues related to color accuracy, tint, or contrast, calibrating the display can often be an effective solution. Here’s how you can calibrate the display on your MacBook Pro:
Step 1: Click on the Apple menu located in the top-left corner of the screen.
Step 2: Select “System Preferences” from the drop-down menu.
Step 3: In the System Preferences window, click on the “Displays” option.
Step 4: Click on the “Color” tab at the top of the Displays preferences window.
Step 5: Under the “Color” tab, you’ll find different display profiles. Select the profile that corresponds to your desired display settings. The available options may vary depending on your MacBook Pro model.
Step 6: If none of the preset profiles match your requirements, click on the “Calibrate” button to access the display calibration wizard.
Step 7: Follow the on-screen instructions to adjust gamma, grayscale, contrast, and color balance settings to achieve an accurate representation of colors on your MacBook Pro’s display.
During the calibration process, ensure that the room lighting conditions are consistent and that there is no direct sunlight falling on the screen. Calibrate the display in a neutral lighting environment to get the best results.
By calibrating the display, you can ensure that colors are displayed as intended by content creators and improve the accuracy of image and video editing tasks. However, it’s important to note that calibration may not resolve all screen issues, especially if they are caused by hardware problems.
If you experience persistent screen issues even after calibrating the display, it’s advisable to explore other troubleshooting methods specific to your issue or seek professional assistance. It may indicate a hardware-related problem that requires further examination or repair.
Lastly, remember to periodically recalibrate your MacBook Pro’s display to maintain accurate color representation and optimal visual quality.
Connecting an External Display
If you’re facing screen issues on your MacBook Pro, another troubleshooting option is to connect an external display. This allows you to determine whether the problem is specific to your MacBook Pro’s built-in display or if it extends to all display outputs. Here’s how you can connect an external display to your MacBook Pro:
Step 1: Ensure your MacBook Pro is powered off.
Step 2: Locate the appropriate video output port on your MacBook Pro. Depending on the model, it may have Thunderbolt 3 (USB-C) ports, HDMI ports, or Mini DisplayPort.
Step 3: Connect one end of the appropriate video cable (Thunderbolt 3, HDMI, or Mini DisplayPort) to the video output port on your MacBook Pro.
Step 4: Connect the other end of the video cable to the corresponding input port on the external display.
Step 5: Power on the external display and set it to the correct input source. This differs depending on the external display model.
Step 6: Power on your MacBook Pro. It should automatically detect the external display and configure the resolution and other settings.
If the external display functions properly without any issues, that indicates the problem may be with your MacBook Pro’s built-in display. You can try further troubleshooting steps specific to your screen issue or seek professional help.
If the external display experiences the same screen issues as the MacBook Pro’s built-in display, it may indicate a software-related problem affecting all display outputs. In such cases, you can try the following troubleshooting methods:
1. Update Graphics Drivers: Ensure your MacBook Pro has the latest graphics drivers installed. Check Apple’s support website or use the Software Update feature to ensure all drivers are up to date.
2. Adjust Display Settings: Navigate to the Settings or Display preferences on your MacBook Pro and check if any settings need adjustment, such as brightness, contrast, or resolution.
3. Test with a Different Cable: Sometimes, a faulty cable can cause screen issues. Try using a different video cable to connect your MacBook Pro to the external display and see if the issue persists.
By connecting an external display, you can determine if the screen issues are specific to your MacBook Pro’s built-in display or extend to all display outputs. This information can help further narrow down the potential causes and guide you towards the appropriate troubleshooting steps.
Remember to select the appropriate display mode (mirrored or extended) based on your requirements to ensure the screen output is as desired on both the MacBook Pro and the external display.
Updating the Graphics Drivers
If you’re experiencing screen issues on your MacBook Pro, updating the graphics drivers can often help resolve compatibility issues and improve overall performance. Graphics drivers play a crucial role in managing the display output on your MacBook Pro, and updating them ensures you have the latest improvements and bug fixes from the manufacturer. Here’s how you can update the graphics drivers on your MacBook Pro:
Step 1: Click on the Apple menu located in the top-left corner of the screen.
Step 2: Select “System Preferences” from the drop-down menu.
Step 3: In the System Preferences window, click on the “Software Update” option.
Step 4: Your MacBook Pro will now check for available software updates. If any updates include graphics driver updates, they will be listed along with other available updates.
Step 5: Click on the “Update Now” button to install all available updates, including the graphics driver updates. You may need to enter your administrator password to proceed.
Step 6: Follow the on-screen instructions to complete the installation process. You may need to restart your MacBook Pro after installing certain updates.
In addition to updating the graphics drivers via software updates, you can also check the manufacturer’s website for specific graphics driver updates. Apple typically releases graphics driver updates as part of macOS updates, but there may be occasions where it’s necessary to install specific drivers for optimal performance.
When updating graphics drivers, it’s important to ensure that you’re using drivers compatible with your MacBook Pro model and the version of macOS installed. Installing incompatible or incorrect drivers can cause further issues instead of resolving them.
Updating the graphics drivers can help resolve screen issues caused by compatibility problems or bugs in the current drivers. If the screen issues persist even after updating the graphics drivers, it’s advisable to explore other troubleshooting methods or seek professional assistance. Persistent screen issues may indicate hardware problems that require specialized knowledge or repairs.
Remember to back up your important files and data before installing any updates to prevent data loss in case of unexpected complications. It’s good practice to regularly back up your data to an external storage device or cloud-based service to ensure its safety.
Resolving Hardware Issues with the Screen
If you’re experiencing screen issues on your MacBook Pro that persist despite trying various software-related troubleshooting steps, it may indicate a hardware problem. Hardware issues can range from loose connections to faulty components that require professional repair. Here are some steps you can take to resolve hardware issues with the screen:
1. Cleaning the Screen: Sometimes, screen issues can be caused by dirt, smudges, or fingerprints on the display. Use a soft, lint-free cloth slightly dampened with water to gently clean the screen. Avoid using harsh chemicals or abrasive materials that can damage the display.
2. Checking for Loose Display Connections: Open your MacBook Pro and check for any loose connections between the display and the logic board. If you’re comfortable with it, you can carefully disconnect and reconnect the display cables. However, if you’re unsure or uncomfortable with this process, it’s recommended to seek assistance from an authorized service provider.
3. Replacing the Display Cable: If you suspect that the display cable is damaged or causing the screen issues, you may need to replace it. This requires expertise in handling MacBook Pro components, so it’s best to consult an authorized service provider for assistance.
4. Diagnosing and Replacing a Faulty LCD Panel: If the above steps don’t resolve the screen issues, it’s possible that the LCD panel itself is faulty and needs to be replaced. Replacing the LCD panel is a complex task that should be done by a professional technician who has experience with MacBook Pro repairs.
It’s crucial to note that attempting to perform hardware repairs on your own without proper knowledge and experience can result in further damage and void your warranty. Whenever possible, consult an authorized service provider or Apple Store for assistance with hardware-related screen issues.
If your MacBook Pro is still under warranty, consider reaching out to Apple Support to discuss the issues you’re experiencing. They can provide guidance and may help arrange repairs or replacement if necessary.
In some cases, the cost of repairing a hardware issue can be significant. If your MacBook Pro is older or the cost of repair is high, you might need to evaluate the feasibility of repairing versus replacing the device.
Remember to back up your important files and data regularly, especially before handing your MacBook Pro over for repairs, to prevent data loss and ensure you have a copy of your important information.
Cleaning the Screen
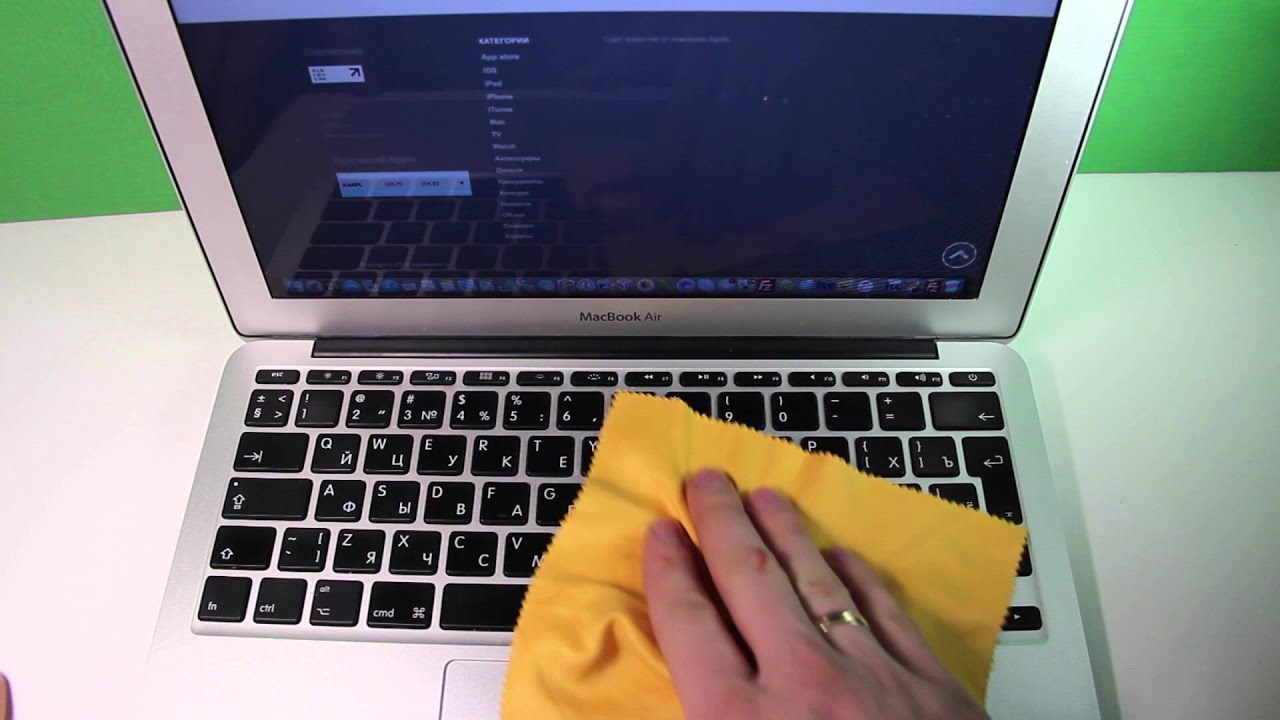
A common issue that can affect the screen of your MacBook Pro is dirt, smudges, and fingerprints. These can not only obstruct your view but also impact the overall visual experience. Cleaning the screen is a simple yet effective solution that can help restore the clarity and brightness of your display. Here’s how you can clean the screen of your MacBook Pro:
Step 1: Ensure your MacBook Pro is powered off and disconnected from its power source.
Step 2: Use a soft, lint-free cloth or microfiber cloth to gently wipe the screen. Avoid using abrasive materials or harsh chemicals that may damage the display.
Step 3: If the cloth alone doesn’t remove the smudges or fingerprints, lightly dampen it with water. It’s important to only use water and avoid any excess moisture that could enter the internal components of your MacBook Pro.
Step 4: Starting from the top of the screen, wipe in a downward motion with gentle pressure. Avoid applying excessive force or using circular motions, as this could spread the dirt or even cause micro-scratches on the screen.
Step 5: Check for any remaining marks or stubborn stains. If necessary, slightly dampen a corner of the cloth and gently focus on those areas, being careful not to wet the entire screen unnecessarily.
Step 6: Once the screen is clean, allow it to air dry for a few minutes before powering on your MacBook Pro.
Cleaning the screen of your MacBook Pro on a regular basis can help maintain its visual quality and extend its lifespan. It’s especially important to clean the screen when you notice smudges or fingerprints, as they can affect the overall display performance.
Remember that prevention is also key to keeping your screen clean. Avoid touching the screen directly with your fingers, as natural oils and dirt from your hands can transfer onto the display. It’s recommended to use a separate touchpad or a stylus for interacting with your MacBook Pro.
If you need to clean the keyboard or other parts of your MacBook Pro, use separate cleaning techniques specifically designed for those areas. Never spray liquid cleaners directly onto the screen or any other part of your MacBook Pro. The liquid can seep into the keyboard or other openings and cause internal damage.
Note that if you’ve tried cleaning the screen and the issues persist, it’s advisable to explore other troubleshooting methods specific to your issue or seek professional assistance. Persistent screen issues may indicate hardware problems that require specialized knowledge or repairs.
Regularly cleaning your MacBook Pro’s screen not only keeps it looking clear and vibrant but also contributes to an enjoyable viewing experience for all your digital activities.
Checking for Loose Display Connections
If you’re experiencing screen issues on your MacBook Pro, such as flickering or intermittent display problems, it’s essential to check for loose connections between the display and the logic board. Over time, the constant opening and closing of the MacBook Pro can potentially cause the display cables to become loose or disconnected. Here’s a step-by-step guide on how to check for loose display connections:
Step 1: Shut down your MacBook Pro and disconnect any peripherals or power sources.
Step 2: Carefully open your MacBook Pro and locate the display connection cables. These cables typically run from the display panel to the logic board, and they may be secured with screws or adhesive tape.
Step 3: Inspect the connections carefully to see if they are loose or improperly seated. Gently push on the connectors to ensure they are securely in place.
Step 4: If the connectors appear loose, carefully disconnect them and then reconnect them firmly. Make sure the connectors are aligned properly and fully inserted into their sockets.
Step 5: Once you’ve reconnected the display cables, close your MacBook Pro and power it on to check if the screen issues have been resolved.
It’s important to exercise caution when working inside your MacBook Pro’s casing. If you’re uncomfortable or unsure about performing the steps yourself, it’s recommended to seek assistance from an authorized service provider or Apple Store.
Checking for loose display connections can often resolve screen issues caused by poor or interrupted electrical connections. The jostling of the laptop during transport or accidental knocks can sometimes dislodge the cables, resulting in display problems.
If you’ve checked the connections and the screen issues persist, it’s advisable to explore other troubleshooting methods specific to your issue or seek professional assistance. It may indicate a hardware-related problem that requires further examination or repair.
Remember to back up your important files and data regularly, especially before attempting any hardware-related troubleshooting, to prevent data loss and ensure you have a copy of your important information.
Checking and securing loose display connections is a simple and potentially effective solution that can restore the functionality of your MacBook Pro’s screen. By addressing these physical connections, you can rule out loose cables as the cause of the display problems and proceed with further troubleshooting if necessary.
Replacing the Display Cable
If you’ve checked for loose display connections on your MacBook Pro and are still experiencing persistent screen issues, it’s possible that the display cable itself may be damaged or faulty. The display cable is responsible for transmitting the video signal from the logic board to the display panel. Replacing the display cable can be a challenging task, as it requires expertise in handling delicate components. Here is some information on how to replace the display cable:
Step 1: Be sure to power off your MacBook Pro and disconnect any peripherals or power sources.
Step 2: Carefully open your MacBook Pro and locate the display cable. It is usually a thin, ribbon-like cable that connects the display panel to the logic board.
Step 3: Take note of how the cable is routed and any adhesive or securing mechanisms holding it in place. Documenting or taking pictures of the cable’s placement can be helpful during reassembly.
Step 4: Use appropriate tools, such as precision screwdrivers, to carefully disconnect the display cable from both the display panel and the logic board. Take care not to yank or pull on the cable forcefully.
Step 5: Once the old display cable is removed, carefully install the new cable by connecting it securely to both the display panel and the logic board. Ensure that the cable is properly aligned and fully inserted into its connectors.
Step 6: Reassemble your MacBook Pro, taking care to route the display cable as it was originally and securing it properly with any adhesive or fasteners.
Replacing the display cable requires delicate and precise handling to avoid further damage to your MacBook Pro’s internal components. It’s recommended to seek assistance from an authorized service provider or Apple Store, as their technicians have the necessary expertise and tools for proper cable replacement.
It’s important to note that display cable replacement may not be a guaranteed solution for all screen issues. In some cases, the problem may lie elsewhere, such as a faulty logic board or LCD panel. Therefore, it’s advisable to explore other troubleshooting methods specific to your issue or seek professional assistance if replacing the cable does not resolve the screen issues.
Remember to back up your important files and data regularly, especially before attempting any hardware-related troubleshooting, to prevent data loss and ensure you have a copy of your important information.
Replacing the display cable is an advanced repair process that should only be undertaken by skilled technicians. By seeking professional assistance, you can ensure the proper replacement of the display cable and potentially overcome screen issues that persist despite other troubleshooting efforts.
Diagnosing and Replacing a Faulty LCD Panel
If you’ve exhausted all other troubleshooting methods and are still experiencing screen issues on your MacBook Pro, it’s possible that the LCD (liquid crystal display) panel itself is faulty. The LCD panel is the component responsible for producing the images you see on your MacBook Pro’s screen. Here’s what you need to know about diagnosing and replacing a faulty LCD panel:
Diagnosing the Faulty LCD Panel:
Step 1: Before diagnosing the LCD panel, ensure that you’ve ruled out other potential causes such as software issues, loose connections, or display cable problems.
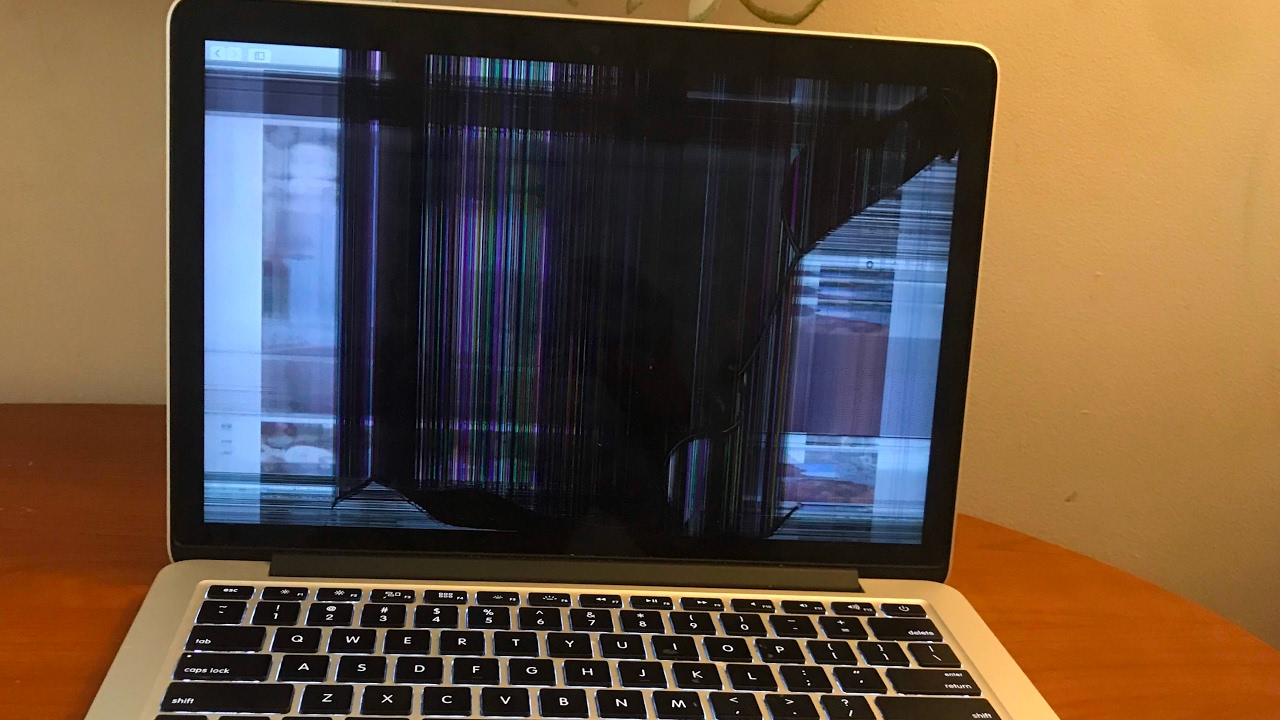
Step 2: Perform a visual inspection of the screen for any visible signs of damage, such as cracks, lines, or discoloration. If you notice any physical damage, it’s highly likely that the LCD panel needs replacement.
Step 3: Connect an external display to your MacBook Pro and observe if the screen issues persist. If the external display functions correctly, it further indicates a problem with the internal LCD panel.
Replacing the Faulty LCD Panel:
Step 1: Power off your MacBook Pro and disconnect any peripherals or power sources.
Step 2: Carefully open your MacBook Pro and locate the LCD panel. It will be connected to the logic board via the display cable.
Step 3: Disconnect the display cable from the logic board and remove any screws or adhesive securing the LCD panel in place.
Step 4: Gently take out the faulty LCD panel and set it aside.
Step 5: Install the new LCD panel by carefully connecting it to the display cable and securing it in place with the appropriate fasteners.
Step 6: Reassemble your MacBook Pro and ensure that all connections and components are properly in place.
Replacing the LCD panel requires expertise in handling delicate components and precision in the installation process. It’s crucial to seek assistance from an authorized service provider or Apple Store to ensure a proper replacement.
It’s important to note that LCD panel replacement can be costly and may not be feasible for older MacBook Pro models. It’s advisable to consider the age and value of your MacBook Pro and evaluate the cost of the LCD panel replacement versus investing in a new device.
Remember to back up your important files and data regularly, especially before attempting any hardware-related troubleshooting, to prevent data loss and ensure you have a copy of your important information.
If you’re unsure about the diagnosis or replacement process, it’s recommended to consult with a professional technician who has experience with MacBook Pro repairs. They can provide an accurate assessment and guide you through the proper course of action.
Conclusion
Screen issues on your MacBook Pro can be frustrating, but with the right troubleshooting steps, many of these problems can be resolved. Throughout this guide, we’ve covered various methods to help you identify and fix screen issues on your MacBook Pro.
We started by restarting the MacBook Pro, which can clear temporary glitches and reload the operating system to fix software-related issues. We then discussed resetting the System Management Controller (SMC), adjusting the display settings, and checking for software updates. These steps can resolve common screen problems caused by power management, incorrect display settings, or outdated software.
If the issues persist, we explored more advanced troubleshooting techniques. Using Safe Mode allows you to identify and isolate software-related problems, while calibrating the display helps achieve accurate color representation. Connecting an external display can determine if the problem lies within your MacBook Pro’s built-in display or extends to all display outputs.
For more persistent issues, we addressed hardware-related problems. Checking for loose display connections can alleviate screen issues caused by poor electrical connections. Replacing the display cable can solve issues originating from a faulty or damaged cable. And if all else fails, diagnosing and replacing a faulty LCD panel may be necessary.
It’s important to remember that some troubleshooting steps, such as replacing the display cable or LCD panel, may require professional assistance from authorized service providers or Apple Stores. Attempting complex repairs without proper knowledge and experience can lead to further damage or void warranties.
As always, don’t forget to back up your important files and data regularly to protect against potential data loss during troubleshooting or repairs.
We hope this guide has provided you with the necessary insights and steps to address screen issues on your MacBook Pro. By following these troubleshooting methods, you can optimize your MacBook Pro’s display and enhance your overall user experience.


