Introduction
Welcome to our guide on how to enable Touch ID on your MacBook Pro! Touch ID is a convenient and secure way to unlock your device, make purchases, and authenticate various actions on your laptop. By following a few simple steps, you’ll be able to enjoy the benefits of this innovative feature.
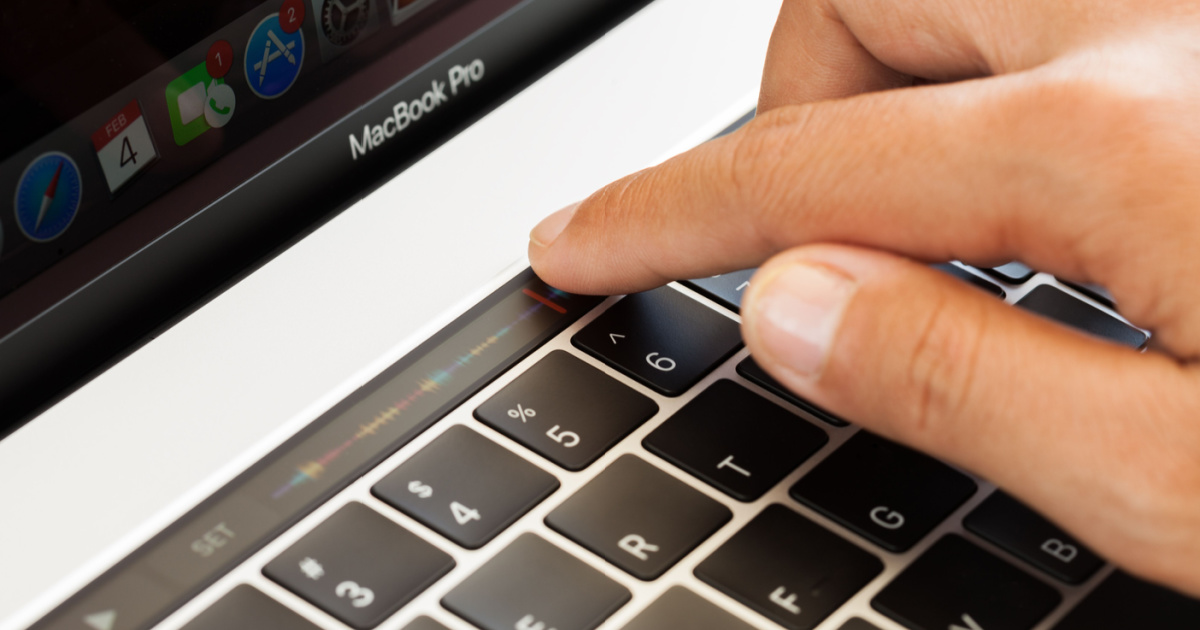
MacBook Pro models released in 2016 and later are equipped with a Touch ID sensor built into the power button. This technology allows you to quickly and effortlessly access your device and certain features with just a touch of your finger.
In this article, we will walk you through the process of enabling Touch ID on your MacBook Pro. We will cover everything from checking compatibility and updating your software to enrolling your fingerprint and customizing Touch ID settings to suit your preferences.
So if you’re ready to enhance the security and convenience of your MacBook Pro, let’s dive into the step-by-step guide to enable Touch ID!
Step 1: Check MacBook Pro Compatibility
The first step towards enabling Touch ID on your MacBook Pro is to ensure that your device is compatible with this feature. Touch ID is available on MacBook Pro models released in 2016 and later.
To check if your MacBook Pro supports Touch ID, follow these steps:
- Click on the Apple menu () in the top-left corner of your screen and select “About This Mac.”
- A window will appear with information about your Mac, including the model and year of release.
- Look for the “Model Name” and “Model Identifier” under the Overview tab.
- If your model name includes “MacBook Pro” and the model identifier is from 2016 or later, your device is compatible with Touch ID.
If your MacBook Pro is not compatible with Touch ID, you may want to consider upgrading to a newer model to take advantage of this convenient feature.
It’s important to note that Touch ID is only available on MacBook Pro models equipped with the Touch Bar. If your MacBook Pro does not have a Touch Bar, it unfortunately does not support Touch ID.
Now that you’ve verified the compatibility of your MacBook Pro, let’s move on to the next step: updating your software to ensure you have the latest features and enhancements.
Step 2: Update MacBook Pro Software
Before enabling Touch ID on your MacBook Pro, it’s important to make sure that your software is up to date. Software updates often include improvements, bug fixes, and new features that can enhance the overall performance and functionality of your device.
To update your MacBook Pro software, follow these steps:
- Click on the Apple menu () in the top-left corner of your screen and select “System Preferences.”
- In the System Preferences window, click on “Software Update.”
- Your MacBook Pro will now check for available updates. If any updates are found, click on the “Update Now” button to begin the installation process.
- Follow the on-screen instructions to complete the software update. Your Mac may restart during the process, so make sure to save any unsaved work.
After your MacBook Pro has finished updating, you’re ready to proceed to the next step: enrolling your fingerprint.
Updating your software regularly ensures that you have the latest security patches and features, providing you with a smooth and secure user experience. It’s a good practice to check for software updates periodically to keep your MacBook Pro running at its best.
Now that you’ve updated your MacBook Pro software, let’s move on to the next step: enrolling your fingerprint with Touch ID.
Step 3: Enroll Your Fingerprint
Enrolling your fingerprint is an essential step to enable Touch ID on your MacBook Pro. This process ensures that your device recognizes and securely identifies your unique fingerprint for authentication purposes.
To enroll your fingerprint with Touch ID, follow these steps:
- Click on the Apple menu () in the top-left corner of your screen and select “System Preferences.”
- In the System Preferences window, click on “Touch ID.”
- You will be prompted to enter your administrator password. Type it in and click on “Unlock.”
- Click on the “Add a Fingerprint” button to begin the enrollment process.
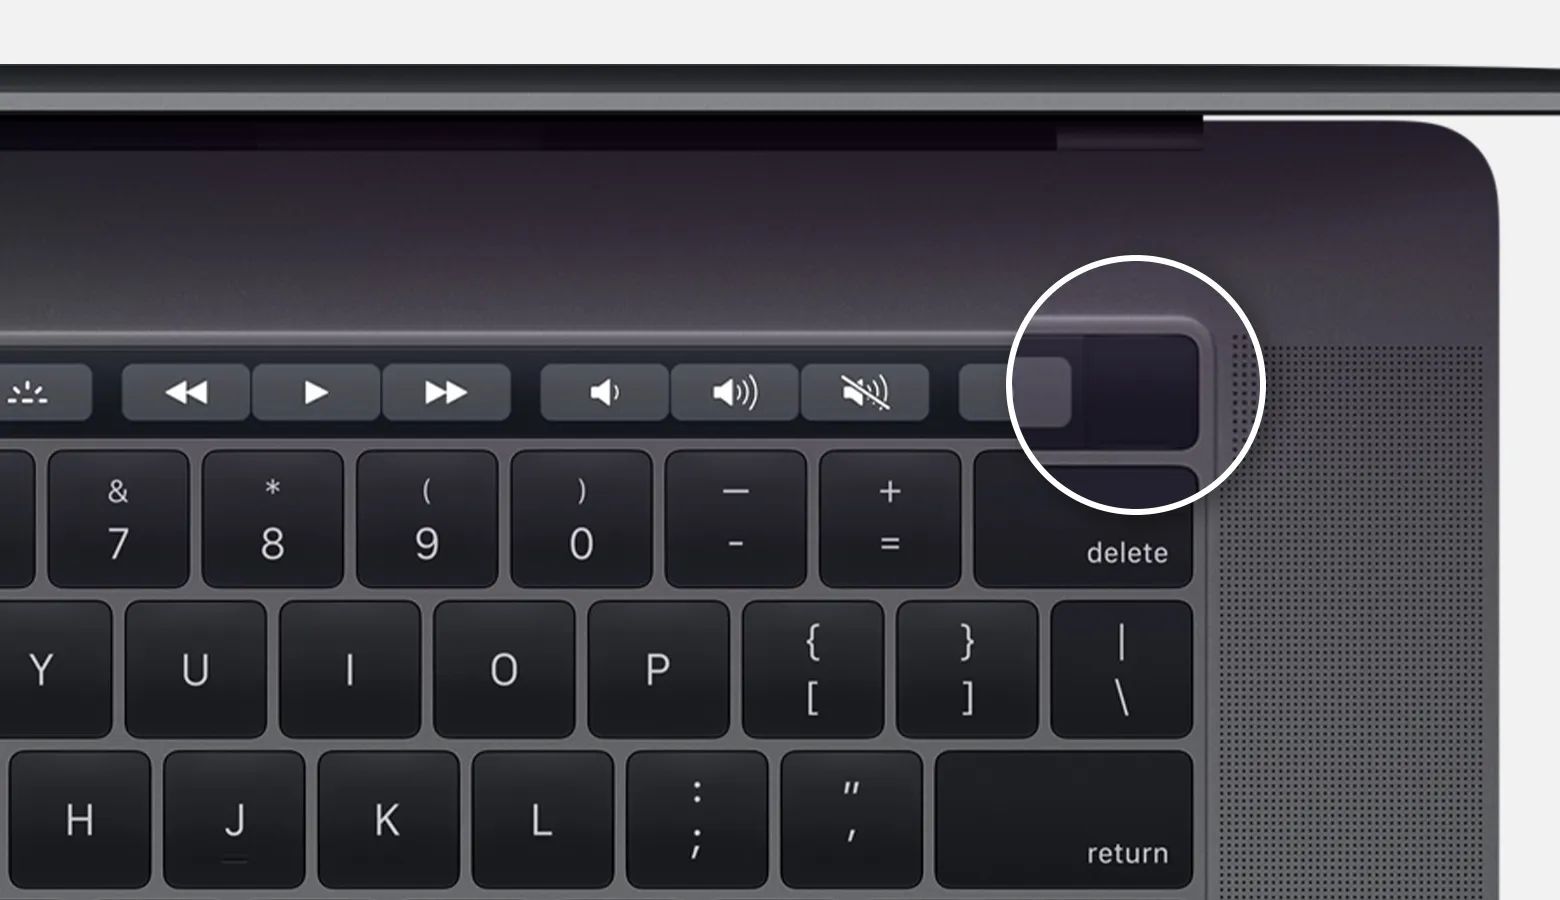
- Place your finger on the Touch ID sensor, which is located on the right side of the Touch Bar. Make sure to cover the entire sensor with your fingerprint.
- Follow the on-screen instructions and lift your finger off the sensor when prompted. The process will require you to place your finger on the sensor multiple times to capture different angles and positions of your fingerprint.
As you continue to lift and reposition your finger on the sensor, your MacBook Pro will gradually build a more comprehensive and accurate representation of your fingerprint.
It’s important to note that during the enrollment process, you can add more than one fingerprint if desired. Adding multiple fingerprints allows you to conveniently use different fingers for authentication.
Once you’ve successfully enrolled your fingerprint(s), you’re ready to move on to the next step: enabling Touch ID on your MacBook Pro.
Step 4: Enable Touch ID
Now that you have enrolled your fingerprint, it’s time to enable Touch ID on your MacBook Pro. Enabling Touch ID allows you to use your fingerprint for various authentication purposes, such as unlocking your device and authorizing app installations or purchases.
To enable Touch ID, follow these simple steps:
- Click on the Apple menu () in the top-left corner of your screen and select “System Preferences.”
- In the System Preferences window, click on “Touch ID.”
- You will be prompted to enter your administrator password. Enter it and click on “Unlock.”
- You will see a list of features where Touch ID can be used. Toggle on the checkboxes next to the features you want to enable using Touch ID.
The available features may vary depending on your MacBook Pro model and the apps installed on your device. Common features that can be enabled with Touch ID include unlocking your Mac, Apple Pay purchases, and App Store purchases.
Once you have enabled Touch ID for the desired features, you can now start enjoying the convenience of authenticating with your fingerprint instead of entering a password or PIN for those specific actions.
Now that Touch ID is enabled, let’s move on to the final step: customizing the Touch ID settings to suit your preferences.
Step 5: Customize Touch ID Settings
After enabling Touch ID on your MacBook Pro, you have the option to customize the Touch ID settings to tailor the user experience to your liking. Customization allows you to adjust various aspects of Touch ID, giving you more control and flexibility.
To customize your Touch ID settings, follow these steps:
- Click on the Apple menu () in the top-left corner of your screen and select “System Preferences.”
- In the System Preferences window, click on “Touch ID.”
- Enter your administrator password when prompted, and click on “Unlock.”
- You will see the available settings for Touch ID. Here are some common settings you can customize:
- Add Additional Finger: If you want to enroll more fingerprints, click on the “+” button to add additional fingerprints.
- Remove a Finger: To remove a previously enrolled fingerprint, select the fingerprint from the list and click on the “-” button.
- Enable Touch ID for: Here you can toggle on or off the specific features for which you want to use Touch ID.
- Use Touch ID with: This setting allows you to use Touch ID for unlocking your Mac, making Apple Pay purchases, and performing App Store purchases.
By customizing the Touch ID settings, you can have greater control over which actions require authentication and which fingerprints are associated with your MacBook Pro.
Feel free to explore the various settings and make adjustments according to your preferences. This customization ensures that Touch ID works seamlessly with your everyday workflow.
With the Touch ID settings customized to your liking, you have successfully enabled and personalized the Touch ID feature on your MacBook Pro. Enjoy the convenience and security that Touch ID brings to your device!
Conclusion
Congratulations! You have successfully enabled Touch ID on your MacBook Pro, making it easier and more secure to access your device and perform various tasks. Touch ID provides a convenient alternative to passwords and PINs, utilizing the unique fingerprint authentication technology built into your MacBook Pro.
In this guide, we covered five essential steps to enable Touch ID:
- Checking MacBook Pro compatibility
- Updating MacBook Pro software
- Enrolling your fingerprint
- Enabling Touch ID
- Customizing Touch ID settings
By following these steps, you have set up Touch ID and ensured that it is personalized to your preferences and needs. Remember to keep your enrolled fingerprints up to date and make any necessary adjustments to the settings as your usage patterns change.
With Touch ID enabled, you can now enjoy the benefits of quick and secure authentication for unlocking your MacBook Pro, making Apple Pay purchases, and authorizing App Store actions. No more tedious password entries or worrying about unauthorized access!
Should you ever decide to disable Touch ID or make changes to your enrolled fingerprints, you can easily manage these settings through the Touch ID section in System Preferences.
Thank you for following this guide on how to enable Touch ID on your MacBook Pro. We hope that this feature enhances your user experience and provides you with a hassle-free and secure way to interact with your device.
Happy fingerprint-authenticated computing!