Introduction
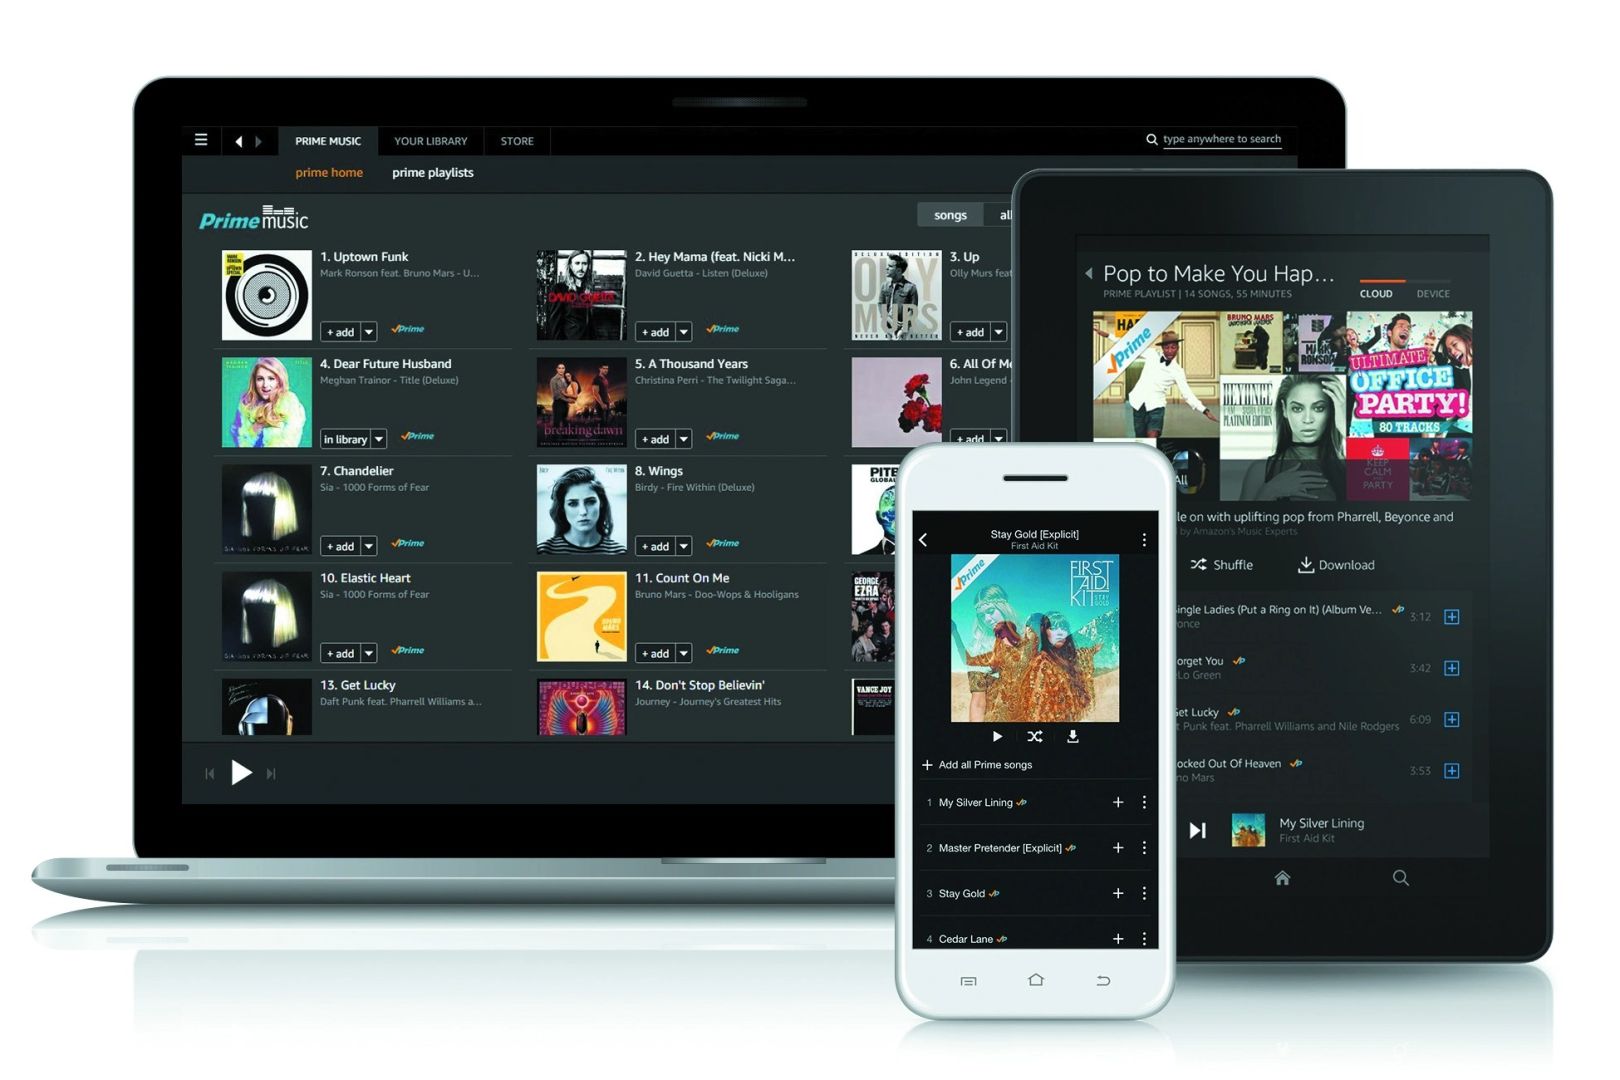
Welcome to the world of Amazon Music, where you can discover and stream a vast library of music from various genres and artists. Whether you’re a music enthusiast, a casual listener, or someone who simply enjoys having access to a wide range of melodies, Amazon Music has got you covered.
In this article, we will guide you through the process of downloading Amazon Music to MP3, allowing you to enjoy your favorite tracks offline anytime, anywhere. With the ability to store your music on MP3 devices, you can take your tunes with you on the go, without having to rely on an internet connection.
Before we dive into the step-by-step instructions, let’s clarify what Amazon Music is all about. It is a music streaming platform offered by Amazon, featuring a vast collection of songs accessible through a subscription service. Depending on your preference, you can choose between Amazon Music Prime, included with your Amazon Prime membership, or Amazon Music Unlimited, a premium subscription that offers even more music options.
With Amazon Music Prime, you have access to a catalog of over two million songs, as well as personalized playlists and stations. On the other hand, Amazon Music Unlimited offers over 70 million songs with additional features like offline listening and on-demand access to new releases. Both options provide a delightful music streaming experience.
Downloading Amazon Music to MP3 format offers several benefits. Firstly, it allows you to enjoy your favorite tracks offline, eliminating the need for a stable internet connection. This is especially convenient during travel or when you’re in an area with limited network coverage. Secondly, storing music as MP3 files enables you to transfer them to various devices, including smartphones, MP3 players, or even burn them onto CDs.
Now that you have a clear understanding of what Amazon Music is and why downloading it to MP3 format is advantageous, let’s move on to the step-by-step guide on how to accomplish this. Follow along, and soon you’ll have your own collection of Amazon Music MP3 files ready to jam to!
Step 1: Create an Amazon Music Account
Before you can start downloading Amazon Music to MP3 format, you will need to create an Amazon Music account if you don’t already have one. Follow these simple steps to get started:
- Visit the Amazon Music website or download the Amazon Music app on your device.
- If you already have an Amazon account, sign in using your Amazon username and password. If you don’t have an account, click on the “Create account” or “Sign up” button to register for a new account.
- Provide the necessary information, including your name, email address, and password. Ensure that you choose a strong and unique password to protect your account.
- Once you have filled out the required fields, click on the “Create your Amazon account” or “Sign up” button to proceed.
- An email will be sent to the address you provided during registration. Open the email and click on the verification link to confirm your account.
- After verifying your account, you will be prompted to choose a subscription plan. Select the option that suits your needs, either Amazon Music Prime or Amazon Music Unlimited. If you’re unsure, you can always start with Amazon Music Prime and upgrade later if desired.
- Complete the subscription process by providing the necessary payment details. If you’re signing up for Amazon Music Prime, your subscription may already be covered if you have an existing Amazon Prime membership.
- Once your account is fully set up, you can access Amazon Music’s extensive collection of songs and begin exploring the wide range of music available.
Creating an Amazon Music account is the first step towards downloading your favorite tracks to MP3 format. By having an account, you gain access to a world of music, personalized playlists, and exciting features that will enhance your listening experience. Let’s move on to the next step, where we will guide you through the process of installing the Amazon Music app.
Step 2: Install the Amazon Music App
Once you have created your Amazon Music account, the next step is to install the Amazon Music app on your device. Follow these instructions to get started:
- Open the app store on your device. If you’re using an Android device, open the Google Play Store. For iOS devices, open the App Store.
- Search for “Amazon Music” in the app store’s search bar.
- Locate the official Amazon Music app from the search results and tap on it.
- Tap the “Install” button for Android devices or the “Get” button for iOS devices to initiate the installation process.
- Wait for the app to download and install on your device. The installation time may vary depending on your internet connection speed.
- Once the installation is complete, open the Amazon Music app.
- Sign in to the app using your Amazon Music account credentials (the same username and password you used to create your account).
- Upon successful login, you will have full access to the Amazon Music app, including the ability to browse and stream the extensive music library.
Installing the Amazon Music app on your device enables you to easily access and enjoy your favorite tunes. Whether you’re using a smartphone, tablet, or other compatible device, the app provides a user-friendly interface and convenient features for seamless music streaming.
Now that you have the Amazon Music app installed, let’s move on to the next step, where we will guide you on how to choose the music you want to download to MP3 format.
Step 3: Choose the Music to Download
Now that you have the Amazon Music app installed on your device, it’s time to choose the music you want to download and enjoy offline. Follow these steps to select the songs, albums, or playlists you wish to download:
- Open the Amazon Music app on your device and sign in if you haven’t done so already.
- Explore the app’s interface to discover various music categories, including curated playlists, popular albums, and genres.
- Browse through the available options and find the music you want to download. You can search for specific artists, songs, or albums using the search bar at the top of the app interface.
- Once you’ve found a song, album, or playlist you’d like to download, tap on it to view more details.
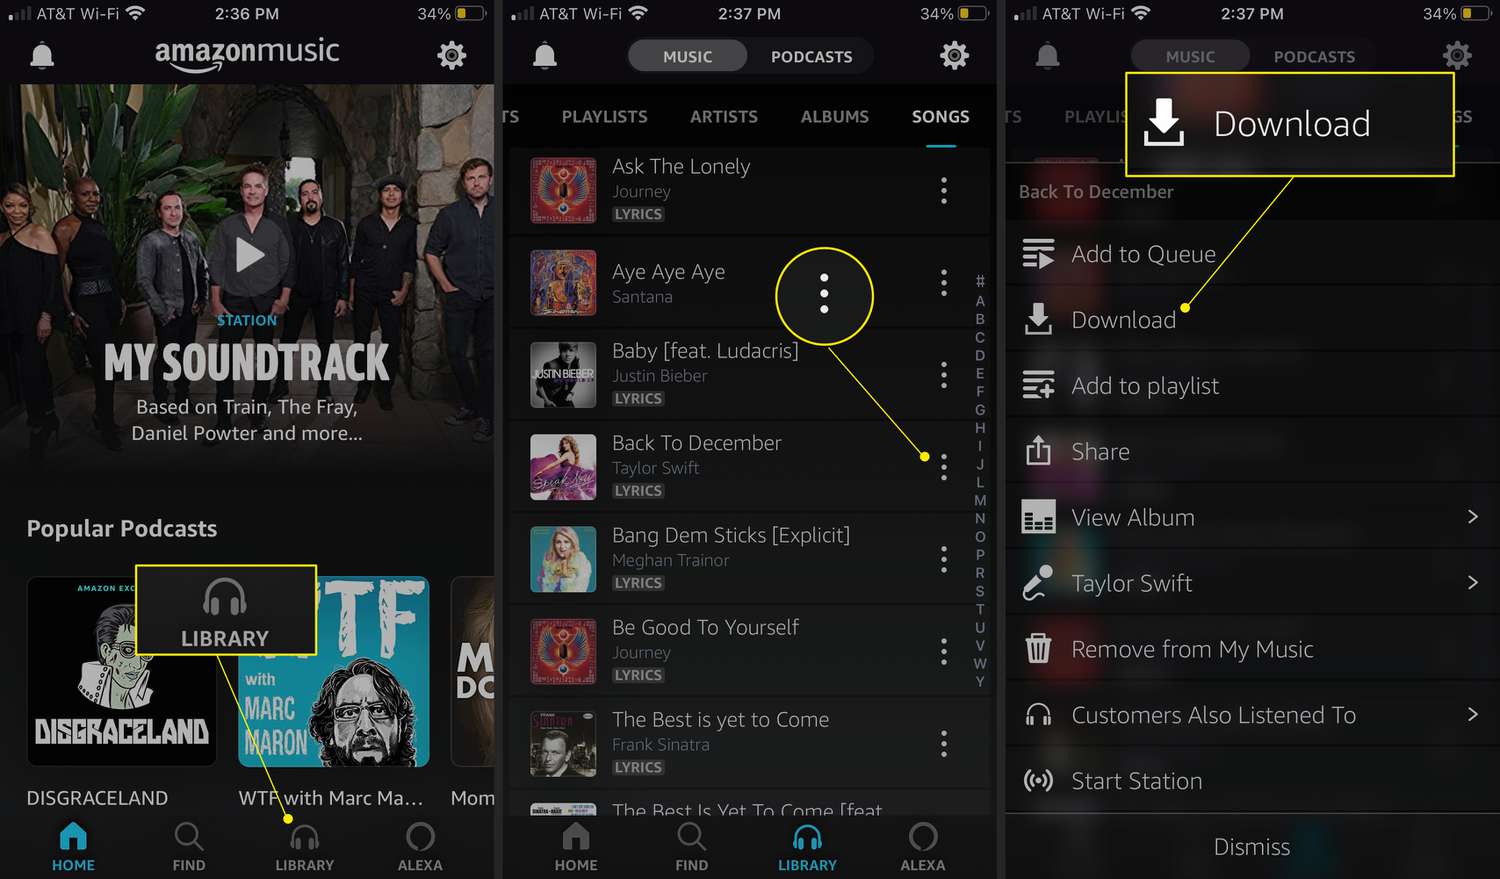
- To download an individual song, tap on the download button (usually represented by a downward-facing arrow) next to the song title. The song will then be added to your downloaded music library.
- If you’d like to download an entire album or playlist, you can usually find a download button at the top of the album or playlist page. Tap on this button to initiate the download process.
- Repeat the above steps to choose and download additional music as desired.
It’s important to note that not all songs, albums, or playlists may be available for download. This depends on the licensing and rights restrictions set by the artists or record labels. However, you will find a vast selection of downloadable music within the Amazon Music library.
By choosing the music you want to download, you can create a personalized collection of songs that you can enjoy offline without the need for an internet connection. Now that you have selected your desired music, let’s move on to the next step, where we will guide you on how to enable downloading for offline listening.
Step 4: Enable Downloading for Offline Listening
To enjoy your chosen music offline, you need to enable downloading within the Amazon Music app. Follow these steps to ensure that your downloaded songs are available for offline listening:
- Open the Amazon Music app on your device and sign in if you haven’t done so already.
- Tap on the menu icon (usually represented by three horizontal lines) located in the top-left corner of the app.
- In the menu, navigate to the “Settings” or “Preferences” option.
- Look for the “Offline Settings” or “Download Options” section within the settings or preferences menu.
- Within the offline settings, locate the option to enable downloading for offline listening. It is usually labeled as “Offline Mode” or “Enable Downloads.”
- Toggle the switch or checkbox to enable offline downloading.
- Depending on the app version and device, you may have additional options to specify settings such as the audio quality for downloaded songs.
- Once you have enabled downloading for offline listening, you can start downloading your selected music to your device by following the previous steps in Section 3.
Enabling downloading for offline listening ensures that any music you download is saved locally on your device, allowing you to enjoy your favorite tracks without an internet connection. This feature provides flexibility and convenience, especially when you’re traveling or in areas with limited network access.
Now that you have enabled downloading, it’s time to move on to the next step, where we will guide you on configuring the download settings to ensure optimal audio quality and storage efficiency.
Step 5: Configure Download Settings
To ensure that your downloaded music meets your preferences and device’s storage capacity, it’s important to configure the download settings in the Amazon Music app. Follow these steps to customize your download settings:
- Open the Amazon Music app on your device.
- Tap on the menu icon (usually represented by three horizontal lines) located in the top-left corner of the app to access the menu.
- Navigate to the “Settings” or “Preferences” option within the menu.
- Look for the “Download” or “Download Quality” section within the settings or preferences menu.
- In the download settings, you will find options to configure the download quality or format. This includes options such as Standard, Better, and Best quality. Choose the option that best suits your preferences and storage capacity.
- Depending on the device and version of the app, you may also find options to specify the download location, choose between downloading songs only or downloading songs and playlists, and select whether or not to download music over a cellular network.
- Once you have configured the download settings according to your preferences, tap on the save or apply button to save your changes.
Configuring the download settings allows you to optimize the audio quality of your downloaded music and manage the storage space on your device effectively. By choosing the appropriate quality level and adjusting other settings, you can strike the right balance between audio fidelity and storage efficiency.
Now that you have customized the download settings, you’re ready to move on to the next step, where we will guide you on how to download songs to MP3 format.
Step 6: Download Songs to MP3 Format
Now that you have set up your Amazon Music account, installed the app, chosen the music you want to download, and configured the download settings, it’s time to download the songs to MP3 format. Follow these steps to complete the process:
- Open the Amazon Music app on your device and sign in if necessary.
- Navigate to the music you wish to download. You can access your chosen songs, albums, or playlists through your library or search for them using the app’s search function.
- Once you have selected the desired music, look for the download button next to the song, album, or playlist. It is usually represented by a downward-facing arrow.
- Tap on the download button to initiate the download process for the selected music.
- The Amazon Music app will start downloading the songs or albums to your device in the specified MP3 format and quality. The progress of the download will be displayed, allowing you to track the process.
- Repeat the above steps for any other songs, albums, or playlists you wish to download.
- Depending on the size of the music and your internet connection speed, the download process may take some time. Be patient and ensure that your device remains connected to the internet until the downloads are complete.
By following these steps, you can successfully download your chosen music to MP3 format on your device. This enables you to enjoy your favorite tunes offline, without the need for an internet connection, and gives you the flexibility to listen to music on various devices that support MP3 files.
Now that you have successfully downloaded the songs in MP3 format, let’s move on to the next step, where we will guide you on how to locate the downloaded MP3 files on your device.
Step 7: Locate the Downloaded MP3 Files
After downloading your favorite music to MP3 format, you may want to know where the downloaded files are located on your device. Locating the downloaded MP3 files allows you to access and manage them easily. Follow these steps to find the downloaded MP3 files:
- Open the file manager or file explorer app on your device. The specific app may vary depending on the operating system of your device.
- Navigate to the internal storage or SD card storage (if applicable) of your device, where downloaded files are typically saved.
- Look for a folder named “Amazon Music” or “Amazon Music Downloads.” This is the default folder where Amazon Music stores downloaded files.
- Open the “Amazon Music” folder to access the downloaded MP3 files.
- You will find the downloaded songs, albums, or playlists organized within subfolders. Open the relevant subfolder to view the specific MP3 files.
Once you have located the downloaded MP3 files, you can manage them as you would with any other files on your device. You can copy, move, rename, or delete the files according to your preferences.
Keep in mind that the exact location of the downloaded MP3 files may vary depending on your device and its file storage settings. If you have changed the default download location in the Amazon Music app or are using an external SD card for storage, you may need to navigate to different folders to find the downloaded files.
Now that you know how to locate the downloaded MP3 files, let’s move on to the final step, where we will guide you on how to transfer the MP3 files to your desired devices for offline listening.
Step 8: Transfer MP3 Files to Devices
Now that you have successfully downloaded the music in MP3 format and located the files on your device, you may want to transfer them to other devices for offline listening. Follow these steps to transfer the MP3 files to your desired devices:
- Connect your device to your computer using a USB cable.
- On your computer, locate the downloaded MP3 files on your device using the file manager or file explorer.
- Open a separate window or tab on your computer and navigate to the location where you want to transfer the MP3 files. This can be a specific folder on your computer or another connected device, such as a smartphone, MP3 player, or external storage.
- Drag and drop the desired MP3 files from the file manager window on your device to the destination folder or device window on your computer.
- The MP3 files will begin transferring from your device to the desired destination. The transfer speed may vary depending on the size of the files and the connection speed between your device and computer.
- Once the transfer is complete, disconnect your device from the computer safely and securely.
By following these steps, you can easily transfer the downloaded MP3 files to other devices, allowing you to enjoy your favorite music offline on different devices that support MP3 playback. Whether you want to listen to music on your smartphone, MP3 player, or even burn them onto CDs, the transferred MP3 files offer flexibility and convenience.
It’s important to note that the exact steps for transferring MP3 files may differ depending on the device and operating systems involved. Make sure to refer to the specific instructions provided by the device manufacturer or consult the user manual for detailed guidance.
Congratulations! You have successfully completed all the steps to download and transfer Amazon Music to MP3 format. Now you can enjoy your favorite tunes offline on your desired devices. Happy listening!
Conclusion
Downloading Amazon Music to MP3 format opens up a world of possibilities for enjoying your favorite tunes offline. By following the step-by-step guide outlined in this article, you have learned how to create an Amazon Music account, install the app, choose the music to download, enable downloading for offline listening, configure download settings, download songs to MP3 format, locate the downloaded files, and transfer them to your desired devices.
With your downloaded Amazon Music MP3 files, you have the freedom to listen to your favorite tracks anytime, anywhere, without relying on an internet connection. Whether you’re on a road trip, at the gym, or simply enjoying some downtime, having offline access to your music enhances your listening experience and provides greater flexibility and convenience.
Remember, creating an Amazon Music account and installing the app are the initial steps to embark on your music downloading journey. From there, you can explore the vast library of songs, albums, and playlists, and choose the music that resonates with your taste.
By enabling downloading for offline listening and configuring the download settings, you can customize the audio quality and manage storage space according to your preferences and device’s capabilities.
Downloading songs to MP3 format is a straightforward process within the Amazon Music app. Once downloaded, you can locate the MP3 files on your device’s storage and transfer them to other devices, such as smartphones, MP3 players, or external storage, for seamless offline listening.
Enjoy the freedom of Amazon Music’s vast collection of songs at your fingertips, and allow the power of MP3 format to enhance your music listening experience. Now it’s time to sit back, relax, and immerse yourself in the world of music, wherever you may be.